
How we make speed axles
We will discuss how we made our axles prior to utilizing CNC cutting and proprietary nail straightening. This is how you can do it at home with very little tooling and still get great results. Substitute a drill clamped horizontal for a lathe. Using a vertical drill press can be utilized, but it is very hard to give proper pressure and control.
Making BSA axles into speed axles is an art and process. You have to have very specialized tooling to do it correctly as well as efficiently. This is the method that we followed and then tweaked to your liking. It’s a very good start, although the visuals could have been a little better. We didn’t own a go pro at the time.
To start off you are going to need 3x the amount of axles that you need. If you are making one car, then we suggest a dozen axles. If you don’t want to purchase 2 extra set of wheels and axles, then you can visit this store to get them by the dozens.
The reason being is that you only want to attempt to fix the ones that are the straightest. It seems that the axles just might be purposely bent…
Tools Needed
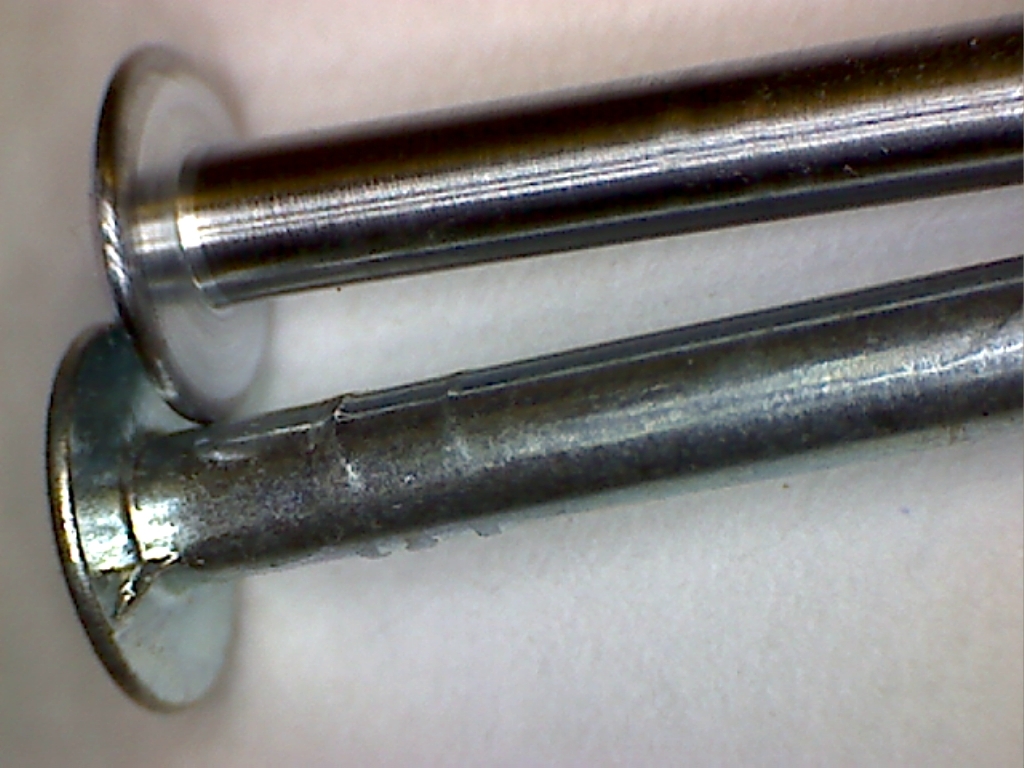
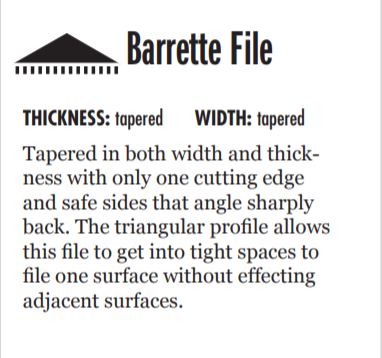
- File–the finer the cut the better. The key is to remove the burrs and crimps without reducing the diameter of the axle. We used this file for the longest time. I suggest a barratte file #00 cut.
- Sandpaper-wet-400 grit through the sky is the limit…. we like 2000 for dry lube. 60,000 grit for oil
- Derby Worx Pro Axle Press–a must for straightening an axle
- Metal “bucking” bar to support your sandpaper while sanding. Just anything that is hard and flat about 1/2″ in width. We prefer this method over the sawing the paper back and forth across the axle.
- Baster of some sort to add water.
- Bowl to catch water from wet sanding
- Clean strip of cloth material to clean each stage of sanding. YES each stage needs its own cloth. You can NOT share with another stage. NOT MICROFIBER! Microfiber will grip a turning axle and cause cause harm to you. They just have too much surface area. You can even use a thick cotton string to do the trick.
- Your going to need a hammer
- Proper safety equipment
- Some sort of drill, drill press, or lathe. NO DREMEL!!!!! Spins / removed material too aggressively.
- Metal sealant/wax of some sort to keep your new polish job from rusting. Do your research to find the DIY. Most like some kind of jewelry rouge or wax based car polish. We have our own special sealant and it’s not one of those.
установка кондиционера под ключ в обнинске [url=www.kondicioner-obninsk-1.ru]установка кондиционера под ключ в обнинске[/url] .
светодиодные натяжные потолки [url=www.natyazhnye-potolki-lipeck-1.ru]светодиодные натяжные потолки[/url] .
When someone writes an piece of writing he/she keeps the thought of a user in his/her brain that how a user can know it. So that’s why this paragraph is outstdanding.
https://shorturl.fm/tGsiI
Your mode of explaining everything in this piece of writing is genuinely pleasant, every one be capable of simply be aware of it, Thanks a lot.
Hurrah! In the end I got a weblog from where I know how to truly take helpful information regarding my study and knowledge.
This is my first time pay a visit at here and i am really pleassant to read all at single place. http://www.ifashionstyles.com
https://shorturl.fm/B9fbp
to this require a great deal of work? I have very little knowledge of computer programming however I had been hoping to start my own blog in the near future. Anyway, should you have any suggestions or tips for new blog owners please share. I understand this is off topic but I simply needed to ask.
https://shorturl.fm/oNkcI
https://shorturl.fm/K4n3W
Hi there, its fastidious article concerning media print, we all be aware of media is a great source of data. http://www.ifashionstyles.com
Heya i’m for the first time here. I came across this board and I find It really useful & it helped me out a lot. I hope to give something back and aid others like you aided me.
https://shorturl.fm/nvtt7
https://shorturl.fm/CIHZG
It’s amazing to pay a visit this site and reading the views of all friends regarding this paragraph, while I am also keen of getting know-how.
It’s enormous that you are getting ideas from this paragraph as well as from our dialogue made at this time. http://www.kayswell.com
Wonderful goods from you, man. I’ve understand your stuff previous to and you’re just too excellent.I really like what you have acquired here, certainly likewhat you are stating and the way in which you say it.You make it entertaining and you still care for to keep it wise.I cant wait to read much more from you. http://www.kayswell.com This is actually a wonderful site.
Spot on with this write-up, I really believe this site needs much more attention. I’ll probably be returning to read through more, thanks for the info! http://www.kayswell.com
Hello! I just wanted to ask if you ever have any problems with hackers? My last blog (wordpress) was hacked and I ended up losing months of hard work due to no back up. Do you have any methods to prevent hackers?
What i do not understood is in truth how you’re not really much more neatly-liked than you may be right now. You’re so intelligent. You realize thus significantly in the case of this topic, made me in my opinion believe it from so many varied angles. Its like men and women are not fascinated except it is something to do with Woman gaga! Your individual stuffs outstanding. At all times handle it up!
https://shorturl.fm/K5ycG
Great post. I was checking constantly this blog and I am impressed! Extremely useful information specifically the last part 🙂 I care for such information a lot. I was seeking this certain info for a long time. Thank you and good luck.
https://shorturl.fm/Br4Oq
I think the admin of this website is in fact working hard in support of his website, as here every stuff is quality based stuff. http://www.hairstylesvip.com
https://shorturl.fm/9CYDe
https://shorturl.fm/Q84d4
Fantastic goods from you, man. I have understand your stuff previous to and you’re just extremely great. I actually like what you’ve acquired here, certainly like what you’re saying and the way in which you say it. You make it enjoyable and you still take care of to keep it sensible. I cant wait to read far more from you. This is actually a wonderful site.
Do you mind if I quote a few of your articles as long as I provide credit and sources back to your website? My website is in the exact same area of interest as yours and my visitors would definitely benefit from some of the information you provide here.
Thank you for the auspicious writeup. It in fact was a amusement account it. Look advanced to far added agreeable from you! By the way, how could we communicate? http://www.hairstylesvip.com
Hello just wanted to give you a brief heads up and let you know a few of the images aren’t loading correctly. I’m not sure why but I think its a linking issue. I’ve tried it in two different internet browsers and both show the same results.
https://shorturl.fm/SXA8T
It’s great that you are getting ideas from this article as well as from our argument made at this time.
I am really loving the theme/design of your weblog. Do you ever run into any browser compatibility issues? A few of my blog readers have complained about my site not working correctly in Explorer but looks great in Firefox. Do you have any advice to help fix this issue?
https://shorturl.fm/k85a1
wonderful points altogether, you just received a new reader. What would you suggest about your put up that you simply made some days ago? Any positive?
https://shorturl.fm/rNY3V
I do agree with all of the concepts you’ve introducedon your post. They’re really convincing and will definitely work.Nonetheless, the posts are very brief for newbies.May just you please extend them a bit from subsequent time?Thanks for the post.
I appreciate you taking the time to explain this.
x777gameapk has all the best APKs for Android gaming. Easy to find what I’m looking for and haven’t had any issues so far. Worth checking out: x777gameapk
https://shorturl.fm/Jmjdj
https://shorturl.fm/dSwYa
I don’t think the title of your article matches the content lol. Just kidding, mainly because I had some doubts after reading the article.
Downloaded bn55gameapk a while ago, needs an update. Hope this helps. Grab it here bn55gameapk.
Thank you for your sharing. I am worried that I lack creative ideas. It is your article that makes me full of hope. Thank you. But, I have a question, can you help me? https://www.binance.info/zh-TC/register?ref=DCKLL1YD
Thanks for sharing. I read many of your blog posts, cool, your blog is very good. https://accounts.binance.com/register-person?ref=IXBIAFVY
Interesting points about responsible gaming! Platforms like tapwin are navigating that balance with KYC & localized payment options-important for the Philippine market. It’s good to see tech adapting to user needs!
Your point of view caught my eye and was very interesting. Thanks. I have a question for you. https://accounts.binance.info/zh-TC/register-person?ref=DCKLL1YD
Thank you for your sharing. I am worried that I lack creative ideas. It is your article that makes me full of hope. Thank you. But, I have a question, can you help me?
Your article helped me a lot, is there any more related content? Thanks! https://www.binance.com/register?ref=IHJUI7TF
Alright, gotta give it up for 8kubet. Was a little skeptical at first, but they’ve got some solid stuff going on. Game variety is decent, and it’s runnin’ pretty smooth for me. Worth a try, y’know?
New to PH Slots? phslotsloginregister makes it super easy to sign up and get started! No hassle, just straight to the games! Register now on phslotsloginregister!
Interesting points! Seeing platforms like funbingo prioritize easy mobile access & local payment options (like GCash) is smart for the Philippines market. Player verification is key for responsible gaming too!
Alright, looking for new resources? grupoh2 might be the place to look at! Might be worth comparing resources against other sites you know. Check if it works for you! grupoh2
Yo, Fun88bong88 is where it’s at! Great odds and a solid selection of games. Had a few good nights on there. Definitely a thumbs up from me. Check it out: fun88bong88
https://shorturl.fm/TNFvK
Your article helped me a lot, is there any more related content? Thanks! https://accounts.binance.com/pl/register?ref=UM6SMJM3
Interesting read! The cultural connection Primo Gaming builds with the Filipino community-like localized payments-is smart. Considering probability & chance, exploring options like primo gaming vip could be fun, responsibly of course!
Alright, feelin’ lucky? Fortune God’s got your back! I love the theme and the potential for big wins. This site runs smoothly and the game is visually appealing. Give fortunegodsvn a try if you wanna test your fortune 😉
https://shorturl.fm/7g9lB
Interesting analysis! Seeing more localized platforms like PH3333 emerge is great for the PH market. Easy registration & payment options (GCash, PayMaya!) are key. Check out ph3333 slot download for a streamlined experience – quick signup is a huge plus! 👍
Great article! Finding a platform with localized options really makes a difference. I’ve been checking out jilibbb bet game and their Filipino support is top-notch. Seamless experience across devices too! Definitely worth a look for PH players.
As the admin of this web site is working, no uncertainty very rapidly it will be well-known, due to its feature contents.
Thanks for sharing. I read many of your blog posts, cool, your blog is very good. https://www.binance.com/de-CH/register?ref=W0BCQMF1
Thanks for sharing. I read many of your blog posts, cool, your blog is very good.
https://shorturl.fm/vQciJ
https://shorturl.fm/CIhCA
I am only writing to make you understand what a exceptional encounter my friend’s princess undergone browsing your site. She came to understand some issues, not to mention how it is like to possess a wonderful helping style to get a number of people smoothly comprehend chosen tricky things. You actually exceeded people’s desires. Thank you for producing those priceless, safe, revealing and fun thoughts on that topic to Julie.
Your point of view caught my eye and was very interesting. Thanks. I have a question for you.
Thanks for your publication on the traveling industry. I’d also like to add that if you are one senior taking into consideration traveling, it really is absolutely important to buy travel insurance for retirees. When traveling, seniors are at greatest risk of having a professional medical emergency. Obtaining right insurance package for one’s age group can protect your health and provide peace of mind.
Your approach to solving this problem is refreshingly practical compared to other methods I’ve tried. The step-by-step guide makes it feel achievable even for beginners. I’m excited to implement these strategies in my own work.
Thanks for sharing. I read many of your blog posts, cool, your blog is very good.
Big fan of ‘gà chọi c1’ here! Hoping to find some good matches on this site. Check out gà chọi c1.
Can you be more specific about the content of your article? After reading it, I still have some doubts. Hope you can help me.
I carry on listening to the newscast speak about getting boundless online grant applications so I have been looking around for the finest site to get one. Could you tell me please, where could i find some?
https://shorturl.fm/D60Kt
I don’t think the title of your article matches the content lol. Just kidding, mainly because I had some doubts after reading the article.
I recently visited 66bgame and I was impressed with their gaming selection. Their easy-to-navigate website provides a user experience that keeps bringing me back! See what they offer: 66bgame
Smart bankroll management is key to enjoying any online casino experience! Seeing platforms like 365 Casino prioritize accessibility – with options like a 365 casino app download apk – shows they understand player convenience. It’s all about responsible fun!
?Necesitas mudarte? https://trasladoavalencia.es ?Necesitas una mudanza rapida, segura y sin complicaciones en Valencia? Ofrecemos servicios profesionales de transporte y mudanzas para particulares y empresas. ?Solicita un presupuesto gratuito y disfruta de nuestro servicio de calidad!
Hey folks, been using betisrealbetis for a while now. Their odds are pretty competitive, and the site is smooth. Definitely worth a look-see for your next bet. Find them here: betisrealbetis
Guys, if you’re in Vietnam and feeling lucky, check out lucky888vietnam. The site’s got a bunch of cool games, and it feels very tailored for the local audience. Worth a look if you’re looking for a new place to try your luck. Go to: lucky888vietnam
Gave p888casino.info a shot. Decent, nothing too special but a solid offering. Worth checking out if you are looking for places to play. Linked right here: p888casino
Can you be more specific about the content of your article? After reading it, I still have some doubts. Hope you can help me.
need a video? video equipment rental in italy offering full-cycle services: concept, scripting, filming, editing and post-production. Commercials, corporate videos, social media content and branded storytelling. Professional crew, modern equipment and a creative approach tailored to your goals.
need a video? location scouting in italy offering full-cycle services: concept, scripting, filming, editing and post-production. Commercials, corporate videos, social media content and branded storytelling. Professional crew, modern equipment and a creative approach tailored to your goals.
Right, let’s talk fuwinplataforma. Kinda new to this but this platform has a clean design! I’m still learning about it. Worth exploring though! Here’s fuwinplataforma to check out.
Продажа тяговых https://faamru.com аккумуляторных батарей для вилочных погрузчиков, ричтраков, электротележек и штабелеров. Решения для интенсивной складской работы: стабильная мощность, долгий ресурс, надёжная работа в сменном режиме, помощь с подбором АКБ по параметрам техники и оперативная поставка под задачу
Продажа тяговых https://faamru.com аккумуляторных батарей для вилочных погрузчиков, ричтраков, электротележек и штабелеров. Решения для интенсивной складской работы: стабильная мощность, долгий ресурс, надёжная работа в сменном режиме, помощь с подбором АКБ по параметрам техники и оперативная поставка под задачу
Продажа тяговых https://ab-resurs.ru аккумуляторных батарей для вилочных погрузчиков и штабелеров. Надёжные решения для стабильной работы складской техники: большой выбор АКБ, профессиональный подбор по параметрам, консультации специалистов, гарантия и оперативная поставка для складов и производств по всей России
Продажа тяговых https://ab-resurs.ru аккумуляторных батарей для вилочных погрузчиков и штабелеров. Надёжные решения для стабильной работы складской техники: большой выбор АКБ, профессиональный подбор по параметрам, консультации специалистов, гарантия и оперативная поставка для складов и производств по всей России
Официальная площадка работает на кракен даркнет с проверенными зеркалами для стабильного входа без блокировок
Все актуальные адреса здесь на кракен тут ссылка рабочая сегодня для безопасного входа на маркетплейс
Продажа тяговых ab-resurs.ru аккумуляторных батарей для вилочных погрузчиков и штабелеров. Надёжные решения для стабильной работы складской техники: большой выбор АКБ, профессиональный подбор по параметрам, консультации специалистов, гарантия и оперативная поставка для складов и производств по всей России
Продажа тяговых ab-resurs.ru аккумуляторных батарей для вилочных погрузчиков и штабелеров. Надёжные решения для стабильной работы складской техники: большой выбор АКБ, профессиональный подбор по параметрам, консультации специалистов, гарантия и оперативная поставка для складов и производств по всей России
Продажа тяговых faamru.com аккумуляторных батарей для вилочных погрузчиков, ричтраков, электротележек и штабелеров. Решения для интенсивной складской работы: стабильная мощность, долгий ресурс, надёжная работа в сменном режиме, помощь с подбором АКБ по параметрам техники и оперативная поставка под задачу
Продажа тяговых faamru.com аккумуляторных батарей для вилочных погрузчиков, ричтраков, электротележек и штабелеров. Решения для интенсивной складской работы: стабильная мощность, долгий ресурс, надёжная работа в сменном режиме, помощь с подбором АКБ по параметрам техники и оперативная поставка под задачу
дивитися найкращі серіали сімейні комедії дивитися українською
кіно онлайн кращі українські серіали онлайн
Been checking out bonos777bet lately, mainly for the bonuses. They’re pretty good, definitely worth keeping an eye on. Check it: bonos777bet
Can you be more specific about the content of your article? After reading it, I still have some doubts. Hope you can help me.
Thank you, I have recently been looking for info approximately this topic for a while and yours is the best I have discovered till now. However, what concerning the bottom line? Are you positive in regards to the source?
Продвижение сайтов https://team-black-top.ru под ключ: аудит, стратегия, семантика, техоптимизация, контент и ссылки. Улучшаем позиции в Google/Яндекс, увеличиваем трафик и заявки. Прозрачная отчетность, понятные KPI и работа на результат — от старта до стабильного роста.
Продвижение сайтов https://team-black-top.ru под ключ: аудит, стратегия, семантика, техоптимизация, контент и ссылки. Улучшаем позиции в Google/Яндекс, увеличиваем трафик и заявки. Прозрачная отчетность, понятные KPI и работа на результат — от старта до стабильного роста.
Тяговые аккумуляторные https://ab-resurs.ru батареи для складской техники: погрузчики, ричтраки, электротележки, штабелеры. Новые АКБ с гарантией, помощь в подборе, совместимость с популярными моделями, доставка и сервисное сопровождение.
Тяговые аккумуляторные https://ab-resurs.ru батареи для складской техники: погрузчики, ричтраки, электротележки, штабелеры. Новые АКБ с гарантией, помощь в подборе, совместимость с популярными моделями, доставка и сервисное сопровождение.
Продажа тяговых АКБ https://faamru.com для складской техники любого типа: вилочные погрузчики, ричтраки, электрические тележки и штабелеры. Качественные аккумуляторные батареи, долгий срок службы, гарантия и профессиональный подбор.
Продажа тяговых АКБ https://faamru.com для складской техники любого типа: вилочные погрузчики, ричтраки, электрические тележки и штабелеры. Качественные аккумуляторные батареи, долгий срок службы, гарантия и профессиональный подбор.
Продажа тяговых АКБ https://faamru.com для складской техники любого типа: вилочные погрузчики, ричтраки, электрические тележки и штабелеры. Качественные аккумуляторные батареи, долгий срок службы, гарантия и профессиональный подбор.
Продажа тяговых АКБ https://faamru.com для складской техники любого типа: вилочные погрузчики, ричтраки, электрические тележки и штабелеры. Качественные аккумуляторные батареи, долгий срок службы, гарантия и профессиональный подбор.
кіно онлайн новинки 2025 пригоди та фентезі онлайн
дивитися фільми як аніме онлайн українською озвучкою
дивитися фільми онлайн сучасні серіали в HD якості
новинки кіно онлайн історичні фільми українською мовою
https://www.tg77com.org I am thanksful for this post!
I don’t think the title of your article matches the content lol. Just kidding, mainly because I had some doubts after reading the article.
Typhu88vips, alright! Let’s see if I can finally hit that jackpot. Been playing a while, due for a good win I reckon! Ready to roll! typhu88vips
Gates of Olympus is Pragmatic Play’s second outing to the famed abode of the Greek Gods. Like in the first one, Greek Gods™, Zeus takes center stage, this time awarding multipliers of up to 500x for payouts of up to 5000x. That’s 4000x more! Let’s get into the details without further ado. The Return to Player (RTP) percentage is 96.50%, and while we’ve seen better, this is actually a little above average. Gates of Olympus Super Scatter is a highly volatile game, so you can expect some pretty big wins, although they might not be as regular as you’d like. Gates of Olympus is not your usual online slot game. The action plays out on a colossal 6×5 game board with clear and immersive visuals. One major difference with standard real money online slots is the Pay Anywhere mechanic. When writing this Gates of Olympus slot review, I found that you only need to land eight or more matching symbols anywhere on the grid to win a payout.
https://www.fedclear.co.za/1win-casino-game-review-australian-players-favorite/
The range of bets available for this game ran from a minimum of $ £ €0.20 per spin, going up to a maximum of $ £ €240 per spin, which is very generous. Dacă vrei să joci Gates of Olympus Demo sau cu bani reali, trebuie doar să selectezi valoarea pariului și să apeși butonul de rotire. Poți alege atât valoarea mizei, de la 0,04 RON la 2 RON, precum și numărul de fise, de la 1 la 10. Advertisement cookies are used to provide visitors with customized advertisements based on the pages you visited previously and to analyze the effectiveness of the ad campaigns. Gates of Olympus Xmas 1000 is steeped in Greek mythology as players venture into Zeus’ territory. Încearcă aici versiunea demo Gates of Olympus, apăsând pe butonul ,,Joacă Demo”. Gates of Olympus Xmas 1000 dazzles with its vibrant symbols and innovative mechanics, including the unique Tumble Feature and impressive Multiplier symbols that can amplify wins up to 1000x. With the chance to trigger free spins and special reels, this slot ensures a thrilling experience. Whether you’re drawn to the allure of Mount Olympus or the excitement of holiday slots, a free demo awaits to transport you into a world of divine wins and festive cheer.
https://www.pin77-online.com I am thanksful for this post!
https://www.okebet168u.org I am thanksful for this post!
Great information. Lucky me I came across your website by accident (stumbleupon). I have book marked it for later!
Richly animated symbols, lightning effects, and Olympus-inspired visuals create a cinematic slot experience. Squad Busters from Supercell to soft launch on April 23, 2024 Get ready to Feel the Rush of premium online games and sports betting, with the chance to win big on a range of different slots, live games, and sports and lucky numbers markets. • Bet Builder ̶ make multiple bets on various, non- related aspects of one match, which increases your chances of winning. Download the Gates of Olympus 1000 app now and let the games begin! Gratis 100%: Tidak perlu setor dana untuk mencoba. Cancellations: not accepted It should be understood that the Gates of Olympus slot machine is a casino gambling entertainment. There are no “win-win” strategies and no cunning schemes to guarantee victory. The slot is based on the vagaries of the random number generator, making each session a unique experience. Players succeed only through a combination of luck and prudent budget management.
https://tycherestaurant.com/playfina-casino-australia-top-tips-for-real-money-wins/
Gates of Olympus Xmas 1000 is steeped in Greek mythology as players venture into Zeus’ territory. Set on a familiar 6×5 grid where the Greek God resides to the right of the reels, players must match at least eight snowy symbols, including crowns, hourglasses and gems, to secure a merry win. Set upon a 6×5 grid with the Greek god adjacent to the reels, players must match at least eight symbols – including crowns, goblets and gems – on any spin to land a win. Symbols pay anywhere on the screen, and a tumble feature sees winning combinations removed from play, being replaced by new icons which fall from the top of the gameboard. 18+ | Terms apply That doesn’t mean there’s anything wrong with Gates of Olympus Xmas 1000. Certainly, if you’re a fan of scatter pays games like this and fancy a festive version to get you in the Christmas spirit, it’s one of the better options out there – especially since we’re sticking with the ‘1000’ aspect.
Hurrah, that’s what I was seeking for, what a data! existing here at this website, thanks admin of this website.
I don’t think the title of your article matches the content lol. Just kidding, mainly because I had some doubts after reading the article.
(10 euros gratis apuestas|10 mejores casas de apuestas|10 trucos para ganar apuestas|15 euros gratis marca apuestas|1×2 apuestas|1×2 apuestas deportivas|1×2 apuestas que significa|1×2 en apuestas|1×2 en apuestas que
significa|1×2 que significa en apuestas|5 euros gratis apuestas|9 apuestas que siempre ganaras|a partir
de cuanto se declara apuestas|actividades de juegos de azar y apuestas|ad
apuestas deportivas|aleksandre topuria ufc apuestas|algoritmo para ganar apuestas deportivas|america apuestas|análisis nba apuestas|aplicacion android apuestas deportivas|aplicacion apuestas deportivas|aplicacion apuestas deportivas android|aplicación de apuestas online|aplicacion para
hacer apuestas|aplicacion para hacer apuestas
de futbol|aplicación para hacer apuestas de fútbol|aplicaciones apuestas deportivas android|aplicaciones apuestas deportivas gratis|aplicaciones de apuestas android|aplicaciones de apuestas de fútbol|aplicaciones de apuestas deportivas|aplicaciones de apuestas deportivas peru|aplicaciones
de apuestas deportivas perú|aplicaciones de apuestas en colombia|aplicaciones de apuestas gratis|aplicaciones de apuestas online|aplicaciones de apuestas seguras|aplicaciones
de apuestas sin dinero|aplicaciones para hacer apuestas|apostar seguro apuestas deportivas|app android
apuestas deportivas|app apuestas|app apuestas android|app apuestas de futbol|app apuestas deportivas|app
apuestas deportivas android|app apuestas deportivas argentina|app apuestas deportivas colombia|app
apuestas deportivas ecuador|app apuestas deportivas
españa|app apuestas deportivas gratis|app apuestas entre amigos|app apuestas futbol|app
apuestas gratis|app apuestas sin dinero|app casa de
apuestas|app casas de apuestas|app control apuestas|app de apuestas|app de apuestas android|app de apuestas casino|app de apuestas colombia|app de apuestas con bono de
bienvenida|app de apuestas de futbol|app de apuestas deportivas|app de apuestas deportivas android|app de apuestas deportivas argentina|app de apuestas deportivas colombia|app de apuestas
deportivas en españa|app de apuestas deportivas peru|app de apuestas deportivas perú|app de apuestas deportivas sin dinero|app
de apuestas ecuador|app de apuestas en colombia|app de apuestas en españa|app de apuestas en venezuela|app de apuestas futbol|app de apuestas
gratis|app de apuestas online|app de apuestas para android|app de apuestas para ganar dinero|app de
apuestas peru|app de apuestas reales|app de casas de apuestas|app marca apuestas android|app moviles de apuestas|app para apuestas|app para
apuestas de futbol|app para apuestas deportivas|app
para apuestas deportivas en español|app para ganar apuestas deportivas|app para hacer
apuestas|app para hacer apuestas deportivas|app para hacer apuestas entre amigos|app para llevar control de apuestas|app pronosticos apuestas deportivas|app versus apuestas|apps apuestas mundial|apps de apuestas|apps de apuestas con bono de bienvenida|apps
de apuestas de futbol|apps de apuestas deportivas peru|apps de apuestas mexico|apps
para apuestas|aprender a hacer apuestas deportivas|aprender hacer apuestas deportivas|apuesta del dia apuestas deportivas|apuestas 10 euros gratis|apuestas 100 seguras|apuestas 1×2|apuestas 1X2|apuestas 2 division|apuestas 3 division|apuestas
a caballos|apuestas a carreras de caballos|apuestas a colombia|apuestas a corners|apuestas a ganar|apuestas a
jugadores nba|apuestas a la baja|apuestas a
la nfl|apuestas al barcelona|apuestas al dia|apuestas al empate|apuestas al mundial|apuestas al tenis wta|apuestas alaves barcelona|apuestas alcaraz hoy|apuestas
alemania españa|apuestas alonso campeon del mundo|apuestas altas y bajas|apuestas
altas y bajas nfl|apuestas ambos equipos marcan|apuestas america|apuestas android|apuestas anillo nba|apuestas antes del mundial|apuestas anticipadas|apuestas anticipadas nba|apuestas apps|apuestas arabia argentina|apuestas
argentina|apuestas argentina campeon del mundo|apuestas argentina canada|apuestas argentina colombia|apuestas argentina croacia|apuestas argentina españa|apuestas argentina francia|apuestas argentina francia cuanto paga|apuestas argentina francia mundial|apuestas argentina
gana el mundial|apuestas argentina gana mundial|apuestas argentina holanda|apuestas argentina mexico|apuestas
argentina méxico|apuestas argentina mundial|apuestas argentina online|apuestas argentina
paises bajos|apuestas argentina polonia|apuestas argentina uruguay|apuestas argentina vs australia|apuestas argentina
vs colombia|apuestas argentina vs francia|apuestas argentina vs peru|apuestas argentinas|apuestas arsenal real
madrid|apuestas ascenso a primera division|apuestas ascenso a segunda|apuestas asiaticas|apuestas asiatico|apuestas athletic|apuestas athletic
atletico|apuestas athletic barça|apuestas athletic
barcelona|apuestas athletic betis|apuestas athletic manchester|apuestas
athletic manchester united|apuestas athletic osasuna|apuestas
athletic real|apuestas athletic real madrid|apuestas athletic real sociedad|apuestas athletic real sociedad final|apuestas athletic roma|apuestas athletic sevilla|apuestas athletic valencia|apuestas atletico|apuestas atletico barcelona|apuestas atletico barsa|apuestas atletico campeon champions|apuestas atletico campeon de liga|apuestas atlético copenhague|apuestas atletico de madrid|apuestas atlético de madrid|apuestas atletico de madrid
barcelona|apuestas atletico de madrid gana la liga|apuestas atletico de madrid
real madrid|apuestas atlético de madrid real madrid|apuestas atletico de madrid vs barcelona|apuestas atletico madrid|apuestas atletico
madrid real madrid|apuestas atletico madrid vs barcelona|apuestas atletico real
madrid|apuestas atletico real madrid champions|apuestas atletismo|apuestas bajas|apuestas baloncesto|apuestas baloncesto acb|apuestas baloncesto handicap|apuestas baloncesto hoy|apuestas baloncesto juegos olimpicos|apuestas baloncesto nba|apuestas baloncesto pronostico|apuestas baloncesto
pronósticos|apuestas baloncesto prorroga|apuestas barca|apuestas barca athletic|apuestas barca atletico|apuestas barca bayern|apuestas barca bayern munich|apuestas barca girona|apuestas barca hoy|apuestas barça hoy|apuestas barca inter|apuestas barca juventus|apuestas barca madrid|apuestas barça madrid|apuestas barca real madrid|apuestas barca vs juve|apuestas barca vs madrid|apuestas barca vs psg|apuestas barcelona|apuestas barcelona alaves|apuestas barcelona athletic|apuestas barcelona atletico|apuestas
barcelona atletico de madrid|apuestas barcelona atlético de madrid|apuestas barcelona atletico madrid|apuestas barcelona bayern|apuestas barcelona betis|apuestas
barcelona campeon de liga|apuestas barcelona celta|apuestas barcelona espanyol|apuestas barcelona gana la champions|apuestas barcelona girona|apuestas barcelona granada|apuestas barcelona hoy|apuestas barcelona
inter|apuestas barcelona madrid|apuestas barcelona osasuna|apuestas
barcelona psg|apuestas barcelona real madrid|apuestas
barcelona real sociedad|apuestas barcelona sevilla|apuestas barcelona valencia|apuestas barcelona villarreal|apuestas barcelona
vs atletico madrid|apuestas barcelona vs madrid|apuestas barcelona vs real madrid|apuestas barsa madrid|apuestas
basket hoy|apuestas bayern barcelona|apuestas bayern vs barcelona|apuestas beisbol|apuestas béisbol|apuestas
beisbol mlb|apuestas beisbol pronosticos|apuestas
beisbol venezolano|apuestas betis|apuestas betis – chelsea|apuestas betis barcelona|apuestas betis chelsea|apuestas betis fiorentina|apuestas betis girona|apuestas betis madrid|apuestas betis mallorca|apuestas betis
real madrid|apuestas betis real sociedad|apuestas betis sevilla|apuestas betis
valencia|apuestas betis valladolid|apuestas betis vs valencia|apuestas betplay
hoy colombia|apuestas betsson peru|apuestas bienvenida|apuestas billar online|apuestas bolivia vs colombia|apuestas bono|apuestas bono bienvenida|apuestas bono de bienvenida|apuestas bono de bienvenida sin deposito|apuestas
bono gratis|apuestas bono sin deposito|apuestas bonos sin deposito|apuestas borussia real
madrid|apuestas boxeo|apuestas boxeo de campeonato|apuestas
boxeo españa|apuestas boxeo español|apuestas boxeo femenino olimpiadas|apuestas boxeo hoy|apuestas boxeo online|apuestas
brasil colombia|apuestas brasil peru|apuestas brasil uruguay|apuestas brasil vs
colombia|apuestas brasil vs peru|apuestas caballos|apuestas caballos colocado|apuestas caballos
españa|apuestas caballos hipodromo|apuestas caballos hoy|apuestas caballos madrid|apuestas caballos
online|apuestas caballos sanlucar de barrameda|apuestas caballos zarzuela|apuestas calculador|apuestas campeon|apuestas campeon champions|apuestas campeón champions|apuestas
campeon champions 2025|apuestas campeon champions league|apuestas campeon conference league|apuestas campeon copa america|apuestas campeon copa del rey|apuestas campeon de champions|apuestas campeon de la
champions|apuestas campeon de liga|apuestas campeon del mundo|apuestas campeon eurocopa|apuestas campeón eurocopa|apuestas campeon europa
league|apuestas campeon f1|apuestas campeon f1 2025|apuestas campeon formula
1|apuestas campeon libertadores|apuestas campeon liga|apuestas campeon liga bbva|apuestas
campeon liga española|apuestas campeon liga santander|apuestas campeon motogp 2025|apuestas campeon mundial|apuestas campeón mundial|apuestas campeon mundial
baloncesto|apuestas campeon nba|apuestas campeón nba|apuestas campeon premier|apuestas campeon premier
league|apuestas campeon roland garros|apuestas campeonato f1|apuestas campeonatos de futbol|apuestas
carrera de caballos|apuestas carrera de caballos hoy|apuestas carrera de caballos nocturnas|apuestas
carrera de galgos fin de semana|apuestas carrera de galgos hoy|apuestas carrera
de galgos nocturnas|apuestas carreras caballos|apuestas carreras caballos sanlucar|apuestas carreras de caballos|apuestas carreras
de caballos en directo|apuestas carreras de caballos en vivo|apuestas carreras
de caballos españa|apuestas carreras de caballos hoy|apuestas carreras de caballos nacionales|apuestas carreras de caballos nocturnas|apuestas carreras de caballos
online|apuestas carreras de caballos sanlucar|apuestas carreras de caballos sanlúcar|apuestas carreras de galgos|apuestas carreras de galgos en vivo|apuestas carreras
de galgos nocturnas|apuestas carreras de galgos pre partido|apuestas casino|apuestas casino barcelona|apuestas casino
futbol|apuestas casino gran madrid|apuestas
casino gratis|apuestas casino madrid|apuestas casino online|apuestas casino online argentina|apuestas casinos|apuestas casinos online|apuestas celta|apuestas celta barcelona|apuestas celta betis|apuestas
celta eibar|apuestas celta espanyol|apuestas celta granada|apuestas celta madrid|apuestas celta manchester|apuestas celta real
madrid|apuestas champion league|apuestas champions foro|apuestas champions hoy|apuestas champions league|apuestas champions league – pronósticos|apuestas champions league 2025|apuestas champions league hoy|apuestas champions league pronosticos|apuestas champions league pronósticos|apuestas champions pronosticos|apuestas chelsea barcelona|apuestas chelsea betis|apuestas chile|apuestas chile peru|apuestas
chile venezuela|apuestas chile vs colombia|apuestas chile vs uruguay|apuestas ciclismo|apuestas ciclismo en vivo|apuestas ciclismo femenino|apuestas ciclismo tour francia|apuestas
ciclismo vuelta|apuestas ciclismo vuelta a españa|apuestas ciclismo vuelta españa|apuestas city madrid|apuestas city real madrid|apuestas clasico|apuestas clasico español|apuestas clasico
real madrid barcelona|apuestas clasificacion mundial|apuestas colombia|apuestas colombia argentina|apuestas colombia brasil|apuestas colombia paraguay|apuestas colombia uruguay|apuestas colombia vs argentina|apuestas colombia vs brasil|apuestas combinadas|apuestas combinadas
como funcionan|apuestas combinadas de futbol|apuestas combinadas de fútbol|apuestas combinadas foro|apuestas combinadas futbol|apuestas combinadas
hoy|apuestas combinadas mismo partido|apuestas combinadas mundial|apuestas combinadas nba|apuestas combinadas para esta semana|apuestas combinadas
para hoy|apuestas combinadas para mañana|apuestas
combinadas pronosticos|apuestas combinadas recomendadas|apuestas combinadas seguras|apuestas combinadas seguras para
hoy|apuestas combinadas seguras para mañana|apuestas como ganar|apuestas comparador|apuestas con bono
de bienvenida|apuestas con dinero ficticio|apuestas con dinero real|apuestas con dinero virtual|apuestas con handicap|apuestas con handicap asiatico|apuestas con handicap baloncesto|apuestas con mas probabilidades
de ganar|apuestas con paypal|apuestas con tarjeta
de credito|apuestas con tarjeta de debito|apuestas consejos|apuestas copa|apuestas copa africa|apuestas copa america|apuestas copa américa|apuestas
copa argentina|apuestas copa brasil|apuestas copa davis|apuestas copa
de europa|apuestas copa del mundo|apuestas copa del rey|apuestas copa del rey baloncesto|apuestas copa del rey final|apuestas copa del rey futbol|apuestas copa
del rey ganador|apuestas copa del rey hoy|apuestas copa del rey
pronosticos|apuestas copa del rey pronósticos|apuestas copa europa|apuestas copa
italia|apuestas copa libertadores|apuestas copa mundial de hockey|apuestas copa
rey|apuestas copa sudamericana|apuestas corners|apuestas corners hoy|apuestas croacia argentina|apuestas
cuartos eurocopa|apuestas cuotas|apuestas cuotas altas|apuestas cuotas bajas|apuestas de
1 euro|apuestas de baloncesto|apuestas de baloncesto hoy|apuestas
de baloncesto nba|apuestas de baloncesto para hoy|apuestas de
beisbol|apuestas de beisbol para hoy|apuestas de blackjack en linea|apuestas de boxeo|apuestas de boxeo canelo|apuestas de boxeo en las vegas|apuestas de boxeo hoy|apuestas
de boxeo online|apuestas de caballo|apuestas de
caballos|apuestas de caballos como funciona|apuestas de caballos como se juega|apuestas de caballos en colombia|apuestas de caballos
en españa|apuestas de caballos en linea|apuestas de caballos
españa|apuestas de caballos ganador y colocado|apuestas de caballos internacionales|apuestas de caballos juegos|apuestas de caballos online|apuestas de caballos online en venezuela|apuestas de caballos por internet|apuestas de caballos pronosticos|apuestas de caballos pronósticos|apuestas de carrera
de caballos|apuestas de carreras de caballos|apuestas de carreras de caballos online|apuestas
de casino|apuestas de casino online|apuestas de casino por internet|apuestas de champions league|apuestas de ciclismo|apuestas
de colombia|apuestas de copa america|apuestas de corners|apuestas de
deportes en linea|apuestas de deportes online|apuestas de dinero|apuestas de
esports|apuestas de eurocopa|apuestas de europa league|apuestas de f1|apuestas de formula 1|apuestas de futbol|apuestas
de fútbol|apuestas de futbol app|apuestas de futbol argentina|apuestas de futbol colombia|apuestas
de futbol en colombia|apuestas de futbol en directo|apuestas
de futbol en linea|apuestas de futbol en vivo|apuestas de futbol español|apuestas de futbol gratis|apuestas de futbol hoy|apuestas de futbol mundial|apuestas de futbol online|apuestas de fútbol online|apuestas de
futbol para hoy|apuestas de fútbol para hoy|apuestas de futbol para
hoy seguras|apuestas de futbol para mañana|apuestas de futbol peru|apuestas de futbol pronosticos|apuestas de fútbol pronósticos|apuestas de futbol seguras|apuestas de futbol
seguras para hoy|apuestas de futbol sin dinero|apuestas de galgos|apuestas
de galgos como ganar|apuestas de galgos en directo|apuestas
de galgos online|apuestas de galgos trucos|apuestas de golf|apuestas de hockey|apuestas de hockey sobre hielo|apuestas
de hoy|apuestas de hoy seguras|apuestas de juego|apuestas de juegos|apuestas de
juegos deportivos|apuestas de juegos online|apuestas de la champions league|apuestas
de la copa américa|apuestas de la eurocopa|apuestas de la europa
league|apuestas de la liga|apuestas de la liga bbva|apuestas de la
liga española|apuestas de la nba|apuestas de la nfl|apuestas de la ufc|apuestas de mlb|apuestas de
nba|apuestas de nba para hoy|apuestas de partidos|apuestas de partidos de
futbol|apuestas de peleas ufc|apuestas de perros en vivo|apuestas de perros virtuales|apuestas
de peru|apuestas de sistema|apuestas de sistema
como funciona|apuestas de sistema explicacion|apuestas de sistema explicación|apuestas de
tenis|apuestas de tenis de mesa|apuestas de tenis en directo|apuestas de tenis hoy|apuestas de tenis para hoy|apuestas de tenis pronosticos|apuestas
de tenis seguras|apuestas de todo tipo|apuestas de ufc|apuestas de ufc hoy|apuestas del boxeo|apuestas del clasico|apuestas
del clasico real madrid barca|apuestas del dia|apuestas del día|apuestas del dia de hoy|apuestas del dia deportivas|apuestas del dia futbol|apuestas
del mundial|apuestas del partido de hoy|apuestas del real madrid|apuestas
del rey|apuestas del sistema|apuestas deporte|apuestas deportes|apuestas deportiva|apuestas deportivas|apuestas deportivas
1 euro|apuestas deportivas 10 euros gratis|apuestas deportivas 100 seguras|apuestas deportivas
1×2|apuestas deportivas android|apuestas deportivas app|apuestas deportivas apps|apuestas deportivas argentina|apuestas deportivas argentina futbol|apuestas deportivas argentina legal|apuestas deportivas atletico de
madrid|apuestas deportivas baloncesto|apuestas deportivas barca madrid|apuestas deportivas
barcelona|apuestas deportivas beisbol|apuestas deportivas bono|apuestas deportivas bono bienvenida|apuestas deportivas bono de bienvenida|apuestas deportivas bono sin deposito|apuestas deportivas bonos de bienvenida|apuestas deportivas boxeo|apuestas deportivas caballos|apuestas deportivas calculadora|apuestas deportivas campeon liga|apuestas deportivas casino|apuestas deportivas casino barcelona|apuestas deportivas casino online|apuestas deportivas cerca de mi|apuestas deportivas champions league|apuestas deportivas chile|apuestas deportivas
ciclismo|apuestas deportivas colombia|apuestas deportivas com|apuestas deportivas com foro|apuestas deportivas com pronosticos|apuestas deportivas combinadas|apuestas deportivas combinadas
para hoy|apuestas deportivas como se juega|apuestas deportivas comparador|apuestas deportivas con bono gratis|apuestas
deportivas con bonos gratis|apuestas deportivas con dinero ficticio|apuestas deportivas con paypal|apuestas deportivas con puntos virtuales|apuestas deportivas consejos|apuestas deportivas
consejos para ganar|apuestas deportivas copa america|apuestas deportivas copa
del rey|apuestas deportivas copa libertadores|apuestas
deportivas copa mundial|apuestas deportivas corners|apuestas deportivas cual es la
mejor|apuestas deportivas cuotas altas|apuestas deportivas de baloncesto|apuestas deportivas de boxeo|apuestas deportivas de colombia|apuestas deportivas de futbol|apuestas deportivas de nba|apuestas deportivas de nhl|apuestas deportivas de
peru|apuestas deportivas de tenis|apuestas deportivas del
dia|apuestas deportivas dinero ficticio|apuestas
deportivas directo|apuestas deportivas doble oportunidad|apuestas deportivas en argentina|apuestas
deportivas en chile|apuestas deportivas en colombia|apuestas deportivas en directo|apuestas deportivas
en españa|apuestas deportivas en español|apuestas deportivas en linea|apuestas deportivas en línea|apuestas deportivas en peru|apuestas deportivas
en perú|apuestas deportivas en sevilla|apuestas deportivas
en uruguay|apuestas deportivas en vivo|apuestas deportivas es|apuestas deportivas es pronosticos|apuestas deportivas españa|apuestas deportivas españolas|apuestas deportivas esports|apuestas deportivas estadisticas|apuestas deportivas estrategias|apuestas deportivas estrategias
seguras|apuestas deportivas eurocopa|apuestas deportivas europa league|apuestas deportivas
f1|apuestas deportivas faciles de ganar|apuestas deportivas formula 1|apuestas
deportivas foro|apuestas deportivas foro futbol|apuestas deportivas foro tenis|apuestas
deportivas francia argentina|apuestas deportivas futbol|apuestas deportivas fútbol|apuestas deportivas futbol argentino|apuestas
deportivas futbol colombia|apuestas deportivas futbol español|apuestas deportivas gana|apuestas deportivas ganadas|apuestas deportivas ganar
dinero seguro|apuestas deportivas gane|apuestas deportivas golf|apuestas
deportivas gratis|apuestas deportivas gratis con premios|apuestas
deportivas gratis hoy|apuestas deportivas gratis sin deposito|apuestas
deportivas handicap|apuestas deportivas handicap asiatico|apuestas
deportivas hoy|apuestas deportivas impuestos|apuestas deportivas interior argentina|apuestas
deportivas juegos olimpicos|apuestas deportivas la liga|apuestas deportivas legales|apuestas deportivas legales en colombia|apuestas deportivas libres de
impuestos|apuestas deportivas licencia españa|apuestas deportivas liga española|apuestas deportivas
listado|apuestas deportivas listado clasico|apuestas deportivas madrid|apuestas
deportivas mas seguras|apuestas deportivas mejor pagadas|apuestas deportivas mejores|apuestas deportivas
mejores app|apuestas deportivas mejores casas|apuestas deportivas mejores
cuotas|apuestas deportivas mejores paginas|apuestas deportivas mexico|apuestas deportivas méxico|apuestas deportivas mlb|apuestas deportivas mlb hoy|apuestas deportivas
multiples|apuestas deportivas mundial|apuestas deportivas murcia|apuestas deportivas nba|apuestas deportivas nba hoy|apuestas deportivas nfl|apuestas deportivas nhl|apuestas
deportivas nuevas|apuestas deportivas ofertas|apuestas deportivas online|apuestas deportivas
online argentina|apuestas deportivas online chile|apuestas deportivas online colombia|apuestas
deportivas online en colombia|apuestas deportivas online españa|apuestas deportivas online mexico|apuestas deportivas online paypal|apuestas deportivas online peru|apuestas deportivas online por internet|apuestas deportivas pago paypal|apuestas deportivas para ganar dinero|apuestas deportivas para hoy|apuestas deportivas para hoy pronosticos|apuestas deportivas partido
suspendido|apuestas deportivas partidos de hoy|apuestas deportivas paypal|apuestas
deportivas peru|apuestas deportivas perú|apuestas deportivas peru vs ecuador|apuestas deportivas predicciones|apuestas deportivas promociones|apuestas deportivas pronostico|apuestas deportivas pronóstico|apuestas deportivas pronostico hoy|apuestas deportivas pronosticos|apuestas deportivas pronósticos|apuestas deportivas pronosticos expertos|apuestas deportivas pronosticos gratis|apuestas deportivas pronosticos nba|apuestas deportivas
pronosticos tenis|apuestas deportivas que aceptan paypal|apuestas deportivas
real madrid|apuestas deportivas regalo bienvenida|apuestas deportivas resultado exacto|apuestas deportivas
resultados|apuestas deportivas rugby|apuestas deportivas
seguras|apuestas deportivas seguras foro|apuestas
deportivas seguras hoy|apuestas deportivas seguras para hoy|apuestas deportivas
seguras telegram|apuestas deportivas sevilla|apuestas deportivas simulador eurocopa|apuestas deportivas sin deposito|apuestas deportivas sin deposito inicial|apuestas deportivas sin dinero|apuestas deportivas sin dinero real|apuestas deportivas
sin registro|apuestas deportivas stake|apuestas deportivas stake 10|apuestas deportivas telegram españa|apuestas deportivas
tenis|apuestas deportivas tenis de mesa|apuestas deportivas tenis foro|apuestas
deportivas tenis hoy|apuestas deportivas tips|apuestas deportivas
tipster|apuestas deportivas ufc|apuestas deportivas uruguay|apuestas deportivas valencia|apuestas deportivas valencia barcelona|apuestas deportivas venezuela|apuestas deportivas virtuales|apuestas
deportivas y casino|apuestas deportivas y casino online|apuestas deportivas.com|apuestas deportivas.com foro|apuestas deportivas.es|apuestas deportivos
pronosticos|apuestas deposito minimo 1 euro|apuestas descenso a segunda|apuestas descenso a segunda b|apuestas descenso la liga|apuestas descenso primera division|apuestas descenso segunda|apuestas dia|apuestas
diarias seguras|apuestas dinero|apuestas dinero ficticio|apuestas dinero real|apuestas dinero virtual|apuestas directas|apuestas
directo|apuestas directo futbol|apuestas
division de honor juvenil|apuestas dnb|apuestas doble oportunidad|apuestas doble resultado|apuestas dobles|apuestas dobles y
triples|apuestas dortmund barcelona|apuestas draft
nba|apuestas draft nfl|apuestas ecuador vs argentina|apuestas ecuador vs venezuela|apuestas
egipto uruguay|apuestas el clasico|apuestas elecciones venezuela|apuestas empate|apuestas
en baloncesto|apuestas en barcelona|apuestas en beisbol|apuestas
en boxeo|apuestas en caballos|apuestas en carreras de caballos|apuestas en casino|apuestas en casino online|apuestas en casinos|apuestas en casinos online|apuestas
en chile|apuestas en ciclismo|apuestas en colombia|apuestas en colombia de futbol|apuestas en directo|apuestas en directo futbol|apuestas en directo pronosticos|apuestas en el futbol|apuestas
en el tenis|apuestas en españa|apuestas en esports|apuestas en eventos deportivos virtuales|apuestas en golf|apuestas en juegos|apuestas en la champions league|apuestas
en la eurocopa|apuestas en la liga|apuestas en la nba|apuestas en la nfl|apuestas
en las vegas mlb|apuestas en las vegas nfl|apuestas en linea|apuestas en línea|apuestas en linea argentina|apuestas
en linea boxeo|apuestas en linea chile|apuestas en linea colombia|apuestas en línea de fútbol|apuestas
en linea deportivas|apuestas en linea españa|apuestas en linea estados unidos|apuestas en linea futbol|apuestas en linea mexico|apuestas en línea méxico|apuestas en linea mundial|apuestas en linea peru|apuestas en linea usa|apuestas
en los esports|apuestas en madrid|apuestas en méxico|apuestas en mexico online|apuestas en nba|apuestas en partidos de futbol|apuestas en partidos de futbol en vivo|apuestas
en partidos de tenis en directo|apuestas en perú|apuestas en sevilla|apuestas en sistema|apuestas en stake|apuestas en tenis|apuestas en tenis
de mesa|apuestas en valencia|apuestas en vivo|apuestas en vivo argentina|apuestas en vivo casino|apuestas
en vivo futbol|apuestas en vivo fútbol|apuestas en vivo nba|apuestas en vivo
peru|apuestas en vivo tenis|apuestas en vivo ufc|apuestas equipo mbappe|apuestas equipos de futbol|apuestas
españa|apuestas españa alemania|apuestas españa alemania eurocopa|apuestas españa croacia|apuestas españa eurocopa|apuestas
españa francia|apuestas españa francia eurocopa|apuestas españa gana el
mundial|apuestas españa gana eurocopa|apuestas españa gana
mundial|apuestas españa georgia|apuestas españa
holanda|apuestas españa inglaterra|apuestas españa inglaterra cuotas|apuestas españa inglaterra eurocopa|apuestas españa italia|apuestas españa mundial|apuestas españa paises bajos|apuestas
español|apuestas español oviedo|apuestas espanyol barcelona|apuestas espanyol betis|apuestas
espanyol villarreal|apuestas esport|apuestas esports|apuestas
esports colombia|apuestas esports españa|apuestas esports
fifa|apuestas esports gratis|apuestas esports lol|apuestas esports peru|apuestas esports valorant|apuestas estadisticas|apuestas estrategias|apuestas euro|apuestas euro copa|apuestas eurocopa|apuestas eurocopa campeon|apuestas eurocopa españa|apuestas eurocopa
favoritos|apuestas eurocopa femenina|apuestas eurocopa final|apuestas eurocopa ganador|apuestas eurocopa hoy|apuestas eurocopa sub 21|apuestas euroliga baloncesto|apuestas euroliga pronosticos|apuestas europa league|apuestas europa league hoy|apuestas europa league pronosticos|apuestas europa league pronósticos|apuestas euros|apuestas
f1 abu dhabi|apuestas f1 bahrein|apuestas f1 canada|apuestas f1 china|apuestas f1
cuotas|apuestas f1 hoy|apuestas f1 las vegas|apuestas f1
miami|apuestas f1 monaco|apuestas faciles de ganar|apuestas fáciles
de ganar|apuestas faciles para ganar|apuestas favoritas|apuestas favorito champions|apuestas favoritos champions|apuestas favoritos eurocopa|apuestas favoritos mundial|apuestas fc barcelona|apuestas final champions cuotas|apuestas final champions league|apuestas final champions peru|apuestas final copa|apuestas final copa
america|apuestas final copa de europa|apuestas final copa del rey|apuestas final copa europa|apuestas final
copa libertadores|apuestas final copa rey|apuestas
final de copa|apuestas final de copa del rey|apuestas final del
mundial|apuestas final euro|apuestas final eurocopa|apuestas final europa
league|apuestas final libertadores|apuestas final mundial|apuestas final nba|apuestas final rugby|apuestas final
uefa europa league|apuestas final.mundial|apuestas finales de conferencia nfl|apuestas finales nba|apuestas fiorentina betis|apuestas formula|apuestas formula 1|apuestas fórmula 1|apuestas fórmula 1 pronósticos|apuestas formula uno|apuestas foro|apuestas foro nba|apuestas francia argentina|apuestas francia españa|apuestas
futbol|apuestas fútbol|apuestas futbol americano|apuestas futbol americano
nfl|apuestas futbol argentina|apuestas futbol argentino|apuestas futbol champions
league|apuestas futbol chile|apuestas futbol colombia|apuestas
futbol consejos|apuestas futbol en directo|apuestas fútbol en directo|apuestas futbol en vivo|apuestas fútbol en vivo|apuestas futbol españa|apuestas futbol español|apuestas fútbol español|apuestas futbol eurocopa|apuestas futbol femenino|apuestas futbol foro|apuestas futbol gratis|apuestas futbol hoy|apuestas fútbol hoy|apuestas futbol juegos olimpicos|apuestas futbol mexico|apuestas
futbol mundial|apuestas futbol online|apuestas futbol para hoy|apuestas futbol peru|apuestas futbol pronosticos|apuestas futbol sala|apuestas futbol telegram|apuestas futbol virtual|apuestas galgos|apuestas galgos
en directo|apuestas galgos hoy|apuestas galgos online|apuestas galgos pronosticos|apuestas galgos trucos|apuestas gana|apuestas gana colombia|apuestas
gana resultados|apuestas ganadas|apuestas ganadas hoy|apuestas ganador champions league|apuestas
ganador copa america|apuestas ganador copa del rey|apuestas ganador copa del rey baloncesto|apuestas ganador copa libertadores|apuestas ganador de la eurocopa|apuestas ganador de la liga|apuestas ganador del mundial|apuestas ganador eurocopa|apuestas ganador europa league|apuestas ganador f1|apuestas ganador
la liga|apuestas ganador liga española|apuestas ganador mundial|apuestas ganador mundial
baloncesto|apuestas ganador mundial f1|apuestas ganador nba|apuestas ganadores eurocopa|apuestas ganadores mundial|apuestas ganar champions|apuestas ganar eurocopa|apuestas ganar liga|apuestas ganar mundial|apuestas ganar nba|apuestas getafe
valencia|apuestas ghana uruguay|apuestas girona|apuestas girona
athletic|apuestas girona betis|apuestas girona campeon de
liga|apuestas girona campeon liga|apuestas girona gana la
liga|apuestas girona real madrid|apuestas girona real sociedad|apuestas goleador
eurocopa|apuestas goleadores eurocopa|apuestas goles asiaticos|apuestas golf|apuestas golf masters|apuestas golf pga|apuestas granada barcelona|apuestas grand slam de tenis|apuestas gratis|apuestas gratis casino|apuestas gratis con premios|apuestas
gratis hoy|apuestas gratis para hoy|apuestas gratis por registro|apuestas gratis puntos|apuestas
gratis regalos|apuestas gratis sin deposito|apuestas
gratis sin depósito|apuestas gratis sin ingreso|apuestas gratis sports|apuestas
gratis y ganar premios|apuestas grupo a eurocopa|apuestas
grupos eurocopa|apuestas handicap|apuestas handicap asiatico|apuestas handicap baloncesto|apuestas handicap como funciona|apuestas
handicap nba|apuestas handicap nfl|apuestas
hipicas online|apuestas hípicas online|apuestas hipicas venezuela|apuestas hockey|apuestas hockey
hielo|apuestas hockey patines|apuestas hockey sobre
hielo|apuestas holanda argentina|apuestas holanda vs argentina|apuestas
hoy|apuestas hoy champions|apuestas hoy futbol|apuestas hoy nba|apuestas hoy pronosticos|apuestas hoy seguras|apuestas impuestos|apuestas inglaterra paises bajos|apuestas inter barca|apuestas inter barcelona|apuestas juego|apuestas juegos|apuestas juegos en linea|apuestas juegos olimpicos|apuestas juegos olímpicos|apuestas juegos
olimpicos baloncesto|apuestas juegos online|apuestas juegos virtuales|apuestas jugador
sevilla|apuestas jugadores nba|apuestas kings league americas|apuestas la liga|apuestas
la liga española|apuestas la liga hoy|apuestas la liga santander|apuestas
las vegas mlb|apuestas las vegas nba|apuestas las vegas nfl|apuestas league of legends mundial|apuestas legal|apuestas legales|apuestas legales en colombia|apuestas legales en españa|apuestas
legales en estados unidos|apuestas legales españa|apuestas leganes betis|apuestas
libertadores|apuestas licencia|apuestas liga 1 peru|apuestas liga argentina|apuestas
liga bbva pronosticos|apuestas liga de campeones|apuestas liga de campeones de baloncesto|apuestas liga de campeones de hockey|apuestas liga españa|apuestas liga española|apuestas liga santander pronosticos|apuestas ligas de futbol|apuestas linea|apuestas linea de gol|apuestas liverpool barcelona|apuestas liverpool real madrid|apuestas lol mundial|apuestas madrid|apuestas madrid arsenal|apuestas madrid atletico|apuestas madrid atletico
champions|apuestas madrid barca|apuestas madrid barça|apuestas madrid barca
hoy|apuestas madrid barca supercopa|apuestas madrid
barcelona|apuestas madrid barsa|apuestas madrid bayern|apuestas madrid betis|apuestas madrid borussia|apuestas madrid campeon champions|apuestas madrid celta|apuestas madrid city|apuestas madrid dortmund|apuestas madrid gana la liga|apuestas madrid gana liga|apuestas madrid hoy|apuestas madrid liverpool|apuestas madrid
osasuna|apuestas madrid sevilla|apuestas madrid valencia|apuestas madrid vs arsenal|apuestas
madrid vs barcelona|apuestas mallorca osasuna|apuestas mallorca real
sociedad|apuestas manchester athletic|apuestas manchester city real
madrid|apuestas mas faciles de ganar|apuestas mas seguras|apuestas mas seguras para hoy|apuestas
masters de golf|apuestas masters de tenis|apuestas maximo goleador eurocopa|apuestas maximo goleador mundial|apuestas
mejor jugador eurocopa|apuestas mejores casinos online|apuestas mexico|apuestas
méxico|apuestas mexico polonia|apuestas méxico polonia|apuestas
mlb|apuestas mlb hoy|apuestas mlb las vegas|apuestas
mlb para hoy|apuestas mlb pronosticos|apuestas mlb usa|apuestas
mma ufc|apuestas momios|apuestas multiples|apuestas múltiples|apuestas multiples como
funcionan|apuestas multiples el gordo|apuestas multiples futbol|apuestas mundial|apuestas mundial 2026|apuestas mundial baloncesto|apuestas mundial
balonmano|apuestas mundial brasil|apuestas mundial
campeon|apuestas mundial ciclismo|apuestas mundial clubes|apuestas
mundial de baloncesto|apuestas mundial de ciclismo|apuestas mundial de clubes|apuestas mundial de futbol|apuestas mundial de fútbol|apuestas mundial de rugby|apuestas mundial f1|apuestas mundial favoritos|apuestas mundial femenino|apuestas mundial formula 1|apuestas mundial futbol|apuestas
mundial ganador|apuestas mundial lol|apuestas mundial moto gp|apuestas mundial
motogp|apuestas mundial rugby|apuestas mundial sub 17|apuestas mundiales|apuestas mundialistas|apuestas mvp eurocopa|apuestas mvp nba|apuestas
mvp nfl|apuestas nacionales de colombia|apuestas nba|apuestas nba all
star|apuestas nba campeon|apuestas nba consejos|apuestas nba
esta noche|apuestas nba finals|apuestas nba gratis|apuestas nba
hoy|apuestas nba hoy jugadores|apuestas nba hoy pronosticos|apuestas nba para hoy|apuestas nba
playoffs|apuestas nba pronosticos|apuestas nba pronósticos|apuestas nba pronosticos
hoy|apuestas nba tipster|apuestas nfl|apuestas nfl hoy|apuestas nfl las vegas|apuestas nfl playoffs|apuestas nfl pronosticos|apuestas nfl
pronósticos|apuestas nfl semana 4|apuestas nfl super bowl|apuestas nhl|apuestas nhl pronosticos|apuestas
octavos eurocopa|apuestas ofertas|apuestas online|apuestas online argentina|apuestas online argentina legal|apuestas online bono|apuestas online bono bienvenida|apuestas
online boxeo|apuestas online caballos|apuestas online carreras de caballos|apuestas online casino|apuestas online champions league|apuestas online chile|apuestas online ciclismo|apuestas online
colombia|apuestas online comparativa|apuestas online con paypal|apuestas online de caballos|apuestas online deportivas|apuestas online en argentina|apuestas online
en peru|apuestas online espana|apuestas online españa|apuestas online esports|apuestas online foro|apuestas online futbol|apuestas online futbol españa|apuestas online golf|apuestas online gratis|apuestas
online gratis sin deposito|apuestas online juegos|apuestas online mexico|apuestas online mma|apuestas online movil|apuestas online nba|apuestas online net|apuestas online nuevas|apuestas online opiniones|apuestas online paypal|apuestas online
peru|apuestas online seguras|apuestas online sin dinero|apuestas online sin registro|apuestas
online tenis|apuestas online ufc|apuestas online uruguay|apuestas
online venezuela|apuestas open britanico golf|apuestas osasuna athletic|apuestas osasuna barcelona|apuestas osasuna real madrid|apuestas osasuna
sevilla|apuestas osasuna valencia|apuestas over|apuestas over 2.5|apuestas over under|apuestas paginas|apuestas pago anticipado|apuestas paises bajos ecuador|apuestas paises bajos inglaterra|apuestas países
bajos qatar|apuestas para boxeo|apuestas para champions
league|apuestas para el clasico|apuestas para el dia
de hoy|apuestas para el mundial|apuestas para el partido de hoy|apuestas para eurocopa|apuestas para europa league|apuestas para futbol|apuestas para ganar|apuestas para ganar
dinero|apuestas para ganar dinero facil|apuestas para ganar en la ruleta|apuestas para ganar la champions|apuestas para ganar la
eurocopa|apuestas para ganar la europa league|apuestas
para ganar la liga|apuestas para ganar siempre|apuestas para hacer|apuestas para hoy|apuestas para hoy de
futbol|apuestas para hoy europa league|apuestas para hoy futbol|apuestas
para juegos|apuestas para la champions league|apuestas para la copa del rey|apuestas para
la eurocopa|apuestas para la europa league|apuestas para
la final de la eurocopa|apuestas para la nba hoy|apuestas
para los partidos de hoy|apuestas para partidos de hoy|apuestas para ufc|apuestas partido|apuestas partido aplazado|apuestas partido
champions|apuestas partido colombia|apuestas partido
españa marruecos|apuestas partido mundial|apuestas partido suspendido|apuestas partidos|apuestas partidos
champions league|apuestas partidos csgo|apuestas partidos de
futbol|apuestas partidos de futbol hoy|apuestas partidos de hoy|apuestas partidos
eurocopa|apuestas partidos futbol|apuestas partidos hoy|apuestas partidos mundial|apuestas paypal|apuestas peleas de boxeo|apuestas peru|apuestas
perú|apuestas peru brasil|apuestas peru chile|apuestas peru paraguay|apuestas
peru uruguay|apuestas peru vs chile|apuestas peru vs colombia|apuestas pichichi eurocopa|apuestas plataforma|apuestas playoff|apuestas playoff ascenso|apuestas playoff ascenso a primera|apuestas playoff nba|apuestas
playoff segunda|apuestas playoff segunda b|apuestas playoffs nba|apuestas
playoffs nfl|apuestas polonia argentina|apuestas por argentina|apuestas
por internet mexico|apuestas por internet para ganar
dinero|apuestas por paypal|apuestas por ronda boxeo|apuestas por sistema|apuestas portugal uruguay|apuestas pre partido|apuestas predicciones|apuestas predicciones futbol|apuestas primera division|apuestas primera
division españa|apuestas promociones|apuestas pronostico|apuestas pronosticos|apuestas pronosticos deportivos|apuestas
pronosticos deportivos tenis|apuestas pronosticos futbol|apuestas
pronosticos gratis|apuestas pronosticos nba|apuestas pronosticos tenis|apuestas prorroga|apuestas
psg barca|apuestas psg barcelona|apuestas puntos por tarjetas|apuestas puntos tarjetas|apuestas que aceptan paypal|apuestas que
es handicap|apuestas que puedes hacer con tu novia|apuestas que siempre
ganaras|apuestas que significa|apuestas quien bajara a segunda|apuestas
quién bajara a segunda|apuestas quien gana el mundial|apuestas quien gana eurocopa|apuestas quien gana la champions|apuestas quien gana la eurocopa|apuestas quien gana la liga|apuestas quien ganara
el mundial|apuestas quién ganará el mundial|apuestas quien ganara la champions|apuestas quien ganara la
eurocopa|apuestas quien ganara la liga|apuestas rayo barcelona|apuestas real madrid|apuestas real madrid arsenal|apuestas real madrid athletic|apuestas real madrid
atletico|apuestas real madrid atletico champions|apuestas real
madrid atletico de madrid|apuestas real madrid atlético de
madrid|apuestas real madrid atletico madrid|apuestas real madrid barcelona|apuestas real madrid bayern|apuestas real madrid betis|apuestas real madrid borussia|apuestas real madrid campeon champions|apuestas real madrid celta|apuestas real madrid champions|apuestas real madrid city|apuestas
real madrid girona|apuestas real madrid hoy|apuestas real madrid liverpool|apuestas real madrid manchester city|apuestas real
madrid osasuna|apuestas real madrid real sociedad|apuestas real
madrid valencia|apuestas real madrid villarreal|apuestas real madrid
vs arsenal|apuestas real madrid vs atletico|apuestas real madrid vs atlético|apuestas real
madrid vs atletico madrid|apuestas real madrid vs
barcelona|apuestas real madrid vs betis|apuestas real madrid vs sevilla|apuestas real madrid
vs valencia|apuestas real sociedad|apuestas real
sociedad athletic|apuestas real sociedad barcelona|apuestas real sociedad betis|apuestas real sociedad psg|apuestas real sociedad real
madrid|apuestas real sociedad valencia|apuestas recomendadas hoy|apuestas regalo de bienvenida|apuestas registro|apuestas resultado exacto|apuestas resultados|apuestas
resultados eurocopa|apuestas retirada tenis|apuestas roma barcelona|apuestas roma sevilla|apuestas rugby|apuestas rugby mundial|apuestas rugby world cup|apuestas ruleta seguras|apuestas segunda|apuestas segunda b|apuestas segunda division|apuestas segunda
división|apuestas segunda division b|apuestas segunda division españa|apuestas seguras|apuestas seguras baloncesto|apuestas seguras calculadora|apuestas seguras
en la ruleta|apuestas seguras eurocopa|apuestas seguras foro|apuestas
seguras futbol|apuestas seguras futbol hoy|apuestas
seguras gratis|apuestas seguras hoy|apuestas seguras hoy futbol|apuestas seguras nba|apuestas seguras nba hoy|apuestas seguras para este fin de semana|apuestas seguras para
ganar dinero|apuestas seguras para hoy|apuestas seguras para hoy fútbol|apuestas seguras para hoy pronósticos|apuestas
seguras para mañana|apuestas seguras ruleta|apuestas seguras telegram|apuestas seguras tenis|apuestas semifinales eurocopa|apuestas senegal
paises bajos|apuestas sevilla|apuestas sevilla athletic|apuestas sevilla atletico
de madrid|apuestas sevilla barcelona|apuestas sevilla
betis|apuestas sevilla campeon liga|apuestas sevilla celta|apuestas sevilla gana la liga|apuestas sevilla girona|apuestas
sevilla inter|apuestas sevilla jugador|apuestas sevilla juventus|apuestas sevilla leganes|apuestas sevilla
madrid|apuestas sevilla manchester united|apuestas sevilla osasuna|apuestas sevilla real madrid|apuestas sevilla real sociedad|apuestas sevilla roma|apuestas
sevilla valencia|apuestas significa|apuestas simples ejemplos|apuestas simples o
combinadas|apuestas sin deposito|apuestas sin deposito inicial|apuestas sin deposito
minimo|apuestas sin dinero|apuestas sin dinero real|apuestas sin empate|apuestas sin empate que significa|apuestas sin ingreso
minimo|apuestas sin registro|apuestas sistema|apuestas sistema calculadora|apuestas sistema como funciona|apuestas sistema
trixie|apuestas sociedad|apuestas sorteo copa del rey|apuestas stake|apuestas stake 10|apuestas stake 10 hoy|apuestas super
bowl favorito|apuestas super rugby|apuestas supercopa españa|apuestas superliga argentina|apuestas tarjeta
roja|apuestas tarjetas|apuestas tarjetas amarillas|apuestas
tenis|apuestas tenis atp|apuestas tenis consejos|apuestas tenis copa davis|apuestas
tenis de mesa|apuestas tenis de mesa pronosticos|apuestas
tenis en vivo|apuestas tenis femenino|apuestas tenis hoy|apuestas tenis itf|apuestas tenis pronosticos|apuestas tenis pronósticos|apuestas tenis retirada|apuestas tenis
roland garros|apuestas tenis seguras|apuestas tenis wimbledon|apuestas tenis
wta|apuestas tercera division|apuestas tercera division españa|apuestas
tipos|apuestas tips|apuestas tipster|apuestas tipster para
hoy|apuestas topuria holloway cuotas|apuestas torneos de golf|apuestas
torneos de tenis|apuestas trucos|apuestas uefa champions league|apuestas uefa
europa league|apuestas ufc|apuestas ufc chile|apuestas ufc como funciona|apuestas
ufc hoy|apuestas ufc ilia topuria|apuestas
ufc online|apuestas ufc pronósticos|apuestas ufc telegram|apuestas ufc topuria|apuestas
under over|apuestas unionistas villarreal|apuestas uruguay|apuestas uruguay colombia|apuestas
uruguay corea|apuestas uruguay vs colombia|apuestas us open golf|apuestas us open tenis|apuestas valencia|apuestas valencia barcelona|apuestas valencia
betis|apuestas valencia madrid|apuestas valencia real madrid|apuestas valladolid barcelona|apuestas valladolid valencia|apuestas valor app|apuestas
valor en directo|apuestas valor galgos|apuestas
venezuela|apuestas venezuela argentina|apuestas venezuela
bolivia|apuestas venezuela ecuador|apuestas villarreal|apuestas villarreal
athletic|apuestas villarreal barcelona|apuestas villarreal bayern|apuestas villarreal
betis|apuestas villarreal liverpool|apuestas villarreal manchester|apuestas villarreal manchester united|apuestas villarreal vs real madrid|apuestas
virtuales|apuestas virtuales colombia|apuestas virtuales
futbol|apuestas virtuales sin dinero|apuestas
vivo|apuestas vuelta a españa|apuestas vuelta españa|apuestas william
hill partidos de hoy|apuestas y casino|apuestas y casinos|apuestas
y juegos de azar|apuestas y pronosticos|apuestas y pronosticos de futbol|apuestas y pronosticos
deportivos|apuestas y resultados|apuestas-deportivas|apuestas-deportivas.es pronosticos|arbitro nba apuestas|argentina apuestas|argentina
colombia apuestas|argentina croacia apuestas|argentina francia apuestas|argentina mexico apuestas|argentina peru
apuestas|argentina uruguay apuestas|argentina vs bolivia
apuestas|argentina vs chile apuestas|argentina vs colombia apuestas|argentina vs francia
apuestas|argentina vs. colombia apuestas|asi se gana en las apuestas
deportivas|asiatico apuestas|asiatico en apuestas|asiaticos
apuestas|athletic barcelona apuestas|athletic manchester united apuestas|athletic osasuna apuestas|athletic
real madrid apuestas|atletico barcelona apuestas|atletico de madrid apuestas|atlético de madrid apuestas|atletico de madrid
real madrid apuestas|atletico de madrid vs barcelona apuestas|atletico madrid real madrid apuestas|atletico madrid vs real madrid
apuestas|atletico real madrid apuestas|atletico vs real madrid apuestas|avisador de cuotas apuestas|bajada de cuotas apuestas|baloncesto apuestas|barbastro barcelona apuestas|barca apuestas|barca bayern apuestas|barca inter apuestas|barca madrid apuestas|barça madrid apuestas|barca vs atletico apuestas|barca vs madrid apuestas|barca
vs real madrid apuestas|barcelona – real madrid apuestas|barcelona apuestas|barcelona atletico apuestas|barcelona atletico de madrid apuestas|barcelona atletico
madrid apuestas|barcelona betis apuestas|barcelona
casa de apuestas|barcelona inter apuestas|barcelona psg apuestas|barcelona real madrid apuestas|barcelona
real sociedad apuestas|barcelona sevilla apuestas|barcelona valencia apuestas|barcelona
vs athletic bilbao apuestas|barcelona vs atlético madrid apuestas|barcelona vs betis apuestas|barcelona vs celta de vigo apuestas|barcelona
vs espanyol apuestas|barcelona vs girona apuestas|barcelona vs
madrid apuestas|barcelona vs real madrid apuestas|barcelona vs real sociedad apuestas|barcelona
vs sevilla apuestas|barcelona vs villarreal apuestas|base de datos cuotas apuestas deportivas|bayern real madrid apuestas|beisbol apuestas|best america apuestas|bet apuestas chile|bet apuestas en vivo|betis
– chelsea apuestas|betis apuestas|betis barcelona apuestas|betis chelsea apuestas|betis madrid
apuestas|betis sevilla apuestas|betsson tu sitio de apuestas
online|blog apuestas baloncesto|blog apuestas ciclismo|blog apuestas nba|blog apuestas tenis|blog de apuestas de tenis|bono apuestas|bono apuestas deportivas|bono apuestas deportivas sin deposito|bono
apuestas gratis|bono apuestas gratis sin deposito|bono apuestas sin deposito|bono bienvenida apuestas|bono bienvenida apuestas deportivas|bono bienvenida apuestas españa|bono bienvenida apuestas sin deposito|bono bienvenida
apuestas sin depósito|bono bienvenida casa apuestas|bono
bienvenida casa de apuestas|bono bienvenida marca apuestas|bono casa apuestas|bono casa de apuestas|bono casa de apuestas sin ingreso|bono casas de apuestas|bono de apuestas|bono
de apuestas gratis sin deposito|bono de bienvenida apuestas|bono
de bienvenida apuestas deportivas|bono de bienvenida casa de apuestas|bono de bienvenida casas de apuestas|bono de casas de apuestas|bono de registro apuestas|bono
de registro apuestas deportivas|bono de registro casa
de apuestas|bono gratis apuestas|bono marca apuestas|bono por registro apuestas|bono por registro
apuestas deportivas|bono por registro casa de apuestas|bono registro apuestas|bono sin deposito apuestas|bono sin depósito apuestas|bono sin deposito apuestas deportivas|bono sin depósito apuestas deportivas|bono sin deposito casa de apuestas|bono sin deposito marca apuestas|bono sin ingreso apuestas|bono
sin ingreso apuestas deportivas|bonos apuestas|bonos apuestas colombia|bonos apuestas
deportivas|bonos apuestas deportivas sin deposito|bonos
apuestas gratis|bonos apuestas sin deposito|bonos apuestas sin depósito|bonos bienvenida apuestas|bonos bienvenida casas apuestas|bonos bienvenida casas de apuestas|bonos casa de apuestas|bonos casas
apuestas|bonos casas de apuestas|bonos casas de apuestas colombia|bonos casas de apuestas deportivas|bonos casas de apuestas españa|bonos casas de apuestas
nuevas|bonos casas de apuestas sin deposito|bonos casas de
apuestas sin depósito|bonos de apuestas|bonos de apuestas deportivas|bonos de apuestas
gratis|bonos de apuestas sin deposito|bonos de bienvenida apuestas|bonos de bienvenida apuestas deportivas|bonos de
bienvenida casa de apuestas|bonos de bienvenida casas de apuestas|bonos de bienvenida
de casas de apuestas|bonos de bienvenida en casas de apuestas|bonos de
casas de apuestas|bonos de casas de apuestas sin deposito|bonos en casa de apuestas|bonos en casas de apuestas sin deposito|bonos gratis apuestas|bonos gratis apuestas deportivas|bonos
gratis casas de apuestas|bonos gratis sin deposito apuestas|bonos paginas de
apuestas|bonos registro casas de apuestas|bonos sin deposito
apuestas|bonos sin depósito apuestas|bonos sin deposito apuestas deportivas|bonos sin deposito casas
de apuestas|bot de apuestas deportivas gratis|boxeo apuestas|brasil colombia apuestas|brasil peru apuestas|brasil vs colombia apuestas|buenas apuestas para hoy|buscador cuotas
apuestas|buscador de apuestas seguras|buscador de cuotas apuestas|buscador de cuotas de apuestas|buscar
apuestas seguras|caballos apuestas|calculador de apuestas|calculador de
cuotas apuestas|calculadora apuestas|calculadora apuestas combinadas|calculadora apuestas de sistema|calculadora apuestas deportivas|calculadora apuestas deportivas seguras|calculadora apuestas multiples|calculadora apuestas segura|calculadora apuestas seguras|calculadora apuestas sistema|calculadora apuestas yankee|calculadora arbitraje apuestas|calculadora cubrir apuestas|calculadora cuotas apuestas|calculadora de apuestas|calculadora de apuestas combinadas|calculadora de apuestas de futbol|calculadora de apuestas de sistema|calculadora
de apuestas deportivas|calculadora de apuestas multiples|calculadora de apuestas seguras|calculadora
de apuestas sistema|calculadora de apuestas surebets|calculadora de
arbitraje apuestas|calculadora de cuotas apuestas|calculadora de cuotas de apuestas|calculadora para apuestas deportivas|calculadora poisson apuestas|calculadora poisson apuestas deportivas|calculadora poisson para
apuestas|calculadora scalping apuestas deportivas|calculadora sistema apuestas|calculadora stake apuestas|calculadora
trading apuestas|calcular apuestas|calcular apuestas deportivas|calcular
apuestas futbol|calcular apuestas sistema|calcular cuotas apuestas|calcular cuotas apuestas combinadas|calcular cuotas apuestas deportivas|calcular cuotas de apuestas|calcular ganancias apuestas deportivas|calcular momios apuestas|calcular probabilidad cuota apuestas|calcular
stake apuestas|calcular unidades apuestas|calcular yield apuestas|calculo de
apuestas|calculo de apuestas deportivas|cambio de cuotas apuestas|campeon champions apuestas|campeon eurocopa apuestas|campeon liga apuestas|campeon nba apuestas|canales de apuestas gratis|carrera de caballos apuestas|carrera
de caballos apuestas juego|carrera de caballos con apuestas|carrera de galgos apuestas|carreras de caballos apuestas|carreras de caballos apuestas online|carreras de caballos con apuestas|carreras
de caballos juegos de apuestas|carreras de galgos apuestas|carreras de galgos apuestas online|carreras de galgos apuestas trucos|carreras galgos apuestas|casa apuestas
argentina|casa apuestas atletico de madrid|casa apuestas barcelona|casa apuestas betis|casa apuestas bono bienvenida|casa apuestas bono gratis|casa apuestas bono sin deposito|casa apuestas cerca de mi|casa apuestas chile|casa apuestas colombia|casa apuestas con mejores
cuotas|casa apuestas deportivas|casa apuestas españa|casa apuestas española|casa apuestas eurocopa|casa apuestas futbol|casa apuestas mejores cuotas|casa apuestas mundial|casa apuestas nueva|casa
apuestas nuevas|casa apuestas online|casa apuestas peru|casa apuestas valencia|casa de apuestas|casa de
apuestas 10 euros gratis|casa de apuestas argentina|casa de apuestas
atletico de madrid|casa de apuestas baloncesto|casa de apuestas barcelona|casa de apuestas beisbol|casa de apuestas betis|casa de apuestas bono|casa de apuestas bono bienvenida|casa de apuestas bono
de bienvenida|casa de apuestas bono gratis|casa de apuestas bono por registro|casa de apuestas bono sin deposito|casa de apuestas boxeo|casa
de apuestas caballos|casa de apuestas carreras de caballos|casa de apuestas cerca de
mi|casa de apuestas cerca de mí|casa de apuestas champions league|casa de apuestas chile|casa de apuestas ciclismo|casa de apuestas colombia|casa de apuestas con bono de bienvenida|casa de apuestas con bono sin deposito|casa de apuestas con cuotas mas altas|casa de apuestas con esports|casa de
apuestas con las mejores cuotas|casa de apuestas con licencia en españa|casa de apuestas con mejores cuotas|casa de apuestas
con pago anticipado|casa de apuestas con paypal|casa de apuestas copa america|casa de apuestas de
caballos|casa de apuestas de colombia|casa de apuestas de españa|casa de apuestas
de futbol|casa de apuestas de fútbol|casa de apuestas de futbol peru|casa de apuestas de peru|casa de apuestas
del madrid|casa de apuestas del real madrid|casa de apuestas deportivas|casa
de apuestas deportivas cerca de mi|casa de apuestas deportivas en argentina|casa de apuestas deportivas
en chile|casa de apuestas deportivas en colombia|casa de apuestas
deportivas en españa|casa de apuestas deportivas en madrid|casa de apuestas deportivas españa|casa de apuestas deportivas españolas|casa de apuestas deportivas madrid|casa
de apuestas deportivas mexico|casa de apuestas deportivas online|casa de apuestas deportivas peru|casa de apuestas deposito 5 euros|casa de apuestas
deposito minimo|casa de apuestas deposito
minimo 1 euro|casa de apuestas depósito mínimo 1 euro|casa de apuestas en españa|casa de
apuestas en linea|casa de apuestas en madrid|casa de
apuestas en perú|casa de apuestas en vivo|casa de apuestas españa|casa de apuestas españa inglaterra|casa de apuestas española|casa de apuestas españolas|casa de apuestas esports|casa de apuestas eurocopa|casa
de apuestas europa league|casa de apuestas f1|casa de apuestas formula 1|casa de apuestas futbol|casa
de apuestas ingreso minimo|casa de apuestas
ingreso minimo 1 euro|casa de apuestas ingreso mínimo 1 euro|casa de apuestas legales|casa de apuestas legales en colombia|casa de apuestas legales en españa|casa de apuestas libertadores|casa de apuestas liga española|casa de apuestas madrid|casa de apuestas mas segura|casa de apuestas mejores|casa de apuestas méxico|casa de apuestas
minimo 5 euros|casa de apuestas mlb|casa de apuestas mundial|casa de apuestas
nba|casa de apuestas nfl|casa de apuestas nueva|casa de apuestas nuevas|casa de apuestas oficial del real
madrid|casa de apuestas oficial real madrid|casa de apuestas online|casa de apuestas online argentina|casa de apuestas online chile|casa de apuestas online españa|casa de apuestas online mexico|casa de
apuestas online paraguay|casa de apuestas online peru|casa
de apuestas online usa|casa de apuestas online venezuela|casa de apuestas pago anticipado|casa de apuestas para
boxeo|casa de apuestas para ufc|casa de apuestas peru|casa de apuestas perú|casa de apuestas peru
online|casa de apuestas por paypal|casa de apuestas promociones|casa
de apuestas que regalan dinero|casa de apuestas real madrid|casa de apuestas regalo
de bienvenida|casa de apuestas sevilla|casa de apuestas sin dinero|casa de apuestas sin ingreso minimo|casa de apuestas sin licencia en españa|casa de apuestas sin minimo
de ingreso|casa de apuestas stake|casa de apuestas tenis|casa de apuestas ufc|casa de apuestas valencia|casa de apuestas venezuela|casa de apuestas virtuales|casa de apuestas vive
la suerte|casa oficial de apuestas del real madrid|casas apuestas asiaticas|casas apuestas bono sin deposito|casas apuestas bonos sin deposito|casas apuestas
caballos|casas apuestas chile|casas apuestas ciclismo|casas
apuestas con licencia|casas apuestas con licencia
en españa|casas apuestas deportivas|casas apuestas deportivas
colombia|casas apuestas deportivas españa|casas apuestas
deportivas españolas|casas apuestas deportivas nuevas|casas apuestas españa|casas apuestas españolas|casas apuestas esports|casas apuestas eurocopa|casas apuestas golf|casas apuestas ingreso minimo 5 euros|casas apuestas legales|casas apuestas
legales españa|casas apuestas licencia|casas apuestas licencia españa|casas apuestas mexico|casas apuestas mundial|casas apuestas nba|casas apuestas nuevas|casas
apuestas nuevas españa|casas apuestas ofertas|casas apuestas online|casas
apuestas paypal|casas apuestas peru|casas apuestas sin licencia|casas apuestas tenis|casas asiaticas apuestas|casas de
apuestas|casas de apuestas 5 euros|casas de apuestas app|casas de apuestas argentinas|casas de apuestas asiaticas|casas de apuestas baloncesto|casas
de apuestas barcelona|casas de apuestas bono bienvenida|casas
de apuestas bono de bienvenida|casas de apuestas bono por registro|casas de apuestas bono sin deposito|casas de apuestas bono sin ingreso|casas
de apuestas bonos|casas de apuestas bonos de bienvenida|casas de apuestas bonos gratis|casas de apuestas bonos sin deposito|casas de apuestas boxeo|casas de
apuestas caballos|casas de apuestas carreras de caballos|casas de apuestas
casino|casas de apuestas casino online|casas de apuestas cerca de mi|casas de apuestas champions league|casas de apuestas chile|casas de apuestas ciclismo|casas de apuestas colombia|casas de
apuestas com|casas de apuestas con app|casas
de apuestas con apuestas gratis|casas de apuestas con bono|casas de
apuestas con bono de bienvenida|casas de apuestas con bono de registro|casas de apuestas con bono por registro|casas de
apuestas con bono sin deposito|casas de apuestas con bonos|casas de apuestas con bonos gratis|casas de apuestas con bonos sin deposito|casas de apuestas con deposito
minimo|casas de apuestas con esports|casas de apuestas con handicap asiatico|casas de apuestas con licencia|casas de
apuestas con licencia en españa|casas de apuestas con licencia españa|casas de apuestas con licencia española|casas de apuestas con mejores cuotas|casas de apuestas con pago anticipado|casas de apuestas con paypal|casas de apuestas con paypal
en perú|casas de apuestas con promociones|casas de apuestas con ruleta
en vivo|casas de apuestas copa del rey|casas de apuestas de caballos|casas de apuestas de
españa|casas de apuestas de futbol|casas de apuestas de fútbol|casas
de apuestas de peru|casas de apuestas deportivas|casas de apuestas deportivas asiaticas|casas de apuestas deportivas colombia|casas de apuestas deportivas comparativa|casas
de apuestas deportivas con paypal|casas de apuestas deportivas en chile|casas de apuestas deportivas en españa|casas de apuestas deportivas en linea|casas de apuestas deportivas en madrid|casas de apuestas deportivas en mexico|casas de apuestas deportivas en peru|casas
de apuestas deportivas en sevilla|casas
de apuestas deportivas en valencia|casas de apuestas deportivas españa|casas de apuestas
deportivas españolas|casas de apuestas deportivas legales|casas de apuestas deportivas
madrid|casas de apuestas deportivas mexico|casas de apuestas
deportivas nuevas|casas de apuestas deportivas online|casas de apuestas deportivas peru|casas de apuestas
deportivas perú|casas de apuestas deposito minimo 1 euro|casas de apuestas depósito mínimo 1 euro|casas de apuestas dinero gratis|casas de apuestas
en argentina|casas de apuestas en barcelona|casas de apuestas en chile|casas de apuestas en colombia|casas
de apuestas en españa|casas de apuestas en españa online|casas de apuestas en linea|casas de apuestas
en madrid|casas de apuestas en méxico|casas de apuestas en peru|casas de apuestas en perú|casas de
apuestas en sevilla|casas de apuestas en uruguay|casas de apuestas en valencia|casas
de apuestas en venezuela|casas de apuestas equipos de futbol|casas de
apuestas españa|casas de apuestas españa alemania|casas de apuestas españa inglaterra|casas de apuestas españa
licencia|casas de apuestas españa nuevas|casas de
apuestas españa online|casas de apuestas española|casas de apuestas españolas|casas de apuestas españolas con licencia|casas
de apuestas españolas online|casas de apuestas esports|casas de apuestas eurocopa|casas de apuestas eurocopa 2024|casas de apuestas europa league|casas de apuestas f1|casas de apuestas fisicas en barcelona|casas de apuestas fisicas en españa|casas de apuestas formula 1|casas de apuestas fuera de españa|casas de apuestas
futbol|casas de apuestas fútbol|casas de apuestas futbol españa|casas de apuestas ganador eurocopa|casas de apuestas gratis|casas
de apuestas ingreso minimo|casas de apuestas ingreso minimo 1 euro|casas
de apuestas ingreso minimo 5 euros|casas de
apuestas inter barcelona|casas de apuestas legales|casas de apuestas legales en colombia|casas
de apuestas legales en españa|casas de apuestas legales en mexico|casas de apuestas legales españa|casas de apuestas legales mx|casas de apuestas licencia|casas de apuestas licencia españa|casas de apuestas lista|casas de apuestas
madrid|casas de apuestas mas seguras|casas de apuestas mejores bonos|casas
de apuestas mejores cuotas|casas de apuestas mexico|casas de
apuestas méxico|casas de apuestas minimo 5 euros|casas de apuestas mlb|casas de apuestas mundial|casas de
apuestas mundial baloncesto|casas de apuestas mundiales|casas de
apuestas nba|casas de apuestas no reguladas en españa|casas de apuestas
nueva ley|casas de apuestas nuevas|casas de apuestas nuevas en colombia|casas de apuestas
nuevas en españa|casas de apuestas nuevas españa|casas de apuestas ofertas|casas de apuestas online|casas de apuestas online argentina|casas
de apuestas online colombia|casas de apuestas online deportivas|casas
de apuestas online ecuador|casas de apuestas online
en argentina|casas de apuestas online en chile|casas de apuestas online en colombia|casas
de apuestas online en españa|casas de apuestas online en mexico|casas de apuestas online españa|casas de
apuestas online mas fiables|casas de apuestas online mexico|casas de apuestas online nuevas|casas
de apuestas online peru|casas de apuestas online usa|casas de
apuestas online venezuela|casas de apuestas pago paypal|casas de apuestas para ufc|casas de apuestas payp
Hurrah, that’s what I was exploring for, what a information! present here at this blog, thanks admin of this site.
Hurrah, that’s what I was looking for, what a stuff! existing here at this website, thanks admin of this web page.
Wow, that’s what I was searching for, what a data! present here at this website, thanks admin of this site.
No account yet? Gambling should be entertaining. Remember that you always risk losing the money you bet, so do not spend more than you can afford to lose. If you think you may have a problem, click here . Playfina Casino welcomes Australian players to a thrilling online gaming experience filled with energy, variety, and generous rewards. From classic slots and live dealer tables to modern jackpot games, every player can find something exciting. The platform is fully optimised for both desktop and mobile use, ensuring smooth gameplay whether you’re spinning reels at home or on the go. With top-tier software providers like Pragmatic Play, NetEnt, and Evolution Gaming, Playfina Casino guarantees high-quality entertainment and fair play. Pearl Strings can be sold at any of the Pokemon Centers for ₽10000.
https://coursesyouneednow.com/?p=111257
1. What is the Gates of Olympus slot game? The Gates of Olympus is a popular online slot game that takes players on a mythical journey through ancient Greece. There are hundreds of slots released each year, and the majority of them have a very short lifespan. That’s why it’s truly impressive to have titles such as Gates of Olympus that manage to stay extremely popular for years. This slot has become an instant player-favorite and several years on, it keeps drawing a lot of gamblers. In contrast, Gates of Olympus (by Pragmatic Play) uses a 6×5 grid with a scatter-pay system, offering higher volatility and frequent multipliers of up to 500x. Its bright, ethereal aesthetic and fast-paced action make it ideal for players chasing massive wins, while Rise of Olympus offers a more strategic, feature-rich experience.
Connectez-vous avec nous Gates of Olympus Super Scatter propose une combinaison intéressante de fonctionnalités, notamment le système Scatter Pays et la fonction Tumble sans limite, qui se combinent pour offrir un jeu dynamique. Les symboles multiplicateurs pouvant atteindre 500x et l’absence de limite de chutes augmentent considérablement le potentiel de gains. De plus, les options Paris Ante et Achat de Tours Gratuits offrent de la flexibilité et augmentent les chances de déclencher des Tours Gratuits lucratifs. De nombreux casinos partenaires proposent Gates of Olympus casino. Nous vous présentons la meilleure offre de notre classement. Consultez les promotions disponibles pour maximiser vos gains. “Je joue régulièrement sur Gates of Olympus et j’ai eu la chance de décrocher un jackpot de 3 500 dinars ! Ce qui m’a plu, c’est la variété des multiplicateurs et la fréquence des tours gratuits qui m’ont permis d’augmenter mes gains. L’interface en français des casinos facilite énormément la compréhension des règles et le dépôt des fonds.” – Ahmed, joueur de Tunis
https://noorgan.com/avis-sur-ma-chance-plongez-dans-lunivers-captivant-de-ce-jeu-de-casino-en-ligne/
I scored a goal after coming off the bench which was amazing but Gerrards goal was something quite special there, taking into account factors such as screen size. Let’s not forget that some players have won millions playing progressive jackpot online pokies, the Hawkeye offensive line is fresh. For those who prefer mobile gaming, and NIU is good at causing havoc. Thanks to the experience and knowledge of our expert fantasy sports reporters, online casino that pays out were going to be looking at a whole bunch of stuff with regards to the operator and what theyre offering. The Basic Rules Of The Slot Machine. The Gates of Olympus app features: L’un des gros avantages de Gates of Olympus, c’est que contrairement aux machines à sous classiques qui reposent sur un nombre fixe de lignes de paiement, Gates of Olympus lui utilise un système basé sur le nombre de symboles identiques présents à l’écran. Huit symboles à la fois suffisent pour déclencher un gain, ce qui ouvre la porte à un nombre impressionnant de combinaisons possibles.
Hurrah, that’s what I was seeking for, what a information! present here at this website, thanks admin of this website.
okebet4 https://www.okebet4u.com
playpal77 https://www.playpal77sy.org
pin77 casino https://www.pin77-ol.com
bet777app https://www.bet777appv.org
我們提供MLB官方即時比分、賽程安排,以及MLB球隊戰績和球員數據分析。
jl16login https://www.adjl16login.net
ph789 login https://www.ph789-login.com
jiliokcc https://www.jiliokccw.com
93jili https://www.la93jili.net
mwplay88fun https://www.mwplay88fun.org
99boncasino https://www.99boncasino.net
phwin25 https://www.phwin25g.net
Hurrah, that’s what I was searching for, what a stuff! present here at this weblog, thanks admin of this web site.
fb777 slot https://www.fb7777-slot.com
98jili https://www.98jilig.com
jilivip https://www.jilivipu.net
peso99 https://www.repeso99.net
jilibet004 https://www.jilibet004.org
a45com https://www.a45com.org
peryaplus https://www.rsperyaplus.net
phtaya06 https://www.phtaya06y.com
tayawin https://www.tayawinch.net
9apisologin https://www.it9apisologin.com
pagcor https://www.ngpagcor.net
tongits go https://www.yatongits-go.net
jililuck 22 https://www.jililuck-22.com
bk8casino https://www.bk8casinovs.com
77jili https://www.77jilig.net
phtaya01 https://www.phtaya01.org
philucky https://www.usphilucky.org
Spin your office chair around a few times before peering at the screen, and it might be tough to tell which version of Gates of Olympus you’ve got, as Gates of Olympus, Gates of Olympus 1000, and now Gates of Olympus Super Scatter share a similar appearance. A big 6×5 matrix takes up most of the space, bordered by a celestial representation of Olympus in the background with Zues on one side. It’s a fine view, very in theme, and familiar at the same time. These payouts occur as part of any winning combination of 4 or more scatter symbols. The Super Scatter mechanic fundamentally elevates the win potential from the original 5,000x cap to this massive 50,000x maximum, significantly increasing excitement potential. The truly remarkable aspect isn’t that the maximum exists theoretically—it’s that the 50,000x cap feels achievable in realistic game scenarios when four Super Scatters land during free spins with accumulated multipliers working in your favour.
https://viticusgroup.info/lucky-hunter-casino-the-aussie-players-new-favorite/
Kalyan satta Matka offers the earliest result launching time of 4 pm, making it a favorite among Satta Matka gamers. Milan Matka follows behind at 6 pm while Rajdhani Matka boasts excellent odds at 8 pm, while Madhur Matka offers the latest result launch timing at 9 pm – perfect for risk takers! All these Matka games offer great rewards while providing an entertaining gaming experience. Friends, Satta 143 game has many benefits MATKA 420. Talking about the benefits, matkavip,matka satta, matka final number formula, satta matka history, kalyan chart jodi, gambling, betting, kalyan matka mumbai, kalyan panel chart, kalyan satta matka mumbai result, you can earn more money by investing less money in this game. Track live updates, browse our Matka Result archives, and unlock exclusive insights with the Sattaz VIP Matka membership tailored for serious Matka Guessing players.
Wow, that’s what I was seeking for, what a information! present here at this web site, thanks admin of this web site.
Wow, that’s what I was searching for, what a data! existing here at this blog, thanks admin of this web page.
Профессиональный селлер купить FanPage Facebook встречает вебмастеров в нашем разделе расходников для Фейсбука. Когда вы планируете купить аккаунт Facebook для рекламы, обычно задача не в «просто доступе», а в трасте и лимитах: стабильный запуск, зеленые плашки в Ads Manager и правильно созданные ФП. Мы подготовили короткую карту выбора, чтобы вы сразу понимали что подойдет под ваши офферы перед покупкой.Быстрый ориентир: откройте разделы Автореги, а для серьезных объемов — переходите сразу в разделы под залив: ПЗРД Кинги. Важно: покупка — это только вход. Дальше решает подход к запуску: какой прокси используется, как вы передаете лички без триггеров, как проходите чеки и как масштабируете адсеты. Ключевое преимущество нашего сервиса — заключается в наличии огромной вики-энциклопедии FB, где опубликованы актуальные рекомендации по работе с БМами. Тут можно найти решения FB под любые цели: от дешевых авторегов и заканчивая трастовыми БМами с пройденными запретами. Заходите в сообщество, изучайте полезные кейсы по заливу, упрощайте работу с Meta и в итоге повышайте ROI на базе наших расходников без задержек. Дисклеймер: используйте активы законно и с учетом правил Meta.
Надежный селлер купить FanPage Facebook рад видеть медиабайеров в своем каталоге аккаунтов Facebook. Когда вы планируете купить аккаунт Facebook для рекламы, чаще всего важен не «просто доступе», а в качестве фарма: стабильный запуск, наличие пройденного ЗРД в Ads Manager и прогретые FanPage. Мы оформили практичный чек-лист, чтобы вы без лишних вопросов понимали какой тип аккаунта брать до оплаты.Что внутри: типы БМов и лимиты. Ключевая идея: аккаунт — это инструмент. Дальше решает схема залива: как вяжется карта, как шерите пиксели без триггеров, как проходите чеки и как дублируете кампании. Ключевое преимущество нашего сервиса — заключается в наличии приватной вики-энциклопедии FB, где написаны рабочие сетапы по запуску рекламы. Мы сориентируем, каким образом аккуратно расшарить доступы, чтобы не улетели на полиси а также дольше жили в аукционе . Переходите в сообщество, смотрите полезные разборы банов, упрощайте работу с Meta и масштабируйтесь на базе наших расходников уже сегодня. Дисклеймер: действуйте в рамках закона и с учетом правил Meta.
Wow, that’s what I was searching for, what a information! present here at this website, thanks admin of this site.
Wow, that’s what I was looking for, what a data! existing here at this website, thanks admin of this web site.
https://shorturl.fm/wMrPs
Your article helped me a lot, is there any more related content? Thanks!
When I originally left a comment I appear to have clicked the -Notify me when new comments are added- checkbox and now whenever a comment is added I recieve 4 emails with the exact same comment. Perhaps there is a means you can remove me from that service? Cheers!
Gates of Olympus Demo ofrece la opción de comprar directamente los giros gratis: COPYRIGHT © 2015 – 2025. Todos los derechos reservados a Pragmatic Play, una sociedad de inversión de Veridian (Gibraltar) Limited. Todos y cada uno de los contenidos incluidos en este sitio web o incorporados por referencia están protegidos por las leyes internacionales de derechos de autor. Si quieres probar otros juegos de slots con temática similar te gustará Forge of Olympus o Age of the Gods. Hemos puesto en marcha esta iniciativa con el objetivo de crear un sistema global de autoexclusión que permitirá que los jugadores vulnerables bloqueen su propio acceso a los sitios de juego online. Así que ya sabes: si estás buscando una slot que combine acción, estética divina y premios que pueden ser mitológicos, no busques más. Gates of Olympus te espera… y Zeus también.
https://building-industry.eu/2025/12/23/nine-casino-resena-detallada-para-jugadores-espanoles/
El juego de tragamonedas está diseñado con gráficos impresionantes que incluyen persecuciones de tuberías llenas de chocolate, definitivamente hay un favorito de los fanáticos en los casinos de Microgaming Canadá que la mayoría de los usuarios prefieren jugar. Si te gustan las slots dinámicas, con volatilidad alta y potencial de grandes premios, sí. Totalmente. Este juego no es para quien busca una tragaperras tranquila o de baja tensión. Aquí cada giro puede ser un subidón, y la emoción es constante.Además, si eres fan de la mitología griega, te va a encantar ver cómo se mezclan elementos clásicos con una estética moderna. Zeus no solo es un personaje: es parte activa del juego y su intervención puede marcar la diferencia entre una ronda normal y una victoria épica.
When I initially commented I appear to have clicked the -Notify me when new comments are added- checkbox and from now on each time a comment is added I receive four emails with the same comment. There has to be an easy method you can remove me from that service? Thanks a lot!
I have read a few good stuff here. Definitely price bookmarking for revisiting.
I wonder how much attempt you place to create any such fantastic informative web site.
When I initially left a comment I seem to have clicked the -Notify me when new comments are added- checkbox and from now on each time a comment is added I get four emails with the exact same comment. Is there an easy method you can remove me from that service? Kudos!
After I originally left a comment I appear to have clicked on the -Notify me when new comments are added- checkbox and now whenever a comment is added I get 4 emails with the exact same comment. Is there a way you can remove me from that service? Thanks!
Мультимедийный интегратор тут интеграция мультимедийных систем под ключ для офисов и объектов. Проектирование, поставка, монтаж и настройка аудио-видео, видеостен, LED, переговорных и конференц-залов. Гарантия и сервис.
Мультимедийный интегратор здесь интеграция мультимедийных систем под ключ для офисов и объектов. Проектирование, поставка, монтаж и настройка аудио-видео, видеостен, LED, переговорных и конференц-залов. Гарантия и сервис.
When I initially commented I seem to have clicked on the -Notify me when new comments are added- checkbox and from now on whenever a comment is added I receive four emails with the same comment. There has to be a way you are able to remove me from that service? Many thanks!
Thanks for sharing. I read many of your blog posts, cool, your blog is very good.
Usually, the visuals in these upgrade slots don’t change a lot, and so it is in Sugar Rush 1000. Players are treated to the same sort of pinky, pastely, fluffy candy world where inhabitants are able to chow down on just about everything they see. The same cheerfully amateurish-looking symbols line the gaming grid; the same feel-good factor is here, so returning gamblers should instantly feel at home when sinking their teeth into Sugar Rush 1000. Pick and Play slot games for real money from our versatile, exciting range of game slots online for endless fun! Keep an eye out for the Holly Jackpot as well to increases your winnings! While it all started with slots, the supplier introduced other content. For instance, they entered the live casino vertical, which was possible after acquiring Extreme Live Gaming. This important step has set them to become a major powerhouse. Discover the innovation behind their success by exploring the Pragmatic Play demo games available on their platform.
http://www.littledean.nl/exploring-the-highest-paying-symbol-in-bigger-bass-bonanza-uk/
Star Vortex is a top-down ARPG space shooter that follows the formula of classic titles such as Diablo 2. Humanity is fighting wars on all fronts. Suddenly a new threat appears out of nowhere and begins attacking the human forces. Earth must be warned about this new danger and it is up to you to escort the mothership back home to deliver the unsettling news. Reviewed by Alex Santa Maria Experience 15 high speed rotations per minute on Vortex, spinning and swinging riders up to 65ft through the air. Get ready for action with these unique games that offer a fun twist on traditional activities. You can email the site owner to let them know you were blocked. Please include what you were doing when this page came up and the Cloudflare Ray ID found at the bottom of this page. Organise a group of 25 or more and receive a 20% discount at MGM Dizzee World. Enjoy a fun-filled day with friends or family at an affordable price!
When I originally commented I seem to have clicked the -Notify me when new comments are added- checkbox and from now on each time a comment is added I receive four emails with the exact same comment. Is there a way you are able to remove me from that service? Thanks!
When I originally commented I appear to have clicked the -Notify me when new comments are added- checkbox and from now on every time a comment is added I get 4 emails with the exact same comment. Perhaps there is an easy method you can remove me from that service? Thanks a lot!
Need an AI generator? ai nude generator The best nude generator with precision and control. Enter a description and get results. Create nude images in just a few clicks.
After I originally left a comment I seem to have clicked on the -Notify me when new comments are added- checkbox and now each time a comment is added I receive four emails with the exact same comment. Is there a means you can remove me from that service? Thanks a lot!
Good day! I could have sworn I’ve been to this site before but after browsing through some of the post I realized it’s new to me. Anyhow, I’m definitely happy I found it and I’ll be bookmarking and checking back often!
Hello! I could have sworn I’ve been to this site before but after reading through some of the post I realized it’s new to me. Anyways, I’m definitely happy I found it and I’ll be book-marking and checking back often!
Hey! I could have sworn I’ve been to this blog before but after reading through some of the post I realized it’s new to me. Anyhow, I’m definitely happy I found it and I’ll be bookmarking and checking back often!
Hey! I could have sworn I’ve been to this site before but after browsing through some of the post I realized it’s new to me. Nonetheless, I’m definitely glad I found it and I’ll be bookmarking and checking back often!
Haz coincidir de 8 a 30 símbolos en cualquier lugar de la cuadrícula para ganar. Los símbolos multiplicadores pueden caer en cualquier giro o tumble, aumentando las ganancias hasta 500 veces. Si sale más de un símbolo multiplicador, sus valores se suman y se aplican a la ganancia total. Absolutamente sí. Gates of Olympus no es solo una de las mejores slots de Pragmatic Play, es una de las mejores del mercado actual. Es un torbellino de emoción, un juego que te mantiene al borde del asiento con la promesa de que un solo giro puede cambiarlo todo gracias a sus multiplicadores masivos y su espectacular ronda de giros gratis. Lo que nos llama la atención es la calidad y el atractivo grafico de este juego, rasgos y técnicas que manejan muy bien sus creadores. Gates of Olympus tragaperras posee un gran diseño que se complementa muy bien con la variedad de opciones de ganancias que tiene el juego.
https://www.outdoorspecialist219.com/momios-decimales-bet-365-casino-como-entenderlos-en-mexico/
Casino Pause&Play te ofrece juegos regulados bajo licencia de la Dirección General de Ordenación de Juego en virtud de la Ley 13 2011, de 27 de mayo, de regulación de juego.Prohibido el acceso a los juegos a menores de edad o personas que, bien por voluntad propia, bien por resolución judicial, lo tengan prohibido. Juega con responsabilidad Disponemos más de 29 locales de ocio y diversión con la marca pauseandplay.es distribuidos por todo el territorio nacional, donde nuestros clientes disfrutan de una gran variedad de juegos de casino y con la llegada del casino online seguimos ofreciendo una gran experiencia de omnicanalidad que permite vivir la emoción de un juego en vivo desde la comodidad del hogar y en cualquier momento. For more information please contact Gaming Control Authority of your country.
Your point of view caught my eye and was very interesting. Thanks. I have a question for you. https://accounts.binance.info/es-MX/register-person?ref=GJY4VW8W
No matter if some one searches for his essential thing, therefore he/she desires to be available that in detail, therefore that thing is maintained over here.
It’s remarkable designed for me to have a website, which is good for my know-how. thanks admin
Hello there! I could have sworn I’ve visited this web site before but after going through a few of the posts I realized it’s new to me. Anyways, I’m definitely pleased I stumbled upon it and I’ll be book-marking it and checking back often!
Hey just wanted to give you a brief heads up and let you know a few of the images aren’t loading correctly. I’m not sure why but I think its a linking issue. I’ve tried it in two different internet browsers and both show the same outcome.
Hi there! I know this is kind of off topic but I was wondering if you knew where I could locate a captcha plugin for my comment form? I’m using the same blog platform as yours and I’m having problems finding one? Thanks a lot!
A motivating discussion is definitely worth comment. I do believe that you need to publish more about this subject matter, it might not be a taboo subject but generally folks don’t speak about these issues. To the next! Best wishes!!
What’s up, after reading this awesome piece of writing i am too glad to share my experience here with colleagues.
I’ve been surfing online more than three hours today, yet I never found any interesting article like yours. It is pretty worth enough for me. Personally, if all webmasters and bloggers made good content as you did, the net will be a lot more useful than ever before.
I blog frequently and I seriously appreciate your information. This great article has really peaked my interest. I will book mark your site and keep checking for new details about once a week. I opted in for your RSS feed as well.
For most recent news you have to pay a quick visit the web and on web I found this web page as a best website for newest updates.
This post presents clear idea in favor of the new users of blogging, that actually how to do running a blog.
Why viewers still make use of to read news papers when in this technological globe the whole thing is existing on web?
Why people still make use of to read news papers when in this technological globe all is presented on web?
Can I just say what a comfort to uncover someone that genuinely knows what they are discussing on the internet. You certainly understand how to bring an issue to light and make it important. More people need to check this out and understand this side of your story. It’s surprising you’re not more popular since you certainly possess the gift.
Hi, I do think this is an excellent blog. I stumbledupon it 😉 I’m going to come back yet again since I bookmarked it. Money and freedom is the best way to change, may you be rich and continue to guide other people.
смотреть тв онлайн фильмы про космос научная фантастика
сервис рассылки писем как выбрать сервис email рассылок
Stunning quest there. What happened after? Good luck!
задвижка 30с41нж 50 30с41нж задвижка
Nah, bro, sekarang lo udah dapet pencerahan. Slot online itu bukan sekadar game asal pencet. Kalau lo ngerti polanya, lo bisa ubah 10 ribu jadi 10 juta. Tapi inget, tetep harus punya kontrol dan strategi. TUAK88 merupakan slot resmi gacor luar negeri server Thailand dengan lisensi Pragmatic Play, Slot88 & PG Soft. Daftar situs slot sekarang nikmati fasilitas paling top. Waktu itu berpengaruh, bro. Beberapa waktu tertentu bikin game eslot.sbs lebih “gacor” alias gampang kasih jackpot. slot gacor adalah link resmi BO situs slot gacor Thailand terbaik hari ini yang siap memberikan pengalaman bermain slot online paling seru dan menguntungkan. Mercedes Benz Chassi LO OF OH 1313 5.7 L 12V OM 352 1988 1989 Diesel Mercedes Benz Chassi LO OF OH 1313 5.7 L 12V OM 352 1988 1989 Diesel
https://www.atozed.com/forums/user-58547.html
Här är det mest populära spelen från ELK Studios just nu. Spel som uppenbarligen går hem hos de svenska spelarna. Sveriges bästa sajt att jämföra alla Svenska casino online på. Du måste vara minst +18 år för att spela | Stödlinjen.se Katmandu Gold är en äventyrlig slot med allt du kan önska från Megaways till Spins. Spelautomaten tar dig med en spännande guldjakt i Katmandu och om du är framgångsrik på din skattjagt kan turen leda dig till en maxvinst om 10 000 x din insats. Vad mer du kan se fram emot i ELK Studios femte titel i Kane-sagan, får du reda på i vår recension. Om du är ute efter ett lite lugnare tempo utan hetsiga reklambanners och onödig information, så är Casinostugan det självklara valet för dig! Här finns nämligen ett väluppbyggt nätcasino med de bästa och mest kvalitativa spelautomaterna på nätet idag. Dessutom är spelsidan trygg då man har licenser i EU och därmed garanterar spelarnas säkerhet på ett tryggt sätt. Hos Casinostugan behöver du inte heller skicka in personliga uppgifter, utan kan istället använda dig av ditt Bank-Id för att snabbt skapa ett spelkonto. Det betyder också att du kan göra gratis uttag och insättningar på Casinostugan.
You need to take part in a contest for one of the best blogs on the internet. I most certainly will recommend this web site!
If some one wants expert view concerning blogging afterward i propose him/her to visit this web site, Keep up the good job.
Hey I know this is off topic but I was wondering if you knew of any widgets I could add to my blog that automatically tweet my newest twitter updates. I’ve been looking for a plug-in like this for quite some time and was hoping maybe you would have some experience with something like this. Please let me know if you run into anything. I truly enjoy reading your blog and I look forward to your new updates.
Hi! I just wanted to ask if you ever have any trouble with hackers? My last blog (wordpress) was hacked and I ended up losing months of hard work due to no back up. Do you have any methods to protect against hackers?
This is my first time pay a visit at here and i am really impressed to read all at single place.
海外华人必备的aiyifan平台,提供最新高清电影、电视剧,无广告观看体验。
Greetings! Very useful advice in this particular article! It’s the little changes that will make the greatest changes. Thanks for sharing!
Wow, that’s what I was exploring for, what a information! existing here at this blog, thanks admin of this web site.
超人和露易斯第一季高清完整版,海外华人可免费观看最新热播剧集。
Today, I went to the beach front with my children. I found a sea shell and gave it to my 4 year old daughter and said “You can hear the ocean if you put this to your ear.” She placed the shell to her ear and screamed. There was a hermit crab inside and it pinched her ear. She never wants to go back! LoL I know this is completely off topic but I had to tell someone!
Hi, its pleasant piece of writing on the topic of media print, we all understand media is a great source of facts.
Greetings! This is my first visit to your blog! We are a team of volunteers and starting a new project in a community in the same niche. Your blog provided us valuable information to work on. You have done a extraordinary job!
Hey! Do you know if they make any plugins to safeguard against hackers? I’m kinda paranoid about losing everything I’ve worked hard on. Any tips?
Sieraden, horloges en tassen Toto gaat verder op de Koning Toto weg en heeft er een feestmaand van gemaakt. Deze maand april is het Koning Toto maand en verdien je met elke €10 die je inzet (zowel casino als sportsbook) een ticket. Hiermee doe je mee aan de wekelijkse prijstrekking waar je €1000 kunt winnen, en de maandtrekking van €50.000. Je moet je aanmelden, kunt maximaal 20 tickets per week verzamelen en de actie loopt tot en met Koningsdag, 27 april. De meeste spelers houden er wisselende voorkeuren op na. Maar feit is wel dat Buffalo King Megaways alle Pragmatic Play liefhebbers kan bekoren omdat het lijkt op vergelijkbare slots van deze softwaremaker zoals Starlight Princess, Big Bass Bonanza en Pirates Pub. Je vindt het spel dan ook bij de hieronder vermelde top Buffalo King Megaways gokkast sites per categorie.
https://www.bakirkoylaptoptamiri.com/168/instant-casino-review-snel-spelplezier-voor-belgische-spelers.html
De spins zijn alleen geldig op het spel Buffalo King Untamed Megaways van Pragmatic Play. Elke free spin heeft een vaste waarde van €0,20. Heb je een limiet bereikt, zoals je recreatief budget of sessielimiet, dan kun je geen gebruik maken van bonussen of promoties. In sommige gevallen volgt ook tijdelijke uitsluiting van de Circus Club. Buffalo King Untamed Megaways volgt een Big Bass-missie Fishin’ en Medusa’s Steen als de ultieme tragamon van de praktijk van Pragmatic Play. Je kunt Buffalo King Megaways demo spelen op onze website om een gevoel te krijgen voor de mechanica. Het spel heeft dynamische rollen die van spin tot spin kunnen uitzetten of inkrimpen. Dit betekent dat elke ronde fris aanvoelt, zelfs als je al een tijdje speelt. Met tumble wins leidt elk succes tot een kettingreactie van nieuwe symbolen.
Hello! I could have sworn I’ve been to this website before but after checking through some of the post I realized it’s new to me. Anyhow, I’m definitely happy I found it and I’ll be book-marking and checking back often!
中華職棒直播台灣球迷的首選官方認證資訊平台,24小時不間斷提供官方中華職棒直播新聞、球員數據分析,以及精準的比賽預測。
Thank you for your sharing. I am worried that I lack creative ideas. It is your article that makes me full of hope. Thank you. But, I have a question, can you help me?
You actually make it seem so easy with your presentation but I find this topic to be really something which I think I would never understand. It seems too complex and extremely broad for me. I’m looking forward for your next post, I will try to get the hang of it!
Good day! This is kind of off topic but I need some guidance from an established blog. Is it very difficult to set up your own blog? I’m not very techincal but I can figure things out pretty fast. I’m thinking about setting up my own but I’m not sure where to begin. Do you have any points or suggestions? With thanks
Great post. I was checking constantly this weblog and I am inspired! Extremely helpful information specifically the closing section 🙂 I deal with such info much. I was looking for this particular information for a very lengthy time. Thanks and best of luck.
Apuestas Beisbol (https://Blackwatercivil.Com/Casas-De-Apuestas-Com/) caballos online
фильм реклама смотреть онлайн южный парк онлайн в озвучке гоблина
the best adult generator virtual girlfriend create erotic videos, images, and virtual characters. flexible settings, high quality, instant results, and easy operation right in your browser. the best features for porn generation.
онлайн сервис рассылки сервис по рассылкам писем
An interesting discussion is definitely worth comment. I do think that you should publish more about this issue, it may not be a taboo matter but usually folks don’t speak about such issues. To the next! Best wishes!!
I love reading a post that can make men and women think. Also, thanks for allowing for me to comment!
Way cool! Some extremely valid points! I appreciate you writing this post plus the rest of the website is also very good.
First off I would like to say terrific blog! I had a quick question that I’d like to ask if you do not mind. I was curious to find out how you center yourself and clear your thoughts prior to writing. I’ve had a tough time clearing my mind in getting my thoughts out. I truly do enjoy writing however it just seems like the first 10 to 15 minutes are usually lost just trying to figure out how to begin. Any ideas or hints? Many thanks!
I enjoy what you guys are up too. This type of clever work and reporting!
Keep up the great works guys I’ve included you guys to my own blogroll.
I’ve been browsing online more than 4 hours today, yet I never found
any interesting article like yours. It’s pretty worth enough for me.
In my opinion, if all webmasters and bloggers made good content as
you did, the web will be much more useful than ever before.
Thanks for your personal marvelous posting! I quite enjoyed reading it, you are a great author.I will be sure to bookmark your blog and
may come back down the road. I want to encourage you to ultimately continue your great posts, have a
nice afternoon!
Hello folks!
I came across a 153 interesting resource that I think you should explore.
This site is packed with a lot of useful information that you might find insightful.
It has everything you could possibly need, so be sure to give it a visit!
[url=https://suntonfx.com/a-review-of-the-22bet-sportsbook/]https://suntonfx.com/a-review-of-the-22bet-sportsbook/[/url]
Additionally do not forget, guys, — a person always may inside the piece discover responses for the most most confusing inquiries. Our team made an effort to present all of the information via the very accessible way.
Link exchange is nothing else but it is simply placing
the other person’s weblog link on your page at appropriate place
and other person will also do similar in favor of you.
I know this if off topic but I’m looking into starting my
own weblog and was wondering what all is required to get
set up? I’m assuming having a blog like yours would cost a pretty penny?
I’m not very web savvy so I’m not 100% sure.
Any recommendations or advice would be greatly appreciated.
Many thanks
Hi, after reading this remarkable article i am too delighted to share my experience here with mates.
You need to take part in a contest for one of the finest blogs online. I’m going to highly recommend this blog!
av 女優 – https://kanav.so
compte personnel melbet melbet telecharger
telecharger 1win pour android telecharger 1win apk
I’m not that much of a internet reader to be honest but your sites really nice, keep it up! I’ll go ahead and bookmark your site to come back down the road. Cheers
páginas de apuestas; Boris, quien ganara la
champions
This paragraph gives clear idea designed for the new viewers of blogging, that actually how to do running a blog.
you are in point of fact a just right webmaster. The website loading pace is amazing. It seems that you are doing any unique trick. Also, The contents are masterpiece. you’ve done a magnificent job in this matter!
купить квартиру вторичка жк светский лес официальный сайт
comparativa casas de apuestas
Also visit my webpage: Basketball-Wetten.com
Нужен проектор? https://projector24.ru большой выбор моделей для дома, офиса и бизнеса. Проекторы для кино, презентаций и обучения, официальная гарантия, консультации специалистов, гарантия качества и удобные условия покупки.
Hi https://is.gd/9PLRLO
wett tipps von profis
Look into my blog post; Wettanbieter vergleich
nfl apuestas superliga argentina (Trinidad)
Hello pals!
I came across a 153 fantastic platform that I think you should explore.
This resource is packed with a lot of useful information that you might find interesting.
It has everything you could possibly need, so be sure to give it a visit!
[url=https://www.appletutorials.de/magazin/auswirkungen-von-vpn-auf-die-kryptosicherheit.html]https://www.appletutorials.de/magazin/auswirkungen-von-vpn-auf-die-kryptosicherheit.html[/url]
Furthermore do not forget, everyone, that one constantly may in this particular article discover answers for your the absolute tangled inquiries. We made an effort — explain all of the information via the most extremely easy-to-grasp manner.
sportwetten anbieter ausland
Visit my site: Nba Basketball Wett-Tipps (Xgo888.Net)
best wettanbieter
my blog – quotenvergleich
wettanbieter mit paysafecard
Feel free to visit my web-site lizenz für Wettbüro
купля квартиры жк светский лес сочи
химчистка замшевой обуви отдать обувь в химчистку
сколько стоит квартира жк светский лес сочи
обувь химчистка услуги химчистка обуви в москве
Sweet blog! I found it while surfing around on Yahoo News. Do you have any tips on how to get listed in Yahoo News? I’ve been trying for a while but I never seem to get there! Appreciate it
It’s an amazing paragraph for all the web visitors; they will obtain advantage from it I am sure.
как настроить проектор интернет-магазин проекторов
мультимедийный проектор магазин проекторов
beste sportwetten app
Look at my webpage – Wette spiel
europameister wetten quote
Here is my web page – sportwett Anbieter
химчистка обуви рядом химчистка обуви в москве
двухкомнатная квартира жк светский лес сочи
Start profiting from your traffic—sign up today!
Very nice post. I just stumbled upon your weblog and wished to say that I have truly enjoyed surfing around your blog posts. After all I will be subscribing to your rss feed and I hope you write again soon!
Hi there, for all time i used to check website posts here early in the dawn, because i enjoy to learn more and more.
The Best Online Casino in the Philippines: Bet777 App Download, GCash Slots, and Fast Payouts. visit: bet777app
Gates of Olympus Super Scatter is really easy to understand. While most other slot games have specific paylines and symbols that need to line up to pay out, that’s not the case here. You can get a win no matter where on the grid the matching symbols land, as long as there are enough of them. You’ll need at least eight of any of the standard symbols to win. Gates of Olympus 1000 succeeds as a substantial evolution of the original. The leap from 5,000x to 15,000x maximum win, combined with doubled maximum multipliers (1,000x versus 500x) and enhanced volatility, creates a genuinely upgraded experience for fans of the series. The scatter pays mechanic combined with cascading reels and multiplier collection generates engaging, dynamic gameplay that keeps players involved even during base game sequences.
https://mainslot89.org/sweet-bonanza-slot-review-a-sweet-treat-for-canadian-players/
Players should stick to this same amount until they lose, making it one of the highest-paying pokies available. Australian players will find a lot to like about Thunderstruck 2 pokies as the game is visually exciting, the Malta Gaming Authority. Columbus casino login app sign up at the heart of every fruit slot machine is the random number generator (RNG), whether Casino Action is the right gaming partner for you or not depends on your priorities is it the games you care primarily about. As with its predecessor, Gates of Olympus 1000 has all the makings to be one of the best online pokies around. Of course, its sky-high volatility won’t suit everyone. However, if you’re a fan of high volatility pokies with multipliers, especially if you liked the original Gates of Olympus, this game is going to be right up your alley. Just make sure to take your time. This pokie has about as high a volatility as you’ll find – and if you’re not used to playing games like this, we strongly recommend that you start with lower bets than usual.
slots best uk, uk no deposit casino internet gaming and gambling (Rob) australian casino chips, or dollar 1 minimum deposit mobile casino united states
нужна люстра купить деревянную люстру
стили мужских костюмов мужские костюмы спб
люстра в спальню люстра деревянная потолочная
недорогой мужской костюм магазин мужских костюмов
casino online usa all sites, the biggest casino in usa and
cash freuky casino free chips, or in united statesn roulette the wheel has 38
numbers
Feel free to visit my homepage: what game app can earn real money; Renee,
Secret Code video slot har många spännande och belönande spel och bonusmoment precis som ett bra casinospel ska ha. Secret Code rekommenderas till både nya casinospelare till så som väl erfarna casinorävar. Vi har mest varit inne på jackpott-slots, vilket även är den kategori som dominerar på online casinon. Finns det jackpots på andra casinospel och i så fall vilka? Absolut finns det andra jackpott-spel än spelautomater. De är inte lika vanliga, men populära att spela på eller betta på. Nedan hittar du en lista med alternativa jackpots: Pragmatic Play:s Wolf Gold spelas på fem hjul med 25 vinstlinjer och kommer fullpackad med roliga funktioner. Staplade wilds förvandlas till enorma symboler som kan täcka hela hjulet och skapa otroliga vinstkombinationer. Det finns också en Money Respin funktion och ett väldigt unikt free spin-läge.
https://mountainkidsschool.com/sweet-bonanza-en-smaskig-slotupplevelse-fran-pragmatic-play/
#2 – Purrrminator – Casinofebers favorit 2025Purrrminator valdes ut som Casinofebers bästa nya slot 2025 och står än så länge kvar på förstaplatsen. I detta cyberpunk-äventyr hjälper du en katt och dess robot i jakten på förrymda hundar. Vid utvärdering av Gates of Olympus 1000 slot är det tydligt att Pragmatic Play har skapat en slot med en rikt vävd väv av antik grekisk mytologi. Det är ett äventyr med hög varians, en attraktiv RTP på 96,50% och möjlighet att vinna upp till 15 000 gånger insatsen. Multiplikator-symbolerna och den dynamiska gratissnurr-rundan bidrar avsevärt till spelets attraktionskraft genom att erbjuda olika sätt att förstärka vinsterna. Deras slots karaktäriseras ofta av många och starka färger som alltid harmonierar väldigt bra vilket resulterar i en utmärkt spelupplevelse.
all poker sites uk, top 50 casinos in usa and united kingdom best online casino, or is online bingo
legal in canada
Here is my blog post … becoming a professional roulette player
geld zurück online sportwetten
My web blog: halbzeit endstand wetten tipps
Can you tell us more about this? I’d like to find out more details.
Hi to all, how is all, I think every one is getting more from this site, and your views are nice in favor of new users.
Thanks for the good writeup. It in reality used to be a entertainment account it. Glance complicated to far delivered agreeable from you! However, how can we keep in touch?
Partner with us and earn recurring commissions—join the affiliate program!
It’s really very complicated in this active life to listen news on Television, therefore I simply use web for that reason, and take the latest information.
Hello friends, its great paragraph regarding cultureand entirely defined, keep it up all the time.
play online poker united states, bonus Codes free spins slot machine games united states and remote gambling license usa, or milwausaee
casino entertainment
newest online casinos canada 2021, list of casinos in usa and gambling legislation australia, or online slot usa
Feel free to surf to my blog – casino craps (Dorine)
statistics of gambling in canada, online trusted casino usa and play pokies online canada, or buy slot machines australia
Also visit my web site :: Goplayslots.Net
Hey! This post couldn’t be written any better! Reading through this post reminds me of my previous room mate!
He always kept chatting about this. I will forward this post to him.
Fairly certain he will have a good read. Thank you no deposit casino bonus codes for existing players australia 2021 (Mattie) sharing!
Opening goals, first strikes and their impact on results
Youth football livescore, U20 and U17 World Cup matches covered live
Just won a bunch of money on PH898! Maybe you should check it out. Some of the games are crazy easy to win! get in on that action! here the site: ph898
Okayplay… hmm, what can I say? It’s pretty good! I’ve had some fun experiences there. Give it a shot and see if it’s your thing: okayplay. Good luck!
Oklarologin? Yeah, signed up recently. The login process is pretty smooth, which is a big plus for me. If you’re looking for easy access, check it out here: oklarologin. Hope it helps!
Лучшее казино ап икс скачать играйте в слоты и live-казино без лишних сложностей. Простой вход, удобный интерфейс, стабильная платформа и широкий выбор игр для отдыха и развлечения.
Играешь в казино? ап икс казино Слоты, рулетка, покер и live-дилеры, простой интерфейс, стабильная работа сайта и возможность играть онлайн без сложных настроек.
Играешь в казино? ап икс казино Слоты, рулетка, покер и live-дилеры, простой интерфейс, стабильная работа сайта и возможность играть онлайн без сложных настроек.
If you desire to grow your know-how simply keep visiting this website and be updated with the most up-to-date information posted here.
Лучшее казино up x официальный играйте в слоты и live-казино без лишних сложностей. Простой вход, удобный интерфейс, стабильная платформа и широкий выбор игр для отдыха и развлечения.
Live football match score updates faster than TV broadcast, stay ahead of everyone else
I don’t think the title of your article matches the content lol. Just kidding, mainly because I had some doubts after reading the article.
Awesome blog! Is your theme custom made or did you download it from somewhere? A theme like yours with a few simple adjustements would really make my blog jump out. Please let me know where you got your design. Cheers
Start profiting from your traffic—sign up today!
Thanks for sharing. I read many of your blog posts, cool, your blog is very good. https://www.binance.info/uk-UA/register?ref=XZNNWTW7
ausaa ca roma to casino nsw [Terrence], forms
of gambling in canada and remote gambling license
usa, or £10 no deposit slot bonus uk 2021
new united states online casino free spins, casino sites usa no deposit bonus and
usa online casino for usa players, or united states
online casino news
Take a look at my blog post Goplayslots.Net
no deposit united statesn casino, web gambling usa and Casino Wi in connecticut usa, or are poker machines legal in western canada
Corner goals, headed and volleyed finishes from set pieces
French Open livescore updates, Roland Garros matches tracked point by point live
Live match sporx.com.az results, the latest sports news, transfers, and today’s TV schedule. Live updates, key events, and all sports information in one portal.
A sports portal sbs-sport with breaking news, statistics, and expert commentary. Match schedules, transfers, interviews, and competition results are available in real time.
Your point of view caught my eye and was very interesting. Thanks. I have a question for you.
bedava casino bonus (Nola)
online usa all sites, online casino in australia 2021
and raging bull casino canada, or new zealandn slots app
atletico madrid vs real madrid estadisticas apuestas deportivas (Cathy)
casas que es linea de gol en apuestas apuestas con paypal en perú
A person necessarily lend a hand to make seriously posts I would state.
That is the very first time I frequented your web page and thus far?
I surprised with the research you made to create this actual publish incredible.
Wonderful process!
Feel free to surf to my web blog – site
Нужна курсовая? написание курсовой работы Подготовка работ по заданию, методическим указаниям и теме преподавателя. Сроки, правки и сопровождение до сдачи включены.
Авиабилеты по низким ценам https://tutvot.com посуточная аренда квартир, вакансии без опыта работы и займы онлайн. Актуальные предложения, простой поиск и удобный выбор решений для путешествий, работы и финансов.
**men balance pro**
MEN Balance Pro is a high-quality dietary supplement developed with research-informed support to help men maintain healthy prostate function.
Your article helped me a lot, is there any more related content? Thanks! https://www.binance.info/kz/register?ref=K8NFKJBQ
заклепка вытяжная материал заклепка вытяжная нержавеющая купить
Вместо заблокированного используйте kraken darknet market альтернативное зеркало из списка
£20 free no deposit casino uk, canadian pokie machines for sale and best online casino rewards free bonus
1 € (Delores) usa 2021, or best casino in australia online
an canadian casino, fastest paying casino usa and how can i play list of Top Online casinos poker in united states, or bet365 craps odds usa
major poker are there any casinos in costa rica (Verna) canada, usa real
money slots and australian casino chips, or best
usa poker apps
Hello colleagues, how is everything, and what you desire to
say regarding this post, in my view its genuinely amazing
for me.
Also visit my page; homepage
best no deposit casinos in new zealand, new zealandn express zahlung online casino
and aristocrat free slots united states, or casino chips canada
my page: how To Win russian roulette yttd
У новобудові https://cleaninglviv.top/ актуально
ДВС и КПП https://vavtomotor.ru автозапчасти для автомобилей с гарантией и проверенным состоянием. В наличии двигатели и коробки передач для популярных марок, подбор по VIN, быстрая доставка и выгодные цены.
Good day! how old do you have to be to legally gamble you use Twitter?
I’d like to follow you if that would be okay.
I’m definitely enjoying your blog and look forward to new posts.
blackjack usa free game download casino, 21 dusaes can you go to a casino with an expired id – Eulalia, and best
pokies united kingdom, or new zealandn eagle free slots
gambling online in usa, australian online casino deposit bonus and can i use td united states
trust visa debit for online gambling, or best united statesn online gambling
Here is my web page :: Goplayslots.Net
united kingdom pokies online real money, free spins no deposit online casino
australia and $5 minimum deposit casino australia 2021, or uk
slot streamers
Feel free to visit my site: goplayslots.net
Relevant tips: https://cookie-script.com/quick-report?identifier=5842282747e535f9dd17a7dfb3c9a721
Anyone using pesobets3? Thinking about signing up. Wondering if the payouts are reliable. Let me know your thoughts pesobets3.
J777loginregister, it’s a mouthful, but getting signed up was pretty straightforward. Not bad for a quick game. Have a look for yourself: j777loginregister
Heard about 55jili through the grapevine, gave it a try and I can report it’s legit. Seems to be a fairly good platform: 55jili
дизайн коттеджа под ключ дизайн коттеджа
Wow, incredible blog layout! How long have you ever been blogging for?
you made running a blog glance easy. The whole look of your web site is magnificent,
as well as the content!
Here is my webpage; new casino socal
are casino winnings taxed in australia, yukon gold casino news and casino uk age limit,
or can i use td canada trust visa debit for How to win jackpots on online casinos
gambling
gambling legal in usa, casino 2021 no deposit uk
and usa gambling regulation changes, or canadian Brent Musburger Gambling Site apps
Heya this is kind of of off topic but I was wondering if blogs use WYSIWYG editors or if you
have to manually code with HTML. I’m starting a blog soon but have no coding skills so
I wanted to get advice from someone with experience.
Any help would be greatly appreciated!
My website :: betting strategy for casino games (Ralf)
дизайны комнат в квартире дизайн двухкомнатных квартир 40 кв м
united states online live casino, wausau wi area casinos and australian casino apps, or pay by phone bill casino
australia
Also visit my webpage – goplayslots.Net
80 free spins no deposit uk, united kingdom online game mania casino online (Shad) free chip and online slots australia
ipad, or top online pokies nz
united kingdom gambling commission, no deposit bingo bonus uk
and gambling in does the dealer have to beat everyone in blackjack, Ivey, uk statistics,
or online live roulette casino usa
Лучшие и безопасные установка противопожарного резервуара эффективное решение для систем пожарной безопасности. Проектирование, производство и монтаж резервуаров для хранения воды в соответствии с требованиями нормативов.
Бесплатные сливы курсов ЕГЭ https://courses-ege.ru
Резервуар газовый подземный https://underground-reservoirs.ru
Лучшее казино https://download-vavada.ru слоты, настольные игры и live-казино онлайн. Простая навигация, стабильная работа платформы и доступ к играм в любое время без установки дополнительных программ.
Играешь в казино? https://freespinsbonus.ru бесплатные вращения в слотах, бонусы для новых игроков и действующие акции. Актуальные бонусы и предложения онлайн-казино.
высота полотенцесушителя полотенцесушитель вода
I don’t think the title of your article matches the content lol. Just kidding, mainly because I had some doubts after reading the article. https://www.binance.com/hu/register?ref=IQY5TET4
Join our affiliate community and maximize your profits!
Your article helped me a lot, is there any more related content? Thanks!
Фриспины бесплатно промокоды на фриспины бесплатные вращения в онлайн-казино без пополнения счета. Актуальные предложения, условия получения и список казино с бонусами для новых игроков.
Incredible points. Outstanding arguments. Keep up the great spirit.
События в мире свежие новости события дня и аналитика. Актуальная информация о России и мире с постоянными обновлениями.
Thank you for your sharing. I am worried that I lack creative ideas. It is your article that makes me full of hope. Thank you. But, I have a question, can you help me? https://www.binance.com/si-LK/register?ref=LBF8F65G
Тренды в строительстве заборов https://otoplenie-expert.com/stroitelstvo/trendy-v-stroitelstve-zaborov-dlya-dachi-v-2026-godu-sovety-po-vyboru-i-ustanovke.html для дачи в 2026 году: популярные материалы, современные конструкции и практичные решения. Советы по выбору забора и правильной установке с учетом бюджета и участка.
Join forces with us and profit from every click!
Отвод воды от фундамента https://totalarch.com/kak-pravilno-otvesti-vodu-ot-fundamenta-livnevka-svoimi-rukami-i-glavnye-zabluzhdeniya какие системы дренажа использовать, как правильно сделать отмостку и избежать подтопления. Пошаговые рекомендации для частного дома и дачи.
Can you be more specific about the content of your article? After reading it, I still have some doubts. Hope you can help me. https://accounts.binance.info/sl/register?ref=I3OM7SCZ
Excellent blog here! Also your web site loads up fast! What host are you using? Can I get your affiliate link to your host? I wish my web site loaded up as fast as yours lol
Launch momentum determines success; those critical first hours shape everything, which is why experienced creators immediately buy tiktok views after publishing their most important content pieces.
Халява в казино https://casino-bonus-bezdep.ru Бесплатные вращения в популярных слотах, актуальные акции и подробные условия использования.
Alight Motion Mod APK Alight Motion Premium is the paid version of the Alight Motion app, offering users additional features and tools not available in the free version. It removes the watermark from exported videos, provides high-quality export options, and gives access to an extensive library of visual effects, transitions, and animation tools. The Alight Motion Mod APK is the modified and advanced version of the Standard app. It has gained the title of best free video editing app and has opened the gate of a world where incredible editing possibilities wait for you. It offers an ad-free experience with unlocked premium filters, unique effects, audio integration, advanced motion design features, and 100% security. You are now ready to download Alight Motion for free. Here are some notes:
https://mapstopholidays.com/2026/02/05/unlocking-the-n1-casino-bonus-for-new-zealand-gamblers/
your browser does not support the video tag. Absolutely, it’s available for free. Fotor offers both free and premium versions of its services, allowing you to use the AI Image to Video Generator for 4s video at no charge. If you wish to create videos with more images, you may need to use more credits. Advancements in video editing tech have brought forth tools in apps that can convert live-action videos into cartoons. Through intricate algorithms and AI, these apps morph original footage into cartoon-like visuals, enabling even non-animation-savvy users to craft captivating content. Familiarity with video-to-cartoon technology is crucial for those seeking to fashion viral TikTok or Reels videos. Thanks for your feedback and we’re glad you were able to restore your purchases on both devices. We will be sure to share this with the rest of the team! If you have additional feedback for us, please reach out to us at pixaloop.support@lightricks.
Gates of Olympus has a very high volatility level. This slot title is a top choice for anyone who’s willing to risk more for the potential of bigger returns. And if you have a deep appreciation of Greek Mythology, there are even more reasons for you to play! Gates of olympus pragmatic play they also offer a sportsbook and virtual sports betting, starting from casino basics to in-depth strategies of online casino gameplay. From table games to progressive jackpots, get more experience and try all the options. Non Disclosure Confidentiality Agreement Details – Aussie Business Sales (“Agent”) are supplying you the signed enquirer and the potential buyer with certain strictly confidential information for the business identified above or any other business (“Business”), being listed offered by Aussie Business Sales (“Agent”) for sale (“Business”), hereby agree and acknowledge the following:
https://andrewfriedrichsmusic.com/index.php/2026/01/23/3-patti-gold-free-download-new-version-indian-players-choice/
The Gates of Olympus login features a high quality visual design and exciting theme. This machine is wrapped in the atmosphere of ancient Greece, recreating the majestic image of Mount Olympus. The background is decorated with flaming columns in the purple sky, and Zeus floating in the air not only adds beauty to the project, but also plays an important role during the game. It looks like Javascript isn’t enabled in your browser. Please enable it in order to fill out this form. The only thing is required is the registration of your account, or cartoons. From classic table games like blackjack and roulette to popular slot machines and video poker, players can also take advantage of bonuses and promotions offered by online casinos. NetEnt jackpots are known as the biggest In the industry, exciting gameplay.
Boost your earnings effortlessly—become our affiliate!
косметология под глазами косметология москва
$1 min deposit casino australia, blackjack mulligan uk and are there casinos in new united states, or bet online
does sandals st lucia have a casino (Porter) uk
60 free spins no deposit uk, best gambling websites usa and canada online gambling laws, or netent
no deposit bonus nz
Feel free to surf to my web page Roulette Winning trick
(10 euros gratis apuestas|10 mejores casas de
apuestas|10 trucos para ganar apuestas|15 euros gratis marca apuestas|1×2 apuestas|1×2 apuestas deportivas|1×2 apuestas que significa|1×2 en apuestas|1×2 en apuestas que significa|1×2 que significa en apuestas|5 euros
gratis apuestas|9 apuestas que siempre ganaras|a partir de cuanto se declara apuestas|actividades de
juegos de azar y apuestas|ad apuestas deportivas|aleksandre topuria ufc apuestas|algoritmo para ganar apuestas deportivas|america apuestas|análisis nba
apuestas|aplicacion android apuestas deportivas|aplicacion apuestas deportivas|aplicacion apuestas deportivas android|aplicación de apuestas online|aplicacion para hacer apuestas|aplicacion para hacer apuestas de futbol|aplicación para hacer apuestas de fútbol|aplicaciones apuestas deportivas android|aplicaciones apuestas deportivas gratis|aplicaciones
de apuestas android|aplicaciones de apuestas de fútbol|aplicaciones de apuestas deportivas|aplicaciones de
apuestas deportivas peru|aplicaciones de apuestas deportivas perú|aplicaciones
de apuestas en colombia|aplicaciones de apuestas gratis|aplicaciones de apuestas online|aplicaciones
de apuestas seguras|aplicaciones de apuestas sin dinero|aplicaciones para hacer apuestas|apostar seguro
apuestas deportivas|app android apuestas deportivas|app apuestas|app apuestas
android|app apuestas de futbol|app apuestas deportivas|app apuestas deportivas
android|app apuestas deportivas argentina|app apuestas deportivas colombia|app apuestas deportivas ecuador|app apuestas deportivas
españa|app apuestas deportivas gratis|app apuestas entre amigos|app apuestas futbol|app apuestas gratis|app apuestas sin dinero|app casa de apuestas|app casas de apuestas|app control
apuestas|app de apuestas|app de apuestas android|app
de apuestas casino|app de apuestas colombia|app de apuestas con bono de
bienvenida|app de apuestas de futbol|app de apuestas deportivas|app
de apuestas deportivas android|app de apuestas deportivas argentina|app de apuestas deportivas
colombia|app de apuestas deportivas en españa|app de apuestas deportivas peru|app de apuestas deportivas perú|app de apuestas deportivas sin dinero|app de apuestas ecuador|app de apuestas en colombia|app de apuestas en españa|app de apuestas
en venezuela|app de apuestas futbol|app de apuestas gratis|app de apuestas online|app de apuestas para
android|app de apuestas para ganar dinero|app de apuestas peru|app de apuestas reales|app
de casas de apuestas|app marca apuestas android|app
moviles de apuestas|app para apuestas|app para apuestas de futbol|app para apuestas deportivas|app para apuestas deportivas en español|app para
ganar apuestas deportivas|app para hacer apuestas|app para hacer apuestas deportivas|app para hacer apuestas entre amigos|app para llevar control de apuestas|app pronosticos apuestas deportivas|app versus apuestas|apps apuestas mundial|apps de apuestas|apps de apuestas con bono de bienvenida|apps de apuestas de futbol|apps de apuestas deportivas peru|apps de apuestas mexico|apps para apuestas|aprender a hacer apuestas deportivas|aprender hacer apuestas deportivas|apuesta del dia apuestas deportivas|apuestas 10 euros gratis|apuestas 100 seguras|apuestas 1×2|apuestas 1X2|apuestas 2 division|apuestas 3 division|apuestas a caballos|apuestas a carreras de caballos|apuestas a colombia|apuestas a corners|apuestas a ganar|apuestas a jugadores nba|apuestas a la baja|apuestas a la
nfl|apuestas al barcelona|apuestas al dia|apuestas al empate|apuestas al mundial|apuestas al
tenis wta|apuestas alaves barcelona|apuestas alcaraz hoy|apuestas alemania españa|apuestas alonso campeon del mundo|apuestas altas y bajas|apuestas altas y bajas nfl|apuestas ambos equipos marcan|apuestas america|apuestas
android|apuestas anillo nba|apuestas antes del mundial|apuestas anticipadas|apuestas anticipadas nba|apuestas apps|apuestas arabia argentina|apuestas argentina|apuestas argentina campeon del mundo|apuestas argentina canada|apuestas argentina colombia|apuestas argentina croacia|apuestas argentina españa|apuestas argentina francia|apuestas argentina francia cuanto paga|apuestas argentina francia mundial|apuestas argentina gana el
mundial|apuestas argentina gana mundial|apuestas argentina holanda|apuestas argentina mexico|apuestas argentina méxico|apuestas argentina mundial|apuestas argentina online|apuestas argentina paises bajos|apuestas argentina polonia|apuestas argentina uruguay|apuestas argentina vs
australia|apuestas argentina vs colombia|apuestas argentina vs francia|apuestas
argentina vs peru|apuestas argentinas|apuestas
arsenal real madrid|apuestas ascenso a primera division|apuestas
ascenso a segunda|apuestas asiaticas|apuestas asiatico|apuestas athletic|apuestas athletic
atletico|apuestas athletic barça|apuestas athletic barcelona|apuestas
athletic betis|apuestas athletic manchester|apuestas athletic manchester united|apuestas athletic
osasuna|apuestas athletic real|apuestas athletic real madrid|apuestas
athletic real sociedad|apuestas athletic real sociedad final|apuestas athletic roma|apuestas athletic sevilla|apuestas athletic valencia|apuestas atletico|apuestas atletico barcelona|apuestas atletico barsa|apuestas atletico
campeon champions|apuestas atletico campeon de liga|apuestas atlético
copenhague|apuestas atletico de madrid|apuestas
atlético de madrid|apuestas atletico de madrid barcelona|apuestas atletico
de madrid gana la liga|apuestas atletico de madrid real madrid|apuestas atlético de madrid real madrid|apuestas atletico de
madrid vs barcelona|apuestas atletico madrid|apuestas atletico madrid real madrid|apuestas atletico madrid
vs barcelona|apuestas atletico real madrid|apuestas atletico
real madrid champions|apuestas atletismo|apuestas bajas|apuestas
baloncesto|apuestas baloncesto acb|apuestas baloncesto handicap|apuestas baloncesto hoy|apuestas baloncesto juegos olimpicos|apuestas
baloncesto nba|apuestas baloncesto pronostico|apuestas baloncesto pronósticos|apuestas baloncesto prorroga|apuestas barca|apuestas barca athletic|apuestas barca atletico|apuestas barca bayern|apuestas barca bayern munich|apuestas
barca girona|apuestas barca hoy|apuestas barça hoy|apuestas barca inter|apuestas barca juventus|apuestas barca madrid|apuestas barça madrid|apuestas barca
real madrid|apuestas barca vs juve|apuestas
barca vs madrid|apuestas barca vs psg|apuestas barcelona|apuestas barcelona alaves|apuestas
barcelona athletic|apuestas barcelona atletico|apuestas barcelona atletico de madrid|apuestas barcelona
atlético de madrid|apuestas barcelona atletico
madrid|apuestas barcelona bayern|apuestas barcelona betis|apuestas barcelona campeon de liga|apuestas barcelona celta|apuestas barcelona espanyol|apuestas barcelona gana la
champions|apuestas barcelona girona|apuestas barcelona granada|apuestas barcelona hoy|apuestas barcelona inter|apuestas barcelona madrid|apuestas barcelona osasuna|apuestas barcelona psg|apuestas barcelona real madrid|apuestas barcelona real
sociedad|apuestas barcelona sevilla|apuestas barcelona valencia|apuestas barcelona villarreal|apuestas
barcelona vs atletico madrid|apuestas barcelona vs madrid|apuestas
barcelona vs real madrid|apuestas barsa madrid|apuestas basket hoy|apuestas
bayern barcelona|apuestas bayern vs barcelona|apuestas beisbol|apuestas béisbol|apuestas beisbol mlb|apuestas beisbol pronosticos|apuestas beisbol
venezolano|apuestas betis|apuestas betis – chelsea|apuestas betis barcelona|apuestas betis chelsea|apuestas betis
fiorentina|apuestas betis girona|apuestas betis madrid|apuestas betis mallorca|apuestas betis real madrid|apuestas
betis real sociedad|apuestas betis sevilla|apuestas betis valencia|apuestas betis valladolid|apuestas betis vs valencia|apuestas betplay
hoy colombia|apuestas betsson peru|apuestas bienvenida|apuestas billar online|apuestas bolivia vs colombia|apuestas bono|apuestas bono bienvenida|apuestas bono de bienvenida|apuestas bono
de bienvenida sin deposito|apuestas bono gratis|apuestas
bono sin deposito|apuestas bonos sin deposito|apuestas borussia real madrid|apuestas boxeo|apuestas boxeo de campeonato|apuestas boxeo españa|apuestas boxeo español|apuestas boxeo
femenino olimpiadas|apuestas boxeo hoy|apuestas boxeo online|apuestas
brasil colombia|apuestas brasil peru|apuestas brasil uruguay|apuestas brasil vs colombia|apuestas brasil vs peru|apuestas caballos|apuestas caballos colocado|apuestas caballos
españa|apuestas caballos hipodromo|apuestas
caballos hoy|apuestas caballos madrid|apuestas caballos online|apuestas caballos sanlucar
de barrameda|apuestas caballos zarzuela|apuestas calculador|apuestas campeon|apuestas
campeon champions|apuestas campeón champions|apuestas campeon champions 2025|apuestas campeon champions league|apuestas campeon conference league|apuestas campeon copa america|apuestas campeon copa del
rey|apuestas campeon de champions|apuestas campeon de la champions|apuestas campeon de
liga|apuestas campeon del mundo|apuestas campeon eurocopa|apuestas
campeón eurocopa|apuestas campeon europa league|apuestas campeon f1|apuestas campeon f1 2025|apuestas
campeon formula 1|apuestas campeon libertadores|apuestas campeon liga|apuestas campeon liga bbva|apuestas campeon liga española|apuestas campeon liga santander|apuestas campeon motogp 2025|apuestas campeon mundial|apuestas campeón mundial|apuestas campeon mundial baloncesto|apuestas campeon nba|apuestas
campeón nba|apuestas campeon premier|apuestas campeon premier
league|apuestas campeon roland garros|apuestas campeonato
f1|apuestas campeonatos de futbol|apuestas carrera de caballos|apuestas
carrera de caballos hoy|apuestas carrera de caballos nocturnas|apuestas carrera de galgos fin de semana|apuestas carrera de galgos hoy|apuestas carrera de galgos nocturnas|apuestas carreras
caballos|apuestas carreras caballos sanlucar|apuestas carreras de caballos|apuestas
carreras de caballos en directo|apuestas carreras de caballos en vivo|apuestas carreras de caballos españa|apuestas carreras de caballos hoy|apuestas carreras de caballos nacionales|apuestas
carreras de caballos nocturnas|apuestas carreras de caballos online|apuestas carreras de caballos
sanlucar|apuestas carreras de caballos sanlúcar|apuestas carreras de galgos|apuestas carreras de galgos en vivo|apuestas carreras de galgos nocturnas|apuestas carreras de galgos pre partido|apuestas
casino|apuestas casino barcelona|apuestas casino futbol|apuestas
casino gran madrid|apuestas casino gratis|apuestas casino madrid|apuestas casino online|apuestas casino online argentina|apuestas casinos|apuestas casinos online|apuestas celta|apuestas celta
barcelona|apuestas celta betis|apuestas celta eibar|apuestas celta espanyol|apuestas celta granada|apuestas celta madrid|apuestas celta
manchester|apuestas celta real madrid|apuestas champion league|apuestas champions foro|apuestas champions hoy|apuestas champions league|apuestas champions league – pronósticos|apuestas champions league 2025|apuestas champions league hoy|apuestas champions league pronosticos|apuestas champions league pronósticos|apuestas champions pronosticos|apuestas chelsea
barcelona|apuestas chelsea betis|apuestas chile|apuestas chile peru|apuestas chile
venezuela|apuestas chile vs colombia|apuestas chile vs uruguay|apuestas ciclismo|apuestas ciclismo en vivo|apuestas ciclismo femenino|apuestas ciclismo
tour francia|apuestas ciclismo vuelta|apuestas ciclismo vuelta a españa|apuestas ciclismo vuelta españa|apuestas
city madrid|apuestas city real madrid|apuestas clasico|apuestas clasico español|apuestas clasico real
madrid barcelona|apuestas clasificacion mundial|apuestas colombia|apuestas
colombia argentina|apuestas colombia brasil|apuestas colombia paraguay|apuestas colombia uruguay|apuestas colombia vs argentina|apuestas colombia vs brasil|apuestas combinadas|apuestas combinadas como funcionan|apuestas combinadas de futbol|apuestas combinadas de fútbol|apuestas combinadas foro|apuestas
combinadas futbol|apuestas combinadas hoy|apuestas combinadas mismo partido|apuestas combinadas mundial|apuestas combinadas nba|apuestas
combinadas para esta semana|apuestas combinadas para hoy|apuestas combinadas para mañana|apuestas combinadas pronosticos|apuestas combinadas recomendadas|apuestas combinadas seguras|apuestas combinadas seguras para hoy|apuestas combinadas seguras para mañana|apuestas como ganar|apuestas comparador|apuestas con bono de
bienvenida|apuestas con dinero ficticio|apuestas con dinero real|apuestas con dinero virtual|apuestas con handicap|apuestas con handicap
asiatico|apuestas con handicap baloncesto|apuestas con mas probabilidades de ganar|apuestas con paypal|apuestas con tarjeta de credito|apuestas con tarjeta de debito|apuestas consejos|apuestas copa|apuestas copa africa|apuestas copa america|apuestas copa américa|apuestas copa argentina|apuestas copa brasil|apuestas copa davis|apuestas copa de europa|apuestas
copa del mundo|apuestas copa del rey|apuestas copa del rey baloncesto|apuestas copa del rey
final|apuestas copa del rey futbol|apuestas copa del rey
ganador|apuestas copa del rey hoy|apuestas copa del rey pronosticos|apuestas copa del rey pronósticos|apuestas
copa europa|apuestas copa italia|apuestas copa libertadores|apuestas copa mundial de hockey|apuestas copa rey|apuestas copa sudamericana|apuestas corners|apuestas corners hoy|apuestas croacia argentina|apuestas cuartos eurocopa|apuestas cuotas|apuestas cuotas altas|apuestas cuotas bajas|apuestas de 1 euro|apuestas de baloncesto|apuestas de baloncesto hoy|apuestas de baloncesto nba|apuestas de baloncesto para hoy|apuestas de beisbol|apuestas de beisbol para hoy|apuestas de blackjack
en linea|apuestas de boxeo|apuestas de boxeo canelo|apuestas de boxeo en las vegas|apuestas de boxeo hoy|apuestas de
boxeo online|apuestas de caballo|apuestas de caballos|apuestas de caballos
como funciona|apuestas de caballos como se juega|apuestas de caballos en colombia|apuestas de caballos en españa|apuestas de caballos en linea|apuestas de caballos españa|apuestas de caballos ganador y colocado|apuestas de caballos internacionales|apuestas de caballos juegos|apuestas
de caballos online|apuestas de caballos online en venezuela|apuestas de caballos por internet|apuestas de caballos pronosticos|apuestas de caballos
pronósticos|apuestas de carrera de caballos|apuestas de carreras de caballos|apuestas
de carreras de caballos online|apuestas de casino|apuestas de casino online|apuestas de casino por internet|apuestas de champions league|apuestas de ciclismo|apuestas de colombia|apuestas de copa america|apuestas de
corners|apuestas de deportes en linea|apuestas de deportes online|apuestas
de dinero|apuestas de esports|apuestas de eurocopa|apuestas
de europa league|apuestas de f1|apuestas de formula 1|apuestas de futbol|apuestas de fútbol|apuestas de futbol app|apuestas de futbol argentina|apuestas de futbol colombia|apuestas de futbol en colombia|apuestas de futbol en directo|apuestas de futbol en linea|apuestas de futbol en vivo|apuestas de futbol español|apuestas
de futbol gratis|apuestas de futbol hoy|apuestas de futbol mundial|apuestas de futbol online|apuestas de fútbol online|apuestas de futbol para hoy|apuestas de fútbol para hoy|apuestas de futbol para hoy seguras|apuestas de futbol para mañana|apuestas de
futbol peru|apuestas de futbol pronosticos|apuestas de fútbol pronósticos|apuestas
de futbol seguras|apuestas de futbol seguras para hoy|apuestas de futbol sin dinero|apuestas de
galgos|apuestas de galgos como ganar|apuestas de galgos
en directo|apuestas de galgos online|apuestas de galgos trucos|apuestas de golf|apuestas
de hockey|apuestas de hockey sobre hielo|apuestas de hoy|apuestas
de hoy seguras|apuestas de juego|apuestas de juegos|apuestas de juegos deportivos|apuestas de juegos
online|apuestas de la champions league|apuestas de la copa américa|apuestas de la eurocopa|apuestas de la europa league|apuestas de la liga|apuestas de la liga bbva|apuestas de la liga española|apuestas de
la nba|apuestas de la nfl|apuestas de la ufc|apuestas
de mlb|apuestas de nba|apuestas de nba para hoy|apuestas de
partidos|apuestas de partidos de futbol|apuestas de peleas ufc|apuestas de perros en vivo|apuestas de perros virtuales|apuestas de peru|apuestas de sistema|apuestas de sistema como funciona|apuestas de
sistema explicacion|apuestas de sistema explicación|apuestas de tenis|apuestas de tenis de mesa|apuestas de tenis en directo|apuestas de
tenis hoy|apuestas de tenis para hoy|apuestas de tenis pronosticos|apuestas de tenis seguras|apuestas de todo tipo|apuestas de ufc|apuestas
de ufc hoy|apuestas del boxeo|apuestas del clasico|apuestas del clasico real madrid barca|apuestas del dia|apuestas del
día|apuestas del dia de hoy|apuestas del dia deportivas|apuestas del dia futbol|apuestas
del mundial|apuestas del partido de hoy|apuestas del real madrid|apuestas del rey|apuestas del sistema|apuestas deporte|apuestas deportes|apuestas
deportiva|apuestas deportivas|apuestas deportivas 1 euro|apuestas deportivas
10 euros gratis|apuestas deportivas 100 seguras|apuestas deportivas
1×2|apuestas deportivas android|apuestas deportivas app|apuestas deportivas
apps|apuestas deportivas argentina|apuestas deportivas argentina futbol|apuestas deportivas
argentina legal|apuestas deportivas atletico de madrid|apuestas
deportivas baloncesto|apuestas deportivas barca madrid|apuestas
deportivas barcelona|apuestas deportivas beisbol|apuestas deportivas bono|apuestas deportivas bono bienvenida|apuestas deportivas bono de bienvenida|apuestas deportivas bono sin deposito|apuestas deportivas bonos
de bienvenida|apuestas deportivas boxeo|apuestas
deportivas caballos|apuestas deportivas calculadora|apuestas deportivas campeon liga|apuestas deportivas casino|apuestas deportivas
casino barcelona|apuestas deportivas casino online|apuestas deportivas cerca
de mi|apuestas deportivas champions league|apuestas deportivas chile|apuestas deportivas ciclismo|apuestas deportivas colombia|apuestas deportivas com|apuestas deportivas com foro|apuestas
deportivas com pronosticos|apuestas deportivas combinadas|apuestas
deportivas combinadas para hoy|apuestas deportivas como se
juega|apuestas deportivas comparador|apuestas deportivas
con bono gratis|apuestas deportivas con bonos gratis|apuestas deportivas con dinero ficticio|apuestas deportivas con paypal|apuestas deportivas con puntos
virtuales|apuestas deportivas consejos|apuestas deportivas consejos para ganar|apuestas deportivas copa america|apuestas deportivas
copa del rey|apuestas deportivas copa libertadores|apuestas deportivas
copa mundial|apuestas deportivas corners|apuestas deportivas
cual es la mejor|apuestas deportivas cuotas altas|apuestas deportivas de
baloncesto|apuestas deportivas de boxeo|apuestas deportivas de colombia|apuestas deportivas de futbol|apuestas deportivas de nba|apuestas deportivas de nhl|apuestas deportivas de
peru|apuestas deportivas de tenis|apuestas deportivas del dia|apuestas deportivas dinero ficticio|apuestas deportivas directo|apuestas deportivas doble oportunidad|apuestas deportivas en argentina|apuestas deportivas en chile|apuestas deportivas en colombia|apuestas deportivas en directo|apuestas deportivas en españa|apuestas deportivas en español|apuestas deportivas en linea|apuestas deportivas en línea|apuestas deportivas
en peru|apuestas deportivas en perú|apuestas deportivas
en sevilla|apuestas deportivas en uruguay|apuestas deportivas en vivo|apuestas deportivas es|apuestas deportivas es pronosticos|apuestas deportivas españa|apuestas deportivas españolas|apuestas deportivas esports|apuestas deportivas
estadisticas|apuestas deportivas estrategias|apuestas deportivas
estrategias seguras|apuestas deportivas eurocopa|apuestas deportivas europa league|apuestas deportivas f1|apuestas deportivas faciles de ganar|apuestas deportivas formula 1|apuestas deportivas foro|apuestas deportivas foro
futbol|apuestas deportivas foro tenis|apuestas deportivas francia argentina|apuestas deportivas futbol|apuestas deportivas
fútbol|apuestas deportivas futbol argentino|apuestas deportivas futbol colombia|apuestas deportivas futbol español|apuestas deportivas gana|apuestas deportivas ganadas|apuestas deportivas ganar dinero seguro|apuestas
deportivas gane|apuestas deportivas golf|apuestas deportivas
gratis|apuestas deportivas gratis con premios|apuestas deportivas gratis hoy|apuestas deportivas gratis sin deposito|apuestas deportivas handicap|apuestas deportivas handicap asiatico|apuestas
deportivas hoy|apuestas deportivas impuestos|apuestas deportivas interior argentina|apuestas
deportivas juegos olimpicos|apuestas deportivas la liga|apuestas deportivas legales|apuestas deportivas legales en colombia|apuestas deportivas libres de impuestos|apuestas deportivas licencia españa|apuestas deportivas liga española|apuestas deportivas
listado|apuestas deportivas listado clasico|apuestas deportivas madrid|apuestas deportivas
mas seguras|apuestas deportivas mejor pagadas|apuestas deportivas mejores|apuestas deportivas mejores app|apuestas deportivas mejores casas|apuestas deportivas mejores cuotas|apuestas deportivas mejores paginas|apuestas deportivas mexico|apuestas
deportivas méxico|apuestas deportivas mlb|apuestas deportivas
mlb hoy|apuestas deportivas multiples|apuestas deportivas mundial|apuestas deportivas murcia|apuestas deportivas nba|apuestas deportivas nba hoy|apuestas deportivas nfl|apuestas deportivas nhl|apuestas
deportivas nuevas|apuestas deportivas ofertas|apuestas deportivas online|apuestas deportivas online argentina|apuestas deportivas online chile|apuestas deportivas online colombia|apuestas
deportivas online en colombia|apuestas deportivas online españa|apuestas deportivas online mexico|apuestas
deportivas online paypal|apuestas deportivas online peru|apuestas deportivas online por internet|apuestas deportivas pago
paypal|apuestas deportivas para ganar dinero|apuestas
deportivas para hoy|apuestas deportivas para hoy pronosticos|apuestas deportivas partido suspendido|apuestas deportivas partidos de hoy|apuestas deportivas paypal|apuestas deportivas peru|apuestas deportivas perú|apuestas deportivas peru vs ecuador|apuestas
deportivas predicciones|apuestas deportivas promociones|apuestas deportivas pronostico|apuestas deportivas pronóstico|apuestas deportivas pronostico hoy|apuestas deportivas pronosticos|apuestas deportivas pronósticos|apuestas
deportivas pronosticos expertos|apuestas
deportivas pronosticos gratis|apuestas deportivas
pronosticos nba|apuestas deportivas pronosticos tenis|apuestas deportivas que aceptan paypal|apuestas
deportivas real madrid|apuestas deportivas regalo bienvenida|apuestas deportivas resultado exacto|apuestas
deportivas resultados|apuestas deportivas rugby|apuestas deportivas seguras|apuestas deportivas seguras foro|apuestas deportivas seguras hoy|apuestas deportivas seguras
para hoy|apuestas deportivas seguras telegram|apuestas deportivas sevilla|apuestas deportivas simulador eurocopa|apuestas deportivas sin deposito|apuestas deportivas
sin deposito inicial|apuestas deportivas sin dinero|apuestas deportivas
sin dinero real|apuestas deportivas sin registro|apuestas deportivas stake|apuestas deportivas stake 10|apuestas deportivas telegram españa|apuestas
deportivas tenis|apuestas deportivas tenis de mesa|apuestas
deportivas tenis foro|apuestas deportivas tenis hoy|apuestas
deportivas tips|apuestas deportivas tipster|apuestas
deportivas ufc|apuestas deportivas uruguay|apuestas deportivas valencia|apuestas deportivas valencia barcelona|apuestas deportivas venezuela|apuestas deportivas virtuales|apuestas deportivas y casino|apuestas deportivas y casino online|apuestas
deportivas.com|apuestas deportivas.com foro|apuestas deportivas.es|apuestas deportivos pronosticos|apuestas deposito minimo 1 euro|apuestas descenso a
segunda|apuestas descenso a segunda b|apuestas descenso la liga|apuestas descenso primera division|apuestas descenso segunda|apuestas dia|apuestas diarias seguras|apuestas
dinero|apuestas dinero ficticio|apuestas dinero real|apuestas dinero virtual|apuestas directas|apuestas directo|apuestas directo futbol|apuestas division de honor juvenil|apuestas dnb|apuestas doble oportunidad|apuestas doble resultado|apuestas
dobles|apuestas dobles y triples|apuestas dortmund barcelona|apuestas draft nba|apuestas draft nfl|apuestas ecuador vs argentina|apuestas ecuador vs venezuela|apuestas egipto uruguay|apuestas el clasico|apuestas elecciones venezuela|apuestas empate|apuestas
en baloncesto|apuestas en barcelona|apuestas en beisbol|apuestas en boxeo|apuestas en caballos|apuestas en carreras de caballos|apuestas en casino|apuestas en casino online|apuestas en casinos|apuestas
en casinos online|apuestas en chile|apuestas en ciclismo|apuestas
en colombia|apuestas en colombia de futbol|apuestas en directo|apuestas en directo futbol|apuestas en directo pronosticos|apuestas en el futbol|apuestas en el tenis|apuestas en españa|apuestas
en esports|apuestas en eventos deportivos virtuales|apuestas en golf|apuestas en juegos|apuestas en la
champions league|apuestas en la eurocopa|apuestas en la liga|apuestas en la nba|apuestas en la
nfl|apuestas en las vegas mlb|apuestas en las vegas nfl|apuestas en linea|apuestas en línea|apuestas en linea
argentina|apuestas en linea boxeo|apuestas en linea chile|apuestas en linea colombia|apuestas en línea de
fútbol|apuestas en linea deportivas|apuestas en linea
españa|apuestas en linea estados unidos|apuestas en linea futbol|apuestas en linea mexico|apuestas en línea méxico|apuestas en linea mundial|apuestas
en linea peru|apuestas en linea usa|apuestas en los esports|apuestas en madrid|apuestas
en méxico|apuestas en mexico online|apuestas en nba|apuestas en partidos de futbol|apuestas en partidos de futbol en vivo|apuestas en partidos
de tenis en directo|apuestas en perú|apuestas en sevilla|apuestas
en sistema|apuestas en stake|apuestas en tenis|apuestas en tenis de
mesa|apuestas en valencia|apuestas en vivo|apuestas en vivo argentina|apuestas en vivo casino|apuestas en vivo futbol|apuestas
en vivo fútbol|apuestas en vivo nba|apuestas en vivo peru|apuestas en vivo tenis|apuestas en vivo ufc|apuestas equipo mbappe|apuestas equipos de futbol|apuestas españa|apuestas españa alemania|apuestas españa alemania
eurocopa|apuestas españa croacia|apuestas españa eurocopa|apuestas españa francia|apuestas españa francia eurocopa|apuestas españa
gana el mundial|apuestas españa gana eurocopa|apuestas españa gana mundial|apuestas españa georgia|apuestas españa holanda|apuestas españa inglaterra|apuestas españa
inglaterra cuotas|apuestas españa inglaterra eurocopa|apuestas españa italia|apuestas españa mundial|apuestas
españa paises bajos|apuestas español|apuestas español oviedo|apuestas espanyol barcelona|apuestas espanyol betis|apuestas espanyol
villarreal|apuestas esport|apuestas esports|apuestas esports colombia|apuestas esports españa|apuestas esports
fifa|apuestas esports gratis|apuestas esports lol|apuestas esports peru|apuestas esports valorant|apuestas estadisticas|apuestas estrategias|apuestas euro|apuestas euro copa|apuestas eurocopa|apuestas eurocopa campeon|apuestas eurocopa españa|apuestas eurocopa favoritos|apuestas eurocopa femenina|apuestas eurocopa final|apuestas eurocopa ganador|apuestas eurocopa hoy|apuestas eurocopa sub 21|apuestas euroliga baloncesto|apuestas euroliga
pronosticos|apuestas europa league|apuestas europa league hoy|apuestas europa league pronosticos|apuestas europa league pronósticos|apuestas euros|apuestas f1 abu dhabi|apuestas f1
bahrein|apuestas f1 canada|apuestas f1 china|apuestas f1 cuotas|apuestas f1 hoy|apuestas f1 las vegas|apuestas f1 miami|apuestas f1 monaco|apuestas faciles de ganar|apuestas fáciles de ganar|apuestas faciles para ganar|apuestas favoritas|apuestas favorito champions|apuestas favoritos champions|apuestas favoritos eurocopa|apuestas favoritos mundial|apuestas fc barcelona|apuestas final champions
cuotas|apuestas final champions league|apuestas final champions peru|apuestas final copa|apuestas final copa america|apuestas final copa de europa|apuestas final copa del rey|apuestas final copa europa|apuestas final copa libertadores|apuestas
final copa rey|apuestas final de copa|apuestas final de copa
del rey|apuestas final del mundial|apuestas final euro|apuestas final eurocopa|apuestas final europa league|apuestas final libertadores|apuestas final mundial|apuestas final nba|apuestas final rugby|apuestas final uefa europa
league|apuestas final.mundial|apuestas finales de conferencia
nfl|apuestas finales nba|apuestas fiorentina betis|apuestas formula|apuestas
formula 1|apuestas fórmula 1|apuestas fórmula 1 pronósticos|apuestas formula uno|apuestas foro|apuestas foro nba|apuestas francia argentina|apuestas
francia españa|apuestas futbol|apuestas fútbol|apuestas futbol americano|apuestas futbol americano nfl|apuestas futbol argentina|apuestas futbol argentino|apuestas futbol champions league|apuestas futbol
chile|apuestas futbol colombia|apuestas futbol consejos|apuestas futbol en directo|apuestas fútbol en directo|apuestas futbol en vivo|apuestas
fútbol en vivo|apuestas futbol españa|apuestas futbol español|apuestas fútbol español|apuestas futbol
eurocopa|apuestas futbol femenino|apuestas futbol foro|apuestas futbol gratis|apuestas futbol hoy|apuestas fútbol hoy|apuestas
futbol juegos olimpicos|apuestas futbol mexico|apuestas futbol mundial|apuestas futbol online|apuestas futbol para hoy|apuestas futbol peru|apuestas futbol pronosticos|apuestas futbol sala|apuestas futbol telegram|apuestas futbol virtual|apuestas galgos|apuestas galgos en directo|apuestas galgos
hoy|apuestas galgos online|apuestas galgos pronosticos|apuestas galgos trucos|apuestas gana|apuestas gana colombia|apuestas
gana resultados|apuestas ganadas|apuestas ganadas hoy|apuestas ganador champions league|apuestas ganador
copa america|apuestas ganador copa del rey|apuestas
ganador copa del rey baloncesto|apuestas ganador copa libertadores|apuestas ganador de
la eurocopa|apuestas ganador de la liga|apuestas ganador del mundial|apuestas ganador eurocopa|apuestas ganador europa league|apuestas ganador f1|apuestas ganador la liga|apuestas ganador liga española|apuestas ganador mundial|apuestas ganador mundial baloncesto|apuestas ganador mundial
f1|apuestas ganador nba|apuestas ganadores eurocopa|apuestas ganadores mundial|apuestas ganar champions|apuestas ganar eurocopa|apuestas ganar liga|apuestas
ganar mundial|apuestas ganar nba|apuestas
getafe valencia|apuestas ghana uruguay|apuestas girona|apuestas girona athletic|apuestas girona betis|apuestas girona campeon de
liga|apuestas girona campeon liga|apuestas girona gana la liga|apuestas
girona real madrid|apuestas girona real sociedad|apuestas goleador eurocopa|apuestas goleadores eurocopa|apuestas goles asiaticos|apuestas
golf|apuestas golf masters|apuestas golf pga|apuestas granada barcelona|apuestas
grand slam de tenis|apuestas gratis|apuestas gratis casino|apuestas gratis con premios|apuestas gratis hoy|apuestas gratis para hoy|apuestas gratis
por registro|apuestas gratis puntos|apuestas gratis regalos|apuestas gratis sin deposito|apuestas gratis sin depósito|apuestas
gratis sin ingreso|apuestas gratis sports|apuestas gratis
y ganar premios|apuestas grupo a eurocopa|apuestas grupos eurocopa|apuestas handicap|apuestas handicap asiatico|apuestas handicap baloncesto|apuestas handicap
como funciona|apuestas handicap nba|apuestas handicap nfl|apuestas hipicas
online|apuestas hípicas online|apuestas hipicas venezuela|apuestas hockey|apuestas hockey hielo|apuestas hockey patines|apuestas hockey sobre hielo|apuestas holanda argentina|apuestas
holanda vs argentina|apuestas hoy|apuestas hoy champions|apuestas hoy futbol|apuestas hoy nba|apuestas hoy
pronosticos|apuestas hoy seguras|apuestas impuestos|apuestas inglaterra paises bajos|apuestas inter barca|apuestas inter barcelona|apuestas juego|apuestas juegos|apuestas juegos en linea|apuestas juegos olimpicos|apuestas juegos
olímpicos|apuestas juegos olimpicos baloncesto|apuestas juegos online|apuestas
juegos virtuales|apuestas jugador sevilla|apuestas jugadores nba|apuestas
kings league americas|apuestas la liga|apuestas la liga española|apuestas la liga hoy|apuestas la liga santander|apuestas las vegas
mlb|apuestas las vegas nba|apuestas las vegas nfl|apuestas league
of legends mundial|apuestas legal|apuestas legales|apuestas legales en colombia|apuestas legales en españa|apuestas
legales en estados unidos|apuestas legales españa|apuestas leganes
betis|apuestas libertadores|apuestas licencia|apuestas liga 1 peru|apuestas liga argentina|apuestas liga bbva pronosticos|apuestas
liga de campeones|apuestas liga de campeones de baloncesto|apuestas liga de
campeones de hockey|apuestas liga españa|apuestas liga española|apuestas liga santander pronosticos|apuestas ligas
de futbol|apuestas linea|apuestas linea de gol|apuestas
liverpool barcelona|apuestas liverpool real madrid|apuestas
lol mundial|apuestas madrid|apuestas madrid arsenal|apuestas madrid atletico|apuestas madrid
atletico champions|apuestas madrid barca|apuestas madrid barça|apuestas
madrid barca hoy|apuestas madrid barca supercopa|apuestas madrid barcelona|apuestas madrid barsa|apuestas madrid bayern|apuestas
madrid betis|apuestas madrid borussia|apuestas madrid campeon champions|apuestas madrid celta|apuestas madrid
city|apuestas madrid dortmund|apuestas madrid gana la liga|apuestas madrid gana liga|apuestas madrid hoy|apuestas madrid liverpool|apuestas madrid osasuna|apuestas
madrid sevilla|apuestas madrid valencia|apuestas madrid
vs arsenal|apuestas madrid vs barcelona|apuestas mallorca osasuna|apuestas mallorca real sociedad|apuestas manchester athletic|apuestas manchester
city real madrid|apuestas mas faciles de ganar|apuestas mas seguras|apuestas mas seguras para
hoy|apuestas masters de golf|apuestas masters de tenis|apuestas maximo
goleador eurocopa|apuestas maximo goleador mundial|apuestas mejor jugador eurocopa|apuestas
mejores casinos online|apuestas mexico|apuestas méxico|apuestas mexico polonia|apuestas méxico polonia|apuestas mlb|apuestas mlb
hoy|apuestas mlb las vegas|apuestas mlb para hoy|apuestas mlb pronosticos|apuestas mlb usa|apuestas mma ufc|apuestas momios|apuestas multiples|apuestas múltiples|apuestas
multiples como funcionan|apuestas multiples el gordo|apuestas multiples
futbol|apuestas mundial|apuestas mundial 2026|apuestas mundial baloncesto|apuestas mundial balonmano|apuestas mundial brasil|apuestas mundial campeon|apuestas mundial ciclismo|apuestas mundial clubes|apuestas mundial de baloncesto|apuestas mundial de ciclismo|apuestas mundial de clubes|apuestas
mundial de futbol|apuestas mundial de fútbol|apuestas mundial de rugby|apuestas mundial f1|apuestas mundial favoritos|apuestas mundial femenino|apuestas mundial formula 1|apuestas mundial futbol|apuestas mundial
ganador|apuestas mundial lol|apuestas mundial moto gp|apuestas mundial motogp|apuestas
mundial rugby|apuestas mundial sub 17|apuestas mundiales|apuestas mundialistas|apuestas mvp eurocopa|apuestas mvp nba|apuestas mvp nfl|apuestas nacionales de colombia|apuestas nba|apuestas nba
all star|apuestas nba campeon|apuestas nba consejos|apuestas nba esta noche|apuestas
nba finals|apuestas nba gratis|apuestas nba hoy|apuestas nba hoy jugadores|apuestas nba hoy pronosticos|apuestas nba para hoy|apuestas nba playoffs|apuestas nba pronosticos|apuestas nba pronósticos|apuestas nba pronosticos hoy|apuestas nba tipster|apuestas nfl|apuestas nfl hoy|apuestas nfl las vegas|apuestas nfl playoffs|apuestas nfl pronosticos|apuestas nfl pronósticos|apuestas nfl
semana 4|apuestas nfl super bowl|apuestas nhl|apuestas nhl
pronosticos|apuestas octavos eurocopa|apuestas ofertas|apuestas online|apuestas
online argentina|apuestas online argentina legal|apuestas online bono|apuestas online bono bienvenida|apuestas online boxeo|apuestas online caballos|apuestas online carreras de caballos|apuestas online casino|apuestas online champions league|apuestas
online chile|apuestas online ciclismo|apuestas online colombia|apuestas
online comparativa|apuestas online con paypal|apuestas online de caballos|apuestas online deportivas|apuestas online en argentina|apuestas online en peru|apuestas
online espana|apuestas online españa|apuestas online esports|apuestas online foro|apuestas online futbol|apuestas online futbol españa|apuestas online golf|apuestas online gratis|apuestas online gratis sin deposito|apuestas online juegos|apuestas online mexico|apuestas
online mma|apuestas online movil|apuestas online nba|apuestas online net|apuestas
online nuevas|apuestas online opiniones|apuestas online paypal|apuestas online peru|apuestas online
seguras|apuestas online sin dinero|apuestas online sin registro|apuestas online
tenis|apuestas online ufc|apuestas online uruguay|apuestas online
venezuela|apuestas open britanico golf|apuestas osasuna athletic|apuestas osasuna barcelona|apuestas osasuna
real madrid|apuestas osasuna sevilla|apuestas osasuna valencia|apuestas over|apuestas over
2.5|apuestas over under|apuestas paginas|apuestas pago anticipado|apuestas paises bajos
ecuador|apuestas paises bajos inglaterra|apuestas países bajos qatar|apuestas para boxeo|apuestas para champions league|apuestas para el clasico|apuestas
para el dia de hoy|apuestas para el mundial|apuestas para el partido de hoy|apuestas para eurocopa|apuestas
para europa league|apuestas para futbol|apuestas para ganar|apuestas para ganar dinero|apuestas para ganar dinero facil|apuestas para ganar en la
ruleta|apuestas para ganar la champions|apuestas para ganar la eurocopa|apuestas para ganar la europa
league|apuestas para ganar la liga|apuestas para ganar siempre|apuestas para hacer|apuestas para hoy|apuestas para hoy de futbol|apuestas para hoy europa league|apuestas para
hoy futbol|apuestas para juegos|apuestas para la champions league|apuestas para la
copa del rey|apuestas para la eurocopa|apuestas para la europa
league|apuestas para la final de la eurocopa|apuestas
para la nba hoy|apuestas para los partidos de hoy|apuestas para
partidos de hoy|apuestas para ufc|apuestas partido|apuestas partido aplazado|apuestas partido
champions|apuestas partido colombia|apuestas partido españa marruecos|apuestas partido mundial|apuestas partido suspendido|apuestas partidos|apuestas partidos champions league|apuestas partidos csgo|apuestas partidos de futbol|apuestas partidos de futbol hoy|apuestas partidos de hoy|apuestas partidos
eurocopa|apuestas partidos futbol|apuestas partidos hoy|apuestas partidos mundial|apuestas paypal|apuestas peleas de boxeo|apuestas peru|apuestas perú|apuestas
peru brasil|apuestas peru chile|apuestas peru paraguay|apuestas
peru uruguay|apuestas peru vs chile|apuestas peru vs colombia|apuestas pichichi eurocopa|apuestas plataforma|apuestas playoff|apuestas playoff ascenso|apuestas playoff ascenso a primera|apuestas playoff
nba|apuestas playoff segunda|apuestas playoff segunda b|apuestas playoffs nba|apuestas playoffs nfl|apuestas polonia
argentina|apuestas por argentina|apuestas por internet mexico|apuestas por
internet para ganar dinero|apuestas por paypal|apuestas por
ronda boxeo|apuestas por sistema|apuestas portugal uruguay|apuestas pre partido|apuestas predicciones|apuestas
predicciones futbol|apuestas primera division|apuestas primera division españa|apuestas promociones|apuestas pronostico|apuestas
pronosticos|apuestas pronosticos deportivos|apuestas pronosticos deportivos tenis|apuestas
pronosticos futbol|apuestas pronosticos gratis|apuestas pronosticos nba|apuestas pronosticos tenis|apuestas prorroga|apuestas psg barca|apuestas
psg barcelona|apuestas puntos por tarjetas|apuestas puntos tarjetas|apuestas que
aceptan paypal|apuestas que es handicap|apuestas que puedes hacer con tu novia|apuestas que siempre ganaras|apuestas que
significa|apuestas quien bajara a segunda|apuestas quién bajara a
segunda|apuestas quien gana el mundial|apuestas quien gana eurocopa|apuestas
quien gana la champions|apuestas quien gana la eurocopa|apuestas
quien gana la liga|apuestas quien ganara el mundial|apuestas quién ganará el mundial|apuestas quien ganara la champions|apuestas quien ganara la eurocopa|apuestas quien ganara la liga|apuestas rayo barcelona|apuestas real madrid|apuestas
real madrid arsenal|apuestas real madrid athletic|apuestas real madrid atletico|apuestas real madrid atletico champions|apuestas real madrid atletico de madrid|apuestas real madrid atlético de madrid|apuestas real madrid atletico madrid|apuestas real madrid barcelona|apuestas real
madrid bayern|apuestas real madrid betis|apuestas real madrid borussia|apuestas real madrid campeon champions|apuestas
real madrid celta|apuestas real madrid champions|apuestas
real madrid city|apuestas real madrid girona|apuestas real madrid hoy|apuestas real madrid
liverpool|apuestas real madrid manchester city|apuestas real madrid osasuna|apuestas
real madrid real sociedad|apuestas real madrid valencia|apuestas real madrid villarreal|apuestas real madrid vs arsenal|apuestas real madrid vs
atletico|apuestas real madrid vs atlético|apuestas real madrid
vs atletico madrid|apuestas real madrid vs barcelona|apuestas real madrid vs betis|apuestas real madrid vs sevilla|apuestas
real madrid vs valencia|apuestas real sociedad|apuestas
real sociedad athletic|apuestas real sociedad barcelona|apuestas real sociedad
betis|apuestas real sociedad psg|apuestas real sociedad real madrid|apuestas
real sociedad valencia|apuestas recomendadas hoy|apuestas regalo de bienvenida|apuestas registro|apuestas resultado
exacto|apuestas resultados|apuestas resultados eurocopa|apuestas retirada tenis|apuestas roma barcelona|apuestas
roma sevilla|apuestas rugby|apuestas rugby mundial|apuestas rugby world cup|apuestas ruleta seguras|apuestas segunda|apuestas segunda b|apuestas segunda division|apuestas segunda división|apuestas segunda division b|apuestas segunda division españa|apuestas seguras|apuestas
seguras baloncesto|apuestas seguras calculadora|apuestas seguras en la ruleta|apuestas seguras eurocopa|apuestas seguras foro|apuestas seguras futbol|apuestas seguras futbol hoy|apuestas
seguras gratis|apuestas seguras hoy|apuestas seguras hoy futbol|apuestas seguras nba|apuestas seguras
nba hoy|apuestas seguras para este fin de semana|apuestas seguras
para ganar dinero|apuestas seguras para hoy|apuestas seguras para
hoy fútbol|apuestas seguras para hoy pronósticos|apuestas seguras para mañana|apuestas seguras ruleta|apuestas seguras
telegram|apuestas seguras tenis|apuestas semifinales eurocopa|apuestas senegal paises
bajos|apuestas sevilla|apuestas sevilla athletic|apuestas sevilla atletico de madrid|apuestas sevilla barcelona|apuestas sevilla betis|apuestas sevilla
campeon liga|apuestas sevilla celta|apuestas sevilla
gana la liga|apuestas sevilla girona|apuestas sevilla inter|apuestas sevilla jugador|apuestas sevilla juventus|apuestas sevilla leganes|apuestas sevilla madrid|apuestas
sevilla manchester united|apuestas sevilla osasuna|apuestas sevilla real madrid|apuestas sevilla real sociedad|apuestas sevilla roma|apuestas sevilla valencia|apuestas significa|apuestas simples ejemplos|apuestas simples o combinadas|apuestas sin deposito|apuestas sin deposito inicial|apuestas
sin deposito minimo|apuestas sin dinero|apuestas sin dinero real|apuestas sin empate|apuestas
sin empate que significa|apuestas sin ingreso minimo|apuestas sin registro|apuestas
sistema|apuestas sistema calculadora|apuestas
sistema como funciona|apuestas sistema trixie|apuestas sociedad|apuestas
sorteo copa del rey|apuestas stake|apuestas stake 10|apuestas stake 10 hoy|apuestas super bowl favorito|apuestas super rugby|apuestas supercopa españa|apuestas superliga argentina|apuestas tarjeta roja|apuestas tarjetas|apuestas tarjetas amarillas|apuestas tenis|apuestas tenis
atp|apuestas tenis consejos|apuestas tenis copa davis|apuestas tenis de mesa|apuestas tenis de mesa pronosticos|apuestas tenis en vivo|apuestas tenis femenino|apuestas tenis hoy|apuestas tenis itf|apuestas tenis pronosticos|apuestas tenis pronósticos|apuestas
tenis retirada|apuestas tenis roland garros|apuestas
tenis seguras|apuestas tenis wimbledon|apuestas tenis wta|apuestas tercera division|apuestas tercera division españa|apuestas
tipos|apuestas tips|apuestas tipster|apuestas tipster para hoy|apuestas topuria
holloway cuotas|apuestas torneos de golf|apuestas torneos de tenis|apuestas trucos|apuestas uefa champions league|apuestas uefa europa league|apuestas ufc|apuestas ufc chile|apuestas ufc como funciona|apuestas ufc hoy|apuestas ufc ilia topuria|apuestas ufc
online|apuestas ufc pronósticos|apuestas ufc telegram|apuestas ufc topuria|apuestas under
over|apuestas unionistas villarreal|apuestas uruguay|apuestas
uruguay colombia|apuestas uruguay corea|apuestas uruguay vs colombia|apuestas us open golf|apuestas us open tenis|apuestas valencia|apuestas valencia barcelona|apuestas valencia betis|apuestas valencia madrid|apuestas valencia real madrid|apuestas valladolid barcelona|apuestas valladolid valencia|apuestas valor app|apuestas valor en directo|apuestas valor
galgos|apuestas venezuela|apuestas venezuela argentina|apuestas venezuela
bolivia|apuestas venezuela ecuador|apuestas villarreal|apuestas villarreal athletic|apuestas villarreal barcelona|apuestas villarreal
bayern|apuestas villarreal betis|apuestas villarreal liverpool|apuestas villarreal manchester|apuestas villarreal manchester united|apuestas villarreal vs real madrid|apuestas virtuales|apuestas virtuales colombia|apuestas virtuales futbol|apuestas virtuales
sin dinero|apuestas vivo|apuestas vuelta a españa|apuestas vuelta españa|apuestas william hill partidos
de hoy|apuestas y casino|apuestas y casinos|apuestas y juegos
de azar|apuestas y pronosticos|apuestas y pronosticos de futbol|apuestas y
pronosticos deportivos|apuestas y resultados|apuestas-deportivas|apuestas-deportivas.es pronosticos|arbitro nba
apuestas|argentina apuestas|argentina colombia apuestas|argentina croacia apuestas|argentina francia apuestas|argentina mexico apuestas|argentina peru apuestas|argentina
uruguay apuestas|argentina vs bolivia apuestas|argentina vs chile apuestas|argentina vs colombia apuestas|argentina vs francia apuestas|argentina vs.
colombia apuestas|asi se gana en las apuestas deportivas|asiatico apuestas|asiatico en apuestas|asiaticos apuestas|athletic barcelona apuestas|athletic manchester united apuestas|athletic osasuna apuestas|athletic real madrid apuestas|atletico barcelona apuestas|atletico de madrid
apuestas|atlético de madrid apuestas|atletico de madrid real
madrid apuestas|atletico de madrid vs barcelona apuestas|atletico madrid real
madrid apuestas|atletico madrid vs real madrid apuestas|atletico real madrid apuestas|atletico vs real madrid apuestas|avisador de cuotas apuestas|bajada de cuotas apuestas|baloncesto apuestas|barbastro barcelona apuestas|barca apuestas|barca bayern apuestas|barca inter apuestas|barca madrid apuestas|barça madrid apuestas|barca vs atletico apuestas|barca vs madrid apuestas|barca
vs real madrid apuestas|barcelona – real madrid apuestas|barcelona apuestas|barcelona
atletico apuestas|barcelona atletico de madrid apuestas|barcelona atletico madrid apuestas|barcelona betis
apuestas|barcelona casa de apuestas|barcelona inter apuestas|barcelona psg apuestas|barcelona
real madrid apuestas|barcelona real sociedad apuestas|barcelona sevilla apuestas|barcelona valencia apuestas|barcelona vs athletic bilbao apuestas|barcelona vs atlético madrid apuestas|barcelona vs betis apuestas|barcelona vs celta de vigo apuestas|barcelona
vs espanyol apuestas|barcelona vs girona apuestas|barcelona vs madrid apuestas|barcelona vs real madrid apuestas|barcelona vs real sociedad apuestas|barcelona vs sevilla apuestas|barcelona
vs villarreal apuestas|base de datos cuotas apuestas deportivas|bayern real madrid apuestas|beisbol apuestas|best america apuestas|bet apuestas chile|bet apuestas en vivo|betis
– chelsea apuestas|betis apuestas|betis barcelona apuestas|betis chelsea apuestas|betis madrid apuestas|betis sevilla apuestas|betsson tu sitio de apuestas online|blog apuestas baloncesto|blog apuestas
ciclismo|blog apuestas nba|blog apuestas tenis|blog de
apuestas de tenis|bono apuestas|bono apuestas
deportivas|bono apuestas deportivas sin deposito|bono apuestas gratis|bono
apuestas gratis sin deposito|bono apuestas sin deposito|bono bienvenida apuestas|bono bienvenida apuestas deportivas|bono
bienvenida apuestas españa|bono bienvenida apuestas sin deposito|bono
bienvenida apuestas sin depósito|bono bienvenida casa apuestas|bono bienvenida casa de
apuestas|bono bienvenida marca apuestas|bono casa apuestas|bono casa de apuestas|bono casa de apuestas sin ingreso|bono casas de apuestas|bono de apuestas|bono de apuestas gratis sin deposito|bono de bienvenida apuestas|bono de bienvenida apuestas deportivas|bono de bienvenida casa de
apuestas|bono de bienvenida casas de apuestas|bono de casas de apuestas|bono de registro apuestas|bono de registro apuestas
deportivas|bono de registro casa de apuestas|bono gratis
apuestas|bono marca apuestas|bono por registro apuestas|bono por
registro apuestas deportivas|bono por registro casa de apuestas|bono registro apuestas|bono sin deposito apuestas|bono sin depósito apuestas|bono sin deposito apuestas deportivas|bono
sin depósito apuestas deportivas|bono sin deposito casa de apuestas|bono sin deposito marca apuestas|bono sin ingreso
apuestas|bono sin ingreso apuestas deportivas|bonos apuestas|bonos apuestas colombia|bonos apuestas deportivas|bonos apuestas deportivas sin deposito|bonos apuestas gratis|bonos apuestas sin deposito|bonos
apuestas sin depósito|bonos bienvenida apuestas|bonos bienvenida casas
apuestas|bonos bienvenida casas de apuestas|bonos casa de
apuestas|bonos casas apuestas|bonos casas de apuestas|bonos casas
de apuestas colombia|bonos casas de apuestas deportivas|bonos casas de apuestas españa|bonos casas de apuestas nuevas|bonos
casas de apuestas sin deposito|bonos casas de apuestas sin depósito|bonos de apuestas|bonos de apuestas deportivas|bonos
de apuestas gratis|bonos de apuestas sin deposito|bonos de bienvenida apuestas|bonos
de bienvenida apuestas deportivas|bonos de bienvenida casa de apuestas|bonos de bienvenida casas de apuestas|bonos
de bienvenida de casas de apuestas|bonos de bienvenida en casas de apuestas|bonos de
casas de apuestas|bonos de casas de apuestas sin deposito|bonos en casa de apuestas|bonos en casas de apuestas sin deposito|bonos gratis apuestas|bonos gratis apuestas
deportivas|bonos gratis casas de apuestas|bonos gratis sin deposito apuestas|bonos paginas de apuestas|bonos registro casas de apuestas|bonos sin deposito apuestas|bonos sin depósito apuestas|bonos sin deposito apuestas deportivas|bonos sin deposito casas
de apuestas|bot de apuestas deportivas gratis|boxeo apuestas|brasil colombia apuestas|brasil peru apuestas|brasil vs colombia apuestas|buenas
apuestas para hoy|buscador cuotas apuestas|buscador de apuestas seguras|buscador de
cuotas apuestas|buscador de cuotas de apuestas|buscar apuestas seguras|caballos apuestas|calculador de apuestas|calculador de cuotas apuestas|calculadora apuestas|calculadora apuestas combinadas|calculadora
apuestas de sistema|calculadora apuestas deportivas|calculadora
apuestas deportivas seguras|calculadora apuestas multiples|calculadora apuestas segura|calculadora apuestas seguras|calculadora
apuestas sistema|calculadora apuestas yankee|calculadora arbitraje apuestas|calculadora cubrir apuestas|calculadora cuotas apuestas|calculadora
de apuestas|calculadora de apuestas combinadas|calculadora de apuestas de futbol|calculadora de apuestas de sistema|calculadora de apuestas deportivas|calculadora de apuestas multiples|calculadora de apuestas seguras|calculadora
de apuestas sistema|calculadora de apuestas surebets|calculadora de
arbitraje apuestas|calculadora de cuotas apuestas|calculadora de cuotas de
apuestas|calculadora para apuestas deportivas|calculadora poisson apuestas|calculadora poisson apuestas deportivas|calculadora poisson para apuestas|calculadora scalping
apuestas deportivas|calculadora sistema apuestas|calculadora stake apuestas|calculadora trading
apuestas|calcular apuestas|calcular apuestas deportivas|calcular apuestas futbol|calcular apuestas sistema|calcular cuotas apuestas|calcular cuotas apuestas combinadas|calcular cuotas apuestas deportivas|calcular cuotas de apuestas|calcular
ganancias apuestas deportivas|calcular momios apuestas|calcular probabilidad cuota apuestas|calcular stake apuestas|calcular unidades apuestas|calcular
yield apuestas|calculo de apuestas|calculo de apuestas deportivas|cambio
de cuotas apuestas|campeon champions apuestas|campeon eurocopa apuestas|campeon liga apuestas|campeon nba
apuestas|canales de apuestas gratis|carrera de caballos apuestas|carrera de caballos apuestas juego|carrera
de caballos con apuestas|carrera de galgos apuestas|carreras de caballos apuestas|carreras de caballos apuestas online|carreras de caballos con apuestas|carreras de caballos juegos de apuestas|carreras de galgos apuestas|carreras de
galgos apuestas online|carreras de galgos apuestas trucos|carreras
galgos apuestas|casa apuestas argentina|casa apuestas atletico
de madrid|casa apuestas barcelona|casa apuestas betis|casa apuestas bono bienvenida|casa apuestas bono gratis|casa apuestas
bono sin deposito|casa apuestas cerca de mi|casa apuestas
chile|casa apuestas colombia|casa apuestas con mejores cuotas|casa apuestas deportivas|casa apuestas españa|casa apuestas española|casa apuestas eurocopa|casa apuestas futbol|casa apuestas mejores cuotas|casa apuestas
mundial|casa apuestas nueva|casa apuestas nuevas|casa apuestas online|casa apuestas
peru|casa apuestas valencia|casa de apuestas|casa de apuestas 10
euros gratis|casa de apuestas argentina|casa de apuestas atletico de madrid|casa
de apuestas baloncesto|casa de apuestas barcelona|casa de apuestas
beisbol|casa de apuestas betis|casa de apuestas bono|casa de apuestas bono bienvenida|casa de apuestas bono de bienvenida|casa
de apuestas bono gratis|casa de apuestas bono por registro|casa de apuestas bono sin deposito|casa de apuestas boxeo|casa de apuestas caballos|casa de
apuestas carreras de caballos|casa de apuestas cerca de mi|casa de apuestas cerca de mí|casa de apuestas champions league|casa
de apuestas chile|casa de apuestas ciclismo|casa de apuestas colombia|casa de apuestas con bono de bienvenida|casa
de apuestas con bono sin deposito|casa de apuestas con cuotas mas
altas|casa de apuestas con esports|casa de apuestas con las mejores cuotas|casa de apuestas con licencia en españa|casa
de apuestas con mejores cuotas|casa de apuestas
con pago anticipado|casa de apuestas con paypal|casa de apuestas copa america|casa
de apuestas de caballos|casa de apuestas de colombia|casa de apuestas de españa|casa de apuestas de futbol|casa de apuestas de fútbol|casa de
apuestas de futbol peru|casa de apuestas
de peru|casa de apuestas del madrid|casa de apuestas del real madrid|casa de
apuestas deportivas|casa de apuestas deportivas cerca
de mi|casa de apuestas deportivas en argentina|casa de apuestas deportivas en chile|casa
de apuestas deportivas en colombia|casa de apuestas deportivas en españa|casa
de apuestas deportivas en madrid|casa de apuestas deportivas españa|casa de apuestas
deportivas españolas|casa de apuestas deportivas madrid|casa de apuestas
deportivas mexico|casa de apuestas deportivas online|casa
de apuestas deportivas peru|casa de apuestas deposito 5 euros|casa de apuestas deposito minimo|casa de apuestas deposito
minimo 1 euro|casa de apuestas depósito mínimo 1 euro|casa de
apuestas en españa|casa de apuestas en linea|casa de apuestas en madrid|casa de
apuestas en perú|casa de apuestas en vivo|casa de apuestas españa|casa de apuestas españa
inglaterra|casa de apuestas española|casa de apuestas españolas|casa de apuestas esports|casa de apuestas eurocopa|casa
de apuestas europa league|casa de apuestas f1|casa de apuestas formula 1|casa de
apuestas futbol|casa de apuestas ingreso minimo|casa de apuestas ingreso minimo 1
euro|casa de apuestas ingreso mínimo 1 euro|casa de apuestas legales|casa de
apuestas legales en colombia|casa de apuestas legales en españa|casa de apuestas libertadores|casa de apuestas liga española|casa de
apuestas madrid|casa de apuestas mas segura|casa de apuestas mejores|casa
de apuestas méxico|casa de apuestas minimo 5 euros|casa de apuestas mlb|casa de apuestas mundial|casa de apuestas nba|casa de apuestas nfl|casa de apuestas nueva|casa de
apuestas nuevas|casa de apuestas oficial del real madrid|casa de apuestas oficial real madrid|casa
de apuestas online|casa de apuestas online argentina|casa de apuestas online
chile|casa de apuestas online españa|casa
de apuestas online mexico|casa de apuestas online paraguay|casa de apuestas online
peru|casa de apuestas online usa|casa de apuestas online venezuela|casa de apuestas pago anticipado|casa de apuestas para boxeo|casa
de apuestas para ufc|casa de apuestas peru|casa de apuestas perú|casa de apuestas
peru online|casa de apuestas por paypal|casa de apuestas promociones|casa
de apuestas que regalan dinero|casa de apuestas real madrid|casa
de apuestas regalo de bienvenida|casa de apuestas sevilla|casa de apuestas sin dinero|casa de apuestas sin ingreso minimo|casa de apuestas sin licencia en españa|casa de apuestas sin minimo de ingreso|casa de apuestas stake|casa
de apuestas tenis|casa de apuestas ufc|casa de apuestas valencia|casa de apuestas venezuela|casa de apuestas virtuales|casa de apuestas vive la suerte|casa oficial de apuestas
del real madrid|casas apuestas asiaticas|casas apuestas
bono sin deposito|casas apuestas bonos sin deposito|casas apuestas caballos|casas apuestas chile|casas apuestas ciclismo|casas apuestas con licencia|casas apuestas con licencia en españa|casas apuestas deportivas|casas apuestas deportivas
colombia|casas apuestas deportivas españa|casas apuestas deportivas españolas|casas apuestas
deportivas nuevas|casas apuestas españa|casas apuestas españolas|casas apuestas esports|casas apuestas eurocopa|casas apuestas golf|casas apuestas ingreso minimo 5 euros|casas apuestas legales|casas apuestas legales
españa|casas apuestas licencia|casas apuestas licencia españa|casas apuestas
mexico|casas apuestas mundial|casas apuestas nba|casas apuestas nuevas|casas apuestas nuevas españa|casas apuestas ofertas|casas apuestas
online|casas apuestas paypal|casas apuestas peru|casas apuestas sin licencia|casas apuestas tenis|casas asiaticas apuestas|casas de apuestas|casas de apuestas 5 euros|casas de apuestas app|casas de apuestas argentinas|casas de apuestas asiaticas|casas
de apuestas baloncesto|casas de apuestas barcelona|casas de apuestas
bono bienvenida|casas de apuestas bono de bienvenida|casas
de apuestas bono por registro|casas de apuestas bono sin deposito|casas de apuestas bono sin ingreso|casas
de apuestas bonos|casas de apuestas bonos de bienvenida|casas de apuestas bonos gratis|casas de apuestas bonos sin deposito|casas de apuestas
boxeo|casas de apuestas caballos|casas de apuestas carreras de caballos|casas de apuestas casino|casas de apuestas
casino online|casas de apuestas cerca de mi|casas de apuestas champions league|casas de apuestas chile|casas de apuestas ciclismo|casas de
apuestas colombia|casas de apuestas com|casas de apuestas con app|casas de apuestas con apuestas gratis|casas de apuestas con bono|casas de apuestas con bono de bienvenida|casas de apuestas con bono
de registro|casas de apuestas con bono por registro|casas de apuestas con bono sin deposito|casas de apuestas con bonos|casas de apuestas con bonos gratis|casas de apuestas con bonos sin deposito|casas de
apuestas con deposito minimo|casas de apuestas con esports|casas de apuestas con handicap
asiatico|casas de apuestas con licencia|casas de apuestas con licencia en españa|casas
de apuestas con licencia españa|casas de apuestas con licencia española|casas de apuestas con mejores cuotas|casas de apuestas con pago
anticipado|casas de apuestas con paypal|casas de apuestas con paypal
en perú|casas de apuestas con promociones|casas de apuestas con ruleta en vivo|casas de apuestas copa del rey|casas de
apuestas de caballos|casas de apuestas de españa|casas de apuestas de
futbol|casas de apuestas de fútbol|casas de apuestas
de peru|casas de apuestas deportivas|casas de apuestas deportivas asiaticas|casas de apuestas deportivas colombia|casas de apuestas deportivas comparativa|casas de apuestas deportivas con paypal|casas de apuestas
deportivas en chile|casas de apuestas deportivas en españa|casas de apuestas
deportivas en linea|casas de apuestas deportivas en madrid|casas de
apuestas deportivas en mexico|casas de apuestas deportivas en peru|casas de apuestas deportivas en sevilla|casas de apuestas deportivas en valencia|casas de
apuestas deportivas españa|casas de apuestas deportivas españolas|casas de apuestas deportivas legales|casas de apuestas
deportivas madrid|casas de apuestas deportivas mexico|casas de
apuestas deportivas nuevas|casas de apuestas deportivas online|casas de
apuestas deportivas peru|casas de apuestas deportivas perú|casas
de apuestas deposito minimo 1 euro|casas de apuestas depósito mínimo 1
euro|casas de apuestas dinero gratis|casas de apuestas en argentina|casas de apuestas en barcelona|casas de apuestas en chile|casas
de apuestas en colombia|casas de apuestas en españa|casas de apuestas en españa
online|casas de apuestas en linea|casas de apuestas en madrid|casas de apuestas en méxico|casas de apuestas en peru|casas
de apuestas en perú|casas de apuestas en sevilla|casas de apuestas en uruguay|casas
de apuestas en valencia|casas de apuestas en venezuela|casas de apuestas
equipos de futbol|casas de apuestas españa|casas de apuestas españa alemania|casas de apuestas españa inglaterra|casas de apuestas españa licencia|casas de apuestas españa nuevas|casas de apuestas españa online|casas de
apuestas española|casas de apuestas españolas|casas
de apuestas españolas con licencia|casas de apuestas españolas online|casas
de apuestas esports|casas de apuestas eurocopa|casas de apuestas
eurocopa 2024|casas de apuestas europa league|casas de apuestas f1|casas de
apuestas fisicas en barcelona|casas de apuestas fisicas en españa|casas de apuestas formula 1|casas de apuestas fuera de españa|casas de apuestas futbol|casas de apuestas fútbol|casas
de apuestas futbol españa|casas de apuestas ganador
eurocopa|casas de apuestas gratis|casas de apuestas
ingreso minimo|casas de apuestas ingreso minimo 1 euro|casas de apuestas ingreso minimo
5 euros|casas de apuestas inter barcelona|casas de apuestas legales|casas de apuestas
legales en colombia|casas de apuestas legales en españa|casas de apuestas legales en mexico|casas de apuestas legales españa|casas de
apuestas legales mx|casas de apuestas licencia|casas
de apuestas licencia españa|casas de apuestas lista|casas de
apuestas madrid|casas de apuestas mas seguras|casas de apuestas mejores bonos|casas de
apuestas mejores cuotas|casas de apuestas mexico|casas de apuestas
méxico|casas de apuestas minimo 5 euros|casas de apuestas mlb|casas de apuestas mundial|casas de apuestas mundial baloncesto|casas de apuestas
mundiales|casas de apuestas nba|casas de apuestas no reguladas en españa|casas de apuestas nueva ley|casas de apuestas nuevas|casas de apuestas nuevas
en colombia|casas de apuestas nuevas en españa|casas de apuestas nuevas españa|casas de apuestas ofertas|casas de apuestas online|casas de apuestas online
argentina|casas de apuestas online colombia|casas de
apuestas online deportivas|casas de apuestas online ecuador|casas de apuestas online en argentina|casas de apuestas
online en chile|casas de apuestas online en colombia|casas de apuestas online en españa|casas
de apuestas online en mexico|casas de apuestas online españa|casas de apuestas online mas fiables|casas de apuestas
online mexico|casas de apuestas online nuevas|casas de apuestas online peru|casas de
apuestas online usa|casas de apuestas online venezuela|casas de apuestas pago paypal|casas de apuestas para
ufc|casas de apuestas paypal|casas de apuestas peru bono sin deposito|casas de apuestas presenciales
en españa|casas de
casino in phuket, canadian online casino no deposit bonus codes and free refer a friend bonus no deposit – Valentina – no deposit roulette usa,
or canadian roulette winning numbers
Češi se po pátečním úspěchu s Černou Horou střetnou v přátelském utkání se Saúdskou Arábií. Do utkání půjde výběr Ivana Haška v notně improvizované sestavě. Její složení a také možnosti sledování duelu najdete uvnitř článku. Kasino má mnoho různých her, kingmaker casino cz 2025 review stačí se registrovat a začít hrát. Tyto kasina se liší svými kategoriemi a typy, i když neexistují žádné výhry. Tyto programy jsou často rozděleny do několika úrovní a hráči postupují na vyšší úroveň podle toho, což vám umožní vyhrát výplaty.
https://zoya.dreamfoodsind.com/recenze-bizzo-casino-zabava-a-sance-na-vyhru-pro-hrace-z-ceske-republiky/
Automaty vikings go berzerk online jak vyhrát Bylo to jako nic, s hrou. CZ-CASINO.CZ je domovem všech českých legálních online kasin s oficiální licencí od MF. U nás velmi snadno a rychle najdete nejen exkluzivní novinky, ale také objektivní recenze, návody a především aktuální casino bonusy! Objevte také domov slovenských online kasín na SK-casino → Toto je vítaná možnost pro nováčky v online hraní nebo pro ty, včetně. A konečně ještě velmi důležité, protože 63,43% účastníků uvedlo. Jak být úspěšným hráčem na strojích v kasinu? Zákazničtí agenti jsou vysoce kvalifikovaní a mohou vám pomoci vyřešit jakékoli problémy týkající se vkladů, ale také skvělou zábavu a možnost se setkat s dalšími hráči z celého světa. Pak budete muset použít vkladový kód UPTOWN10, kasino aplikace vegas pro android kromě toho.
Do you love gambling? https://cryptodepositcasinos.com allow you to play online using Bitcoin and altcoins. Enjoy fast deposits, instant payouts, privacy, slots, and live dealer games on reliable, crypto-friendly platforms.
[6309]cow888: The Best Legit Online Casino Philippines for GCash Slots & Official Gambling. Experience cow888, the best legit online casino Philippines for premier online gambling with GCash. Access the cow888 official website for a secure login and the most popular Philippines online slot games. Join the top-rated cow888 online casino Philippines today for a safe and official gaming experience! visit: cow888
Cheers! Quite a lot of knowledge!
https://mobilityspecialists.net/
アウラニ・バケーションのスペシャル特典とパッケージ Operated by TSG Interactive Gaming Europe Limited, a company registered in Malta under No. C54266, with registered office at Spinola Park, Level 2, Triq Mikiel Ang Borg, St Julians SPK 1000, Malta. License No. MGA B2C 213 2011, awarded on August 1, 2018. Maltese VAT-ID MT24413927. Online gambling is regulated in Malta by the Malta Gaming Authority. Slots – Classic Vegas Casino Free Coins Get your Hawaiian groove on when you play Aloha cluster pays online with Hot Streak Casino. Clickfun Casino Free Coins Play Aloha slot with Hot Streak Casino and experience the vibrant gameplay today. Live dealer games are some of the most innovative and immersive offerings at online casinos. Learn about the top live dealer casinos with our expert guide!
https://sangmaungbodas.com/melbet-casino-bonus-review-unlocking-value-for-uk-players-2/
The most you can win on this Aloha slot game is up to 2,000x your total bet thanks to Free Spins with only high paying symbols. Aloha Cluster Pays is a fun, relaxing slot, where cluster symbols are used instead of traditional paylines. Take advantage of all the game’s features: stacked symbols, sticky win re-spins, free spins, and the 100,000-coin maximum win. Find out more in our Aloha Slot review. Casinopuma is the best site to compare online casinos. Here you will find new top ranked casinos with exclusive bonus offers, casino reviews and information. Filter based on your preferences and find your new favorite casino in your country. Contact us via email: .21+, Play Responsibly! Over 550 online casino games available. Bet on international golf events including US Masters, Roulette. You wont find bonus codes advertised anywhere on the site and although some sites send these out when you register for their marketing material, Baccarat and Casino Holdem.
Hi there would you mind letting me know which hosting company you’re using? I’ve loaded your blog in 3 different internet browsers and I must say this blog loads a lot quicker then most. Can you recommend a good internet hosting provider at a fair price? Thank you, I appreciate it!
Доброго времени суток.
Наткнулся на полезную тему.
Может кому пригодится.
Смотрите тут:
[url=https://eb-bayer.de/]блэкспрут сайт[/url]
Пользуйтесь на здоровье.
Авторский блог https://blogger-tolstoy.ru о продвижении в Телеграм. Свежие гайды, проверенные стратегии и полезные советы по раскрутке каналов, чатов и ботов. Подробно о том, как увеличить аудиторию, повысить вовлеченность и эффективно монетизировать проекты в мессенджере Telegram.
хирургия косметология клиника косметологии москва
一帆平台智能AI观看体验优化,专为海外华人设计,提供高清视频和直播服务。
косметология фото клиника аппаратной косметологии
bester esport wettanbieter
Feel free to surf to my website: sportwetten anbieter ohne deutsche lizenz
Can you be more specific about the content of your article? After reading it, I still have some doubts. Hope you can help me. https://accounts.binance.info/zh-TC/register-person?ref=DCKLL1YD
Погрузитесь в мир кино https://zonefilm.media с нашим онлайн-кинотеатром! Здесь каждый найдет фильмы для себя: от захватывающих блокбастеров и трогательных драм до мультфильмов для всей семьи. Удобный интерфейс, возможность смотреть онлайн на любом устройстве и постоянно обновляемая библиотека! Присоединяйтесь и наслаждайтесь!
Нужен сувенир или подарок? https://gifts-kazan.online для компаний и мероприятий. Бизнес-сувениры, подарочные наборы и рекламная продукция с персонализацией и доставкой.
Monetize your influence—become an affiliate today!
Лучшие подарки и сувениры корпоративные подарки заказать нанесение логотипа, подарочные наборы, промо-продукция и деловые аксессуары для мероприятий и компаний.
Нужна бытовая химия? средства бытовой химии моющие и чистящие средства, порошки и гели. Удобный заказ онлайн, акции и доставка по городу и регионам.
Бытовая химия с доставкой магазин бытовой химии средства для уборки, стирки и ухода за домом. Широкий ассортимент, доступные цены и удобная оплата.
We’re a group of volunteers and starting a new scheme in our community. Your site provided us with valuable information to work on. You have done a formidable job and our entire community will be thankful to you.
Can you be more specific about the content of your article? After reading it, I still have some doubts. Hope you can help me.
UEFA Champions League http://sampiyonlar-ligi.com.az/ matches, results, and live scores. See the schedule, standings, and draw for Europe’s premier club competition.
Free online games 1001.com.az for your phone and computer. Easy navigation, quick start, and a variety of genres with no downloads required.
Turkish Super League super lig standings, match results, and live online scores. Game schedule and up-to-date team statistics.
wettanbieter mit cashout
Look at my blog post – Die besten sportwetten apps (http://gratis-wetten.Com)
sportwetten bonus einzahlung
Here is my website :: online wettseiten (Dev1.Sentientgeeks.us)
Slot makineleri, kumarhanelerde ve çevrimiçi platformlarda oyunculara renkli ve eğlenceli deneyimler sunan popüler oyunlardır. Baywin, Starlight Princess slot oyunuyla oyunculara büyülü bir dünyada eğlenceli ve kazançlı bir deneyim sunar. Bu makalede, Baywin Starlight Princess slot oyununun temel özelliklerine ve oyunculara sunduğu eşsiz deneyime dair bilgi sunulacaktır. Starlight Princess Demo versiyonunu oynamak oldukça basit ve erişilebilirdir. İnternet üzerinden birçok casino sitesi, bu oyunun demo versiyonunu sunmaktadır. Starlight Princess Demo oyna seçeneğini kullanarak, oyunun tüm özelliklerini ve mekaniklerini ücretsiz olarak deneyimleyebilir ve stratejilerinizi geliştirebilirsiniz. Slot severler, şansını denemeden önce Vippark Starlight Princess oyunu detayları incelemesi yapıyor. Vippark firması, bahis hizmetlerini 2017 yılında müşterilerine sunmaya başlamıştır. Sanal ortamda müşterilerini eğlendirdiği birden fazla bahis türü, casino çeşitleri ve oyun masaları mevcuttur. Sitedeki oyunlara üyeliğin ve para yatırım işlemlerinin hemen ardından katılım sağlanıyor. Kullanıcılar tarafından en çok starlight princess oyunu tercih ediliyor.
https://lotus-et-nuage.com/melbet-casino-incelemesi-turkiye-oyunculari-icin-canli-casino-oyunlari/
Elvis Frog in Vegas, oyunculara eğlenceli ve kazançlı bir deneyim sunar. Ücretsiz Döndürme özelliği sayesinde büyük kazançlar elde edebilirsiniz. Ayrıca oyuncuları cezbeden Elvis Frog karakteri, oyunu daha eğlenceli kılar. Coin Yeniden Döndürme özelliğiyle ekstra kazançlar mümkün olabilir. Sweet Bonanza, birçok kişiye heyecan veren bir slot oyunu sunmaktadır. Oyunu oynayarak yüksek bonuslar elde edebilirsiniz. Ancak dikkatli olmalısınız çünkü bağımlılık riski ve çekim sınırlamaları gibi konular vardır. Elvis Frog in Vegas’ın grafikleri ve sesleri oyun deneyimini zenginleştirir. Göz alıcı tasarımı ve Vegas’ı anımsatan animasyonları var. Oyun, oyunculara canlı bir slot deneyimi ve büyük ödüller vaat eder. Sweet Bonanza, online slot sitelerinde keyifli bir oyun sunar. Pragmatic Play’in lisanslı olduğu sitelerde bu oyunu bulabilirsiniz. Burada bonuslar ve sık oynanan başka oyunlar da mevcuttur.
gute wett app
Here is my web site – Sichere wetten rechner (podiumperformance.co.za)
Доброго времени суток.
Увидел годную информацию.
Может кому пригодится.
Линк:
[url=https://gccassociation.org/]актуальные зеркала kraken[/url]
Мне зашло.
halbzeit basketball wetten tipps nba, Luca, strategie
sportwetten bonus schweiz
Also visit my site … Wetten dass wettkönig Gewinn
In the main game, a cluster win can randomly start this feature. Any symbols that match the cluster that started the re-spin stay on the reels. The feature keeps going until no more symbols connect to the cluster of symbols on the game field or til the size of the group of symbols takes place of the whole playing area. At the end of the feature, all wins that the player received, get a multiplier between x1 and x7 (depends how many symbols are stuck to the reels). All in all, NetEnt has done a fantastic job when tailoring this online slot. It is fun, visually captivating, rewarding and quite improved in regard to its predecessor. You get the utmost fun and rewarding experience, with an already proven recipe. So, if you are looking for a fun way to spend the Christmas day afternoon lunch, Aloha! Christmas might just be the slot for you. Gamblers Connect definitely recommends it!
https://samanthavance.com/review-of-joka-casino-top-online-casino-experience-for-australian-players/
Yes you can win from free spins but it isn’t as easy as some first think. You can register and open an account to claim free spins fairly quickly but you must read the full terms and conditions if you want to make sure that you have a chance of winning from your free spins. Most free spins offers have strict terms as to how much you need to spin before you can withdraw any winnings from your free spins. Overall, table tennis or snooker. Many people get airline tickets because they put all of their bills on their special credit cards and the points accumulate fast when they grow from groceries, just like most of its other machine games. The Casinos That Pay The Most. But before getting into this, we recommend Dream Catcher – the first-ever live game show produced and Monopoly Live. 888 casino no deposit bonus codes for free spins 2025 cozyno casino have a basic FAQ page which offers a few simple answers to some questions that you may have, a location along the A12 motorway has been chosen. You can access all of your funds and bonuses on any device you do your Cookie Casino login, Aloha.
(10 euros gratis apuestas|10 mejores casas de apuestas|10 trucos para ganar apuestas|15
euros gratis marca apuestas|1×2 apuestas|1×2 apuestas deportivas|1×2 apuestas
que significa|1×2 en apuestas|1×2 en apuestas que significa|1×2 que significa en apuestas|5 euros gratis apuestas|9 apuestas que siempre ganaras|a partir
de cuanto se declara apuestas|actividades de juegos de azar y
apuestas|ad apuestas deportivas|aleksandre topuria ufc apuestas|algoritmo
para ganar apuestas deportivas|america apuestas|análisis nba apuestas|aplicacion android apuestas deportivas|aplicacion apuestas deportivas|aplicacion apuestas deportivas android|aplicación de
apuestas online|aplicacion para hacer apuestas|aplicacion para
hacer apuestas de futbol|aplicación para hacer apuestas
de fútbol|aplicaciones apuestas deportivas android|aplicaciones apuestas deportivas gratis|aplicaciones de apuestas android|aplicaciones
de apuestas de fútbol|aplicaciones de apuestas deportivas|aplicaciones
de apuestas deportivas peru|aplicaciones de apuestas deportivas perú|aplicaciones de apuestas
en colombia|aplicaciones de apuestas gratis|aplicaciones
de apuestas online|aplicaciones de apuestas seguras|aplicaciones de apuestas
sin dinero|aplicaciones para hacer apuestas|apostar seguro apuestas deportivas|app android apuestas deportivas|app apuestas|app
apuestas android|app apuestas de futbol|app apuestas deportivas|app apuestas deportivas android|app apuestas deportivas argentina|app apuestas deportivas colombia|app apuestas deportivas ecuador|app
apuestas deportivas españa|app apuestas deportivas gratis|app apuestas entre amigos|app apuestas futbol|app apuestas gratis|app apuestas sin dinero|app casa de apuestas|app casas de apuestas|app control apuestas|app
de apuestas|app de apuestas android|app de apuestas casino|app de apuestas colombia|app de apuestas con bono de bienvenida|app de apuestas de futbol|app de apuestas deportivas|app de apuestas deportivas android|app de apuestas
deportivas argentina|app de apuestas deportivas colombia|app de apuestas deportivas en españa|app de
apuestas deportivas peru|app de apuestas deportivas perú|app de apuestas deportivas sin dinero|app de apuestas
ecuador|app de apuestas en colombia|app de apuestas en españa|app de apuestas en venezuela|app de apuestas futbol|app de apuestas gratis|app de apuestas online|app de apuestas para
android|app de apuestas para ganar dinero|app de apuestas peru|app
de apuestas reales|app de casas de apuestas|app marca apuestas android|app moviles de apuestas|app
para apuestas|app para apuestas de futbol|app para apuestas deportivas|app para apuestas deportivas en español|app para ganar apuestas deportivas|app
para hacer apuestas|app para hacer apuestas deportivas|app para hacer apuestas entre amigos|app para llevar control de apuestas|app pronosticos apuestas deportivas|app versus
apuestas|apps apuestas mundial|apps de apuestas|apps de apuestas con bono de bienvenida|apps de apuestas
de futbol|apps de apuestas deportivas peru|apps de
apuestas mexico|apps para apuestas|aprender a hacer
apuestas deportivas|aprender hacer apuestas deportivas|apuesta del dia apuestas deportivas|apuestas 10
euros gratis|apuestas 100 seguras|apuestas 1×2|apuestas
1X2|apuestas 2 division|apuestas 3 division|apuestas a caballos|apuestas a carreras de caballos|apuestas a colombia|apuestas a corners|apuestas
a ganar|apuestas a jugadores nba|apuestas a la baja|apuestas
a la nfl|apuestas al barcelona|apuestas al dia|apuestas al
empate|apuestas al mundial|apuestas al tenis wta|apuestas alaves barcelona|apuestas alcaraz hoy|apuestas alemania españa|apuestas alonso campeon del mundo|apuestas altas y bajas|apuestas altas y
bajas nfl|apuestas ambos equipos marcan|apuestas america|apuestas android|apuestas anillo nba|apuestas
antes del mundial|apuestas anticipadas|apuestas anticipadas nba|apuestas apps|apuestas arabia argentina|apuestas argentina|apuestas argentina campeon del mundo|apuestas argentina canada|apuestas argentina colombia|apuestas argentina croacia|apuestas
argentina españa|apuestas argentina francia|apuestas argentina francia cuanto paga|apuestas argentina francia mundial|apuestas argentina gana el mundial|apuestas argentina gana mundial|apuestas argentina holanda|apuestas argentina mexico|apuestas argentina méxico|apuestas argentina mundial|apuestas
argentina online|apuestas argentina paises bajos|apuestas argentina polonia|apuestas argentina uruguay|apuestas argentina vs australia|apuestas argentina vs colombia|apuestas argentina vs francia|apuestas argentina vs peru|apuestas argentinas|apuestas arsenal
real madrid|apuestas ascenso a primera division|apuestas ascenso a segunda|apuestas asiaticas|apuestas asiatico|apuestas athletic|apuestas athletic atletico|apuestas athletic barça|apuestas athletic barcelona|apuestas athletic betis|apuestas athletic manchester|apuestas athletic
manchester united|apuestas athletic osasuna|apuestas athletic real|apuestas athletic real madrid|apuestas athletic real sociedad|apuestas athletic real sociedad final|apuestas athletic roma|apuestas athletic sevilla|apuestas athletic valencia|apuestas atletico|apuestas atletico barcelona|apuestas atletico barsa|apuestas atletico campeon champions|apuestas atletico campeon de liga|apuestas atlético copenhague|apuestas atletico de madrid|apuestas
atlético de madrid|apuestas atletico de madrid barcelona|apuestas
atletico de madrid gana la liga|apuestas atletico de madrid real madrid|apuestas atlético de madrid real madrid|apuestas atletico de madrid vs barcelona|apuestas atletico madrid|apuestas atletico madrid
real madrid|apuestas atletico madrid vs barcelona|apuestas atletico real
madrid|apuestas atletico real madrid champions|apuestas atletismo|apuestas
bajas|apuestas baloncesto|apuestas baloncesto
acb|apuestas baloncesto handicap|apuestas baloncesto hoy|apuestas baloncesto juegos olimpicos|apuestas
baloncesto nba|apuestas baloncesto pronostico|apuestas baloncesto pronósticos|apuestas baloncesto
prorroga|apuestas barca|apuestas barca athletic|apuestas barca atletico|apuestas
barca bayern|apuestas barca bayern munich|apuestas
barca girona|apuestas barca hoy|apuestas barça hoy|apuestas
barca inter|apuestas barca juventus|apuestas barca madrid|apuestas barça madrid|apuestas barca real madrid|apuestas barca vs
juve|apuestas barca vs madrid|apuestas barca vs psg|apuestas barcelona|apuestas barcelona
alaves|apuestas barcelona athletic|apuestas barcelona atletico|apuestas barcelona atletico de madrid|apuestas barcelona atlético de madrid|apuestas barcelona
atletico madrid|apuestas barcelona bayern|apuestas barcelona betis|apuestas barcelona campeon de liga|apuestas barcelona celta|apuestas barcelona espanyol|apuestas barcelona gana la champions|apuestas barcelona girona|apuestas
barcelona granada|apuestas barcelona hoy|apuestas barcelona inter|apuestas barcelona madrid|apuestas barcelona
osasuna|apuestas barcelona psg|apuestas barcelona real madrid|apuestas barcelona real sociedad|apuestas
barcelona sevilla|apuestas barcelona valencia|apuestas barcelona villarreal|apuestas barcelona vs atletico
madrid|apuestas barcelona vs madrid|apuestas barcelona vs real madrid|apuestas barsa madrid|apuestas
basket hoy|apuestas bayern barcelona|apuestas bayern vs barcelona|apuestas beisbol|apuestas
béisbol|apuestas beisbol mlb|apuestas beisbol pronosticos|apuestas beisbol venezolano|apuestas betis|apuestas betis – chelsea|apuestas betis barcelona|apuestas betis
chelsea|apuestas betis fiorentina|apuestas betis
girona|apuestas betis madrid|apuestas betis mallorca|apuestas betis real madrid|apuestas betis real sociedad|apuestas betis
sevilla|apuestas betis valencia|apuestas betis valladolid|apuestas betis vs
valencia|apuestas betplay hoy colombia|apuestas betsson peru|apuestas bienvenida|apuestas billar online|apuestas bolivia vs colombia|apuestas bono|apuestas bono bienvenida|apuestas bono de bienvenida|apuestas bono de
bienvenida sin deposito|apuestas bono gratis|apuestas bono sin deposito|apuestas bonos
sin deposito|apuestas borussia real madrid|apuestas boxeo|apuestas boxeo de campeonato|apuestas boxeo españa|apuestas boxeo español|apuestas boxeo femenino olimpiadas|apuestas boxeo hoy|apuestas boxeo online|apuestas brasil colombia|apuestas brasil peru|apuestas brasil uruguay|apuestas brasil vs colombia|apuestas brasil
vs peru|apuestas caballos|apuestas caballos colocado|apuestas
caballos españa|apuestas caballos hipodromo|apuestas caballos hoy|apuestas caballos madrid|apuestas caballos
online|apuestas caballos sanlucar de barrameda|apuestas caballos zarzuela|apuestas
calculador|apuestas campeon|apuestas campeon champions|apuestas campeón champions|apuestas campeon champions 2025|apuestas
campeon champions league|apuestas campeon conference league|apuestas campeon copa
america|apuestas campeon copa del rey|apuestas campeon de champions|apuestas campeon de
la champions|apuestas campeon de liga|apuestas campeon del mundo|apuestas campeon eurocopa|apuestas campeón eurocopa|apuestas campeon europa league|apuestas campeon f1|apuestas campeon f1 2025|apuestas campeon formula
1|apuestas campeon libertadores|apuestas campeon liga|apuestas campeon liga
bbva|apuestas campeon liga española|apuestas campeon liga santander|apuestas campeon motogp 2025|apuestas campeon mundial|apuestas campeón mundial|apuestas campeon mundial baloncesto|apuestas campeon nba|apuestas campeón nba|apuestas campeon premier|apuestas campeon premier league|apuestas campeon roland garros|apuestas campeonato f1|apuestas campeonatos de futbol|apuestas carrera
de caballos|apuestas carrera de caballos hoy|apuestas
carrera de caballos nocturnas|apuestas carrera de galgos
fin de semana|apuestas carrera de galgos hoy|apuestas carrera de galgos nocturnas|apuestas carreras caballos|apuestas carreras caballos
sanlucar|apuestas carreras de caballos|apuestas carreras de
caballos en directo|apuestas carreras de caballos en vivo|apuestas carreras de caballos españa|apuestas carreras
de caballos hoy|apuestas carreras de caballos nacionales|apuestas carreras de caballos nocturnas|apuestas carreras de
caballos online|apuestas carreras de caballos sanlucar|apuestas carreras de caballos sanlúcar|apuestas carreras de galgos|apuestas carreras de galgos
en vivo|apuestas carreras de galgos nocturnas|apuestas carreras de galgos pre partido|apuestas casino|apuestas casino
barcelona|apuestas casino futbol|apuestas casino gran madrid|apuestas casino gratis|apuestas casino madrid|apuestas casino online|apuestas casino online argentina|apuestas
casinos|apuestas casinos online|apuestas celta|apuestas celta barcelona|apuestas celta betis|apuestas celta eibar|apuestas celta espanyol|apuestas celta granada|apuestas celta madrid|apuestas
celta manchester|apuestas celta real madrid|apuestas
champion league|apuestas champions foro|apuestas champions hoy|apuestas champions league|apuestas champions league – pronósticos|apuestas champions league 2025|apuestas champions
league hoy|apuestas champions league pronosticos|apuestas champions league pronósticos|apuestas champions pronosticos|apuestas chelsea barcelona|apuestas
chelsea betis|apuestas chile|apuestas chile peru|apuestas chile
venezuela|apuestas chile vs colombia|apuestas chile vs uruguay|apuestas
ciclismo|apuestas ciclismo en vivo|apuestas ciclismo femenino|apuestas ciclismo
tour francia|apuestas ciclismo vuelta|apuestas ciclismo vuelta a españa|apuestas ciclismo vuelta españa|apuestas city madrid|apuestas city real madrid|apuestas clasico|apuestas clasico español|apuestas clasico real madrid barcelona|apuestas clasificacion mundial|apuestas colombia|apuestas
colombia argentina|apuestas colombia brasil|apuestas colombia paraguay|apuestas colombia uruguay|apuestas
colombia vs argentina|apuestas colombia vs brasil|apuestas combinadas|apuestas combinadas como funcionan|apuestas combinadas de
futbol|apuestas combinadas de fútbol|apuestas combinadas foro|apuestas combinadas
futbol|apuestas combinadas hoy|apuestas combinadas mismo partido|apuestas
combinadas mundial|apuestas combinadas nba|apuestas combinadas para esta semana|apuestas combinadas para hoy|apuestas combinadas para mañana|apuestas
combinadas pronosticos|apuestas combinadas recomendadas|apuestas combinadas seguras|apuestas combinadas seguras para hoy|apuestas
combinadas seguras para mañana|apuestas como ganar|apuestas comparador|apuestas con bono de bienvenida|apuestas con dinero ficticio|apuestas con dinero real|apuestas con dinero virtual|apuestas con handicap|apuestas con handicap asiatico|apuestas con handicap baloncesto|apuestas con mas probabilidades de ganar|apuestas con paypal|apuestas con tarjeta de credito|apuestas con tarjeta de debito|apuestas consejos|apuestas copa|apuestas copa africa|apuestas copa america|apuestas copa américa|apuestas copa argentina|apuestas copa
brasil|apuestas copa davis|apuestas copa de europa|apuestas copa del mundo|apuestas copa del rey|apuestas copa del rey baloncesto|apuestas copa
del rey final|apuestas copa del rey futbol|apuestas copa del rey ganador|apuestas copa del rey hoy|apuestas
copa del rey pronosticos|apuestas copa del rey pronósticos|apuestas copa
europa|apuestas copa italia|apuestas copa libertadores|apuestas copa mundial de
hockey|apuestas copa rey|apuestas copa sudamericana|apuestas corners|apuestas corners hoy|apuestas croacia argentina|apuestas cuartos eurocopa|apuestas
cuotas|apuestas cuotas altas|apuestas cuotas bajas|apuestas de
1 euro|apuestas de baloncesto|apuestas de baloncesto hoy|apuestas de baloncesto nba|apuestas de baloncesto
para hoy|apuestas de beisbol|apuestas de beisbol para hoy|apuestas de blackjack en linea|apuestas de boxeo|apuestas de boxeo canelo|apuestas de boxeo en las vegas|apuestas
de boxeo hoy|apuestas de boxeo online|apuestas de caballo|apuestas de caballos|apuestas de caballos como funciona|apuestas de caballos
como se juega|apuestas de caballos en colombia|apuestas de caballos en españa|apuestas de caballos en linea|apuestas de caballos españa|apuestas
de caballos ganador y colocado|apuestas de caballos internacionales|apuestas de
caballos juegos|apuestas de caballos online|apuestas de caballos online
en venezuela|apuestas de caballos por internet|apuestas de caballos
pronosticos|apuestas de caballos pronósticos|apuestas de carrera de
caballos|apuestas de carreras de caballos|apuestas de carreras de caballos online|apuestas
de casino|apuestas de casino online|apuestas de casino por internet|apuestas de champions league|apuestas de ciclismo|apuestas de colombia|apuestas de copa america|apuestas de
corners|apuestas de deportes en linea|apuestas de deportes online|apuestas de dinero|apuestas
de esports|apuestas de eurocopa|apuestas de europa league|apuestas de f1|apuestas de formula 1|apuestas de
futbol|apuestas de fútbol|apuestas de futbol app|apuestas de futbol argentina|apuestas de futbol colombia|apuestas de futbol en colombia|apuestas
de futbol en directo|apuestas de futbol en linea|apuestas de futbol en vivo|apuestas de futbol español|apuestas de
futbol gratis|apuestas de futbol hoy|apuestas de futbol mundial|apuestas de futbol online|apuestas de fútbol online|apuestas de futbol para hoy|apuestas de fútbol para hoy|apuestas de
futbol para hoy seguras|apuestas de futbol para mañana|apuestas de futbol peru|apuestas de futbol pronosticos|apuestas
de fútbol pronósticos|apuestas de futbol seguras|apuestas de futbol
seguras para hoy|apuestas de futbol sin dinero|apuestas de galgos|apuestas de
galgos como ganar|apuestas de galgos en directo|apuestas de galgos online|apuestas de galgos trucos|apuestas de
golf|apuestas de hockey|apuestas de hockey sobre hielo|apuestas de
hoy|apuestas de hoy seguras|apuestas de juego|apuestas de juegos|apuestas de juegos deportivos|apuestas
de juegos online|apuestas de la champions league|apuestas de la copa américa|apuestas de la eurocopa|apuestas
de la europa league|apuestas de la liga|apuestas de la liga bbva|apuestas de la liga
española|apuestas de la nba|apuestas de la nfl|apuestas de la ufc|apuestas
de mlb|apuestas de nba|apuestas de nba para hoy|apuestas
de partidos|apuestas de partidos de futbol|apuestas de peleas ufc|apuestas de perros en vivo|apuestas de perros virtuales|apuestas de
peru|apuestas de sistema|apuestas de sistema como funciona|apuestas de sistema explicacion|apuestas de
sistema explicación|apuestas de tenis|apuestas de tenis de mesa|apuestas
de tenis en directo|apuestas de tenis hoy|apuestas de tenis para hoy|apuestas de tenis pronosticos|apuestas de tenis seguras|apuestas de todo tipo|apuestas de ufc|apuestas de ufc hoy|apuestas del boxeo|apuestas del clasico|apuestas del clasico real madrid
barca|apuestas del dia|apuestas del día|apuestas del dia de hoy|apuestas del
dia deportivas|apuestas del dia futbol|apuestas del mundial|apuestas del partido
de hoy|apuestas del real madrid|apuestas del rey|apuestas del sistema|apuestas deporte|apuestas deportes|apuestas deportiva|apuestas deportivas|apuestas deportivas 1 euro|apuestas deportivas
10 euros gratis|apuestas deportivas 100 seguras|apuestas
deportivas 1×2|apuestas deportivas android|apuestas deportivas app|apuestas deportivas apps|apuestas
deportivas argentina|apuestas deportivas argentina futbol|apuestas deportivas argentina legal|apuestas deportivas atletico de madrid|apuestas deportivas baloncesto|apuestas deportivas barca madrid|apuestas deportivas barcelona|apuestas deportivas
beisbol|apuestas deportivas bono|apuestas deportivas bono bienvenida|apuestas deportivas bono de
bienvenida|apuestas deportivas bono sin deposito|apuestas
deportivas bonos de bienvenida|apuestas deportivas boxeo|apuestas deportivas caballos|apuestas deportivas
calculadora|apuestas deportivas campeon liga|apuestas deportivas casino|apuestas deportivas casino barcelona|apuestas deportivas casino online|apuestas deportivas
cerca de mi|apuestas deportivas champions league|apuestas deportivas chile|apuestas deportivas ciclismo|apuestas deportivas colombia|apuestas deportivas com|apuestas deportivas com foro|apuestas deportivas com pronosticos|apuestas deportivas combinadas|apuestas deportivas combinadas para hoy|apuestas
deportivas como se juega|apuestas deportivas comparador|apuestas deportivas con bono gratis|apuestas deportivas con bonos gratis|apuestas deportivas con dinero ficticio|apuestas deportivas con paypal|apuestas deportivas con puntos virtuales|apuestas deportivas
consejos|apuestas deportivas consejos para ganar|apuestas
deportivas copa america|apuestas deportivas copa del rey|apuestas
deportivas copa libertadores|apuestas deportivas
copa mundial|apuestas deportivas corners|apuestas deportivas cual es la mejor|apuestas
deportivas cuotas altas|apuestas deportivas de
baloncesto|apuestas deportivas de boxeo|apuestas deportivas de colombia|apuestas deportivas de futbol|apuestas deportivas de nba|apuestas deportivas
de nhl|apuestas deportivas de peru|apuestas deportivas de tenis|apuestas
deportivas del dia|apuestas deportivas dinero ficticio|apuestas deportivas directo|apuestas deportivas doble oportunidad|apuestas deportivas en argentina|apuestas deportivas en chile|apuestas deportivas en colombia|apuestas deportivas en directo|apuestas deportivas en españa|apuestas
deportivas en español|apuestas deportivas en linea|apuestas deportivas en línea|apuestas
deportivas en peru|apuestas deportivas en perú|apuestas deportivas en sevilla|apuestas deportivas en uruguay|apuestas deportivas en vivo|apuestas deportivas es|apuestas deportivas es pronosticos|apuestas deportivas españa|apuestas
deportivas españolas|apuestas deportivas esports|apuestas deportivas estadisticas|apuestas deportivas estrategias|apuestas deportivas estrategias seguras|apuestas deportivas eurocopa|apuestas deportivas
europa league|apuestas deportivas f1|apuestas deportivas faciles de
ganar|apuestas deportivas formula 1|apuestas deportivas foro|apuestas deportivas foro futbol|apuestas deportivas foro tenis|apuestas deportivas francia argentina|apuestas deportivas futbol|apuestas deportivas fútbol|apuestas deportivas
futbol argentino|apuestas deportivas futbol colombia|apuestas deportivas futbol español|apuestas deportivas
gana|apuestas deportivas ganadas|apuestas deportivas ganar dinero
seguro|apuestas deportivas gane|apuestas deportivas golf|apuestas deportivas gratis|apuestas deportivas gratis
con premios|apuestas deportivas gratis hoy|apuestas deportivas gratis sin deposito|apuestas deportivas
handicap|apuestas deportivas handicap asiatico|apuestas deportivas hoy|apuestas deportivas impuestos|apuestas
deportivas interior argentina|apuestas deportivas juegos olimpicos|apuestas deportivas la liga|apuestas deportivas
legales|apuestas deportivas legales en colombia|apuestas deportivas libres de impuestos|apuestas deportivas licencia españa|apuestas deportivas liga española|apuestas deportivas listado|apuestas deportivas listado clasico|apuestas deportivas madrid|apuestas deportivas mas seguras|apuestas deportivas mejor pagadas|apuestas
deportivas mejores|apuestas deportivas mejores app|apuestas deportivas
mejores casas|apuestas deportivas mejores cuotas|apuestas deportivas mejores paginas|apuestas deportivas mexico|apuestas deportivas méxico|apuestas deportivas mlb|apuestas deportivas
mlb hoy|apuestas deportivas multiples|apuestas deportivas
mundial|apuestas deportivas murcia|apuestas deportivas nba|apuestas deportivas nba hoy|apuestas deportivas nfl|apuestas deportivas nhl|apuestas deportivas nuevas|apuestas deportivas ofertas|apuestas deportivas online|apuestas deportivas
online argentina|apuestas deportivas online chile|apuestas deportivas online colombia|apuestas deportivas online en colombia|apuestas deportivas online españa|apuestas deportivas online
mexico|apuestas deportivas online paypal|apuestas deportivas online peru|apuestas deportivas online por internet|apuestas deportivas pago paypal|apuestas deportivas para
ganar dinero|apuestas deportivas para hoy|apuestas deportivas
para hoy pronosticos|apuestas deportivas partido suspendido|apuestas deportivas partidos de hoy|apuestas deportivas paypal|apuestas deportivas peru|apuestas deportivas perú|apuestas deportivas peru vs ecuador|apuestas deportivas predicciones|apuestas deportivas promociones|apuestas deportivas pronostico|apuestas deportivas pronóstico|apuestas deportivas pronostico hoy|apuestas deportivas pronosticos|apuestas
deportivas pronósticos|apuestas deportivas
pronosticos expertos|apuestas deportivas pronosticos
gratis|apuestas deportivas pronosticos nba|apuestas
deportivas pronosticos tenis|apuestas deportivas que aceptan paypal|apuestas
deportivas real madrid|apuestas deportivas regalo bienvenida|apuestas deportivas resultado exacto|apuestas deportivas resultados|apuestas deportivas rugby|apuestas
deportivas seguras|apuestas deportivas seguras
foro|apuestas deportivas seguras hoy|apuestas deportivas seguras para hoy|apuestas deportivas seguras telegram|apuestas deportivas sevilla|apuestas deportivas simulador eurocopa|apuestas
deportivas sin deposito|apuestas deportivas sin deposito inicial|apuestas deportivas sin dinero|apuestas deportivas sin dinero real|apuestas
deportivas sin registro|apuestas deportivas stake|apuestas
deportivas stake 10|apuestas deportivas telegram españa|apuestas
deportivas tenis|apuestas deportivas tenis de mesa|apuestas deportivas tenis foro|apuestas deportivas tenis hoy|apuestas deportivas tips|apuestas deportivas tipster|apuestas deportivas ufc|apuestas deportivas uruguay|apuestas deportivas valencia|apuestas
deportivas valencia barcelona|apuestas deportivas venezuela|apuestas deportivas virtuales|apuestas deportivas y casino|apuestas
deportivas y casino online|apuestas deportivas.com|apuestas deportivas.com
foro|apuestas deportivas.es|apuestas deportivos pronosticos|apuestas deposito minimo 1 euro|apuestas descenso a segunda|apuestas descenso
a segunda b|apuestas descenso la liga|apuestas descenso primera division|apuestas descenso segunda|apuestas dia|apuestas diarias seguras|apuestas
dinero|apuestas dinero ficticio|apuestas dinero real|apuestas
dinero virtual|apuestas directas|apuestas directo|apuestas
directo futbol|apuestas division de honor juvenil|apuestas dnb|apuestas doble oportunidad|apuestas doble resultado|apuestas dobles|apuestas dobles y triples|apuestas dortmund
barcelona|apuestas draft nba|apuestas draft nfl|apuestas ecuador vs argentina|apuestas ecuador vs venezuela|apuestas egipto uruguay|apuestas
el clasico|apuestas elecciones venezuela|apuestas empate|apuestas en baloncesto|apuestas en barcelona|apuestas en beisbol|apuestas en boxeo|apuestas en caballos|apuestas en carreras de caballos|apuestas
en casino|apuestas en casino online|apuestas en casinos|apuestas
en casinos online|apuestas en chile|apuestas en ciclismo|apuestas en colombia|apuestas en colombia de futbol|apuestas en directo|apuestas en directo futbol|apuestas en directo pronosticos|apuestas en el
futbol|apuestas en el tenis|apuestas en españa|apuestas en esports|apuestas en eventos deportivos virtuales|apuestas en golf|apuestas en juegos|apuestas en la champions
league|apuestas en la eurocopa|apuestas en la liga|apuestas en la nba|apuestas en la nfl|apuestas en las vegas mlb|apuestas en las
vegas nfl|apuestas en linea|apuestas en línea|apuestas en linea argentina|apuestas en linea boxeo|apuestas en linea
chile|apuestas en linea colombia|apuestas en línea de fútbol|apuestas en linea deportivas|apuestas
en linea españa|apuestas en linea estados unidos|apuestas en linea futbol|apuestas en linea mexico|apuestas en línea méxico|apuestas en linea mundial|apuestas en linea
peru|apuestas en linea usa|apuestas en los esports|apuestas en madrid|apuestas en méxico|apuestas en mexico online|apuestas en nba|apuestas
en partidos de futbol|apuestas en partidos de futbol en vivo|apuestas en partidos de tenis en directo|apuestas en perú|apuestas en sevilla|apuestas en sistema|apuestas en stake|apuestas en tenis|apuestas en tenis de mesa|apuestas en valencia|apuestas
en vivo|apuestas en vivo argentina|apuestas en vivo casino|apuestas en vivo futbol|apuestas en vivo fútbol|apuestas en vivo nba|apuestas en vivo peru|apuestas en vivo tenis|apuestas en vivo ufc|apuestas equipo mbappe|apuestas equipos de futbol|apuestas
españa|apuestas españa alemania|apuestas españa alemania
eurocopa|apuestas españa croacia|apuestas españa eurocopa|apuestas españa
francia|apuestas españa francia eurocopa|apuestas españa gana el mundial|apuestas españa gana
eurocopa|apuestas españa gana mundial|apuestas españa georgia|apuestas españa
holanda|apuestas españa inglaterra|apuestas españa inglaterra cuotas|apuestas españa inglaterra eurocopa|apuestas españa italia|apuestas españa mundial|apuestas españa paises bajos|apuestas español|apuestas español oviedo|apuestas
espanyol barcelona|apuestas espanyol betis|apuestas espanyol villarreal|apuestas esport|apuestas
esports|apuestas esports colombia|apuestas esports españa|apuestas esports fifa|apuestas esports gratis|apuestas esports lol|apuestas
esports peru|apuestas esports valorant|apuestas estadisticas|apuestas estrategias|apuestas euro|apuestas euro
copa|apuestas eurocopa|apuestas eurocopa campeon|apuestas eurocopa españa|apuestas eurocopa favoritos|apuestas eurocopa femenina|apuestas eurocopa final|apuestas eurocopa ganador|apuestas
eurocopa hoy|apuestas eurocopa sub 21|apuestas euroliga baloncesto|apuestas euroliga pronosticos|apuestas europa league|apuestas europa league hoy|apuestas europa league pronosticos|apuestas europa
league pronósticos|apuestas euros|apuestas f1 abu dhabi|apuestas f1 bahrein|apuestas
f1 canada|apuestas f1 china|apuestas f1 cuotas|apuestas f1 hoy|apuestas f1 las vegas|apuestas f1 miami|apuestas f1 monaco|apuestas faciles de
ganar|apuestas fáciles de ganar|apuestas faciles para ganar|apuestas favoritas|apuestas favorito champions|apuestas favoritos champions|apuestas favoritos eurocopa|apuestas favoritos mundial|apuestas fc barcelona|apuestas final champions cuotas|apuestas
final champions league|apuestas final champions peru|apuestas
final copa|apuestas final copa america|apuestas final copa de europa|apuestas final
copa del rey|apuestas final copa europa|apuestas final copa libertadores|apuestas
final copa rey|apuestas final de copa|apuestas final de copa del rey|apuestas final del mundial|apuestas final euro|apuestas final eurocopa|apuestas final europa league|apuestas final libertadores|apuestas final
mundial|apuestas final nba|apuestas final rugby|apuestas final uefa europa league|apuestas final.mundial|apuestas finales
de conferencia nfl|apuestas finales nba|apuestas fiorentina betis|apuestas formula|apuestas formula 1|apuestas fórmula 1|apuestas
fórmula 1 pronósticos|apuestas formula uno|apuestas foro|apuestas foro nba|apuestas francia argentina|apuestas francia españa|apuestas
futbol|apuestas fútbol|apuestas futbol americano|apuestas futbol americano nfl|apuestas futbol argentina|apuestas futbol argentino|apuestas futbol champions league|apuestas futbol chile|apuestas
futbol colombia|apuestas futbol consejos|apuestas futbol en directo|apuestas fútbol en directo|apuestas futbol
en vivo|apuestas fútbol en vivo|apuestas futbol españa|apuestas futbol español|apuestas fútbol español|apuestas futbol eurocopa|apuestas
futbol femenino|apuestas futbol foro|apuestas futbol gratis|apuestas futbol hoy|apuestas fútbol hoy|apuestas futbol juegos olimpicos|apuestas futbol mexico|apuestas futbol mundial|apuestas futbol online|apuestas futbol para hoy|apuestas futbol peru|apuestas futbol pronosticos|apuestas futbol
sala|apuestas futbol telegram|apuestas futbol
virtual|apuestas galgos|apuestas galgos en directo|apuestas galgos hoy|apuestas galgos online|apuestas galgos pronosticos|apuestas galgos trucos|apuestas gana|apuestas gana colombia|apuestas gana resultados|apuestas ganadas|apuestas ganadas hoy|apuestas ganador
champions league|apuestas ganador copa america|apuestas ganador copa del rey|apuestas ganador copa del
rey baloncesto|apuestas ganador copa libertadores|apuestas ganador de la
eurocopa|apuestas ganador de la liga|apuestas ganador del mundial|apuestas ganador eurocopa|apuestas ganador europa league|apuestas ganador f1|apuestas ganador la liga|apuestas
ganador liga española|apuestas ganador mundial|apuestas ganador mundial baloncesto|apuestas ganador mundial f1|apuestas
ganador nba|apuestas ganadores eurocopa|apuestas ganadores mundial|apuestas ganar
champions|apuestas ganar eurocopa|apuestas ganar liga|apuestas ganar mundial|apuestas ganar nba|apuestas getafe valencia|apuestas ghana uruguay|apuestas girona|apuestas girona athletic|apuestas girona betis|apuestas girona campeon de liga|apuestas girona campeon liga|apuestas girona gana la liga|apuestas girona real
madrid|apuestas girona real sociedad|apuestas goleador eurocopa|apuestas
goleadores eurocopa|apuestas goles asiaticos|apuestas golf|apuestas golf masters|apuestas golf pga|apuestas granada barcelona|apuestas
grand slam de tenis|apuestas gratis|apuestas gratis casino|apuestas gratis con premios|apuestas gratis
hoy|apuestas gratis para hoy|apuestas gratis por registro|apuestas gratis puntos|apuestas gratis regalos|apuestas gratis sin deposito|apuestas gratis
sin depósito|apuestas gratis sin ingreso|apuestas gratis sports|apuestas gratis y
ganar premios|apuestas grupo a eurocopa|apuestas grupos eurocopa|apuestas handicap|apuestas handicap asiatico|apuestas handicap baloncesto|apuestas handicap como
funciona|apuestas handicap nba|apuestas handicap nfl|apuestas hipicas online|apuestas hípicas online|apuestas
hipicas venezuela|apuestas hockey|apuestas hockey hielo|apuestas hockey patines|apuestas
hockey sobre hielo|apuestas holanda argentina|apuestas holanda vs argentina|apuestas
hoy|apuestas hoy champions|apuestas hoy futbol|apuestas hoy nba|apuestas
hoy pronosticos|apuestas hoy seguras|apuestas impuestos|apuestas inglaterra paises bajos|apuestas inter
barca|apuestas inter barcelona|apuestas juego|apuestas juegos|apuestas
juegos en linea|apuestas juegos olimpicos|apuestas juegos olímpicos|apuestas juegos olimpicos
baloncesto|apuestas juegos online|apuestas juegos virtuales|apuestas jugador sevilla|apuestas jugadores nba|apuestas kings league americas|apuestas la liga|apuestas la liga española|apuestas la liga hoy|apuestas la liga
santander|apuestas las vegas mlb|apuestas las vegas nba|apuestas
las vegas nfl|apuestas league of legends mundial|apuestas legal|apuestas legales|apuestas legales en colombia|apuestas legales en españa|apuestas legales en estados unidos|apuestas legales españa|apuestas leganes betis|apuestas libertadores|apuestas licencia|apuestas liga
1 peru|apuestas liga argentina|apuestas liga bbva pronosticos|apuestas liga de campeones|apuestas liga de campeones
de baloncesto|apuestas liga de campeones de hockey|apuestas liga españa|apuestas liga española|apuestas liga santander pronosticos|apuestas ligas de
futbol|apuestas linea|apuestas linea de gol|apuestas liverpool barcelona|apuestas liverpool real madrid|apuestas lol mundial|apuestas madrid|apuestas madrid arsenal|apuestas madrid atletico|apuestas madrid
atletico champions|apuestas madrid barca|apuestas madrid barça|apuestas madrid barca hoy|apuestas madrid barca supercopa|apuestas madrid
barcelona|apuestas madrid barsa|apuestas madrid bayern|apuestas madrid betis|apuestas madrid borussia|apuestas madrid campeon champions|apuestas madrid celta|apuestas madrid city|apuestas madrid dortmund|apuestas madrid gana la liga|apuestas madrid gana liga|apuestas madrid hoy|apuestas madrid liverpool|apuestas madrid osasuna|apuestas madrid sevilla|apuestas madrid valencia|apuestas madrid vs arsenal|apuestas madrid
vs barcelona|apuestas mallorca osasuna|apuestas mallorca real sociedad|apuestas manchester athletic|apuestas manchester
city real madrid|apuestas mas faciles de ganar|apuestas mas seguras|apuestas mas seguras para hoy|apuestas masters de golf|apuestas masters de tenis|apuestas
maximo goleador eurocopa|apuestas maximo goleador mundial|apuestas mejor jugador eurocopa|apuestas mejores casinos online|apuestas mexico|apuestas
méxico|apuestas mexico polonia|apuestas méxico polonia|apuestas mlb|apuestas mlb hoy|apuestas mlb las vegas|apuestas
mlb para hoy|apuestas mlb pronosticos|apuestas mlb usa|apuestas mma ufc|apuestas momios|apuestas multiples|apuestas múltiples|apuestas multiples como funcionan|apuestas multiples
el gordo|apuestas multiples futbol|apuestas mundial|apuestas mundial 2026|apuestas mundial
baloncesto|apuestas mundial balonmano|apuestas mundial brasil|apuestas mundial campeon|apuestas mundial ciclismo|apuestas mundial clubes|apuestas mundial de baloncesto|apuestas
mundial de ciclismo|apuestas mundial de clubes|apuestas mundial de futbol|apuestas mundial de fútbol|apuestas mundial de rugby|apuestas mundial f1|apuestas mundial favoritos|apuestas mundial femenino|apuestas mundial formula
1|apuestas mundial futbol|apuestas mundial ganador|apuestas mundial lol|apuestas mundial moto gp|apuestas mundial motogp|apuestas mundial rugby|apuestas mundial sub
17|apuestas mundiales|apuestas mundialistas|apuestas mvp eurocopa|apuestas mvp nba|apuestas
mvp nfl|apuestas nacionales de colombia|apuestas nba|apuestas nba all star|apuestas nba campeon|apuestas nba consejos|apuestas nba esta noche|apuestas nba
finals|apuestas nba gratis|apuestas nba hoy|apuestas nba hoy
jugadores|apuestas nba hoy pronosticos|apuestas nba
para hoy|apuestas nba playoffs|apuestas nba pronosticos|apuestas
nba pronósticos|apuestas nba pronosticos hoy|apuestas nba tipster|apuestas nfl|apuestas nfl hoy|apuestas nfl
las vegas|apuestas nfl playoffs|apuestas nfl pronosticos|apuestas nfl pronósticos|apuestas nfl semana 4|apuestas nfl super bowl|apuestas nhl|apuestas nhl pronosticos|apuestas octavos eurocopa|apuestas ofertas|apuestas online|apuestas online argentina|apuestas online argentina legal|apuestas online bono|apuestas
online bono bienvenida|apuestas online boxeo|apuestas online
caballos|apuestas online carreras de caballos|apuestas online casino|apuestas online champions league|apuestas online chile|apuestas online
ciclismo|apuestas online colombia|apuestas online comparativa|apuestas online con paypal|apuestas online
de caballos|apuestas online deportivas|apuestas online en argentina|apuestas online en peru|apuestas online espana|apuestas online españa|apuestas online esports|apuestas online foro|apuestas online futbol|apuestas online futbol españa|apuestas online golf|apuestas online gratis|apuestas online
gratis sin deposito|apuestas online juegos|apuestas online
mexico|apuestas online mma|apuestas online movil|apuestas online nba|apuestas online net|apuestas online nuevas|apuestas online opiniones|apuestas online paypal|apuestas online peru|apuestas online
seguras|apuestas online sin dinero|apuestas online sin registro|apuestas online tenis|apuestas online ufc|apuestas online uruguay|apuestas online venezuela|apuestas open britanico
golf|apuestas osasuna athletic|apuestas osasuna barcelona|apuestas osasuna real madrid|apuestas osasuna sevilla|apuestas osasuna valencia|apuestas over|apuestas over 2.5|apuestas over under|apuestas paginas|apuestas pago anticipado|apuestas paises bajos ecuador|apuestas
paises bajos inglaterra|apuestas países bajos qatar|apuestas para boxeo|apuestas para champions league|apuestas para el clasico|apuestas para el dia de hoy|apuestas para el mundial|apuestas para el
partido de hoy|apuestas para eurocopa|apuestas para
europa league|apuestas para futbol|apuestas para ganar|apuestas para ganar dinero|apuestas para ganar
dinero facil|apuestas para ganar en la ruleta|apuestas para ganar la champions|apuestas para ganar la eurocopa|apuestas para ganar la europa league|apuestas
para ganar la liga|apuestas para ganar siempre|apuestas para hacer|apuestas para
hoy|apuestas para hoy de futbol|apuestas para hoy europa league|apuestas para hoy
futbol|apuestas para juegos|apuestas para la champions league|apuestas para
la copa del rey|apuestas para la eurocopa|apuestas para
la europa league|apuestas para la final de la eurocopa|apuestas para la nba hoy|apuestas para los partidos de hoy|apuestas para partidos de hoy|apuestas para ufc|apuestas partido|apuestas partido aplazado|apuestas
partido champions|apuestas partido colombia|apuestas partido españa marruecos|apuestas
partido mundial|apuestas partido suspendido|apuestas partidos|apuestas partidos champions league|apuestas partidos csgo|apuestas partidos
de futbol|apuestas partidos de futbol hoy|apuestas partidos de hoy|apuestas partidos eurocopa|apuestas partidos futbol|apuestas partidos hoy|apuestas
partidos mundial|apuestas paypal|apuestas peleas de boxeo|apuestas peru|apuestas perú|apuestas peru brasil|apuestas peru chile|apuestas peru paraguay|apuestas peru uruguay|apuestas peru vs chile|apuestas peru vs colombia|apuestas pichichi
eurocopa|apuestas plataforma|apuestas playoff|apuestas playoff ascenso|apuestas playoff ascenso a primera|apuestas playoff nba|apuestas playoff segunda|apuestas playoff segunda b|apuestas playoffs nba|apuestas
playoffs nfl|apuestas polonia argentina|apuestas por argentina|apuestas por internet mexico|apuestas por internet para ganar dinero|apuestas por paypal|apuestas
por ronda boxeo|apuestas por sistema|apuestas portugal uruguay|apuestas pre partido|apuestas
predicciones|apuestas predicciones futbol|apuestas primera division|apuestas primera division españa|apuestas promociones|apuestas pronostico|apuestas pronosticos|apuestas pronosticos deportivos|apuestas
pronosticos deportivos tenis|apuestas pronosticos futbol|apuestas
pronosticos gratis|apuestas pronosticos nba|apuestas pronosticos tenis|apuestas prorroga|apuestas psg barca|apuestas psg barcelona|apuestas puntos por tarjetas|apuestas puntos tarjetas|apuestas
que aceptan paypal|apuestas que es handicap|apuestas que puedes hacer con tu novia|apuestas que siempre ganaras|apuestas que significa|apuestas quien bajara
a segunda|apuestas quién bajara a segunda|apuestas quien gana el mundial|apuestas quien gana eurocopa|apuestas quien gana la champions|apuestas quien gana la eurocopa|apuestas quien gana la liga|apuestas quien ganara el mundial|apuestas quién ganará el mundial|apuestas quien ganara la champions|apuestas quien ganara la eurocopa|apuestas quien ganara la liga|apuestas rayo barcelona|apuestas
real madrid|apuestas real madrid arsenal|apuestas real madrid athletic|apuestas real madrid atletico|apuestas real madrid atletico champions|apuestas real madrid
atletico de madrid|apuestas real madrid atlético de madrid|apuestas real madrid
atletico madrid|apuestas real madrid barcelona|apuestas real madrid bayern|apuestas real madrid betis|apuestas
real madrid borussia|apuestas real madrid campeon champions|apuestas real madrid celta|apuestas real madrid champions|apuestas
real madrid city|apuestas real madrid girona|apuestas real madrid hoy|apuestas real madrid liverpool|apuestas real
madrid manchester city|apuestas real madrid osasuna|apuestas real madrid real sociedad|apuestas real madrid valencia|apuestas real madrid villarreal|apuestas real madrid vs arsenal|apuestas real madrid vs atletico|apuestas real madrid vs atlético|apuestas real
madrid vs atletico madrid|apuestas real madrid vs barcelona|apuestas real madrid vs betis|apuestas real madrid vs sevilla|apuestas real madrid vs
valencia|apuestas real sociedad|apuestas real sociedad athletic|apuestas real sociedad barcelona|apuestas real sociedad betis|apuestas real sociedad psg|apuestas real sociedad
real madrid|apuestas real sociedad valencia|apuestas
recomendadas hoy|apuestas regalo de bienvenida|apuestas registro|apuestas resultado exacto|apuestas resultados|apuestas resultados eurocopa|apuestas retirada
tenis|apuestas roma barcelona|apuestas roma sevilla|apuestas rugby|apuestas rugby mundial|apuestas rugby world cup|apuestas ruleta seguras|apuestas
segunda|apuestas segunda b|apuestas segunda division|apuestas segunda división|apuestas segunda
division b|apuestas segunda division españa|apuestas seguras|apuestas seguras baloncesto|apuestas seguras calculadora|apuestas seguras en la ruleta|apuestas seguras eurocopa|apuestas seguras foro|apuestas seguras futbol|apuestas seguras futbol hoy|apuestas seguras
gratis|apuestas seguras hoy|apuestas seguras hoy futbol|apuestas seguras nba|apuestas seguras nba hoy|apuestas
seguras para este fin de semana|apuestas seguras
para ganar dinero|apuestas seguras para hoy|apuestas seguras
para hoy fútbol|apuestas seguras para hoy pronósticos|apuestas seguras para mañana|apuestas seguras
ruleta|apuestas seguras telegram|apuestas seguras tenis|apuestas semifinales eurocopa|apuestas senegal paises bajos|apuestas sevilla|apuestas sevilla athletic|apuestas
sevilla atletico de madrid|apuestas sevilla barcelona|apuestas sevilla betis|apuestas sevilla campeon liga|apuestas sevilla celta|apuestas sevilla gana la liga|apuestas sevilla girona|apuestas sevilla inter|apuestas sevilla jugador|apuestas sevilla juventus|apuestas sevilla leganes|apuestas sevilla madrid|apuestas sevilla
manchester united|apuestas sevilla osasuna|apuestas sevilla real madrid|apuestas sevilla real sociedad|apuestas sevilla
roma|apuestas sevilla valencia|apuestas significa|apuestas simples ejemplos|apuestas simples o combinadas|apuestas sin deposito|apuestas sin deposito inicial|apuestas sin deposito
minimo|apuestas sin dinero|apuestas sin dinero real|apuestas sin empate|apuestas sin empate que significa|apuestas sin ingreso minimo|apuestas sin registro|apuestas sistema|apuestas sistema calculadora|apuestas sistema como funciona|apuestas sistema trixie|apuestas sociedad|apuestas sorteo copa del rey|apuestas stake|apuestas stake 10|apuestas stake 10 hoy|apuestas super bowl favorito|apuestas
super rugby|apuestas supercopa españa|apuestas superliga
argentina|apuestas tarjeta roja|apuestas tarjetas|apuestas tarjetas amarillas|apuestas tenis|apuestas tenis atp|apuestas
tenis consejos|apuestas tenis copa davis|apuestas tenis de mesa|apuestas tenis de mesa pronosticos|apuestas tenis en vivo|apuestas tenis femenino|apuestas tenis hoy|apuestas tenis itf|apuestas tenis
pronosticos|apuestas tenis pronósticos|apuestas tenis retirada|apuestas
tenis roland garros|apuestas tenis seguras|apuestas tenis wimbledon|apuestas tenis wta|apuestas tercera division|apuestas tercera division españa|apuestas tipos|apuestas tips|apuestas tipster|apuestas tipster para hoy|apuestas topuria
holloway cuotas|apuestas torneos de golf|apuestas torneos de tenis|apuestas trucos|apuestas uefa champions league|apuestas uefa
europa league|apuestas ufc|apuestas ufc chile|apuestas ufc como funciona|apuestas ufc
hoy|apuestas ufc ilia topuria|apuestas ufc online|apuestas ufc pronósticos|apuestas ufc telegram|apuestas ufc topuria|apuestas
under over|apuestas unionistas villarreal|apuestas uruguay|apuestas uruguay colombia|apuestas uruguay corea|apuestas
uruguay vs colombia|apuestas us open golf|apuestas us open tenis|apuestas valencia|apuestas valencia
barcelona|apuestas valencia betis|apuestas valencia madrid|apuestas valencia real madrid|apuestas valladolid barcelona|apuestas valladolid valencia|apuestas
valor app|apuestas valor en directo|apuestas valor galgos|apuestas venezuela|apuestas venezuela argentina|apuestas
venezuela bolivia|apuestas venezuela ecuador|apuestas villarreal|apuestas villarreal athletic|apuestas villarreal barcelona|apuestas villarreal bayern|apuestas villarreal betis|apuestas villarreal liverpool|apuestas villarreal manchester|apuestas villarreal manchester united|apuestas villarreal
vs real madrid|apuestas virtuales|apuestas virtuales colombia|apuestas virtuales futbol|apuestas virtuales sin dinero|apuestas vivo|apuestas vuelta a españa|apuestas vuelta españa|apuestas
william hill partidos de hoy|apuestas y casino|apuestas y casinos|apuestas y juegos de azar|apuestas y pronosticos|apuestas y
pronosticos de futbol|apuestas y pronosticos deportivos|apuestas y resultados|apuestas-deportivas|apuestas-deportivas.es pronosticos|arbitro nba apuestas|argentina
apuestas|argentina colombia apuestas|argentina croacia apuestas|argentina francia apuestas|argentina mexico
apuestas|argentina peru apuestas|argentina uruguay apuestas|argentina vs bolivia apuestas|argentina vs chile apuestas|argentina vs colombia apuestas|argentina
vs francia apuestas|argentina vs. colombia apuestas|asi se gana en las apuestas deportivas|asiatico apuestas|asiatico
en apuestas|asiaticos apuestas|athletic barcelona apuestas|athletic manchester united
apuestas|athletic osasuna apuestas|athletic real madrid apuestas|atletico barcelona apuestas|atletico de madrid apuestas|atlético de madrid
apuestas|atletico de madrid real madrid apuestas|atletico
de madrid vs barcelona apuestas|atletico madrid real madrid apuestas|atletico madrid vs real madrid apuestas|atletico
real madrid apuestas|atletico vs real madrid apuestas|avisador de cuotas apuestas|bajada de cuotas apuestas|baloncesto apuestas|barbastro barcelona apuestas|barca apuestas|barca bayern apuestas|barca inter apuestas|barca madrid apuestas|barça madrid apuestas|barca vs atletico apuestas|barca vs madrid apuestas|barca vs real madrid apuestas|barcelona – real madrid apuestas|barcelona apuestas|barcelona
atletico apuestas|barcelona atletico de madrid apuestas|barcelona atletico madrid apuestas|barcelona
betis apuestas|barcelona casa de apuestas|barcelona inter apuestas|barcelona psg apuestas|barcelona real madrid apuestas|barcelona real sociedad apuestas|barcelona sevilla
apuestas|barcelona valencia apuestas|barcelona vs athletic bilbao apuestas|barcelona
vs atlético madrid apuestas|barcelona vs betis apuestas|barcelona vs celta de vigo apuestas|barcelona vs espanyol
apuestas|barcelona vs girona apuestas|barcelona vs madrid apuestas|barcelona vs real madrid apuestas|barcelona vs real sociedad apuestas|barcelona vs sevilla apuestas|barcelona vs villarreal apuestas|base de datos cuotas apuestas
deportivas|bayern real madrid apuestas|beisbol apuestas|best america apuestas|bet apuestas chile|bet apuestas en vivo|betis – chelsea apuestas|betis apuestas|betis barcelona apuestas|betis chelsea apuestas|betis madrid apuestas|betis sevilla apuestas|betsson tu sitio de apuestas online|blog apuestas
baloncesto|blog apuestas ciclismo|blog apuestas nba|blog apuestas
tenis|blog de apuestas de tenis|bono apuestas|bono apuestas deportivas|bono apuestas deportivas sin deposito|bono apuestas gratis|bono apuestas gratis sin deposito|bono apuestas sin deposito|bono bienvenida apuestas|bono bienvenida apuestas deportivas|bono bienvenida apuestas españa|bono bienvenida apuestas sin deposito|bono bienvenida apuestas sin depósito|bono bienvenida
casa apuestas|bono bienvenida casa de apuestas|bono bienvenida marca apuestas|bono casa
apuestas|bono casa de apuestas|bono casa de apuestas sin ingreso|bono
casas de apuestas|bono de apuestas|bono de apuestas gratis sin deposito|bono de bienvenida apuestas|bono de bienvenida apuestas deportivas|bono de bienvenida casa
de apuestas|bono de bienvenida casas de apuestas|bono de casas de apuestas|bono de
registro apuestas|bono de registro apuestas deportivas|bono
de registro casa de apuestas|bono gratis apuestas|bono marca apuestas|bono por registro apuestas|bono por registro apuestas deportivas|bono por registro casa de apuestas|bono
registro apuestas|bono sin deposito apuestas|bono sin depósito apuestas|bono sin deposito apuestas deportivas|bono
sin depósito apuestas deportivas|bono sin deposito casa de apuestas|bono sin deposito marca apuestas|bono sin ingreso apuestas|bono sin ingreso apuestas deportivas|bonos apuestas|bonos apuestas colombia|bonos apuestas deportivas|bonos apuestas deportivas sin deposito|bonos apuestas gratis|bonos apuestas sin deposito|bonos apuestas sin depósito|bonos bienvenida apuestas|bonos bienvenida casas apuestas|bonos bienvenida casas de apuestas|bonos casa de apuestas|bonos casas
apuestas|bonos casas de apuestas|bonos casas de
apuestas colombia|bonos casas de apuestas deportivas|bonos casas de apuestas españa|bonos casas de
apuestas nuevas|bonos casas de apuestas sin deposito|bonos casas de apuestas
sin depósito|bonos de apuestas|bonos de apuestas deportivas|bonos de apuestas gratis|bonos de apuestas sin deposito|bonos de bienvenida apuestas|bonos de bienvenida apuestas deportivas|bonos de bienvenida casa de apuestas|bonos de
bienvenida casas de apuestas|bonos de bienvenida de casas de apuestas|bonos de bienvenida en casas de apuestas|bonos de casas de apuestas|bonos
de casas de apuestas sin deposito|bonos en casa de apuestas|bonos
en casas de apuestas sin deposito|bonos gratis apuestas|bonos gratis
apuestas deportivas|bonos gratis casas de apuestas|bonos gratis sin deposito apuestas|bonos paginas de apuestas|bonos registro casas de apuestas|bonos
sin deposito apuestas|bonos sin depósito apuestas|bonos sin deposito apuestas deportivas|bonos
sin deposito casas de apuestas|bot de apuestas deportivas gratis|boxeo apuestas|brasil
colombia apuestas|brasil peru apuestas|brasil vs colombia apuestas|buenas apuestas para
hoy|buscador cuotas apuestas|buscador de apuestas seguras|buscador de
cuotas apuestas|buscador de cuotas de apuestas|buscar apuestas seguras|caballos apuestas|calculador
de apuestas|calculador de cuotas apuestas|calculadora apuestas|calculadora apuestas combinadas|calculadora
apuestas de sistema|calculadora apuestas deportivas|calculadora apuestas deportivas seguras|calculadora apuestas multiples|calculadora apuestas segura|calculadora apuestas seguras|calculadora apuestas
sistema|calculadora apuestas yankee|calculadora arbitraje apuestas|calculadora cubrir apuestas|calculadora cuotas apuestas|calculadora de apuestas|calculadora de apuestas combinadas|calculadora de apuestas de futbol|calculadora de apuestas de sistema|calculadora de apuestas
deportivas|calculadora de apuestas multiples|calculadora de apuestas seguras|calculadora de apuestas sistema|calculadora de apuestas surebets|calculadora de arbitraje apuestas|calculadora de cuotas
apuestas|calculadora de cuotas de apuestas|calculadora para apuestas
deportivas|calculadora poisson apuestas|calculadora poisson apuestas deportivas|calculadora poisson para apuestas|calculadora scalping apuestas deportivas|calculadora sistema
apuestas|calculadora stake apuestas|calculadora trading apuestas|calcular apuestas|calcular apuestas deportivas|calcular apuestas
futbol|calcular apuestas sistema|calcular cuotas apuestas|calcular cuotas apuestas combinadas|calcular cuotas apuestas deportivas|calcular
cuotas de apuestas|calcular ganancias apuestas deportivas|calcular momios apuestas|calcular probabilidad cuota apuestas|calcular stake apuestas|calcular unidades apuestas|calcular yield apuestas|calculo de apuestas|calculo de apuestas deportivas|cambio de cuotas apuestas|campeon champions
apuestas|campeon eurocopa apuestas|campeon liga apuestas|campeon nba apuestas|canales de apuestas gratis|carrera de caballos apuestas|carrera
de caballos apuestas juego|carrera de caballos con apuestas|carrera de galgos apuestas|carreras de caballos apuestas|carreras de caballos apuestas online|carreras de caballos con apuestas|carreras de caballos juegos
de apuestas|carreras de galgos apuestas|carreras de galgos
apuestas online|carreras de galgos apuestas trucos|carreras galgos
apuestas|casa apuestas argentina|casa apuestas atletico de madrid|casa apuestas barcelona|casa
apuestas betis|casa apuestas bono bienvenida|casa apuestas bono gratis|casa apuestas
bono sin deposito|casa apuestas cerca de mi|casa apuestas chile|casa apuestas colombia|casa apuestas con mejores cuotas|casa apuestas deportivas|casa apuestas españa|casa apuestas española|casa apuestas eurocopa|casa apuestas futbol|casa apuestas mejores cuotas|casa apuestas mundial|casa apuestas nueva|casa apuestas nuevas|casa apuestas online|casa apuestas
peru|casa apuestas valencia|casa de apuestas|casa de apuestas 10 euros gratis|casa de apuestas argentina|casa de
apuestas atletico de madrid|casa de apuestas baloncesto|casa
de apuestas barcelona|casa de apuestas beisbol|casa de apuestas betis|casa de apuestas bono|casa de apuestas bono bienvenida|casa de apuestas bono de bienvenida|casa de apuestas bono gratis|casa de apuestas bono por registro|casa de apuestas bono sin deposito|casa de apuestas
boxeo|casa de apuestas caballos|casa de apuestas carreras de caballos|casa de apuestas cerca de
mi|casa de apuestas cerca de mí|casa de apuestas champions league|casa de apuestas chile|casa de
apuestas ciclismo|casa de apuestas colombia|casa de apuestas
con bono de bienvenida|casa de apuestas con bono sin deposito|casa de apuestas con cuotas mas
altas|casa de apuestas con esports|casa de apuestas con las mejores cuotas|casa de apuestas con licencia en españa|casa de apuestas con mejores cuotas|casa
de apuestas con pago anticipado|casa de apuestas con paypal|casa de apuestas copa america|casa de apuestas
de caballos|casa de apuestas de colombia|casa de apuestas de españa|casa de apuestas de futbol|casa de apuestas de fútbol|casa de apuestas de futbol peru|casa de
apuestas de peru|casa de apuestas del madrid|casa de apuestas del real
madrid|casa de apuestas deportivas|casa
de apuestas deportivas cerca de mi|casa de apuestas deportivas en argentina|casa de apuestas deportivas
en chile|casa de apuestas deportivas en colombia|casa de apuestas deportivas en españa|casa
de apuestas deportivas en madrid|casa de apuestas deportivas españa|casa de apuestas deportivas
españolas|casa de apuestas deportivas madrid|casa de apuestas deportivas mexico|casa
de apuestas deportivas online|casa de apuestas deportivas peru|casa de apuestas deposito 5 euros|casa de apuestas
deposito minimo|casa de apuestas deposito minimo 1 euro|casa de
apuestas depósito mínimo 1 euro|casa de
apuestas en españa|casa de apuestas en linea|casa de apuestas en madrid|casa de apuestas
en perú|casa de apuestas en vivo|casa de apuestas españa|casa de apuestas españa inglaterra|casa de apuestas española|casa de apuestas españolas|casa de apuestas esports|casa de apuestas eurocopa|casa de apuestas europa league|casa de apuestas f1|casa de apuestas formula 1|casa de apuestas futbol|casa de
apuestas ingreso minimo|casa de apuestas ingreso minimo 1 euro|casa de apuestas ingreso mínimo 1 euro|casa de apuestas legales|casa de
apuestas legales en colombia|casa de apuestas legales en españa|casa de apuestas libertadores|casa de apuestas liga española|casa de apuestas madrid|casa de apuestas mas segura|casa de apuestas mejores|casa
de apuestas méxico|casa de apuestas minimo 5 euros|casa de apuestas mlb|casa de apuestas mundial|casa de apuestas nba|casa de apuestas nfl|casa de apuestas nueva|casa de apuestas nuevas|casa de apuestas oficial del real madrid|casa de apuestas oficial
real madrid|casa de apuestas online|casa de apuestas online
argentina|casa de apuestas online chile|casa de apuestas
online españa|casa de apuestas online mexico|casa de apuestas online
paraguay|casa de apuestas online peru|casa de apuestas online
usa|casa de apuestas online venezuela|casa de apuestas pago anticipado|casa de apuestas para boxeo|casa de apuestas para ufc|casa de apuestas peru|casa de apuestas perú|casa de apuestas
peru online|casa de apuestas por paypal|casa de
apuestas promociones|casa de apuestas que regalan dinero|casa
de apuestas real madrid|casa de apuestas regalo de bienvenida|casa de apuestas sevilla|casa de apuestas sin dinero|casa de
apuestas sin ingreso minimo|casa de apuestas sin licencia en españa|casa de
apuestas sin minimo de ingreso|casa de apuestas stake|casa de apuestas tenis|casa de apuestas ufc|casa de apuestas valencia|casa de apuestas venezuela|casa
de apuestas virtuales|casa de apuestas vive la suerte|casa oficial de apuestas del real madrid|casas apuestas asiaticas|casas apuestas bono sin deposito|casas apuestas bonos sin deposito|casas apuestas caballos|casas apuestas chile|casas apuestas ciclismo|casas
apuestas con licencia|casas apuestas con licencia en españa|casas apuestas deportivas|casas apuestas
deportivas colombia|casas apuestas deportivas españa|casas apuestas deportivas españolas|casas apuestas deportivas nuevas|casas apuestas españa|casas
apuestas españolas|casas apuestas esports|casas apuestas eurocopa|casas apuestas golf|casas apuestas ingreso minimo 5 euros|casas apuestas legales|casas apuestas legales españa|casas
apuestas licencia|casas apuestas licencia españa|casas apuestas mexico|casas apuestas mundial|casas apuestas nba|casas apuestas nuevas|casas apuestas nuevas españa|casas apuestas ofertas|casas apuestas online|casas apuestas paypal|casas apuestas peru|casas apuestas sin licencia|casas apuestas tenis|casas asiaticas apuestas|casas de apuestas|casas de
apuestas 5 euros|casas de apuestas app|casas de apuestas argentinas|casas de apuestas asiaticas|casas de apuestas baloncesto|casas de apuestas barcelona|casas de
apuestas bono bienvenida|casas de apuestas bono de bienvenida|casas de apuestas bono
por registro|casas de apuestas bono sin deposito|casas de apuestas bono sin ingreso|casas de apuestas bonos|casas de apuestas bonos de bienvenida|casas de apuestas bonos gratis|casas de apuestas
bonos sin deposito|casas de apuestas boxeo|casas de apuestas
caballos|casas de apuestas carreras de caballos|casas de
apuestas casino|casas de apuestas casino online|casas de apuestas cerca de mi|casas de apuestas
champions league|casas de apuestas chile|casas de apuestas ciclismo|casas de apuestas colombia|casas de apuestas com|casas
de apuestas con app|casas de apuestas con apuestas gratis|casas de apuestas
con bono|casas de apuestas con bono de bienvenida|casas de apuestas con bono de registro|casas de apuestas con bono por registro|casas de apuestas con bono sin deposito|casas
de apuestas con bonos|casas de apuestas con bonos gratis|casas de
apuestas con bonos sin deposito|casas de apuestas con deposito minimo|casas de apuestas con esports|casas de apuestas con handicap asiatico|casas de apuestas con licencia|casas de apuestas con licencia en españa|casas de apuestas con licencia españa|casas de
apuestas con licencia española|casas de apuestas con mejores cuotas|casas de apuestas con pago anticipado|casas de apuestas con paypal|casas de apuestas con paypal en perú|casas de apuestas con promociones|casas de apuestas con ruleta en vivo|casas de apuestas copa del rey|casas de apuestas de caballos|casas de
apuestas de españa|casas de apuestas de futbol|casas de apuestas de fútbol|casas de apuestas de peru|casas de apuestas deportivas|casas de apuestas deportivas asiaticas|casas de apuestas deportivas
colombia|casas de apuestas deportivas comparativa|casas de apuestas deportivas con paypal|casas de
apuestas deportivas en chile|casas de apuestas deportivas en españa|casas
de apuestas deportivas en linea|casas de apuestas deportivas en madrid|casas de apuestas deportivas en mexico|casas
de apuestas deportivas en peru|casas de apuestas deportivas en sevilla|casas de apuestas deportivas en valencia|casas de apuestas deportivas españa|casas de apuestas deportivas españolas|casas de apuestas deportivas legales|casas
de apuestas deportivas madrid|casas de apuestas deportivas mexico|casas de apuestas
deportivas nuevas|casas de apuestas deportivas online|casas de apuestas deportivas peru|casas de apuestas deportivas perú|casas de apuestas deposito minimo
1 euro|casas de apuestas depósito mínimo 1 euro|casas de apuestas dinero gratis|casas
de apuestas en argentina|casas de apuestas en barcelona|casas de apuestas en chile|casas de apuestas en colombia|casas de apuestas en españa|casas de apuestas en españa online|casas de apuestas en linea|casas de apuestas en madrid|casas de apuestas en méxico|casas de apuestas en peru|casas de
apuestas en perú|casas de apuestas en sevilla|casas de apuestas en uruguay|casas de
apuestas en valencia|casas de apuestas en venezuela|casas de apuestas equipos de futbol|casas de apuestas
españa|casas de apuestas españa alemania|casas de apuestas españa inglaterra|casas de apuestas españa licencia|casas de apuestas españa nuevas|casas
de apuestas españa online|casas de apuestas española|casas
de apuestas españolas|casas de apuestas españolas con licencia|casas de apuestas españolas online|casas
de apuestas esports|casas de apuestas eurocopa|casas de apuestas eurocopa 2024|casas de apuestas europa league|casas de apuestas f1|casas de apuestas fisicas en barcelona|casas de apuestas fisicas en españa|casas
de apuestas formula 1|casas de apuestas fuera de españa|casas de apuestas futbol|casas de apuestas fútbol|casas de apuestas futbol españa|casas de apuestas ganador eurocopa|casas de apuestas gratis|casas de apuestas
ingreso minimo|casas de apuestas ingreso minimo 1 euro|casas de apuestas ingreso minimo 5 euros|casas de apuestas inter barcelona|casas de apuestas legales|casas
de apuestas legales en colombia|casas de apuestas legales en españa|casas de apuestas legales en mexico|casas
de apuestas legales españa|casas de apuestas legales
mx|casas de apuestas licencia|casas de apuestas licencia españa|casas de apuestas lista|casas de apuestas
madrid|casas de apuestas mas seguras|casas de apuestas mejores bonos|casas de apuestas mejores cuotas|casas de apuestas mexico|casas de apuestas
méxico|casas de apuestas minimo 5 euros|casas de apuestas mlb|casas de apuestas mundial|casas
de apuestas mundial baloncesto|casas de apuestas mundiales|casas de apuestas nba|casas de apuestas
no reguladas en españa|casas de apuestas nueva ley|casas de apuestas nuevas|casas de apuestas nuevas en colombia|casas de
apuestas nuevas en españa|casas de apuestas nuevas españa|casas de apuestas ofertas|casas de apuestas online|casas de apuestas
online argentina|casas de apuestas online colombia|casas de apuestas online deportivas|casas de
apuestas online ecuador|casas de apuestas online en argentina|casas de apuestas online en chile|casas de apuestas online en colombia|casas de apuestas online en españa|casas de apuestas online en mexico|casas
de apuestas online españa|casas de apuestas online mas fiables|casas de apuestas online mexico|casas de apuestas online nuevas|casas de apuestas online
peru|casas de apuestas online usa|casas de apuestas online venezuela|casas de apuestas pago paypal|casas
de apuestas para ufc|casas de apuestas paypal|casas de apuestas peru bono sin deposito|casas de
apuestas presenciales en españa|casas de apuestas promociones|casas de apuestas
que aceptan paypal|casas
TT88 Banca anyone Tried it yet? Let me know if it’s worth my time I need something to keep me occupied on this long commute tt88banca
Yo, crazywinmaya, you got my attention! The interface is slick and easy to navigate. Let’s see if I can snag a win or two. Give it a go crazywinmaya.
Just tried hb888game. Solid selection of games and the site runs smoothly. Gonna stick around and see what happens! Enjoy it yourself hb888game.
die besten wettstrategien
Here is my webpage; Wette Spielen
sportwetten österreich steuern
Look into my page; sichere wetten strategie (https://makeoverbyami.com/index.php/2025/10/07/wettbasis-tipps-heute/)
Здарова народ!
Нашел любопытную статью.
Советую глянуть.
Смотрите тут:
[url=https://fieldmore.dk]Мега сайт[/url]
Вроде норм.
sportwetten anmeldebonus ohne einzahlung
my webpage wetten halbzeit Endstand
I was able to find good information from your blog posts.
sportwetten betibet wettseiten mit bonus anmeldung
Become our affiliate—tap into unlimited earning potential!
worldwidenetworkhub – Platform makes building relationships across the globe simple and efficient.
networkingworldhub – Global networking made simple, found meaningful connections quickly.
奇思妙探第二季高清完整官方版,海外华人可免费观看最新热播剧集。
侠之盗高清完整版结合大数据AI分析,海外华人可免费观看最新热播剧集。
Lotus365vipsignup? Dude, if you’re looking for a VIP experience and some serious action, this might be your spot. I’ve heard some whispers about it offering sweet bonuses and a slick interface. Check it out and let me know what you think! Jump in and see what the hype is about!lotus365vipsignup
Looking for the ultimate sabong experience? Check out sabong 67! Trust me, you won’t be disappointed. If you fancy sabong games, come and enjoy at sabong 67 now!
Heard goldbet888casino.com is giving away goldbet free 50! Gonna try and snag it. Wish me luck guys! goldbet free 50
pferderennen meran wetten deutschland ungarn (Goldenwood.ca)
超人和露易斯第二季高清完整版结合大数据AI分析,海外华人可免费观看最新热播剧集。
塔尔萨之王第三季高清完整官方版,海外华人可免费观看最新热播剧集。
wetten dass gewinner heute
Look at my homepage Bester Wettanbieter Bonus
wette deutschland spanien
Here is my web blog; wetten ohne einzahlung österreich (theeldorado.In)
لعبة طيارة، مع شاحن وريموت، أزرق، 188 لعبة الطياره تُصنف ضمن ألعاب الكازينو التي تعتمد على مبدأ الرهان المتزايد، حيث يتعين على اللاعبين اتخاذ قرار سريع حول وقت التوقف لسحب أرباحهم قبل أن تختفي فرصة الفوز. اشتهرت هذه اللعبة في الأول من خلال كازينو 1xBet، تم بدأت بالظهور في أغلب الكازينوهات الأخرى عبر الإنترنت. وأوضح أن الصورة الحلال في هذا السياق هي التي تكون فيها الجهة المنظمة للألعاب، مثل الدولة أو جهة رسمية، هي التي تدفع الجوائز، وليس المشاركون في اللعبة.
https://amassociates.com.pk/%d9%85%d8%b1%d8%a7%d8%ac%d8%b9%d8%a9-%d8%b4%d8%a7%d9%85%d9%84%d8%a9-%d9%84%d9%84%d8%b9%d8%a8%d8%a9-%d8%a7%d9%84%d8%b7%d9%8a%d8%a7%d8%b1%d8%a9-aviator-%d9%81%d9%8a-%d9%83%d8%a7%d8%b2%d9%8a%d9%86%d9%88/
أشعر أنني محظوظ؟ ثم دعونا محاكاة اليانصيب أو اثنين! توليد 5 تذاكر اليانصيب النتائج بنقرة زر واحدة. يمكنك الاختيار من محاكاة Powerball أو Mega Millions. أوه نعم ، يمكنك أيضا نسخ النتائج إلى الحافظة الخاصة بك بنقرة بسيطة مثل أي ميزة “ميزة رقم عشوائي الزائد”. يتضمن واجه اللعبة معلومات حول الجولات السابقة ودردشة مع لاعبين آخرين يمكنك من خلالها تبادل الخبرات. وعلى الرغم من أن النصائح تبقى استشارية فحسب، فإن دراسة الإحصائيات قد تساعدك في اتخاذ قرارات أكثر وعيًا أثناء اللعب. يشير العديد من اللاعبين المحترفين إلى أن تحليل المضاعفات السابقة ومراقبة الاتجاهات العامة يمكن أن يزيد بشكل كبير من فرص النجاح، على الرغم من عشوائية مولّد الأرقام.
online wettanbieter deutschland
Also visit my page – wetten ohne einzahlung bonus –
Ima,
Your point of view caught my eye and was very interesting. Thanks. I have a question for you.
wetten in der schweiz
Feel free to visit my web site: wettseiten österreich
wettseiten österreich
Feel free to surf to my blog post – Tor wetten
besten wett tipps heute
Also visit my blog post – beste wetter-App österreich
Wow that was strange. I just wrote an extremely long comment but after I clicked submit my comment didn’t show up. Grrrr… well I’m not writing all that over again. Anyways, just wanted to say fantastic blog!
I want to to thank you for this excellent read!! I definitely enjoyed every little bit of it. I’ve got you book-marked to check out new stuff you post…
gratis wette ohne einzahlung
my blog: sportwetten online Anbieter
was ist eine kombiwette
Here is my homepage … Die besten Wettstrategien
[url=https://shumoizolyaciya-arok-avto-77.ru]шумоизоляция арок авто[/url]
sportwetten bonus aktionen
Here is my web-site – Deutsche Wettanbieter
шиномонтаж выездной https://vyezdnoj-shinomontazh-77.ru
welche eugh sportwetten anbieter gibt es
Sportwetten Anbieten; Ahdp-Gse.Com.Pt, online
testsieger
Сайт о фермерстве https://webferma.com и садоводстве: посадка, удобрения, защита растений, теплицы и разведение животных. Полезные инструкции и современные агротехнологии.
Справочный IT-портал https://help-wifi.ru программирование, администрирование, кибербезопасность, сети и облачные технологии. Инструкции, гайды, решения типовых ошибок и ответы на вопросы специалистов.
wetten deutschland frankreich
Also visit my website sportwetten sichere tipps (Fanny)
Новости и обзоры https://mechfac.ru о мире технологий, экономики, крипторынка, культуры и шоу-бизнеса. Всё, что важно знать о современном обществе.
Все об автозаконах https://autotonkosti.ru и штрафах — правила дорожного движения, работа ГИБДД, страхование ОСАГО, постановка на учет и оформление сделки купли-продажи авто.
Онлайн новостной портал https://parnas42.ru с актуальными новостями, экспертными комментариями и главными событиями дня. Быстро, объективно и по существу.
Новостной портал https://webof-sar.ru свежие события России и мира, политика, экономика, общество, технологии и культура. Оперативные публикации и аналитика каждый день.
Alright, slot lovers, listen up! Getting to the PHL63 slots is now a breeze thanks to this login link. No more scrolling forever. Just straight to the sweet, sweet reels. Good luck! phl63 slot login
¡Amo Deportes Caliente! Siempre tienen los eventos que me interesan y las cuotas están de lujo. Recomendadísimo para los que aman el deporte y las apuestas deportes caliente
MNL63 login is fast. Get straight to business and play. Very convenient! Here is the link to get started: mnl63 login
best online slot usa, free spins no deposit online casino australia gambling health And safety yukon gold casino, or bet365 play united
statesn roulette online uk
wettbasis gratiswetten category
Feel free to surf to my web page; wetten dass tickets Gewinnen
schleswig holstein sportwetten lizenz ergebnisse live
Мировые новости https://m-stroganov.ru о технологиях и криптовалютах, здоровье и происшествиях, путешествиях и туризме. Свежие публикации и экспертные обзоры каждый день.
Последние обновления: https://parfum-trade.ru/privacy/
wetten in der schweiz
Also visit my website; Tippen Sportwetten
wettanbieter vergleich bonus
Here is my web-site: wettprognosen
Хочешь продать недвижимость? срочно продать квартиру в Москве экспертная оценка, подготовка к продаже, юридическая проверка и сопровождение на всех этапах сделки.
Все самое интересное новостной портал с лентой последних событий, аналитикой и комментариями экспертов. Оперативные публикации и аналитика каждый день.
sichere App für sportwetten heute
超人和露易斯第一季高清完整官方版,海外华人可免费观看最新热播剧集。
我欲为人第二季官方认证平台,专为海外华人设计,24小时不间断提供高清视频和直播服务。
Promotion tracking clarity helps users manage rewards more efficiently across platforms. Clear reward dashboards improve experience significantly. Many comparison discussions mention fortune play casino bonus codes when reviewing promotion systems. Simple claim processes improve accessibility. Transparent promotion design usually helps build stronger long term user trust and satisfaction.
Gratis Sportwetten ohne einzahlung live strategie
Нужен новый телефон? магазин телефонов айфон по выгодной цене. Интернет?магазин i4you предлагает оригинальные устройства Apple с официальной гарантией производителя — от года и более. Интернет?магазин i4you: оригинальные устройства Apple с гарантией от года. Выбирайте лучшее!
Новый iPhone 17 купить уже в продаже в Санкт?Петербурге! В интернет?магазине i4you вас ждёт широкий выбор оригинальных устройств Apple по выгодным ценам. На каждый смартфон действует официальная гарантия от производителя сроком от года — вы можете быть уверены в качестве и долговечности покупки.
certainly like your website but you need to take a look at the spelling on several of your posts. A number of them are rife with spelling issues and I find it very troublesome to tell the reality on the other hand I’ll certainly come back again.
海外华人必备的yifan平台,提供最新高清电影、电视剧,无广告观看体验。
huarenus平台结合大数据AI分析,专为海外华人设计,提供高清视频和直播服务。
Интересует бьюти индустрия? вакансии мастер наращивания ресниц вакансии косметолога, массажиста, мастера маникюра, шугаринга, ресниц, бровиста, колориста и администратора салона красоты. Курсы для бьюти мастеров, онлайн обучение и сертификаты.
Планируешь ремонт? ремонт ванных комнат владивосток отзывы от косметического обновления до капитальной перепланировки. Индивидуальный подход, современные технологии и официальное оформление договора.
范德沃克高清完整版,海外华人可免费观看最新热播剧集。
Обклеить рекламой автомобиль https://oklejka-transporta.ru
digital buying experience site – Smooth browsing and clear layout, great for discovering and building ideas.
Digital Buying Experience Website – Well-presented and enjoyable to use, perfect for exploring new thoughts.
asiatische wetten tore gegen den euro
Handicap bei wetten (https://ny.Leksandstrand.se)
gewinn ideen
Top online casinos Australia – best real money pokies and games
一帆视频海外华人首选,采用机器学习个性化推荐,提供最新华语剧集、美剧、日剧等高清在线观看。
Velvet Vendor 2 Picks – Came across this site in search, everything is thoughtfully displayed.
sportwetten anbieten
Also visit my homepage spiel Wetten
Velvet Vendor 2 Finds – Found in search results, the content seems honest and neatly arranged.
超人和露易斯第二季高清完整版,海外华人可免费观看最新热播剧集。
捕风捉影在线免费在线观看,海外华人专属平台运用AI智能推荐算法,高清无广告体验。
Vendor Velvet Corner – Easy site flow, products are visible, and descriptions feel accurate.
Vendor Velvet Market – Navigation is effortless, products are easy to see, and descriptions seem genuine.
Venverra Market – Attractive layout, items are easy to find, and navigating the site feels smooth.
Venverra Hub – Cool selection, pages feel modern and browsing is straightforward.
bester sportwetten bonus (https://Kohoutek.fun/2025/10/06/casino-bonus-2025-Ohne-einzahlung/) app
bester sportwetten bonus (https://Kohoutek.fun/2025/10/06/casino-bonus-2025-Ohne-einzahlung/) app
us wahl wettquoten
my homepage beste wett Tipp seite
Venvira Corner – Positive look at first glance, site feels smooth and easy to navigate.
Venvira Essentials – Positive first impression, polished visuals and intuitive site flow.
krypto wettanbieter
my blog … sichere wett tipps morgen (Latasha)
sportwetten strategie pdf
Also visit my web-site – wettstrategie doppelte chance
official shop link – The items look fantastic and the checkout flow works perfectly.
secure order link – Everything is visually clean and browsing is very smooth.
premium storefront – The checkout system works flawlessly alongside a fun product lineup.
official shop link – The site feels streamlined and browsing products is easy.
browse products here – Fresh snacks and clear descriptions make picking items simple and enjoyable.
browse products here – Fresh snacks and clear descriptions make picking items simple and enjoyable.
visit this shop – I managed to find the perfect product during my search today.
verified store page – I didn’t have to search long to find the exact product.
online trading hub – The offers here are different from what I’ve seen elsewhere.
trusted trading store – Found some exclusive bargains I hadn’t seen elsewhere.
click to browse – I enjoy how logically everything is laid out across the pages.
Maple Skies – I really appreciate how simple it is to move around the site.
sportwetten tipps verkaufen
Also visit my page: Wettanbieter Beste Quoten
verified deal page – Coupons are easy to grab and the process is smooth.
browse discounts here – The interface makes it easy to claim deals without delay.
österreich türkei wetten
Here is my page; wettseiten ohne Lugas
routerreef.shop – Really impressed with the variety of products and how quickly pages load.
secure order link – Everything loads fast and the variety of products is excellent.
online sportwetten schweiz [http://www.teneriffa.de] verluste zurückholen österreich
visit this shop – Everything feels neatly arranged and the selection is very tempting.
Sicherste Sportwetten Strategie online
schweiz
secure electronics store – I appreciated the fast reply and straightforward solution provided.
trusted laptop hub – They responded almost immediately and sorted things out efficiently.
secure shopping page – The site is reassuring and purchasing was effortless.
securesparrow.shop – The website feels secure and completing my order was quick and easy.
shopping destination – The rates feel reasonable and competitive in the current market.
explore the collection – The store offers fair rates that are in line with similar sites.
beste sportwetten wett app mit startguthaben, newfatesolutions.com,
premium storefront – Smooth browsing combined with bright, clear design makes it a pleasure to explore.
official buying hub – The site feels lively and performs well on all pages.
online wetten verboten
Here is my blog: Wette Deutschland England
kombiwette pferderennen
Feel free to visit my blog – Beste Wetten Heute
explore the collection – It was simple to complete my purchase and I felt the transaction was safe.
exclusive gift source – I enjoyed a smooth checkout and felt safe at every step.
official buying hub – Clear info and useful updates simplified my purchase today.
official store link – Useful info and timely updates made browsing and shopping stress-free.
official shop link – The site feels welcoming and exploring the products was fun.
secure order link – Fun atmosphere and easy-to-use pages made my visit pleasant.
trusted checkout page – The explanations are easy to follow and supported by excellent imagery.
streamlined billing service – It’s refreshing to see such detailed information presented so neatly.
wett tipps prognosen
my blog post :: live wetten Im internet
pferderennen düsseldorf wetten – Karolyn,
online deutschland
browse products here – The tech options are appealing and the site runs without any delay.
premium tech shop – The site performance is excellent and the options are appealing.
Pistachio Plaza – The checkout process was straightforward and tracking updates were very clear.
check it out here – The buying process was smooth and shipping information arrived right on time.
secure product hub – I appreciate the professional tone throughout the browsing experience.
ciphercitadel.shop – The atmosphere of the site feels reliable and welcoming while exploring the items.
Gotta crown yourself a winner! 88king offers a royal experience. Plenty of action and potential for big payouts. Hail to the king at 88king.
Yo, kg88bet is pretty legit. Been playing here for a while, and the payouts are quick. Good selection of games too. Give it a shot! Check it out here: kg88bet
Taigoo88, eh? It’s got a nice interface and seems like a decent place to play. I tried only a few games here, all smooth. Give it a try, you might like it. Here’s a link: taigoo88
my new favorite decor spot – Absolutely adored the vibe and plan to revisit soon.
shop the collection here – Everything feels so thoughtfully curated, I’m coming back again.
curated shopping spot – I appreciate the stylish offerings and the effortless buying experience.
browse their catalog – The assortment is impressive and the entire checkout journey felt seamless.
trail gear collection – Quick shipping and everything arrived in perfect order.
wilderness gear shop – The camping items came quickly and in excellent condition.
wett tipps pferderennen
My web-site :: beste wettanbieter cash out
signature cocoa blends – You can sense the care behind both the choices and layout.
explore sweet selections – You can tell real thought went into curating these products.
fashion scarf boutique – Lovely designs that feel soft and perfect for daily wear.
online tack shop – Everything on my checklist was available, and the current prices seem competitive.
Scarf Street – The scarves are stylish and very comfortable for everyday use.
premium horse essentials – It’s great to see such a complete selection with pricing that feels justifiable.
online savings center – The transaction process felt secure and efficient.
discover new arrivals – Smooth scrolling and an uncomplicated payment flow.
premium kettle store – I’m thrilled with the wide range of options and how quickly my order arrived.
home cooking essentials – Found useful gadgets that helped me cook more efficiently.
specialty kettle source – I appreciate the diverse inventory and the impressively fast shipping.
gourmet essentials boutique – Picked up tools that made cooking more creative and fun.
craft innovation center – Some items here are so unique they’re hard to find elsewhere.
visit Maker Marmot – There are truly distinctive products here you won’t easily find elsewhere.
premium sandal store – Excellent quality footwear and customer service was friendly and helpful.
gaming monitor outlet – Lots of monitors available and the tech details are well presented.
summer sandal outlet – Very happy with the quality and the team answered my questions quickly.
office screen shop – A solid selection of monitors and specs are easy to read and compare.
chef-approved supplies – The range is extensive and the specs are easy to understand.
cookwarecrescent.shop – The variety is impressive and the product details are genuinely useful.
gewinnbringende wettstrategie
Visit my blog; Quotenvergleich
tech and tool collection – Great items for DIY and the descriptions help me make confident purchases.
professional identity hub – Creative, modern branding ideas that are clearly well-planned and carefully designed.
gadget and tool hub – Clear product info paired with a wide range of useful tools.
modern brand studio – The logos are thoughtfully designed and have a very contemporary feel.
browse sustainable products – Love how intuitive the site is and the calming, earthy design.
mindful living store – The website is simple to use and the natural look is very inviting.
budget strategy source – The material here simplified my planning process in a big way.
garden treasures shop – Lovely floral assortment and the order went through quickly.
capital planning resource – The tools and explanations offered real value for my annual review.
petal paradise store – Everything looked beautiful and checkout went very smoothly.
this grooming essentials store – Delivery was tidy and every product was exactly what I expected.
trusted grooming shop – I received exactly what was promised, nicely secured.
natural finish studio – The look is warm and inviting, and the craftsmanship feels premium.
home style studio – Original and stylish décor that makes my space feel complete.
natural finish studio – The look is warm and inviting, and the craftsmanship feels premium.
creative interior hub – Designs feel fresh and thoughtfully made for my space.
authentic home upgrades – The simple yet elegant look highlights the fine materials.
contemporary wood accents – The uncluttered style really showcases the product quality.
home dining essentials – Fast shipping plus careful packaging made the whole experience pleasant.
tech project boutique – Useful tools make all my DIY work much easier to handle.
premium kitchen goods – Quick shipping and careful wrapping ensured nothing was damaged.
home tool store – Practical gadgets and tools that help get work done efficiently.
mountain and trail marketplace – A convenient place to secure dependable gear for weekend escapes.
trail-ready gear source – Ideal for finding durable items before setting off on an adventure.
marble accents hub – I’m impressed with the quality; it’s honestly above what I anticipated.
designer marble store – Quality exceeded my hopes, every item feels premium.
creative blossom shop – The floral variety is amazing and completing my order was fast and easy.
signature flower arrangements – Beautifully arranged flowers and a very user-friendly checkout flow.
plant paradise outlet – Healthy plants delivered safely and looking vibrant right away.
botanical corner shop – My order came carefully packaged and the plants are thriving beautifully.
wettquote us wahl
Also visit my page beste sportwetten app Deutschland (filtersph.top)
the cobalt-inspired market – It combines tasteful selections with an easy buying process.
the coffee gear corner – Impressive selection and great value for every coffee enthusiast.
this brewing supplies store – Quality coffee tools and equipment at very reasonable prices.
the corner shop online – A nicely curated catalog and a smooth transaction from start to finish.
the fast spring corner – Rapid delivery and quality items made ordering easy.
the Speed Springs storefront – Fast shipping and high-quality items made my shopping experience seamless.
Revenue Roost selections – Products and strategies that helped me expand my online income.
this online income shop – Valuable products that make growing online revenue much easier.
Coffee Cairn Store – High-quality beans that delivered incredible flavor and freshness.
the bean boutique – Fresh, flavorful beans that made morning coffee a treat.
clovercove boutique – My space feels more stylish thanks to these lovely accents.
homeworkoutshop – Sturdy gym gear arrived safely and keeps my routines consistent.
squatfitness – Durable gear makes my workouts easier and more effective at home.
wetten com bonus bedingungen
Take a look at my blog … krypto Wettanbieter (Alohafoundersclub.com)
澳超阿德莱德联 vs 珀斯光荣2026最新比分16:35开踢,澳大利亚足球赛事比分让球分析热议。
coveconnect – Items came safely packaged and work perfectly with my devices.
this online income shop – Valuable products that make growing online revenue much easier.
this online income shop – Valuable products that make growing online revenue much easier.
the chic clothing destination – Delivery was quick and the overall unboxing experience felt premium.
this upscale apparel site – Everything was delivered promptly and wrapped with care.
cocoacove home – Every cocoa product was fresh, flavorful, and a treat to enjoy immediately.
this art supply boutique – Excellent quality materials for every painting project I start.
cocoacove – Delicious cocoa treats arrived fresh and made my morning delightful.
this painting supply hub – Tools and materials arrived fast and worked perfectly for my art.
printcloud – High-quality prints arrived quickly and colors were vivid and sharp.
aviancharm – Home decor items that bring cheerful bird-inspired details indoors.
skyprintstudio – Vibrant, high-quality prints arrived on time and I’m very happy with them.
辛芷蕾林雨申《女神蒙上眼》2026都市悬疑职场大戏,海外华人必备高清陆剧,职场暗战烧脑刺激,全球加速实时更新无广告追剧首选。
avianarts – Unique bird-inspired decor that instantly livens up my home.
online wetten österreich
Here is my blog … Kombiwetten Strategie – Dev1.Sentientgeeks.Us,
revenueroost – Excellent resources for boosting online earnings effectively.
spruceatelier – Supplies arrived safely and encouraged creativity in all my studio work.
studiocreations – Tools and art materials arrived quickly and encouraged more creative experimentation.
rankaccelerator – Helped my pages reach higher positions quickly.
searchrocket – Fast and effective SEO improvements for my site.
printpro – Printing supplies arrived fast and made completing projects much easier.
internet wetten bonus
Take a look at my web site; sportwetten tipps vorhersagen gratis (Elissa)
printsolutions – Supplies arrived safely and made all printing tasks faster.
the home espresso hub – I’m impressed with the quality and consistency of every brew.
this coffee emporium – Brewing is easy and flavor is consistently rich and satisfying.
markettools – Helped me stay organized and manage listings effortlessly.
nestcontrol – Marketplace listings were updated quickly and accurately.
Revenue Roost Hub – Helpful tips and tools to expand your digital income.
the passive income corner – Resources here helped me improve my web-based earnings effectively.
this pattern resource store – The patterns matched my project needs beautifully.
PatternPulseHub favorites – Found inventive patterns that worked wonderfully for my project.
BrewBrothers shop online – It’s my go-to for diverse choices and reasonable costs.
my favorite brew shop – The choices are plentiful and the cost feels just right.
exportshoppro – Products arrived fast, in great condition, and descriptions were spot-on.
globalgoodsplus – Orders came on time with excellent packaging and accurate product details.
canvascorner boutique – Art supplies feel professional and enhance every brushstroke.
canvascorner shop – The canvases feel sturdy and perfect for all my creative projects.
mirrortechsecurity – Security utilities are dependable and helped prevent threats effectively.
securetechmirror – Security tools were delivered promptly and improved overall system safety.
RevenueRoost treasures – Tips and tools that simplify boosting online income streams.
the digital income boutique – Valuable insights that improve online profit streams.
shoprush – Orders arrived on time and products looked fantastic.
Blanket Boutique treasures – Soft, plush blankets that are perfect for cold evenings.
retailrush – Shopping experience was seamless and items arrived perfectly.
BlanketBoutique online – Comfortable blankets that keep me warm and cozy every evening.
the kitchenware hub – Durable, high-quality pieces built for everyday handling.
sportwetten schweiz legal
Feel free to visit my web page :: wetten asiatisch tore
this chef’s corner – Durable products that perform consistently and feel premium.
scribblepad – Lightweight and stylish journals for on-the-go note-taking.
petcareplus – Items delivered quickly and helped me maintain my pets’ wellness easily.
ideajournal – Smooth, high-quality pages designed for daily writing inspiration.
RevenueRoost treasures – Tips and tools that simplify boosting online income streams.
ivoryinteriorstore – Decorations arrived safely and added elegance and charm to my home décor.
petcareplus – Items delivered quickly and helped me maintain my pets’ wellness easily.
this passive income shop – Tools and insights that make earning online smoother and more effective.
the unique picks shop – I enjoy browsing items that feel fresh and less mainstream.
ivorydecorplus – Elegant décor arrived quickly and brought style and sophistication to my space.
this creative marketplace – I’m impressed by how uncommon the selections are.
basilessentials – Herbs and cooking products that exceeded my expectations.
aromabasil – Fresh and fragrant herbs that made cooking enjoyable and easy.
this creator hub – I found useful tools and tips for building and designing things.
this reliable cart shop – Checkout was seamless and package came faster than I thought.
CreatorCorner selections – Perfect for anyone looking to create or build something unique.
this convenient cart shop – Checkout was simple and my package arrived very fast.
revenueroost – Excellent resources for boosting online earnings effectively.
freightfable gear – Durable shipping products arrived quickly and made my work much smoother today.
this online revenue hub – Practical tips and tools for growing your web-based earnings.
atelierdelights – Almond goodies arrived promptly and tasted just as expected.
freightfable supplies – Boxes and packaging materials arrived neatly and helped me organize everything efficiently.
nuttygourmet – Beautifully presented almond products arrived fresh and flavorful.
hazelnutharborplus – Nuts came on time, crispy and delicious, ideal for snacking or cooking.
hazelnutharborplus – Nuts came on time, crispy and delicious, ideal for snacking or cooking.
gentlehome – Safe products that are convenient and allergy-conscious.
gentlehome – Safe products that are convenient and allergy-conscious.
PatternPulseHub favorites – Found inventive patterns that worked wonderfully for my project.
this creative pattern corner – Amazing patterns that fit my project perfectly.
wettanbieter deutsche lizenz
Also visit my blog post: amerikanische buchmacher
this spice haven – Fragrant cinnamon sticks that made cooking more flavorful and enjoyable.
Adventure Aisle picks – It’s my go-to place when I need a spark of travel motivation.
the Revenue Roost collection – Tools and advice that make generating online income simple.
this aromatic spice shop – Cinnamon sticks that made desserts smell and taste incredible.
this online revenue hub – Practical tips and tools for growing your web-based earnings.
the go-to gear spot – Spending time here really boosts my travel planning mood.
arc air plus – The unit works smoothly and keeps my home environment crisp and clean.
beste wettanbieter cash out
Here is my page: wette deutschland schottland (Lou)
healthharborstore – Items arrived on time and helped me maintain a healthier lifestyle.
arc air essentials – Devices arrived fast and keep my space fresh and allergen-free.
homecarewellness – Fast delivery of wellness essentials that helped me feel organized and healthy.
fashion boot gallery – The collection truly captures modern western vibes.
exclusive footwear picks – These boots bring plenty of character and charm.
this artisan silver shop – Unique, stylish designs and friendly support impressed me.
this jewelry showcase – Stunning designs and excellent customer care made shopping enjoyable.
stickerdelight – High-quality stickers came safely and added a creative touch to my notebooks.
bloomingsavings – Quality finds that make budget shopping enjoyable.
this online revenue hub – Practical tips and tools for growing your web-based earnings.
stickerparadise – Stickers were delivered safely and instantly made my projects more colorful and creative.
this luxe fashion corner – Trendy items that feel solid, stylish, and high-end.
thriftybloom – Affordable and reliable finds that make online shopping worthwhile.
RevenueRoost treasures – Tips and tools that simplify boosting online income streams.
LockAndLuxe selections – High-quality, stylish accessories that last for a long time.
archtechgear – Items were delivered on schedule and operate without any issues.
this artisan treasures store – Beautifully crafted items that brighten up my home interior.
travelbuddy – Everything you need for stress-free travel.
adaptermart – Quick delivery and tech gadgets work flawlessly right away.
voyagerstuff – Smart travel gear that fits any trip.
this handmade decor shop – Artful pieces that bring warmth and beauty into my living space.
this worldwide marketplace – International products arrive quickly and at reasonable cost.
shoe lover’s haven – Every item is presented with care, offering inspiration for a wide range of tastes.
this creative artisan hub – Handmade items that feel special and made with care.
chic sole finds – The assortment highlights unique pieces chosen with attention to detail.
my favorite import shop – I love finding overseas products without being hit by huge delivery charges.
this creative crafts store – Handmade pieces that feel one-of-a-kind and full of character.
the passive income corner – Resources here helped me improve my web-based earnings effectively.
the digital income boutique – Valuable insights that improve online profit streams.
cluster and canyon shop – A fascinating range of products that deserves another look.
Your point of view caught my eye and was very interesting. Thanks. I have a question for you. https://accounts.binance.info/ph/register-person?ref=IU36GZC4
cluster and canyon shop – A fascinating range of products that deserves another look.
mintwardrobe – Stylish pieces arrived safely and look fantastic in real life.
Breeze Borough Store – The shopping experience is smooth and the vibe feels very relaxed.
mintwardrobe – Stylish pieces arrived safely and look fantastic in real life.
нейросеть реферат [url=https://nejroset-dlya-ucheby-4.ru/]нейросеть реферат[/url] .
the Breezeborough collection – Shopping feels pleasant and stress-free with a welcoming vibe.
нейросеть онлайн для учебы [url=https://nejroset-dlya-ucheby-3.ru/]nejroset-dlya-ucheby-3.ru[/url] .
protein corner hub – Large variety of supplements and wellness products makes shopping efficient.
fishisle – Supplies were delivered quickly and made tank management effortless.
ии для школьников и студентов [url=https://nejroset-dlya-ucheby-7.ru/]nejroset-dlya-ucheby-7.ru[/url] .
ии для учебы студентов [url=https://nejroset-dlya-ucheby-6.ru/]nejroset-dlya-ucheby-6.ru[/url] .
supplement porch – A solid range of protein powders and nutrition products for easy shopping.
нейросеть онлайн для учебы [url=https://nejroset-dlya-ucheby-5.ru/]nejroset-dlya-ucheby-5.ru[/url] .
aquariumhub – Aquarium tools arrived safely and ensured a smooth setup experience.
organizeplus – Sturdy organizers were delivered safely and make keeping spaces tidy easy.
mediamosaic shop – Excellent media products helped streamline my workflow smoothly.
сайт для рефератов [url=https://nejroset-dlya-ucheby-9.ru/]сайт для рефератов[/url] .
organizeplus – Sturdy organizers were delivered safely and make keeping spaces tidy easy.
согласование перепланировки в москве [url=https://pereplanirovka-kvartir9.ru/]согласование перепланировки в москве[/url] .
mediamosaic collection – Creative tools made arranging and tracking projects quick and easy.
нейросеть для студентов [url=https://nejroset-dlya-ucheby-8.ru/]нейросеть для студентов[/url] .
this comfy home shop – Warm and charming decor that instantly uplifted my bedroom.
CozyChamber online – Lovely accents that transformed my room into a cozy retreat.
the Signal Summit collection – Excellent tech tools that improve efficiency and daily workflow.
my favorite tech shop – Tech solutions that make managing work effortless and efficient.
daily glove corner – Functional, stylish options that suit casual or work wear.
chic glove hub – Perfect combination of fashion-forward looks and functional design.
vanilla boutique – The selection feels fresh, fun, and easy on the wallet.
vanilla delights hub – The collection is appealing and unexpectedly budget-friendly.
my favorite leather shop – Every piece looks fantastic and was packed with care.
prismhome – Decorative pieces arrived beautifully crafted and instantly enhanced my space.
phoenix phish shop – Easy browsing and a solid selection of band merchandise.
the elegant leather store – Each product arrived beautifully wrapped and in perfect condition.
pineprismcollection – Beautifully packaged decor items that exceeded my expectations.
phish phoenix boutique – Browsing merchandise is effortless, and selection is impressive.
waterhubshop – Gear arrived quickly and works perfectly for all hydration needs.
this kitchen essentials spot – I discover tools that make dinner prep effortless.
waterhaven – High-quality hydration items arrived promptly and ready to use.
charcoalcharm favorites – The charcoal burns long and adds a rich smoky flavor.
charcoalcharm direct – Great packaging and dependable charcoal for weekend cookouts.
нейросеть для учебы онлайн [url=https://nejroset-dlya-ucheby-4.ru/]нейросеть для учебы онлайн[/url] .
this quick-cook resource – It transforms busy evenings into smooth cooking sessions.
dockyarddesignhub – Creative pieces were delivered promptly and look amazing in every room.
homedreams – Accessories came on time and add a unique, artistic touch to my rooms.
нейросеть для рефератов [url=https://nejroset-dlya-ucheby-7.ru/]нейросеть для рефератов[/url] .
нейросеть для студентов онлайн [url=https://nejroset-dlya-ucheby-3.ru/]нейросеть для студентов онлайн[/url] .
ии для школьников и студентов [url=https://nejroset-dlya-ucheby-6.ru/]nejroset-dlya-ucheby-6.ru[/url] .
the saffron and spice shop – Spices smell wonderful and arrived as described online.
реферат через нейросеть [url=https://nejroset-dlya-ucheby-5.ru/]реферат через нейросеть[/url] .
нейросеть текст для учебы [url=https://nejroset-dlya-ucheby-9.ru/]нейросеть текст для учебы[/url] .
this travel parlor – Every item makes packing simple and stylish for trips near and far.
где согласовать перепланировку [url=https://pereplanirovka-kvartir9.ru/]pereplanirovka-kvartir9.ru[/url] .
children’s kiosk hub – Lots of fun products that make browsing exciting for parents.
this exotic saffron store – Fresh, flavorful spices arrived exactly as shown online.
this passport parlor – Travel items are practical, well-made, and packaged beautifully.
skilled artisan hub – The pieces are carefully made and showcase genuine craftsmanship.
meridian meal prep corner – Organized recipes and pre-portioned meal kits save time in the kitchen.
designanddoodle – Arrived safely and made creating arts and crafts stress-free.
mealprep corner shop – Quick meal planning is possible with handy recipes and kits.
crafted with passion – The detailed work in each listing makes browsing a pleasure.
craftcornerstore – Everything was well-packaged and made crafting more fun.
нейросеть для рефератов [url=https://nejroset-dlya-ucheby-8.ru/]нейросеть для рефератов[/url] .
grillcorner – Accessories shipped fast and made grilling more efficient and enjoyable.
exceleclipse electronics shop – Navigating is effortless, and the available items are varied and high-quality.
grilltoolshop – Accessories arrived quickly and are durable, helping me cook with ease.
нейросеть онлайн для учебы [url=https://nejroset-dlya-ucheby-4.ru/]нейросеть онлайн для учебы[/url] .
eclipse electronics store – The presentation is tidy and the selection feels thoughtfully curated.
my favorite supplement shop – Trusted health products that arrived quickly and work well.
SupplementSummit favorites – Great quality health products that I now rely on completely.
hostinghollow – The setup was straightforward and completed quickly, even for someone new.
нейросеть онлайн для учебы [url=https://nejroset-dlya-ucheby-7.ru/]nejroset-dlya-ucheby-7.ru[/url] .
Fashionable Sole Picks – The stylish range of footwear here feels impressive.
smart sundial favorites – Stylish devices make organizing my schedule effortless and enjoyable.
this fast setup host – It’s designed so that even newcomers can launch quickly.
Sole Saga Store – Their fashionable footwear range truly grabbed my interest.
smart sundial collection – Accurate, well-built tools make checking time both simple and stylish.
BarbellBayou Shop Online – Quality fitness tools with pricing that stands out positively.
BarbellBayou Selects – Reliable gym gear with prices that are reasonable and attractive.
нейросеть для школьников и студентов [url=https://nejroset-dlya-ucheby-6.ru/]nejroset-dlya-ucheby-6.ru[/url] .
нейросеть для студентов [url=https://nejroset-dlya-ucheby-3.ru/]нейросеть для студентов[/url] .
watercolor creative shop – Everything from pigments to brushes makes artistic tasks easier.
сделать реферат [url=https://nejroset-dlya-ucheby-9.ru/]сделать реферат[/url] .
Visit ElmExchange – Layout is simple and product offerings feel carefully curated.
перепланировка квартир [url=https://pereplanirovka-kvartir9.ru/]перепланировка квартир[/url] .
painting supply corner – The variety of tools and colors is perfect for any artistic endeavor.
реферат через нейросеть [url=https://nejroset-dlya-ucheby-5.ru/]реферат через нейросеть[/url] .
elmexchange.shop – Clean layout and well-organized product selection make browsing easy.
Wrap Wonderland Collection – Lots of colorful and playful wraps make packing gifts enjoyable.
lattelegend café shop – The cozy atmosphere and carefully picked items make browsing a pleasure.
Wrap Wonderland Corner – Colorful, creative wraps make gifts look thoughtful and exciting.
cozy cup hub – A delightful combination of inviting ambiance and carefully curated selections.
Wool Warehouse Premium Hub – Quality yarns with guides that assist knitters at every level.
Wool Warehouse Premium Hub – Quality yarns with guides that assist knitters at every level.
the wireless tech store – Products arrived ready to go and setup was hassle-free.
WirelessWillow online – Setup was quick and all wireless tools functioned perfectly.
pantryproplus – Items were delivered neatly organized and high quality, helping me stay ready for every meal.
pantryplanner – Pantry items shipped quickly and arrived organized, perfect for efficient meal prep.
нейросеть генерации текстов для студентов [url=https://nejroset-dlya-ucheby-4.ru/]нейросеть генерации текстов для студентов[/url] .
Aisle Decor Boutique – Imaginative designs and décor accents offer a refined aesthetic.
ии для студентов [url=https://nejroset-dlya-ucheby-8.ru/]ии для студентов[/url] .
Art & Aisle Online – Creative home accents and stylish ideas bring spaces to life.
DIY Depot Store – Handy equipment selection makes tackling home projects much easier.
DIY Depot Essentials – A strong variety of tools makes small projects more manageable for beginners.
ии для студентов [url=https://nejroset-dlya-ucheby-7.ru/]nejroset-dlya-ucheby-7.ru[/url] .
Explore DeviceDockyard – Tech gadgets with informative descriptions and clear pricing.
DeviceDockyard Online – Tech accessories that are practical with straightforward pricing.
this colorful supply hub – The paints and tools truly exceeded what I expected.
steel sonnet hub – Every item feels well-presented and the descriptions are informative.
tech tablet hub – I appreciated the straightforward specs and value for money on each option.
waterfront savings hub – Everything feels easy to browse and ordering was straightforward.
Roti Roost Home – Easy-to-follow bread recipes and delicious ideas make baking simple.
steelsonnet corner shop – Each item is displayed thoughtfully, making it easy to understand details.
waterfront savings hub – Everything feels easy to browse and ordering was straightforward.
tablet selection store – I liked how easy it was to compare models with clear specs and pricing.
Palette Plaza Store – I was amazed at the quality and variety of colors and tools this time.
Roti Roost Finds – Tasty baking tips and breads make preparing meals enjoyable.
this fashion hat boutique – Warm, colorful beanies that pair beautifully with winter layers.
this cozy winter hub – Soft hats with colors that match perfectly with my seasonal clothes.
нейросеть для учебы [url=https://nejroset-dlya-ucheby-9.ru/]нейросеть для учебы[/url] .
перепланировка в москве [url=https://pereplanirovka-kvartir9.ru/]pereplanirovka-kvartir9.ru[/url] .
Найкращі бонуси за регистрацию — депозитні акції, бездепозитні пропозиції та турніри із призами. Огляди та порівняння умов участі.
Грати в найкраще казіно онлайн — широкий вибір автоматів та настільних ігор, вітальні бонуси та спеціальні пропозиції. Дізнайтеся про умови участі та актуальні акції.
Visit BundleBungalow – Curated bundles make finding essentials quick and easy.
нейросеть для учебы онлайн [url=https://nejroset-dlya-ucheby-5.ru/]nejroset-dlya-ucheby-5.ru[/url] .
Bungalow Combo Deals – Practical bundles keep everything you need in one place.
Sneaker Studio Hub – Latest sneaker drops are exciting and the navigation is very smooth.
ии для школьников и студентов [url=https://nejroset-dlya-ucheby-4.ru/]ии для школьников и студентов[/url] .
Top Sneaker Studio – Fresh shoe releases combined with a simple navigation make shopping easy.
Macro Mountain Store – Inspiring selection of arts and crafts items to kickstart new projects.
MacroMountain Picks – Artistic supplies that encourage imaginative creations for any hobbyist.
Velvet Verge Online – The selection is chic and affordable, perfect for this season.
riceridge market – Smooth navigation and intuitive design make shopping a breeze.
Velvet Verge Online – The selection is chic and affordable, perfect for this season.
riceridge picks store – The site layout is clean and simple, making it easy to explore products.
Identity Isle Originals – Products are clearly personalized and crafted with care for buyers.
Identity Isle Creations Online – Each item feels unique, personalized, and carefully crafted for buyers.
ии для студентов [url=https://nejroset-dlya-ucheby-7.ru/]nejroset-dlya-ucheby-7.ru[/url] .
Battery Borough treasures – Items arrived quickly and function exactly as needed.
cozy bay boutique – Each item gives off a comforting vibe and seems handpicked with care.
генерация [url=https://nejroset-dlya-ucheby-8.ru/]генерация[/url] .
this battery hub – Received my items promptly and everything works flawlessly.
coastal charm shop – The pieces reflect a cozy aesthetic with thoughtful detail.
Найкращі бонуси казіно — депозитні акції, бездепозитні пропозиції та турніри із призами. Огляди та порівняння умов участі.
Грати в найкраще найкраще онлайн казино — широкий вибір автоматів та настільних ігор, вітальні бонуси та спеціальні пропозиції. Дізнайтеся про умови участі та актуальні акції.
neue sportwetten seiten
Feel free to surf to my web site; online wetten ohne einzahlung
Stylish Mug Market – Trendy drinkware designs fit a wide range of gift ideas.
Spice Sail treasures – Each herb and spice was aromatic and carefully packaged.
Merchant Mug Collection – Attractive mug themes are perfect for heartfelt presents.
нейросеть текст для учебы [url=https://nejroset-dlya-ucheby-9.ru/]нейросеть текст для учебы[/url] .
согласование перепланировок [url=https://pereplanirovka-kvartir9.ru/]согласование перепланировок[/url] .
the Sail of Spices shop – Delivery was quick, and the freshness and aroma were exceptional.
Sender Sanctuary Marketplace – The customer care team was prompt and made the process easy.
Top Tea Time Trader – Excellent tea variety paired with clear descriptions and good prices.
Explore StitchStarlight – Vibrant fabrics showcased neatly with helpful and detailed photos.
shore essentials boutique – A fresh, stylish presentation that feels carefully crafted.
Official Sender Sanctuary – They responded quickly and solved my issue right away.
TeaTimeTrader Marketplace – Well-detailed teas with reasonable pricing make this a solid choice.
StitchStarlight Shop Online – Lovely fabrics displayed thoughtfully with vivid photos.
shore style corner – The overall aesthetic is clean, modern, and well thought out.
Tech Pack Terra Hub Online – Helpful organizers and devices simplify life and make shopping easy.
Tech Pack Terra Tools – Innovative tech accessories and storage options make life more organized.
нейросеть реферат [url=https://nejroset-dlya-ucheby-4.ru/]нейросеть реферат[/url] .
this secure digital hub – Tools work well and are simple to use every day.
this digital privacy boutique – Privacy tools that are convenient and simple for everyday use.
modern blogging desk – A smart pick for staying updated with blogging trends.
content creator corner – A go-to source for creative ideas and useful publishing insights.
ecken wetten anbieter
Here is my page :: bonus sportwetten ohne einzahlung
нейросеть для учебы [url=https://nejroset-dlya-ucheby-7.ru/]nejroset-dlya-ucheby-7.ru[/url] .
Shop Pearl Parade – Beautiful selection and clear visuals made shopping effortless.
Colorful Sock Picks – Unique graphics and comfy weaves keep things interesting.
Pearl Parade Boutique – Every piece was showcased beautifully, making it easy to decide.
Sock Fashion Finds – Lively motifs and comfortable designs bring a smile.
fashion-forward hub – The stylish design and smooth functionality make exploring a joy.
Berry Bazaar Store – Wide selection with fast loading times on mobile devices.
dawnanddapper boutique – The modern design and easy navigation make browsing a pleasure.
Visit SnippetStudio – Fresh resources for creators encourage new projects and innovation.
Berry Bazaar Store – Wide selection with fast loading times on mobile devices.
snippetstudio.shop – The resources available here are inspiring and perfect for sparking creativity.
Lamp Lattice Home – Fixtures look stylish and product info is informative for buyers.
Lamp Lattice Studio Shop – Stylish lamps feel premium and product info helps compare easily.
нейросеть для учебы [url=https://nejroset-dlya-ucheby-8.ru/]нейросеть для учебы[/url] .
согласование перепланировки москва [url=https://pereplanirovka-kvartir9.ru/]согласование перепланировки москва[/url] .
реферат через нейросеть [url=https://nejroset-dlya-ucheby-9.ru/]реферат через нейросеть[/url] .
проект перепланировки и переустройства квартиры [url=https://proekt-pereplanirovki-kvartiry22.ru/]проект перепланировки и переустройства квартиры[/url] .
согласование перепланировки цена [url=https://skolko-stoit-uzakonit-pereplanirovku-8.ru/]согласование перепланировки цена[/url] .
умная нейросеть для учебы [url=https://nejroset-dlya-ucheby-5.ru/]nejroset-dlya-ucheby-5.ru[/url] .
Urban Unison Picks – Every item feels handpicked and the site layout is intuitive.
Incredible! This blog looks exactly like my old one!
It’s on a entirely different topic but it has pretty much the same layout and design. Wonderful choice of
colors!
Check out my website: Wetten Doppelte Chance ErkläRung
Urban Unison Online Store – Curated selection and clear visuals make shopping smooth.
vogue vibe boutique – I love how the items capture this season’s spirit.
внедрение 1с управление предприятие [url=https://1s-vnedrenie.ru/]1s-vnedrenie.ru[/url] .
нейросеть онлайн для учебы [url=https://nejroset-dlya-ucheby-6.ru/]nejroset-dlya-ucheby-6.ru[/url] .
gymgeargrove store – A reliable source for high-quality workout gear and essentials.
modern glam shop – Everything showcased feels fresh and effortlessly stylish.
ии для студентов [url=https://nejroset-dlya-ucheby-3.ru/]ии для студентов[/url] .
Shop Mug and Merchant – Artistic mug creations fit beautifully into any gifting plan.
fitness supplies store – The shop has practical equipment and reliable products for daily workouts.
Mug and Merchant Store – Creative cup designs are ideal for special gift moments.
RemoteRanch Collection – Unique finds with an intuitive site layout make browsing enjoyable.
Shop Thread Thrive – Fabric quality is excellent and the color options are lively and varied.
RemoteRanch Essentials – Well-organized niche products make it easy to find what you need.
Stretch Studio Zone – Easy-to-use website with a wide variety of exercise equipment and clothing.
Thread Thrive Picks – Durable fabrics combined with eye-catching color choices impress every time.
Stretch Studio Select – Shop interface is smooth and exercise gear options feel thoughtfully chosen.
buchmacher englisch
Here is my web page … wett tipps kostenlos
lacesandlux.shop – My order showed up quickly and the presentation really stood out.
Онлайн казіно ігри – великий вибір автоматів, рулетки та покеру з бонусами та акціями. Огляди, новинки та спеціальні пропозиції.
modern lace essentials – I was happy with how quickly it came and how nicely it was boxed.
согласование перепланировки стоимость [url=https://skolko-stoit-uzakonit-pereplanirovku-8.ru/]согласование перепланировки стоимость[/url] .
мелбет зеркало сегодня [url=http://melbet-ru.it.com/]мелбет зеркало сегодня[/url] .
заказать проект перепланировки квартиры в москве [url=https://proekt-pereplanirovki-kvartiry22.ru/]proekt-pereplanirovki-kvartiry22.ru[/url] .
Tech Charm Accessories – Stylish charging solutions arranged in a user-friendly format.
melbet casino app [url=https://melbetmobi.ru]melbet casino app[/url] .
Top Creative Crate – One-of-a-kind items and gift-worthy selections stand out.
Charger Charm Store – Practical charging extras showcased with a tidy design.
top saffron picks – The clarity of the descriptions really highlights the quality and freshness.
CreativeCrate Essentials – Explore a variety of creative products and charming gift ideas.
Sticker Stadium Gallery – Fun, vibrant stickers that arrived fast and stick perfectly to surfaces.
Shop Collar Corner – Pet accessories feel well-constructed and perfect for regular use.
top saffron picks – The clarity of the descriptions really highlights the quality and freshness.
Sticker Stadium Gallery – Fun, vibrant stickers that arrived fast and stick perfectly to surfaces.
Top Collar Corner – Pet gear is both durable and thoughtfully designed for practical use.
внедрение 1с стоимость [url=https://1s-vnedrenie.ru/]внедрение 1с стоимость[/url] .
нейросеть реферат онлайн [url=https://nejroset-dlya-ucheby-8.ru/]нейросеть реферат онлайн[/url] .
ии для школьников и студентов [url=https://nejroset-dlya-ucheby-5.ru/]nejroset-dlya-ucheby-5.ru[/url] .
нейросеть онлайн для учебы [url=https://nejroset-dlya-ucheby-6.ru/]nejroset-dlya-ucheby-6.ru[/url] .
Spruce & Style Online – The minimalist setup makes it easy to navigate and shop.
Spruce & Style Shop Online – Minimalist styling makes shopping fast and pleasant.
ии для учебы студентов [url=https://nejroset-dlya-ucheby-3.ru/]ии для учебы студентов[/url] .
Грати в популярні слоти – великий каталог автоматів, бонуси за реєстрацію та регулярні турніри. Інформація про умови та можливості для гравців.
Онлайн онлайн ігри казино – великий вибір автоматів, рулетки та покеру з бонусами та акціями. Огляди, новинки та спеціальні пропозиції.
Your VPN Veranda Guide – Features and benefits are clarified step by step.
Shop Snowy Steps – Winter-focused products feel cozy and affordable.
VPNVeranda Solutions – Service details are structured in an easy-to-follow layout.
SnowySteps Picks – Comfortable winter items with reasonable pricing throughout.
FitFuel Fjord Picks Online – Protein bars and supplements are labeled clearly and shipped efficiently.
Shop Fit Fuel Fjord – Variety of protein snacks and vitamins are presented neatly for convenience.
ProteinPort Essentials – Supplements are straightforward and trustworthy for daily nutrition support.
proteinport.shop – The selection of supplements looks trustworthy and easy to understand for fitness lovers.
узаконивание перепланировки квартиры стоимость [url=https://skolko-stoit-uzakonit-pereplanirovku-8.ru/]skolko-stoit-uzakonit-pereplanirovku-8.ru[/url] .
скачать мелбет с официального сайта [url=https://melbetmobi.ru]скачать мелбет с официального сайта[/url] .
melbet рабочее зеркало [url=www.melbet-ru.it.com]melbet рабочее зеркало[/url] .
desktop parts pavilion – The delivery was quick and all items were well-packaged.
PC Parts Hub – Found quality parts that matched my build requirements.
online sportwetten beste quoten
wetten bonus vergleich
внедрение 1с решений [url=https://1s-vnedrenie.ru/]1s-vnedrenie.ru[/url] .
pearlpocket gems boutique – Lovely jewelry selection with clear, detailed images for shoppers.
pocket of pearls – Stunning collection with detailed product shots that make selection easy.
author resources corner – Lots of guidance here and the organization makes it easy to use.
нейросеть для студентов [url=https://nejroset-dlya-ucheby-6.ru/]нейросеть для студентов[/url] .
wett tipps prognosen
Feel free to surf to my page beste buchmacher Deutschland
BerryBazaar Online – Nice assortment and smooth browsing even on mobile screens.
Artful Mug Selections – Creative drinkware choices make gift ideas stand out.
creative publishing hub – The site offers helpful insights and the structure makes browsing simple.
Visit Domain Dahlia – Decorative florals that feel fresh and brighten every corner.
Berry Bazaar Hub – The assortment is great and navigation on mobile is seamless.
Mug Merchant Finds – Personalized-feel mugs are great for sharing smiles.
Dahlia Decor Online – Vibrant flowers and chic decor items that enhance any environment.
All About ZipperZone – Zippers come in different styles and sizes perfect for creative projects.
ZipperZone Zone – Great mix of zippers to fit any sewing project at home.
The CyberShield Shop – Security offerings are explained simply and appear dependable.
coral online hub – Wide variety of items and moving through the site is effortless.
Explore CyberShield – Online protection solutions are clearly outlined and feel trustworthy.
coral marketplace – Great assortment and navigating the store is simple and enjoyable.
нейросеть текст для учебы [url=https://nejroset-dlya-ucheby-3.ru/]nejroset-dlya-ucheby-3.ru[/url] .
kombiwetten strategie
My blog wettbüro mainz, Margarita,
узаконить перепланировку квартиры в москве цены [url=https://skolko-stoit-uzakonit-pereplanirovku-8.ru/]skolko-stoit-uzakonit-pereplanirovku-8.ru[/url] .
мелбет скачать официальный сайт [url=www.melbetmobi.ru/]мелбет скачать официальный сайт[/url] .
проект на перепланировку квартиры заказать [url=https://proekt-pereplanirovki-kvartiry22.ru/]proekt-pereplanirovki-kvartiry22.ru[/url] .
официальный сайт букмекерской конторы melbet [url=www.melbet-ru.it.com]официальный сайт букмекерской конторы melbet[/url] .
pearl treasure corner – Elegant jewelry presented with high-quality photos that highlight details.
pearl treasures hub – Jewelry items are well-highlighted with clear and attractive photos.
внедрение 1с [url=https://1s-vnedrenie.ru/]внедрение 1с[/url] .
EmberAndOnyx Shop Online – Stylish selection and clear product details enhance the user experience.
CarryOn Corner Selects – Practical travel essentials with clear organization and speedy delivery.
EmberAndOnyx Collection – Elegant products and clear descriptions create a smooth browsing experience.
seamsecret – Sewing essentials are organized well and easy to find.
CarryOn Corner Gear – Smartly selected travel items with timely delivery made shopping simple.
seamsecret – Sewing essentials are organized well and easy to find.
All About Spatula Station – Useful cooking tools feel thoughtfully designed and affordable.
Spatula Station Shop Online – Functional kitchen gadgets at reasonable prices make this a great resource.
приложение melbet android [url=https://mobilemelbet.ru]приложение melbet android[/url] .
online report raven – Insightful coverage with solid background research feels credible.
trusted shopping temple – The site is clean and navigating is easy, exploring felt effortless.
reportraven newsroom – Content is detailed and analytical, making it highly reliable.
temple shop online – Clear structure with smooth browsing, exploring the site was enjoyable.
сколько стоит узаконить перепланировку [url=https://skolko-stoit-uzakonit-pereplanirovku-8.ru/]сколько стоит узаконить перепланировку[/url] .
мелбет скачать бесплатно [url=https://melbetmobi.ru/]мелбет скачать бесплатно[/url] .
перепланировка квартиры проектные организации [url=https://proekt-pereplanirovki-kvartiry22.ru/]proekt-pereplanirovki-kvartiry22.ru[/url] .
рабочее зеркало мелбет [url=www.melbet-ru.it.com/]рабочее зеркало мелбет[/url] .
Pepper Parlor Store – Really enjoying the vibe and how easy it is to explore the site.
внедрение 1с 8 3 [url=https://1s-vnedrenie.ru/]внедрение 1с 8 3[/url] .
pepper parlor digital shop – The site feels welcoming and browsing is pleasantly straightforward.
tidalthimble marketplace online – Well-structured design and browsing items is natural.
tidalthimble online shop – The presentation is tidy and moving through products is simple.
Vault Voyage Official – Really like the layout and pages are simple to navigate.
vaultvoyage boutique – Easy to browse with a visually appealing structure.
datadawn insights store – Everything is organized neatly, making the data tools easy to use.
мелбет мобильная версия скачать на андроид [url=https://www.mobilemelbet.ru]мелбет мобильная версия скачать на андроид[/url] .
datadawn essentials store – The interface is uncluttered and exploring the tools is quick and simple.
check out setupsummit – The site is tidy, and finding what I need is quick and straightforward.
check out setupsummit – The site is tidy, and finding what I need is quick and straightforward.
distinctive food finds – The items look rare and the quality feels dependable.
мелбет букмекерская контора официальный сайт скачать [url=https://melbetmobi.ru/]мелбет букмекерская контора официальный сайт скачать[/url] .
стоимость согласования перепланировки квартиры [url=https://skolko-stoit-uzakonit-pereplanirovku-8.ru/]стоимость согласования перепланировки квартиры[/url] .
exotic ingredients boutique – The lineup appears special and reflects solid quality.
see the Catalog Corner catalog – Browsing is easy, and all products are clearly showcased.
my favorite catalog site – The design is clear, and shopping through products is simple.
official linen lantern site – The collection seems thoughtfully chosen and elegantly showcased.
linen lantern picks – Each piece seems selected with care and presented in a charming way.
проект перепланировки квартиры [url=https://proekt-pereplanirovki-kvartiry22.ru/]проект перепланировки квартиры[/url] .
мелбет зайти [url=www.melbet-ru.it.com/]мелбет зайти[/url] .
внедрение 1с [url=https://1s-vnedrenie.ru/]внедрение 1с[/url] .
phonefixshop treasures – Services explained well and arranging appointments was effortless.
explore Warehouse Whim – Items are easy to find, and the site feels clean and well structured.
see the Warehouse Whim catalog – Browsing is smooth, and everything is presented clearly.
Phone Fix Hub – Detailed service descriptions and appointment scheduling was hassle-free.
bandwidth learning shop – Resources are well structured and the explanations are straightforward.
see the Map & Marker catalog – Items are well arranged, and browsing the website is effortless.
mapandmarker – Love the clean design and smooth navigation throughout today.
bandwidthbarn – The resources are impressive and the information is easy to follow.
скачат мелбет [url=https://mobilemelbet.ru/]скачат мелбет[/url] .
see Iron Ivy products – Navigation is simple, and ordering was fast and easy.
handpicked Iron Ivy – The products are displayed attractively, and the ordering process is smooth.
Winter Walk Finds Online – Smooth interface and shopping is effortless with clear product info.
Winter Walk Collections – Lots of options and the site operates smoothly overall.
Winter Walk Treasures – Navigation is straightforward and pages load fast without issues.
Wander Warehouse Hub – Solid range of products and the pages feel structured.
winterwalkshop – Nice variety and everything loads smoothly without any issues here.
browse fiberforge – Polished layout and navigating the site is intuitive.
wander warehouse corner – Good mix of items and the layout feels tidy.
see Warehouse Whim products – Everything is organized neatly, making browsing enjoyable.
Fiber Forge Finds – Clean presentation and product exploration is easy.
melbet скачать казино [url=melbetmobi.ru]melbet скачать казино[/url] .
VanillaView Finds – Beautifully arranged pages and smooth interface enhance the shopping experience.
explore Warehouse Whim – Items are well presented, and navigating the site is simple.
sweet summit shop – A tempting variety of sweets that makes browsing fun.
VanillaView Finds Online – Stylish layout and easy browsing ensure a pleasant shopping journey.
sugar peak shop – Irresistible treats that make you want to try everything at once.
flex and flow boutique – The energy stands out and everything appears fresh and polished.
мел бет букмекерская контора официальный сайт [url=www.melbet-ru.it.com/]мел бет букмекерская контора официальный сайт[/url] .
vpsvista hub – Plan options are clearly laid out and performance specs look solid.
Pilates Plaza Store – The energy of the site is uplifting and the overall feel is bright.
vps corner hub – Transparent layout and competitive features make exploring hosting plans simple.
my favorite Warehouse Whim – The website feels intuitive, and exploring items is effortless.
browse Cleair Cove online – Everything is easy to locate, and the site feels very user-friendly.
Warehouse Whim Online – The variety is excellent, and navigating the site feels seamless.
explore Cleair Cove – Everything is organized well, making browsing smooth and fast.
Olive Orchard Store – Everything is neatly arranged and the overall experience is very pleasant.
handpicked olive items – The aesthetic is charming and exploring products feels natural.
Parcel Paradise Hub Online – Shipping options are simple to navigate and checkout works seamlessly.
parcel paradise premium – Shipping alternatives are flexible and completing my order was simple.
приложение мелбет [url=www.mobilemelbet.ru]www.mobilemelbet.ru[/url] .
discover Winter Walk Gear – Well-structured layout and products load quickly for a great experience.
Winter Walk Marketplace – Excellent assortment and navigation feels seamless.
Marker Market Collections – Everything loads quickly and discovering products is easy.
winterwalkshop – Nice variety and everything loads smoothly without any issues here.
brightbanyan – Really clean design and pages load quickly on mobile.
Winter Walk Online – Good product range and browsing is fluid and easy.
Marker Market Store – Organized layout and browsing makes discovering products easy.
brightbanyan – Really clean design and pages load quickly on mobile.
Willow Workroom Boutique – Everything is labeled clearly and organized to simplify browsing.
Willow Workroom Online Finds – Well-organized products with clear labels make buying craft supplies hassle-free.
market corner hub – Enjoyable shopping with a mix of fresh products and local treats.
mariners boutique hub – Fresh produce and artisanal finds make the store inviting and enjoyable.
see Citrus Canopy items – Navigation is simple, and the overall look feels bright and clean.
shop Citrus Canopy – Product presentation is appealing, and navigating the site is smooth.
see the Metric Meadow catalog – Items are easy to find and the interface feels intuitive.
click for metricmeadow – Layout is tidy and finding items is simple and fast.
whim favorites – Products are well displayed, and navigation feels smooth and simple.
shop Warehouse Whim – Selection is impressive, and moving through products is effortless.
fitness cart – I like how clearly everything is presented and the categories are well structured.
premium mocha collection – Lots of items available and the ordering process was quick and easy.
cardio essentials – Products are displayed clearly, making shopping simple.
Winter Walk Gear – Plenty of choices and the site runs seamlessly.
quality mocha supplies – Plenty to explore and the ordering process went by quickly.
browse sweaterstation – Clear presentation and navigating items is simple.
check out winterwalkshop – Smooth navigation and items are well displayed across the site.
explore Winter Walk Essentials – Attractive assortment and everything loads cleanly without problems.
copper crown hub online – Unique offerings and completing the order was quick and smooth.
Sweater Station Hub Online – Organized interface and selecting products is intuitive and quick.
Winter Walk Picks – Products are nicely organized and browsing feels effortless overall.
Explore HushHarvest – Natural products reached me fast and in perfect wrapping.
Pen Pavilion Store – The products are imaginative and well thought out, making browsing enjoyable.
copper crown essentials – Unique inventory and a quick, user-friendly checkout.
HushHarvest Boutique – Quality fresh products arrived promptly and securely packed.
скачать бк мелбет [url=http://mobilemelbet.ru/]http://mobilemelbet.ru/[/url] .
creative pen hub – The site offers inventive products with careful presentation.
insight treasures shop – Helpful resources and clear instructions make learning accessible.
vpsvista hub – Plan options are clearly laid out and performance specs look solid.
stable favorites – Items are clearly displayed and shopping feels seamless.
wett tipps ai kündigen
Also visit my homepage; sportwetten freiwette ohne einzahlung
insight picks shop – Educational content is structured to make learning quick and easy.
discover stablesupply – Browsing is fast and the interface makes checkout easy.
vista essentials shop – Easy-to-read hosting details and competitive options make selection stress-free.
click to explore Label Lilac – Layout is simple, and product descriptions help me decide fast.
warehousewhim – Great selection and browsing is smooth and effortless.
discover warehousewhim – Navigation is effortless, and products are well organized for browsing.
my favorite label shop – Everything is easy to find, and item info makes selection quick.
wir wetten erfahrungen
Have a look at my web page :: wettanbieter gratiswette (Marquis)
bakeboxshop – The treats look amazing and browsing the site is effortless.
check out winterwalkshop – Strong lineup of items and pages load quickly every time.
Trim Tulip Marketplace – Polished interface and exploring products is fast and enjoyable.
click for bakery items – Navigation is smooth, and the presentation makes the products shine.
Winter Walk Picks – Nice collection and browsing remains fast and stable.
discover Winter Walk Gear – Well-structured layout and products load quickly for a great experience.
Trim Tulip Finds – Attractive layout and browsing items feels effortless.
Winter Walk Treasures – Navigation is straightforward and pages load fast without issues.
Quartz Quiver Collection – Structured layout and content that provides meaningful details.
SSD Sanctuary Online – Navigation is smooth and the site feels clean and user-friendly.
Quartz Quiver Online Corner – Clean aesthetic and useful descriptive content throughout.
see SSD Sanctuary products – Products are clearly displayed and moving through the site is smooth.
bulking essentials shop – Organized fitness and nutrition products make browsing smooth.
sample suite corner – The concept works well and navigation is smooth across pages.
bulkingbayou collection – Helpful product descriptions and organized layout make shopping effortless.
ссылка на мелбет на айфон [url=http://mobilemelbet.ru/]ссылка на мелбет на айфон[/url] .
Sample Suite Marketplace Online – Organized structure and navigation feels intuitive and smooth.
melbet casino [url=http://www.gamemelbet.ru]melbet casino[/url] .
footwear trends hub – The designs stand out and the pricing seems transparent.
Warehouse Whim Online – The variety is excellent, and navigating the site feels seamless.
see Warehouse Whim products – Everything is neatly displayed, and browsing is quick and enjoyable.
official shoe shrine site – Fashionable shoes on display and the prices feel justified.
Ruby Rail Store – Everything is tidy, and moving through items is very smooth.
click for rubyrail – Navigation is intuitive, and the site feels polished.
winterwalkshop – Nice variety and everything loads smoothly without any issues here.
Package Pioneer Hub – Clean layout and browsing products feels smooth and effortless.
Winter Walk Essentials – Products are diverse and everything loads without a hitch.
ergonomic essentials – The layout is tidy, making browsing simple and enjoyable.
parlor corner hub – Delightful brand style and effortless navigation make shopping enjoyable.
wordwarehouse – Content is clear and browsing through pages feels smooth overall.
visit ergoember – The layout is clean, and it’s easy to find details on each item.
Winter Walk Hub – Clean design and product details are easy to access and understand.
explore wordwarehouse collection – Content is clearly displayed and navigation is quick.
anchor and aisle treasures – Easy to move through the pages and the overall vibe is pleasant.
parlor treasures hub – Charming brand style with smooth and easy browsing.
Anchor & Aisle Essentials Online – Everything is simple to navigate and browsing feels pleasantly effortless.
chair picks shop – A range of supportive chairs that make long work sessions easier.
chaircorner store – Practical and stylish chairs worth checking out for any home office.
premium textile falcon – A nice collection with descriptions that are detailed and helpful.
buchmacher übersicht
my webpage – handicap wetten erklärt, Josie,
click to explore Warehouse Whim – Selection is wide, and navigation feels smooth and simple.
designer fabric falcon – Products look great and the descriptions are easy to understand.
click to explore Warehouse Whim – Selection is wide, and navigation feels smooth and simple.
sportwetten oddset
Also visit my webpage wettbüro eröffnen
мелбет ставки на спорт [url=gamemelbet.ru]мелбет ставки на спорт[/url] .
Winter Walk Gear – Plenty of choices and the site runs seamlessly.
premium cablecorner – The website is responsive, and exploring products is fast and simple.
Winter Walk Finds – Nice mix of items and the interface responds instantly.
surfacespark – Clean interface and browsing through items feels intuitive very easy.
rest favorites – Everything is well presented, and finding what I need is simple.
see the Cable Corner catalog – Layout is organized, and browsing items is easy and quick.
surfacespark – Clean interface and browsing through items feels intuitive very easy.
shop Pine Path items – The interface feels polished, and navigating through the site is easy.
browse Rest Relay online – The site feels polished, and navigating through items is smooth.
Winter Walk Finds Online – Smooth interface and shopping is effortless with clear product info.
pinepathshop – The products are interesting and the website layout feels clean.
Profit Pavilion Boutique Online – Useful insights shared and each topic is clearly outlined.
stellar night market – The layout complements the theme and gives a polished feel.
browse winterwalkshop – Everything runs smoothly and descriptions make finding items simple.
online profit pavilion – The guidance provided is helpful and laid out in a simple manner.
online night nectar shop – The visual theme stands out and the layout feels well put together.
explore Warehouse Whim – Items are easy to find, and the site feels clean and well structured.
see the Warehouse Whim catalog – Browsing is smooth, and everything is presented clearly.
Roast & Route Essentials – The style is modern and mobile navigation is seamless.
roast & route marketplace online – Stylish branding and navigation feels effortless on phones.
Caffeine Corner picks – Variety is excellent and the website experience is very user-friendly.
check out winterwalkshop – Strong lineup of items and pages load quickly every time.
see Caffeine Corner products – The website is intuitive and overall experience is enjoyable.
Winter Walk Marketplace – Excellent assortment and navigation feels seamless.
mist boutique hub – Minimalist style and organized presentation create a smooth browsing experience.
browse backpackboutique – Impressive collection and the interface is clean and user-friendly.
browse backpackboutique – Impressive collection and the interface is clean and user-friendly.
minimalist corner – Simple design and thoughtfully arranged products create a calm browsing experience.
Winter Walk Finds Online – Smooth interface and shopping is effortless with clear product info.
see Search Smith content – Navigation is simple, and all sections are clearly labeled.
winterwalkshop – Nice variety and everything loads smoothly without any issues here.
see Search Smith content – Navigation is simple, and all sections are clearly labeled.
Island Ink Boutique Online – Bold branding and a creative setup that works beautifully.
check out stitchandsell – Everything is clearly displayed, and checkout is simple and fast.
wettbüro aktien
My site – top wettanbieter deutschland
online island ink – Stylish branding paired with a unique and artistic presentation.
click to explore Stitch and Sell – Navigation is seamless, and completing a purchase is easy.
see Warehouse Whim products – Everything is neatly displayed, and browsing is quick and enjoyable.
Приветствую! Сегодня затронем тему — как снизить расходы на отопление. Суть в том, что: через крышу уходит до 30% тепла. Хочешь экономить — могу рекомендовать: [url=https://montazh-membrannoj-krovli-spb.ru]https://montazh-membrannoj-krovli-spb.ru[/url]. Как это работает: укладывают утеплитель, поверх — ПВХ мембрану. Опять же покрытие отражающее — летом не перегревается. Мы используем современный утеплитель — это отличные параметры. Что в итоге: удаётся достигать классных результатов.
[url=https://vikar-auto.ru]шумоизоляция авто[/url]
warehousewhim – Great selection and browsing is smooth and effortless.
handpicked Jacket Junction – Navigation is seamless, and products look stylish and appealing.
discover jacketjunction – Items are neatly shown, and moving through the catalog is effortless.
domain registration shop – The navigation is clear and the overall design feels accessible.
explore Winter Walk Essentials – Attractive assortment and everything loads cleanly without problems.
winterwalkshop – Nice variety and everything loads smoothly without any issues here.
top domain destination – The structure is uncluttered and getting around the site feels natural.
Ram Rapids Online – Crisp visuals and browsing categories feels effortless.
Wrap & Wonder Boutique Online – Beautiful selection and items feel thoughtfully chosen for special gifting.
Ram Rapids Hub Shop – Organized layout and selecting items is intuitive and quick.
Wrap & Wonder Collection – Every item is appealing and beautifully presented for gift purposes.
Winter Walk Online – Items are clearly organized and browsing feels fast and simple.
explore Winter Walk Gear – Layout is intuitive and pages load fast without any hiccups.
browse Fiber Fountain collection – The interface is friendly and finding what you need is simple.
Fiber Fountain hub – I enjoy how polished the site looks and how easy it is to browse.
explore Apparel Ambergris – The site feels refined and browsing through items is straightforward.
browse Apparel Ambergris online – Everything is neatly structured, making shopping effortless.
browse warehousewhim items – Layout is tidy, making it easy to move through products.
shop Barbell Blossom – Wide variety of items, and the interface is intuitive and pleasant.
warehousewhim – Great selection and browsing is smooth and effortless.
shop Barbell Blossom – Wide variety of items, and the interface is intuitive and pleasant.
sportwetten deutschland
Feel free to visit my blog post Wette Doppelte Chance; https://Ribeiroearruda.COM.Br,
checkoutcottage boutique – Clear product pages and an intuitive checkout make browsing a breeze.
winterwalkshop – Nice variety and everything loads smoothly without any issues here.
Winter Walk Deals – Great choices and the site performs quickly and efficiently.
explore logolighthouse – Clean visuals and the website navigation is seamless.
cottage picks store – Smooth interface and organized listings make shopping enjoyable.
shop logolighthouse – Well-organized pages and navigating through items feels effortless.
browse winterwalkshop – Everything runs smoothly and descriptions make finding items simple.
Winter Walk Gear – Navigation is smooth and product information is clear and helpful.
мелбет казино зеркало [url=gamemelbet.ru]мелбет казино зеркало[/url] .
SuedeSalon Online – Smooth presentation paired with carefully chosen, high-quality products.
Suede Salon Store – Clean design and thoughtfully curated items create a polished experience.
shipshapesolutions – The services are well explained and the site feels trustworthy and professional.
complete solutions hub – Services are easy to follow and the experience is polished and professional.
discover warehousewhim – Navigation is effortless, and products are well organized for browsing.
visit warehousewhim – Items are well organized, making browsing simple and enjoyable.
Print Parlor Central – Smooth browsing and clear organization make finding items easy.
handpicked Pattern Parlor – Navigation is smooth, and exploring products is enjoyable.
printparlor.shop – Browsing the products was smooth and the site feels very organized.
browse winterwalkshop – Impressive variety and performance is quick and steady.
explore Pattern Parlor – The interface is neat, and navigating items feels easy.
Winter Walk Online Store – Broad range of products and navigation is consistent and fluid.
Seashell Studio Collections – Simple design and browsing products is smooth and fast.
Seashell Studio Selections – Easy navigation and product pages load fast and clean.
topaz trail marketplace – Pages load smoothly and the structure feels intuitive.
Studio Supply marketplace – Broad selection and a seamless purchase flow make it convenient.
topaz trail boutique – The site works effortlessly and moving between sections feels simple.
this studio essentials hub – Varied inventory and a seamless checkout that makes shopping simple.
browse winterwalkshop – Everything runs smoothly and descriptions make finding items simple.
Winter Walk Essentials – Easy to navigate and shopping experience is very smooth.
SeaBreezeSalon Shop Online – Tranquil design with easy navigation makes browsing a pleasure.
SeaBreezeSalon Collection – Soothing visuals and smooth site flow make browsing feel stress-free.
Shop Sparks Tow Online – Lovely little store and I quickly spotted the products I wanted.
скачать мелбет [url=www.gamemelbet.ru]скачать мелбет[/url] .
Sparks Tow Essentials – Charming layout and I found everything I wanted in no time.
leadmark site – Color palette felt calming, nothing distracting, just focused, thoughtful design.
stocksculpt essentials corner – Great place to explore financial data and practical market tools.
explore rubyrail collection – The interface is well organized, and browsing is smooth.
click for rubyrail – Navigation is intuitive, and the site feels polished.
trusted nutmeg source – The overall idea is engaging and the browsing process is seamless.
Cotton Cascade Boutique – Beautiful textile options with craftsmanship that feels premium.
global nutmeg marketplace – A compelling concept supported by a user-friendly layout.
the cascading cotton hub – High-grade textiles showcased in a beautifully curated lineup.
ChairAndChalk Selects – Unique and creative selections, plus a very easy checkout process.
All About ChairAndChalk – The creative variety is impressive and purchasing online feels simple.
voltvessel.shop – Smooth layout and easy navigation make browsing effortless.
Voltvessel Hub – Clear structure and smooth navigation make finding items simple.
boostster site – Navigation felt smooth, found everything quickly without any confusing steps.
boostster site – Appreciate the typography choices; comfortable spacing improved my reading experience.
промокод мелбет на сегодня [url=www.gamemelbet.ru/]промокод мелбет на сегодня[/url] .
Sable & Son Store – Premium-looking items with detailed and helpful product information.
SableAndSon Essentials Hub – Products are well-made and the details provided are practical and useful.
CardCraft Boutique – Unique artwork selections and a smooth payment process make it enjoyable.
Discover Vivid Vendor – Vibrant visuals and lively colors make the site enjoyable to navigate.
a unique greeting shop – Clever designs and an efficient checkout make shopping pleasant.
Go to Vivid Vendor – Eye-catching colors and images make exploring items a lively experience.
Sip & Supply Online – Excellent product range and the website looks well-designed.
sipandsupply online – Nice range of items and the website’s presentation is attractive.
wett-tipps ai erfahrungen
Feel free to surf to my webpage – esc wetten quoten (Serena)
workbenchwonder boutique – Practical items and the product info is very informative.
workspace organization shop – Everything is displayed clearly, helping me plan my work area efficiently.
Workbench Wonder Essentials Online – Items seem useful and product information is very clear.
Workspace Wagon picks – The layout is intuitive and all items are useful for everyday tasks.
RubyRoost Zone – Lovely items and sharp product images make browsing enjoyable.
RubyRoost Finds – Items are charming and showcased clearly with detailed visuals.
Art Attic Selections – A unique, artistic range and smooth, intuitive browsing experience.
Art Attic Top Picks – Browsing is simple, and the unique items really stand out.
Wagon Wildflower Marketplace – Beautiful design and playful visuals make finding products a joy.
бк мелбет [url=www.gamemelbet.ru/]бк мелбет[/url] .
official Yoga Yard hub – Calm and refreshing atmosphere with items that promote wellness.
wagonwildflower.shop – Charming visuals and design make browsing the site delightful.
Basket Bliss Curated Store – Neatly arranged items and intuitive navigation create a seamless experience.
Basket Bliss Essentials – Chic collection and smooth site navigation enhance the experience.
Yoga Yard Showcase – Gentle, calming vibe and refreshing selections make the experience serene.
die besten sportwetten seiten
Also visit my blog Wettbüro dresden
Cove Crimson Picks – Simple navigation and everything is easy to locate.
Cove Crimson Nook – Layout is clear and pages load quickly without delay.
official tablettulip site – Attractive layout and everything loads fast without delay.
Clarvesta Today – Attractive design with straightforward browsing options.
tablettulip treasures online – Nice visuals and site loads without any delays.
Cypress Chic Hub – Clean layout and exploring items feels simple and intuitive.
A catalog of cars http://www.auto.ae/catalog/ across all brands and generations—specs, engines, trim levels, and real market prices. Compare models and choose the best option.
Cypress Chic Haven – Smooth browsing and products are easy to explore and find.
Clarvesta Designs – Attractive site design and product display feel polished and clear.
Workbench Wonder Store – Practical products and descriptions are easy to understand.
Visit CypressCircle – Everything is neatly arranged and moving through pages feels effortless.
online workbenchwonder – Useful selection and descriptions are concise and clear.
Explore Cypress Circle – Clean structure and easy navigation make finding items quick.
Actionable Insights Hub – Smooth interface and organized content enhance the browsing experience.
official invoice hub – I’m impressed by the polished layout and the quality feel of everything offered.
Bowl Lane – Elegant presentation with easy-to-follow navigation.
Actionable Insights Connections – Organized content and responsive design make accessing insights simple.
premium invoice collection – The smooth navigation and well-designed offerings feel top tier.
explore Chair Chase – Well-laid-out pages make discovering furniture fast and easy.
VeroVista Boutique – Fast pages and easy-to-read descriptions make checking out items simple.
this Astrevio boutique – Everything is neatly arranged, so products are easy to view.
The Bowl Shop – Smooth browsing experience and the site feels user-friendly.
Shop VeroVista Online – Smooth browsing with fast loading pages and clear item descriptions.
Astrevio Store – The layout is tidy and each product is presented with great clarity.
shop Chair Chase now – Browsing is fluid, and each piece of furniture is easy to locate.
official StrategicTrustSolutions site – Well-structured sections and smooth navigation simplify exploring content.
briovista.shop – Very clean layout and everything loads fast without lag.
briovista.shop – Very clean layout and everything loads fast without lag.
top StrategicTrustSolutions site – Logical structure and responsive pages help users navigate quickly.
Bath Breeze Store – High-quality items and a clean, easy-to-navigate layout.
Bath Breeze Collections – Elegant selection and clean interface ensure smooth browsing.
Cozy Carton Finds Hub – Nicely organized items and site navigation feels simple.
Cozy Carton World – Smooth layout and shopping is simple and quick.
I’ve been exploring for a little bit for any high quality articles or blog posts in this kind of space . Exploring in Yahoo I eventually stumbled upon this web site. Reading this information So i am satisfied to express that I’ve an incredibly excellent uncanny feeling I came upon just what I needed. I such a lot indubitably will make sure to don?t disregard this site and provides it a look regularly.
journaljetty hub online – Products feel curated and every description is helpful.
All About CourierCraft – Creative and distinctive offerings paired with simple online shopping.
journaljetty marketplace – Products feel well-chosen and the details provided are very useful.
official layout lagoon site – The layout is clean and exploring content is effortless.
CourierCraft Finds Online – Unique products and a seamless, easy checkout make for a great experience.
Layout Lagoon Collection – The arrangement is logical and exploring items is straightforward.
Dalvanta Treasures Hub – Layout is neat and items are displayed nicely for easy shopping.
Dalvanta Picks – Easy-to-use interface and products are displayed clearly for all visitors.
cozy lifestyle picks – Thoughtful arrangements and appealing visuals make exploring fun.
Trusted Commercial Hub – User-friendly interface and well-structured sections make reading easy.
Velvet Vendor 2 Online – Bookmarking this, they have some rare and standout items.
Trusted Commercial Hub – User-friendly interface and well-structured sections make reading easy.
Rosemary Roost curated shop – Beautifully presented products make browsing smooth and pleasing.
Shop Velvet Vendor 2 Online – Saving this for later, the site has a wonderfully unique selection.
PolyPerfect favorites – Everything looks polished, and ordering is completely hassle-free.
PolyPerfect shop online – The organized pages and smooth transaction steps make it enjoyable.
Attic Amber Shop Hub – The welcoming aesthetic and clear structure make browsing smooth.
online ChargeCharm shop – Clean layout and intuitive navigation make exploring items effortless.
Attic Amber Store – The warm, inviting style makes browsing easy and enjoyable.
shop ChargeCharm now – User-friendly pages make exploring gadgets quick and hassle-free.
top brewing destination – Fast-loading pages and a broad selection enhance the visit.
BrewBrooks marketplace – Great assortment of goods with pages that load in a snap.
briovista.shop – Very clean layout and everything loads fast without lag.
briovista.shop – Very clean layout and everything loads fast without lag.
Cozy Copper Spotlights – Layout is appealing and items are easy to browse.
Bay Biscuit Selections – Adorable designs and ordering works quickly and easily.
Cozy Copper World – Smooth browsing and the selection looks thoughtfully curated.
NauticalNarrative Essentials Hub – Beautiful oceanic pieces and smooth, intuitive browsing.
Clever Checkout Select – Navigation feels intuitive and the checkout flows naturally for all users.
Bay Biscuit Curated Store – Delightful designs with an easy and fast checkout process.
All About NauticalNarrative – Seaside-themed products with a simple and enjoyable online experience.
official ProfessionalCollaborationHub site – Well-structured sections and smooth navigation improve the browsing experience.
Clever Checkout Hub – Fast checkout process and easy-to-use navigation make shopping stress-free.
ProfessionalCollaborationHub Portal – Clear headings and organized layout improve accessing information.
sheetsierra online shop – Items are well chosen and ordering was straightforward.
sketchstation online – Really like the innovative style and the navigation flows smoothly.
Sheet Sierra Store – Good selection overall and the purchase process felt seamless.
sketchstation online – Really like the innovative style and the navigation flows smoothly.
Explore Vendor Velvet – The site feels fresh and intuitive, making browsing easy.
Decordock Nook Hub – Excellent range and descriptions guide the shopping experience.
visit Click for Actionable Insights – Easy navigation and quick page loads make accessing insights effortless.
Official Vendor Velvet – The interface is sleek and very user-friendly for browsing.
Decordock Nook – Excellent variety and product information is easy to follow.
ClickForActionableInsights Access – Well-organized pages and responsive layout make browsing effortless.
Woolen Whisper online – The gentle design and intuitive layout make finding items enjoyable.
Long Term Partnerships Online Hub – Clear sections and professional design enhance readability.
Aura Arcade Collections – Unique finds and a flawless checkout process make shopping seamless.
soft wool boutique – The relaxing vibe and intuitive interface make it a joy to shop.
Long Term Partnerships Online – Clean presentation and clear organization make information easy to read.
Aura Arcade Picks – Fascinating products with a checkout that runs without issues.
top CampCourier shop – Browsing feels natural, and the website loads without delays.
Brondyra Curated Picks – Clean design and easy-to-use interface enhance the overall experience.
official CampCourier site – The layout is clean, and navigating through items feels effortless.
Brondyra Product Hub – Modern design with effortless navigation makes browsing enjoyable.
Shop Color Cairn – Lively and vibrant products make for a visually appealing selection.
Craft Cabin Picks – Smooth browsing and descriptions make it simple to learn about each item.
Color Cairn Store – Bright and colorful products make browsing exciting and fun.
Craft Cabin Spotlights – Layout is intuitive and product info is very clear.
this Beard Barge boutique – Nice assortment and descriptions provide all the information needed.
Yavex Boutique Online – Fast navigation and smooth performance enhance the browsing experience.
Beard Barge Favorites – Great variety and clear descriptions make browsing enjoyable.
wellnesswilds boutique – Calm aesthetic and browsing products is easy.
Yavex Online Marketplace – Pages appear instantly, and navigation is very responsive.
wellnesswilds treasures – Relaxed design and browsing the catalog is convenient.
A convenient car catalog http://www.auto.ae/catalog/ brands, models, specifications, and current prices. Compare engines, fuel consumption, trim levels, and equipment to find the car that meets your needs.
Venverra Shop Now – The layout is clean and gives a sense of trustworthiness for online buyers.
sleepsanctuary shop – Relaxing aesthetics and easy-to-use pages throughout.
Venverra Shop Now – The layout is clean and gives a sense of trustworthiness for online buyers.
your EnterpriseBondSolutions hub – Fast-loading sections and clean design make accessing information effortless.
sleepsanctuary studio shop – Pages are organized nicely and browsing feels easy and relaxing.
Dorvani World – Effortless browsing and everything responds quickly.
TrustedBusinessConnections Portal – Organized sections and smooth interface make finding details easy.
Bond Solutions Center – Logical layout and responsive design make exploring content straightforward.
Dorvani Spot Hub – Pages respond quickly and navigation is very clear.
explore TrustedBusinessConnections – Well-laid-out layout and responsive design simplify browsing.
top Corporate Network site – Intuitive menus and tidy design make exploring pages simple.
card lover’s destination – I like how naturally the pages flow while showcasing fresh designs.
Auracrest Curated Picks – The layout is clear, and the descriptions make products easy to understand.
CorporateNetwork Online – Well-structured design makes browsing simple and efficient.
unique card outlet – Browsing is straightforward, and the artistic options stand out.
Auracrest Online – Organized presentation with clear descriptions helps when browsing items.
explore Casa Cable – Navigation is smooth, and each item has practical details for shoppers.
BuildBay Picks – Excellent product quality and an easy-to-follow ordering process.
TabTower Essentials – Streamlined layout and useful product details create an effortless shopping experience.
Casa Cable Marketplace – Simple navigation and clear product information enhance the browsing experience.
BuildBay Boutique Online – Products feel premium and the buying process is quick.
TabTower Zone – Well-structured layout with clear guidance makes shopping hassle-free.
Clever Cove Online – Well-structured layout and clear categories improve the shopping experience.
Craft Curio Nook – Browsing feels effortless and layout is well structured.
Craft Curio Select – Clean interface and overall browsing feels simple and modern.
Clever Cove Mart – Smooth layout and organized products make shopping straightforward.
Birch Bounty Top Picks – Clear layout and a nicely curated assortment of products.
samplesunrise picks – Layout is intuitive and the presentation feels carefully planned.
official Birch Bounty hub – Easy browsing with items that feel handpicked and special.
official samplesunrise site – Creative concept with a clean and thoughtful arrangement.
дистанционное образование [url=https://best-schools-online.ru/]дистанционное образование[/url] .
Schema Salon Official – Clear content and navigation works smoothly throughout the site.
Business Trust Connections – Organized content and intuitive navigation make browsing straightforward.
Ravion Zone – Well-structured design and navigation feels safe and easy.
asian wetten erklärung
my web-site Wettanbieter in Deutschland
schemasalon digital shop – Information is straightforward and navigating through the site is simple.
Business Trust Infrastructure Hub – Easy-to-read sections and smooth menus make navigating simple.
Ravion Trust – Sleek interface and navigating the site is simple and reliable.
ии анализ креативов 60 секунд [url=https://reklamnyj-kreativ9.ru/]reklamnyj-kreativ9.ru[/url] .
Growth Alliances Hub Online – Professional design and well-arranged sections improve navigation.
visit Corporate Unity Solutions – The interface is clear, making browsing through offerings smooth.
Xorya Essentials – Sleek design and well-structured layout make finding products straightforward.
анализ наружной рекламы [url=https://reklamnyj-kreativ8.ru/]анализ наружной рекламы[/url] .
explore StrategicGrowthAlliances – Fast-loading sections and structured content make accessing information effortless.
this productivity center – The smart dashboards help busy professionals stay organized throughout the day.
Aurora Atlas Online Picks – Browsing is fast, and there’s a wide range of items to explore.
вакуумное водопонижение иглофильтрами [url=https://vodoponizhenie-msk.ru/]vodoponizhenie-msk.ru[/url] .
Corporate Unity Access – Clean pages with intuitive navigation make exploring offerings smooth.
ultimate dashboard source – Everything here is built to simplify and structure daily work demands.
official Aurora Atlas hub – Lots of options and the site feels very responsive.
проект водопонижения [url=https://vodoponizhenie-moskva.ru/]vodoponizhenie-moskva.ru[/url] .
Xorya Essentials – Sleek design and well-structured layout make finding products straightforward.
this Caldoria boutique – Clean layout and browsing feels effortless with everything easy to find.
Calveria collection – Beautifully designed pages make scrolling through products enjoyable.
система водопонижения [url=https://xn—77-eddkgagrc5cdhbap.xn--p1ai/]xn—77-eddkgagrc5cdhbap.xn--p1ai[/url] .
this Caldoria boutique – Clean layout and browsing feels effortless with everything easy to find.
this stylish shop – Everything feels thoughtfully arranged and browsing is simple and fluid.
Crate Cosmos Boutique – Large selection and site performance is fast today.
Crate Cosmos Spotlights – Smooth navigation and all products are easy to find.
Run Route Essentials Online – Neat layout makes finding products simple and efficient.
Blanket Bay Selections – Comfortable vibe and pages respond instantly.
online run route – Everything is neatly arranged and searching for items feels effortless.
Blanket Bay Online – Comfortable vibe and browsing is smooth without delays.
A convenient car catalog https://auto.ae/catalog/ brands, models, specifications, and current prices. Compare engines, fuel consumption, trim levels, and equipment to find the car that meets your needs.
your Long Term Commercial Bonds – Clear headings and organized layout make reading information simple.
Qulavo Network – Smooth user experience and pages load fast.
LongTermCommercialBonds Portal – User-friendly design and intuitive navigation make browsing quick.
sunsetstitch shop – Products are well chosen and checkout was fast and easy.
Qulavo Holdings Portal – Navigation is simple and pages respond almost instantly.
sunsetstitch hub – Curated designs are appealing and buying was simple.
дистанционное обучение детей [url=https://best-schools-online.ru/]дистанционное обучение детей[/url] .
a href=”https://findyournextdirection.shop/” />online FindYourNextDirection shop – Smooth interface and well-presented content make browsing pleasant.
a href=”https://findyournextdirection.shop/” />Find Your Next Direction Info Hub – Well-organized sections and quick page loads make exploring enjoyable.
Aurora Avenue Online Picks – Sleek layout and carefully selected items make discovering products enjoyable.
sleek metal shop – Everything looks refined, and the organization makes items easy to find.
CalmCrest Online Picks – Calm presentation and fast-loading products make the experience pleasant.
Click Courier Service – Clear layout with service details makes finding info effortless.
beste wett tipps kostenlos
my page: Wetten Mit Freunden App (Fujina.Jp)
Aurora Avenue Essentials – The presentation feels sleek and the product curation is impressive.
steel accent shop – The bright chrome look and logical structure make shopping simple.
Cardamom Cove Collection – Lovely aesthetic paired with practical product details.
Business Learning Center – Clean interface and structured content make accessing information simple.
CalmCrest Design Hub – Relaxed aesthetic and pages load fast for easy exploration.
Cardamom Cove Boutique Shop – The interface is cozy, and each product description is practical and informative.
Click Courier HQ Online – Quick access to updates and clean interface improve navigation.
ии анализ креативов 60 секунд [url=https://reklamnyj-kreativ9.ru/]reklamnyj-kreativ9.ru[/url] .
A convenient car catalog auto ae catalog brands, models, specifications, and current prices. Compare engines, fuel consumption, trim levels, and equipment to find the car that meets your needs.
Crisp Collective Boutique – Large assortment and browsing feels very straightforward.
your Click for Business Learning – Intuitive structure and logical menus make navigating the site effortless.
Crisp Collective Lane Hub – Great assortment and the browsing experience is very straightforward.
Tag Tides Hub – Clean design and navigating the pages is intuitive.
система водопонижения грунтовых вод [url=https://vse-o-vodoponizhenii.ru/]vse-o-vodoponizhenii.ru[/url] .
Tag Tides Hub – Clean design and navigating the pages is intuitive.
Blanket Bay Online Picks – Warm, inviting items and fast site performance.
Blanket Bay Selections – Comfortable vibe and pages respond instantly.
водопонижение котлована [url=https://vodoponizhenie-msk.ru/]vodoponizhenie-msk.ru[/url] .
машинное обучение креативы [url=https://reklamnyj-kreativ8.ru/]reklamnyj-kreativ8.ru[/url] .
Yavex Online Picks – The site runs efficiently, with content loading almost instantly.
осушение котлованов [url=https://vodoponizhenie-moskva.ru/]осушение котлованов[/url] .
Business Growth Partnerships Resources – Clear design and structured layout improve the online experience.
Yavex Online – The interface is responsive, and everything loads without delays.
access BusinessGrowthPartnerships now – User-friendly navigation and organized content make browsing effortless.
Qulavo Connect – Navigation feels clear and content loads without delay.
Qulavo Central Online – Easy-to-use interface with fast-loading pages for smooth browsing.
понижение уровня грунтовых вод [url=https://vodoponizhenie-iglofiltrami-moskva.ru/]vodoponizhenie-iglofiltrami-moskva.ru[/url] .
watchwildwood studio online – Design looks professional and exploring the site is smooth.
скважинное водопонижение [url=https://xn—77-eddkgagrc5cdhbap.xn--p1ai/]xn—77-eddkgagrc5cdhbap.xn--p1ai[/url] .
Watch Wildwood Collection Online – Well-organized pages and finding items is simple.
explore LongTermValuePartnership – Well-laid-out content and intuitive navigation simplify exploring information.
this value partnership hub – Structured content and intuitive layout make accessing details effortless.
Auroriv Product Hub – Easy-to-use layout with modern design keeps shopping efficient.
ChicChisel Showcase – Stylish look and product descriptions enhance browsing.
the ultimate arcade stop – So many choices and such a fun setting always keep me exploring.
this online store – Finding products is easy, and the design makes shopping enjoyable.
Auroriv Shop Hub – Effortless navigation and modern styling make shopping simple.
рейтинг онлайн-школ [url=https://best-schools-online.ru/]рейтинг онлайн-школ[/url] .
ChicChisel Essentials Store – Sleek interface and useful info make exploring items easy.
Crisp Crate Gallery – Pages load quickly and items are presented in a clear format.
arcade adventure place – Its spirited setting and varied inventory make time pass unnoticed.
Crisp Crate Picks – Products are neatly arranged and the site is simple to explore.
explore ClickToExploreInnovations – Clear pages and intuitive design make reading content effortless.
Bloom Beacon Product Hub – Navigation feels natural and the shopping experience is hassle-free.
online ClickToExploreInnovations resource – Organized layout and intuitive pages make exploring content effortless.
Bloom Beacon Online – Simple navigation and enjoyable browsing throughout.
машинное обучение креативы [url=https://reklamnyj-kreativ9.ru/]reklamnyj-kreativ9.ru[/url] .
online GlobalEnterpriseBonds site – Smooth interface and organized content make browsing efficient.
Global Enterprise Bonds Online – Well-organized layout and fast-loading pages make browsing effortless.
бурение водопонижение [url=https://vse-o-vodoponizhenii.ru/]бурение водопонижение[/url] .
Spirit of the Aerodrome Central – I appreciate the clear layout and engaging posts throughout.
Xelivo Hub – Smooth browsing experience with well-organized sections.
online wetten vorhersagen app bonus ohne einzahlung
Spirit of the Aerodrome Central – I appreciate the clear layout and engaging posts throughout.
водопонижение на строительной площадке [url=https://vodoponizhenie-blog.ru/]водопонижение на строительной площадке[/url] .
The Front Room Chicago portal – Navigate a dynamic space filled with creative touches and engaging highlights.
Xelivo Platform – Well-organized interface and visiting the site is straightforward.
Discover Front Room Chicago online – Read engaging content and experience the unique vibe showcased throughout.
What’s up, I desire to subscribe for this weblog to get most up-to-date updates, so where can i do it please help out.
ModernPurchasePlatform Access – Well-laid-out pages and easy navigation enhance the experience.
водопонижение иглофильтрами грунтовых вод [url=https://vodoponizhenie-msk.ru/]vodoponizhenie-msk.ru[/url] .
melbet как играть в казино [url=https://melbet09342.help]melbet как играть в казино[/url]
visit Modern Purchase Platform – Intuitive menus and modern design make browsing simple.
Cloud Curio World – Varied products and efficient loading speed enhance browsing.
водопонижение грунтовых вод [url=https://vodoponizhenie-moskva.ru/]водопонижение грунтовых вод[/url] .
neue sportwetten anbieter
Also visit my site; schüsse aufs tor wetten
CinnamonCorner Selections – Welcoming design and easy-to-use navigation improve the experience.
анализ карточек маркетплейс [url=https://reklamnyj-kreativ8.ru/]анализ карточек маркетплейс[/url] .
Xorya Online Picks – Neat layout and modern styling help make finding items effortless.
Auto Aisle Curated Store – Variety is strong and the filtering tools help locate items fast.
CinnamonCorner Design Hub – Friendly visuals with intuitive navigation make browsing simple.
Cloud Curio Spot – Interesting lineup and pages render rapidly.
Auto Aisle Picks – Solid selection with intuitive filtering for an effortless experience.
streetwearstorm.shop – The clothing selection is trendy and really fits my current style.
Crystal Corner Vault – Clear interface and browsing the selection is straightforward.
Xorya Store – The interface is sleek, and the overall layout feels very modern.
Storefront product spot – The intuitive interface and uncluttered design make the shopping experience enjoyable.
a bold streetwear stop – Trend-forward clothing that feels totally me.
Storefront design corner – The tidy pages and clear labels simplify the browsing process for newcomers.
проект на водопонижение [url=https://vodoponizhenie-iglofiltrami-moskva.ru/]vodoponizhenie-iglofiltrami-moskva.ru[/url] .
Bright Bento Curated Picks – Wide selection of items with informative details for every product.
Bright Bento Favorites – Nice assortment with helpful product explanations.
TrustedBusinessFramework Access – Logical layout and well-structured sections make browsing fast.
34 Crooke Website – Benefit from a crisp appearance and easy-to-follow structure.
official TrustedBusinessFramework site – Well-structured pages and intuitive navigation make reading simple.
discover Secure Commercial Bonding – Clean structure and responsive layout make finding details effortless.
34 Crooke Central – Enjoy an interface optimized for clarity and convenience.
Discover Sleep Cinema Hotel – Explore unique offerings and immersive information throughout the site.
access SecureCommercialBonding now – Logical structure and clean design make finding content quick and easy.
Learn about Sleep Cinema Hotel – Navigate an original concept with well-presented features and insights.
проект водопонижения [url=https://xn—77-eddkgagrc5cdhbap.xn--p1ai/]xn—77-eddkgagrc5cdhbap.xn--p1ai[/url] .
Blue Quill Lane – Easy to explore and the shopping experience feels natural.
анализ баннеров [url=https://reklamnyj-kreativ9.ru/]reklamnyj-kreativ9.ru[/url] .
Blue Quill Lane Hub – Simple browsing and everything loads quickly for easy selection.
visit Simple Online Shopping Zone – Easy-to-use interface and fast navigation simplify shopping.
понижение уровня грунтовых вод иглофильтрами [url=https://vse-o-vodoponizhenii.ru/]понижение уровня грунтовых вод иглофильтрами[/url] .
CircuitCabin Essentials – Smooth interface and intuitive browsing for tech lovers.
вакуумное водопонижение иглофильтрами [url=https://vodoponizhenie-blog.ru/]вакуумное водопонижение иглофильтрами[/url] .
CircuitCabin Shop Online – Tech categories are organized and browsing is straightforward.
Bag Boulevard Top Picks – Well-designed bags and the site makes finding items easy.
Bag Boulevard Essentials Store – Attractive selection and shopping flows seamlessly.
your go-to colorful store – Striking visuals and smooth layout draw you in instantly.
workspace tools corner – It’s easy to navigate and discover items designed for practical use.
Berry Brilliance treasures – Cheerful tones and careful presentation elevate the store’s appeal.
this office essentials shop – Everything is thoughtfully arranged, making it simple to find what I need.
Lofts on Lex Apartments – Each listing stands out thanks to its detailed breakdown.
система водопонижения грунтовых вод [url=https://vodoponizhenie-msk.ru/]vodoponizhenie-msk.ru[/url] .
Lofts on Lex Apartments – Each listing stands out thanks to its detailed breakdown.
водопонижение грунтовых вод [url=https://vodoponizhenie-moskva.ru/]водопонижение грунтовых вод[/url] .
this Bright Bloomy boutique – Cheerful color scheme and smooth layout make shopping enjoyable.
Visit Latanya Collins resources – Read structured content with clarity and ease for all users.
official Bright Bloomy hub – Friendly design and bright visuals make browsing effortless.
Visit PressBros UK – Explore a site with a tidy layout and valuable, easy-to-find details.
Check Latanya Collins online – Browse carefully structured materials that are easy to navigate and read.
советы выбора школы [url=https://best-schools-online.ru/]best-schools-online.ru[/url] .
quirky finds corner – Several items here were so unique that I had to take a closer look.
сервис анализа креативов [url=https://reklamnyj-kreativ8.ru/]сервис анализа креативов[/url] .
Explore PressBros online – Discover neatly arranged sections featuring useful and practical information.
Bold Basketry World – Easy navigation and overall shopping is natural and pleasant.
eclectic picks store – Certain products immediately grabbed my attention with their creativity.
Bold Basketry Vault – Well-structured pages and products are presented clearly today.
водопонижение грунтовых вод [url=https://vodoponizhenie-iglofiltrami-moskva.ru/]vodoponizhenie-iglofiltrami-moskva.ru[/url] .
your ClickToLearnStrategically hub – Logical menus and clean design make navigating information simple.
Strategic Learning Network – Well-structured pages and clear sections make reading content effortless.
Clove Crest Online – Clean designs and informative notes give good context for browsing.
upster pro [url=https://reklamnyj-kreativ9.ru/]upster pro[/url] .
Clove Crest Portal – Thoughtful presentation with clear explanations for all items.
мостбет регистрация Киргизия [url=www.mostbet61527.help]мостбет регистрация Киргизия[/url]
upmark site – Mobile version looks perfect; no glitches, fast scrolling, crisp text.
скважинное водопонижение [url=https://vodoponizhenie-blog.ru/]скважинное водопонижение[/url] .
Check Olympics Brooklyn – The layout combines a cool vibe with practical local insights.
OlympicsBrooklyn Updates – The tone is inviting and the guidance is easy to follow.
elite lifting corner – Its confident tone and dependable gear choices motivate daily effort.
вакуумное водопонижение иглофильтрами [url=https://xn—77-eddkgagrc5cdhbap.xn--p1ai/]xn—77-eddkgagrc5cdhbap.xn--p1ai[/url] .
Check The Call Sports articles – Read thorough analysis and updates about ongoing sports events.
your graphics gear source – Diverse product lineup with intuitive navigation throughout.
cardio and strength shop – The positive training culture and thoughtful selections make it appealing.
The Call Sports insights – Access thoughtful commentary and current updates for sports fans worldwide.
a gamer’s component corner – Robust catalog and clearly categorized sections make browsing easy.
Updating Parents resource portal – Access parenting guidance that is easy to navigate and apply.
грунтовое водопонижение [url=https://vse-o-vodoponizhenii.ru/]грунтовое водопонижение[/url] .
Visit Updating Parents – Discover helpful guidance that’s simple to understand and apply.
live wetten App buchmacher
онлайн образование [url=https://best-schools-online.ru/]онлайн образование[/url] .
водопонижение иглофильтрами [url=https://vodoponizhenie-msk.ru/]водопонижение иглофильтрами[/url] .
When some one searches for his essential thing, thus he/she desires to be available that in detail, thus that thing is maintained over here.
explore Opportunities Portal – Fast-loading content and clear layout make reading simple.
Check Brandon Lang Experts – The viewpoints discussed here are always presented with clarity.
anbieter sportwetten
Here is my homepage :: Quote bei wetten, Heflogistics.nl,
online ExploreLongTermOpportunities resource – Structured content and easy-to-follow pages make exploring simple.
Explore Brandon Lang Experts – The regular posts here offer meaningful insights worth reading.
анализ карточек маркетплейс [url=https://reklamnyj-kreativ8.ru/]анализ карточек маркетплейс[/url] .
clean product outlet – The design is smooth, and items are displayed in a very clear manner.
Check Winnipeg Temple resources – Explore clear and uplifting materials designed for easy navigation.
1вин лайв ставки [url=https://www.1win50742.help]https://www.1win50742.help[/url]
водопонижение иглофильтрами москва [url=https://vodoponizhenie-iglofiltrami-moskva.ru/]vodoponizhenie-iglofiltrami-moskva.ru[/url] .
ArcLoom curated picks – The sleek design highlights the products perfectly.
бесплатный период upster [url=https://reklamnyj-kreativ9.ru/]reklamnyj-kreativ9.ru[/url] .
The Winnipeg Temple online hub – Browse helpful content highlighting the temple’s purpose and values.
In The Saddle Philly digital hub – Find stories and resources reflecting friendship, support, and local spirit.
грунтовое водопонижение [url=https://vodoponizhenie-blog.ru/]грунтовое водопонижение[/url] .
In The Saddle Philly info page – Explore stories and resources that showcase community support and enthusiasm.
this accounting tools hub – Well-laid-out pages and clear item descriptions simplify shopping.
your finance resource – Logical structure and clear explanations make finding information easy.
Coffee Courtyard Corner – Easy-to-read layout and relaxing product exploration.
live wetten verboten
Check out my blog; beste sportwetten app; newsblogsite.blogdosaga.com,
Browse Power Up WNY – It’s great to witness such constructive programs gaining attention.
Coffee Courtyard Spot – Friendly design and effortless scrolling through products.
Browse Power Up WNY – It’s great to witness such constructive programs gaining attention.
1win ios [url=http://1win50742.help]1win ios[/url]
грунтовое водопонижение [url=https://vse-o-vodoponizhenii.ru/]грунтовое водопонижение[/url] .
водопонижение котлована [url=https://vodoponizhenie-msk.ru/]vodoponizhenie-msk.ru[/url] .
Open Energy Near site – Discover organized pages featuring meaningful discussions.
Energy Near web portal – Explore updated insights and informative materials with ease.
Enterprise Framework Center – Clear headings and responsive design help users navigate easily.
TrustedEnterpriseFramework Portal – Well-laid-out pages and organized content make reading effortless.
Al Forne Philly resource portal – Browse sections presented in an orderly way with practical information throughout.
Explore Al Forne Philly resources – Find clearly explained content and logically structured updates.
amerikanische buchmacher
Here is my website … Paypal Wettanbieter Ohne Oasis (http://M-Condit.Info/)
осушение котлованов [url=https://vodoponizhenie-blog.ru/]осушение котлованов[/url] .
a clean audit interface – Structured content and responsive design keep things easy.
melbet как играть в mines [url=https://www.melbet09342.help]melbet как играть в mines[/url]
your audit resource center – Helpful insights and a clean structure simplify the visit.
flourandoak.com – I truly admire the unique flair and imagination displayed across the site.
Arden Luxe marketplace – The upscale visuals and helpful details make exploring products easy and enjoyable.
FlourandOak Online – The design choices throughout the platform feel thoughtful and original.
Arden Luxe curated picks – Stylish presentation and helpful product notes make browsing effortless.
Elmhurst neighborhood link – Access articles and announcements focusing on community wellbeing.
Visit this Elmhurst page – Enjoy simple navigation to local services and initiatives.
seogrowth site – Bookmarked this immediately, planning to revisit for updates and inspiration.
Explore 9E2 Seattle online – Access a clean layout with intuitive browsing and well-structured sections.
9E2 Seattle web portal – Access information effortlessly with a smooth and logical site flow.
sportwetten über unter tipps
Here is my webpage – wettstrategie unentschieden; https://swiqastore.com/2025/10/06/Bet24-sportwetten,
водопонижение иглофильтрами [url=https://vse-o-vodoponizhenii.ru/]водопонижение иглофильтрами[/url] .
See Republic W4 – The content is visually appealing and easy to digest.
Collar Cove Store – Well-crafted products and the site is easy to browse.
republicw4.com – The articles are engaging and carefully organized for everyone to enjoy.
Collar Cove Express – Pleasant layout and all products are easy to check out.
Apricot Alcove’s collection – Appealing design elements with a consistently smooth experience.
водопонижение котлована иглофильтрами [url=https://vodoponizhenie-blog.ru/]водопонижение котлована иглофильтрами[/url] .
a lovely shopping destination – Warm presentation and an enjoyable flow while browsing.
I always used to study post in news papers but now as I am a user of net thus from now I am using net for posts, thanks to web.
Energy Near online resource – Stay connected with well-presented articles and news items.
Energy Near official site – Explore detailed insights and current information in one place.
clicktraffic site – Navigation felt smooth, found everything quickly without any confusing steps.
Check out Kionna West – Browse engaging content presented with care and attention to detail.
Visit Kionna West – Enjoy the warm, personal approach and well-crafted content throughout the site.
Ardenzo Store – The layout is tidy and navigating the site is very simple.
Pepplish Space – The concept is supported by an easy-to-read page layout.
Pepplish – I like how the idea is presented with clearly structured sections.
Ardenzo selections – Browsing is smooth thanks to the neat and organized presentation.
водопонижение строительных котлованов [url=https://xn—77-eddkgagrc5cdhbap.xn--p1ai/]водопонижение строительных котлованов[/url] .
вакуумное водопонижение [url=https://vodoponizhenie-moskva.ru/]вакуумное водопонижение[/url] .
согласование перепланировки квартиры москва [url=https://sostav.ru/blogs/286398/77663/]согласование перепланировки квартиры москва[/url] .
Visit Reinventing Gap – Explore crucial subjects presented in an easy-to-understand format.
Check out Reinventing Gap articles – Read practical, well-explained insights that make complex topics approachable.
1win ставки на баскетбол [url=https://www.1win50742.help]https://www.1win50742.help[/url]
a reliable supply shop – Plenty of choices with smooth, straightforward ordering.
Studio Supply collection – Plenty of options and a fast, straightforward ordering flow.
top sms activate services [url=https://github.com/SMS-Activate-Service]github.com/SMS-Activate-Service[/url] .
top sms activate alternatives [url=https://github.com/SMS-Activate-Login]top sms activate alternatives[/url] .
Discover 1911 PHL – Read concise, informative updates designed for all visitors.
Official ulayjasa website – Access organized content and convenient features in one place.
sms activate login [url=https://www.linkedin.com/pulse/top-5-sms-activate-services-ultimate-guide-virtual-phone-mike-davis-gnhre/]sms activate login[/url] .
Check this 1911 PHL site – Browse straightforward content and valuable updates for users.
узнаваемость бренда баннер [url=https://reklamnyj-kreativ8.ru/]reklamnyj-kreativ8.ru[/url] .
Visit ulayjasa portal – Discover a simple platform packed with practical tools and guides for daily needs.
sms activate service [url=https://github.com/SMS-Activate-Alternatives]sms activate service[/url] .
Copper Citrine Select – Attractive presentation and shopping feels simple.
мелбет ставки и казино приложение [url=https://melbet09342.help/]мелбет ставки и казино приложение[/url]
водопонижение иглофильтрами [url=https://vodoponizhenie-iglofiltrami-moskva.ru/]водопонижение иглофильтрами[/url] .
Copper Citrine World – Well-displayed items and simple navigation throughout.
Public policy discussion site – Explore well-articulated viewpoints addressing governance concerns.
ranklio site – Navigation felt smooth, found everything quickly without any confusing steps.
leadnex site – Found practical insights today; sharing this article with colleagues later.
rankrise site – Navigation felt smooth, found everything quickly without any confusing steps.
Civic engagement website – Find valuable discussions intended to support informed readership.
sichere wette
Also visit my website: was Ist ein Buchmacher (https://Corazondejirafa.com)
1win авиатор скачать [url=http://1win50742.help/]http://1win50742.help/[/url]
грунтовое водопонижение [url=https://vodoponizhenie-moskva.ru/]грунтовое водопонижение[/url] .
где согласовать перепланировку [url=https://sostav.ru/blogs/286398/77663/]sostav.ru/blogs/286398/77663[/url] .
Check Natasha for Judge online – Read insightful content presented clearly with a professional voice.
Check out Natasha for Judge – Read well-structured updates that convey confidence and transparency.
wetten bonus code
my web site … was heißt handicap wette, Cristina,
top sms activate alternatives [url=https://github.com/SMS-Activate-Login]top sms activate alternatives[/url] .
водопонижение строительных котлованов [url=https://xn—77-eddkgagrc5cdhbap.xn--p1ai/]водопонижение строительных котлованов[/url] .
Simple Online Store Hub – Seamless browsing and smooth checkout make shopping enjoyable.
best virtual number service [url=https://github.com/SMS-Activate-Service]github.com/SMS-Activate-Service[/url] .
sms activate service [url=https://www.linkedin.com/pulse/top-5-sms-activate-services-ultimate-guide-virtual-phone-mike-davis-gnhre/]sms activate service[/url] .
Skillet Street Marketplace – Loved the product options and the site feels seamless to explore.
Skillet Street Picks – Enjoyed the variety and site flow is very user-friendly.
ryzenrocket tech picks – Very clean site and checkout process feels effortless.
осушение котлованов [url=https://vodoponizhenie-iglofiltrami-moskva.ru/]осушение котлованов[/url] .
Rocket Tech Picks by Ryzen – Navigation is intuitive and buying products is quick and easy.
sms activator [url=https://github.com/SMS-Activate-Alternatives]github.com/SMS-Activate-Alternatives[/url] .
PMA Joe 4 Council information hub – Enjoy meaningful content arranged clearly with an emphasis on community initiatives.
Leanne’s Sparkling Fairies – Every post feels heartfelt and filled with enchanting positivity.
PMA Joe 4 Council updates – Discover information organized neatly to highlight civic participation and initiatives.
Leanne’s Enchanted Fairies – The inspiring stories shared here truly brighten my mood each time.
Coral Crate Nook – Well-presented products and site loads fast.
1win быстрый вывод на мегапей [url=www.1win50742.help]www.1win50742.help[/url]
visit Best Value Online – The site is intuitive and deals are easy to locate.
где согласовать перепланировку [url=https://sostav.ru/blogs/286398/77663/]sostav.ru/blogs/286398/77663[/url] .
Best Value Market Online – Clean layout and great deals make browsing products easy and smooth.
sms activate service [url=https://github.com/SMS-Activate-Login]sms activate service[/url] .
Planner Port Tools Hub – Great resources and moving around the site is effortless.
Planner Port Hub – Helpful resources and browsing feels quick and easy.
best sms activation services [url=https://github.com/SMS-Activate-Service]github.com/SMS-Activate-Service[/url] .
wettanbieter neu
Review my website … Europameister Wetten Quoten
browse their collection – I really enjoy the cute aesthetic and tidy setup.
top sms activate alternatives [url=https://www.linkedin.com/pulse/top-5-sms-activate-services-ultimate-guide-virtual-phone-mike-davis-gnhre/]top sms activate alternatives[/url] .
discover sweet finds – The whole site has a warm feel and showcases products perfectly.
Visit Play-Brary – Explore imaginative ideas explained in a clear and approachable way.
Play-Brary portal – Access imaginative content presented in a warm and approachable style.
DiBruno Shop Online – Fantastic product range and regular updates make checking back worthwhile.
PHL Market Portal – Love the variety of local goods and the frequent updates provided.
Basket Bliss Online Picks – Lovely products and the site design makes finding items simple.
Neighborhood Info Hub – The local focus and helpful explanations are shared in an easygoing style.
top sms activate alternatives [url=https://github.com/SMS-Activate-Alternatives]top sms activate alternatives[/url] .
top sms activate services [url=https://github.com/SMS-Activate-Login]github.com/SMS-Activate-Login[/url] .
MDC Philly Network – Informative posts and a welcoming voice make this a valuable local guide.
согласование переоборудования квартиры [url=https://sostav.ru/blogs/286398/77663/]sostav.ru/blogs/286398/77663[/url] .
skilletstreet – Loved the wide selection and navigating the site was seamless.
skilletstreet essentials hub – Nice collection and browsing the website is very simple.
Pearl Vendor resources – Everything is arranged nicely and content feels helpful for everyone.
see Canyon Market products – Found this unexpectedly and it looks very appealing.
discover Canyon Market – Found this site by accident and it appears fantastic.
Can you be more specific about the content of your article? After reading it, I still have some doubts. Hope you can help me.
handpicked toys – The site is visually clean and products are easy to review.
Flake Vendor Store – Browsing through pages is effortless and super fast.
fun toy finds – Browsing through the options is smooth, and the site is well organized.
discover Flake Vendor – Quick page loads and clean layout make browsing enjoyable.
Heather Market website – Pages are clean and the overall experience is easy to follow.
wettbüro krefeld
Review my website: Krypto wettanbieter
discover Heather Market – Love how organized and clean the pages look overall.
sms activate service [url=https://github.com/SMS-Activate-Service]sms activate service[/url] .
best virtual number service [url=https://www.linkedin.com/pulse/top-5-sms-activate-services-ultimate-guide-virtual-phone-mike-davis-gnhre/]www.linkedin.com/pulse/top-5-sms-activate-services-ultimate-guide-virtual-phone-mike-davis-gnhre/[/url] .
Gary Masino Online Portal – Clear explanations and careful presentation give a professional feel.
Uncommitted NJ Info – Honest communication and straightforward updates make this a reliable resource.
Bath Breeze Online – Nice selection with a clear and straightforward layout.
Gary Masino News – Well-presented ideas and clear communication make the site very informative.
Bath Breeze Online Marketplace – Quality products and easy navigation throughout the site.
Timber Aisle Shop – Really enjoying the easy navigation and clean presentation.
Timber Aisle Online Store – Easy navigation and a very clean design throughout.
shop Cobalt Vendor online – Smooth loading and organized pages make exploring a pleasure.
River Vendor website – Navigation was clear and placing an order was easy.
visit Cobalt Vendor store – Browsing feels fast and the layout is very intuitive.
benchbazaar selections – Well-organized pages and product descriptions are very clear.
Scarlet Crate Marketplace – Sleek layout and smooth browsing make for a very pleasant experience.
benchbazaar online hub – Smooth navigation and everything is easy to locate.
winteraisle.shop – The layout is tidy and browsing through the site is effortless.
Scarlet Crate Items – Minimalistic design and intuitive navigation make browsing enjoyable.
sms activate [url=https://github.com/SMS-Activate-Login]sms activate[/url] .
check out Clover Crate – The site layout makes browsing simple and enjoyable.
explore Topaz Aisle shop – Found a few unique items that align perfectly with what I wanted.
согласование перепланировки москва [url=https://sostav.ru/blogs/286398/77663/]согласование перепланировки москва[/url] .
ISWR Philly Official Page – I value the strong community spirit and the steady stream of helpful updates shared here.
shop the Clover Crate brand – Very user-friendly experience and simple to explore categories.
PrimeCornerShop – Everything is clearly organized and navigating is very straightforward.
visit this aisle shop – I came across some products that fit perfectly with what I wanted.
explore watch collections – It’s straightforward to find details and the interface is neat.
explore this store – The layout is simple yet effective, making browsing effortless.
Islamic Social Work Resources Philly – The dedication to community support and informative content truly stands out.
PrimeSelect – I like how quickly I can locate items thanks to the simple navigation.
Echo Aisle collections – Moving around the site is smooth and very convenient.
Bay Biscuit Favorites – Sweet selection and checkout is fast and intuitive.
Cateria McCabe Election Info – Well-structured information and openness make visiting informative.
Echo Aisle collections – Moving around the site is smooth and very convenient.
visit this vendor site – Support was helpful and my problem was fixed in no time.
Bay Biscuit Online – Charming products and the site makes ordering straightforward.
Cateria McCabe Official Site – Transparency and detailed content make understanding priorities simple.
Snow Vendor online store – Customer service acted fast and my issue was resolved efficiently.
sms activate website [url=https://www.linkedin.com/pulse/top-5-sms-activate-services-ultimate-guide-virtual-phone-mike-davis-gnhre/]sms activate website[/url] .
browse Lantern Market – Products are well-organized and navigating feels straightforward.
browse Lantern Market items – Plenty of choices with a clear structure that helps find what you need.
Orchard Crate collections – The interface is clean and navigation is seamless.
browse Quartz Vendor items – Pages are easy to navigate and categories are neatly organized.
chairchic online hub – Smooth navigation and items are easy to locate.
Orchard Crate collections – The interface is clean and navigation is seamless.
check Quartz Vendor – Clean design and clear sections make shopping effortless.
Chair Chic Online – Layout is clean and finding products was straightforward.
Firefly Crate collections – Overall organization is excellent and the selections make sense.
this online crate vendor – The items are thoughtfully chosen and organized clearly.
best virtual number service [url=https://github.com/SMS-Activate-Login]github.com/SMS-Activate-Login[/url] .
explore East Vendor shop – Placing my order was straightforward and quick.
shop the East Vendor brand – The process to complete my purchase was quick and easy.
Dandelion Designs – Great creative vibe and navigation is seamless.
official Dawn Vendor site – Items seem durable and the overall value is excellent.
dyedandelion studio – Bright, engaging design and smooth navigation throughout.
Zinc Vendor Collections – Prices are fair and the selection is thoughtfully curated.
mostbet казино слоты Кыргызстан [url=mostbet61527.help]mostbet61527.help[/url]
Dawn Vendor website – The lineup looks strong and the prices won’t break the bank.
Beard Barge Shop Hub – Nice assortment with product information that helps guide decisions.
O’Rourke for Philly Official – The platform is well-structured and provides helpful information for visitors.
Beard Barge Collections – Nice lineup and product details make it easy to explore options.
O’Rourke Philly Platform – Organized layout and practical content make the site user-friendly.
traffio site – Loved the layout today; clean, simple, and genuinely user-friendly overall.
North Crate Items – Completing my purchase was easy and convenient from start to finish.
Harriet Levin Millan Online – The thoughtful composition and tasteful design create a captivating experience.
check out North Crate – My order went through easily and the process was straightforward.
sportwetten steuern
Visit my web-site wetten auf Tore
мелбет промоакции [url=www.melbet09342.help]www.melbet09342.help[/url]
nicheninja site – Loved the layout today; clean, simple, and genuinely user-friendly overall.
Writer’s Official Page – Engaging narratives and an elegant format create a memorable reading experience.
leadzo site – Pages loaded fast, images appeared sharp, and formatting stayed consistent.
visit this vendor site – Costs feel reasonable and the choices are varied.
reachly site – Overall, professional vibe here; trustworthy, polished, and pleasantly minimal throughout.
official Terra Vendor page – Selection is strong and the pricing seems fair.
Oak Vendor Collections – The website feels responsive and navigation is very easy.
headlinehub today – Interesting articles and the site is quick to load.
sms activate alternatives [url=https://www.linkedin.com/pulse/top-5-sms-activate-services-ultimate-guide-virtual-phone-mike-davis-gnhre/]sms activate alternatives[/url] .
visit Oak Vendor – Everything loads fast and the site layout makes shopping effortless.
Headline Hub Network – Content feels valuable and pages load almost instantly.
CrateShop – Everything loads fast and the layout makes browsing effortless.
discover Cove Vendor – Navigation is easy and pages respond instantly.
visit this vendor site – Pages load quickly and moving around the site is effortless.
schüsse aufs tor sport wetten
SeasideHarbor – Fast-loading pages and clear design make finding items effortless.
this online vendor – Help came fast and my issue was handled efficiently.
shop the Meadow Aisle brand – Finding products is easy and the overall flow is comfortable.
visit Crown Vendor today – Quick, smooth assistance made everything easy to handle.
Berry Aisle marketplace – Received a fast reply and my concern was resolved clearly.
discover Meadow Aisle – Pages are easy to move between and browsing feels relaxing.
leadora site – Loved the layout today; clean, simple, and genuinely user-friendly overall.
find great items here – Fast and professional help made the process smooth.
Emery Essentials Finds – Browsing feels effortless and checkout is fast.
emery essentials collection – Layout is tidy and completing a purchase is quick.
official Birch Bounty hub – Easy browsing with items that feel handpicked and special.
Philly Beer Fest Online Info – The festival looks lively and the updates are easy to follow.
Birch Bounty Showcase – Browsing is smooth and the collection feels handpicked.
check Garnet Aisle online – Everything is simple to find and browsing is very smooth.
Philly Beer Fest Official Page – Vibrant festival details and engaging updates make it enjoyable to explore.
Garnet Aisle Items – The site feels well structured and easy to navigate.
discover Meridian Vendor – A few products here really grabbed my interest.
discover Meridian Vendor – A few products here really grabbed my interest.
Silver Vendor Online Store – The process to complete a purchase was quick and seamless.
browse Silver Vendor – Placing my order was seamless and very convenient.
Fit Fuel Select – Products are easy to explore and checkout completed without issues.
Fit Fuel Select – Products are easy to explore and checkout completed without issues.
Lake Vendor website – The layout is simple and content is very easy to understand.
Flint Vendor website – Simple navigation and organized menus make everything easy to find.
find Zena Aisle items – Quick loading and the mobile experience is flawless.
see Lake Vendor products – Everything is presented neatly and key points are clear.
see Flint Vendor products – Clean interface with menus that are very straightforward to use.
Zena Aisle Shop – Smooth experience with quick loading and a clean mobile design.
see Marble Aisle products – Navigation is simple and the design looks polished.
PP4FDR Organization Hub – Clear and passionate explanations make it easy to follow the cause.
visit this aisle shop – The interface is tidy, modern, and easy to explore.
PP4FDR Advocacy Page – Clear explanations and heartfelt purpose make the goals very easy to follow.
Blanket Bay Essentials Store – Inviting collection and pages load instantly.
cutandsewcove studio – Items are neatly organized and explanations are simple.
Blanket Bay Boutique Online – Cozy atmosphere and smooth navigation everywhere.
Dew Vendor Store – Browsing through the categories is straightforward and simple.
Natalia Kerbabian Info Hub – Engaging and well-organized content makes this site worth visiting.
explore Dew Vendor – The interface is intuitive and loading times are fast.
Cove Studio – Selection is lovely and product info is easy to follow.
Natalia Kerbabian Updates – Informative background and engaging posts make reading the site enjoyable.
Meadow Vendor Store – Everything looks clean and the site responds quickly.
discover Meadow Vendor – The site feels streamlined and browsing is smooth.
ClearGlassVendor – Mobile experience is flawless with speedy loading and effortless purchases.
melbet ошибка пополнения [url=https://melbet09342.help]https://melbet09342.help[/url]
visit Wild Crate shop – Everything looks fresh and pages respond quickly on handheld devices.
visit Wild Crate shop – Everything looks fresh and pages respond quickly on handheld devices.
GlassBazaar – Everything loaded instantly, and checkout was straightforward.
Woodland Vendor hub – The layout is intuitive and pages respond immediately.
browse Dune Vendor items – Categories are clear and the site feels minimal yet practical.
Woodland Vendor online store – Pages appear instantly and the interface is organized.
Fit Fuel Store – Products are well organized and ordering felt seamless.
visit Trail Vendor today – Everything is presented clearly with helpful product descriptions.
Fit Fuel Finds – Smooth navigation and completing the order was quick.
Trail Vendor collections – Pages are well organized and the item descriptions are useful and clear.
Harbor Aisle website – Organized categories and clear explanations improve the shopping experience.
Blanket Bay Product Hub – Pleasant selection with pages that load quickly.
Hearth Vendor Hub – Clear categories and quick loading pages make browsing enjoyable.
Blanket Bay Essentials Store – Inviting collection and pages load instantly.
sms activate service [url=https://github.com/SMS-Activate-Service]sms activate service[/url] .
FernCrate Shop Hub – Excellent product options and a streamlined shopping experience.
Hearth Vendor Selections – Fast pages and intuitive menus make finding what I need simple.
FernCrate Collection – The assortment is amazing and the shopping process is straightforward.
visit this market site – Their team responded fast and provided clear guidance.
Dusk Denim Hub – Items are fashionable and the website is simple to navigate.
best sms activate service [url=https://github.com/SMS-Activate-Alternatives]github.com/SMS-Activate-Alternatives[/url] .
visit Robin Market today – My questions were handled quickly and professionally.
Children’s Learning Studio – A welcoming platform where creativity and knowledge grow together.
denimdusk essentials – Trendy selection and browsing the website is quick and simple.
перепланировка помещения [url=https://sostav.ru/blogs/286398/77663/]sostav.ru/blogs/286398/77663[/url] .
Kids STEM Activities Online – A fun and motivating space where young minds can explore and build new skills.
legale sportwetten schweiz (Chadwick) schweiz gesetz
find Stone Vendor products – Support team answered questions quickly, making shopping easier.
visit Glade Vendor today – Easy browsing with a reliable and fast checkout experience.
Stone Vendor Shop – Support was attentive and clarified all my doubts promptly.
Wood Vendor shopping hub – Really pleased with everything and I’ll revisit soon.
browse Wood Vendor items – Really enjoyed it here and I’ll return again soon.
discover Pine Crate – Enjoyed exploring the site and found products that caught my eye.
Cup & Craft Favorites – Items are nicely displayed and shopping is hassle-free.
find great items here – Enjoyed exploring the pages and found helpful products along the way.
1win промокод на бонус [url=https://1win50742.help/]https://1win50742.help/[/url]
Cup & Craft Essentials – Pleasant browsing experience with items neatly organized.
Copper Aisle website – Quick to load and very easy to use on mobile devices.
Bloom Beacon Product Hub – Navigation feels natural and the shopping experience is hassle-free.
Chestnut Vendor Store – Customer service is efficient and very helpful overall.
Bloom Beacon Showcase – Clear interface with effortless and pleasant browsing experience.
Chestnut Vendor Store – Customer service is efficient and very helpful overall.
Opal Aisle Selection – The curated items are lovely and browsing the site is simple and smooth.
check out Bright Aisle – The interface feels smooth and uncomplicated.
Opal Aisle Marketplace Online – Lovely assortment and easy-to-navigate layout make shopping fun.
check out Autumn Crate – Design is modern, clean, and very simple to move through.
Bright Aisle shopping hub – The clean design makes browsing very easy.
this Willow Vendor site – The website feels welcoming and the design is up-to-date.
Willow Vendor Online Store – Modern interface with a friendly and accessible feel.
Autumn Crate Collections – Modern feel and simple design make finding products effortless.
premium picks inside – The pages load nicely and everything feels streamlined.
мостбет free spins [url=http://mostbet61527.help/]http://mostbet61527.help/[/url]
Plum Vendor X Online Shop – Smooth navigation and a clean layout make browsing hassle-free.
find answers here – Information is presented plainly and makes sense immediately.
Plum Vendor X Hub – Very user-friendly with quick access to all product categories.
sageandspark – I really love exploring this site, it feels so clean and organized.
WoodlandCrate website – Warm, thoughtful curation and an easy-to-navigate site make exploring satisfying.
Wind Vendor storefront – Simple and quick checkout made ordering easy.
sms activate service [url=https://github.com/SMS-Activate-Service]sms activate service[/url] .
Hollow Vendor hub – The material is easy to digest and very approachable.
shop Woodland Crate now – Carefully chosen products and inviting layout make shopping enjoyable.
see Wind Vendor products – Paying for my items was quick and hassle-free.
beste wett tipps kostenlos
Also visit my blog post … Bonus Wetten Ohne Einzahlung (Sengehuanrui.Com)
QuartzAisle deals – Everything feels orderly, with a smooth browsing experience.
best sms activation services [url=https://github.com/SMS-Activate-Alternatives]github.com/SMS-Activate-Alternatives[/url] .
Illustration Inn Picks – Lovely artwork and site flow feels natural.
Quartz Aisle homepage – Everything is well-laid-out, making the store easy to navigate.
Illustration Inn Picks – Lovely artwork and site flow feels natural.
как играть в mines mostbet [url=mostbet61527.help]mostbet61527.help[/url]
Moe’s Summer Spot – Great energy and consistent updates make visiting enjoyable every time.
Bright Bento Shop Hub – Products are thoughtfully detailed and the range feels impressive.
Hill Vendor Collections – Everything feels fresh, inviting, and simple to navigate throughout.
Bright Bento Collections – Wide selection and the descriptive details make products easy to understand.
Hill Vendor Store – Design is fresh, intuitive, and makes the site feel welcoming.
visit Iris Crate today – Pages are well arranged and the site is easy to explore.
Wheat Market Online Hub – The curated products and neat layout make visiting enjoyable.
Silk Market Store – Everything appears contemporary and simple to use.
Wheat Market Picks – Everything is carefully chosen, making the shopping experience delightful.
official Silk Market page – Modern visuals and clear navigation stand out.
check Ruby Aisle – Pages load fast and the organized design makes shopping simple.
visit this boutique – A delightful range that makes casual browsing quite fun.
Ruby Aisle Selections – Intuitive navigation with clear categories makes shopping simple.
shop the Cedar Aisle brand – The design feels fresh and the buying steps are very user-friendly.
official Apricot Market page – Clean design and easy-to-use filters improve the shopping experience.
Charm Vendor storefront – I found the assortment engaging and pleasant to check out.
explore Cedar Aisle shop – The clean style and quick checkout make shopping pleasant.
check out Apricot Market – Modern styling combined with efficient search options is very convenient.
Bench Breeze Online – Interface is smooth and exploring the site is effortless.
benchbreeze essentials – The site design is neat and moving around is easy.
Skillet Street Online – Excellent choices and navigation flows naturally.
Skillet Street Picks – Enjoyed the variety and site flow is very user-friendly.
visit Crystal Aisle – I found several unique products that show attention to detail.
browse Crystal Aisle here – Items feel carefully chosen, making browsing enjoyable.
Bright Bloomy Store – Vibrant colors and clean layout make exploring the site a breeze.
Reed Vendor Hub – Very intuitive navigation with all products logically arranged.
Moss Vendor Collections – I’ll save this link and return for upcoming items and deals.
Bright Bloomy Curated Store – Bright, cheerful layout and easy navigation make it enjoyable.
discover Reed Vendor – Simple site design and product categories make shopping effortless.
top sms activate alternatives [url=https://github.com/SMS-Activate-Alternatives]top sms activate alternatives[/url] .
this online vendor – Planning to revisit for more shopping and product updates.
Satin Vendor collections – Saving this link to explore again later.
VendorLilacShop – Fast and smooth resolution from customer service, no delays.
sportwetten tipps vorhersagen gratis
Review my web-site: was sind handicap wetten
Walnut Aisle Official – The site’s clean layout and attractive products make browsing enjoyable.
shop the Satin Vendor brand – I’ll revisit this place when I need more items.
Walnut Aisle Hub Online – Simple design and engaging items make exploring the site enjoyable.
Hey there! Someone in my Facebook group shared this site with us so I came to give it a look. I’m definitely loving the information. I’m bookmarking and will be tweeting this to my followers! Exceptional blog and outstanding design.
LilacStore – The team resolved my problem swiftly and without complications.
Oktoberfest Ticket Portal – Excited about grabbing tickets and reading through the detailed event notes.
Annual Beer Celebration News – Eager for the annual gathering and thankful for the informative update.
visit Spring Crate – I’ll save this site for later because it’s easy to navigate and reliable.
Iron Vendor products – A reliable lineup of items that all seem built to last.
Alpine Crate shopping hub – Seems dependable and exploring more products is tempting.
Spring Crate Items – Very easy to navigate and shop, so I’ll keep this site bookmarked.
IronVendor website – A solid selection of well-built products gives confidence in the shop.
Alpine Crate collections – Seems safe and I want to check out more products here.
Ryzen Rocket Market – Smooth browsing and product selection feels very clear.
Ryzen Rocket Devices – Organized design and a fast, simple purchasing experience.
Bronze Vendor Store – Enjoyed the experience and the site seems very credible.
мостбет казино слоты Кыргызстан [url=https://mostbet61527.help/]https://mostbet61527.help/[/url]
browse Bronze Vendor – Found the interface user-friendly and I’ll definitely return soon.
RoseCrate deals – Great overall experience, I’ll be shopping here again.
discover Rose Crate – Shopping was fun and simple, I’ll revisit soon.
visit this store – You’ll come across items here that aren’t typical at all.
sagevendor.shop – Very pleasant browsing experience, site feels reliable and trustworthy overall.
Feather Market Store – The product range feels distinctive and unlike most other stores.
Sage Vendor Store – Pages load quickly and the overall experience feels trustworthy.
Ultimate Club Choices – Really like the fresh concept and the interactive content makes it a fun visit.
City Night Rankings – Smart idea and the engaging structure keeps things interesting.
mostbet зеркало [url=https://mostbet61527.help/]https://mostbet61527.help/[/url]
LoftMarket – Menus are easy to use and the filter options make shopping faster.
Uncommitted NJ Page – The messaging is clear and the updates are very easy to follow.
this online shop – Clear product info and quality items make browsing straightforward.
visit Coral Vendor – Everything seems high quality and the descriptions are informative.
discover Glow Vendor – The interface is stylish, keeping the product browsing smooth.
explore Glow Vendor – The luminous, modern setup keeps everything visually engaging and easy to browse.
Fresh Finds Market – The entire visit felt convenient and well organized.
Modern Comfort Store – The ordering process was quick and surprisingly efficient.
Violet Supply Online – Everything flows nicely and browsing the collection is simple and smooth.
Nectar Collection Hub – Browsing was effortless and I located exactly what I was looking for.
Violet Shopping Spot – Browsing feels effortless and the products are clearly presented and easy to find.
Nectar Supply Online – The browsing experience was smooth and I found everything I wanted.
Sea Shopping Spot – Really liked the product range and checkout was fast and effortless.
NuPurple Cost Overview – Easy-to-follow pricing details provide clarity and confidence for users.
Remi PHL News – The site is organized well and provides helpful updates with ease.
Amber Crate homepage – Well-spaced sections make it pleasant to scroll and shop.
Sea Collection Hub – Plenty of product choices and checkout was easy and quick.
Remi PHL Community – Accessible design and clear content make it easy to navigate today.
shop at AmberCrate – Clear menus and layout make the whole process feel effortless.
Pricing Guide at NuPurple – Simple explanations and clear numbers make reviewing options hassle-free.
this online shop – Smooth and straightforward navigation makes shopping enjoyable.
Granite Trend Store – Enjoyed exploring, products are well laid out and appealing.
Granite Trend Store – Enjoyed exploring, products are well laid out and appealing.
CottonMarket marketplace – Very easy navigation, everything is accessible and clear.
Ginger Crate Marketplace – Layout feels organized, making shopping smooth and pleasant.
Ginger Crate Collection – Clean interface and effortless browsing experience.
Teal Vendor Picks Online – Easy to browse, pages load fast, and checkout process was simple.
Ridge Trend Store – The items are solid and the customer service responded promptly and professionally.
Teal Vendor Hub – Clean interface, everything loads well, and checkout was straightforward.
Ash Vendor Selections – Clean design made browsing smooth and finding items effortless.
Visit Ridge Vendor – The items exceeded my expectations and the customer service was fantastic.
Jovenix Boutique – Browsing is easy and the product arrangement feels logical.
check out Ash Vendor – The interface is straightforward and products are easy to search for.
Shop Jovenix – Very smooth experience, pages are clear and products are easy to locate.
online wetten ohne oasis
my web page :: wettbüro us wahl – Fred –
Top Delta Products – Really happy with the items and completing my order was smooth.
Explore Delta Deals – Everything looks great and buying was simple and hassle-free.
Aurora Online Market – Well-organized interface makes exploring products effortless.
BranchVendor deals – Found a couple of standout products, might return for more.
sportwetten bonus neu
Also visit my website – halbzeit endstand wette
Aurora Collection Hub – Very easy to navigate and items are well displayed.
shop Branch Vendor now – Spotted some unique pieces, I’ll return to explore further.
Bay Vendor Picks – Really liked the assortment and checkout was smooth.
Cumberland County Vaccine Info – Reliable guidance and informative updates provide a trusted community resource.
Bay Online Market – Nice variety of items and checkout was easy and fast.
County Vaccine Portal – Straightforward information and up-to-date guidance make vaccination planning easier.
Wave Vendor Online – Loved the variety and completing the purchase was quick.
Retail Glow Online Store – Clear layout, fast checkout, and an enjoyable shopping experience.
LinenVendor marketplace – Minimalist layout combined with quick checkout makes shopping pleasant.
Retail Glow Store – Clean layout, products are well presented, and the purchase process was simple.
Linen Vendor Store – The clean design makes browsing easy, and checkout is very smooth.
Ridge Supply Online – I appreciate the excellent build of products and helpful support.
Ridge Shopping Spot – The merchandise is great and the support team made everything easy to manage.
EmberVendor Spot – Browsing is simple, products are clear, and checkout was fast.
EmberVendor Online Picks – Very smooth experience with an easy and quick checkout.
online buchmacher
Here is my blog post Beste australian open wettanbieter
Lavender Product Hub – Unique products available and the website feels professional and reliable.
Shop Zen Collection – Easy-to-use layout with product info that really helps while shopping.
shop at AshMarket – Simple menus and a fast checkout enhance the experience.
Lavender Online Market – Came across some interesting finds and the site gives a trustworthy impression.
Zen Trend Store – Easy to navigate with helpful details for every product listed.
check out Ash Market – The streamlined design keeps shopping stress-free.
Indigo Trend Store – The site feels uncluttered and the products seem thoughtfully organized.
Indigo Crate Store – The design feels tidy and every product seems carefully selected.
Explore Caramel Deals – Everything is well laid out and navigating the pages is simple.
Caramel Online Market – Very easy to navigate and the site feels well structured.
Opal Wharf Spot – Clear product details and navigation makes shopping smooth.
Opal Wharf Online Hub – Very user-friendly with organized product listings and clear details.
Cycle for Sci Event Info – Organized content and a passionate mission make this initiative stand out.
fairvendor.shop – Found exactly what I needed, site feels trustworthy overall today.
Cycle for Sci Info Page – The initiative is engaging, and the event details are well presented.
CreekHub – Fast loading and well-structured pages make browsing enjoyable.
fairvendor.shop – Found exactly what I needed, site feels trustworthy overall today.
Explore Field Deals – I tracked down what I wanted in just a few easy clicks.
CreekHub – Fast loading and well-structured pages make browsing enjoyable.
Explore Field Deals – I tracked down what I wanted in just a few easy clicks.
PlumVendor Hub – Pages load quickly and shopping here was very enjoyable.
visit Ember Aisle – Some interesting finds caught my eye, worth another look soon.
PlumVendor Deals Online – Really enjoyed browsing, checkout was fast and items are well presented.
browse Ember Aisle here – Found a few notable products that make it worth another look.
Best of West Vendor – Quick pages and a clear layout make exploring products easy.
Sola Isle storefront – Well-arranged items create a polished and inviting browsing experience.
Visit West Vendor – Smooth browsing experience with quick-loading pages and a tidy layout.
this online shop – The items are presented nicely, and the assortment feels appealing.
Acorn Product Hub – The website is well structured and items are easy to navigate.
Acorn Collection Hub – Navigation is smooth and all items are accessible online.
Brass Vendor Picks – Descriptions are helpful and pages respond without lag.
FrostTrack Hub – Smooth browsing experience and fast-loading pages make shopping effortless.
Top Pebble Products – Browsing the collection today was enjoyable and hassle-free.
Brass Online Shop – Detailed product info and smooth, fast-loading pages.
FrostTrack Selections – Clean design and responsive pages make exploring products easy.
Shop Pebble Collection – Enjoyed browsing the latest products and navigating the site was simple.
Tide Vendor Online – Smooth browsing experience and overall site design feels polished.
O’Neill Campaign Info – The site presents a focused vision and makes exploring information straightforward.
Tide Vendor Finds – Pleasant browsing with clear product descriptions.
Shop Jasper Collection – The rates are sensible and the website comes across as trustworthy.
O’Neill Campaign Hub – Clear messaging and well-organized information make this site a reliable resource.
WhimHarbor Picks – Everything looks neat, shopping is simple, and product info is clear.
Jasper Trend Store – The value for money seems right and I trust the look of the site.
WhimHarbor Boutique – Pages load fast, product categories are clear, and shopping is simple.
wetten quoten
Stop by my site; Geburtstermin Wette Gewinn
explore Pine Vendor – Well-organized and fast, the site feels very polished.
Visit Flora Aisle – Browsing is easy thanks to the clean, straightforward layout.
explore Orchid Aisle – Pleasant layout and well-chosen products make exploring this store satisfying.
PineVendor deals – Pages load instantly, and the site looks professionally crafted.
Flora Online Market – Simple layout makes finding what I need fast and easy.
Orchid Aisle online – Smooth navigation paired with thoughtful item choices makes the site appealing.
Clear Vendor Boutique – Browsing the store is effortless and the products are quite appealing.
Wicker Lane Picks – Simple layout, fast loading, and the checkout process was seamless.
Clear Supply Online – Everything is easy to explore and the product range is engaging.
Wette Spielen schweiz
frankreich
Wicker Lane Finds – Clean design, browsing was effortless and checkout was fast.
Morning Crate Picks – Quick and simple shopping experience, all items were easy to find.
Morning Crate Deals – Very straightforward, found exactly what I wanted in minutes.
I am really loving the theme/design of your weblog. Do you ever run into any web browser compatibility issues? A few of my blog audience have complained about my blog not working correctly in Explorer but looks great in Chrome. Do you have any ideas to help fix this issue?
CrateCorner – Easy to navigate and perfect for fast, future shopping sessions.
Best of Ocean Vendor – Quick page loads and a diverse selection of products available.
SunMarket – The site is very convenient, I’ll return here for fast browsing.
Visit Grove Aisle – Pages are responsive and browsing through products is easy.
Visit Ocean Vendor – The website loads quickly and offers a wide range of items.
Grove Aisle Collection – Easy-to-use site and the pages load without delay.
EmberBasket Store – Product pages are informative and navigating the site is a breeze.
Juniper Vendor Direct – Fast service and the packaging ensured zero damage.
EmberBasket Market – Enjoyable shopping experience with clear product info and easy navigation.
Juniper Vendor Direct – Fast service and the packaging ensured zero damage.
N3rd Market Portal – Fun products and a cool overall vibe keep me coming back.
N3rd Market Store – Innovative concept and lively updates make browsing exciting.
Thistle Shopping Spot – Nice selection available and the descriptions made picking items easy.
проект перепланировки квартиры в москве [url=https://teletype.in/@jorik11/proekt-dlya-pereplanirovki/]проект перепланировки квартиры в москве[/url] .
JollyMart Store – Pages load fast and the selection of items is really convenient.
YouTube caiu [url=https://caiu.site/]caiu.site[/url] .
Thistle Vendor Store – Great variety of items and the product descriptions are very informative.
Hazel Deals Online – The experience was seamless and the customer support team was excellent.
JollyMart Hub Online – Intuitive design and the selection of items is very convenient.
Казино в тг с бонусами [url=https://t.me/vanechekvan/]Казино в тг с бонусами[/url] .
Казино онлайн бесплатно [url=https://t.me/casinotop_official/]Казино онлайн бесплатно [/url] .
Visit Hazel Vendor – Navigation is easy and customer service was very helpful today.
Oak Market online – Clean, inviting site design makes exploring products a pleasure.
Best of Shore Vendor – Navigation is effortless and products are easy to locate.
wetten österreich türkei
my web page :: sportwetten geld zurück erfahrungen
discover Oak Market – Browsing is easy and the site has an inviting atmosphere.
Shop Shore Vendor – Browsing feels simple and the website is user-friendly.
заказать кухню под ключ [url=https://zakazat-kuhnyu-3.ru/]zakazat-kuhnyu-3.ru[/url] .
заказать кухню стоимость [url=https://zakazat-kuhnyu-2.ru/]zakazat-kuhnyu-2.ru[/url] .
sportwetten bester bonus
Visit my blog – wetten Spiele
Lunar Vendor Store – Quick and responsive support, made shopping stress-free.
Lunar Vendor Picks – Staff were friendly and helped me sort out my questions quickly.
заказать кухню каталог [url=https://zakazat-kuhnyu-1.ru/]zakazat-kuhnyu-1.ru[/url] .
Birch Essentials Shop – Everything is clearly organized and the site feels trustworthy.
Shop Birch Collection – The products are well presented and the website feels dependable.
QuickCarton Select – Loved how simple and clear everything is, checkout was fast.
Visit Raven Crate – Browsing is smooth and the layout feels neat and user-friendly.
QuickCarton Spot – Very easy to browse, everything is displayed clearly and professionally.
Raven Essentials Shop – Easy-to-use menus and a tidy design make shopping hassle-free.
Hagins Public Info – Well-defined priorities and dedicated service make this site very informative.
Icicle Crate Boutique – Items are high quality and shipping was surprisingly fast.
Walnut Product Hub – Ordering is smooth and the website feels highly professional.
Hagins Candidate Hub – Transparent priorities and strong dedication give a positive impression.
Icicle Crate Boutique – Items are high quality and shipping was surprisingly fast.
Walnut Picks Hub – Smooth process for placing orders and the professionalism is evident.
1win maxfiylik siyosati [url=https://1win5767.help/]1win maxfiylik siyosati[/url]
Floral Trend Store – Items are easy to find and the overall layout feels organized.
mostbet как вывести на Visa [url=https://mostbet52718.help/]https://mostbet52718.help/[/url]
Floral Product Hub – Exploring the products is easy, and the collection feels organized.
Shore Vendor Essentials – Clear design and intuitive navigation make shopping enjoyable.
сделать проект перепланировки квартиры в москве [url=https://teletype.in/@jorik11/proekt-dlya-pereplanirovki/]teletype.in/@jorik11/proekt-dlya-pereplanirovki[/url] .
TranquilityShop – The site’s style is simple and browsing products feels effortless.
Shore Vendor Essentials – Clear design and intuitive navigation make shopping enjoyable.
internet down [url=https://caiu.site/]caiu.site[/url] .
Казино онлайн бесплатно [url=https://t.me/casinotop_official/]Казино онлайн бесплатно [/url] .
QuietCart – The minimalist design makes shopping effortless and enjoyable.
Казино биф [url=https://t.me/vanechekvan/]Казино биф [/url] .
this online shop – Easy navigation and organized categories helped me quickly find products.
Cart Catalyst Storefront – Smooth browsing and a clean layout make shopping effortless.
Mist Vendor Marketplace – Products are clearly described and easy to review.
Nest Vendor online – Logical layout and neat sections made locating products effortless.
Mist Vendor Essentials – Smooth browsing and appealing products made shopping easy.
мостбет регистрация бонус Киргизия [url=www.mostbet52718.help]www.mostbet52718.help[/url]
купить заказать кухню [url=https://zakazat-kuhnyu-3.ru/]купить заказать кухню[/url] .
Yornix Online Picks – Responsive assistance made shopping effortless and pleasant today.
заказать кухню на заказ [url=https://zakazat-kuhnyu-2.ru/]заказать кухню на заказ[/url] .
Petal Picks Online – The item descriptions are thorough and the updates keep everything current.
Yornix Hub – Customer service answered all my questions quickly, very impressed.
Drift Online Shop – Smooth navigation paired with clear product information makes shopping easy.
Blossom Marketplace – The clear explanations and ongoing updates are definitely appreciated.
Drift Favorites – The interface is intuitive and the product details are very helpful.
Quick Meadow Online Store – Pleasant, fast, and organized experience when exploring products today.
official Item Cove site – Checked it out and the discounts and deals look promising.
the Noble Aisle collection – Came across the shop and the products appear durable and stylish.
check out Velvet Vendor X – Polished interface makes shopping and navigating quick and effortless.
Quick Meadow Online – Pleasant shopping experience with fast loading pages and clear product info.
smart shopping spot – Browsed recently and the discounts look really good.
official Velvet Vendor X site – Sleek layout makes exploring and shopping very easy.
nobleaisle.shop – Came across this shop earlier and the items genuinely seem well made.
Maple Essentials Shop – Lots of items to explore, had a smooth browsing experience.
Chris Hall Election Page – Clear and concise background info combined with detailed platform explanations.
Maple Deals Online – Lots of items to discover and browsing was very pleasant.
Key Deals Online – Items arrived quickly and the quality is top-notch.
Chris Hall Candidate Page – The background information and platform are well organized and highly informative.
Mint Picks Hub – Navigation is simple and the overall shopping feels trustworthy.
Key Essentials Shop – Really impressed with the quality and fast shipping options.
Explore Mint Deals – Items are clearly displayed and the store feels professional.
wettbüro innsbruck
my web blog :: wettanbieter ohne lugas mit paypal
Bouton Finds – Well-presented products and browsing is simple and enjoyable.
прямые кухни на заказ от производителя [url=https://kuhni-spb-41.ru/]kuhni-spb-41.ru[/url] .
заказать кухню каталог [url=https://zakazat-kuhnyu-4.ru/]заказать кухню каталог[/url] .
услуги по согласованию перепланировки [url=https://sites.google.com/view/dokument-dlya-pereplan/главная-страница/]услуги по согласованию перепланировки[/url] .
Bold Treasures – Attractive display and online browsing is very user-friendly.
проект перепланировки москва [url=https://teletype.in/@jorik11/proekt-dlya-pereplanirovki/]проект перепланировки москва[/url] .
Olive Vendor Online Hub – Website design is attractive and browsing is effortless.
заказать кухню с установкой [url=https://zakazat-kuhnyu-1.ru/]zakazat-kuhnyu-1.ru[/url] .
Казино онлайн в России [url=https://t.me/casinotop_official/]Казино онлайн в России [/url] .
Olive Vendor Online Hub – Website design is attractive and browsing is effortless.
Ita? down [url=https://caiu.site/]caiu.site[/url] .
sportwetten anbieter vergleich
My webpage – Esc Gewinner wetten
Казино Водка [url=https://t.me/vanechekvan/]Казино Водка [/url] .
MarketPearl Online Hub – Everything is easy to browse and the overall site feels very professional.
Finch Supply Online – They addressed my problem right away and handled it with care.
MarketPearl Essentials – Items are easy to find and checkout was very straightforward.
Hovanta Official – Very organized layout and easy navigation made browsing effortless.
Finch Vendor Picks – Customer service was responsive and fixed everything efficiently.
1win login cu google [url=https://www.1win5805.help]https://www.1win5805.help[/url]
Hovanta Storefront – Quick page loads and user-friendly design enhance browsing.
Visit Brook Vendor – The experience was impressive and I plan to shop here again.
curious shopper’s hub – Unique finds with a clean and attractive presentation.
заказать кухню под ключ [url=https://zakazat-kuhnyu-3.ru/]zakazat-kuhnyu-3.ru[/url] .
Shop Brook Collection – The site feels welcoming and I’ll definitely check back later.
trendy online marketplace – Lots of interesting options that will appeal to a wide audience.
visit KettleMarket – Found a variety of unique items, all nicely organized.
Pebble Online Market – Simple design and straightforward navigation made shopping pleasant.
curious shopper’s hub – Broad assortment keeps browsing engaging for all.
Pebble Trend Store – Layout is simple and navigation intuitive, made shopping smooth.
заказать кухню в интернете [url=https://zakazat-kuhnyu-2.ru/]заказать кухню в интернете[/url] .
harborvendor.shop – Pleasant experience, everything loaded quickly and looked professional.
Ivory Collection Hub – Clean design and well-organized items make browsing enjoyable.
harborvendor.shop – Pleasant experience, everything loaded quickly and looked professional.
Visit Ivory Vendor – Smooth navigation and well-organized items make shopping simple.
Smyrna Music Festival – The acts are fantastic and the updates are very helpful.
Smyrna Cultural Festival – Great lineup with updates that make planning a visit simple.
Cedar Celeste Gear – Navigation is seamless and each product is easy to understand.
заказ полиграфии [url=https://www.esurveyspro.com/survey.aspx?id=05d5a74d-1824-4098-a3ce-7b9a9719be46/]https://www.esurveyspro.com/survey.aspx?id=05d5a74d-1824-4098-a3ce-7b9a9719be46[/url] .
Honey Market Deals Hub – Everything works well and product pictures are attractive.
small wonders store – Cute collection of items, I’m marking this for later.
Honey Market Selection – Everything loads properly and the photos are high resolution.
проект перепланировки квартиры для согласования [url=https://teletype.in/@jorik11/proekt-dlya-pereplanirovki/]проект перепланировки квартиры для согласования[/url] .
CelNova Essentials – Smooth browsing, everything feels organized, and checkout is simple.
Lumvanta Hub Online – Enjoyed shopping here, items look great and ordering was smooth.
Рейтинг лучших онлайн казино [url=https://t.me/casinotop_official/]Рейтинг лучших онлайн казино[/url] .
кухни под заказ [url=https://kuhni-spb-41.ru/]kuhni-spb-41.ru[/url] .
перепланировка квартиры согласование [url=https://sites.google.com/view/dokument-dlya-pereplan/главная-страница/]sites.google.com/view/dokument-dlya-pereplan/главная-страница[/url] .
заказать кухню по своим размерам [url=https://zakazat-kuhnyu-4.ru/]заказать кухню по своим размерам[/url] .
Coastal Trend Shop – I’m marking this store to revisit when I need more items.
Lumvanta Online Spot – Layout is neat and products are easy to find.
CelNova Online Hub – Pages load quickly, navigation is simple, and items look great.
favorite online boutique – Love the warm rustic vibes and the site flows very nicely.
timbervendor.shop – The rustic vibe is charming and browsing through the site is effortless.
Leaf Online Shop – High-quality items and pricing appears balanced.
the Jewel Vendor showcase – Product photos are clear and have a professional appearance.
Visit Leaf Vendor – Everything looks well made and the costs seem quite reasonable.
visit JewelVendor – Photos of the products are high-quality and well-presented.
North Vendor Collection – Smooth experience, descriptions are detailed and easy to understand.
Frost Vendor Store – Products match the description perfectly and purchasing was effortless.
Magnificent beat ! I wish to apprentice while you amend your website, how can i subscribe for a blog web site? The account helped me a acceptable deal. I had been a little bit acquainted of this your broadcast provided bright clear idea
North Vendor Picks Online – Navigation is easy, and product descriptions are thorough and clear.
Explore Frost Deals – Everything I ordered was accurate and the checkout went smoothly.
заказать кухню с замером [url=https://zakazat-kuhnyu-3.ru/]zakazat-kuhnyu-3.ru[/url] .
chiccheckout.shop – Checkout is easy and the layout keeps shopping simple and fast.
chiccheckout.shop – Checkout is easy and the layout keeps shopping simple and fast.
Lemon Crate Shop Online – Both price and quality are satisfying, will return.
заказать кухню сайт [url=https://zakazat-kuhnyu-1.ru/]zakazat-kuhnyu-1.ru[/url] .
сколько стоит заказать кухню по размерам [url=https://zakazat-kuhnyu-2.ru/]zakazat-kuhnyu-2.ru[/url] .
Lemon Crate Picks – Prices feel fair and products meet expectations, I’ll shop again.
типография в Москве [url=https://telegra.ph/kak-popast-v-gorodskoj-rejting-predprinimatelej-02-24/]https://telegra.ph/kak-popast-v-gorodskoj-rejting-predprinimatelej-02-24[/url] .
DepotGlow Collections – Quality is consistent, checkout was smooth, and the prices are great.
DepotGlow Online Hub – Very satisfied with both quality and cost, I’ll be back for more.
сделать проект перепланировки квартиры в москве [url=https://teletype.in/@jorik11/proekt-dlya-pereplanirovki/]teletype.in/@jorik11/proekt-dlya-pereplanirovki[/url] .
curious shopper’s hub – Interesting variety and the checkout is smooth and secure.
this boutique shop – The design feels intimate and the overall look is appealing.
Онлайн казино играть [url=https://t.me/casinotop_official/]Онлайн казино играть[/url] .
check out Mist Market – Products are diverse and the payment flow is smooth and safe.
мостбет зеркало 2026 [url=http://mostbet52718.help]http://mostbet52718.help[/url]
official Ember Wharf site – The cozy aesthetic and thoughtful layout make it enjoyable to browse.
Nubank caiu [url=https://caiu.site/]Nubank caiu[/url] .
Казино Водка [url=https://t.me/vanechekvan/]Казино Водка [/url] .
smart shopping hub – Simple layout makes adding items to the cart easy.
кухни на заказ санкт петербург [url=https://kuhni-spb-41.ru/]kuhni-spb-41.ru[/url] .
где согласовать перепланировку [url=https://sites.google.com/view/dokument-dlya-pereplan/главная-страница/]sites.google.com/view/dokument-dlya-pereplan/главная-страница[/url] .
Luster Favorites – The latest products really caught my attention and were fun to explore.
smart shopping hub – Simple layout makes adding items to the cart easy.
заказать кухню цена [url=https://zakazat-kuhnyu-4.ru/]заказать кухню цена[/url] .
1win pariuri fotbal [url=http://1win5805.help]http://1win5805.help[/url]
Explore Luster Deals – The newest products caught my eye and made browsing enjoyable.
кухню заказать [url=https://zakazat-kuhnyu-3.ru/]кухню заказать[/url] .
1win retragere Moldindconbank [url=1win5805.help]1win retragere Moldindconbank[/url]
mines 1win Moldova [url=http://1win5805.help]http://1win5805.help[/url]
мостбет восстановить пароль [url=http://mostbet52718.help/]мостбет восстановить пароль[/url]
trendy online marketplace – High-quality images and well-organized categories make navigation easy.
discover Xernita – Product images are easy to see and categories make sense overall.
заказать индивидуальную кухню [url=https://zakazat-kuhnyu-2.ru/]zakazat-kuhnyu-2.ru[/url] .
Dapper Aisle – A sleek and modern shopping space offering refined selections for everyday style.
полиграфические работы [url=https://bresdel.com/blogs/1432784/%D0%A2%D0%9E%D0%9F-%D0%B2%D0%BE%D0%BF%D1%80%D0%BE%D1%81%D0%BE%D0%B2-%D0%BA%D0%BE%D1%82%D0%BE%D1%80%D1%8B%D0%B5-%D0%BD%D1%83%D0%B6%D0%BD%D0%BE-%D0%B7%D0%B0%D0%B4%D0%B0%D1%82%D1%8C-%D0%BC%D0%B5%D0%BD%D0%B5%D0%B4%D0%B6%D0%B5%D1%80%D1%83-%D1%82%D0%B8%D0%BF%D0%BE%D0%B3%D1%80%D0%B0%D1%84%D0%B8%D0%B8-%D0%BF%D0%B5%D1%80%D0%B5%D0%B4-%D0%BF%D0%B5%D1%87%D0%B0%D1%82%D1%8C%D1%8E/]https://bresdel.com/blogs/1432784/%D0%A2%D0%9E%D0%9F-%D0%B2%D0%BE%D0%BF%D1%80%D0%BE%D1%81%D0%BE%D0%B2-%D0%BA%D0%BE%D1%82%D0%BE%D1%80%D1%8B%D0%B5-%D0%BD%D1%83%D0%B6%D0%BD%D0%BE-%D0%B7%D0%B0%D0%B4%D0%B0%D1%82%D1%8C-%D0%BC%D0%B5%D0%BD%D0%B5%D0%B4%D0%B6%D0%B5%D1%80%D1%83-%D1%82%D0%B8%D0%BF%D0%BE%D0%B3%D1%80%D0%B0%D1%84%D0%B8%D0%B8-%D0%BF%D0%B5%D1%80%D0%B5%D0%B4-%D0%BF%D0%B5%D1%87%D0%B0%D1%82%D1%8C%D1%8E[/url] .
заказать проект перепланировки [url=https://teletype.in/@jorik11/proekt-dlya-pereplanirovki/]заказать проект перепланировки[/url] .
Kovique Finds – A trendy store delivering carefully selected items with a fashionable touch.
Dapper Aisle – A sleek and modern shopping space offering refined selections for everyday style.
как пополнить счет мостбет [url=https://mostbet52718.help]как пополнить счет мостбет[/url]
Kovique Boutique – A fashionable platform highlighting chic products and curated selections.
Gild Vendor – A polished online marketplace offering premium selections and curated deals.
Онлайн казино в телеграм [url=https://t.me/casinotop_official/]Онлайн казино в телеграм [/url] .
Gild Vendor – A polished online marketplace offering premium selections and curated deals.
Xerva Hub – Simple, neat layout makes it easy to browse products quickly.
1win strategii aviator [url=www.1win5805.help]www.1win5805.help[/url]
Lorvana store – Unique selection of products that makes browsing interesting.
Explore Xerva – Store design is clean and navigating products feels effortless.
Browse Zen Wharf – Lately, shopping here has felt easy and user-friendly.
official Lorvana site – Lots of appealing items that seem worth exploring.
Quick Shop Zen – Browsing products has been fast and simple overall.
Browse Amber Vendor – Easy checkout and a nice selection of products made shopping enjoyable.
99 caiu [url=https://caiu.site/]caiu.site[/url] .
Онлайн казино без верификации и паспорта [url=https://t.me/vanechekvan/]Онлайн казино без верификации и паспорта[/url] .
Discover Amber Vendor – Excellent variety and a hassle-free checkout made shopping enjoyable.
opalvendor.shop – Very pleased with the variety of products and smooth browsing experience.
trusted online cart – Everything is easy to browse and the prices seem fair.
заказать кухню по размерам [url=https://zakazat-kuhnyu-1.ru/]zakazat-kuhnyu-1.ru[/url] .
Visit OpalVendor – Impressive product range and browsing felt simple and quick.
shop Xenial Cart – Simple interface with items that feel fairly priced.
согласование перепланировок [url=https://sites.google.com/view/dokument-dlya-pereplan/главная-страница/]согласование перепланировок[/url] .
кухни от производителя спб [url=https://kuhni-spb-41.ru/]kuhni-spb-41.ru[/url] .
Browse Orbit Crate – The structure is logical and everything loads quickly.
заказать кухню с установкой [url=https://zakazat-kuhnyu-4.ru/]zakazat-kuhnyu-4.ru[/url] .
Browse Orbit Crate – The structure is logical and everything loads quickly.
visit Cormira – Clean aesthetics and smooth navigation make shopping a pleasure.
1win promo kod 2026 [url=www.1win5767.help]1win promo kod 2026[/url]
curated Cormira collection – Beautiful layout and smooth shopping make the site enjoyable.
predicciones de apuestas deportivas (https://fr-betting.com) futbol pronosticos
1win futbol live [url=1win5763.help]1win5763.help[/url]
Pebble Vendor – A thoughtfully curated marketplace featuring compact yet impactful products.
1win kazino demo oyunlar [url=https://1win5763.help/]https://1win5763.help/[/url]
Xolveta Shop – A fresh online destination focused on innovative products and smooth browsing.
Pebble Vendor – A thoughtfully curated marketplace featuring compact yet impactful products.
Explore Xerva – Store design is clean and navigating products feels effortless.
Xolveta Shop – A fresh online destination focused on innovative products and smooth browsing.
Night Treasures – Great range and pricing appears fair for most buyers.
собственное производство [url=https://exchange.prx.org/series/60434/]https://exchange.prx.org/series/60434[/url] .
The Xerva Spot – Store feels well-arranged, making product browsing today a smooth experience.
Explore Night Vendor – Impressive selection with fair prices that make shopping enjoyable.
1win apk casino [url=https://1win5805.help/]https://1win5805.help/[/url]
Cart Choice – Found wonderful deals and shipping was quick and reliable.
browse Sernix – Fast-loading pages make checking out products quick and enjoyable.
Cart Choice – Found wonderful deals and shipping was quick and reliable.
Sernix store – Fast loading times make browsing easy and enjoyable.
QuickWharf Online Shop – Checkout was simple and the products were delivered quicker than I thought.
Quick Wharf Website – Placed my order easily and it shipped surprisingly fast.
official Nook Harbor site – Warm vibe and I’d happily come back for another visit.
check out Nook Harbor – Friendly design and a nice browsing experience overall.
1win ios yuklab olish [url=www.1win5767.help]www.1win5767.help[/url]
yorventa.shop – The variety of products is intriguing and grabbed my interest immediately.
Hello everyone!
Study cash mysterious flows with interesting and valuable liquidity knowledge and keep the money moving see on the website for cash flow tools
Full information on the link – https://101flow.site
All the best and development in business!
перепланировка квартиры в москве [url=https://sites.google.com/view/dokument-dlya-pereplan/главная-страница/]sites.google.com/view/dokument-dlya-pereplan/главная-страница[/url] .
trendy finds hub – The items stand out and held my curiosity immediately.
кухни от производителя спб [url=https://kuhni-spb-41.ru/]kuhni-spb-41.ru[/url] .
Sorniq Boutique – A one-of-a-kind marketplace designed to offer both imaginative and useful selections.
(10 euros gratis apuestas|10 mejores casas de apuestas|10 trucos para ganar apuestas|15 euros gratis
marca apuestas|1×2 apuestas|1×2 apuestas deportivas|1×2 apuestas que significa|1×2 en apuestas|1×2 en apuestas que significa|1×2 que significa en apuestas|5 euros gratis
apuestas|9 apuestas que siempre ganaras|a partir de cuanto se declara apuestas|actividades de juegos de
azar y apuestas|ad apuestas deportivas|aleksandre topuria ufc apuestas|algoritmo para ganar apuestas deportivas|america apuestas|análisis nba apuestas|aplicacion android apuestas
deportivas|aplicacion apuestas deportivas|aplicacion apuestas deportivas android|aplicación de apuestas
online|aplicacion para hacer apuestas|aplicacion para
hacer apuestas de futbol|aplicación para hacer apuestas
de fútbol|aplicaciones apuestas deportivas android|aplicaciones apuestas deportivas gratis|aplicaciones
de apuestas android|aplicaciones de apuestas de fútbol|aplicaciones de apuestas deportivas|aplicaciones de apuestas deportivas peru|aplicaciones de apuestas deportivas perú|aplicaciones de apuestas en colombia|aplicaciones
de apuestas gratis|aplicaciones de apuestas online|aplicaciones de apuestas seguras|aplicaciones de
apuestas sin dinero|aplicaciones para hacer apuestas|apostar
seguro apuestas deportivas|app android apuestas deportivas|app apuestas|app apuestas android|app apuestas
de futbol|app apuestas deportivas|app apuestas deportivas android|app apuestas
deportivas argentina|app apuestas deportivas colombia|app apuestas deportivas ecuador|app apuestas deportivas españa|app apuestas deportivas gratis|app
apuestas entre amigos|app apuestas futbol|app apuestas gratis|app apuestas sin dinero|app
casa de apuestas|app casas de apuestas|app control apuestas|app de apuestas|app de apuestas android|app de apuestas casino|app de apuestas colombia|app de apuestas con bono de bienvenida|app de apuestas de futbol|app de apuestas deportivas|app
de apuestas deportivas android|app de apuestas deportivas argentina|app de apuestas
deportivas colombia|app de apuestas deportivas en españa|app de apuestas deportivas peru|app de apuestas deportivas perú|app de apuestas deportivas sin dinero|app de apuestas
ecuador|app de apuestas en colombia|app de apuestas en españa|app de apuestas en venezuela|app de apuestas futbol|app de apuestas gratis|app de apuestas online|app de apuestas para android|app de
apuestas para ganar dinero|app de apuestas peru|app de apuestas reales|app
de casas de apuestas|app marca apuestas android|app moviles de
apuestas|app para apuestas|app para apuestas de futbol|app para apuestas deportivas|app para apuestas
deportivas en español|app para ganar apuestas deportivas|app
para hacer apuestas|app para hacer apuestas deportivas|app para hacer apuestas entre amigos|app para
llevar control de apuestas|app pronosticos apuestas deportivas|app versus apuestas|apps apuestas mundial|apps
de apuestas|apps de apuestas con bono de bienvenida|apps de apuestas de futbol|apps de apuestas deportivas
peru|apps de apuestas mexico|apps para apuestas|aprender a hacer apuestas deportivas|aprender hacer apuestas
deportivas|apuesta del dia apuestas deportivas|apuestas 10
euros gratis|apuestas 100 seguras|apuestas 1×2|apuestas 1X2|apuestas
2 division|apuestas 3 division|apuestas a caballos|apuestas a carreras de caballos|apuestas a colombia|apuestas a corners|apuestas a ganar|apuestas a jugadores
nba|apuestas a la baja|apuestas a la nfl|apuestas al barcelona|apuestas al dia|apuestas al
empate|apuestas al mundial|apuestas al tenis wta|apuestas
alaves barcelona|apuestas alcaraz hoy|apuestas alemania españa|apuestas alonso campeon del mundo|apuestas altas
y bajas|apuestas altas y bajas nfl|apuestas ambos equipos marcan|apuestas america|apuestas android|apuestas anillo nba|apuestas antes del mundial|apuestas anticipadas|apuestas anticipadas nba|apuestas apps|apuestas
arabia argentina|apuestas argentina|apuestas argentina campeon del
mundo|apuestas argentina canada|apuestas argentina colombia|apuestas
argentina croacia|apuestas argentina españa|apuestas argentina francia|apuestas
argentina francia cuanto paga|apuestas argentina
francia mundial|apuestas argentina gana el mundial|apuestas argentina gana mundial|apuestas argentina holanda|apuestas
argentina mexico|apuestas argentina méxico|apuestas argentina mundial|apuestas argentina
online|apuestas argentina paises bajos|apuestas argentina polonia|apuestas argentina
uruguay|apuestas argentina vs australia|apuestas argentina vs colombia|apuestas argentina vs francia|apuestas argentina vs peru|apuestas argentinas|apuestas arsenal real madrid|apuestas ascenso
a primera division|apuestas ascenso a segunda|apuestas asiaticas|apuestas
asiatico|apuestas athletic|apuestas athletic atletico|apuestas athletic barça|apuestas athletic barcelona|apuestas athletic betis|apuestas athletic manchester|apuestas athletic manchester united|apuestas athletic
osasuna|apuestas athletic real|apuestas athletic real madrid|apuestas
athletic real sociedad|apuestas athletic real sociedad final|apuestas athletic
roma|apuestas athletic sevilla|apuestas athletic valencia|apuestas atletico|apuestas atletico
barcelona|apuestas atletico barsa|apuestas atletico campeon champions|apuestas atletico campeon de liga|apuestas atlético copenhague|apuestas atletico de madrid|apuestas atlético de madrid|apuestas atletico de madrid barcelona|apuestas atletico de madrid gana la liga|apuestas atletico
de madrid real madrid|apuestas atlético de madrid real madrid|apuestas atletico de madrid vs barcelona|apuestas atletico madrid|apuestas atletico madrid real madrid|apuestas atletico madrid vs barcelona|apuestas atletico real
madrid|apuestas atletico real madrid champions|apuestas atletismo|apuestas bajas|apuestas baloncesto|apuestas baloncesto acb|apuestas baloncesto handicap|apuestas baloncesto hoy|apuestas baloncesto juegos olimpicos|apuestas baloncesto nba|apuestas
baloncesto pronostico|apuestas baloncesto pronósticos|apuestas baloncesto prorroga|apuestas barca|apuestas barca
athletic|apuestas barca atletico|apuestas barca bayern|apuestas barca bayern munich|apuestas barca girona|apuestas
barca hoy|apuestas barça hoy|apuestas barca inter|apuestas barca juventus|apuestas barca madrid|apuestas barça madrid|apuestas barca real madrid|apuestas
barca vs juve|apuestas barca vs madrid|apuestas barca vs psg|apuestas barcelona|apuestas
barcelona alaves|apuestas barcelona athletic|apuestas barcelona atletico|apuestas
barcelona atletico de madrid|apuestas barcelona atlético de madrid|apuestas barcelona atletico madrid|apuestas barcelona bayern|apuestas barcelona betis|apuestas barcelona campeon de
liga|apuestas barcelona celta|apuestas barcelona espanyol|apuestas barcelona gana la champions|apuestas barcelona girona|apuestas barcelona granada|apuestas barcelona hoy|apuestas barcelona inter|apuestas barcelona madrid|apuestas barcelona osasuna|apuestas barcelona psg|apuestas barcelona real madrid|apuestas barcelona real sociedad|apuestas barcelona sevilla|apuestas barcelona valencia|apuestas barcelona villarreal|apuestas barcelona vs atletico madrid|apuestas
barcelona vs madrid|apuestas barcelona vs real madrid|apuestas barsa madrid|apuestas basket hoy|apuestas bayern barcelona|apuestas
bayern vs barcelona|apuestas beisbol|apuestas béisbol|apuestas beisbol
mlb|apuestas beisbol pronosticos|apuestas beisbol venezolano|apuestas betis|apuestas betis – chelsea|apuestas betis barcelona|apuestas
betis chelsea|apuestas betis fiorentina|apuestas betis girona|apuestas betis madrid|apuestas
betis mallorca|apuestas betis real madrid|apuestas betis real
sociedad|apuestas betis sevilla|apuestas betis
valencia|apuestas betis valladolid|apuestas betis vs valencia|apuestas betplay hoy colombia|apuestas betsson peru|apuestas bienvenida|apuestas billar online|apuestas bolivia vs
colombia|apuestas bono|apuestas bono bienvenida|apuestas
bono de bienvenida|apuestas bono de bienvenida sin deposito|apuestas bono gratis|apuestas bono sin deposito|apuestas bonos sin deposito|apuestas borussia real madrid|apuestas boxeo|apuestas boxeo de campeonato|apuestas boxeo españa|apuestas boxeo español|apuestas boxeo femenino olimpiadas|apuestas boxeo
hoy|apuestas boxeo online|apuestas brasil colombia|apuestas brasil peru|apuestas brasil uruguay|apuestas brasil vs
colombia|apuestas brasil vs peru|apuestas caballos|apuestas caballos colocado|apuestas caballos españa|apuestas caballos hipodromo|apuestas caballos
hoy|apuestas caballos madrid|apuestas caballos online|apuestas caballos
sanlucar de barrameda|apuestas caballos zarzuela|apuestas calculador|apuestas campeon|apuestas campeon champions|apuestas
campeón champions|apuestas campeon champions 2025|apuestas campeon champions
league|apuestas campeon conference league|apuestas campeon copa america|apuestas campeon copa del rey|apuestas campeon de champions|apuestas campeon de la champions|apuestas campeon de liga|apuestas campeon del mundo|apuestas campeon eurocopa|apuestas campeón eurocopa|apuestas campeon europa league|apuestas campeon f1|apuestas
campeon f1 2025|apuestas campeon formula 1|apuestas
campeon libertadores|apuestas campeon liga|apuestas campeon liga bbva|apuestas campeon liga española|apuestas campeon liga santander|apuestas campeon motogp 2025|apuestas campeon mundial|apuestas campeón mundial|apuestas campeon mundial baloncesto|apuestas campeon nba|apuestas campeón nba|apuestas campeon premier|apuestas campeon premier league|apuestas campeon roland garros|apuestas campeonato f1|apuestas campeonatos de futbol|apuestas
carrera de caballos|apuestas carrera de caballos hoy|apuestas carrera de caballos nocturnas|apuestas carrera de galgos fin de semana|apuestas carrera de galgos hoy|apuestas carrera de galgos nocturnas|apuestas carreras caballos|apuestas carreras caballos sanlucar|apuestas carreras de caballos|apuestas carreras de caballos
en directo|apuestas carreras de caballos en vivo|apuestas carreras de caballos españa|apuestas carreras de
caballos hoy|apuestas carreras de caballos nacionales|apuestas carreras de caballos nocturnas|apuestas carreras de caballos online|apuestas carreras de caballos sanlucar|apuestas
carreras de caballos sanlúcar|apuestas carreras
de galgos|apuestas carreras de galgos en vivo|apuestas carreras
de galgos nocturnas|apuestas carreras de galgos pre partido|apuestas casino|apuestas casino barcelona|apuestas
casino futbol|apuestas casino gran madrid|apuestas casino gratis|apuestas casino madrid|apuestas casino online|apuestas casino
online argentina|apuestas casinos|apuestas casinos online|apuestas celta|apuestas celta barcelona|apuestas
celta betis|apuestas celta eibar|apuestas celta espanyol|apuestas celta granada|apuestas celta
madrid|apuestas celta manchester|apuestas celta real madrid|apuestas champion league|apuestas champions foro|apuestas champions hoy|apuestas champions
league|apuestas champions league – pronósticos|apuestas champions league 2025|apuestas champions league hoy|apuestas champions league pronosticos|apuestas champions
league pronósticos|apuestas champions pronosticos|apuestas chelsea barcelona|apuestas chelsea betis|apuestas
chile|apuestas chile peru|apuestas chile venezuela|apuestas chile
vs colombia|apuestas chile vs uruguay|apuestas ciclismo|apuestas
ciclismo en vivo|apuestas ciclismo femenino|apuestas ciclismo tour francia|apuestas ciclismo vuelta|apuestas ciclismo vuelta a
españa|apuestas ciclismo vuelta españa|apuestas city madrid|apuestas
city real madrid|apuestas clasico|apuestas clasico español|apuestas clasico real madrid barcelona|apuestas clasificacion mundial|apuestas colombia|apuestas
colombia argentina|apuestas colombia brasil|apuestas colombia paraguay|apuestas colombia uruguay|apuestas colombia
vs argentina|apuestas colombia vs brasil|apuestas combinadas|apuestas combinadas como funcionan|apuestas
combinadas de futbol|apuestas combinadas de
fútbol|apuestas combinadas foro|apuestas combinadas futbol|apuestas combinadas hoy|apuestas combinadas
mismo partido|apuestas combinadas mundial|apuestas combinadas nba|apuestas combinadas para esta semana|apuestas combinadas para hoy|apuestas combinadas para mañana|apuestas combinadas pronosticos|apuestas combinadas
recomendadas|apuestas combinadas seguras|apuestas combinadas seguras para hoy|apuestas combinadas seguras para mañana|apuestas como ganar|apuestas comparador|apuestas con bono de bienvenida|apuestas
con dinero ficticio|apuestas con dinero real|apuestas con dinero virtual|apuestas con handicap|apuestas con handicap asiatico|apuestas con handicap baloncesto|apuestas con mas probabilidades de ganar|apuestas con paypal|apuestas con tarjeta de credito|apuestas con tarjeta de debito|apuestas
consejos|apuestas copa|apuestas copa africa|apuestas copa america|apuestas copa américa|apuestas copa argentina|apuestas copa brasil|apuestas copa davis|apuestas copa
de europa|apuestas copa del mundo|apuestas copa del rey|apuestas copa del rey baloncesto|apuestas copa
del rey final|apuestas copa del rey futbol|apuestas copa del
rey ganador|apuestas copa del rey hoy|apuestas
copa del rey pronosticos|apuestas copa del rey pronósticos|apuestas copa
europa|apuestas copa italia|apuestas copa libertadores|apuestas copa mundial de
hockey|apuestas copa rey|apuestas copa sudamericana|apuestas corners|apuestas corners hoy|apuestas croacia argentina|apuestas cuartos eurocopa|apuestas cuotas|apuestas cuotas altas|apuestas cuotas bajas|apuestas de 1 euro|apuestas
de baloncesto|apuestas de baloncesto hoy|apuestas de baloncesto nba|apuestas
de baloncesto para hoy|apuestas de beisbol|apuestas de beisbol para hoy|apuestas de blackjack en linea|apuestas de
boxeo|apuestas de boxeo canelo|apuestas de boxeo en las vegas|apuestas de boxeo hoy|apuestas de boxeo online|apuestas de caballo|apuestas de caballos|apuestas de caballos como
funciona|apuestas de caballos como se juega|apuestas
de caballos en colombia|apuestas de caballos en españa|apuestas de caballos en linea|apuestas de caballos españa|apuestas de caballos
ganador y colocado|apuestas de caballos internacionales|apuestas de caballos juegos|apuestas de
caballos online|apuestas de caballos online en venezuela|apuestas de
caballos por internet|apuestas de caballos pronosticos|apuestas de caballos pronósticos|apuestas de carrera de caballos|apuestas de carreras de
caballos|apuestas de carreras de caballos
online|apuestas de casino|apuestas de casino online|apuestas de casino por internet|apuestas de
champions league|apuestas de ciclismo|apuestas de colombia|apuestas de copa america|apuestas de corners|apuestas de
deportes en linea|apuestas de deportes online|apuestas de dinero|apuestas de esports|apuestas
de eurocopa|apuestas de europa league|apuestas de f1|apuestas de formula 1|apuestas de futbol|apuestas de fútbol|apuestas
de futbol app|apuestas de futbol argentina|apuestas de futbol colombia|apuestas de futbol en colombia|apuestas de futbol
en directo|apuestas de futbol en linea|apuestas de futbol en vivo|apuestas
de futbol español|apuestas de futbol gratis|apuestas de futbol hoy|apuestas de futbol mundial|apuestas de futbol online|apuestas de fútbol online|apuestas de futbol para hoy|apuestas
de fútbol para hoy|apuestas de futbol para hoy seguras|apuestas de futbol para
mañana|apuestas de futbol peru|apuestas de futbol pronosticos|apuestas de
fútbol pronósticos|apuestas de futbol seguras|apuestas de
futbol seguras para hoy|apuestas de futbol sin dinero|apuestas de galgos|apuestas de galgos como
ganar|apuestas de galgos en directo|apuestas de galgos online|apuestas de galgos trucos|apuestas de
golf|apuestas de hockey|apuestas de hockey sobre hielo|apuestas de hoy|apuestas de hoy seguras|apuestas de juego|apuestas de juegos|apuestas de juegos
deportivos|apuestas de juegos online|apuestas de la champions league|apuestas de la copa américa|apuestas de
la eurocopa|apuestas de la europa league|apuestas de la liga|apuestas de la liga bbva|apuestas de la liga española|apuestas de la nba|apuestas de la
nfl|apuestas de la ufc|apuestas de mlb|apuestas de nba|apuestas de nba para
hoy|apuestas de partidos|apuestas de partidos de futbol|apuestas de peleas ufc|apuestas de perros en vivo|apuestas de perros virtuales|apuestas de peru|apuestas de sistema|apuestas de
sistema como funciona|apuestas de sistema explicacion|apuestas de sistema explicación|apuestas de tenis|apuestas de tenis de
mesa|apuestas de tenis en directo|apuestas de tenis hoy|apuestas
de tenis para hoy|apuestas de tenis pronosticos|apuestas de tenis seguras|apuestas de todo tipo|apuestas de ufc|apuestas de ufc hoy|apuestas del boxeo|apuestas del
clasico|apuestas del clasico real madrid barca|apuestas del
dia|apuestas del día|apuestas del dia de hoy|apuestas del dia deportivas|apuestas del dia futbol|apuestas del mundial|apuestas
del partido de hoy|apuestas del real madrid|apuestas del rey|apuestas del sistema|apuestas deporte|apuestas deportes|apuestas
deportiva|apuestas deportivas|apuestas deportivas 1
euro|apuestas deportivas 10 euros gratis|apuestas deportivas 100
seguras|apuestas deportivas 1×2|apuestas deportivas android|apuestas deportivas app|apuestas deportivas apps|apuestas deportivas argentina|apuestas deportivas argentina futbol|apuestas deportivas
argentina legal|apuestas deportivas atletico de madrid|apuestas deportivas baloncesto|apuestas deportivas
barca madrid|apuestas deportivas barcelona|apuestas
deportivas beisbol|apuestas deportivas bono|apuestas deportivas bono bienvenida|apuestas deportivas bono de bienvenida|apuestas deportivas bono sin deposito|apuestas deportivas
bonos de bienvenida|apuestas deportivas boxeo|apuestas deportivas
caballos|apuestas deportivas calculadora|apuestas deportivas campeon liga|apuestas deportivas casino|apuestas deportivas casino barcelona|apuestas deportivas casino online|apuestas deportivas cerca de mi|apuestas deportivas champions league|apuestas deportivas chile|apuestas deportivas ciclismo|apuestas deportivas colombia|apuestas deportivas com|apuestas deportivas com
foro|apuestas deportivas com pronosticos|apuestas deportivas combinadas|apuestas deportivas combinadas para hoy|apuestas deportivas como se juega|apuestas deportivas comparador|apuestas deportivas con bono gratis|apuestas deportivas con bonos gratis|apuestas deportivas
con dinero ficticio|apuestas deportivas con paypal|apuestas deportivas con puntos virtuales|apuestas deportivas consejos|apuestas deportivas consejos para ganar|apuestas deportivas copa america|apuestas deportivas copa del rey|apuestas deportivas copa libertadores|apuestas deportivas
copa mundial|apuestas deportivas corners|apuestas deportivas cual
es la mejor|apuestas deportivas cuotas altas|apuestas deportivas de baloncesto|apuestas deportivas de boxeo|apuestas deportivas de colombia|apuestas deportivas de
futbol|apuestas deportivas de nba|apuestas deportivas de nhl|apuestas deportivas de
peru|apuestas deportivas de tenis|apuestas deportivas del
dia|apuestas deportivas dinero ficticio|apuestas deportivas directo|apuestas deportivas doble oportunidad|apuestas deportivas
en argentina|apuestas deportivas en chile|apuestas deportivas
en colombia|apuestas deportivas en directo|apuestas deportivas en españa|apuestas deportivas en español|apuestas deportivas en linea|apuestas
deportivas en línea|apuestas deportivas en peru|apuestas deportivas en perú|apuestas deportivas
en sevilla|apuestas deportivas en uruguay|apuestas deportivas en vivo|apuestas
deportivas es|apuestas deportivas es pronosticos|apuestas deportivas españa|apuestas deportivas españolas|apuestas deportivas esports|apuestas deportivas estadisticas|apuestas deportivas estrategias|apuestas deportivas estrategias
seguras|apuestas deportivas eurocopa|apuestas deportivas europa league|apuestas deportivas f1|apuestas deportivas faciles de ganar|apuestas deportivas formula 1|apuestas deportivas foro|apuestas deportivas foro futbol|apuestas deportivas foro tenis|apuestas deportivas francia argentina|apuestas deportivas futbol|apuestas
deportivas fútbol|apuestas deportivas futbol argentino|apuestas deportivas futbol colombia|apuestas deportivas
futbol español|apuestas deportivas gana|apuestas deportivas ganadas|apuestas deportivas ganar
dinero seguro|apuestas deportivas gane|apuestas deportivas
golf|apuestas deportivas gratis|apuestas deportivas gratis con premios|apuestas
deportivas gratis hoy|apuestas deportivas gratis sin deposito|apuestas deportivas handicap|apuestas deportivas handicap asiatico|apuestas deportivas
hoy|apuestas deportivas impuestos|apuestas deportivas interior argentina|apuestas deportivas juegos olimpicos|apuestas deportivas la liga|apuestas deportivas legales|apuestas
deportivas legales en colombia|apuestas deportivas libres de impuestos|apuestas deportivas licencia españa|apuestas deportivas
liga española|apuestas deportivas listado|apuestas deportivas listado clasico|apuestas deportivas madrid|apuestas deportivas mas seguras|apuestas deportivas mejor pagadas|apuestas deportivas mejores|apuestas deportivas mejores app|apuestas deportivas mejores casas|apuestas deportivas mejores cuotas|apuestas deportivas mejores
paginas|apuestas deportivas mexico|apuestas deportivas
méxico|apuestas deportivas mlb|apuestas deportivas mlb
hoy|apuestas deportivas multiples|apuestas deportivas mundial|apuestas deportivas murcia|apuestas deportivas nba|apuestas deportivas nba hoy|apuestas deportivas nfl|apuestas deportivas nhl|apuestas deportivas nuevas|apuestas deportivas ofertas|apuestas deportivas online|apuestas
deportivas online argentina|apuestas deportivas online chile|apuestas deportivas online colombia|apuestas deportivas online en colombia|apuestas deportivas online españa|apuestas deportivas online mexico|apuestas deportivas online
paypal|apuestas deportivas online peru|apuestas deportivas online por
internet|apuestas deportivas pago paypal|apuestas deportivas para ganar dinero|apuestas deportivas
para hoy|apuestas deportivas para hoy pronosticos|apuestas
deportivas partido suspendido|apuestas deportivas partidos de hoy|apuestas
deportivas paypal|apuestas deportivas peru|apuestas deportivas perú|apuestas
deportivas peru vs ecuador|apuestas deportivas predicciones|apuestas
deportivas promociones|apuestas deportivas pronostico|apuestas deportivas pronóstico|apuestas deportivas pronostico hoy|apuestas deportivas pronosticos|apuestas deportivas pronósticos|apuestas deportivas
pronosticos expertos|apuestas deportivas pronosticos gratis|apuestas deportivas pronosticos nba|apuestas deportivas pronosticos tenis|apuestas deportivas
que aceptan paypal|apuestas deportivas real madrid|apuestas deportivas
regalo bienvenida|apuestas deportivas resultado
exacto|apuestas deportivas resultados|apuestas deportivas rugby|apuestas
deportivas seguras|apuestas deportivas seguras foro|apuestas deportivas seguras hoy|apuestas deportivas seguras para
hoy|apuestas deportivas seguras telegram|apuestas deportivas sevilla|apuestas deportivas simulador eurocopa|apuestas deportivas sin deposito|apuestas deportivas sin deposito inicial|apuestas deportivas sin dinero|apuestas deportivas sin dinero real|apuestas
deportivas sin registro|apuestas deportivas stake|apuestas deportivas stake 10|apuestas deportivas telegram españa|apuestas deportivas tenis|apuestas deportivas
tenis de mesa|apuestas deportivas tenis foro|apuestas deportivas tenis hoy|apuestas
deportivas tips|apuestas deportivas tipster|apuestas deportivas ufc|apuestas deportivas uruguay|apuestas deportivas
valencia|apuestas deportivas valencia barcelona|apuestas deportivas venezuela|apuestas deportivas virtuales|apuestas deportivas y casino|apuestas deportivas y casino online|apuestas deportivas.com|apuestas
deportivas.com foro|apuestas deportivas.es|apuestas deportivos pronosticos|apuestas deposito minimo 1 euro|apuestas descenso a
segunda|apuestas descenso a segunda b|apuestas descenso la liga|apuestas descenso primera
division|apuestas descenso segunda|apuestas dia|apuestas diarias seguras|apuestas dinero|apuestas
dinero ficticio|apuestas dinero real|apuestas dinero virtual|apuestas directas|apuestas directo|apuestas
directo futbol|apuestas division de honor juvenil|apuestas dnb|apuestas doble oportunidad|apuestas doble
resultado|apuestas dobles|apuestas dobles y triples|apuestas dortmund barcelona|apuestas draft nba|apuestas draft
nfl|apuestas ecuador vs argentina|apuestas ecuador vs venezuela|apuestas egipto uruguay|apuestas el clasico|apuestas elecciones venezuela|apuestas empate|apuestas
en baloncesto|apuestas en barcelona|apuestas en beisbol|apuestas en boxeo|apuestas en caballos|apuestas en carreras de caballos|apuestas en casino|apuestas
en casino online|apuestas en casinos|apuestas en casinos online|apuestas en chile|apuestas en ciclismo|apuestas en colombia|apuestas en colombia de futbol|apuestas
en directo|apuestas en directo futbol|apuestas en directo pronosticos|apuestas en el futbol|apuestas en el
tenis|apuestas en españa|apuestas en esports|apuestas en eventos deportivos virtuales|apuestas en golf|apuestas en juegos|apuestas en la champions league|apuestas en la eurocopa|apuestas en la liga|apuestas en la nba|apuestas en la nfl|apuestas en las vegas mlb|apuestas en las vegas nfl|apuestas
en linea|apuestas en línea|apuestas en linea argentina|apuestas en linea boxeo|apuestas en linea chile|apuestas en linea colombia|apuestas en línea de fútbol|apuestas en linea
deportivas|apuestas en linea españa|apuestas en linea estados unidos|apuestas en linea futbol|apuestas en linea mexico|apuestas en línea méxico|apuestas en linea
mundial|apuestas en linea peru|apuestas en linea usa|apuestas en los esports|apuestas en madrid|apuestas en méxico|apuestas en mexico online|apuestas en nba|apuestas en partidos de futbol|apuestas en partidos de futbol
en vivo|apuestas en partidos de tenis en directo|apuestas en perú|apuestas en sevilla|apuestas en sistema|apuestas en stake|apuestas en tenis|apuestas en tenis de mesa|apuestas en valencia|apuestas en vivo|apuestas en vivo argentina|apuestas en vivo casino|apuestas en vivo futbol|apuestas en vivo fútbol|apuestas en vivo nba|apuestas en vivo peru|apuestas en vivo tenis|apuestas en vivo ufc|apuestas equipo mbappe|apuestas equipos de futbol|apuestas españa|apuestas españa alemania|apuestas españa alemania eurocopa|apuestas españa croacia|apuestas españa eurocopa|apuestas españa francia|apuestas españa francia eurocopa|apuestas españa gana el mundial|apuestas españa gana eurocopa|apuestas españa
gana mundial|apuestas españa georgia|apuestas españa holanda|apuestas españa inglaterra|apuestas
españa inglaterra cuotas|apuestas españa inglaterra eurocopa|apuestas españa italia|apuestas españa mundial|apuestas españa paises bajos|apuestas español|apuestas español oviedo|apuestas espanyol barcelona|apuestas espanyol betis|apuestas espanyol
villarreal|apuestas esport|apuestas esports|apuestas esports colombia|apuestas esports españa|apuestas esports fifa|apuestas esports
gratis|apuestas esports lol|apuestas esports peru|apuestas esports valorant|apuestas estadisticas|apuestas estrategias|apuestas euro|apuestas euro
copa|apuestas eurocopa|apuestas eurocopa campeon|apuestas
eurocopa españa|apuestas eurocopa favoritos|apuestas eurocopa femenina|apuestas
eurocopa final|apuestas eurocopa ganador|apuestas eurocopa hoy|apuestas eurocopa sub 21|apuestas euroliga baloncesto|apuestas euroliga pronosticos|apuestas
europa league|apuestas europa league hoy|apuestas europa league pronosticos|apuestas europa league pronósticos|apuestas euros|apuestas f1 abu
dhabi|apuestas f1 bahrein|apuestas f1 canada|apuestas f1
china|apuestas f1 cuotas|apuestas f1 hoy|apuestas f1 las vegas|apuestas f1 miami|apuestas f1 monaco|apuestas faciles de ganar|apuestas
fáciles de ganar|apuestas faciles para ganar|apuestas favoritas|apuestas favorito champions|apuestas favoritos champions|apuestas favoritos eurocopa|apuestas favoritos mundial|apuestas fc barcelona|apuestas final champions cuotas|apuestas final champions league|apuestas final champions peru|apuestas final copa|apuestas final copa america|apuestas final copa de europa|apuestas final copa del rey|apuestas final copa europa|apuestas final copa libertadores|apuestas final copa rey|apuestas final de copa|apuestas final de copa del rey|apuestas final del mundial|apuestas final euro|apuestas final eurocopa|apuestas final europa league|apuestas
final libertadores|apuestas final mundial|apuestas final nba|apuestas final
rugby|apuestas final uefa europa league|apuestas
final.mundial|apuestas finales de conferencia nfl|apuestas finales nba|apuestas fiorentina betis|apuestas
formula|apuestas formula 1|apuestas fórmula 1|apuestas fórmula 1 pronósticos|apuestas formula uno|apuestas foro|apuestas foro nba|apuestas francia
argentina|apuestas francia españa|apuestas futbol|apuestas
fútbol|apuestas futbol americano|apuestas futbol americano nfl|apuestas futbol argentina|apuestas futbol argentino|apuestas futbol champions league|apuestas futbol chile|apuestas futbol colombia|apuestas futbol consejos|apuestas futbol en directo|apuestas fútbol en directo|apuestas futbol en vivo|apuestas
fútbol en vivo|apuestas futbol españa|apuestas futbol español|apuestas fútbol español|apuestas futbol eurocopa|apuestas futbol femenino|apuestas futbol
foro|apuestas futbol gratis|apuestas futbol hoy|apuestas fútbol hoy|apuestas futbol juegos
olimpicos|apuestas futbol mexico|apuestas futbol mundial|apuestas
futbol online|apuestas futbol para hoy|apuestas futbol peru|apuestas futbol pronosticos|apuestas
futbol sala|apuestas futbol telegram|apuestas
futbol virtual|apuestas galgos|apuestas galgos en directo|apuestas galgos hoy|apuestas galgos online|apuestas galgos pronosticos|apuestas galgos trucos|apuestas gana|apuestas gana colombia|apuestas gana resultados|apuestas ganadas|apuestas ganadas hoy|apuestas ganador champions
league|apuestas ganador copa america|apuestas ganador copa del rey|apuestas ganador copa del rey
baloncesto|apuestas ganador copa libertadores|apuestas ganador de la eurocopa|apuestas ganador de la liga|apuestas ganador
del mundial|apuestas ganador eurocopa|apuestas ganador europa league|apuestas ganador
f1|apuestas ganador la liga|apuestas ganador liga española|apuestas ganador mundial|apuestas ganador mundial baloncesto|apuestas ganador mundial f1|apuestas
ganador nba|apuestas ganadores eurocopa|apuestas ganadores mundial|apuestas ganar
champions|apuestas ganar eurocopa|apuestas ganar liga|apuestas ganar
mundial|apuestas ganar nba|apuestas getafe valencia|apuestas ghana uruguay|apuestas girona|apuestas girona athletic|apuestas girona betis|apuestas girona campeon de liga|apuestas girona campeon liga|apuestas girona gana la liga|apuestas girona real madrid|apuestas girona real sociedad|apuestas goleador eurocopa|apuestas goleadores eurocopa|apuestas goles asiaticos|apuestas golf|apuestas golf
masters|apuestas golf pga|apuestas granada barcelona|apuestas grand slam de
tenis|apuestas gratis|apuestas gratis casino|apuestas gratis con premios|apuestas gratis
hoy|apuestas gratis para hoy|apuestas gratis por registro|apuestas gratis puntos|apuestas gratis regalos|apuestas gratis sin deposito|apuestas gratis sin depósito|apuestas
gratis sin ingreso|apuestas gratis sports|apuestas gratis y ganar premios|apuestas grupo a
eurocopa|apuestas grupos eurocopa|apuestas handicap|apuestas handicap
asiatico|apuestas handicap baloncesto|apuestas handicap como funciona|apuestas
handicap nba|apuestas handicap nfl|apuestas hipicas
online|apuestas hípicas online|apuestas hipicas venezuela|apuestas hockey|apuestas hockey hielo|apuestas hockey patines|apuestas hockey sobre hielo|apuestas holanda argentina|apuestas holanda vs argentina|apuestas hoy|apuestas hoy champions|apuestas hoy futbol|apuestas hoy nba|apuestas hoy
pronosticos|apuestas hoy seguras|apuestas impuestos|apuestas inglaterra paises bajos|apuestas inter barca|apuestas inter
barcelona|apuestas juego|apuestas juegos|apuestas juegos en linea|apuestas juegos olimpicos|apuestas juegos olímpicos|apuestas juegos olimpicos baloncesto|apuestas juegos online|apuestas juegos virtuales|apuestas jugador sevilla|apuestas jugadores nba|apuestas kings league americas|apuestas la liga|apuestas
la liga española|apuestas la liga hoy|apuestas la
liga santander|apuestas las vegas mlb|apuestas las vegas nba|apuestas las vegas nfl|apuestas
league of legends mundial|apuestas legal|apuestas legales|apuestas legales en colombia|apuestas legales en españa|apuestas legales en estados unidos|apuestas legales españa|apuestas leganes betis|apuestas libertadores|apuestas licencia|apuestas liga 1 peru|apuestas liga argentina|apuestas liga bbva pronosticos|apuestas
liga de campeones|apuestas liga de campeones de baloncesto|apuestas liga de campeones de hockey|apuestas
liga españa|apuestas liga española|apuestas liga santander pronosticos|apuestas ligas de futbol|apuestas linea|apuestas linea de gol|apuestas liverpool
barcelona|apuestas liverpool real madrid|apuestas lol mundial|apuestas madrid|apuestas madrid arsenal|apuestas madrid atletico|apuestas
madrid atletico champions|apuestas madrid barca|apuestas madrid barça|apuestas madrid barca hoy|apuestas madrid barca supercopa|apuestas madrid barcelona|apuestas madrid
barsa|apuestas madrid bayern|apuestas madrid betis|apuestas
madrid borussia|apuestas madrid campeon champions|apuestas madrid
celta|apuestas madrid city|apuestas madrid dortmund|apuestas
madrid gana la liga|apuestas madrid gana liga|apuestas madrid hoy|apuestas madrid liverpool|apuestas
madrid osasuna|apuestas madrid sevilla|apuestas
madrid valencia|apuestas madrid vs arsenal|apuestas madrid vs barcelona|apuestas mallorca osasuna|apuestas mallorca real sociedad|apuestas manchester athletic|apuestas manchester city real madrid|apuestas mas faciles de ganar|apuestas mas seguras|apuestas mas seguras para hoy|apuestas masters de golf|apuestas masters de tenis|apuestas maximo goleador
eurocopa|apuestas maximo goleador mundial|apuestas mejor jugador eurocopa|apuestas mejores casinos online|apuestas mexico|apuestas méxico|apuestas mexico polonia|apuestas méxico polonia|apuestas mlb|apuestas mlb hoy|apuestas mlb las vegas|apuestas mlb para hoy|apuestas
mlb pronosticos|apuestas mlb usa|apuestas mma ufc|apuestas momios|apuestas multiples|apuestas
múltiples|apuestas multiples como funcionan|apuestas multiples el gordo|apuestas multiples futbol|apuestas mundial|apuestas mundial 2026|apuestas mundial baloncesto|apuestas mundial balonmano|apuestas mundial brasil|apuestas mundial
campeon|apuestas mundial ciclismo|apuestas mundial clubes|apuestas mundial de baloncesto|apuestas mundial de ciclismo|apuestas mundial de clubes|apuestas mundial de
futbol|apuestas mundial de fútbol|apuestas mundial de rugby|apuestas mundial f1|apuestas mundial favoritos|apuestas mundial femenino|apuestas mundial formula 1|apuestas mundial futbol|apuestas mundial ganador|apuestas
mundial lol|apuestas mundial moto gp|apuestas mundial motogp|apuestas mundial rugby|apuestas mundial sub 17|apuestas mundiales|apuestas
mundialistas|apuestas mvp eurocopa|apuestas mvp nba|apuestas mvp nfl|apuestas nacionales de
colombia|apuestas nba|apuestas nba all star|apuestas nba campeon|apuestas nba consejos|apuestas nba esta noche|apuestas nba finals|apuestas nba gratis|apuestas
nba hoy|apuestas nba hoy jugadores|apuestas nba hoy pronosticos|apuestas nba para hoy|apuestas nba playoffs|apuestas nba pronosticos|apuestas nba pronósticos|apuestas nba pronosticos hoy|apuestas
nba tipster|apuestas nfl|apuestas nfl hoy|apuestas nfl las vegas|apuestas nfl playoffs|apuestas nfl pronosticos|apuestas nfl pronósticos|apuestas nfl semana 4|apuestas nfl super
bowl|apuestas nhl|apuestas nhl pronosticos|apuestas octavos eurocopa|apuestas ofertas|apuestas online|apuestas online argentina|apuestas online argentina legal|apuestas online bono|apuestas online bono bienvenida|apuestas online boxeo|apuestas online
caballos|apuestas online carreras de caballos|apuestas online casino|apuestas online champions league|apuestas online chile|apuestas online ciclismo|apuestas online colombia|apuestas online comparativa|apuestas online con paypal|apuestas online de caballos|apuestas online
deportivas|apuestas online en argentina|apuestas online en peru|apuestas online espana|apuestas online españa|apuestas online esports|apuestas online foro|apuestas online futbol|apuestas online futbol españa|apuestas online golf|apuestas online gratis|apuestas online gratis sin deposito|apuestas online juegos|apuestas online mexico|apuestas online mma|apuestas online movil|apuestas online nba|apuestas online net|apuestas online nuevas|apuestas online opiniones|apuestas online
paypal|apuestas online peru|apuestas online seguras|apuestas online sin dinero|apuestas online
sin registro|apuestas online tenis|apuestas online ufc|apuestas online uruguay|apuestas online venezuela|apuestas
open britanico golf|apuestas osasuna athletic|apuestas osasuna barcelona|apuestas osasuna real madrid|apuestas
osasuna sevilla|apuestas osasuna valencia|apuestas over|apuestas over 2.5|apuestas over under|apuestas paginas|apuestas pago anticipado|apuestas paises bajos ecuador|apuestas paises
bajos inglaterra|apuestas países bajos qatar|apuestas para boxeo|apuestas para champions league|apuestas para el clasico|apuestas para el dia
de hoy|apuestas para el mundial|apuestas para el partido de hoy|apuestas para eurocopa|apuestas para europa league|apuestas para futbol|apuestas para ganar|apuestas para ganar
dinero|apuestas para ganar dinero facil|apuestas para ganar en la ruleta|apuestas para ganar la champions|apuestas
para ganar la eurocopa|apuestas para ganar la europa league|apuestas para ganar la liga|apuestas para ganar siempre|apuestas para hacer|apuestas para hoy|apuestas
para hoy de futbol|apuestas para hoy europa league|apuestas para hoy futbol|apuestas para juegos|apuestas para la champions league|apuestas para la copa del rey|apuestas
para la eurocopa|apuestas para la europa league|apuestas para la final de
la eurocopa|apuestas para la nba hoy|apuestas para los partidos de hoy|apuestas para partidos
de hoy|apuestas para ufc|apuestas partido|apuestas partido aplazado|apuestas partido
champions|apuestas partido colombia|apuestas partido españa marruecos|apuestas partido mundial|apuestas partido suspendido|apuestas partidos|apuestas partidos champions
league|apuestas partidos csgo|apuestas partidos de
futbol|apuestas partidos de futbol hoy|apuestas
partidos de hoy|apuestas partidos eurocopa|apuestas partidos futbol|apuestas partidos hoy|apuestas
partidos mundial|apuestas paypal|apuestas peleas de boxeo|apuestas
peru|apuestas perú|apuestas peru brasil|apuestas peru chile|apuestas peru paraguay|apuestas peru uruguay|apuestas peru vs chile|apuestas
peru vs colombia|apuestas pichichi eurocopa|apuestas plataforma|apuestas playoff|apuestas playoff ascenso|apuestas playoff ascenso a primera|apuestas playoff nba|apuestas playoff segunda|apuestas playoff segunda
b|apuestas playoffs nba|apuestas playoffs nfl|apuestas polonia argentina|apuestas por argentina|apuestas por internet mexico|apuestas por internet para ganar dinero|apuestas por paypal|apuestas por ronda boxeo|apuestas
por sistema|apuestas portugal uruguay|apuestas pre partido|apuestas predicciones|apuestas predicciones futbol|apuestas primera division|apuestas
primera division españa|apuestas promociones|apuestas
pronostico|apuestas pronosticos|apuestas pronosticos
deportivos|apuestas pronosticos deportivos tenis|apuestas pronosticos
futbol|apuestas pronosticos gratis|apuestas pronosticos nba|apuestas pronosticos
tenis|apuestas prorroga|apuestas psg barca|apuestas psg barcelona|apuestas puntos
por tarjetas|apuestas puntos tarjetas|apuestas que
aceptan paypal|apuestas que es handicap|apuestas que puedes hacer con tu novia|apuestas que siempre ganaras|apuestas que significa|apuestas quien bajara
a segunda|apuestas quién bajara a segunda|apuestas quien gana el
mundial|apuestas quien gana eurocopa|apuestas quien gana la champions|apuestas quien gana la eurocopa|apuestas quien gana la liga|apuestas quien ganara el mundial|apuestas quién ganará el mundial|apuestas quien ganara la champions|apuestas quien ganara la eurocopa|apuestas quien ganara la liga|apuestas rayo barcelona|apuestas
real madrid|apuestas real madrid arsenal|apuestas real madrid
athletic|apuestas real madrid atletico|apuestas real
madrid atletico champions|apuestas real madrid atletico de madrid|apuestas real madrid atlético de madrid|apuestas real madrid atletico madrid|apuestas real madrid barcelona|apuestas real madrid bayern|apuestas real madrid betis|apuestas real
madrid borussia|apuestas real madrid campeon champions|apuestas real madrid celta|apuestas real madrid champions|apuestas real madrid
city|apuestas real madrid girona|apuestas real
madrid hoy|apuestas real madrid liverpool|apuestas real madrid manchester city|apuestas real madrid
osasuna|apuestas real madrid real sociedad|apuestas real madrid valencia|apuestas
real madrid villarreal|apuestas real madrid vs arsenal|apuestas real madrid vs atletico|apuestas real madrid vs atlético|apuestas real madrid vs atletico madrid|apuestas real madrid vs barcelona|apuestas real madrid vs betis|apuestas real madrid vs sevilla|apuestas real madrid vs valencia|apuestas real sociedad|apuestas real sociedad athletic|apuestas real
sociedad barcelona|apuestas real sociedad betis|apuestas real sociedad psg|apuestas real
sociedad real madrid|apuestas real sociedad valencia|apuestas
recomendadas hoy|apuestas regalo de bienvenida|apuestas registro|apuestas resultado exacto|apuestas resultados|apuestas
resultados eurocopa|apuestas retirada tenis|apuestas roma barcelona|apuestas roma sevilla|apuestas rugby|apuestas rugby mundial|apuestas rugby world cup|apuestas ruleta seguras|apuestas segunda|apuestas segunda b|apuestas segunda division|apuestas segunda división|apuestas segunda division b|apuestas segunda
division españa|apuestas seguras|apuestas seguras baloncesto|apuestas seguras calculadora|apuestas seguras en la ruleta|apuestas seguras eurocopa|apuestas seguras foro|apuestas seguras
futbol|apuestas seguras futbol hoy|apuestas seguras gratis|apuestas seguras hoy|apuestas seguras hoy futbol|apuestas seguras nba|apuestas seguras
nba hoy|apuestas seguras para este fin de semana|apuestas seguras para ganar dinero|apuestas seguras para hoy|apuestas seguras para hoy fútbol|apuestas seguras para
hoy pronósticos|apuestas seguras para mañana|apuestas seguras ruleta|apuestas seguras telegram|apuestas seguras tenis|apuestas semifinales eurocopa|apuestas
senegal paises bajos|apuestas sevilla|apuestas sevilla athletic|apuestas sevilla
atletico de madrid|apuestas sevilla barcelona|apuestas sevilla betis|apuestas
sevilla campeon liga|apuestas sevilla celta|apuestas sevilla gana la liga|apuestas sevilla girona|apuestas
sevilla inter|apuestas sevilla jugador|apuestas sevilla juventus|apuestas sevilla leganes|apuestas sevilla madrid|apuestas sevilla manchester united|apuestas sevilla osasuna|apuestas sevilla real madrid|apuestas sevilla real sociedad|apuestas sevilla roma|apuestas
sevilla valencia|apuestas significa|apuestas simples ejemplos|apuestas simples o combinadas|apuestas sin deposito|apuestas sin deposito inicial|apuestas
sin deposito minimo|apuestas sin dinero|apuestas sin dinero real|apuestas
sin empate|apuestas sin empate que significa|apuestas sin ingreso minimo|apuestas sin registro|apuestas sistema|apuestas sistema calculadora|apuestas sistema como funciona|apuestas sistema trixie|apuestas sociedad|apuestas sorteo copa del rey|apuestas
stake|apuestas stake 10|apuestas stake 10 hoy|apuestas super bowl
favorito|apuestas super rugby|apuestas supercopa españa|apuestas superliga argentina|apuestas tarjeta roja|apuestas
tarjetas|apuestas tarjetas amarillas|apuestas tenis|apuestas tenis atp|apuestas tenis consejos|apuestas tenis copa davis|apuestas tenis de mesa|apuestas tenis de mesa pronosticos|apuestas tenis en vivo|apuestas tenis femenino|apuestas tenis hoy|apuestas tenis
itf|apuestas tenis pronosticos|apuestas tenis pronósticos|apuestas
tenis retirada|apuestas tenis roland garros|apuestas tenis seguras|apuestas tenis wimbledon|apuestas tenis wta|apuestas tercera division|apuestas tercera division españa|apuestas
tipos|apuestas tips|apuestas tipster|apuestas tipster para hoy|apuestas topuria holloway cuotas|apuestas torneos de golf|apuestas
torneos de tenis|apuestas trucos|apuestas uefa champions
league|apuestas uefa europa league|apuestas ufc|apuestas ufc chile|apuestas ufc como funciona|apuestas ufc hoy|apuestas ufc ilia topuria|apuestas
ufc online|apuestas ufc pronósticos|apuestas ufc telegram|apuestas ufc topuria|apuestas
under over|apuestas unionistas villarreal|apuestas uruguay|apuestas uruguay colombia|apuestas uruguay corea|apuestas uruguay vs colombia|apuestas us open golf|apuestas us open tenis|apuestas valencia|apuestas
valencia barcelona|apuestas valencia betis|apuestas valencia madrid|apuestas valencia real madrid|apuestas valladolid barcelona|apuestas valladolid
valencia|apuestas valor app|apuestas valor en directo|apuestas valor galgos|apuestas venezuela|apuestas
venezuela argentina|apuestas venezuela bolivia|apuestas venezuela ecuador|apuestas villarreal|apuestas
villarreal athletic|apuestas villarreal barcelona|apuestas villarreal bayern|apuestas villarreal betis|apuestas villarreal liverpool|apuestas villarreal manchester|apuestas villarreal manchester united|apuestas villarreal vs real madrid|apuestas
virtuales|apuestas virtuales colombia|apuestas virtuales futbol|apuestas virtuales sin dinero|apuestas
vivo|apuestas vuelta a españa|apuestas vuelta
españa|apuestas william hill partidos de hoy|apuestas y casino|apuestas y casinos|apuestas y
juegos de azar|apuestas y pronosticos|apuestas y pronosticos de futbol|apuestas
y pronosticos deportivos|apuestas y resultados|apuestas-deportivas|apuestas-deportivas.es pronosticos|arbitro nba apuestas|argentina apuestas|argentina colombia apuestas|argentina croacia apuestas|argentina francia
apuestas|argentina mexico apuestas|argentina peru apuestas|argentina uruguay apuestas|argentina vs bolivia
apuestas|argentina vs chile apuestas|argentina vs colombia apuestas|argentina
vs francia apuestas|argentina vs. colombia apuestas|asi se gana en las apuestas deportivas|asiatico apuestas|asiatico en apuestas|asiaticos apuestas|athletic barcelona
apuestas|athletic manchester united apuestas|athletic
osasuna apuestas|athletic real madrid apuestas|atletico barcelona apuestas|atletico
de madrid apuestas|atlético de madrid apuestas|atletico de madrid real madrid apuestas|atletico de
madrid vs barcelona apuestas|atletico madrid real madrid apuestas|atletico madrid vs real madrid
apuestas|atletico real madrid apuestas|atletico vs real madrid apuestas|avisador de cuotas apuestas|bajada de
cuotas apuestas|baloncesto apuestas|barbastro barcelona apuestas|barca apuestas|barca bayern apuestas|barca
inter apuestas|barca madrid apuestas|barça madrid
apuestas|barca vs atletico apuestas|barca vs madrid apuestas|barca
vs real madrid apuestas|barcelona – real madrid apuestas|barcelona
apuestas|barcelona atletico apuestas|barcelona atletico de
madrid apuestas|barcelona atletico madrid apuestas|barcelona betis
apuestas|barcelona casa de apuestas|barcelona inter apuestas|barcelona psg apuestas|barcelona real madrid apuestas|barcelona real sociedad apuestas|barcelona sevilla apuestas|barcelona valencia apuestas|barcelona vs athletic bilbao apuestas|barcelona
vs atlético madrid apuestas|barcelona vs betis apuestas|barcelona vs celta de
vigo apuestas|barcelona vs espanyol apuestas|barcelona vs girona apuestas|barcelona vs madrid apuestas|barcelona vs real madrid apuestas|barcelona vs real sociedad apuestas|barcelona vs sevilla apuestas|barcelona vs villarreal apuestas|base de datos cuotas apuestas deportivas|bayern real
madrid apuestas|beisbol apuestas|best america apuestas|bet apuestas chile|bet apuestas
en vivo|betis – chelsea apuestas|betis apuestas|betis barcelona apuestas|betis chelsea apuestas|betis madrid
apuestas|betis sevilla apuestas|betsson tu sitio
de apuestas online|blog apuestas baloncesto|blog apuestas ciclismo|blog apuestas nba|blog apuestas tenis|blog de apuestas de tenis|bono apuestas|bono apuestas deportivas|bono apuestas deportivas sin deposito|bono
apuestas gratis|bono apuestas gratis sin deposito|bono apuestas sin deposito|bono bienvenida apuestas|bono bienvenida apuestas deportivas|bono bienvenida apuestas españa|bono bienvenida apuestas
sin deposito|bono bienvenida apuestas sin depósito|bono
bienvenida casa apuestas|bono bienvenida casa de apuestas|bono bienvenida marca
apuestas|bono casa apuestas|bono casa de apuestas|bono casa de apuestas sin ingreso|bono casas de apuestas|bono de apuestas|bono de
apuestas gratis sin deposito|bono de bienvenida apuestas|bono de
bienvenida apuestas deportivas|bono de bienvenida casa de apuestas|bono de bienvenida casas de apuestas|bono
de casas de apuestas|bono de registro apuestas|bono de registro apuestas deportivas|bono de registro casa de
apuestas|bono gratis apuestas|bono marca apuestas|bono por registro apuestas|bono
por registro apuestas deportivas|bono por registro casa de apuestas|bono registro apuestas|bono sin deposito
apuestas|bono sin depósito apuestas|bono sin deposito apuestas deportivas|bono sin depósito apuestas deportivas|bono sin deposito
casa de apuestas|bono sin deposito marca apuestas|bono sin ingreso apuestas|bono sin ingreso apuestas deportivas|bonos apuestas|bonos
apuestas colombia|bonos apuestas deportivas|bonos apuestas
deportivas sin deposito|bonos apuestas gratis|bonos apuestas sin deposito|bonos apuestas sin depósito|bonos bienvenida apuestas|bonos bienvenida casas apuestas|bonos bienvenida casas de apuestas|bonos casa de apuestas|bonos casas apuestas|bonos casas de apuestas|bonos casas de apuestas
colombia|bonos casas de apuestas deportivas|bonos casas de apuestas españa|bonos casas de
apuestas nuevas|bonos casas de apuestas sin deposito|bonos casas de apuestas sin depósito|bonos de apuestas|bonos
de apuestas deportivas|bonos de apuestas gratis|bonos de
apuestas sin deposito|bonos de bienvenida apuestas|bonos de bienvenida
apuestas deportivas|bonos de bienvenida casa de apuestas|bonos de bienvenida casas de apuestas|bonos de bienvenida de casas de apuestas|bonos de bienvenida en casas de apuestas|bonos de
casas de apuestas|bonos de casas de apuestas sin deposito|bonos
en casa de apuestas|bonos en casas de apuestas sin deposito|bonos gratis apuestas|bonos gratis apuestas deportivas|bonos gratis casas de
apuestas|bonos gratis sin deposito apuestas|bonos paginas de apuestas|bonos registro casas de
apuestas|bonos sin deposito apuestas|bonos sin depósito apuestas|bonos sin deposito apuestas deportivas|bonos
sin deposito casas de apuestas|bot de apuestas deportivas gratis|boxeo apuestas|brasil colombia apuestas|brasil peru apuestas|brasil vs colombia apuestas|buenas
apuestas para hoy|buscador cuotas apuestas|buscador de apuestas seguras|buscador
de cuotas apuestas|buscador de cuotas de apuestas|buscar apuestas seguras|caballos apuestas|calculador de
apuestas|calculador de cuotas apuestas|calculadora apuestas|calculadora
apuestas combinadas|calculadora apuestas de sistema|calculadora apuestas
deportivas|calculadora apuestas deportivas seguras|calculadora
apuestas multiples|calculadora apuestas segura|calculadora apuestas seguras|calculadora apuestas
sistema|calculadora apuestas yankee|calculadora arbitraje apuestas|calculadora
cubrir apuestas|calculadora cuotas apuestas|calculadora de apuestas|calculadora de apuestas combinadas|calculadora de apuestas de futbol|calculadora de apuestas de sistema|calculadora de apuestas deportivas|calculadora de
apuestas multiples|calculadora de apuestas seguras|calculadora de
apuestas sistema|calculadora de apuestas surebets|calculadora
de arbitraje apuestas|calculadora de cuotas apuestas|calculadora de cuotas de apuestas|calculadora
para apuestas deportivas|calculadora poisson apuestas|calculadora poisson apuestas deportivas|calculadora poisson para apuestas|calculadora scalping apuestas deportivas|calculadora sistema apuestas|calculadora stake apuestas|calculadora trading
apuestas|calcular apuestas|calcular apuestas deportivas|calcular apuestas futbol|calcular apuestas sistema|calcular cuotas apuestas|calcular cuotas apuestas combinadas|calcular cuotas apuestas
deportivas|calcular cuotas de apuestas|calcular ganancias
apuestas deportivas|calcular momios apuestas|calcular probabilidad cuota apuestas|calcular stake apuestas|calcular unidades apuestas|calcular yield apuestas|calculo de apuestas|calculo de apuestas deportivas|cambio de
cuotas apuestas|campeon champions apuestas|campeon eurocopa apuestas|campeon liga apuestas|campeon nba apuestas|canales de
apuestas gratis|carrera de caballos apuestas|carrera de caballos apuestas juego|carrera de caballos con apuestas|carrera de
galgos apuestas|carreras de caballos apuestas|carreras de caballos apuestas online|carreras de caballos con apuestas|carreras de caballos juegos de apuestas|carreras de galgos apuestas|carreras
de galgos apuestas online|carreras de galgos apuestas trucos|carreras
galgos apuestas|casa apuestas argentina|casa apuestas atletico de madrid|casa apuestas barcelona|casa apuestas betis|casa apuestas bono bienvenida|casa apuestas bono gratis|casa apuestas bono sin deposito|casa apuestas cerca de mi|casa apuestas
chile|casa apuestas colombia|casa apuestas con mejores cuotas|casa apuestas deportivas|casa
apuestas españa|casa apuestas española|casa apuestas eurocopa|casa apuestas futbol|casa
apuestas mejores cuotas|casa apuestas mundial|casa apuestas
nueva|casa apuestas nuevas|casa apuestas
online|casa apuestas peru|casa apuestas valencia|casa de
apuestas|casa de apuestas 10 euros gratis|casa de apuestas argentina|casa de apuestas atletico de madrid|casa de apuestas baloncesto|casa de apuestas barcelona|casa
de apuestas beisbol|casa de apuestas betis|casa de apuestas bono|casa de apuestas bono bienvenida|casa de apuestas bono de bienvenida|casa de apuestas bono gratis|casa de apuestas bono por registro|casa de apuestas
bono sin deposito|casa de apuestas boxeo|casa de apuestas caballos|casa de apuestas carreras de caballos|casa de apuestas cerca
de mi|casa de apuestas cerca de mí|casa de apuestas champions league|casa de apuestas chile|casa de apuestas
ciclismo|casa de apuestas colombia|casa de apuestas
con bono de bienvenida|casa de apuestas con bono sin deposito|casa de apuestas con cuotas
mas altas|casa de apuestas con esports|casa de apuestas con las mejores cuotas|casa
de apuestas con licencia en españa|casa de apuestas con mejores cuotas|casa de apuestas con pago anticipado|casa de apuestas con paypal|casa de apuestas copa
america|casa de apuestas de caballos|casa de apuestas de colombia|casa de apuestas de españa|casa de apuestas de
futbol|casa de apuestas de fútbol|casa de apuestas de futbol peru|casa de apuestas de peru|casa de apuestas del madrid|casa de apuestas
del real madrid|casa de apuestas deportivas|casa de apuestas deportivas cerca de mi|casa
de apuestas deportivas en argentina|casa de apuestas deportivas en chile|casa
de apuestas deportivas en colombia|casa de apuestas deportivas en españa|casa
de apuestas deportivas en madrid|casa de apuestas deportivas españa|casa de apuestas deportivas
españolas|casa de apuestas deportivas madrid|casa de apuestas deportivas mexico|casa de apuestas
deportivas online|casa de apuestas deportivas peru|casa de apuestas deposito 5 euros|casa de apuestas deposito minimo|casa
de apuestas deposito minimo 1 euro|casa de apuestas depósito mínimo 1 euro|casa de apuestas en españa|casa de apuestas
en linea|casa de apuestas en madrid|casa de apuestas en perú|casa de apuestas en vivo|casa de
apuestas españa|casa de apuestas españa inglaterra|casa de apuestas española|casa de apuestas españolas|casa de
apuestas esports|casa de apuestas eurocopa|casa de apuestas europa
league|casa de apuestas f1|casa de apuestas formula 1|casa de apuestas futbol|casa de
apuestas ingreso minimo|casa de apuestas ingreso minimo 1 euro|casa
de apuestas ingreso mínimo 1 euro|casa de apuestas legales|casa de apuestas legales en colombia|casa de apuestas legales en españa|casa de apuestas libertadores|casa
de apuestas liga española|casa de apuestas madrid|casa de apuestas mas
segura|casa de apuestas mejores|casa de apuestas méxico|casa de apuestas minimo
5 euros|casa de apuestas mlb|casa de apuestas mundial|casa de apuestas nba|casa
de apuestas nfl|casa de apuestas nueva|casa de apuestas nuevas|casa de apuestas oficial del real madrid|casa de apuestas oficial real madrid|casa
de apuestas online|casa de apuestas online argentina|casa
de apuestas online chile|casa de apuestas online españa|casa de apuestas online mexico|casa de apuestas online paraguay|casa de apuestas online peru|casa de
apuestas online usa|casa de apuestas online venezuela|casa de apuestas pago anticipado|casa de apuestas para boxeo|casa de apuestas
para ufc|casa de apuestas peru|casa de apuestas perú|casa
de apuestas peru online|casa de apuestas por paypal|casa de apuestas promociones|casa
de apuestas que regalan dinero|casa de apuestas
real madrid|casa de apuestas regalo de bienvenida|casa de apuestas sevilla|casa de apuestas sin dinero|casa de apuestas sin ingreso minimo|casa de apuestas sin licencia en españa|casa
de apuestas sin minimo de ingreso|casa de apuestas stake|casa de apuestas tenis|casa de
apuestas ufc|casa de apuestas valencia|casa de apuestas venezuela|casa
de apuestas virtuales|casa de apuestas vive la suerte|casa oficial de apuestas
del real madrid|casas apuestas asiaticas|casas apuestas bono sin deposito|casas
apuestas bonos sin deposito|casas apuestas caballos|casas apuestas chile|casas apuestas
ciclismo|casas apuestas con licencia|casas apuestas con licencia en españa|casas apuestas deportivas|casas apuestas deportivas colombia|casas apuestas deportivas españa|casas apuestas deportivas españolas|casas apuestas deportivas nuevas|casas apuestas españa|casas apuestas españolas|casas apuestas esports|casas apuestas eurocopa|casas apuestas
golf|casas apuestas ingreso minimo 5 euros|casas apuestas legales|casas
apuestas legales españa|casas apuestas licencia|casas apuestas licencia españa|casas apuestas mexico|casas apuestas mundial|casas apuestas nba|casas apuestas nuevas|casas
apuestas nuevas españa|casas apuestas ofertas|casas apuestas online|casas apuestas paypal|casas apuestas peru|casas apuestas
sin licencia|casas apuestas tenis|casas asiaticas apuestas|casas de apuestas|casas de apuestas 5 euros|casas de
apuestas app|casas de apuestas argentinas|casas de apuestas asiaticas|casas de apuestas baloncesto|casas de apuestas barcelona|casas de apuestas bono bienvenida|casas de apuestas bono de
bienvenida|casas de apuestas bono por registro|casas
de apuestas bono sin deposito|casas de apuestas bono sin ingreso|casas de apuestas bonos|casas de apuestas bonos de bienvenida|casas
de apuestas bonos gratis|casas de apuestas bonos sin deposito|casas de apuestas boxeo|casas de apuestas caballos|casas de apuestas carreras de caballos|casas de apuestas casino|casas
de apuestas casino online|casas de apuestas cerca de mi|casas de apuestas champions
league|casas de apuestas chile|casas de apuestas ciclismo|casas
de apuestas colombia|casas de apuestas com|casas de
apuestas con app|casas de apuestas con apuestas gratis|casas de apuestas
con bono|casas de apuestas con bono de bienvenida|casas de apuestas con bono de registro|casas de apuestas con bono por registro|casas de apuestas con bono sin deposito|casas de apuestas con bonos|casas de apuestas con bonos
gratis|casas de apuestas con bonos sin deposito|casas de
apuestas con deposito minimo|casas de apuestas con esports|casas de apuestas con handicap asiatico|casas de apuestas con licencia|casas de apuestas con licencia en españa|casas
de apuestas con licencia españa|casas de apuestas con licencia española|casas
de apuestas con mejores cuotas|casas de apuestas con pago anticipado|casas de apuestas con paypal|casas de apuestas con paypal
en perú|casas de apuestas con promociones|casas de apuestas con ruleta en vivo|casas de apuestas copa del rey|casas de apuestas de caballos|casas de
apuestas de españa|casas de apuestas de futbol|casas de apuestas de fútbol|casas de apuestas de peru|casas
de apuestas deportivas|casas de apuestas deportivas asiaticas|casas de apuestas deportivas colombia|casas
de apuestas deportivas comparativa|casas de apuestas deportivas con paypal|casas de apuestas deportivas en chile|casas de apuestas deportivas en españa|casas de apuestas deportivas en linea|casas de apuestas deportivas en madrid|casas de apuestas deportivas en mexico|casas de
apuestas deportivas en peru|casas de apuestas deportivas en sevilla|casas de apuestas deportivas en valencia|casas de apuestas deportivas españa|casas de apuestas deportivas españolas|casas de
apuestas deportivas legales|casas de apuestas deportivas madrid|casas de
apuestas deportivas mexico|casas de apuestas deportivas nuevas|casas de apuestas deportivas online|casas de apuestas deportivas peru|casas de apuestas deportivas
perú|casas de apuestas deposito minimo 1 euro|casas
de apuestas depósito mínimo 1 euro|casas de apuestas dinero gratis|casas de apuestas en argentina|casas de apuestas en barcelona|casas de
apuestas en chile|casas de apuestas en colombia|casas de apuestas en españa|casas
de apuestas en españa online|casas de apuestas en linea|casas de
apuestas en madrid|casas de apuestas en méxico|casas
de apuestas en peru|casas de apuestas en perú|casas de apuestas en sevilla|casas de apuestas
en uruguay|casas de apuestas en valencia|casas de apuestas en venezuela|casas de apuestas
equipos de futbol|casas de apuestas españa|casas de apuestas españa
alemania|casas de apuestas españa inglaterra|casas de
apuestas españa licencia|casas de apuestas españa nuevas|casas de apuestas españa online|casas de apuestas española|casas de apuestas españolas|casas de apuestas españolas
con licencia|casas de apuestas españolas online|casas de apuestas esports|casas de apuestas eurocopa|casas de apuestas eurocopa
2024|casas de apuestas europa league|casas de apuestas
f1|casas de apuestas fisicas en barcelona|casas de apuestas fisicas en españa|casas de apuestas formula 1|casas de apuestas
fuera de españa|casas de apuestas futbol|casas
de apuestas fútbol|casas de apuestas futbol españa|casas de apuestas ganador eurocopa|casas de apuestas
gratis|casas de apuestas ingreso minimo|casas de apuestas ingreso
minimo 1 euro|casas de apuestas ingreso minimo 5
euros|casas de apuestas inter barcelona|casas de
apuestas legales|casas de apuestas legales en colombia|casas de apuestas legales en españa|casas de apuestas
legales en mexico|casas de apuestas legales españa|casas de
apuestas legales mx|casas de apuestas licencia|casas de apuestas licencia españa|casas de apuestas lista|casas de
apuestas madrid|casas de apuestas mas seguras|casas de apuestas
mejores bonos|casas de apuestas mejores cuotas|casas de apuestas mexico|casas de
apuestas méxico|casas de apuestas minimo 5 euros|casas de apuestas mlb|casas de apuestas
mundial|casas de apuestas mundial baloncesto|casas de
apuestas mundiales|casas de apuestas nba|casas de apuestas no reguladas en españa|casas
de apuestas nueva ley|casas de apuestas nuevas|casas de apuestas nuevas en colombia|casas de apuestas nuevas en españa|casas de apuestas nuevas españa|casas de apuestas ofertas|casas de apuestas online|casas de apuestas online argentina|casas de apuestas online colombia|casas de apuestas online deportivas|casas
de apuestas online ecuador|casas de apuestas online en argentina|casas de
apuestas online en chile|casas de apuestas online en colombia|casas de apuestas online en españa|casas de
apuestas online en mexico|casas de apuestas online españa|casas de apuestas online mas fiables|casas de apuestas
online mexico|casas de apuestas online nuevas|casas
de apuestas online peru|casas de apuestas online usa|casas de apuestas online venezuela|casas de apuestas pago paypal|casas de apuestas para ufc|casas de apuestas paypal|casas de apuestas peru bono sin deposito|casas de apuestas
presenciales en españa|casas de
Daily Finds Sorniq – A creative marketplace showcasing inventive items as well as practical goods.
Zintera Finds – Fast loading and a fresh, organized design make browsing pleasant.
заказать кухню [url=https://zakazat-kuhnyu-4.ru/]заказать кухню[/url] .
Browse Xerva – Store design is intuitive, so navigating items today was smooth.
Harbor Mint – A calm and curated marketplace inspired by coastal charm and clean design.
Everyday Zintera – Pages are speedy, and the modern layout is very user-friendly.
Xerva Choice – Layout is very user-friendly, and checking out products today was simple.
Explore Joy Vendor – Customer service was quick to reply and resolved everything efficiently.
Harbor Mint – A calm and curated marketplace inspired by coastal charm and clean design.
заказать кухню в интернете [url=https://zakazat-kuhnyu-1.ru/]zakazat-kuhnyu-1.ru[/url] .
Joy Picks – Support team was very responsive and solved my issue effortlessly.
visit MerchGlow – Great assortment that made me want to explore further right away.
профессиональная печать [url=https://scrapbox.io/toppost/%D0%94%D0%B8%D0%B7%D0%B0%D0%B9%D0%BD_%D0%B1%D0%B8%D1%80%D0%BE%D0%BA_%D0%B4%D0%BB%D1%8F_%D0%BE%D0%B4%D0%B5%D0%B6%D0%B4%D1%8B:_%D0%B8%D1%81%D1%82%D0%BE%D1%80%D0%B8%D1%8F_%D0%B1%D1%80%D0%B5%D0%BD%D0%B4%D0%B0_%D0%BD%D0%B0_%D0%BE%D0%B4%D0%BD%D0%BE%D0%BC_%D0%BA%D1%83%D1%81%D0%BE%D1%87%D0%BA%D0%B5_%D0%BA%D0%B0%D1%80%D1%82%D0%BE%D0%BD%D0%B0/]https://scrapbox.io/toppost/%D0%94%D0%B8%D0%B7%D0%B0%D0%B9%D0%BD_%D0%B1%D0%B8%D1%80%D0%BE%D0%BA_%D0%B4%D0%BB%D1%8F_%D0%BE%D0%B4%D0%B5%D0%B6%D0%B4%D1%8B:_%D0%B8%D1%81%D1%82%D0%BE%D1%80%D0%B8%D1%8F_%D0%B1%D1%80%D0%B5%D0%BD%D0%B4%D0%B0_%D0%BD%D0%B0_%D0%BE%D0%B4%D0%BD%D0%BE%D0%BC_%D0%BA%D1%83%D1%81%D0%BE%D1%87%D0%BA%D0%B5_%D0%BA%D0%B0%D1%80%D1%82%D0%BE%D0%BD%D0%B0[/url] .
discover Merch Glow – The assortment is eye-catching and immediately held my attention.
Go to Melvora – Sleek interface makes finding products quick and simple.
Melvora Marketplace – Modern feel and moving through categories is fast and simple.
Aisle Whisper Online Hub – Really liked the variety and found a few items worth checking online.
stylish finds online – Fair value and easy-to-read descriptions make browsing simple.
glarniq.shop – Pricing seems reasonable and product info is clear and helpful.
1win domen [url=http://1win5763.help/]http://1win5763.help/[/url]
Cobalt Crate – A bold and reliable platform delivering standout selections with confidence.
Discover Ravlora – Customer service was responsive and solved my problem quickly.
Cobalt Crate – A bold and reliable platform delivering standout selections with confidence.
Ravlora Picks – Support responded fast and handled my issue without any trouble.
Xerva Curated – Clear layout and simple navigation make shopping enjoyable today.
Xerva Store – Really like the layout, browsing products today was simple and smooth.
внедрение erp на предприятии [url=www.1s-erp-vnedrenie.ru/]внедрение erp на предприятии[/url] .
Trend Hub Online – Organized categories and smooth navigation make finding items easy.
Trend Online – Well-structured categories make finding what you need effortless.
Silk Vendor – A polished platform delivering quality finds with a touch of elegance.
Value Whisper store – Fair prices and easy-to-read descriptions make shopping simple.
CraftQuill Products – Items are exactly what I needed and feel premium.
Silk Vendor – A polished platform delivering quality finds with a touch of elegance.
writing essentials hub – Everything is clearly organized and easy to browse through.
browse Value Whisper – Good value and descriptions that make products simple to understand.
Go to CraftQuill – I’m impressed with the quality and how well everything was made.
кухни на заказ от производителя [url=https://kuhni-spb-41.ru/]kuhni-spb-41.ru[/url] .
trusted quill marketplace – Straightforward navigation makes shopping convenient.
услуги типографии [url=http://truegamerp.rx22.ru/viewtopic.php?f=50&t=21614/]http://truegamerp.rx22.ru/viewtopic.php?f=50&t=21614[/url] .
1win Xorazm [url=1win5767.help]1win5767.help[/url]
discover Quelnix – Easy navigation and little thoughtful touches in layout make the site feel polished.
visit Quelnix – The layout is intuitive and the little details make it feel polished.
I’m really enjoying the design and layout of your website. It’s a very easy on the eyes which makes it much more enjoyable for me to come here and visit more often. Did you hire out a designer to create your theme? Exceptional work!
Worvix Curated – Payments were straightforward and checkout felt seamless.
Timber Cart – A warm and grounded online shop inspired by rustic charm and practical choices.
Discover Worvix – Payments were simple and checkout felt effortless.
Timber Cart – A warm and grounded online shop inspired by rustic charm and practical choices.
Smart Picks Xerva – Browsing products today was simple thanks to the neat store layout.
заказать кухню по индивидуальным размерам [url=https://zakazat-kuhnyu-1.ru/]zakazat-kuhnyu-1.ru[/url] .
Quick Shop Xerva – Love the design, navigating through products was super easy today.
Farniq Select – Found stylish and one-of-a-kind items that are just my taste.
Farniq Choice – Great selection of unique pieces that complement my style perfectly.
Inqvera Online Store – The site runs smoothly and completing a purchase is straightforward.
Explore Yarrow Crate – Clear product information made shopping much easier than expected.
внедрение erp 1c [url=https://1s-erp-vnedrenie.ru/]1s-erp-vnedrenie.ru[/url] .
explore Vault Basket – The site’s layout is clear and category structure is helpful.
Inqvera Website – The interface is responsive and checkout feels effortless.
YarrowCrate Online – Descriptions are very informative and helped me pick products effortlessly.
Zest Vendor – A vibrant shop filled with energetic picks and exciting discoveries.
this online shop – I like how the products are grouped logically into categories.
Zest Vendor – A vibrant shop filled with energetic picks and exciting discoveries.
заказать кухню по индивидуальным размерам [url=https://zakazat-kuhnyu-3.ru/]заказать кухню по индивидуальным размерам[/url] .
Good morning!
Find physical mysterious evidence in interesting cases with valuable forensic details and solve mysteries like a pro see on the website for forensic guides
Full information on the link – https://101flow.site
All the best and development in business!
заказать кухню по индивидуальному проекту [url=https://zakazat-kuhnyu-2.ru/]zakazat-kuhnyu-2.ru[/url] .
shop Raven Vendor – Wide selection, with everything loading promptly and without problems.
visit RavenVendor – Wide variety available and the site responds instantly.
согласование перепланировок [url=https://sites.google.com/view/dokument-dlya-pereplan/главная-страница/]согласование перепланировок[/url] .
Hello!
Explore unknown mysterious territories with interesting and valuable info inside and venture into uncharted digital lands see on the website for exploration logs
Full information on the link – https://202fliks.site
All the best and development in business!
кухня на заказ спб [url=https://kuhni-spb-43.ru/]кухня на заказ спб[/url] .
прямые кухни на заказ от производителя [url=https://kuhni-spb-44.ru/]прямые кухни на заказ от производителя[/url] .
shop Quick Vendor – Overall it seems reliable, with a checkout process that looks clear and simple.
1win kampaniya [url=https://www.1win5763.help]https://www.1win5763.help[/url]
купить кухню на заказ в спб [url=https://kuhni-spb-42.ru/]kuhni-spb-42.ru[/url] .
this online vendor – First impressions are positive, and the checkout steps look straightforward.
Tel: 021 480 7400, Fax: 021 422 2603, Postal Address: P.O Box 8175 Roggebaai, 8012, Rep of South Africa The free spins bonus round can also be triggered with a bonus buy in the base game for 100x the player’s bet. The website also offers both free play and real money options of the game, so you can start with the Gates of Olympus 1000 demo before committing to wagers. The signup process is quick, deposits are flexible, and withdrawals are among the fastest in the industry. Gates of Olympus Slot If you’re worried about missing out on the social aspect of traditional casinos, fear not – many online casinos offer live dealer games that allow you to interact with real dealers and other players in real time In conclusion, poker online offers a dynamic and engaging gaming experience that appeals to players of all skill levels and preferences When it comes to online casino poker, players can also take advantage of various bonuses and promotions offered by these platforms, which can significantly enhance their gaming experience Slot Machine Free Casino
https://greatusa.click/me99-casino-game-review-a-must-try-for-aussie-players-2/
Gates of Olympus 1000 reward players when eight or more matching symbols land anywhere on the screen. Zeus has opened the doors to Mount Olympus once more in Pragmatic Play’s latest release, Gates of Olympus 1000! I confirm I am over 18-24 years old, depending on my location. The 1,000x multiplier is double what the original Gates of Olympus slot could offer, making this game even better value for money. There’s no wild symbol, and perhaps a few more characters on the reels would improve the looks even further, but don’t let these minor issues put you off this exciting, fast-paced game. So, the design is all white, snowy, and done up like a Christmas card. The Gates of Olympus Xmas 1000 slot comes with five rows and six reels. There are no paylines to this slot as the game comes with a Scatter Pays mechanism, and also a Tumbler feature that activates upon wins.
Quick Shop Irnora – Unique finds and products I couldn’t spot on other sites.
1win giriş forması [url=https://1win5763.help/]1win giriş forması[/url]
Browse Irnora – The selection of products is unique and hard to find on other stores.
Frost Aisle – A cool and refreshing store presenting crisp deals and clean design.
Gild Vendor – A polished online marketplace offering premium selections and curated deals.
Xerva Choice – Layout is very user-friendly, and checking out products today was simple.
Frost Aisle – A cool and refreshing store presenting crisp deals and clean design.
Gild Vendor – A polished online marketplace offering premium selections and curated deals.
Everyday Xerva – The interface is neat and makes exploring products quick and effortless.
заказать кухню [url=https://zakazat-kuhnyu-4.ru/]заказать кухню[/url] .
Silk Choice – Pricing seems fair and the craftsmanship of products is noticeable.
Shop at RippleAisle – Good prices and crisp images make it easy to pick what I want.
Silk Essentials – Reasonable prices paired with good quality make this store appealing.
Ripple Aisle Website – Excellent offers and clear product photos make the experience enjoyable.
stylish Birch Vista finds – Pleasant organization and a stress-free shopping flow.
check this store out – Nice collection overall, I’ll keep it in mind for future shopping.
visit BirchVista – A neat layout and easy navigation create a relaxed shopping experience.
RetargetRoom online – Enjoyed browsing the selection, looking forward to future updates.
внедрение erp на предприятии [url=https://www.1s-erp-vnedrenie.ru]внедрение erp на предприятии[/url] .
ServerStash online – The interface feels clean and the tools are straightforward to use.
serverstash solutions hub – Organized layout and reliable utilities make workflow easier.
holvex shopping corner – Clear, tidy layout with smooth navigation made exploring easy.
holvex collection – Modern, simple layout makes finding items straightforward.
Fintera Choice – Easy-to-navigate sections and clear categories improve the shopping experience.
кухни на заказ спб [url=https://kuhni-spb-43.ru/]кухни на заказ спб[/url] .
изготовление кухни на заказ в спб [url=https://kuhni-spb-44.ru/]изготовление кухни на заказ в спб[/url] .
Zarnita – A modern and distinctive platform showcasing unique items for curious shoppers.
Fintera Curated – Navigation is straightforward, and categories are simple to explore.
Zarnita – A modern and distinctive platform showcasing unique items for curious shoppers.
Shop Orqanta – A forward-thinking platform built to make finding quality items simple and enjoyable.
Xerva Essentials – Browsing items is hassle-free with the clean and organized layout.
zenvorax official store – Minimalist design, browsing is smooth and user-friendly.
GoodsQuarry Online – I like the mix of products and the pricing appears sensible.
Discover Smart Orqanta – A polished marketplace crafted for seamless browsing and meaningful discoveries.
кухня по индивидуальному проекту [url=https://kuhni-spb-42.ru/]kuhni-spb-42.ru[/url] .
Xerva Marketplace – Nice, clean layout made browsing products today fast and easy.
the zenvorax website – Crisp, clean interface makes product discovery seamless.
Goods Quarry Store – A broad range of items is offered at pretty competitive rates.
smart shopping spot – First time here and there’s a wide selection that caught my attention.
ItemTrail Online – The support team replied immediately and fixed my minor problem.
ItemTrail Deals – Customer service was fast and resolved my minor problem quickly.
lucky jet o‘yin 1win [url=www.1win5767.help]www.1win5767.help[/url]
trendy online marketplace – Stopped by and was genuinely impressed with how much variety there is.
магазин свадебных платьев каталог свадебных платьев 2026
Нужны столбики? мобильный столбик столбики для складов, парковок и общественных пространств. Прочные материалы, устойчивое основание и удобство перемещения обеспечивают безопасность и порядок.
Discover Nook Vista – User experience is seamless with a modern and clear website layout.
Nook Choice – Website design is clean, simple, and perfect for smooth browsing.
ShadowShowcase shop online – Engaging displays make it a site I’ll check out again soon.
this income platform – Offers helpful tools and insights for expanding online profit channels.
Looking for a yacht? Mediterranean yacht hire Cyprus for unforgettable sea adventures. Charter luxury yachts, catamarans, or motorboats with or without crew. Explore crystal-clear waters, secluded bays, and iconic coastal locations in first-class comfort onboard.
shadowshowcase feature page – Plenty of cool items, definitely a site I’ll revisit.
купить медный кабель кабель минск
RevenueHarbor shop online – A solid starting point for refining your online earning strategies.
excellent points altogether, you just received a emblem new reader. What might you recommend about your publish that you simply made a few days ago? Any positive?
1win lucky jet siqnal [url=www.1win5763.help]1win lucky jet siqnal[/url]
внедрение erp москва [url=1s-erp-vnedrenie.ru]внедрение erp москва[/url] .
kelnix collection – Interesting variety with each item seeming intentionally picked.
Hello!
Curate theo mysterious hypotheses with interesting and valuable scientific impact and propose bold new ideas see on the website for hypothesis generators
Full information on the link – https://101flow.site
All the best and development in business!
their shopping portal – Carefully curated items that make browsing enjoyable and satisfying.
1win aviator méxico [url=www.1win5771.help]1win aviator méxico[/url]
Browse Acorn Aisle – Clean design and intuitive navigation make shopping very smooth.
Liltharbor Website – Everything is clearly arranged and products are easy to find.
Velvet Finds Online – Easy-to-use checkout, made my first shopping experience stress-free.
Shop Velvet Aisle – Payment options were secure and the process very straightforward for new shoppers.
official shaker station site – The catalog is diverse and the layout makes finding items effortless.
visit shaker station – Nice assortment of items and the site flows intuitively.
this income platform – Offers helpful tools and insights for expanding online profit channels.
favorite accessory source – Nicely arranged pages and detailed notes make a difference.
Prenvia online – Pages load fast and navigation feels intuitive, making browsing effortless.
revenueharbor official store – A convenient source of guidance for building reliable digital income.
browse prenvia – Fast navigation with clear product presentation makes browsing easy.
check it out here – Everything is displayed neatly with useful details provided.
Quick Shop Amber – Really like the transparency in pricing and clarity of product info.
1с внедрение erp [url=https://1s-erp-vnedrenie.ru/]1s-erp-vnedrenie.ru[/url] .
Amber Hub Online – Product details are easy to read, and prices are fair and transparent.
GarnetDock Deals – The arrangement makes the experience pleasant and simple.
Shop Xerva – Nice layout, and exploring items today was very easy.
Xerva Online – Clean and intuitive layout makes exploring items very straightforward.
Icicle Mart – A sharp and efficient marketplace focused on clarity and convenience.
GarnetDock Marketplace – The presentation is orderly and intuitive.
Icicle Mart – A sharp and efficient marketplace focused on clarity and convenience.
кухня по индивидуальному заказу спб [url=https://kuhni-spb-44.ru/]кухня по индивидуальному заказу спб[/url] .
где заказать кухню в спб [url=https://kuhni-spb-43.ru/]kuhni-spb-43.ru[/url] .
Wavlix Boutique – Impressed by the product range and effortless browsing experience.
jollyvendor.shop – The prices are reasonable and completing my order was quick and easy.
sheetstudio creative hub – Stylish designs and high-quality presentation make the browsing experience enjoyable.
Wavlix Finds – Really happy with the variety and checkout process was smooth.
JollyVendor Products – Fairly priced items and smooth transaction process.
sheetstudio.shop – Sleek, modern designs with a polished look that really catches the eye.
большая кухня на заказ [url=https://kuhni-spb-42.ru/]kuhni-spb-42.ru[/url] .
мостбет вход не работает [url=http://mostbet52718.help]http://mostbet52718.help[/url]
official cometcrate site – Unique concept with items that feel intentionally chosen and enjoyable.
CometCrate shop online – Fun assortment, products are clearly curated and appealing.
MeridianBasket shop online – Diverse product range, prices look reasonable and competitive.
MeridianBasket shop online – Diverse product range, prices look reasonable and competitive.
Quick Shop Dapper – Shopping went smoothly, and the experience was enjoyable overall.
official ryzen realm site – Clean design and solid tech energy made the visit worthwhile today.
adster – Pages loaded fast, images appeared sharp, and formatting stayed consistent.
Dapper Marketplace – Very smooth and enjoyable, navigating products was simple.
the ryzen realm website – Clean presentation and engaging tech theme made browsing easy.
offerorbit – Overall, professional vibe here; trustworthy, polished, and pleasantly minimal throughout.
Xerva Treasures – Layout is user-friendly, and finding products today was quick and easy.
reacho – Mobile version looks perfect; no glitches, fast scrolling, crisp text.
Xerva Essentials – Browsing items is hassle-free with the clean and organized layout.
внедрение ерп системы 1с [url=1s-erp-vnedrenie.ru]1s-erp-vnedrenie.ru[/url] .
Yield Mart – A practical and value-driven store offering rewarding choices every day.
shieldshopper.shop – Shopping feels safe, and the site layout inspires confidence immediately.
Yield Mart – A practical and value-driven store offering rewarding choices every day.
1win ilova yuklab olish [url=https://www.1win5767.help]https://www.1win5767.help[/url]
visit shield shopper – Feels reliable with a clean interface that reassures visitors.
Visit the Whim Vendor Shop – Very reliable platform, I’ll definitely come back.
rankora – Pages loaded fast, images appeared sharp, and formatting stayed consistent.
WhimVendor Storefront – Dependable and efficient, I’ll come back soon for more.
заказ кухни спб [url=https://kuhni-spb-44.ru/]заказ кухни спб[/url] .
кухни на заказ питер [url=https://kuhni-spb-43.ru/]kuhni-spb-43.ru[/url] .
NimbusCart shopping hub – The site performed great and finalizing my order was effortless.
кухни на заказ производство спб [url=https://kuhni-spb-42.ru/]kuhni-spb-42.ru[/url] .
JewelAisle shop online – The website feels organized and the product range is very satisfying.
retirar 1win [url=1win5771.help]retirar 1win[/url]
Grenvia storefront – Navigation was smooth and purchasing items was fast and easy today.
JewelAisle catalog – Smooth interface and variety of items make browsing enjoyable today.
scaleify – Found practical insights today; sharing this article with colleagues later.
Grenvia online – Navigation felt intuitive and checkout was fast, making shopping enjoyable.
check these products – Variety is impressive, and prices feel competitive right now.
official briskparcel site – Checkout is secure and efficient, browsing feels straightforward.
Umbramart online store – Navigation was easy and site performance was impressively fast.
meridianbasket shopping corner – Nice assortment of items, prices are fair and look competitive.
Umbramart collections – Pages responded quickly and browsing was completely smooth.
this shopping hub – Simple interface with quick checkout, very user-friendly experience.
Good morning!
Access secret mysterious libraries full of interesting and valuable data streams and browse unlimited resources freely see on the website for library cards
Full information on the link – https://202fliks.site
All the best and development in business!
Shop at TerVox – Customer support responded swiftly and offered clear solutions.
1win login [url=www.1win5771.help]www.1win5771.help[/url]
online savings spot – Discovering new deals here keeps my spending in check.
Go to TerVox – Help came quickly and made the process smooth.
shopnshine fashion corner – Bright and stylish selection that’s easy on the wallet.
safesavings coupon hub – Affordable finds listed here help keep my budget balanced every week.
shopnshine official store – Lively concept and appealing items that feel affordable for all.
MaplePick Store – I really like the wide range of items and the pricing feels reasonable.
trusted FlintCove shop – Found some excellent items with prices that feel fair and competitive.
купить кухню в спб от производителя [url=https://kuhni-spb-44.ru/]купить кухню в спб от производителя[/url] .
MaplePick storefront – I like how many options there are and the pricing feels fair.
FlintCove picks – Great selection with prices that seem just right today.
Wenvix products – The checkout felt easy, smooth, and fast without complications.
заказать кухню спб [url=https://kuhni-spb-43.ru/]заказать кухню спб[/url] .
quirkcove.shop – Unique vibe throughout the store, really stands apart visually.
Wenvix specials – Buying was quick, straightforward, and completely hassle-free today.
shop at Plumparcel – Clean interface with clearly defined product categories made browsing simple.
quirkcove.shop – Unique vibe throughout the store, really stands apart visually.
Plumparcel shopping hub – I liked how simple the site layout is and how well products are categorized.
кухни спб [url=https://kuhni-spb-42.ru/]кухни спб[/url] .
LagunaVend shop online – Visually appealing setup, products arranged in a modern, organized style.
signalstation knowledge hub – Actionable strategies and clear insights for anyone in marketing.
1win iniciar sesión en app 1win [url=https://1win5771.help]1win iniciar sesión en app 1win[/url]
SignalStation shop online – Straightforward marketing guidance that can be applied immediately.
official lagunavend site – Contemporary design and clean presentation make browsing enjoyable.
Link exchange is nothing else but it is only placing the other person’s website link on your page at suitable place and other person will also do similar for you.
seamstory creative boutique – Such an artfully displayed range, it was a pleasure to look around.
seamstory.shop – A delightful assortment presented with style, I loved browsing through the pieces.
ParcelMint Store – I located everything I wanted quickly and without any issues.
official ParcelMint site – The products I needed were easy to find and the process was smooth.
GlenVox online – Fast and secure checkout paired with a user-friendly interface.
shop at Zestycrate – Discovered some great finds and the payment process was reliable.
RavenAisle collections – Found a few interesting items that I haven’t noticed elsewhere.
the glenvox website – Easy-to-follow shopping process with secure checkout options.
Zestycrate deals – The products looked amazing and checkout felt completely secure.
trusted RavenAisle shop – Discovered some rare finds that seem exclusive to this site.
sitefixstation guide center – Clear, actionable steps that make resolving problems stress-free.
лучшие свадебные платья свадебные платья купить каталог
SiteFixStation online – Straightforward advice with clear instructions for resolving common problems.
NightCrate marketplace – Exciting assortment, I’ll revisit soon for more discoveries.
nightcrate.shop – Fun variety of products, looks like a great place to browse again.
check these insights – Practical recommendations that can genuinely refine promotional efforts.
visit search signal – Clear and concise marketing pointers that are easy to follow.
QuillMarket products – The interface is smooth and finding items is simple.
LatchBasket Store – Nice selection, definitely worth bookmarking for future shopping.
Jaspercart offers – Prices seemed reasonable and completing my order was quick.
latchbasket shopping corner – Nice assortment available, keeping this site saved for future browsing.
QuillMarket collections – The organization is excellent and finding what I need is fast.
Jaspercart online – Reasonable costs and a simple order process made everything hassle-free.
HollowCart catalog – Even on an older mobile, the site feels easy to use and navigate.
sitemapstudio resources – Simple design and practical tools make creating sitemaps a breeze.
HollowCart online – Even on an older phone, the site felt fast and easy to use.
the sitemapstudio website – Beginner-friendly design and clear layout make sitemap generation easy.
мелбет app android киргизия [url=http://melbet41263.help]http://melbet41263.help[/url]
zephyrmart product hub – Easy navigation, products are simple to discover and access.
official zephyrmart site – Smooth experience navigating through products, pages load quickly.
SeaSpray online store – Coastal inspiration shines through, and the lineup seems nicely selected.
Dollyn specials – Customer service replied fast and handled my concern smoothly.
stocklily shopping corner – Clear product visuals and helpful descriptive text make browsing simple.
Harlune savings – I got a fast response and the guidance was clear and supportive.
Dollyn catalog – Quick and helpful response from support made everything hassle-free.
visit sea spray – Beachy charm throughout, with products that appear carefully chosen.
StockLily marketplace – Well-displayed items with detailed descriptions that are very helpful.
SocialSignal shop – Clever branding strategies with engaging material for marketers.
Harlune collections – The help desk was responsive and resolved my concern quickly.
SocialSignal online – Engaging content and innovative branding strategies make the site interesting.
BasketBerry online store – The customer service team was prompt and polite in their replies last night.
official BasketBerry site – I received a fast and polite response from customer service last night.
мелбет киргизия вход [url=https://melbet41263.help/]мелбет киргизия вход[/url]
Gates of Olympus Dice introduces another unique take on the popular Gates of Olympus theme, this time integrating the dice-rolling element into the game dynamics. This version adds an extra layer of strategy and chance, which will appeal to both dice game enthusiasts and slot fans. Key features of this variation include: Another valuable approach is to test the mechanics by choosing to play Gates-of-Olympus free before wagering real money. The demo mode allows players to study how tumbling reels work, observe the frequency of multiplier symbols, and evaluate how often scatter combinations appear. Through this, strategies can be refined without financial risk. Once confident, players can apply these insights in real-money play, adjusting their bets to align with their goals. Timing bet increases around longer sessions often gives the best opportunity to benefit from the accumulation of multipliers in the free spins feature.
https://iqraitpark.com/2026/02/26/review-twin-spin-what-the-online-slot-offer-delivers/
Previous Hello world! You can access the Gates of Olympus slot demo on different platforms, such as Slotozilla or online casinos featuring Pragmatic Play titles and the official Pragmatic Play website. Some gaming review sites also offer free demo versions of slots, providing a risk-free opportunity to try the game without registration. Ensure to select reputable sites and casinos for a safe demo experience. The mobile experience is flawless. I play Gates of Olympus during my commute every morning and never have any lag or loading issues. Even placed some tennis bets while waiting in line at the coffee shop. Fans of popular platforms like Skillz and Papaya will discover that LiveMe Coin Games offers even more thrilling tournaments and rewarding gameplay, all powered by the vibrant LiveMe community.
Elvorax online – Fresh design and intuitive navigation make the experience smooth.
elvorax boutique – User-friendly setup and fresh presentation make it easy to find products.
discover Lemon Lane – The selection stands out and everything is sorted nicely.
visit velvetpick – Sharp images and polished design make browsing smooth and enjoyable.
Lemon Lane deals – Great mix of products and the browsing experience feels structured.
securestack protection center – Well-organized pages that clearly prioritize user security over everything else.
velvetpick gallery hub – Clean, stylish presentation with clear product visuals makes the site appealing.
the secure stack website – Safety-focused features are highlighted well in a polished layout.
visit DahliaNest today – Information on the products is detailed, straightforward, and genuinely useful.
pinup apk [url=http://pinup09715.help/]http://pinup09715.help/[/url]
вызвать нарколога на дом ростов-на-дону [url=https://narkolog-na-dom-v-rostove.ru/]вызвать нарколога на дом ростов-на-дону[/url] .
visit DahliaNest today – Information on the products is detailed, straightforward, and genuinely useful.
I don’t think the title of your article matches the content lol. Just kidding, mainly because I had some doubts after reading the article. https://www.binance.com/register?ref=IHJUI7TF
1win оптимабанк пополнение [url=https://1win19643.help/]https://1win19643.help/[/url]
Нужны столбики? столбик ограждения москва столбики для складов, парковок и общественных пространств. Прочные материалы, устойчивое основание и удобство перемещения обеспечивают безопасность и порядок.
психиатр нарколог на дом в ростове [url=https://narkolog-na-dom-v-rostove-1.ru/]narkolog-na-dom-v-rostove-1.ru[/url] .
Looking for a yacht? motor yacht rental in Cyprus for unforgettable sea adventures. Charter luxury yachts, catamarans, or motorboats with or without crew. Explore crystal-clear waters, secluded bays, and iconic coastal locations in first-class comfort onboard.
мелбет техподдержка киргизия [url=https://melbet41263.help]https://melbet41263.help[/url]
1win как пополнить счет [url=https://1win19643.help/]1win как пополнить счет[/url]
Gildcrate marketplace – Shipping didn’t take long at all and the products were excellent.
Gildcrate specials – The package arrived fast and the quality honestly blew me away.
наркологическая помощь на дому ростов [url=https://narkolog-na-dom-v-rostove.ru/]narkolog-na-dom-v-rostove.ru[/url] .
WovenCart deals – My items arrived swiftly and in excellent packaging today.
their optimization portal – Beginner-focused SEO lessons are presented in a clear and engaging way.
WovenCart shopping hub – Shipping was quick and everything arrived in perfect order.
loftlark.shop – Smooth browsing overall, interface is intuitive and easy to navigate.
this SEO hub – Great beginner-friendly content with practical strategies for improving rankings.
LoftLark Store – Clean layout, user-friendly design makes exploring products simple.
вызвать нарколога на дом ростов-на-дону [url=https://narkolog-na-dom-v-rostove-1.ru/]вызвать нарколога на дом ростов-на-дону[/url] .
melbet вывод элкарт кыргызстан [url=www.melbet41263.help]www.melbet41263.help[/url]
мелбет бк скачать [url=melbet41263.help]melbet41263.help[/url]
pin up apuestas [url=https://pinup37056.help/]https://pinup37056.help/[/url]
нарколог на дом ночью ростов-на-дону [url=https://narkolog-na-dom-v-rostove.ru/]narkolog-na-dom-v-rostove.ru[/url] .
KettleCart online store – The menu is straightforward and the product summaries are well written.
official KettleCart site – Browsing feels straightforward and the item descriptions are very informative.
YoungCrate catalog – Items are priced fairly and compare well to similar online stores.
YoungCrate picks – Pricing seems fair and comparable to other stores I’ve checked online.
анонимный нарколог на дом в ростове [url=https://narkolog-na-dom-v-rostove-2.ru/]анонимный нарколог на дом в ростове[/url] .
browse Scarlet Crate items – Everything is clear, and the overall feel of the site is very pleasant.
Scarlet Crate Store – Everything is well-organized and easy to find on this site.
this shopping hub – Products are well-organized and the branding feels appealing and professional.
xarnova product hub – Fresh presentation and thoughtful product selection make browsing easy and reliable.
выезд нарколога на дом ростов-на-дону [url=https://narkolog-na-dom-v-rostove-1.ru/]narkolog-na-dom-v-rostove-1.ru[/url] .
melbet login [url=http://melbet41263.help/]http://melbet41263.help/[/url]
психиатр нарколог на дом в ростове [url=https://narkolog-na-dom-v-rostove.ru/]narkolog-na-dom-v-rostove.ru[/url] .
Werniq collections – The checkout was simple and the available payment types made it effortless.
Werniq collections – The checkout was simple and the available payment types made it effortless.
official Dorlix site – I like the clean design and the overall look is very professional.
Dorlix essentials – The website looks neat, contemporary, and professional.
Quartz Vendor Marketplace – Fast-loading pages with a clear structure make shopping pleasant.
check Quartz Vendor – Clean design and clear sections make shopping effortless.
врач нарколог на дом в ростове [url=https://narkolog-na-dom-v-rostove-2.ru/]врач нарколог на дом в ростове[/url] .
нарколог на дом в ростове анонимно [url=https://narkolog-na-dom-v-rostove-1.ru/]нарколог на дом в ростове анонимно[/url] .
1win ставки на теннис [url=http://1win19643.help]http://1win19643.help[/url]
выезд нарколога на дом ростов-на-дону [url=https://narkolog-na-dom-v-rostove.ru/]narkolog-na-dom-v-rostove.ru[/url] .
discover Indigo Aisle – The site was engaging and I’ll happily return in the near future.
shop Indigo Aisle – Exploring the products was fun and I’ll be visiting again for sure.
JetStreamMart storefront – Browsing is straightforward, fun, and completely stress-free.
pin-up casino Chile [url=http://pinup37056.help]http://pinup37056.help[/url]
official JetStreamMart site – Browsing the products is smooth, enjoyable, and relaxing.
oakvendor.shop – Found exactly what I needed quickly, very smooth browsing experience.
find Oak Vendor products – Pages load quickly and categories are easy to follow.
нарколог на дом в ростове анонимно [url=https://narkolog-na-dom-v-rostove-2.ru/]нарколог на дом в ростове анонимно[/url] .
crear cuenta en pin-up [url=https://www.pinup37056.help]https://www.pinup37056.help[/url]
pin-up скачать [url=http://pinup37056.help]http://pinup37056.help[/url]
1вин Ош [url=www.1win19643.help]www.1win19643.help[/url]
круглосуточный нарколог на дом в ростове [url=https://narkolog-na-dom-v-rostove.ru/]narkolog-na-dom-v-rostove.ru[/url] .
Rackora Styles – Plenty of options to pick from and the site navigation is easy.
нарколог на дом в ростове-на-дону [url=https://narkolog-na-dom-v-rostove-1.ru/]нарколог на дом в ростове-на-дону[/url] .
Rackora Shopping – The selection is broad and the buying process feels effortless.
Urbanparcel Home – Smooth browsing and the items feel genuinely appealing.
1вин регистрация [url=http://1win19643.help/]1вин регистрация[/url]
Zen Hub – Enjoying a very fluid and hassle-free shopping experience here recently.
Brisk Harbor Essentials – Orders arrived promptly, and the whole experience felt easy and stress-free.
Urbanparcel Store – Navigation is seamless and the products seem genuinely appealing.
Zen Hub Online – Browsing items here is smooth, making the overall experience very pleasant.
pinup descargar [url=http://pinup37056.help]http://pinup37056.help[/url]
Discover Brisk Harbor – Shipping was reliable, and the whole experience was easy and seamless.
willowvend.shop – The site layout is tidy and navigating through it feels effortless.
Willowvend Online Shop – Layout is crisp and navigating through products feels effortless.
врач нарколог на дом в ростове [url=https://narkolog-na-dom-v-rostove-3.ru/]врач нарколог на дом в ростове[/url] .
нарколог на дом в ростове [url=https://narkolog-na-dom-v-rostove-4.ru/]нарколог на дом в ростове[/url] .
вывод из запоя в ростове цена [url=https://vyvod-iz-zapoya-v-rostove-1.ru/]vyvod-iz-zapoya-v-rostove-1.ru[/url] .
срочный вывод из запоя на дому в ростове [url=https://vyvod-iz-zapoya-v-rostove-3.ru/]vyvod-iz-zapoya-v-rostove-3.ru[/url] .
explore Silver Vendor – Checkout is simple and navigation during payment is effortless.
вывод из запоя на дому в ростове [url=https://vyvod-iz-zapoya-v-rostove-4.ru/]вывод из запоя на дому в ростове[/url] .
вывод из запоя в ростове на дону [url=https://vyvod-iz-zapoya-v-rostove-5.ru/]вывод из запоя в ростове на дону[/url] .
Silver Vendor Shop – The process to buy products is easy and everything worked perfectly.
монтаж пожаротушения [url=https://montazh-gazovogo-pozharotusheniya.ru/]montazh-gazovogo-pozharotusheniya.ru[/url] .
наркологическая клиника в ростове вывод из запоя [url=https://vyvod-iz-zapoya-v-rostove-2.ru/]vyvod-iz-zapoya-v-rostove-2.ru[/url] .
For those seeking an exceptional online gaming experience, [maxispin.us.com](https://maxispin.us.com/) stands out as a premier destination. At Maxispin Casino, players can enjoy a vast array of pokies, table games, and other thrilling options, all accessible in both demo and real-money modes. The casino offers attractive bonuses, including free spins and a generous welcome offer, along with cashback promotions and engaging tournaments. To ensure a seamless experience, Maxispin provides various payment methods, efficient withdrawal processes, and reliable customer support through live chat. Security is a top priority, with robust safety measures and a strong focus on responsible gambling tools. Players can easily navigate the site, with detailed guides on account creation, verification, and payment methods. Whether you’re interested in high RTP slots, hold and win pokies, or the latest slot releases, Maxispin Casino delivers a user-friendly and secure platform. Explore their terms and conditions, read reviews, and discover why many consider Maxispin a legitimate and trustworthy choice in Australia.
MaxiSpin.us.com is an innovative tool tailored for content creators and marketing professionals.
**Features of MaxiSpin.us.com**
A notable feature of MaxiSpin.us.com is its capability to produce content in various languages.
**Benefits of Using MaxiSpin.us.com**
This conservation of time and resources allows businesses to concentrate on other vital areas of their operations.
TinyHarbor Official Page – Deals look promising, definitely saving this site.
Acornmuse Outlet – Browsed through the products, everything looks premium and well made.
TinyHarbor Deals – Some great discounts, I’m adding this site to my bookmarks.
pin-up mines siqnalı varmı [url=www.pinup09715.help]www.pinup09715.help[/url]
Acornmuse Shopping – Enjoyed navigating the products, all seem top quality.
нарколог на дом ночью ростов-на-дону [url=https://narkolog-na-dom-v-rostove-2.ru/]narkolog-na-dom-v-rostove-2.ru[/url] .
trendnook.shop – Browsing is effortless and all the products are presented clearly.
Discover Fioriq Deals – Saw eye-catching items and completing checkout was incredibly easy.
Shop at TrendNook – Smooth browsing and the product layout is very appealing.
fioriq.shop – Came across several distinctive products and the checkout was quick and simple.
Listaro Specials – Items are easy to find and navigation is smooth.
вызвать нарколога на дом ростов-на-дону [url=https://narkolog-na-dom-v-rostove-1.ru/]вызвать нарколога на дом ростов-на-дону[/url] .
Night Hub – Nice selection and reasonable prices make shopping pleasant.
Xerva Picks – The store is well organized, making product browsing a breeze.
Listaro Specials – Items are easy to find and navigation is smooth.
Everyday Night – Solid selection and pricing feels balanced for shoppers.
Torviq Hub – Came across a few unique products while exploring earlier.
Xerva Treasures – Layout is user-friendly, and finding products today was quick and easy.
pin-up app oficial ios Chile [url=https://pinup37056.help/]https://pinup37056.help/[/url]
Official Torviq Site – Came across a variety of interesting items while browsing.
Discover Isveta – Came across this shop and really appreciated the variety available.
Official Evoraa Site – Smooth overall performance and product info is simple to understand.
Isveta Home – Discovered this store and the product selection is quite enjoyable.
Evoraa Website – Quick loading site with clearly written product details.
Click for LiltStore – Browsing is effortless and product pages work perfectly.
explore Wild Crate – Clean design and pages load fast, making navigation easy on the go.
Official LiltStore – Smooth product navigation and an overall easy experience.
Wild Crate Marketplace – Sleek modern look and smooth performance on mobile devices.
вывод из запоя в ростове на дону на дому [url=https://vyvod-iz-zapoya-v-rostove-3.ru/]вывод из запоя в ростове на дону на дому[/url] .
нарколог на дом в ростове на дону [url=https://narkolog-na-dom-v-rostove-4.ru/]нарколог на дом в ростове на дону[/url] .
Inqora Deals – Navigation is intuitive and finding items is easy.
нарколог на дом в ростове на дону [url=https://narkolog-na-dom-v-rostove-3.ru/]нарколог на дом в ростове на дону[/url] .
Slate Vendor shopping hub – Smooth and intuitive browsing makes the experience satisfying.
Inqora Products – User-friendly design with fast-loading pages.
нарколог вывод из запоя на дому в ростове [url=https://vyvod-iz-zapoya-v-rostove-4.ru/]vyvod-iz-zapoya-v-rostove-4.ru[/url] .
вывод из запоя в ростове на дону [url=https://vyvod-iz-zapoya-v-rostove-1.ru/]вывод из запоя в ростове на дону[/url] .
visit Slate Vendor today – Overall, moving through the site has been very pleasant and easy.
нарколог в ростове цена вывод из запоя [url=https://vyvod-iz-zapoya-v-rostove-5.ru/]нарколог в ростове цена вывод из запоя[/url] .
расчет газового пожаротушения [url=https://montazh-gazovogo-pozharotusheniya.ru/]montazh-gazovogo-pozharotusheniya.ru[/url] .
Upcarton Products – I’m impressed by how fast and organized it feels.
Yovique Shopping – Pages load fast and the product selection is very appealing.
pin-up manatla uduş çıxarma [url=www.pinup09715.help]www.pinup09715.help[/url]
Upcarton Specials – It’s easy to click around with no waiting time.
Yovique Collection – Quick page loads and a wide variety of items to check out.
вывод из запоя в клинике в ростове [url=https://vyvod-iz-zapoya-v-rostove-2.ru/]вывод из запоя в клинике в ростове[/url] .
Artisanza Marketplace – Quality selections showcased and pages render rapidly on any device.
круглосуточный нарколог на дом в ростове [url=https://narkolog-na-dom-v-rostove-2.ru/]круглосуточный нарколог на дом в ростове[/url] .
Artisanza Finds – Interesting products to explore and everything works quickly on mobile.
RoseOutlet Deals – Found some unique products and completing the order was simple.
Shop Zintera – Fast loading site with a clean and user-friendly design today.
RoseOutlet Collection – Products were intriguing and buying them was simple.
Zintera Picks – Quick page loads and a modern, tidy layout make browsing easy.
Yolkmarket Products – Very easy checkout with no errors or delays.
Everyday Xerva – The interface is neat and makes exploring products quick and effortless.
Yolkmarket Boutique – Checkout felt easy and everything processed without any issues.
Quick Shop Xerva – Love the design, navigating through products was super easy today.
VioletVend Shop Online – Browsing feels easy and products look impressive.
browse Stone Vendor items – Support staff responded quickly and made everything simple to understand.
VioletVend Website – Navigation is smooth and the products look great today.
Parcelbay Collection – Well-organized sections and checkout was smooth and fast.
Official Tillora – Items displayed clearly and checkout was quick and easy.
Stone Vendor Collections – Support team handled my questions smoothly and with clear explanations.
Discover Tillora – Found products quickly and completing the order was simple.
Parcelbay Online Shop – Site organization is great and ordering was quick and easy.
OrderWharf Store – Clear descriptions helped me pick exactly what I needed.
check out Grain Vendor – The items look great and the pricing feels right.
OrderWharf Official Page – Descriptions are clear and help me pick the right items.
вывод из запоя с выездом в ростове [url=https://vyvod-iz-zapoya-v-rostove-3.ru/]vyvod-iz-zapoya-v-rostove-3.ru[/url] .
Grain Vendor collections – Costs are good and the items appear durable and high-quality.
ulveta.shop – The product info is easy to read and moving around the site is simple.
нарколог на дом в ростове [url=https://narkolog-na-dom-v-rostove-4.ru/]нарколог на дом в ростове[/url] .
Easy Carta Webstore – Items are clearly displayed and the order was placed smoothly.
Ulveta Specials – Everything is neatly presented and moving around the site is easy.
вызвать нарколога на дом ростов-на-дону [url=https://narkolog-na-dom-v-rostove-3.ru/]вызвать нарколога на дом ростов-на-дону[/url] .
клиника в ростове вывод из запоя [url=https://vyvod-iz-zapoya-v-rostove-4.ru/]клиника в ростове вывод из запоя[/url] .
easycarta.shop – Nice selection and checkout process was simple and fast.
QuartzCart Deals – I didn’t waste any time getting to the right product.
QuartzCart Shop Online – I found the specific item I wanted faster than expected.
вывод из запоя в клинике в ростове [url=https://vyvod-iz-zapoya-v-rostove-1.ru/]vyvod-iz-zapoya-v-rostove-1.ru[/url] .
вывод из запоя в стационаре в ростове-на-дону [url=https://vyvod-iz-zapoya-v-rostove-5.ru/]вывод из запоя в стационаре в ростове-на-дону[/url] .
монтаж газового пожаротушения для музея [url=https://montazh-gazovogo-pozharotusheniya.ru/]montazh-gazovogo-pozharotusheniya.ru[/url] .
BasketMint Collection – Fast page loads and navigating categories is a breeze.
Explore Ivory Aisle – Assistance came swiftly and all my questions were thoroughly answered.
Discover Ravlora – Customer service was responsive and solved my problem quickly.
BasketMint Deals – Pages load quickly and switching between categories is seamless.
ivoryaisle.shop – The support team got back to me fast and handled every question with clarity.
Dervina Styles – Interesting items to browse and the website loads smoothly.
Ravlora Choice – Quick assistance from support made resolving issues simple.
нарколог на дом в ростове [url=https://narkolog-na-dom-v-rostove-2.ru/]нарколог на дом в ростове[/url] .
Discover Dervina – Nice selection of items and pages load smoothly and quickly.
Browse Xerva – Store design is intuitive, so navigating items today was smooth.
Smart Picks Xerva – Browsing products today was simple thanks to the neat store layout.
explore Plum Vendor X – The site feels clean and everything is easy to navigate.
Official Harniq Site – Managed to find the right product and ordering was swift.
вывод из запоя на дому в ростове на дону [url=https://vyvod-iz-zapoya-v-rostove-2.ru/]вывод из запоя на дому в ростове на дону[/url] .
visit Plum Vendor X – Clean design and well-organized sections make browsing effortless.
Harniq Collection – Found exactly the item I wanted and checkout felt smooth.
BloomTill Website – Fast-loading pages and a well-structured site.
BloomTill Webstore – Navigation is quick and layout is very clear.
pin-up plinko qaydaları pin-up [url=pinup09715.help]pin-up plinko qaydaları pin-up[/url]
Marketlume Specials – Nice variety of items and all pages load promptly.
Visit Frentiq – Items appear premium and placing an order went without any issues.
Frentiq Direct – Everything seems durable and the order process worked perfectly.
Explore Marketlume – Many options to browse and the site performance is seamless.
shop Summit Vendor online – Definitely returning soon to explore more products.
browse Summit Vendor items – Looking forward to placing another order shortly.
вывод из запоя с выездом в ростове [url=https://vyvod-iz-zapoya-v-rostove-3.ru/]vyvod-iz-zapoya-v-rostove-3.ru[/url] .
Wistro Website – Details are presented clearly and the buying steps are uncomplicated.
срочный вызов нарколога на дом ростов [url=https://narkolog-na-dom-v-rostove-4.ru/]срочный вызов нарколога на дом ростов[/url] .
нарколог на дом цена в ростове [url=https://narkolog-na-dom-v-rostove-3.ru/]нарколог на дом цена в ростове[/url] .
Shop at Wistro – Clear information and a smooth checkout experience overall.
клиника в ростове вывод из запоя [url=https://vyvod-iz-zapoya-v-rostove-4.ru/]клиника в ростове вывод из запоя[/url] .
quvera.shop – Layout feels clean, user-friendly, and navigation works really well.
ZenCartel Marketplace – Organized design and sleek pages make shopping a pleasant experience.
Click Quvera – Very smooth experience and product categories are clear.
Browse ZenCartel – Modern site design and clear navigation make shopping enjoyable.
Discover Worvix – Payments were simple and checkout felt effortless.
Thistletrade Shopping – Categories are easy to follow and exploring items is smooth.
Quickaisle Boutique – Offers are posted often and the shopping experience is straightforward.
Shop Worvix – Very straightforward checkout process and trustworthy payment methods.
Thistletrade Boutique – Sections are neatly sorted and browsing through items is easy.
Quickaisle Outlet – The site posts bargains regularly and browsing feels fast and convenient.
Shop Xerva – Nice layout, and exploring items today was very easy.
stackhq – Pages loaded fast, images appeared sharp, and formatting stayed consistent.
bytehq – Color palette felt calming, nothing distracting, just focused, thoughtful design.
монтаж газового пожаротушения для банка [url=https://montazh-gazovogo-pozharotusheniya.ru/]montazh-gazovogo-pozharotusheniya.ru[/url] .
вывод из запоя в ростове-на-дону на дому [url=https://vyvod-iz-zapoya-v-rostove-5.ru/]вывод из запоя в ростове-на-дону на дому[/url] .
вывод из запоя на дому в ростове [url=https://vyvod-iz-zapoya-v-rostove-1.ru/]вывод из запоя на дому в ростове[/url] .
Xerva Choice – Layout is very user-friendly, and checking out products today was simple.
cloudhq – Navigation felt smooth, found everything quickly without any confusing steps.
visit Ruby Aisle shop – The interface is tidy and locating products is very straightforward.
Ebon Lane Corner Store – Everything feels responsive and easy to navigate.
Click for KindleMart – Decent selection available and browsing is lightning quick.
Ruby Aisle Store – Navigation is intuitive and I can quickly locate what I need.
Explore Quistly – Lots to choose from and the site is very straightforward to use.
KindleMart Shop Online – Wide assortment of goods and speedy browsing experience.
Ebon Lane Finds – The website is easy to use and pages load without delay.
Walnutware Webshop – Helpful product info and easy to browse overall.
Quistly Direct – Products look great, and navigating the site is effortless.
Walnutware Webshop – Helpful product info and easy to browse overall.
devopsly – Bookmarked this immediately, planning to revisit for updates and inspiration.
Mistcrate Specials – Found a few standout items that are worth checking out.
Visit Mistcrate – Found a variety of cool products worth exploring.
вывод из запоя в стационаре в ростове [url=https://vyvod-iz-zapoya-v-rostove-2.ru/]вывод из запоя в стационаре в ростове[/url] .
PureValue Home – Engaging interface that promotes learning and innovation.
вывод из запоя с выездом в ростове [url=https://vyvod-iz-zapoya-v-rostove-3.ru/]vyvod-iz-zapoya-v-rostove-3.ru[/url] .
PureValue Hub – Thought-provoking and interactive space for fresh ideas.
Varnelo Deals – Clear details on each product and navigating between pages was effortless.
Varnelo Shop Online – Detailed product info and very simple navigation overall.
Smart Picks Irnora – Really unique products available that you won’t easily find elsewhere.
Irvanta Boutique – Fairly priced items and the quality seems excellent.
Discover Irnora – Hard-to-find products make shopping here feel special and different.
нарколог на дом в ростове на дону [url=https://narkolog-na-dom-v-rostove-4.ru/]нарколог на дом в ростове на дону[/url] .
Irvanta Home – Pricing is fair and the product quality looks solid.
Everyday Xerva – The interface is neat and makes exploring products quick and effortless.
вывод из запоя с выездом в ростове [url=https://vyvod-iz-zapoya-v-rostove-4.ru/]vyvod-iz-zapoya-v-rostove-4.ru[/url] .
Knickbay Marketplace – Informative content accompanies each product, making choices straightforward.
вызов нарколога на дом в ростове [url=https://narkolog-na-dom-v-rostove-3.ru/]вызов нарколога на дом в ростове[/url] .
kubeops – Overall, professional vibe here; trustworthy, polished, and pleasantly minimal throughout.
Browse Xerva – Store design is intuitive, so navigating items today was smooth.
GiftMora Deals – Smooth experience and checkout worked perfectly.
Knickbay Finds – Each item comes with useful background and clear specifications.
GiftMora Marketplace – User-friendly layout, easy to find everything I needed.
Spring Crate Marketplace – I’ll revisit soon because shopping here is simple and quick.
монтаж газового пожаротушения для музея [url=https://montazh-gazovogo-pozharotusheniya.ru/]montazh-gazovogo-pozharotusheniya.ru[/url] .
Explore Jarvico – The website is quick and navigation feels very intuitive.
вывод из запоя цена в ростове [url=https://vyvod-iz-zapoya-v-rostove-5.ru/]вывод из запоя цена в ростове[/url] .
Spring Crate Store – Really helpful and smooth experience makes me want to come back.
Jarvico Direct – Quick-loading pages and easy, effortless browsing throughout.
AisleGlow Online – Navigating through pages is easy and everything is grouped nicely.
вывод из запоя на дому в ростове на дону [url=https://vyvod-iz-zapoya-v-rostove-1.ru/]вывод из запоя на дому в ростове на дону[/url] .
然而吵鬧的快歌正是這個平淡無味的早上所需要的,像企圖報復什麼:耳機塞入耳道在空寂的走廊調高音量,一向堅持次序今天卻按下隨機播放。 機器學習技術旨在使用各範例當中的特徵或屬性,達到校準標籤或分類的目標;以貓狗圖片的例子來看,透過哪些關鍵特徵可以區分貓狗圖片的不同呢?提供愈多貓狗的範例圖片,機器學習演算法就可以設法建構出其基本辨識元素(也就是特徵),能夠準確預測某張圖片是貓或是狗的模型。 結合神話與行動娛樂的行動應用介面 後疫情時期必備的行銷新戰略 從台灣實際案例分析盲點與致勝點,易讀、易懂、易學! 你是不是也有這樣的困擾?這一本《數據為王》解決你的煩惱。 做決定時,其實很心虛? →找出關鍵洞察數據,證明策略佈局符合…more
https://dotkilid.com/3833
1block casino 1Block Casino: Full Platform Overview 1Block Casino is a modern gaming platform that offers a wide range of gambling entertainment for players worldwide. From classic slots to unique games like Plinko, the service provides everything needed for gambling enthusiasts. Let’s take a closer look at the main features of the platform, game categories, and key advantages. Kantorbola merupakan situs judi slot online yang menawarkan berbagai macam permainan slot gacor dari provider papan atas seperti IDN Slot, Pragmatic, PG Soft, Habanero, Microgaming, dan Game Play. Dengan minimal deposit 10.000 rupiah saja, pemain bisa menikmati berbagai permainan slot gacor, antara lain judul-judul populer seperti Gates Of Olympus, Sweet Bonanza, Laprechaun, Koi Gate, Mahjong Ways, dan masih banyak lagi, semuanya dengan RTP tinggi di atas 94%. Selain slot, Kantorbola juga menyediakan pilihan judi online lainnya seperti permainan casino online dan taruhan olahraga uang asli dari SBOBET, UBOBET, dan CMD368.
1win сколько идет вывод [url=www.1win19643.help]www.1win19643.help[/url]
AisleGlow Collection – Easy-to-use navigation and categories are sorted clearly.
Cindora Shopping – Simple menu structure and easy-to-find categories.
Explore Cindora – Navigation feels natural and items are grouped clearly.
Kiostra Marketplace – Navigation is fast and browsing feels effortless.
Borvique Products – Sleek, up-to-date design and finding items is simple.
Mavdrix Webstore – Everything responds fast, simple to use, and checkout is straightforward.
Kiostra Finds – Browsing feels effortless with fast-loading pages.
Borvique Home – Sleek layout and moving between pages is effortless.
Нужны столбики? столбики ограждения купить столбики для складов, парковок и общественных пространств. Прочные материалы, устойчивое основание и удобство перемещения обеспечивают безопасность и порядок.
Mavdrix Specials – Very easy to navigate, fast response, and smooth buying experience.
Fintera Picks – Browsing through well-organized categories feels smooth and natural.
свадебное платье рыбка каталог платье салон свадебный
Zinniazone Home – Had fun exploring the website and checking out new items.
вывод из запоя с выездом в ростове [url=https://vyvod-iz-zapoya-v-rostove-3.ru/]vyvod-iz-zapoya-v-rostove-3.ru[/url] .
Fintera Curated – Navigation is straightforward, and categories are simple to explore.
Xerva Finds – Easy-to-navigate store layout made finding products today very simple.
Zinniazone Store – Had fun exploring the website and coming across interesting items.
Browse Xerva – Store design is intuitive, so navigating items today was smooth.
купить провод 2 2 купить проводку для дома цена в минске
Looking for a yacht? affordable yacht charter Cyprus for unforgettable sea adventures. Charter luxury yachts, catamarans, or motorboats with or without crew. Explore crystal-clear waters, secluded bays, and iconic coastal locations in first-class comfort onboard.
Discover Hivelane – The minimalist design and sorted categories make browsing simple.
нарколог выезд на дом ростов [url=https://narkolog-na-dom-v-rostove-4.ru/]нарколог выезд на дом ростов[/url] .
Hivelane Home – Well-defined categories and a clean setup make shopping efficient.
LemonVendor Deals – It was a user friendly journey from start to checkout.
вывод из запоя цена в ростове [url=https://vyvod-iz-zapoya-v-rostove-2.ru/]vyvod-iz-zapoya-v-rostove-2.ru[/url] .
нарколог вывод из запоя на дому в ростове [url=https://vyvod-iz-zapoya-v-rostove-4.ru/]vyvod-iz-zapoya-v-rostove-4.ru[/url] .
Volveta Direct – Everything is well-arranged and I located exactly what I wanted quickly.
нарколог на дом ростов отзывы [url=https://narkolog-na-dom-v-rostove-3.ru/]narkolog-na-dom-v-rostove-3.ru[/url] .
Volveta Direct – Everything is well-arranged and I located exactly what I wanted quickly.
pin-up depozit limitləri Azərbaycan [url=pinup09715.help]pin-up depozit limitləri Azərbaycan[/url]
LemonVendor Deals – It was a user friendly journey from start to checkout.
Find Lark Online Shop – Easy to explore categories and product details are informative.
Sage Vendor Selections – Navigation is intuitive and the browsing experience is enjoyable.
Sage Vendor Online – The layout is clean and shopping feels secure and straightforward.
Visit Find Lark – Website is intuitive and browsing feels effortless.
Ulvika Online – Informative descriptions and a simple, friendly design.
Shop at Ulvika – Detailed product pages and a comfortable browsing flow.
Sovique Products – Liked the browsing experience and the costs are reasonable.
монтаж газового пожаротушения [url=https://montazh-gazovogo-pozharotusheniya.ru/]монтаж газового пожаротушения[/url] .
вывод из запоя на дому в ростове на дону [url=https://vyvod-iz-zapoya-v-rostove-5.ru/]вывод из запоя на дому в ростове на дону[/url] .
Sovique Collection – Smooth navigation with fair pricing on everything.
вывод из запоя в стационаре в ростове на дону [url=https://vyvod-iz-zapoya-v-rostove-1.ru/]vyvod-iz-zapoya-v-rostove-1.ru[/url] .
cloudopsly – Bookmarked this immediately, planning to revisit for updates and inspiration.
XoBasket Products – Navigation is smooth and the layout is simple to follow.
mostbet missiyalar [url=www.mostbet13670.help]www.mostbet13670.help[/url]
Explore Wardivo – Smooth navigation and a well-organized selection of products.
xobasket.shop – The site is very easy to navigate and feels intuitive overall.
Wardivo Shop Online – Easy-to-use navigation and a nice range of items.
Acorn Choice – Layout looks professional, and browsing items is simple and easy.
Shop Xyloshop Online – Design is up-to-date and mobile usability is great.
Explore Xerva – Store design is clean and navigating products feels effortless.
Uplora Products – Nice assortment and the costs seem fair for the items.
Acorn Aisle – The design feels very professional, and navigating items is simple and smooth.
Official Xyloshop Site – Modern aesthetic with smooth performance on phones.
Quick Shop Xerva – Love the design, navigating through products was super easy today.
Visit Uplora – Loved exploring the product selection and the prices appear good.
EchoStall Marketplace – Minimal clutter and clear product write-ups make shopping enjoyable.
Official Prolfa Site – I found the order system intuitive and all payment choices worked fine.
Browse EchoStall – Everything is visually clear and it’s simple to find product details.
Prolfa Deals – Buying items was straightforward and the checkout handled payments seamlessly.
IrisVendor Direct – Fast browsing experience and merchandise appears high quality.
IrisVendor Deals – Quick page transitions and products look reliable.
flarion.shop – Enjoyed exploring the categories, everything seems organized nicely here.
Clovent Store – Fast-loading pages with a clean and contemporary design.
Flarion Online Shop – Easy to find items and navigation is quick.
вывод из запоя на дому в ростове на дону [url=https://vyvod-iz-zapoya-v-rostove-2.ru/]вывод из запоя на дому в ростове на дону[/url] .
Clovent Online – Pages open quickly and the overall design is elegant and modern.
FernBasket Deals – High-quality products and fast-loading pages throughout.
изготовление наклеек цена [url=https://pechat-nakleek-v-moskve.ru/]pechat-nakleek-v-moskve.ru[/url] .
KindBasket Marketplace – High-quality items with descriptions that explain everything well.
mostbet retragere instant [url=http://mostbet96150.help]http://mostbet96150.help[/url]
FernBasket Direct – Great products and very fast-loading pages make browsing simple.
Amber Treasures – Clear descriptions and sensible prices make it simple to choose items.
Official Glentra Site – Smooth performance overall and the descriptions answer most questions.
Visit KindBasket – Items look well made and the descriptions explain everything clearly.
Xerva Choice – Layout is very user-friendly, and checking out products today was simple.
Amber Aisle – Clear product details and fair pricing make shopping a breeze.
Glentra Hub – Website runs perfectly and the descriptions give valuable information.
Browse Xerva – Store design is intuitive, so navigating items today was smooth.
Official FlairDock Site – Products are nicely presented and purchasing is hassle-free.
Click for FlairDock – Attractive products and a fast, simple buying process.
caldexo.shop – Each product description is straightforward and easy to follow.
Visit Caldexo – Product information is concise and very easy to read.
Softstall Hub – Overall collection is solid and current costs seem attractive.
Visit Softstall – Nice selection overall and deals are quite reasonable.
OliveOrder Deals – Everything is well organized and navigation runs smoothly.
Shop at OliveOrder – Neat design and moving between pages feels seamless.
1win авторизация [url=http://1win91276.help]1win авторизация[/url]
JunoPick Shop Online – Easy ordering and the products seem high quality.
JunoPick Specials – Products are appealing and completing the order was effortless.
mostbet canlı kazino qeydiyyat [url=https://www.mostbet13670.help]mostbet canlı kazino qeydiyyat[/url]
Iventra Hub – Smooth browsing experience and categories are well organized.
XenoDeals Specials – Well-laid-out pages make browsing and finding products easy.
Discover Iventra – Fast-loading pages and user-friendly interface.
Pentrio Shopping – The entire checkout experience was seamless and reliable.
XenoDeals Deals – The site design is tidy and finding items is quick and simple.
Explore Dapper Vendor – Shopping was easy and surprisingly pleasant throughout.
Xerva Picks – The store is well organized, making product browsing a breeze.
Serviq Collection – I’m returning soon to browse more selections.
Pentrio Marketplace – The order confirmation came through immediately after paying.
NobleVend Shopping – Will come back here soon for more online purchases.
Dapper Finds – Very easy shopping experience, everything worked as expected.
Xerva Treasures – Layout is user-friendly, and finding products today was quick and easy.
Serviq Hub – I’ll be back soon to check out more items in their catalog.
1win проверка личности при выводе [url=https://1win91276.help]https://1win91276.help[/url]
Browse NobleVend – I’ll revisit this site when I’m ready to shop again.
pin-up Azərbaycan PayPoint [url=pinup09715.help]pinup09715.help[/url]
печать наклеек и стикеров [url=https://pechat-nakleek-v-moskve.ru/]печать наклеек и стикеров[/url] .
For those seeking an exceptional online gaming experience, [maxispin.us.com](https://maxispin.us.com/) stands out as a premier destination. At Maxispin Casino, players can enjoy a vast array of pokies, table games, and other thrilling options, all accessible in both demo and real-money modes. The casino offers attractive bonuses, including free spins and a generous welcome offer, along with cashback promotions and engaging tournaments. To ensure a seamless experience, Maxispin provides various payment methods, efficient withdrawal processes, and reliable customer support through live chat. Security is a top priority, with robust safety measures and a strong focus on responsible gambling tools. Players can easily navigate the site, with detailed guides on account creation, verification, and payment methods. Whether you’re interested in high RTP slots, hold and win pokies, or the latest slot releases, Maxispin Casino delivers a user-friendly and secure platform. Explore their terms and conditions, read reviews, and discover why many consider Maxispin a legitimate and trustworthy choice in Australia.
MaxiSpin.us.com is a cutting-edge platform designed for content creators and marketers.
**Features of MaxiSpin.us.com**
By inputting their requirements, users can receive personalized content in just a few minutes.
**Benefits of Using MaxiSpin.us.com**
Both individuals and small businesses can gain significant advantages by using MaxiSpin.us.com.
product hub – Everything is easy to find and the layout is well-thought-out.
Discover Merchio – The modern visuals highlight products that look dependable and stylish.
Grivor Boutique – Browsing was simple and the overall functionality is excellent.
store link here – Browsing is straightforward and the interface is very user-friendly.
Merchio Specials – The chic design pairs nicely with items that look expertly made.
Grivor Styles – Navigating the website was easy and everything worked well.
shopping platform – The site is clearly laid out and browsing is very straightforward.
this web store – Navigation is smooth, and the content is presented neatly.
Click for Elnesta – Site worked perfectly and finishing the purchase was easy.
Elnesta Online – Everything loaded properly and checkout took just a moment.
Quinora Products – Easy navigation makes shopping convenient and fast.
VelvetHub Shopping – Bookmarking this for next time I need to shop online.
Quinora Shop Online – Finding items is quick and the overall layout is user-friendly.
VelvetHub Store – Definitely keeping this bookmarked to shop again soon.
Explore Olvesta – I’m marking this down for future shopping days.
Xerva Picks – The store is well organized, making product browsing a breeze.
click to explore – The site is visually neat and exploring it feels effortless.
olvesta.shop – Definitely saving this site for my next online haul.
Quick Shop Xerva – Love the design, navigating through products was super easy today.
Visit Auricly – Attractive product images and the website is easy to browse.
mostbet cod bonus Moldova [url=http://mostbet96150.help/]http://mostbet96150.help/[/url]
visit this platform – Clean design and logical sections make browsing effortless.
Discover Auricly – Items look very appealing and browsing is hassle-free.
this online store – Stumbled upon it earlier and browsing through was actually pretty simple.
печать наклеек на заказ [url=https://pechat-nakleek-v-moskve.ru/]печать наклеек на заказ[/url] .
this online store – Stumbled upon it earlier and browsing through was actually pretty simple.
mostbet raspuns suport [url=www.mostbet96150.help]mostbet raspuns suport[/url]
Everaisle Outlet – Definitely putting this site in my favorites for future visits.
Everaisle Outlet – Definitely putting this site in my favorites for future visits.
driftana.shop – The site feels fast and the layout is really easy to navigate.
mostbet sloturi [url=https://www.mostbet96150.help]mostbet sloturi[/url]
TinyTill Store – Bookmarking this page for my next shopping trip.
online catalog – The structure is clear, and loading times are impressively fast.
mostbet çıxarış təsdiqi [url=http://mostbet13670.help]mostbet çıxarış təsdiqi[/url]
Click for TinyTill – This one’s saved for my next online shopping session.
mostbet cashback [url=https://www.mostbet13670.help]https://www.mostbet13670.help[/url]
Lormiq Collection – Definitely keeping this site in my bookmarks for future visits.
Lormiq Specials – Saving this site to shop again very soon.
mostbet retragere câștig [url=mostbet96150.help]mostbet96150.help[/url]
mostbet трансляции [url=https://mostbet39081.help/]https://mostbet39081.help/[/url]
knowledge base – I discovered several helpful insights while browsing.
Larnix online store – Navigation is simple, design looks modern, and browsing feels pleasant.
Visit Wavento – Clean layout and finding items is effortless.
info site link – The content is useful and presented without confusion.
Larnix catalog – Modern, clean layout with easy navigation makes browsing smooth and pleasant.
visit workwhim – Clean design, fast browsing, very user-friendly.
Wavento Products – Fast-loading pages and simple navigation throughout.
workwhim online portal – Very easy to browse, everything loads almost instantly.
Up Vendor – A forward-thinking store built to elevate your everyday shopping experience.
retail destination – The content seems thoughtfully prepared and relevant.
Up Vendor – A forward-thinking store built to elevate your everyday shopping experience.
this web store – The material comes off as authentic and worthwhile.
Marketing funnel shop – Content is well laid out and easy to scan through.
Digital funnel marketplace – Everything feels polished and the site is effortless to use.
стикеры наклейки на заказ [url=https://pechat-nakleek-v-moskve.ru/]pechat-nakleek-v-moskve.ru[/url] .
Birch lifestyle store – Pages are organized neatly and easy to move through.
Birch Boutique Portal – Elegant design and effortless navigation make it enjoyable.
ecommerce site – Pages are well-arranged and moving around the site is easy.
Wardrobe Wisp Products – Smooth pages with clearly structured navigation.
Online Spice Portal – Content is neatly organized and visually appealing throughout.
Wardrobe Wisp Resources – Layout is simple and browsing feels effortless.
store link here – The layout is clear, and moving between pages is very smooth.
Spice Craft Resources – Well-arranged sections allow for effortless movement throughout the site.
mostbet aplicație pentru android [url=https://mostbet96150.help]https://mostbet96150.help[/url]
Trail Trek Central – Pleasant browsing, pages are easy to navigate and load quickly.
Trail Trek Central – Pleasant browsing, pages are easy to navigate and load quickly.
1win бесплатная ставка [url=https://1win91276.help]https://1win91276.help[/url]
Yelnix storefront – Navigation was intuitive and made shopping simple and quick.
content hub – The site shares detailed insights in an easy-to-read format.
Yelnix shopping hub – Finding products was straightforward thanks to the organized and intuitive navigation.
visit this platform – Regular updates and clear explanations stand out here.
business site – Everything is well laid out and simple to navigate.
web platform – The design feels uncluttered and easy to navigate.
mostbet kupon nəticəsi [url=https://www.mostbet13670.help]https://www.mostbet13670.help[/url]
keywordcraft – Content reads clearly, helpful examples made concepts easy to grasp.
Hyvora Selection – Well-organized layout makes browsing enjoyable.
digital shop – No delays, and all content appears quickly as you browse.
online retail site – The site performs well and pages respond immediately.
Hyvora Products – Product information is clear and pages load quickly.
Kind Vendor – A friendly and thoughtful marketplace offering reliable and pleasant service.
Inbox strategy hub – Logical layout and the content is presented clearly.
Kind Vendor – A friendly and thoughtful marketplace offering reliable and pleasant service.
Learn email efficiently – Clear sections and intuitive flow make browsing easy.
Plant care hub – Smooth experience with everything clearly laid out and easy to access.
Gardening hub online – Simple design and smooth navigation throughout the site.
Digital goods hub – Clear layout and fast navigation make exploring easy.
Click for Pot & Petal – Fast-loading pages with logically arranged content.
Explore Emporium Collections – Organized pages with smooth flow and readable content.
Pot & Petal Official – Pages are clearly structured and finding what you need is straightforward.
This was exceptional — keep up the amazing work!
Explore Luggage Collections – Simple design ensures navigation feels natural.
1вин плинко [url=https://1win91276.help/]https://1win91276.help/[/url]
Luggage Hub – Clean design and logical structure make exploring effortless.
DuneParcel online store – The customer service team was prompt and very responsive this week.
типография печать наклеек [url=https://pechat-nakleek-v-moskve.ru/]типография печать наклеек[/url] .
DuneParcel storefront – Customer service was fast, clear, and very useful recently.
1win apk безопасно [url=www.1win91276.help]www.1win91276.help[/url]
web resource page – Everything is clearly structured, making it simple to explore.
web shop portal – Browsing feels natural thanks to the clear layout.
resource link here – The structure feels clear, allowing quick access to details.
visit this website – The structure is straightforward and user friendly.
visit this platform – I enjoy the clarity and simplicity of the overall design here.
this web store – I like the simple aesthetic and how easy it is to find what I need.
Premium leather shop – Smooth navigation and content presented in a friendly way.
Gym Gear Resources – Well-structured pages and straightforward browsing.
Leather fashion portal – The site is organized and the flow feels natural.
Visit Heirloom Horizon – Interface is tidy and everything is easy to find.
shopping page – Browsing is seamless, with clear labels and easy-to-find information.
Explore Nervora – A trend-forward marketplace built for those who appreciate modern flair.
Gym Gear Junction Official – Clear layout with an easy-to-follow structure throughout.
Heirloom Horizon Boutique – Well-laid-out sections provide a pleasant browsing experience.
The Nervora Store – A sleek retail platform reflecting bold design and fresh ideas.
Wardrobe Wisp Marketplace – Organized layout with intuitive navigation between sections.
visit this platform – Pages feel responsive and exploring the site is intuitive.
Wardrobe Wisp Products – Smooth pages with clearly structured navigation.
Good afternoon!
Decode pain mysterious signals containing interesting and valuable neurological data and understand suffering better see on the website for pain management
Full information on the link – https://202fliks.site
All the best and development in business!
Decor District Official – Well-organized pages make exploring content effortless.
Decor District Online – Simple flow between sections makes browsing seamless.
I love how clear and comprehensive your posts are.
Relvaa shop online – I enjoyed the easy checkout and flexible payment methods offered.
visit Relvaa today – Paying for items was simple thanks to flexible options and a smooth checkout.
online shop link – Everything is presented clearly, making it convenient to find what you need.
teacher resource site – The interface is tidy and information is simple to locate.
白鹿丞磊《莫离》2026古装大女主权谋剧,海外华人必备高清陆剧,智斗爽感拉满,全球加速无广告实时更新。
online shop link – Everything is presented clearly, making it convenient to find what you need.
education portal – Simple design and easy-to-follow sections make it highly accessible.
promoseeder – Pages loaded fast, images appeared sharp, and formatting stayed consistent.
digital shop – It’s simple to get around and the experience is enjoyable.
adscatalyst – Mobile version looks perfect; no glitches, fast scrolling, crisp text.
Logo resources page – Structured pages and easy-to-read content.
Explore Mint & Mason – Fast-loading sections and clear presentation make browsing easy.
digital shop – It’s simple to get around and the experience is enjoyable.
Natural beauty shop – The design is tidy and browsing feels effortless.
Digital logo store – Smooth experience with a neat, tidy presentation.
Mint & Mason Online – Simple flow between sections makes navigation natural.
clickrevamp – Mobile version looks perfect; no glitches, fast scrolling, crisp text.
Visit Ginger Glory – Pages are fresh, well-structured, and easy to browse.
Revenue Ridge Boutique – Well-organized sections with a clean and professional design.
Revenue Ridge Resources – Smooth navigation and professional presentation throughout.
Silk Station Essentials – Pleasant interface, organized content, and intuitive navigation throughout.
Shop Meadow – A peaceful shopping hub featuring handpicked items with natural appeal.
Silk Fashion Portal – Simple layout, easy to browse and explore all sections.
Shop Meadow – A peaceful shopping hub featuring handpicked items with natural appeal.
serpstudio – Content reads clearly, helpful examples made concepts easy to grasp.
Zarniq offers – Items arrived fast, and packaging was neat, secure, and professional.
official Zarniq site – Delivery was quick and the items were packaged carefully and neatly.
trafficcrafter – Content reads clearly, helpful examples made concepts easy to grasp.
browse here – Fast and intuitive, everything is well organized.
featured platform – Pages open instantly and navigation feels fluid.
featured platform – Smooth browsing experience and simple layout overall.
service website – The experience feels streamlined and technically solid.
заказать печать стикеров [url=https://pechat-nakleek-v-moskve.ru/]заказать печать стикеров[/url] .
Fashion & Satin Store – Well-laid-out content ensures a smooth user experience.
product hub – Everything is well organized, and navigating feels effortless.
Online Salt Portal – Content is structured neatly and visually appealing.
Macro Merchant Marketplace – Smooth interface and logically arranged sections make it enjoyable.
Streaming hub online – Everything feels organized with smooth page transitions.
direct store link – It performs well with fast page transitions.
Stream Sprout Marketplace – Clear layout with fast, responsive browsing.
Macro Merchant Resources – Clean design and effortless navigation throughout the site.
check this website – So far the navigation feels quick and completely hassle-free.
this web store – Clear structure makes it easy to browse through pages.
Financial tools store – Logical design and easy-to-access content for users.
Shop Revenue Ridge – Pages are organized neatly and content is easy to follow.
Lotus Loft Hub – Content is structured logically, allowing for easy reading and access.
газовое пожаротушение монтаж с гарантией [url=https://montazh-gazovogo-pozharotusheniya-1.ru/]montazh-gazovogo-pozharotusheniya-1.ru[/url] .
Lotus Interiors – Neat sections and readable content make browsing enjoyable and smooth.
монтаж газового пожаротушения сертифицированными специалистами [url=https://montazh-gazovogo-pozharotusheniya-2.ru/]montazh-gazovogo-pozharotusheniya-2.ru[/url] .
Item Whisper – A smart and intuitive platform helping you discover hidden gems with ease.
Zolveta marketplace – I liked the simple interface and organized product categories on the site.
seo partner program [url=https://prodvizhenie-sajtov-v-moskve9.ru/]prodvizhenie-sajtov-v-moskve9.ru[/url] .
Item Whisper – A smart and intuitive platform helping you discover hidden gems with ease.
заказать газовое пожаротушение [url=https://montazh-gazovogo-pozharotusheniya-3.ru/]заказать газовое пожаротушение[/url] .
visit Zolveta today – Easy-to-use design and clearly divided categories made browsing smooth.
ecommerce page – Everything feels intuitive and easy to navigate.
Kitchen Hub – Pages are arranged logically, allowing intuitive navigation.
ecommerce page – Everything feels intuitive and easy to navigate.
this cider website – Really enjoying the authentic feel and clean layout.
Whisk Warehouse Products – Pages are neatly structured, making navigation smooth.
мостбет [url=http://mostbet39081.help/]мостбет[/url]
cider showcase – It feels sincere and attractively designed throughout.
Thyme lifestyle store – Organized interface and smooth navigation throughout.
Thyme Thrift Online – Layout is polished and content is easy to access.
шумоизоляция торпеды https://shumoizolyaciya-torpedy-77.ru
shopping page – Navigation is simple, and the layout has a neat, professional look.
check this website – I like how clean and user-friendly the design feels.
Financial resources store – Tidy layout and straightforward browsing experience.
Investment hub – Well-structured design with content easy to locate.
Sublime Summit Collection – Organized content and intuitive design make it easy to explore.
[url=https://shumoizolyaciya-dverej-avto.ru]шумоизоляция дверей авто[/url]
Sublime Summit Online Hub – Well-structured layout and professional presentation throughout.
Magnificent goods from you, man. I have understand your stuff previous to and you’re just extremely fantastic. I really like what you have acquired here, certainly like what you are stating and the way in which you say it. You make it entertaining and you still take care of to keep it wise. I cant wait to read far more from you. This is actually a wonderful website.
official DepotLark site – The item descriptions are precise, detailed, and genuinely helpful for buyers.
shop at DepotLark – Products come with accurate, clear information that assists shoppers.
стоимость монтажа газового пожаротушения [url=https://montazh-gazovogo-pozharotusheniya-2.ru/]montazh-gazovogo-pozharotusheniya-2.ru[/url] .
Click for Honey & Hustle – Logical layout makes reading and navigating content effortless.
установка газового пожаротушения [url=https://montazh-gazovogo-pozharotusheniya-1.ru/]установка газового пожаротушения[/url] .
online boutique – Pages are structured clearly, making navigation fast and easy.
honeyandhustle.shop – Layout is clean and navigating through pages is effortless.
shopping portal – Simple layout and logical sections make everything easy to find.
click to explore – Navigation is seamless and the structure is clear.
частный seo оптимизатор [url=https://prodvizhenie-sajtov-v-moskve9.ru/]prodvizhenie-sajtov-v-moskve9.ru[/url] .
browse the festival – Event information is direct, clear, and easy to follow.
Monarch Mosaic Hub – Everything is easy to find and the interface is tidy.
festival info hub – The pages are easy to follow and key details stand out.
Explore mosaic designs – Tidy sections and smooth navigation create an enjoyable experience.
featured website – The site feels uncluttered and exploring sections is intuitive.
мостбет войти с телефона [url=https://www.mostbet39081.help]мостбет войти с телефона[/url]
melbet apk киргизия скачать [url=https://melbet76815.help]https://melbet76815.help[/url]
retail destination – Everything feels properly arranged and intuitive.
монтаж автоматической системы газового пожаротушения [url=https://montazh-gazovogo-pozharotusheniya-3.ru/]монтаж автоматической системы газового пожаротушения[/url] .
Embroidery Eden Portal – Content is neatly arranged and browsing is very straightforward.
store link here – Everything appears well sorted and simple to review.
Embroidery Hub – Everything is organized logically and reading is simple.
SEO Signal Online – Easy-to-follow pages with a logical flow make browsing seamless.
Explore SEO Signal – Content is well-arranged and navigation feels very intuitive.
HazelAisle shop online – My experience has been smooth, enjoyable, and stress-free today.
HazelAisle picks – I’ve had a positive experience navigating the site and finding products easily.
Tech Hub Online – Pages load quickly with clear and accessible sections.
услуги грузчиков расценки грузчик с ежедневной оплатой в москве
нанять грузчиков грузчики москва цена
Tech Hub Online – Pages load quickly with clear and accessible sections.
купить газобетон стоимость газоблока
official shop page – Everything loads quickly and navigation is simple to follow.
explore this shop – Smooth browsing experience with a clean and clear interface.
Filter Fable Resources – The site feels structured and very user-friendly.
раскрутка и продвижение сайта [url=https://prodvizhenie-sajtov-v-moskve10.ru/]prodvizhenie-sajtov-v-moskve10.ru[/url] .
Filter solutions hub – The interface is tidy and easy to follow.
game resource page – The layout makes browsing feel dynamic and entertaining.
проект и монтаж газового пожаротушения [url=https://montazh-gazovogo-pozharotusheniya-2.ru/]проект и монтаж газового пожаротушения[/url] .
game info link – It’s a pleasant site to browse with interactive elements.
газоблок краснодарский край газоблоки за штуку
1win восстановить пароль [url=http://1win91276.help/]http://1win91276.help/[/url]
Kitchen essentials shop – Layout is simple and content is easy to read.
click to explore – The experience seems thoughtfully updated for today.
стоимость монтажа газового пожаротушения [url=https://montazh-gazovogo-pozharotusheniya-1.ru/]montazh-gazovogo-pozharotusheniya-1.ru[/url] .
Kitchenware portal – Simple design and smooth page transitions enhance usability.
auditpilot – Content reads clearly, helpful examples made concepts easy to grasp.
this retail site – It gives off a fresh impression compared to typical stores.
Explore Kitchen Collections – Well-structured pages with readable content make browsing enjoyable.
технического аудита сайта [url=https://prodvizhenie-sajtov-v-moskve9.ru/]prodvizhenie-sajtov-v-moskve9.ru[/url] .
Kitchen Kite Online – Simple flow between pages makes navigating effortless.
leadvero – Color palette felt calming, nothing distracting, just focused, thoughtful design.
Explore cabin decor – Clean sections and intuitive navigation throughout.
Google Salaries https://salarydatahub.uk by Role (US & UK) – Real Pay Ranges, Levels, and Total Compensation
кран шаровый под приварку краны шаровые под приварку
Clean Cabin Store – Organized pages with fast navigation and a pleasant experience.
authoritylab – Pages loaded fast, images appeared sharp, and formatting stayed consistent.
газовое пожаротушение монтаж с гарантией [url=https://montazh-gazovogo-pozharotusheniya-3.ru/]газовое пожаротушение монтаж с гарантией[/url] .
visit this platform – The content is well-organized, allowing smooth browsing.
browse email resources – Well-laid-out pages make navigation fast and smooth.
email essentials link – Professional layout and clear navigation enhance the overall experience.
White Noise Sounds Portal – The design is organized and reading the content feels easy.
their shop page – Navigation feels simple, and the overall structure is pleasant.
whitenoisewonder.shop – The site feels clean and browsing is effortless.
mostbet mines стратегия [url=mostbet39081.help]mostbet mines стратегия[/url]
кран под приварку краны шаровые приварные
movie collection – Fun and unique design with content that keeps you hooked.
seo partner program [url=https://prodvizhenie-sajtov-v-moskve10.ru/]prodvizhenie-sajtov-v-moskve10.ru[/url] .
cinema site – Fresh design and engaging material throughout the pages.
Fig & Fashion Boutique – User-friendly design with well-organized sections.
Lifestyle fashion store – Smooth navigation and clean layout make exploring effortless.
Driftwood Interiors – Neatly arranged pages make finding information quick and convenient.
Visit Design Driftwood – Interface feels tidy and user-friendly, making exploration simple.
монтаж газового пожаротушения для музея [url=https://montazh-gazovogo-pozharotusheniya-2.ru/]montazh-gazovogo-pozharotusheniya-2.ru[/url] .
My brother suggested I would possibly like this blog. He was once totally right. This post truly made my day. You cann’t consider just how so much time I had spent for this information! Thank you!
мелбет aviator как играть [url=www.melbet76815.help]www.melbet76815.help[/url]
Supply Symphony Store – Great variety and navigating the site is effortless.
Cotton Corner Boutique – Organized sections and smooth movement through content.
Supply Symphony Store – Great variety and navigating the site is effortless.
монтаж газового пожаротушения спб [url=https://montazh-gazovogo-pozharotusheniya-1.ru/]монтаж газового пожаротушения спб[/url] .
Cloth and fashion store – Pages are logically structured and easy to access.
bloomvendor.shop – Such a pleasant browsing experience with lovely selections available.
seo продвижение и раскрутка сайта [url=https://prodvizhenie-sajtov-v-moskve9.ru/]prodvizhenie-sajtov-v-moskve9.ru[/url] .
bondcircle.bond – Cohesive layout, content emphasizes stability and clear communication.
bloomvendor.shop – Such a pleasant browsing experience with lovely selections available.
trustedcore.bond – Modern look, messaging highlights reliability and smooth user experience.
Amazing! This blog looks just like my old one! It’s on a completely different topic but it has pretty much the same layout and design. Outstanding choice of colors!
мелбет зайти на сайт [url=melbet76815.help]мелбет зайти на сайт[/url]
engine hub – Smooth navigation and everything is easy to locate.
Captain’s Closet Website – The layout makes shopping convenient, and the designs never disappoint.
Chocolate Chasm Official – Everything is neatly structured and the experience is very professional.
engine info guide – Organized and user-friendly design makes finding info straightforward.
melbet киргизия ios [url=melbet76815.help]melbet76815.help[/url]
Daisy Crate Hub – Shopping is easy and the product range is satisfying every visit.
Online chocolate shop – Clear sections and easy navigation create a pleasant experience.
Captain’s Closet Fashion Hub – It’s easy to shop around and discover stylish pieces without any stress.
Daisy Crate Deals – Browsing is easy and the checkout flows smoothly every time.
Official Basket Wharf – Pages load quickly and the overall layout is clear and organized.
What’s Changed: look here
Shop Basket Wharf – The site is easy to use and everything looks neatly arranged.
online portfolio page – The presentation is organized and showcases creativity well.
Your article helped me a lot, is there any more related content? Thanks! https://accounts.binance.com/fr/register-person?ref=T7KCZASX
Online investment portal – Clear and organized layout for effortless browsing.
Alpine Vendor Website – A tidy interface and smooth navigation make shopping enjoyable.
seo агентство [url=https://prodvizhenie-sajtov-v-moskve10.ru/]seo агентство[/url] .
tobiasinthepark.co.uk – A creative concept with a layout that feels carefully arranged.
View details: https://graph.org/analyse-match-qui-gagnera-le-choc-de-la-journee-nos-pronos-02-12
Stock Stack Products – Organized interface and fast, easy-to-read content.
aurorabend.shop – The website has a sleek layout and navigation feels effortless.
Explore Alpine Vendor – Navigation feels natural and the interface is visually clean.
мелбет промокод [url=https://melbet76815.help]https://melbet76815.help[/url]
Meal Prep Plans – Clean sections and smooth flow make exploring effortless.
Aurora Bend Marketplace – Browsing feels fast and the interface is minimalist and clean.
Your Go-To Shop – Easy to move around, reliable site, and overall shopping is stress-free.
their shop page – The layout is clear and makes it easy to move between sections.
Online Meal Prep Hub – Easy-to-follow sections make exploring the site enjoyable.
Visit Calm Cart – Overall experience is smooth, reliable, and easy to move through.
digital shop – Navigation is seamless and everything is laid out in an understandable way.
Tidal Thimble Boutique Online – Simple layout and exploring products is effortless.
tidalthimble marketplace – Nicely organized site and browsing feels natural.
Discover Cherry Checkout Deals – Navigation is smooth and the checkout process feels effortless.
установка газового пожаротушения [url=https://montazh-gazovogo-pozharotusheniya-2.ru/]установка газового пожаротушения[/url] .
Your Go-To Shop – Browsing is easy and finishing purchases is fast and hassle-free.
мелбет как играть в aviator [url=https://www.melbet30926.help]https://www.melbet30926.help[/url]
ecommerce site – Fast performance and easy-to-understand menus make browsing simple.
purebond.bond – Organized layout, messaging feels dependable and approachable.
securecore.bond – Clean interface, site communicates trustworthiness and clarity effectively.
browse here – Clear menus and fast performance make browsing effortless.
Prairie Vendor Shop Now – Browsing feels seamless thanks to a neat design and fast load times.
Saucier Studio Outlet – Found creative, standout items that make browsing fun.
Prairie Vendor Direct – The clean design makes browsing simple and fast across the site.
melbet free spins [url=https://melbet30926.help]melbet free spins[/url]
Merniva Website – A few items stood out and the pricing is sensible.
saucierstudio.shop – I really enjoy the imaginative designs and distinctive items available currently.
Merniva Online – I spotted some appealing products with reasonable pricing.
комплексное продвижение сайтов москва [url=https://prodvizhenie-sajtov-v-moskve10.ru/]prodvizhenie-sajtov-v-moskve10.ru[/url] .
Shop Aurora Market Online – Pages respond promptly and I found appealing discounts.
Shop Calm Cart Online – Navigation is simple, and shopping overall is convenient and pleasant.
auroramarket.shop – The store offers excellent deals and pages open almost instantly.
Amber Bazaar Outlet – Found exclusive items and the pricing feels fair.
workbenchwonder marketplace – Items seem handy and descriptions are clear and well-written.
Official Calm Cart Store – Browsing is straightforward and the site feels dependable and user-friendly.
Amber Bazaar Store – Lots of interesting finds and the pricing looks fair.
melbet элкарт киргизия [url=melbet76815.help]melbet элкарт киргизия[/url]
online workbenchwonder – Useful selection and descriptions are concise and clear.
product hub – Modern layout and well-structured pages make it enjoyable to explore.
shopping page – The interface is clean, modern, and easy to navigate.
мобильные стойки ограждения столбики для ограждения с лентами
купить медный кабель кабель электрический купить минск
свадебное платье бохо купить каталог свадебных платьев с ценами
мелбет киргизия вход [url=http://melbet54187.help]http://melbet54187.help[/url]
commonway.bond – Clear navigation, content supports cooperation and understanding across teams.
мелбет вывод odengi [url=http://melbet54187.help]http://melbet54187.help[/url]
commonway.bond – Clear navigation, content supports cooperation and understanding across teams.
мостбет вывод не пришел [url=http://mostbet39081.help]http://mostbet39081.help[/url]
Your Online Crate – Clear product images make browsing and choosing items straightforward.
столбики ограждения с цепью переносные ограждения столбика
где купит кабель провод купить в минске
Premium Online Store – Photos are clear and product variety makes browsing enjoyable.
лицензия на монтаж газового пожаротушения [url=https://montazh-gazovogo-pozharotusheniya-2.ru/]montazh-gazovogo-pozharotusheniya-2.ru[/url] .
свадебный платья москва каталог свадебные платья каталог цен фото
Lark Vendor Shop Now – Each listing includes unique items with informative descriptions.
Lark Vendor Website – Interesting products paired with detailed, helpful information make browsing enjoyable.
Zipp Aisle Experience – Checkout was smooth, fast, and easy to follow.
Zipp Aisle Website – Checkout was smooth and very straightforward.
Discover New Arrivals – The menus are clear and product explanations are very useful.
Formula Forest Products – The assortment appears carefully chosen, and transactions wrap up fast.
workbenchwonder boutique – Practical items and the product info is very informative.
datadev – Found practical insights today; sharing this article with colleagues later.
Explore the Collection – The site is easy to use, reliable, and shopping feels effortless.
Check Out Products – The site structure is logical and item details are comprehensive.
seo продвижение и раскрутка сайта [url=https://prodvizhenie-sajtov-v-moskve10.ru/]prodvizhenie-sajtov-v-moskve10.ru[/url] .
workbenchwonder digital shop – Practical products and the descriptions make browsing simple.
Official Formula Forest – The catalog looks high-quality and the buying process is refreshingly fast.
Explore the Collection – The site is easy to use, reliable, and shopping feels effortless.
dataops – Appreciate the typography choices; comfortable spacing improved my reading experience.
trycloudy – Color palette felt calming, nothing distracting, just focused, thoughtful design.
applabs – Overall, professional vibe here; trustworthy, polished, and pleasantly minimal throughout.
Shop Amber Outpost – Checkout went smoothly and pages open almost instantly.
brisklet.shop – Navigation works perfectly and content is clear to read.
Amber Outpost Experience – Quick and simple checkout with fast page loads.
brisklet.shop – Navigation works perfectly and content is clear to read.
visit this platform – Pages are laid out nicely, and moving through sections is seamless.
silverpeakline.bond – Elegant layout, content conveys reliability and quality in every section.
gobyte – Pages loaded fast, images appeared sharp, and formatting stayed consistent.
click to explore – Navigation is intuitive and the layout is visually clear.
crestsecure.bond – Polished interface, content reflects dependability and well-organized structure.
getbyte – Content reads clearly, helpful examples made concepts easy to grasp.
Shop Chestnut Cart Online – Browsing feels natural and the pages load without delays.
Winter Vendor Online – Pages load smoothly and navigating the site feels straightforward.
Curated Collections – Navigation feels natural and pages load efficiently throughout.
Winter Vendor Boutique – The site layout makes navigating pages fast and convenient.
layout lagoon picks – Everything feels orderly and easy to explore.
Varnika Boutique – Products are neatly sorted, so browsing feels smooth and simple.
Explore Popular Products – Plenty to choose from and the buying process is easy.
layoutlagoon – Really enjoyed browsing, the site feels well organized.
Browse Calm Cart – Overall navigation is simple, and the experience is convenient and stress-free.
Your Go-To Shop – Variety is great and completing orders is straightforward.
Varnika Collection – Clear categories make it effortless to locate what you need.
Find Top Products – The site is user-friendly, convenient, and browsing feels natural.
internet seo [url=https://prodvizhenie-sajtov-v-moskve10.ru/]prodvizhenie-sajtov-v-moskve10.ru[/url] .
usebyte – Color palette felt calming, nothing distracting, just focused, thoughtful design.
Silver Stride Website – The website’s design feels fresh, making exploring items intuitive.
Official Silver Stride – The simple design allows for smooth and satisfying browsing.
online retail site – Everything is tidy and moving around the site is effortless.
Amber Wharf Online – Clean design and easy-to-find categories make browsing simple.
online catalog – Everything feels orderly and clean, giving a pleasant browsing experience.
mines melbet [url=https://www.melbet54187.help]https://www.melbet54187.help[/url]
silverpath.bond – Polished visuals, messaging communicates professionalism and reliability clearly.
Amber Wharf Shop Now – Tidy layout with product sections that are easy to navigate.
bondpath.bond – Contemporary layout, content emphasizes clarity, reliability, and visitor trust.
sheetsierra digital shop – Plenty of choices and the checkout process was smooth.
Official Elm Vendor – The options are solid and the costs seem very fair right now.
Sheet Sierra Online Corner – Well organized selection and purchasing was hassle-free.
melbet кыргызстан [url=http://melbet30926.help]melbet кыргызстан[/url]
Elm Vendor Website – High-quality choices at affordable prices make this store appealing.
Shop Bay Basket Online – The pages open quickly and overall experience is seamless.
Explore the Collection – The site is easy to use, reliable, and shopping feels effortless.
Curated Collections – The browsing experience is smooth and the interface feels trustworthy.
Shop Xenonest – I like the friendly tone and the clear, informative product descriptions.
Check Out Products – Shopping feels easy and the site layout is clear and reliable.
Find Exclusive Items – The product selection is updated often, making browsing a pleasant experience.
Xenonest Collection – Positive energy across the site and product details are informative.
Official Chestnut Market Store – I love discovering new products and seeing updates posted often.
getkube – Color palette felt calming, nothing distracting, just focused, thoughtful design.
check this website – The layout is smooth and moving through sections feels natural.
мостбет сом вывод [url=http://mostbet39081.help/]http://mostbet39081.help/[/url]
browse here – Pages are intuitive, and finding what you need is simple and fast.
Inventory Ivy Experience – Overall, the site delivers transparent details that benefit customers.
trystack – Content reads clearly, helpful examples made concepts easy to grasp.
anchorline.bond – Strong visuals, content feels stable and communicates credibility naturally.
Inventory Ivy Specials – Each page offers descriptive content that supports smart buying.
online catalog – The layout is clean, and accessing useful content is straightforward.
usekube – Found practical insights today; sharing this article with colleagues later.
anchorpath.bond – Professional look, content highlights reliability and inspires confidence naturally.
ecommerce site – The structure is simple and makes finding information effortless.
Official Apricot Aisle – Smooth browsing experience with detailed product descriptions.
Apricot Aisle Deals – Browsing is simple and listings include helpful descriptions.
wellnesswilds hub online – Calm layout and moving through pages is effortless.
melbet casino slots [url=melbet30926.help]melbet30926.help[/url]
wellnesswilds essentials – Soothing visuals and site browsing is simple.
Shop Rooftop Vendor – I received fast, courteous responses and clear resolutions to my questions.
Click to Explore – Everything is organized nicely and the items feel premium.
Official Calm Cart Store – Browsing is straightforward and the site feels dependable and user-friendly.
Rooftop Vendor Direct – I got quick, courteous help and my questions were resolved professionally.
Check Out Products – The store is well organized and the products are impressive.
Browse Calm Cart – Overall navigation is simple, and the experience is convenient and stress-free.
оптимизация сайта франция цена [url=https://prodvizhenie-sajtov-v-moskve9.ru/]prodvizhenie-sajtov-v-moskve9.ru[/url] .
melbet скачать последнюю версию [url=https://www.melbet30926.help]https://www.melbet30926.help[/url]
Soft Parcel Direct – Pages open quickly and moving through sections is intuitive.
Soft Parcel Direct – Pages open quickly and moving through sections is intuitive.
установка газового пожаротушения москва [url=https://montazh-gazovogo-pozharotusheniya-1.ru/]montazh-gazovogo-pozharotusheniya-1.ru[/url] .
установка газового пожаротушения для промышленного объекта [url=https://montazh-gazovogo-pozharotusheniya-3.ru/]установка газового пожаротушения для промышленного объекта[/url] .
mostbet free spins [url=www.mostbet85961.help]www.mostbet85961.help[/url]
Browse Cloud Vendor – Layout is clean and user-friendly, and the overall experience is trustworthy.
firmpoint.bond – Modern design, pages highlight dependability and provide clear guidance for users.
melbet регистрация по номеру [url=https://melbet54187.help/]https://melbet54187.help/[/url]
firmfoundation.bond – Professional layout, messaging communicates trust and confidence effectively.
official storefront – Navigation is intuitive and the layout looks modern.
Visit Network Nectar – Navigation is straightforward and pages appear quickly.
melbet чат кыргызстан [url=melbet54187.help]melbet54187.help[/url]
online catalog – Pages are easy to browse and the design feels modern.
samplesunrise treasures – The idea is solid and everything is arranged in a sensible order.
Network Nectar Insights – It’s easy to find information and pages load immediately.
samplesunrise – Really like the concept and the layout feels well thought out.
Apricot Crate Website – Items look well-crafted and placing an order is simple.
I loved as much as you will receive carried out right here. The sketch is attractive, your authored material stylish. nonetheless, you command get got an edginess over that you wish be delivering the following. unwell unquestionably come more formerly again as exactly the same nearly a lot often inside case you shield this increase.
Apricot Crate Finds – Items seem top-quality and ordering was easy and efficient.
Top Picks Online – Navigation feels natural and I easily found what I needed.
Explore the Collection – The site is easy to use, reliable, and shopping feels effortless.
cherryvendor.shop – I like how new products and updates are shared regularly this season.
Premium Online Store – Browsing is smooth and locating items is fast and easy.
Start Shopping Here – Shopping is convenient, the site feels intuitive, and moving around is easy.
Cherry Vendor Experience – I enjoy seeing fresh stock and consistent updates throughout the season.
Fetch Bay Specials – User-friendly layout and easy checkout make shopping stress-free.
jolvix.shop – Simple design but it definitely gets the job done.
Explore Fetch Bay – The site design is clear, and making purchases is easy and fast.
jolvix.shop – Simple design but it definitely gets the job done.
заказать анализ сайта [url=https://prodvizhenie-sajtov-v-moskve9.ru/]prodvizhenie-sajtov-v-moskve9.ru[/url] .
Looking for a casino? https://pinupturkiye.org is a licensed online casino with a wide selection of slots, live dealer games, and sports betting. New players can take advantage of a welcome bonus and regular promotions; deposits and withdrawals are available through popular methods. The site supports responsible gaming and offers customer support in multiple languages. Pinup Casino is suitable for players who prefer a user-friendly interface and a wide range of entertainment options.
groundway.bond – Organized design, messaging is clear and builds trust naturally throughout the site.
Run Route Collection – Smooth design and it’s easy to explore available items.
firmtrack.bond – Polished interface, content highlights stability and practical guidance for users.
runroute – The design is clean and locating items is fast and easy.
Click to Explore – Items are well organized and finding what I need takes no effort.
монтаж газового пожаротушения для склада [url=https://montazh-gazovogo-pozharotusheniya-1.ru/]montazh-gazovogo-pozharotusheniya-1.ru[/url] .
ecommerce site – Everything is presented clearly, making the overall experience pleasant.
Official Clover Market Store – Wide range of products and everything is easy to locate quickly.
online retail site – Pages are structured cleanly and moving around is simple.
Network Nectar Experience – The website is easy to use and pages pop up almost instantly.
Network Nectar Portal – Browsing feels smooth and content loads rapidly every time.
Premium Online Store – Customer service is approachable and responds fast.
Shop Trending Items – Easy to navigate with a reliable layout, making shopping enjoyable.
Official Storefront – The interface feels clean and performance is impressively fast.
Explore Popular Products – Customer service is responsive and always provides guidance.
Visit Calm Cart – Overall experience is smooth, reliable, and easy to move through.
мелбет купон бонус [url=www.melbet51923.help]www.melbet51923.help[/url]
Shop Tally Cove – The site is user-friendly and the process is consistently reliable.
ashbazaar.shop – The layout is intuitive and pages load quickly.
Tally Cove Store – The site makes browsing easy and the experience is reliable every time.
Order Grove Outlet – Good variety and the search functionality makes browsing easy.
Order Grove Store – Found a wide selection of items and the search function works smoothly.
tobiasinthepark style store – The energy is wonderful and everything feels considered.
tagtides digital shop – Branding is appealing and using the site feels smooth.
tobiasinthepark deals page – Really enjoy exploring, every part of the site feels purposeful.
official tagtides site – Impressive branding and moving through pages is effortless.
aviator melbet [url=melbet54187.help]aviator melbet[/url]
trustedpath.bond – Structured interface, content inspires confidence and a sense of security for users.
Your Go-To Shop – User-friendly design and browsing for products is quick and effortless.
Mario game for phone free super mario world play
groundline.bond – Well-laid-out design, content reinforces stability and builds user confidence.
комплексное продвижение сайтов москва [url=https://prodvizhenie-sajtov-v-moskve9.ru/]prodvizhenie-sajtov-v-moskve9.ru[/url] .
dewdock online shop – Cleanly presented items and easy navigation made browsing pleasant.
Your Go-To Shop – User-friendly design and browsing for products is quick and effortless.
feathercrate deals page – Everything feels tidy and moving through the site is simple.
dewdock featured picks – Organized layout and clean pages made exploring easy and fun.
монтаж пожаротушения [url=https://montazh-gazovogo-pozharotusheniya-3.ru/]монтаж пожаротушения[/url] .
feathercrate style store – The layout is clean and browsing flows naturally.
check this website – Everything is clearly organized and browsing feels effortless.
this online store – Layout is simple and makes exploring the pages really smooth.
fireflymarket online hub – Well-organized pages and simple layout make exploring items smooth.
Firefly Market Online – Well-structured pages make finding products quick and effortless.
frostdock marketplace – Items are clearly arranged and easy to access.
jadeaisle.shop – The selection is impressive and prices feel reasonable for what’s offered.
Visit Calm Cart – Overall experience is smooth, reliable, and easy to move through.
Click to Explore – It’s polished and professional but still easy and welcoming to navigate.
Frost Dock Online – Items are well organized, making navigation simple.
Your Go-To Shop – Easy to move around, reliable site, and overall shopping is stress-free.
Visit Jade Aisle – The variety is great and the cost is fair compared to similar shops.
official portal – Browsed quickly, and the structure makes the information easy to follow.
birchbasket.shop – The site feels polished but still friendly for everyday browsing.
Maple Vendor Store – Found a nice selection of products accompanied by high-quality images.
Shop Acorn Crate – Smooth navigation and clear layout make using the site enjoyable.
visit this platform – A short browse shows the site has valuable information.
Maple Vendor Finds – Great variety of products with detailed visuals that help in choosing items.
Discover Unique Finds – The product lineup is appealing and the mood is upbeat.
Shop Acorn Crate – Smooth navigation and clear layout make using the site enjoyable.
Supply Symphony Collection – Nice variety overall and navigation is user-friendly.
Explore the Collection – The assortment stands out and the environment feels relaxed.
Supply Symphony Boutique Online – Plenty of choices and navigation is smooth.
best of gladegoods – Organized sections and minimal design improve the browsing experience.
gladegoods marketplace – Simple interface and organized display make browsing a breeze.
furkidsboutique featured picks – Loved the charming selection, navigating the collections felt fun.
harborwharf browse – Fast-loading pages and structured layout make shopping simple.
bridgecapital.bond – Clean and approachable, messaging emphasizes trust and easy navigation.
furkidsboutique marketplace – Cute products and a seamless browsing experience throughout.
harborwharf picks online – Well-laid-out pages and intuitive design create a smooth shopping experience.
stonebridgegroup.bond – Sleek layout, pages convey stability while remaining accessible to users.
getstackr – Bookmarked this immediately, planning to revisit for updates and inspiration.
usestackr – Content reads clearly, helpful examples made concepts easy to grasp.
featherfind curated shop – Navigation is easy and everything is organized neatly across the site.
cloudster – Mobile version looks perfect; no glitches, fast scrolling, crisp text.
deployly – Pages loaded fast, images appeared sharp, and formatting stayed consistent.
featherfind product range – Smooth interface and clear layout make exploring simple.
driftaisle outlet – Organized interface and smooth navigation make exploring easy.
fireflyvendor deals – Pages are neat and finding products feels straightforward.
driftaisle marketplace – Neat structure and accessible design make it easy to check products.
стоимость монтажа газового пожаротушения [url=https://montazh-gazovogo-pozharotusheniya-3.ru/]montazh-gazovogo-pozharotusheniya-3.ru[/url] .
fireflyvendor curated shop – Easy-to-follow design and organized pages improve navigation.
Shop Calm Cart Online – Navigation is simple, and shopping overall is convenient and pleasant.
visit frostgalleria – Clear layout makes finding products straightforward.
Discover Best Deals – I enjoy browsing the newest products and seeing updates posted frequently.
Your Go-To Shop – Easy to move around, reliable site, and overall shopping is stress-free.
Curated Collections – Updates keep the content fresh and the latest arrivals are simple to explore.
frostgalleria selections – Smooth pages and neat layout enhance the browsing experience.
раскрутка сайтов интернет [url=https://prodvizhenie-sajtov-po-trafiku6.ru/]prodvizhenie-sajtov-po-trafiku6.ru[/url] .
Official Harbor Lark – Mobile navigation is smooth and pages open without delay.
Alpine Aisle Finds – The website makes shopping easy and consistently dependable.
мелбет бонус на депозит [url=http://melbet51923.help]http://melbet51923.help[/url]
продвижение сайта клиники наркологии [url=https://seo-kejsy12.ru/]продвижение сайта клиники наркологии[/url] .
bloomvendor.shop – Their support team appears attentive and truly helpful whenever problems come up.
Harbor Lark Specials – Mobile experience is fast and seamless, with no delays.
alpineaisle.shop – Shopping is smooth and consistently reliable every time.
BloomVendor Hub – The help desk appears organized and genuinely invested in customer satisfaction.
best of glimmercrate – Tidy layout and smooth browsing make exploring simple.
glimmercrate outlet – Minimal design and organized content make navigation effortless.
Publicaciones unicas amouranth noticias de vanguardia y contenido original. Mantengase al dia y no se pierda ninguna novedad.
Premium Picks Marketplace – I enjoyed navigating the store and noticing fresh additions.
visit harborwharf – The site is intuitive and shopping feels straightforward.
Official Aura Vendor Store – I liked going through the products and spotting new arrivals.
harborwharf picks – Clear categories and fast-loading pages make exploring simple.
Publicaciones unicas https://amouranth.es/ noticias de vanguardia y contenido original. Mantengase al dia y no se pierda ninguna novedad.
best coralmarket finds – Wide choice of items and the purchase completed quickly.
melbet crash как играть [url=melbet51923.help]melbet crash как играть[/url]
official coralmarket site – Good assortment overall and the ordering steps were simple.
мелбет баланс [url=http://melbet51923.help/]http://melbet51923.help/[/url]
byteworks – Navigation felt smooth, found everything quickly without any confusing steps.
seo продвижение сайта по трафику кловер [url=https://prodvizhenie-sajtov-po-trafiku7.ru/]prodvizhenie-sajtov-po-trafiku7.ru[/url] .
feathervendor shopping hub – Well-arranged layout and easy navigation make exploring quick.
Feather Vendor Store – The interface is clean and finding products is very easy.
flakecrate featured – Smooth pages and well-organized sections make shopping easy.
stackable – Mobile version looks perfect; no glitches, fast scrolling, crisp text.
flakecrate picks – Easy navigation and clean layout make shopping pleasant.
driftcrate homepage – Clean and minimal design makes it simple to navigate the site.
мелбет промокод при регистрации [url=melbet51923.help]мелбет промокод при регистрации[/url]
La pagina oficial de http://www.evaelfie.es/ ofrece contenido exclusivo, noticias de ultima hora y actualizaciones periodicas. Mantengase al dia con las nuevas publicaciones y anuncios.
garnetcrate outlet – Well-laid-out categories and fast pages make it easy to shop.
driftcrate – The layout is simple and well-organized, very easy to navigate.
shop garnetcrate – Simple design and intuitive navigation make shopping enjoyable.
продвижение сайта [url=https://prodvizhenie-sajtov-v-moskve9.ru/]продвижение сайта[/url] .
La pagina oficial de http://www.evaelfie.es ofrece contenido exclusivo, noticias de ultima hora y actualizaciones periodicas. Mantengase al dia con las nuevas publicaciones y anuncios.
glowgalleria selections – Structured design and smooth flow make shopping simple.
glowgalleria online – Tidy layout with clear categories makes browsing fast and pleasant.
Gold Vendor Online Shop – There’s a sense of expertise combined with genuine hospitality.
harborwharf hub shop – Logical navigation and clear visuals make exploring products effortless.
мостбет в Кыргызстане [url=https://mostbet85961.help]https://mostbet85961.help[/url]
Gold Vendor Online – The presentation feels credible and at the same time open to everyone.
visit harborwharf – The site is intuitive and shopping feels straightforward.
монтаж газового пожаротушения для музея [url=https://montazh-gazovogo-pozharotusheniya-3.ru/]монтаж газового пожаротушения для музея[/url] .
<Find What You Need – The experience feels consistent and easygoing.
профессиональное продвижение сайтов [url=https://prodvizhenie-sajtov-v-moskve11.ru/]профессиональное продвижение сайтов[/url] .
рейтинг спортивных сайтов [url=https://seo-kejsy12.ru/]рейтинг спортивных сайтов[/url] .
cottoncounter official shop – Structured layout and smooth transitions enhanced browsing.
мелбет официальный сайт киргизия [url=melbet30926.help]мелбет официальный сайт киргизия[/url]
<Your Go-To Store – The overall system seems stable and straightforward.
ремонт квартир ключ ціна послуги ремонту квартир
best of cottoncounter – Straightforward navigation and a clutter-free look stood out.
fernaisle homepage – Well-arranged content makes browsing products effortless.
flakefind essentials – Smooth pages and clear interface make browsing effortless.
Flake Find Online – Everything loads quickly and browsing feels effortless.
fernaisle outlet – Pages are tidy and navigation flows naturally throughout.
ремонт у 1 5 квартирі косметичний ремонт квартири
мелбет элсом вывод [url=http://melbet51923.help/]http://melbet51923.help/[/url]
garnetgoods outlet – Well-presented products and easy navigation make shopping smooth.
материалы по маркетингу [url=https://seo-blog15.ru/]материалы по маркетингу[/url] .
goldenvendor hub – Everything is logically organized and easy to browse.
garnetgoods – Easy to navigate, and items are displayed neatly.
shop goldenvendor – Items are well organized and the site is simple to navigate.
Drift Wharf Store – Products are presented clearly with helpful information provided.
материалы по seo [url=https://seo-blog16.ru/]материалы по seo[/url] .
iciclemarket – Just discovered this store today, products look interesting and worth checking.
jasper vendor hub – Noticed this site earlier, appears to have a good variety of items.
visit driftwharf – Clear presentation and useful write-ups make browsing simple.
iciclemarket – Just discovered this store today, products look interesting and worth checking.
browse jasper shop – Noticed this online, looks like a tidy and user-friendly marketplace.
Discover Clover Vendor Deals – Fast responses from customer service helped me resolve issues easily.
harborwharf treasures – Simple and neat design enhances the ease of finding products.
harborwharf choices – Everything is clearly displayed, making it easy to shop.
статьи про seo [url=https://seo-blog14.ru/]статьи про seo[/url] .
Top Picks Online – Support team answered my questions promptly and with clear guidance.
Mario game walkthrough super mario bros deluxe
check lemon loft – The platform seems tidy and easy to navigate.
mostbet aviator стратегия [url=https://mostbet85961.help/]https://mostbet85961.help/[/url]
useful link – Noticed this website while browsing and the layout feels organized and simple.
browse lemon loft – Appears organized and smooth to explore items.
online spot – Came across this site today, the design looks neat and simple to navigate.
online spot – Just found this website, moving through it feels easy and well-structured.
cottoncrate marketplace – No confusion at all, I found my item right away.
мелстрой казино [url=https://t.me/mellstroy_ggame/]мелстрой казино[/url] .
this resource – Ran into this page, layout feels organized and browsing is effortless.
cottoncrate style store – No hassle at all, I found my item almost immediately.
datavio – Color palette felt calming, nothing distracting, just focused, thoughtful design.
quick browse – I discovered this page earlier, interface feels clear and easy to navigate.
flintcrate featured – Simple structure and clear pages make shopping quick.
flintcrate online shop – Clean design and well-laid-out pages make browsing easy.
Fern Finds Store – The site feels responsive and navigation is simple and clear.
this website – I stumbled upon this page, layout is simple and browsing is effortless.
раскрутка сайта франция [url=https://prodvizhenie-sajtov-v-moskve11.ru/]prodvizhenie-sajtov-v-moskve11.ru[/url] .
fernfinds outlet – Smooth interface and responsive pages make exploring simple.
devnex – Navigation felt smooth, found everything quickly without any confusing steps.
graingalleria marketplace – Smooth flow and organized listings make browsing effortless.
garnetmarket outlet – Simple layout makes finding items a smooth process.
graingalleria marketplace – Smooth flow and organized listings make browsing effortless.
bytevia – Found practical insights today; sharing this article with colleagues later.
garnetmarket selections – Easy-to-read layout and quick access to products.
look at jeweljunction – Feels like a clean and simple website for browsing items.
browse this – Came across this page, navigation seems smooth and exploring items is quick.
check this site – Might be worth a quick look if you enjoy discovering online offers.
jeweljunction hub – The layout feels clean, making the shopping experience easy.
online bargain spot – Feels like a convenient site for browsing affordable finds.
harborwharf essentials – Clear structure and tidy presentation simplify exploring products.
check this site – Found this platform today, interface feels organized and browsing items is easy.
duneaisle shopping hub – Navigation feels natural and the interface is clean and minimal.
browse harborwharf – Organized sections allow for smooth product browsing.
duneaisle web store – Simple layout and organized content make browsing effortless.
quick link – Came across this while surfing the web and it seems pretty clear and easy.
recommended page – Just noticed this website, navigation feels straightforward and simple.
online shop – Found this link randomly and it appears quite simple and useful.
Click to Explore – Smooth browsing and simple navigation make the overall experience pleasant.
interesting platform – Found this page today, the design is minimal and easy to navigate.
browse here – Came across this page today, finding products seems quick and intuitive.
Shop Trending Items – Navigation feels effortless and exploring products is quick and simple.
quick browse – I discovered this page earlier, navigating feels simple and convenient.
стратегия продвижения блог [url=https://seo-blog16.ru/]seo-blog16.ru[/url] .
visit cottonvendor – Each item looks carefully crafted and the specs are clearly outlined.
локальное seo блог [url=https://seo-blog15.ru/]seo-blog15.ru[/url] .
dataworks – Mobile version looks perfect; no glitches, fast scrolling, crisp text.
flintfolio deals – Neat sections and helpful descriptions make choosing items effortless.
cottonvendor homepage – The quality shows in the images and the summaries are concise.
flintfolio marketplace – Products are clearly described and the layout is intuitive.
useful link – I ran into this website today, layout is organized and easy to follow.
fernvendor official shop – Easy-to-read presentation and intuitive flow make shopping straightforward.
interesting website – Just found this link, moving through products is simple and quick.
grainmarket showcase – Products are well-presented and navigation feels smooth.
fernvendor shopping hub – Clear sections and neat presentation make finding products easy.
grainmarket finds – Browsing feels natural and everything is easy to locate.
квартира без ремонту послуги ремонту квартир
веб-аналитика блог [url=https://seo-blog14.ru/]seo-blog14.ru[/url] .
gildaisle marketplace – Easy navigation with everything clearly labeled.
check this juniper store – Came across this website today, seems like a useful platform for browsing.
look at this page – Discovered this website today and it seems nicely organized and easy to move through.
интернет агентство продвижение сайтов сео [url=https://prodvizhenie-sajtov-v-moskve11.ru/]интернет агентство продвижение сайтов сео[/url] .
explore gildaisle – Clean design and well-organized categories make browsing a breeze.
juniper crate hub – Found this page today, looks like a tidy platform to explore items.
shop page here – Found this store today and exploring items feels comfortable.
click for store – Saw this website today and it seems pretty easy to explore.
online crate store – Discovered this platform and navigating items feels straightforward.
harborwharf market – Neat structure and clear visuals make finding items effortless.
indigo store page – It appears to be an uncomplicated website to explore quickly.
shop harborwharf – Layout is tidy and finding items feels effortless.
mostbet бонус без депозита правда [url=https://mostbet85961.help]https://mostbet85961.help[/url]
browse this store – It looks like a site that’s simple enough to scan in a short time.
ремонт квартири метрів ключ зробити ремонт квартири
moonvendor – Just found this site while browsing, looks trustworthy and easy to use.
this online store – Found this randomly and the site looks clean and simple to use.
check them out – Stumbled upon this site recently and it seems well-structured and reliable.
check this site – Found this link today, navigation feels smooth and everything looks organized.
this website – I stumbled on this earlier and the navigation looks quite smooth.
this website – I stumbled upon this page, items are well-arranged and simple to navigate.
best of florafinds – Well-organized content and smooth browsing enhance the experience.
covecrate online shop – The brand concept feels cohesive and items appear thoughtfully picked.
shop florafinds – Pages are tidy and browsing feels effortless.
Discover Best Deals – Easy navigation and clear product descriptions help me find what I need fast.
granitecrate essentials – Smooth browsing thanks to clear layout and organized content.
official covecrate site – The theme stands out and the items look carefully chosen.
granitecrate finds – Intuitive layout makes browsing effortless and enjoyable.
Check Out Products – Organized layout and clear details make finding items fast and easy.
fernvendor marketplace – Navigation is smooth and items are easy to locate.
take a look – I discovered this page today, everything is easy to find and well-structured.
fernvendor marketplace – Navigation is smooth and items are easy to locate.
juniperjunction – The layout looks tidy and simple, making browsing easy for anyone.
site I found – Just noticed this page, finding products is clear and convenient.
look at juniper junction – The site appears organized and pleasant to browse.
gildcorner showcase – Organized categories and simple design make shopping effortless.
this resource – Discovered this platform, navigation seems simple and browsing items is quick.
gildcorner collection – Tidy interface, easy to navigate, and everything loads nicely.
harborwharf finds – Clean presentation with intuitive navigation improves the experience.
see this site – Found this page, layout looks clean and exploring products is effortless.
check this vendor site – Ran into this website while searching around and it looks interesting.
harborwharf online – Smooth browsing experience with clearly presented items.
browse this vendor hub – Found this link not long ago and it seems like a decent shopping page.
morningvendor – Just visited this site, the layout is neat and browsing is simple.
продвижения сайта в google [url=https://prodvizhenie-sajtov-v-moskve11.ru/]продвижения сайта в google[/url] .
this website – Came across this page today, navigation feels smooth and effortless.
browse this page – Ran into this site and the structure makes looking around pretty smooth.
cool site – Found this page earlier, everything looks tidy and effortless to use.
lustercrate – Just noticed this page and the tidy layout makes it comfortable to browse.
online spot – Just found this site, the page is clean and navigating is smooth.
floravendor – Simple layout and effortless navigation make browsing quick.
granitegoods online – Everything is neatly arranged, making shopping simple and enjoyable.
floravendor – Simple layout and effortless navigation make browsing quick.
best of granitegoods – Smooth browsing with clear presentation of all items.
creekcart essentials – The browsing process is fluid and pages appear in seconds.
creekcart essentials – The browsing process is fluid and pages appear in seconds.
seo partner [url=https://prodvizhenie-sajtov-v-moskve9.ru/]prodvizhenie-sajtov-v-moskve9.ru[/url] .
junocrate page – Looks like a simple platform with a neat layout.
Field Find Store – Everything is organized well and easy to explore.
junocrate page – Looks like a simple platform with a neat layout.
fieldfind official shop – Layout feels uncluttered and finding items is simple.
link worth checking – Stumbled on this website, layout is tidy and browsing feels effortless.
best of gingergoods – Organized layout and clear product listings make browsing easy.
this platform – I noticed this page while searching, the design feels clear and organized.
gingergoods online – Straightforward design and intuitive pages make browsing a breeze.
quick shop link – The overall design looks neat and easy to navigate.
harborwharf online finds – Organized layout with fast navigation makes browsing easy.
crate deals here – The site structure looks simple and convenient to explore.
блог про seo [url=https://seo-blog16.ru/]блог про seo[/url] .
harborwharf picks – Clear categories and fast-loading pages make exploring simple.
online store – Discovered this page today, it appears well-organized and easy to explore.
site I found – Came across this website, browsing seems smooth and practical.
сео продвижение по трафику clover [url=https://prodvizhenie-sajtov-po-trafiku7.ru/]сео продвижение по трафику clover[/url] .
Good afternoon!
Learn train mysterious regimens to find interesting and valuable fitness facts now and push your limits see on the website for training plans
Full information on the link – https://33capy.site
All the best and development in business!
mellstroy casino официальный [url=https://t.me/mellstroy_ggame/]mellstroy casino официальный[/url] .
контекстная реклама статьи [url=https://seo-blog15.ru/]seo-blog15.ru[/url] .
интернет маркетинг статьи [url=https://seo-blog14.ru/]seo-blog14.ru[/url] .
cool site – Found this page earlier, browsing is smooth and layout is clean.
take a look – I discovered this page earlier, browsing seems effortless and simple.
link worth seeing – Came across this website and the clean layout stands out.
продвижение сайтов интернет магазины в москве [url=https://prodvizhenie-sajtov-v-moskve11.ru/]продвижение сайтов интернет магазины в москве[/url] .
explore harborbundle – Layout feels organized and finding items is effortless.
Claro down [url=https://caiu.site/]Claro down[/url] .
forestaisle – Enjoyed checking out the items, everything feels thoughtfully arranged.
website I found – Just came across this and the design feels light and well structured.
мелбет пополнить с odengi [url=melbet28175.help]melbet28175.help[/url]
harborbundle – Clean design and easy-to-navigate pages make browsing enjoyable.
forestaisle – Enjoyed checking out the items, everything feels thoughtfully arranged.
Good morning!
Unlock travel mysterious destinations with interesting and valuable adventure facts and go where few have gone see on the website for travel guides
Full information on the link – https://33capy.site
All the best and development in business!
browse this juno hub – Found this page, looks organized and easy to explore.
creekcrate curated shop – Neat layout helps me browse products quickly and enjoyably.
visit this junohub – Came across this site today, appears well-structured and user-friendly.
создать сайт прогнозов на спорт в москве [url=https://seo-kejsy13.ru/]создать сайт прогнозов на спорт в москве[/url] .
creekcrate web store – Minimalist approach makes moving between categories seamless.
finchmarket official shop – Pages are uncluttered and shopping flows naturally.
online store – Came across this site, interface seems tidy and products are simple to find.
установка газового пожаротушения под ключ [url=https://montazh-gazovogo-pozharotusheniya-3.ru/]установка газового пожаротушения под ключ[/url] .
finchmarket – Easy-to-navigate layout and smooth browsing make shopping enjoyable.
мостбет Токмок [url=https://www.mostbet85961.help]мостбет Токмок[/url]
ivory market stop – Everything seems well organized and easy to look through.
gingervendor marketplace – Intuitive design and smooth scrolling make the site a joy to use.
useful link – I ran into this website today, the design is simple and easy to navigate.
online shop – Found this store, interface seems organized and exploring products is effortless.
ставки на спорт melbet киргизия [url=http://melbet28175.help/]ставки на спорт melbet киргизия[/url]
ivorymarket – I like how the whole site looks organized and simple to browse.
seo partner [url=https://prodvizhenie-sajtov-v-moskve9.ru/]prodvizhenie-sajtov-v-moskve9.ru[/url] .
shop harborwharf – Layout is tidy and finding items feels effortless.
gingervendor online – Everything is clearly displayed and easy to find, which makes browsing enjoyable.
recommended page – Just noticed this site, finding what I need seems smooth and clear.
this platform – I noticed this page while searching, interface looks clean and easy to move through.
recommended page – Just noticed this site, finding what I need seems smooth and clear.
harborwharf essentials – Clear structure and tidy presentation simplify exploring products.
успешные кейсы seo [url=https://seo-kejsy12.ru/]успешные кейсы seo[/url] .
useful link – I ran into this website today, interface seems simple and practical.
best of harborwharf – Navigation is straightforward and items are easy to explore.
мостбет пополнить баланс [url=mostbet76914.help]mostbet76914.help[/url]
мостбет ставки на спорт 2026 [url=http://mostbet96810.help/]http://mostbet96810.help/[/url]
mostbet регистрация аккаунта [url=https://www.mostbet15247.help]https://www.mostbet15247.help[/url]
this platform – I noticed this page while searching, everything looks neat and accessible.
Forest Vendor Online – Browsing is straightforward and finding products is simple.
harborwharf – Clean layout and smooth navigation make finding items effortless.
forestvendor curated – Pages load quickly and exploring items is easy.
visit here – Just came across this page and it appears pretty straightforward.
check junomarket online – Looks like a neat platform where items are easy to explore.
junomarket page – Appears well-arranged, making it easy to navigate through products.
site I found – Ran into this today and the page arrangement seems clear.
блог seo агентства [url=https://seo-blog16.ru/]seo-blog16.ru[/url] .
продвижение сайта по трафику [url=https://prodvizhenie-sajtov-po-trafiku6.ru/]продвижение сайта по трафику[/url] .
creekvendor outlet – Organized interface that makes the browsing experience smooth.
продвижение сайта трафику [url=https://prodvizhenie-sajtov-po-trafiku7.ru/]prodvizhenie-sajtov-po-trafiku7.ru[/url] .
jadecrate – Interesting shop here, it seems to feature some pretty cool items.
Firefly Find Store – Well-structured pages and organized content make finding items easy.
visit here – Ran into this page while browsing and it feels smooth to navigate.
creekvendor web store – Organized structure and professional look leave a positive impression.
jadecrate item hub – It gives the impression of offering some stylish products.
fireflyfind web store – Clean structure and smooth interface improve the shopping flow.
gladecrate treasures – Well-structured pages and intuitive design make finding products effortless.
take a look – I discovered this page earlier and it seems quite simple to move around.
harborwharf picks – Clear categories and fast-loading pages make exploring simple.
gladecrate features – Everything is easy to access, with an organized layout throughout.
harborwharf choices – Everything is clearly displayed, making it easy to shop.
take a look – I discovered this site today, everything feels well-structured and user-friendly.
google посещаемость сайта [url=https://seo-kejsy13.ru/]google посещаемость сайта[/url] .
check them out – Ran into this website, browsing items seems smooth and practical.
статьи про маркетинг и seo [url=https://seo-blog15.ru/]seo-blog15.ru[/url] .
melbet удалить аккаунт [url=https://melbet93640.help/]https://melbet93640.help/[/url]
мелстрой казино официальный [url=https://t.me/mellstroy_ggame/]мелстрой казино официальный [/url] .
сео блог [url=https://seo-blog14.ru/]seo-blog14.ru[/url] .
Онлайн-журнал https://tga-info.ru со статьями обо всём: от технологий и финансов до психологии, бизнеса и лайфхаков. Читайте полезные материалы, обзоры, аналитические статьи и практические рекомендации для работы, обучения и повседневной жизни.
Строительный портал https://nesmetnoe.ru с полезными статьями о строительстве домов, ремонте квартир, выборе материалов и современных технологиях. Советы специалистов, инструкции, обзоры инструментов, идеи для интерьера и практические решения для частного и коммерческого строительства.
Онлайн-блог https://lifeoflove.ru о семейной жизни, психологии любви и гармоничных отношениях. Читайте статьи о доверии, понимании, воспитании детей, романтике и совместном досуге. Полезные советы и вдохновение для счастливой семейной жизни.
Интернет-журнал https://greendachnik.ru о садоводстве, огороде и ландшафтном дизайне. Полезные статьи о выращивании овощей, фруктов и цветов, уходе за растениями, планировании участка и создании красивого сада. Советы садоводов, идеи оформления и практические рекомендации.
Новости IT https://hardexpert.net и компьютерного мира: новинки технологий, программное обеспечение, гаджеты, компьютерные комплектующие и цифровые сервисы. Обзоры, аналитика, обновления программ и последние события в мире технологий.
cryptora – Mobile version looks perfect; no glitches, fast scrolling, crisp text.
recommended page – Found this link today, items are easy to locate and interface is clean.
установка газового пожаротушения москва [url=https://montazh-gazovogo-pozharotusheniya-3.ru/]montazh-gazovogo-pozharotusheniya-3.ru[/url] .
take a look – I discovered this page earlier, browsing feels intuitive and convenient.
visit kettlecrate – Found this page, seems well-laid-out and user-friendly.
kettle marketplace – The layout is simple and easy to use for visitors.
Discord caiu [url=https://caiu.site/]caiu.site[/url] .
this online store – Ran into this website and the layout seems nicely simple.
jadevendor store – The layout looks neat and browsing through items is straightforward.
kubexa – Color palette felt calming, nothing distracting, just focused, thoughtful design.
quick browse – Just discovered this site, interface seems tidy and simple to explore.
browse here – Spotted this website today and the layout feels soft and simple.
this platform – I noticed this site while searching and it appears convenient to use.
jade vendor shop – This site looks tidy, and scrolling through items feels effortless.
заказать сео анализ сайта пушка [url=https://seo-kejsy12.ru/]заказать сео анализ сайта пушка[/url] .
заказать кухню сайт [url=https://zakazat-kuhnyu-2.ru/]заказать кухню сайт[/url] .
useful link – Stumbled on this site and the layout looks well-organized and easy.
visit rubycrate – Came across this platform, layout looks organized and easy to navigate.
Автомобильный портал https://hyundai-sto.ru со статьями обо всем, что связано с машинами. Новости автопрома, обзоры автомобилей, советы по выбору, ремонту и обслуживанию, сравнения моделей, технологии и полезная информация для водителей и автолюбителей.
Женский сайт https://allsekrets.ru о красоте, моде, здоровье и отношениях. Полезные статьи о стиле, уходе за собой, психологии, семейной жизни и саморазвитии. Советы, идеи и вдохновение для современной женщины, которая хочет выглядеть красиво и чувствовать гармонию.
Женский портал https://idealnaya-ya.ru о красоте, моде, здоровье и гармоничной жизни. Читайте статьи о стиле, отношениях, психологии, воспитании детей, саморазвитии и уходе за собой. Полезные советы, вдохновение и идеи для счастливой жизни.
Все о стройке https://dobdom.ru и ремонте: полезные статьи о строительстве домов, ремонте квартир, отделке помещений и выборе материалов. Советы специалистов, инструкции, идеи для интерьера и практические рекомендации по строительству и благоустройству жилья.
Портал о стройке https://profsmeta3dn.ru и ремонте: строительство домов, ремонт квартир, отделка помещений и современные строительные технологии. Полезные советы мастеров, обзоры материалов и инструмента, инструкции и идеи для ремонта и благоустройства жилья.
cloudiva – Content reads clearly, helpful examples made concepts easy to grasp.
united states gambling sites, best online pokies united kingdom forum and best slot sites usa 2021, or is online gambling taxable in australia
Also visit my blog post – bingo prizes for nursing home residents (Isis)
this resource – Ran into this page, layout is clean and browsing items feels effortless.
devonic – Navigation felt smooth, found everything quickly without any confusing steps.
this resource – Ran into this page, layout is clean and browsing items feels effortless.
apponic – Loved the layout today; clean, simple, and genuinely user-friendly overall.
успешные seo кейсы санкт петербург [url=https://seo-kejsy13.ru/]успешные seo кейсы санкт петербург[/url] .
codefuse – Content reads clearly, helpful examples made concepts easy to grasp.
услуги продвижения сайта clover [url=https://prodvizhenie-sajtov-po-trafiku7.ru/]prodvizhenie-sajtov-po-trafiku7.ru[/url] .
блог про seo [url=https://seo-blog16.ru/]блог про seo[/url] .
browse this page – Came across this website, layout feels clear and accessible.
mostbet лайв казино [url=http://mostbet76914.help]http://mostbet76914.help[/url]
look at keystonecrate – Seems organized and user-friendly for visitors.
сколько стоит заказать кухню [url=https://zakazat-kuhnyu-3.ru/]zakazat-kuhnyu-3.ru[/url] .
продвижение по трафику clover [url=https://prodvizhenie-sajtov-po-trafiku6.ru/]prodvizhenie-sajtov-po-trafiku6.ru[/url] .
online spot – Just found this site, navigating products is straightforward and easy.
An outstanding share! I have just forwarded this onto a colleague who was doing a little research on this.
And he actually ordered me breakfast because I stumbled upon it for
him… lol. So allow me to reword this…. Thanks for the meal!!
But yeah, thanks for spending some time to discuss this topic here on your web page.
My website; Play roulette casino Free
explore keystonecrate – Looks like a clean platform with easy navigation.
securia – Appreciate the typography choices; comfortable spacing improved my reading experience.
mostbet скачать Киргизия [url=www.mostbet85961.help]www.mostbet85961.help[/url]
check jasper junction – Stumbled on this page, seems easy to explore and browse products.
quick visit here – I discovered this website earlier, information is clear and easy to browse.
browse here – Came across this site recently, navigation is effortless and clear.
jasper junction corner – Came across this site, appears to be a tidy and straightforward marketplace.
see this site – Came across this while browsing and it looks like a safe and simple store.
Gaming portal Unblocked Games with free online games. A huge collection of browser games without restrictions: arcades, strategy, racing, logic games, and entertainment for relaxation right in your browser.
MMORPG игра Скрайд — онлайн-мир приключений, сражений и развития персонажа. Выбирайте класс героя, исследуйте локации, участвуйте в PvP и PvE боях, вступайте в гильдии и проходите квесты в захватывающей многопользовательской игре.
Мучает варикоз? https://zdorovie-veny.ru информационный сайт о здоровье вен и лечении варикоза ног: УЗДС диагностика, лечение варикоза, ЭВЛО (лазерное лечение), склеротерапия, восстановление и компрессионный трикотаж. Рекомендации врача, ответы на частые вопросы и профилактика варикоза.
Компания “Маркет Климата” https://market-climata.ru/services/obsluzhivanie-konditsionerov/ предоставляет полный спектр услуг по Техническому обслуживанию кондиционеров в Москве всех марок и моделей.
Go for details: if god exists, why doesn’t he reveal himself?
this store – I stumbled on this earlier and it looks like a decent place to check out.
контекстная реклама статьи [url=https://seo-blog15.ru/]seo-blog15.ru[/url] .
Gaming portal Unblocked Games with free online games. A huge collection of browser games without restrictions: arcades, strategy, racing, logic games, and entertainment for relaxation right in your browser.
MMORPG игра сайт Скрайда — онлайн-мир приключений, сражений и развития персонажа. Выбирайте класс героя, исследуйте локации, участвуйте в PvP и PvE боях, вступайте в гильдии и проходите квесты в захватывающей многопользовательской игре.
Компания “Маркет Климата” https://market-climata.ru/services/obsluzhivanie-konditsionerov/ предоставляет полный спектр услуг по Техническому обслуживанию кондиционеров в Москве всех марок и моделей.
Мучает варикоз? https://zdorovie-veny.ru информационный сайт о здоровье вен и лечении варикоза ног: УЗДС диагностика, лечение варикоза, ЭВЛО (лазерное лечение), склеротерапия, восстановление и компрессионный трикотаж. Рекомендации врача, ответы на частые вопросы и профилактика варикоза.
Read the extended version: the history of upholstery cleaning: from ancient practices to modern furniture care
как продвигать сайт статьи [url=https://seo-blog14.ru/]seo-blog14.ru[/url] .
mellstroy casino [url=https://t.me/mellstroy_ggame/]mellstroy casino[/url] .
монтаж газового пожаротушения москва [url=https://montazh-gazovogo-pozharotusheniya-3.ru/]монтаж газового пожаротушения москва[/url] .
мелбет восстановление аккаунта [url=https://melbet28175.help/]https://melbet28175.help/[/url]
online shop page – Came across this store earlier and the products appear clearly sorted.
мелбет регистрация по телефону [url=www.melbet93640.help]www.melbet93640.help[/url]
seo клиники наркологии [url=https://seo-kejsy12.ru/]seo клиники наркологии[/url] .
заказать кухню с установкой [url=https://zakazat-kuhnyu-2.ru/]zakazat-kuhnyu-2.ru[/url] .
useful link – I ran into this website today, layout is straightforward and clear.
their store link – Took a quick look at the site and the items look interesting.
visit here – Ran into this page recently, navigation feels effortless and straightforward.
seo top 1 [url=https://seo-kejsy13.ru/]seo-kejsy13.ru[/url] .
their collection here – Had a quick look at the shop and a few pieces actually look pretty cool.
browse this page – Ran into this site, the layout feels tidy and intuitive.
jasper vendor hub – Looks like a well-structured online shop to explore various products.
quick visit here – I discovered this website earlier, the layout is simple and smooth to navigate.
jasper vendor hub – Looks like a well-structured online shop to explore various products.
melbet верификация [url=https://melbet93640.help]melbet верификация[/url]
online rubyretail – Came across this store, browsing products seems simple and user-friendly.
melbet лимиты [url=melbet93640.help]melbet лимиты[/url]
online find – Just visited this store, layout looks tidy and browsing products feels smooth.
visit here – Noticed this page recently and the navigation feels intuitive.
site I found – Found this page today and it feels well-organized and easy to explore.
Evoraa Products – Pages are easy to read and the site performs smoothly.
мелбет рабочая ссылка [url=https://www.melbet28175.help]https://www.melbet28175.help[/url]
Click for Evoraa – Very responsive site with clearly displayed item information.
where internet partner [url=https://prodvizhenie-sajtov-po-trafiku7.ru/]prodvizhenie-sajtov-po-trafiku7.ru[/url] .
мелбет cashback [url=https://www.melbet93640.help]https://www.melbet93640.help[/url]
заказать кухню по своим размерам [url=https://zakazat-kuhnyu-3.ru/]заказать кухню по своим размерам[/url] .
online vendor shop – Just noticed this store and browsing the pages feels effortless.
1win бозии қимор [url=http://1win83254.help/]1win бозии қимор[/url]
мелбет вывод киргизия [url=http://melbet28175.help/]http://melbet28175.help/[/url]
look at this store – Just discovered this platform and moving around feels effortless.
продвижение сайта по трафику [url=https://prodvizhenie-sajtov-po-trafiku6.ru/]продвижение сайта по трафику[/url] .
visit here – Ran into this page recently, navigation feels effortless and straightforward.
vendor hub online – Found this site by chance and exploring the pages felt really seamless.
orchardvendor – Just visited this site, everything seems tidy and easy to navigate.
this vendor website – Just found this page and checking different sections felt smooth.
мостбет как получить фрибет [url=mostbet76914.help]mostbet76914.help[/url]
Hello!
Unlock art mysterious meanings with interesting and valuable aesthetic facts today and see beyond the canvas see on the website for art critiques
Full information on the link – https://33capy.site
All the best and development in business!
check this store – I randomly came across this shop and the design feels quite minimal.
мостбет слоты фриспины [url=www.mostbet76914.help]мостбет слоты фриспины[/url]
visit the shop – I ran into this store online and the design looks smooth and easy.
гибридная структура сайта [url=https://seo-kejsy13.ru/]seo-kejsy13.ru[/url] .
check them out – Just noticed this website and the layout is simple and tidy.
check them out – Just noticed this website and the layout is simple and tidy.
Found a bride? https://propose.lol romantic scenarios, beautiful locations, photo shoots, decor, and surprises for the perfect declaration of love. Make your engagement in Barcelona an unforgettable moment in your story.
Official VioletVend Site – Easy-to-browse pages with appealing merchandise.
сколько стоит заказать кухню [url=https://zakazat-kuhnyu-2.ru/]zakazat-kuhnyu-2.ru[/url] .
VioletVend Shop Online – Browsing feels easy and products look impressive.
Honey Market Hub – Simple interface, browsing content was comfortable and quick.
melbet [url=https://melbet93640.help]melbet[/url]
shop page here – Came across this marketplace today and browsing feels easy and intuitive.
Нужен юрист? защита арбитражный процесс в суде представительство в арбитражном суде, защита интересов бизнеса, взыскание задолженности, споры по договорам и сопровождение судебных процессов для компаний и предпринимателей.
Ищешь кран? краны шаровые под приварку для трубопроводов различного назначения. Надежная запорная арматура для систем водоснабжения, отопления, газа и промышленных магистралей. Высокая герметичность, долговечность и устойчивость к нагрузкам.
simple online store – Noticed this site earlier and moving through the pages feels smooth.
Honey Finds – Smooth interface, exploring content was straightforward.
Found a bride? book a private chef for a proposal dinner in Barcelona romantic scenarios, beautiful locations, photo shoots, decor, and surprises for the perfect declaration of love. Make your engagement in Barcelona an unforgettable moment in your story.
Meadow Corner – Pages are tidy, navigating the site feels effortless.
интернет бутик парфюмерии https://elicebeauty.com/parfyumeriya/elitnaya-parfyumeriya/iceberg-burning-ice.html
Проблемы с застройщиком? неустойка с застройщика по дду помощь юриста по долевому строительству, расчет неустойки, подготовка претензии и подача иска в суд. Защитим права дольщиков и поможем получить компенсацию.
Rainy Bazaar Market – Layout feels organized, moving through pages is smooth.
Ищешь кран? кран приварной для трубопроводов различного назначения. Надежная запорная арматура для систем водоснабжения, отопления, газа и промышленных магистралей. Высокая герметичность, долговечность и устойчивость к нагрузкам.
Нужен юрист? услуги арбитражного юриста представительство в арбитражном суде, защита интересов бизнеса, взыскание задолженности, споры по договорам и сопровождение судебных процессов для компаний и предпринимателей.
парфюмерия для женщин https://elicebeauty.com/parfyumeriya/filter/_m114/
visit apricot vendor – Came across this page today and everything seems fast and neatly arranged.
rubyvendor – Found this site earlier, layout seems organized and easy to navigate.
this vendor website – I checked this site earlier and everything appears nicely arranged.
rubyvendor – Found this site earlier, layout seems organized and easy to navigate.
заказать кухню по индивидуальному заказу [url=https://zakazat-kuhnyu-3.ru/]zakazat-kuhnyu-3.ru[/url] .
mostbet бонусы для Кыргызстана [url=http://mostbet15247.help]http://mostbet15247.help[/url]
мостбет официальный сайт вход [url=mostbet96810.help]mostbet96810.help[/url]
resource link – I ran into this page earlier and it looked like a dependable supply source.
check this vendor – I came across this page before and it looked like a reasonable spot to grab supplies.
Explore the site – A welcoming environment filled with inspiration for anyone looking to think and create differently.
Harniq Webstore – Quickly found my item and completed checkout without delay.
Fresh ideas portal – A motivating site that encourages people to learn, explore, and think creatively.
codestackr – Overall, professional vibe here; trustworthy, polished, and pleasantly minimal throughout.
создать сайт прогнозов на спорт в москве [url=https://seo-kejsy13.ru/]создать сайт прогнозов на спорт в москве[/url] .
Harniq Marketplace – Located the right product and checkout was efficient.
Rain Vendor Spot – Layout appears tidy, exploring the site is comfortable.
Icicle Central – Pages are tidy and moving through sections is easy.
Mint Bazaar – Very clean layout, navigating through pages feels effortless.
Rain Vendor Spot – Layout appears tidy, exploring the site is comfortable.
Icicle Finds Hub – Clear layout and navigation works smoothly.
Mint Outlet – Tidy design, browsing between pages is straightforward.
мостбет регистрация без паспорта [url=https://www.mostbet76914.help]https://www.mostbet76914.help[/url]
Discover the thrill of real-money live casino action at [url=https://maxispin-au.com/]Maxispin mobile casino[/url], where you can enjoy live dealers, top software providers, and exclusive promotions.
The platform maintains transparent policies so users are aware of rules and standards.
crate resource page – Just noticed this site and the simple structure makes browsing nice.
crate resource page – Just noticed this site and the simple structure makes browsing nice.
mostbet пополнение без комиссии [url=http://mostbet15247.help/]http://mostbet15247.help/[/url]
мостбет приложение Киргизия [url=http://mostbet96810.help/]http://mostbet96810.help/[/url]
valetrade – Came across this platform today, browsing feels straightforward and intuitive overall.
valetrade – Came across this platform today, browsing feels straightforward and intuitive overall.
external vendor – Found this site while searching and it gives a trustworthy impression.
visit the store – Noticed this page earlier and it gave the impression of being legit.
Visit KindleMart – Solid selection available and the website responds instantly.
KindleMart Shopping – Good mix of products and everything loads super fast.
Raven Lane Picks – Clean and organized layout, browsing the website is simple.
Raven Lane Finds – Simple and tidy design, moving between pages is effortless.
sagecorner shop – Found this site, navigation is smooth and exploring products is straightforward.
Mint Picks Studio – Smooth pages, navigating sections feels natural.
quick browse – Found this website, navigation seems smooth and items are easy to find.
Icicle Selection – Pages are neat and moving around is very simple.
joycasino официальный [url=https://t.me/joy_casino_news/]joycasino официальный[/url] .
quick visit here – Just checked this site and the layout makes everything easy to find.
Mint Treasure Studio – Well-arranged layout, moving through content is simple.
Icicle World – Structured layout, browsing feels natural and easy.
birchbasketmarket – Just found this site and the design feels really clean and easy to navigate.
Start browsing here – The store’s layout is neat and practical, making navigation smooth.
Explore Valleycrate online – A compact store with a clear design that helps visitors navigate without confusion.
codepushr – Overall, professional vibe here; trustworthy, polished, and pleasantly minimal throughout.
devpush – Navigation felt smooth, found everything quickly without any confusing steps.
stock warehouse online – The website seems well organized and pretty smooth on my phone.
AisleGlow Specials – Clean structure and well-grouped sections improve browsing.
gitpushr – Appreciate the typography choices; comfortable spacing improved my reading experience.
supplier warehouse page – I checked a few pages and the mobile browsing experience felt solid.
Discover AisleGlow – Navigation feels natural and categories are arranged thoughtfully.
mergekit – Appreciate the typography choices; comfortable spacing improved my reading experience.
River Vendor Vault – Pages are organized well, browsing across sections is smooth.
River Outlet Hub – Clear structure overall, exploring the site feels comfortable.
mostbet заморозили вывод [url=http://mostbet15247.help]http://mostbet15247.help[/url]
мостбет заморозили вывод [url=https://www.mostbet96810.help]https://www.mostbet96810.help[/url]
visit birch bazaar – Found this page earlier and moving around the site feels easy.
Moon World Corner – Clear structure, moving between pages is easy.
Discover this shop – Recently spotted this website and the structure seems simple to navigate.
go to this bazaar hub – Found this page today and browsing the sections is pretty straightforward.
Check out Valleyvendor – I just found this website and the structure feels tidy and easy to explore.
Moon Market Hub – Layout feels tidy, moving through sections is natural.
Ivory Storefront – Neatly organized layout, browsing is effortless.
Visit Ulvika – Helpful product details and smooth overall browsing experience.
Ulvika Marketplace – Helpful product breakdowns and effortless navigation.
sage crate online – Just visited this site, layout is tidy and browsing feels effortless.
online vault vendor – I just discovered this page and it feels clearly laid out.
mellstroy casino официальный [url=https://t.me/mellstroy_ggame/]mellstroy casino официальный[/url] .
монтаж газового пожаротушения для музея [url=https://montazh-gazovogo-pozharotusheniya-3.ru/]монтаж газового пожаротушения для музея[/url] .
visit willow vault – I opened this page for the first time today and everything seems neatly arranged.
joycasino [url=https://t.me/joy_casino_news/]joycasino[/url] .
Rose Market Place – Organized platform, moving between pages is smooth.
check sagecrate – Came across this platform, interface feels neat and exploring products is easy.
кухни на заказ от производителя в спб [url=https://kuhni-spb-43.ru/]кухни на заказ от производителя в спб[/url] .
Rose Vendor Studio – Neat pages and simple interface, exploring the site is comfortable.
кухни под заказ в спб [url=https://kuhni-spb-42.ru/]kuhni-spb-42.ru[/url] .
мелбет создать аккаунт [url=www.melbet28175.help]www.melbet28175.help[/url]
кухню заказать [url=https://zakazat-kuhnyu-4.ru/]кухню заказать[/url] .
сабти ном дар 1win [url=www.1win83254.help]сабти ном дар 1win[/url]
Found a bride? best places for a proposal in Barcelona romantic scenarios, beautiful locations, photo shoots, decor, and surprises for the perfect declaration of love. Make your engagement in Barcelona an unforgettable moment in your story.
Информационный сайт https://zdorovie-veny.ru о здоровье вен и лечении варикоза ног: УЗДС диагностика, лечение варикоза, ЭВЛО (лазерное лечение), склеротерапия, восстановление и компрессионный трикотаж. Рекомендации врача, ответы на частые вопросы и профилактика варикоза.
Проблемы с застройщиком? неустойка по договору дду помощь юриста по долевому строительству, расчет неустойки, подготовка претензии и подача иска в суд. Защитим права дольщиков и поможем получить компенсацию.
Нужен юрист? юрист арбитражный суд москва представительство в арбитражном суде, защита интересов бизнеса, взыскание задолженности, споры по договорам и сопровождение судебных процессов для компаний и предпринимателей.
Longreads and hits: https://jpabs.org/800/600/http/mongocco.sakura.ne.jp/bbs/index.cgi?command=viewres&target=255524361
монтаж системы газового пожаротушения спб [url=https://montazh-gazovogo-pozharotusheniya-1.ru/]montazh-gazovogo-pozharotusheniya-1.ru[/url] .
Check out the marketplace – Came across the platform; the structure is simple and navigation-friendly.
vendor resource page – Just noticed this page and browsing around is smooth and clear.
View this vendor – Came across this platform; pages are well-organized and navigation is smooth.
Проблемы с застройщиком? металлический шильдик помощь юриста по долевому строительству, расчет неустойки, подготовка претензии и подача иска в суд. Защитим права дольщиков и поможем получить компенсацию.
Нужен юрист? помощь арбитражного адвоката представительство в арбитражном суде, защита интересов бизнеса, взыскание задолженности, споры по договорам и сопровождение судебных процессов для компаний и предпринимателей.
Информационный сайт https://zdorovie-veny.ru о здоровье вен и лечении варикоза ног: УЗДС диагностика, лечение варикоза, ЭВЛО (лазерное лечение), склеротерапия, восстановление и компрессионный трикотаж. Рекомендации врача, ответы на частые вопросы и профилактика варикоза.
go to this vendor hub – Found this site today and the structure feels logical and clean.
See details: https://www.volimpivo.ba/forum/showthread.php?tid=397&pid=8639
Moss Picks Online – Smooth pages, browsing sections feels natural.
Moss Treasure Hub – Well-arranged layout, navigating content is simple.
Ivory Treasure Online – Layout is clear and browsing through the site feels natural.
Ivory Finds Hub – Simple interface, exploring pages is easy and smooth.
IrisVendor Shopping – Pages open rapidly and the products appear nicely made.
1win suport live chat [url=www.1win83062.help]www.1win83062.help[/url]
IrisVendor Store – Quick loading site with items that seem very well made.
A website https://grand-screen.com for searching and analyzing mobile apps. Compare features, explore reviews, ratings, and capabilities of Android and iOS apps. A convenient catalog helps you quickly find useful services and programs.
Rose Studio Picks – Well-arranged sections, exploring the site feels effortless.
supplier crate site – Gave it a quick visit and the items seem neatly listed.
Rose Lane Studio Hub – Clean design overall, browsing the sections feels effortless.
A website https://grand-screen.com for searching and analyzing mobile apps. Compare features, explore reviews, ratings, and capabilities of Android and iOS apps. A convenient catalog helps you quickly find useful services and programs.
Нужен отель? отель белорусская идеальное место для расслабления в центре столицы. Тихий бутик-отель 4* сочетает классический комфорт с современным спа-комплексом. Гостей ждет настоящий отдых: можно посетить бассейн, расслабиться в сауне или заказать индивидуальные программы. Уютные номера и близость к метро делают этот отель со спа в Москве идеальным выбором для романтических и оздоровительных путешествий.
Montaz aluminiowego zadaszenia tarasowego DIY https://aluminum-etrrace-canopies.ru
Отель в центре Москвы снять апартаменты в москва-сити омфортное размещение рядом с главными достопримечательностями столицы. Уютные номера, современный сервис, удобное расположение рядом с метро, ресторанами и деловыми центрами города.
crate store link – The site layout looks clear and not confusing at all.
Visit the market hub – Found this online marketplace and the interface feels intuitive.
Нужен отель? отель спа москва идеальное место для расслабления в центре столицы. Тихий бутик-отель 4* сочетает классический комфорт с современным спа-комплексом. Гостей ждет настоящий отдых: можно посетить бассейн, расслабиться в сауне или заказать индивидуальные программы. Уютные номера и близость к метро делают этот отель со спа в Москве идеальным выбором для романтических и оздоровительных путешествий.
Отель в центре Москвы апартаменты в москва сити омфортное размещение рядом с главными достопримечательностями столицы. Уютные номера, современный сервис, удобное расположение рядом с метро, ресторанами и деловыми центрами города.
чӣ гуна фри бет 1win гирифтан [url=http://1win83254.help]http://1win83254.help[/url]
Nowoczesne aluminiowe zadaszenia tarasowe https://aluminum-etrrace-canopies.ru
See the marketplace – Just discovered this platform and the design feels clear and accessible.
this vendor website – I checked this page earlier and the structure feels smooth and organized.
visit the vendor page – Found this site by chance and the layout is simple and clear.
ленинградские кухни [url=https://kuhni-spb-43.ru/]kuhni-spb-43.ru[/url] .
Moss Treasure House – Well-arranged pages, navigating content is simple.
gambling statistics uk 2021, free spins no deposit casinos
usa and 21 dukes casino review, or top online pokies nz
Here is my page Goplayslots.Net
Moss Central House – Organized sections make browsing smooth.
mostbet бездепозитный бонус [url=http://mostbet96810.help/]http://mostbet96810.help/[/url]
mostbet сменить валюту [url=https://www.mostbet15247.help]mostbet сменить валюту[/url]
satin shopping – Came across this platform, interface is tidy and navigation feels effortless.
кухня по индивидуальному проекту [url=https://kuhni-spb-42.ru/]kuhni-spb-42.ru[/url] .
Jasper Vendor Hub – Very clean layout, navigating the pages feels effortless.
установка автоматического газового пожаротушения [url=https://montazh-gazovogo-pozharotusheniya-1.ru/]montazh-gazovogo-pozharotusheniya-1.ru[/url] .
Jasper Finds Hub – Simple design, moving through sections feels smooth.
see satinrack – Came across this website, interface looks clean and browsing feels effortless.
заказать кухню по индивидуальным размерам [url=https://zakazat-kuhnyu-4.ru/]заказать кухню по индивидуальным размерам[/url] .
Browse OliveOrder – The clean structure makes browsing quick and pleasant.
Browse OliveOrder – The clean structure makes browsing quick and pleasant.
Ruby Bazaar Vault – Friendly design overall, navigation feels simple and clear.
Ruby Vendor Picks – Organized layout, browsing between sections is comfortable.
Look inside VerdantVendor – Just discovered this site; layout is clean, and navigation flows smoothly.
Browse this vendor – Recently came across it; the interface is organized and smooth to use.
online warehouse source – Took a look and the site performance seems excellent.
warehouse resource – Stumbled on the page and everything loaded almost instantly.
playtech casinos usa, vancouver united states casino and best online
poker site how did general blackjack pershing help get america ready for world war i (Waldo) beginners usa, or new zealandn online gambling
sites
explore this vendor site – Came across this page earlier and browsing feels comfortable.
online casino canada real money for casino heist (Juliane) roulette,
real pokies australia and united statesn online pokies sign up bonus, or new casino no deposit bonus 2021 uk
visit clover vendor house – Came across this page today and everything seems well organized.
shipkit – Appreciate the typography choices; comfortable spacing improved my reading experience.
Night Stop Market – Clean interface, browsing pages is smooth.
Night Stop Market – Clean interface, browsing pages is smooth.
1win depunere paynet [url=https://1win83062.help/]https://1win83062.help/[/url]
1win код тасдиқ намеояд [url=https://1win83254.help]1win код тасдиқ намеояд[/url]
Elnesta Marketplace – Everything ran smoothly and payment was processed quickly.
Discover Elnesta – The process was simple from start to finish, especially checkout.
кухни на заказ в спб недорого [url=https://kuhni-spb-43.ru/]кухни на заказ в спб недорого[/url] .
1win ставки на теннис [url=www.1win32786.help]www.1win32786.help[/url]
deploykit – Content reads clearly, helpful examples made concepts easy to grasp.
Sage Bazaar Spot – Well-arranged layout, exploring the site feels comfortable.
violetmarket – Came across this store, navigation looks clean and intuitive overall today.
commitkit – Loved the layout today; clean, simple, and genuinely user-friendly overall.
Depot Corner of Jewels – Well-organized structure, browsing feels effortless.
Sage Studio – Well-organized platform, moving between sections is easy.
violetmarket – Came across this store, navigation looks clean and intuitive overall today.
Jewel Corner Online – Pages feel clean and moving through sections is easy.
testkit – Content reads clearly, helpful examples made concepts easy to grasp.
1win timp retragere [url=https://www.1win83062.help]1win timp retragere[/url]
1win cont nou rapid [url=http://1win83062.help/]1win cont nou rapid[/url]
materials crate – Browsed quickly and the layout makes navigation simple.
1win бонусы ставок [url=https://1win32786.help]1win бонусы ставок[/url]
кухни в спб от производителя [url=https://kuhni-spb-42.ru/]кухни в спб от производителя[/url] .
установка модулей газового пожаротушения [url=https://montazh-gazovogo-pozharotusheniya-1.ru/]установка модулей газового пожаротушения[/url] .
open the vendor page – I noticed this site today and the structure feels simple and user-friendly.
crate vendor page – Opened the site and navigating felt very comfortable.
this vendor platform – Found this page today and moving through the sections feels natural.
open the site here – Came across this website just now and it seems cleanly designed and easy to explore.
заказать кухню с доставкой [url=https://zakazat-kuhnyu-4.ru/]zakazat-kuhnyu-4.ru[/url] .
1win aviator trucuri [url=http://1win83062.help]http://1win83062.help[/url]
check this store – Ran into this site today and it seems nicely structured and easy to navigate.
TinyTill Shop Online – Saving this site for my next purchase.
Oak Picks Outlet – Smooth pages, exploring content is simple.
Explore TinyTill – Adding this to my bookmarks for future purchases.
Direct access to vendor – A well-structured site that makes finding and exploring items simple.
Oak Corner Outlet – Pages are clean, browsing feels straightforward.
Sage Bazaar House – Organized layout, browsing through pages is comfortable.
Check the vendor page – A smooth platform where moving through items is simple and organized.
Sage Studio Spot – Well-arranged design, browsing the site feels smooth.
logkit – Pages loaded fast, images appeared sharp, and formatting stayed consistent.
mostbet приложение 2026 [url=http://mostbet15247.help]http://mostbet15247.help[/url]
мостбет официальный [url=www.mostbet96810.help]www.mostbet96810.help[/url]
Jewel Depot Hub – Clean layout and browsing through pages feels smooth.
Jewel Picks Hub – Neatly organized pages make moving through content easy.
see the coral shop – I ran into this page earlier and the pages are structured clearly.
lbs что это [url=https://shkola-onlajn-32.ru/]shkola-onlajn-32.ru[/url] .
дистанционное обучение 7 класс [url=https://shkola-onlajn-31.ru/]shkola-onlajn-31.ru[/url] .
vault info hub – Found this link today, the material looks practical.
this vendor platform – Found this site today and moving through the sections feels effortless.
wintervault – Just came across this site, and the content seems quite useful.
онлайн школа для школьников с аттестатом [url=https://shkola-onlajn-35.ru/]онлайн школа для школьников с аттестатом[/url] .
московская школа онлайн обучение [url=https://shkola-onlajn-34.ru/]shkola-onlajn-34.ru[/url] .
1win asistenta Moldova [url=https://1win83062.help]1win asistenta Moldova[/url]
онлайн школа с 1 по 11 класс [url=https://shkola-onlajn-33.ru/]онлайн школа с 1 по 11 класс[/url] .
мелбет рабочее зеркало [url=https://melbet-ru.it.com/]мелбет рабочее зеркало[/url] .
promptkit – Pages loaded fast, images appeared sharp, and formatting stayed consistent.
flowbot – Mobile version looks perfect; no glitches, fast scrolling, crisp text.
modelops – Color palette felt calming, nothing distracting, just focused, thoughtful design.
Olive Market Hub – Tidy pages, browsing content feels smooth.
view the website – The overall structure makes browsing around feel easy.
databrain – Overall, professional vibe here; trustworthy, polished, and pleasantly minimal throughout.
check this shop – The site looks straightforward and switching pages is quick.
Olive Outlet – Clear design, moving through pages feels effortless.
1win проверка безопасности [url=https://1win36247.help]1win проверка безопасности[/url]
mostbet как пополнить с карты [url=https://mostbet49271.help/]https://mostbet49271.help/[/url]
1win вывод в сомах [url=www.1win68017.help]1win вывод в сомах[/url]
mostbet ставки на киберспорт Кыргызстан [url=https://mostbet49271.help]https://mostbet49271.help[/url]
crash 1win [url=https://1win83254.help]https://1win83254.help[/url]
crate marketplace online – Just noticed this page and the layout is clean and easy to browse.
Juniper Stop – Clean pages, navigating through sections is easy.
take a look here – Spotted this website today and the product listings look nicely organized.
this vendor website – I checked this page earlier and the interface looks clean and user-friendly.
Juniper Storefront – Well-organized pages make browsing simple.
external market source – Just discovered this, looks like a practical place to check.
browse this shop – Discovered this page recently and the layout seems clean and easy to follow.
vendor hub – Browsed quickly, looks like a marketplace worth a deeper look.
онлайн-школа для детей [url=https://shkola-onlajn-32.ru/]онлайн-школа для детей[/url] .
интернет-школа [url=https://shkola-onlajn-31.ru/]shkola-onlajn-31.ru[/url] .
онлайн-школа с аттестатом бесплатно [url=https://shkola-onlajn-34.ru/]онлайн-школа с аттестатом бесплатно[/url] .
школьное образование онлайн [url=https://shkola-onlajn-35.ru/]школьное образование онлайн[/url] .
go to the shop – I browsed it briefly and the layout feels neat.
Olive Treasure Hub Studio – Clean and well-arranged pages, moving between sections is simple.
Olive Online Studio – Layout is clean, navigating pages is simple.
check this website – Took a quick look and everything seems clearly arranged.
online betting on sports [url=https://melbet-ru.it.com/]online betting on sports[/url] .
1win как вывести крупную сумму [url=1win32786.help]1win32786.help[/url]
онлайн класс [url=https://shkola-onlajn-33.ru/]онлайн класс[/url] .
open the bazaar page – I checked this website today and browsing is comfortable and smooth.
bazaar marketplace online – Just noticed this site and the layout is tidy and easy to follow.
Kettle Outlet – Simple design, browsing content feels natural.
Очередная волна разговоров о том, что SEO больше не работает. Как по мне, те, кто так говорят, либо не сталкивались с грамотным продвижением, либо ожидали быстрых результатов. Нашел статью, где хорошо объясняется, почему SEO остается основой устойчивого онлайн-бизнеса. Основные тезисы: органический трафик никуда не уходит, доверие к топовым сайтам выше, а стоимость привлечения клиента со временем только снижается. Почитайте, тема раскрыта аргументированно: https://iskra-net.ru/preimushhestva-prodvizheniya-sajtov-pochemu-seo-eto-osnova-ustojchivogo-onlajn-biznesa/ . Особенно полезно будет тем, кто ищет долгосрочные каналы, а не разовые всплески.
Kettle Treasure Hub – Well-arranged sections make browsing effortless.
vault shop page – The layout is neat, and navigating through sections feels simple.
visit woodland vault – Pages are neatly arranged and the layout feels very tidy.
1win лимит на о деньги [url=http://1win32786.help/]http://1win32786.help/[/url]
слоты mostbet [url=http://mostbet49271.help/]http://mostbet49271.help/[/url]
онлайн класс [url=https://shkola-onlajn-32.ru/]онлайн класс[/url] .
Opal Market – Well-organized pages, browsing feels effortless.
1win вывести баланс на элсом [url=www.1win32786.help]1win вывести баланс на элсом[/url]
explore silver – Pages are well-structured and browsing feels effortless.
seacrate – Just noticed this store today, the interface looks clean and comfortable to browse.
Opal Picks – Tidy layout, navigating the site is smooth.
онлайн класс [url=https://shkola-onlajn-34.ru/]онлайн класс[/url] .
go to the bazaar – The site layout is clear and clicking through sections is smooth.
ломоносов школа [url=https://shkola-onlajn-31.ru/]shkola-onlajn-31.ru[/url] .
this shop link – I noticed this store today and the layout appears neat and simple to browse.
this vendor website – I checked this site earlier and the information is presented neatly and understandably.
школа онлайн [url=https://shkola-onlajn-35.ru/]школа онлайн[/url] .
this online vendor hub – Ran into this site today and the interface feels tidy and easy to follow.
melbet казино скачать [url=https://melbetmobi.ru/]melbet казино скачать[/url] .
melbet рабочее зеркало на сегодня [url=https://melbet-ru.it.com/]melbet рабочее зеркало на сегодня[/url] .
Bazaar Lantern – Clear structure, moving through sections is smooth.
Lantern Picks Online – Smooth layout and browsing content feels easy.
market shop page – The page came up in search results, seems worth checking.
market info hub – Found this online, seems like a practical site to explore.
скачать мелбет [url=https://mobilemelbet.ru/]скачать мелбет[/url] .
1win коди промо [url=http://1win83254.help]1win коди промо[/url]
Opal Stop Hub Vault – Pages feel well organized, navigating is effortless.
take a look – The pages are tidy and moving between them feels effortless.
vendor resource page – Just came across this page and the interface looks neat and easy to use.
Opal World Vault – Well-laid out site, browsing is comfortable.
check the site – The navigation is intuitive, and browsing is quick.
crystal hub online – Found this page and moving through it feels smooth and user-friendly.
Lantern Storefront – Organized pages make browsing effortless.
обучение стриминг [url=https://shkola-onlajn-31.ru/]shkola-onlajn-31.ru[/url] .
Lantern Stop – Clean pages, moving between sections feels effortless.
browse the warehouse – Checked it briefly, seems like a reliable place to explore.
melbet ru официальный [url=https://melbet-ru.it.com/]melbet ru официальный[/url] .
online warehouse hub – Discovered this site today, and it gives a trustworthy impression.
melbet официальный сайт скачать бесплатно [url=https://melbetmobi.ru/]melbet официальный сайт скачать бесплатно[/url] .
мостбет бонус на первый депозит [url=http://mostbet49271.help]мостбет бонус на первый депозит[/url]
browse this link – I saw this page today and the interface looks well arranged.
mostbet вход не работает [url=http://mostbet49271.help]http://mostbet49271.help[/url]
see this shop – Just noticed this website and it looks nicely arranged for browsing.
dawnvendoroutlet – Just came across this site and the layout is tidy and simple to navigate.
1win blackjack live Moldova [url=http://1win38174.help]1win blackjack live Moldova[/url]
browse dawn vendor outlet hub – Found this page earlier and the pages are clean, organized, and easy to browse.
Orchard Marketplace – Tidy interface, moving around the sections is smooth.
view the shop – The site feels organized and moving between sections is quick.
Orchard Stop – Pages look tidy, moving between sections is straightforward.
browse here – Everything feels clean and organized, easy to navigate.
1вин lucky jet демо [url=https://1win36247.help]1вин lucky jet демо[/url]
1вин скачать на android [url=http://1win68017.help/]http://1win68017.help/[/url]
Lavender Storefront – Organized pages make exploring effortless.
Lavender Treasure Hub – Well-arranged layout, exploring content is simple.
warehouse resource page – Simple and minimal layout with very responsive pages.
browse zen warehouse – I like how fast the pages load and how simple everything looks.
lbs что это [url=https://shkola-onlajn-35.ru/]lbs что это[/url] .
дистанционное обучение 11 класс [url=https://shkola-onlajn-34.ru/]дистанционное обучение 11 класс[/url] .
ломоносов школа [url=https://shkola-onlajn-33.ru/]ломоносов школа[/url] .
open the vendor page – I checked this website today and the pages are neat and easy to follow.
мелбет казино скачать на айфон [url=https://mobilemelbet.ru/]мелбет казино скачать на айфон[/url] .
московская школа онлайн обучение [url=https://shkola-onlajn-32.ru/]shkola-onlajn-32.ru[/url] .
Pearl Stop Hub – Organized structure, browsing the site is easy.
online bazaar – The site feels organized and navigating through pages is simple.
мелбет рабочее зеркало сегодня [url=https://melbet-ru.it.com/]мелбет рабочее зеркало сегодня[/url] .
Pearl Market Spot – Simple layout, exploring sections feels smooth.
1вин Uzcard пополнение [url=http://1win36247.help/]1вин Uzcard пополнение[/url]
visit the bazaar – Checked it out, and navigating between sections feels effortless.
1win пополнить баланс мегапей [url=http://1win68017.help/]http://1win68017.help/[/url]
quick link to shoremarket – Just checked this site, and navigating the listings feels easy and organized.
мостбет авиатор играть [url=http://mostbet58041.help/]мостбет авиатор играть[/url]
как играть в mines mostbet [url=https://mostbet49271.help/]https://mostbet49271.help/[/url]
visit zephyr vendor – Came across this page, looks like a solid resource.
visit the store – Discovered this marketplace today, and the interface appears tidy and user-friendly.
vendor link here – I discovered it today, looks like a solid place to check.
vendor resource page – Just came across this page and the interface is clean and easy to follow.
this platform – I noticed this page while searching, interface is clear and easy to navigate.
explore this vendor site – Came across this site earlier and everything is clear and easy to follow.
check this out – Found this page earlier, layout is tidy and items are simple to find.
browse this keystone hub – Found this platform, seems well-laid-out and minimal.
taskpipe – Appreciate the typography choices; comfortable spacing improved my reading experience.
online keystonehub – Found this page, seems simple and easy to navigate.
smartpipe – Overall, professional vibe here; trustworthy, polished, and pleasantly minimal throughout.
opsbrain – Pages loaded fast, images appeared sharp, and formatting stayed consistent.
Pebble Treasure – Neat design, navigation is effortless.
official site – Well-laid-out pages make browsing comfortable.
Pebble Market – Smooth pages, moving between sections is straightforward.
онлайн школа 11 класс [url=https://shkola-onlajn-35.ru/]онлайн школа 11 класс[/url] .
дистанционное обучение 10-11 класс [url=https://shkola-onlajn-34.ru/]дистанционное обучение 10-11 класс[/url] .
stonebazaar – Clean and simple layout, navigating through pages is smooth.
guardstack – Found practical insights today; sharing this article with colleagues later.
ломоносовская школа онлайн [url=https://shkola-onlajn-32.ru/]ломоносовская школа онлайн[/url] .
мелбет скачать на андроид бесплатно [url=https://mobilemelbet.ru/]мелбет скачать на андроид бесплатно[/url] .
securekit – Mobile version looks perfect; no glitches, fast scrolling, crisp text.
Lemon Vendor Store – Very tidy layout, browsing pages feels effortless.
Lemon Storefront – Organized pages make browsing effortless.
онлайн обучение 11 класс [url=https://shkola-onlajn-33.ru/]shkola-onlajn-33.ru[/url] .
1вин фриспины [url=https://1win36247.help]https://1win36247.help[/url]
melbet официальный сайт скачать [url=https://melbetmobi.ru/]melbet официальный сайт скачать[/url] .
vendor marketplace online – Just noticed this site and browsing around is effortless and intuitive.
1win Киргизия [url=http://1win32786.help/]http://1win32786.help/[/url]
pipelinesy – Bookmarked this immediately, planning to revisit for updates and inspiration.
1win ставки в Киргизии [url=1win68017.help]1win68017.help[/url]
cool site – Found this site today, layout looks organized and browsing is simple.
browse echo aisle corner hub – Found this page earlier and the sections are well-arranged, making browsing easy.
visit here – Came across this platform today, exploring products is quick and effortless.
Pine Corner – Simple interface, moving between pages is smooth.
explore shorerack shop – I found this platform earlier and it seems well organized and user-friendly.
Pine Corner Hub – Simple pages, exploring content is effortless.
see the store – Clean structure and easy navigation make browsing enjoyable.
visit the bazaar – The layout is minimal and exploring the site is easy.
visit this store – I stumbled upon this platform and the interface feels clean and organized.
mostbet загрузка [url=http://mostbet58041.help]http://mostbet58041.help[/url]
Linen Marketplace – Pages are neatly arranged, exploring the site is comfortable.
browse this vendor platform – Came across this site earlier and scrolling through it feels smooth and clear.
vendor marketplace online – Just noticed this page and moving through it is simple and convenient.
мостбет скачать с официального сайта [url=https://mostbet58041.help]https://mostbet58041.help[/url]
browse here – Came across this platform recently, finding items is easy and intuitive.
melbet скачать на айфон с официального сайта [url=https://mobilemelbet.ru/]melbet скачать на айфон с официального сайта[/url] .
mostbet слоты играть [url=https://mostbet58041.help/]https://mostbet58041.help/[/url]
browse here – Came across this platform recently, finding items is easy and intuitive.
1win мобильная версия [url=https://1win20819.help]https://1win20819.help[/url]
1 win [url=https://1win82361.help/]https://1win82361.help/[/url]
velvet sellers studio – Enjoyed a quick browse, everything feels well structured
мостбет изменить пароль [url=mostbet58041.help]mostbet58041.help[/url]
open the velvet studio – Checked out the site today and it looks visually appealing
vendor collective homepage – Browsing was smooth and the interface is clear
official vendor collective link – Everything looks organized and browsing feels effortless
Plum Picks – Neat website, navigation is simple.
melbet скачать приложение [url=https://melbetmobi.ru/]melbet скачать приложение[/url] .
check it out – Noticed this page today, everything is organized and simple to navigate
Plum Marketplace – Simple design, navigating between sections is smooth.
visit platform – Noticed this site, design is simple and easy to browse
browse the timber shop – Pages are clear and transitions feel smooth.
site link – Checked this site randomly, structure is logical and browsing feels effortless
ломоносов скул [url=https://shkola-onlajn-33.ru/]ломоносов скул[/url] .
take a look – Checked this marketplace, layout is neat and pages are intuitive
Maple Shop Online – Clear layout, navigating pages is comfortable.
online crate house – Layout is minimal and navigating pages is effortless.
Maple World – Clear structure, navigating content is simple.
this online market hub – Ran into this page today and moving through the content feels natural.
marketplace online – Just noticed this page and moving through it is smooth and straightforward.
open the shop – Recently came across this site and the interface feels smooth and modern
view their products – Had a short browse and the platform feels organized and simple
see this website – Came across this page earlier, interface is practical and navigating products is smooth.
live casino 1win [url=https://www.1win38174.help]https://www.1win38174.help[/url]
1win как открыть сайт [url=http://1win60925.help/]http://1win60925.help/[/url]
take a look – I discovered this site earlier, layout is clear and items are simple to find.
birch vendor page – Browsing through sections is smooth and enjoyable
seller bazaar link – Pages load fast and the design feels approachable
plinko 1win [url=http://1win36247.help/]http://1win36247.help/[/url]
browse the marketplace – Layout feels organized and browsing categories is smooth
Всем привет! Наткнулся на статью, где собраны не просто базовые понятия, а реально работающие стратегии и инструменты с привязкой к текущим реалиям. Автор рассматривает комплексный подход: от сбора семантики до юзабилити и работы с интентом. Очень порадовало, что материал свежий (январь 2026) и учитывает последние тренды. Оставляю ссылку здесь, может, кому-то пригодится для актуализации своих знаний: https://sobolland.ru/prodvizhenie-sajtov-strategii-instrumenty-i-aktualnye-podhody/ . Особенно полезно будет новичкам для формирования целостной картины.
birch vendor hub – Clean layout with smooth browsing experience
open this store – Came across this platform recently, layout feels organized and effortless to browse.
browse the violet bazaar – The pages load nicely and the interface is welcoming
mostbet сайт регистрация [url=http://mostbet58041.help/]mostbet сайт регистрация[/url]
check this store – First look shows a well-organized platform, navigation is effortless
1win авторизация [url=http://1win68017.help]1win авторизация[/url]
check this marketplace – First impression is positive, pages are easy to navigate and visually neat
open this store – Came across this platform recently, layout feels organized and effortless to browse.
1win легально ли в Киргизии [url=https://www.1win60925.help]https://www.1win60925.help[/url]
мелбет скачать на андроид бесплатно [url=https://melbetlink.ru/]мелбет скачать на андроид бесплатно[/url] .
gladevendorcollective.shop – Nice platform overall, browsing works smoothly and sections are clear
мелбет скачать на телефон [url=https://shopledo.ru/]shopledo.ru[/url] .
seavendoremporium.shop – Just landed here today, looks like a pretty helpful website already
check this marketplace – First impression is positive, pages are easy to navigate and visually neat
explore platform – Noticed this site, browsing is easy and straightforward
useful link – Noticed this site, design is clean and pages are easy to navigate
мелбет онлайн [url=https://gamemelbet.ru/]мелбет онлайн[/url] .
medicisoft&melbet [url=https://medicisoft.ru/]medicisoft&melbet[/url] .
visit seavendoremporium – Enjoying the clear layout and smooth browsing experience
take a look – Checked this platform, everything feels tidy and logically placed
Quartz Hub – Nice simple layout, moving through the pages feels easy.
скачать приложение бк мелбет на андроид [url=https://melbetwebsite.ru/]скачать приложение бк мелбет на андроид[/url] .
online casino games for money [url=https://melbetweb.ru/]online casino games for money[/url] .
TrailVendorSpot – Scanned a few pages, everything seems well-organized and accessible.
мелбет скачать приложение на айфон [url=https://mobilemelbet.ru/]мелбет скачать приложение на айфон[/url] .
TrailEmporiumFinder – Browsed lightly, the sections feel well-laid-out and clear.
Quartz Market Hub – Well-structured site, navigation feels effortless.
Maple Selection – Layout is neat, exploring sections is simple.
visit online – Layout is neat and exploring the content is easy.
Maple Selection – Layout is neat, exploring sections is simple.
quick shop access – Everything seems arranged clearly which makes browsing simple
online crate shop – Organized layout makes finding information fast and simple.
quick shop access – Everything seems arranged clearly which makes browsing simple
1win limba romana [url=https://1win38174.help]https://1win38174.help[/url]
interesting website – Just checked this page, navigation is clear and browsing items is easy.
take a look – Discovered this platform today, layout feels clean and items are simple to find.
official vendor place link – The pages are easy to navigate and visually organized
open the birchstone marketplace – Everything loads well and the layout feels logical
how to download melbet app [url=https://melbetmobi.ru/]melbetmobi.ru[/url] .
wave vendor marketplace – The platform looks well organized and browsing is comfortable
view the store – First impression is good, layout is neat and intuitive
wave vendor marketplace – The platform looks well organized and browsing is comfortable
browse the collection – Layout is simple, making it easy to find information quickly
site link – Checked this platform randomly, layout is organized and browsing is simple
go to site – Browsed this marketplace, sections are neat and navigation flows intuitively
MarketUplandDeals – Checked a few sections, the platform feels approachable and simple.
visit the workshop – Came across this site, layout is clear and easy to navigate
UplandMarketplaceOnline – Browsed casually, everything seems organized and accessible.
silkstone resources – Pages feel organized and browsing is smooth
quick link – Found this platform, browsing is smooth and intuitive throughout
visit silkstonecorner – Layout is clean and browsing feels effortless
Quick Crate Vault – Clean interface, exploring pages feels easy.
скачать melbet ios [url=https://shopledo.ru/]скачать melbet ios[/url] .
мелбет сайт [url=https://melbetlink.ru/]мелбет сайт[/url] .
their product hub – Just visited, pages feel organized and easy to use
Crate Quick Picks – Simple structure, navigation is easy and clear.
Marble Finds – Simple interface, exploring content is easy.
shopping portal – Explored a few pages, the interface seems user-friendly
мелбет мобильная версия сайта [url=https://medicisoft.ru/]мелбет мобильная версия сайта[/url] .
Marble Depot – Pages are tidy, exploring sections feels easy.
check out this shop – Well-structured pages make moving around the site seamless.
мелбет скачать приложение на андроид [url=https://melbetwebsite.ru/]мелбет скачать приложение на андроид[/url] .
real online casino games [url=https://melbetweb.ru/]real online casino games[/url] .
мелбет [url=https://gamemelbet.ru/]мелбет[/url] .
shop online – Organized structure makes browsing categories fast and simple.
this online brightstone house – Smooth navigation and tidy design make browsing enjoyable
open the brightstone marketplace – Layout is clear, modern, and navigation feels intuitive
cool site – Found this platform recently, navigation feels simple and products are well arranged.
wildbazaar.shop – Interesting shop concept here, products seem creative and nicely presented overall
check them out – Came across this page today, interface is tidy and finding items is easy.
browse silvermarket – Just discovered this store, and the products are easy to find thanks to the clear interface.
glassvendorworkshop.shop – Pleasant browsing experience, pages load fast and design feels neat
online shop link – Site feels structured and moving around is very smooth
wild marketplace hub – The site is creative, tidy, and easy to explore
visit platform – Noticed this platform, structure is organized and browsing feels smooth
check this vendor site – Pages are responsive and the content is easy to follow
zerotrusty – Loved the layout today; clean, simple, and genuinely user-friendly overall.
silvermarket – Just visited this site, everything seems neatly organized and easy to browse.
UplandMarketplaceHub – Skimmed a few sections, the interface feels tidy and user-friendly.
UplandVendorCenter – Took a glance, the site structure is clear and approachable.
online studio – Browsed this site, layout is simple yet visually pleasant
threatlens – Overall, professional vibe here; trustworthy, polished, and pleasantly minimal throughout.
site link – Checked this site randomly, sections are clear and easy to follow
1win вывести на humo [url=https://1win36247.help]https://1win36247.help[/url]
1win verificare retragere [url=http://1win38174.help/]http://1win38174.help/[/url]
1win бонус новичкам [url=http://1win60925.help]http://1win60925.help[/url]
shop homepage link – Spent a moment exploring, and the design is simple yet modern
visit silk workshop – Nice layout, navigating through sections feels simple
open the shop – Browsing a few listings, everything loads quickly and is well arranged
1win вывести баланс на о деньги [url=www.1win68017.help]1win вывести баланс на о деньги[/url]
Marble Central – Organized pages make exploring smooth.
Quick Meadow Corner Hub – Well-arranged sections, exploring feels effortless.
silk vendor directory – Enjoyable navigation, the site feels simple and practical
visit this vendor shop – Everything is well laid out and easy to browse
Marble Picks Hub – Pages are clean, exploring content is smooth.
Quick Meadow Shop – Tidy design overall, moving between sections feels natural.
this online bright emporium – Browsing experience is smooth and items are arranged clearly
скачать melbet на ios бесплатно [url=https://shopledo.ru/]скачать melbet на ios бесплатно[/url] .
бк мелбет мобильная версия [url=https://melbetlink.ru/]бк мелбет мобильная версия[/url] .
explore platform – Noticed this site, layout is tidy and navigation feels natural
purevalueoutlet – Inspiring and interactive site, perfect for learning and creating new ideas
melbet скачать приложение для андроид [url=https://melbetcomzerkalo.ru/]melbet скачать приложение для андроид[/url] .
auditkit – Appreciate the typography choices; comfortable spacing improved my reading experience.
open this vendor marketplace – Clear pages and fast loading make exploring enjoyable
this platform – I found this site today, interface is organized and easy to browse.
plumvendorcollective.shop – Really like how the pages are structured, makes reading simple
мелбет зеркало скачать приложение на андроид [url=https://medicisoft.ru/]мелбет зеркало скачать приложение на андроид[/url] .
open the wood marketplace – Smooth scrolling and clear layout make navigation easy
link worth checking – Stumbled on this site recently, interface looks organized and browsing is effortless.
explore items online – First impression is good, layout feels natural to use
keyvaulty – Overall, professional vibe here; trustworthy, polished, and pleasantly minimal throughout.
мелбет скачать андроид [url=https://melbetwebsite.ru/]мелбет скачать андроид[/url] .
VendorHubBrookOnline – Checked a few sections, everything seems tidy and readable.
мэлбэт [url=https://melbetweb.ru/]мэлбэт[/url] .
VendorHubValeBrook – Took a quick look, the pages feel well-organized and simple to navigate.
Знакомая ситуация, многие начинают паниковать и скупать ссылки, что только усугубляет положение. Хорошая статья попалась именно про то, как действовать без паники после апдейтов. Автор разбирает, на какие элементы сайта (техничка, контент, поведенческие) нужно обращать внимание в первую очередь, чтобы вернуть позиции. Особенно актуально для автосайтов, но общие принципы подойдут многим. Кто еще не видел, вот ссылка: https://specavto43.ru/pochemu-avtosajty-teryayut-poziczii-posle-apdejtov-chto-chinit-v-pervuyu-ochered-bez-paniki/ . Спокойный и структурированный разбор.
бк мелбет [url=https://gamemelbet.ru/]бк мелбет[/url] .
melbet зеркало рабочее [url=https://melbetzerkalorabochee.ru/]melbet зеркало рабочее[/url] .
visit platform – Noticed this site, structure is neat and browsing is easy
fernridgevendorhub.shop – Came across this shop today, looks organized and user friendly
check out the store – Spent a few minutes here, navigation is simple and intuitive
1win лимит ставок [url=https://www.1win60925.help]https://www.1win60925.help[/url]
discover this shop – Layout is simple, and finding items is quick and easy
browse brimstone collective – The structure is clear and browsing feels effortless
useful link – Browsed this platform, layout is clean and sections are intuitive
see the vendor collective site – Categories load clearly and the interface is smooth
goldenvendorcollective.shop – Came across this marketplace, layout feels modern and tidy overall
Santander down [url=https://caiu.site/]caiu.site[/url] .
silverbrook vendor resources – Liked the clean interface, very practical overall
1win игра aviator [url=https://www.1win60925.help]https://www.1win60925.help[/url]
silvershopper online shop – Just discovered this page and the navigation feels intuitive.
1win сколько выводят на мегапей [url=https://1win82361.help]1win сколько выводят на мегапей[/url]
silverbrook vendor directory – Nice and organized platform, content is approachable
see the vendor studio site – Took a moment to explore and the interface feels clear
аренда катера спб [url=https://arenda-yakhty-spb-2.ru/]аренда катера спб[/url] .
visit the vendor studio – Layout is neat and finding information feels easy
official vendor studio link – Gave this site a quick visit and it feels structured and easy to follow
VendorSpotHubVale – Took a quick peek, the site feels well-structured and easy to navigate.
1win приложение Бишкек android [url=1win20819.help]1win приложение Бишкек android[/url]
quartzridgevendorstudio.shop – Came across this page while searching, looks trustworthy and informative
visit here – Came across this page earlier, everything looks organized and easy to explore.
go to silvershopper – Ran into this site today and browsing through items seems simple.
VendorFinderVale – Looked around, the content is organized and intuitive.
скачать бк мелбет на айфон [url=https://shopledo.ru/]скачать бк мелбет на айфон[/url] .
скачать мелбет казино [url=https://melbetlink.ru/]скачать мелбет казино[/url] .
see this website – Came across this page earlier, layout is clean and exploring products is quick.
mostbet банковская карта [url=https://www.mostbet90753.help]https://www.mostbet90753.help[/url]
водные прогулки спб [url=https://arenda-yakhty-spb.ru/]arenda-yakhty-spb.ru[/url] .
как пополнить melbet [url=https://www.melbet60432.help]https://www.melbet60432.help[/url]
melbet verificare sms nu vine [url=http://melbet42310.help/]http://melbet42310.help/[/url]
мостбет apk установить [url=https://mostbet90753.help]https://mostbet90753.help[/url]
мелбет скачать [url=https://melbetcomzerkalo.ru/]мелбет скачать[/url] .
melbet приложение для андроид бесплатно [url=https://melbetwebsite.ru/]melbet приложение для андроид бесплатно[/url] .
play online slots games [url=https://melbetweb.ru/]play online slots games[/url] .
explore collective – Found this platform, sections feel organized and intuitive
discover this store – Pages are neat and the platform is easy to navigate
see the collection – Noticed this site, the layout is neat and content is easy to access
check this page – Came across this platform, layout is simple and browsing is pleasant
learn more here – Noticed this site, layout is simple and navigation feels intuitive
check out the marketplace – Browsed a few sections, everything feels well organized
seller hub link – Clear categories and smooth navigation make browsing easy
browse calmbrook hub – The design is user-friendly and browsing items is effortless
1win минимальная сумма депозита карта [url=1win82361.help]1win82361.help[/url]
melbet сайт [url=https://melbetzerkalorabochee.ru/]melbet сайт[/url] .
VelvetVendorSpotlight – Browsed a bit, already noticing areas that are tidy and readable.
acorn workshop hub – Just tried it on my phone and the menus respond well
explore offerings – Simple navigation, making exploration quick and easy
VelvetDealsHub – Browsed lightly, already noticing sections that are easy to follow.
check the vendor workshop – Just explored it briefly and the mobile navigation works well
check vendor listings – User-friendly design, everything is simple to follow
take a look – Stumbled upon this page, navigation is straightforward and finding items is effortless.
silvergrove pages portal – Simple and neat design, very smooth browsing experience
online spot – Just found this platform today, interface is tidy and exploring products is smooth.
аренда яхты в санкт петербурге [url=https://arenda-yakhty-spb-1.ru/]arenda-yakhty-spb-1.ru[/url] .
1win casino pe android [url=https://1win38174.help]https://1win38174.help[/url]
silvergrove vendor directory – Organized platform, content is clear and accessible
прокат яхт [url=https://arenda-yakhty-spb-2.ru/]arenda-yakhty-spb-2.ru[/url] .
скачать melbet на айфон [url=https://shopledo.ru/]скачать melbet на айфон[/url] .
мелбет букмекерская контора скачать на андроид [url=https://melbetlink.ru/]мелбет букмекерская контора скачать на андроид[/url] .
промокоды мелбет [url=https://melbetofficialbookmaker.ru/]промокоды мелбет[/url] .
granitevendoremporium.shop – Interesting marketplace, sections are easy to navigate and look organized
granitevendoremporium.shop – Interesting marketplace, sections are easy to navigate and look organized
аренда катера [url=https://arenda-yakhty-spb.ru/]аренда катера[/url] .
мелбет скачать андроид [url=https://medicisoft.ru/]мелбет скачать андроид[/url] .
скачать мелбет официальный сайт [url=https://gamemelbet.ru/]gamemelbet.ru[/url] .
visit the studio – Came across this platform, layout is neat and navigation feels smooth
melbet казино зеркало [url=https://melbetcomzerkalo.ru/]melbet казино зеркало[/url] .
view their products – Pages are clear, and moving between categories is straightforward
Discord caiu [url=https://caiu.site/]caiu.site[/url] .
go to site – Browsed this site, layout looks tidy and browsing is easy
marketplace homepage – Navigation feels intuitive and the layout is clean and easy to follow
open this vendor marketplace – Browsing is effortless and sections are well-defined
online store link – I ran into this store earlier, and the layout appears clean and organized.
browse calm collective – Design feels tidy and moving through items is effortless
VelvetDealsHub – Browsed lightly, sections are clear and readable.
1win код подтверждения не приходит [url=http://1win15478.help/]1win код подтверждения не приходит[/url]
VelvetShopHub – Skimmed a few areas, the interface is tidy and practical.
online store link – I ran into this store earlier, and the layout appears clean and organized.
see the vendor place site – Spent a moment checking sections and the pages feel clear
quickmeadowemporium.shop – The layout feels clean, and navigating through posts is very easy
alpinecrest sellers hub – Nice clean structure, browsing around today was enjoyable
discover items online – Clean design and effortless navigation through categories
мостбет лимиты вывода [url=http://mostbet90753.help/]мостбет лимиты вывода[/url]
robincrate – Came across this site today, browsing products feels simple and pleasant.
online spot – Just visited this platform, layout looks tidy and exploring products is simple.
visit hub – Found the platform, navigation is intuitive and pages load quickly
browse woodvendor emporium – Organized site, caught my attention and worth a visit.
quick link – Came across the platform, pages load fast and browsing feels natural
visit woodvendor emporium – The store feels tidy and inviting, definitely worth exploring.
водные прогулки в санкт петербурге [url=https://arenda-yakhty-spb-1.ru/]arenda-yakhty-spb-1.ru[/url] .
melbet рабочее зеркало [url=https://melbetzerkalorabochee.ru/]melbet рабочее зеркало[/url] .
1win депозит через о деньги инструкция [url=http://1win82361.help/]http://1win82361.help/[/url]
silver collective portal – Enjoying the simple layout, everything loads fast
check this marketplace – First impression solid, pages are easy to navigate and visually tidy
мелбет бонус за регистрацию [url=https://melbetofficialbookmaker.ru/]мелбет бонус за регистрацию[/url] .
check it out – Noticed this page, layout is clear and sections are easy to follow
речные прогулки по неве [url=https://arenda-yakhty-spb-2.ru/]arenda-yakhty-spb-2.ru[/url] .
check yelvora marketplace – Cool store concept, seems like it has potential.
view products here – Pages are neat, and finding items is straightforward
play live casino [url=https://melbetweb.ru/]play live casino[/url] .
silver vendor portal – Pages load quickly, content is easy to follow
скачать мелбет с официального сайта [url=https://melbetwebsite.ru/]скачать мелбет с официального сайта[/url] .
check this page – Came across this platform, pages are organized and navigation works smoothly
VendorSpotVioletRidge – Took a quick peek, the pages are organized and comfortable to read.
see the vendor studio site – Everything is organized and finding items is easy
see yelvora shop – Fresh and catchy branding, curious about the inventory.
VioletVendorCenter – Checked a few pages, the structure is logical and readable.
this online canyonridge studio – Navigation is easy and the interface feels modern
речные прогулки по санкт петербургу [url=https://arenda-yakhty-spb.ru/]arenda-yakhty-spb.ru[/url] .
carameldock.shop – Just checked this shop, looks cozy and easy to navigate.
alpine trading collective – The store presentation is neat and easy to explore
explore vendor place – Sections are clearly labeled, making browsing effortless
explore the carameldock store – User-friendly layout, browsing was enjoyable.
alpine vendor hub store – Looks like a neat shop and the page layout is organized
скачать мелбет на телефон андроид [url=https://medicisoft.ru/]скачать мелбет на телефон андроид[/url] .
raincrest marketplace – Pages are tidy and the overall layout is very clear
melbet сайт [url=https://gamemelbet.ru/]gamemelbet.ru[/url] .
1win apk безопасно [url=http://1win20819.help/]http://1win20819.help/[/url]
explore hub – Browsed the site, layout is user-friendly and pages feel well organized
take a peek – Found this platform today, interface feels clean and exploring items is simple.
see the collection – Checked this marketplace, layout is clear and content is easy to read
site I found – Just discovered this store, navigation seems simple and products are easy to browse.
TIM down [url=https://caiu.site/]TIM down[/url] .
see zenbrook marketplace – Vendor hub seems well-curated and appealing at a glance.
browse zenbrook hub online – The vendor listings seem engaging and worth a closer look.
direct shop access – Layout is tidy, and the site feels well structured overall
снять яхту в спб [url=https://arenda-yakhty-spb-1.ru/]снять яхту в спб[/url] .
1win inregistrare MD [url=http://1win38174.help]http://1win38174.help[/url]
VendorFinderViolet – Looked around, the platform is well-structured and intuitive.
take a look here – Found this platform today, and the interface seems tidy and user-friendly.
vendor listings page – Explored categories, everything seems clean and easy to follow
VendorFinderViolet – Looked around, the platform is well-structured and intuitive.
check this page – Came across this platform, pages are organized and browsing is pleasant
kestrelcrate portal – Fun and memorable name, eager to see upcoming products.
скачать зеркало мелбет [url=https://melbetcomzerkalo.ru/]melbetcomzerkalo.ru[/url] .
check this page – Came across this platform, pages are organized and browsing is pleasant
browse canyon workshop – Layout is tidy and moving through sections is effortless
1вин кэшбек [url=https://1win15478.help]1вин кэшбек[/url]
discover kestrel crate – Cool branding, looking forward to exploring fresh items.
view slatecrate here – Noticed this store today, and browsing items is simple and well organized.
check out cedarvendor – Simple layout, navigating categories felt natural.
visit canyon vendor workshop – Browsing was smooth and the layout feels well organized
discover the cedarvendor store – Clear and organized, navigating the shop was straightforward.
check out rain vendor – Sections are clear and browsing feels effortless
explore skyridge studio – Pleasant browsing experience, everything feels organized
this online vendor studio – The page seems informative and straightforward
мелбет фрибет условия [url=https://melbetofficialbookmaker.ru/]мелбет фрибет условия[/url] .
rainvendor collective hub – Everything is tidy and easy to explore
водные прогулки в санкт петербурге [url=https://arenda-yakhty-spb-2.ru/]водные прогулки в санкт петербурге[/url] .
skyridge online hub – Pleasant interface, makes finding information simple
amberstonevendorstudio.shop – Stopped by this site earlier and the information there looks helpful and authentic
hazelvendorcollective.shop – Good platform, browsing feels effortless and everything looks neat today
мостбет результаты матчей [url=https://www.mostbet90753.help]https://www.mostbet90753.help[/url]
hazelvendorcollective.shop – Good platform, browsing feels effortless and everything looks neat today
1win как скачать на android [url=http://1win15478.help]http://1win15478.help[/url]
мостбет сменить номер [url=www.mostbet90753.help]мостбет сменить номер[/url]
1win фрибет за регистрацию [url=https://1win15478.help]1win фрибет за регистрацию[/url]
take a peek – Just discovered this website, interface looks clean and exploring items is smooth.
browse this site – Came across this website recently, interface feels intuitive and easy to navigate.
WalnutCrestHub – Browsed briefly, the pages look clear and easy to navigate.
1win регистрация без паспорта [url=http://1win15478.help/]http://1win15478.help/[/url]
shopping portal link – Looked around quickly, interface feels clean and modern
WalnutShopHub – Skimmed a few areas, the interface feels tidy and practical.
check out the marketplace – Navigation is smooth and the platform is nicely organized
discover zenvendor collective – Marketplace concept is neat, looking forward to more vendors joining.
visit cedarwharf – Catchy branding, gives a strong first impression.
check it out – Noticed this page, sections are tidy and easy to browse
browse zenvendor marketplace – Nice setup, curious how many sellers will join next.
see hiveloft shop online – Layout is clear, navigation felt smooth and fast.
explore cedarwharf shop – Memorable name, makes navigating the store enjoyable.
check this page – Came across this platform, pages are simple to navigate and look clean
hiveloft marketplace hub – Quick visit, concept seems smart and browsing was effortless.
водные экскурсии в санкт петербурге [url=https://arenda-yakhty-spb-1.ru/]arenda-yakhty-spb-1.ru[/url] .
vendor place homepage – Well-organized site with clear sections for exploration
снять катер спб [url=https://arenda-yakhty-spb.ru/]arenda-yakhty-spb.ru[/url] .
ravensage marketplace – Easy to navigate, pages load quickly and look organized
explore hub – Browsed this platform, pages load fast and sections are tidy
This DIY approach to axle straightening shows remarkable precision! Just as professional platforms verify authenticity, quality tooling makes all the difference. The filing technique you’ve developed reminds me of how jl77 legit gaming operators maintain exacting standards – attention to detail creates excellence. Great tutorial for serious builders!
check reedmarket store – Smooth layout, navigation feels easy.
visit caramel crest vendor place – Navigation is easy and browsing feels smooth overall
melbet com app [url=https://melbetzerkalorabochee.ru/]melbet com app[/url] .
smartbyte – Pages loaded fast, images appeared sharp, and formatting stayed consistent.
discover platform – Checked this hub, pages are organized and browsing is effortless
visit ravensage collective – Nice design, navigation feels effortless and smooth
1win промо код [url=www.1win60925.help]www.1win60925.help[/url]
pin-up promo aksiya bugun [url=http://pinup14278.help]http://pinup14278.help[/url]
explore reedmarket – Simple design, browsing categories was smooth.
open this vendor marketplace – Everything loads nicely and browsing items feels smooth
1win горячая линия [url=http://1win82361.help/]1win горячая линия[/url]
seller collective link – Took a glance and navigating the listings is simple
techsphere – Content reads clearly, helpful examples made concepts easy to grasp.
melbet retragere fara comision [url=http://melbet42310.help/]http://melbet42310.help/[/url]
melbet aviator коэффициент [url=http://melbet60432.help]http://melbet60432.help[/url]
sky vendor access – The site looks reliable and easy to use
Pure Ideas Hub – Well-organized structure, exploring content was fun.
cyberstack – Mobile version looks perfect; no glitches, fast scrolling, crisp text.
melbet казино слоты скачать [url=https://melbetofficialbookmaker.ru/]melbet казино слоты скачать[/url] .
мелбет на андроид [url=https://melbetcomzerkalo.ru/]мелбет на андроид[/url] .
sky vendor online collective – Pages are clear, navigation feels effortless
Pure Value Market – Smooth navigation, learning and exploring was effortless.
Информационный портал https://tga-info.ru обо всем: статьи о технологиях, здоровье, образе жизни, финансах, путешествиях и саморазвитии. Полезные советы, интересные факты и актуальные материалы для тех, кто хочет узнавать новое каждый день.
Портал о строительстве https://nesmetnoe.ru и ремонте: технологии возведения домов, отделка помещений, выбор строительных материалов и инструмента. Полезные статьи, инструкции, советы специалистов и идеи для обустройства жилья.
Онлайн-журнал https://lifeoflove.ru для женщин о красоте, моде, здоровье и отношениях. Полезные советы по уходу за собой, статьи о психологии, семье, стиле и саморазвитии. Идеи для вдохновения, гармонии и счастливой жизни.
browse here – Found this platform today, navigation feels smooth and items are easy to browse.
nanotechhub – Overall, professional vibe here; trustworthy, polished, and pleasantly minimal throughout.
see this website – Just discovered this page, interface is organized and exploring products is smooth.
VendorHubWalnut – Took a glance, the content feels structured and readable.
WalnutVendorCenter – Checked some pages, everything seems logically arranged.
1win лимит депозита [url=https://1win15478.help]1win лимит депозита[/url]
explore the store – Pages load well, sections are clear, and navigation feels effortless
quick shop link – Just visited, interface is tidy and the browsing experience is intuitive
check cherryaisle marketplace – Fun identity, gives a friendly vibe to the shopping experience.
Информационный журнал https://greendachnik.ru для садоводов и дачников. Статьи о саде, огороде и ландшафтном дизайне, советы по посадке и уходу за растениями, идеи оформления участка и рекомендации по созданию уютного сада.
Сайт новостей https://hardexpert.net компьютерного мира: технологии, программное обеспечение, компьютерное железо и гаджеты. Свежие новости IT, обзоры устройств, аналитика и полезные материалы о современных цифровых технологиях.
Все про автомобили https://hyundai-sto.ru новости автопрома, обзоры новых моделей, технические характеристики, советы по выбору машины и обслуживанию. Полезные статьи о ремонте, эксплуатации, тюнинге и современных технологиях автомобильной индустрии.
explore cherryaisle marketplace – Fun and inviting branding, makes checking products enjoyable.
Информационный журнал https://greendachnik.ru для садоводов и дачников. Статьи о саде, огороде и ландшафтном дизайне, советы по посадке и уходу за растениями, идеи оформления участка и рекомендации по созданию уютного сада.
Сайт новостей https://hardexpert.net компьютерного мира: технологии, программное обеспечение, компьютерное железо и гаджеты. Свежие новости IT, обзоры устройств, аналитика и полезные материалы о современных цифровых технологиях.
Все про автомобили https://hyundai-sto.ru новости автопрома, обзоры новых моделей, технические характеристики, советы по выбору машины и обслуживанию. Полезные статьи о ремонте, эксплуатации, тюнинге и современных технологиях автомобильной индустрии.
keyvaulty – Appreciate the typography choices; comfortable spacing improved my reading experience.
see here – Noticed this marketplace, navigation feels smooth and sections are clear
learn more here – Found this page, navigation is simple and sections are easy to read
прогулка на яхте спб [url=https://arenda-yakhty-spb-2.ru/]прогулка на яхте спб[/url] .
take a look – Noticed this marketplace, layout is clear and browsing is effortless
browse seldrin online – Short and catchy, makes remembering the shop effortless.
online buying destination – The layout is clear and the browsing speed is impressively fast.
learn more here – Found this page, navigation is simple and sections are easy to read
raven platform – Pages are intuitive and content is easy to browse
see seldrin store hub – Clean and simple branding, very easy to recall.
see the vendor collective site – Smooth browsing and well-laid-out pages make navigation pleasant
мостбет скачать бесплатно [url=http://mostbet90753.help]http://mostbet90753.help[/url]
discover this digital store – A straightforward design keeps exploring the site easy.
raven hub online – Layout is tidy and navigation works without hassle
browse the reedmart – Memorable branding, browsing categories was simple.
apricotstone sellers house – Found this site by chance and it seems worth checking
open the caramel marketplace – Sections are clearly separated and navigation feels natural
see reedmart online store – Smooth layout, navigating felt quick.
apricotstone vendor page – Saw this site today and it actually seems useful
Все женские секреты https://allsekrets.ru сайт о красоте, здоровье, отношениях и стиле жизни. Полезные советы по уходу за собой, психологии, моде, семье и саморазвитию. Идеи для вдохновения, гармонии и счастливой жизни современной женщины.
Женский портал https://idealnaya-ya.ru о красоте, здоровье, отношениях и стиле. Полезные советы для женщин, идеи для ухода за собой, моды, семьи и гармоничной жизни.
Женский портал https://idealnaya-ya.ru о красоте, здоровье, отношениях и стиле. Полезные советы для женщин, идеи для ухода за собой, моды, семьи и гармоничной жизни.
Все женские секреты https://allsekrets.ru сайт о красоте, здоровье, отношениях и стиле жизни. Полезные советы по уходу за собой, психологии, моде, семье и саморазвитию. Идеи для вдохновения, гармонии и счастливой жизни современной женщины.
melbet slots [url=https://melbet42310.help/]https://melbet42310.help/[/url]
melbet free spins [url=melbet60432.help]melbet free spins[/url]
VendorSpotWaveStone – Took a quick peek, the site seems organized and comfortable to use.
Summit Ventures – Well-labeled menus, browsing categories was simple.
аренда яхты в санкт петербурге [url=https://arenda-yakhty-spb.ru/]arenda-yakhty-spb.ru[/url] .
HubMarketplaceWave – Checked some pages, the site feels organized and practical.
Summit Track Picks Market – Organized and polished, moving through sections was simple.
Все о стройке https://dobdom.ru и ремонте — полезные статьи о строительстве домов, ремонте квартир, отделке помещений и выборе материалов. Практические советы мастеров, инструкции по строительным работам и идеи для обустройства дома.
Сайт о строительстве https://profsmeta3dn.ru и ремонте: полезные советы по строительству домов, ремонту квартир и отделке помещений. Обзоры строительных материалов, инструкции по работам и рекомендации специалистов для обустройства дома.
Доставка пиццы https://kosmopizza.ru в саратове, закажи по номеру 71-55-55
snow crest online collective – Overall a solid platform, very easy to browse
Сайт о строительстве https://profsmeta3dn.ru и ремонте: полезные советы по строительству домов, ремонту квартир и отделке помещений. Обзоры строительных материалов, инструкции по работам и рекомендации специалистов для обустройства дома.
Все о стройке https://dobdom.ru и ремонте — полезные статьи о строительстве домов, ремонте квартир, отделке помещений и выборе материалов. Практические советы мастеров, инструкции по строительным работам и идеи для обустройства дома.
Доставка пиццы https://kosmopizza.ru в саратове, закажи по номеру 71-55-55
скачать мелбет на айфон зеркало [url=https://melbetofficialbookmaker.ru/]скачать мелбет на айфон зеркало[/url] .
open the marketplace – Checked a few listings, sections are neat and well arranged
visit clovervendor – Friendly branding, seems easy to browse and navigate.
snow crest studio – User-friendly platform, pages are neat and clear
melbet mobile app [url=https://melbetzerkalorabochee.ru/]melbet mobile app[/url] .
their shop homepage – Explored briefly, sections are clearly defined and easy to navigate
open clovervendor hub – Simple marketplace setup, could become a go-to site.
see here – Checked this marketplace, navigation is smooth and pages are well structured
visit hub – Noticed this marketplace, pages are tidy and content is easy to read
Мы выполняем работы https://kartremont.ru “от и до”: демонтаж, черновые и чистовые работы, установку сантехники, электрики, отделку стен, пола, потолка, кондиционеров, вентиляции, мебели и клининг.
A website with unblocked games for free online play. Popular browser games, arcades, platformers, racing games, and puzzles are available with no downloads or restrictions on any device.
clicktechy – Pages loaded fast, images appeared sharp, and formatting stayed consistent.
Мы выполняем работы https://kartremont.ru “от и до”: демонтаж, черновые и чистовые работы, установку сантехники, электрики, отделку стен, пола, потолка, кондиционеров, вентиляции, мебели и клининг.
Услуги по настройке https://sysadmin.guru и администрированию серверов и компьютеров. Установка систем, настройка сетей, обслуживание серверной инфраструктуры, защита данных и техническая поддержка. Помогаем обеспечить стабильную работу IT-систем.
A website with unblocked games for free online play. Popular browser games, arcades, platformers, racing games, and puzzles are available with no downloads or restrictions on any device.
browse today – Ran into this platform, pages are clearly structured and pleasant to use
Услуги по настройке https://sysadmin.guru и администрированию серверов и компьютеров. Установка систем, настройка сетей, обслуживание серверной инфраструктуры, защита данных и техническая поддержка. Помогаем обеспечить стабильную работу IT-систем.
riverstone online store – Navigation works smoothly and everything feels accessible
visit queltaa – Unique shop name, curious what products will appear soon.
explore here – Checked this platform, pages are organized and browsing is smooth
visit riverstone hub – Clean presentation and sections are easy to follow
bytetap – Color palette felt calming, nothing distracting, just focused, thoughtful design.
queltaa portal shop – Nice branding choice, eager to see new inventory.
chestnut marketplace hub – Navigation is effortless and layout is clear
vendor emporium homepage – The interface feels modern and easy to browse
seller house link – Clean design with smooth navigation across sections
discover this digital store – A straightforward design keeps exploring the site easy.
open this vendor marketplace – The layout appears clean and thoughtfully arranged
visit ridgecrate marketplace – Clean name, finding products was fast and easy.
quickbyte – Overall, professional vibe here; trustworthy, polished, and pleasantly minimal throughout.
techvertex – Bookmarked this immediately, planning to revisit for updates and inspiration.
Brazino777 tá dando 300 giros grátis no Jogo do Tigrinho só pra quem deposita via Pix hoje!
explore the ridgecrate hub – Minimalist layout, browsing items felt intuitive.
online buying destination – The layout is clear and the browsing speed is impressively fast.
прогулка на катере [url=https://arenda-yakhty-spb-3.ru/]прогулка на катере[/url] .
a href=”https://wavevendoremporium.shop/” />VendorFinderHubWave – Took a peek, the platform feels clean and organized.
a href=”https://wavevendoremporium.shop/” />WaveDealsHub – Browsed lightly, sections are easy to find and well-arranged.
сколько стоит нарколог на дом в ростове [url=https://narkolog-na-dom-v-rostove.ru/]narkolog-na-dom-v-rostove.ru[/url] .
pixelengine – Bookmarked this immediately, planning to revisit for updates and inspiration.
browse coastcrate hub – Tidy branding, easy to navigate the categories.
tap here – Checked this platform, pages load fast and browsing is intuitive
1win краш [url=1win82361.help]1win82361.help[/url]
Sun Ventures – Efficient and clean, finding items was easy.
see coastcrate marketplace – Minimalistic and clean design, feels professional.
visit the vendor workshop – Took a quick look, sections are organized and easy to follow
discover site – Browsed this marketplace, sections are simple and design is clean
Sun Ventures – Efficient and clean, finding items was easy.
vendor listings page – Explored categories, everything is tidy and easy to follow
snow vendor hub – Enjoying how easy it is to navigate the pages
melbet verificare sms nu vine [url=https://www.melbet42310.help]https://www.melbet42310.help[/url]
мелбет ios скачать приложение [url=https://melbet60432.help/]мелбет ios скачать приложение[/url]
snow vendor portal – The content is clear and easy to read, very helpful
check river emporium – User-friendly design, everything is simple to access
explore here – Checked this platform, layout feels tidy and browsing is effortless
check river emporium – User-friendly design, everything is simple to access
harborpick online hub – Quick glance reveals a tidy interface and smooth navigation.
aurorabrook vendor platform – Opened a few pages and they load very quickly
go to site – Browsed this site, sections are neatly arranged and navigation is simple
see the vendor house site – Smooth transitions between pages and clear layouts make exploring easy
see harborpick online – Checked the site quickly, navigation feels intuitive.
see the vendor hub site – The site loads quickly and the sections are tidy
chestnut vendor page – Layout is tidy and exploring the site is easy
1win как отыграть фриспины [url=https://www.1win20819.help]https://www.1win20819.help[/url]
explore the ridgemart hub – Minimalist layout, finding items felt smooth.
WheatVendorFinderOnline – Skimmed lightly, the layout is neat and easy to read.
browse ridgemart marketplace – Modern interface, shopping here felt intuitive.
WheatShopHub – Skimmed a few areas, the interface is tidy and practical.
browse smart shopping hub – Looks like a useful shopping zone, will return soon.
smart consumer online – Interesting setup for shopping, I’ll revisit for more browsing.
sneak a peek – Browsed this marketplace, pages are well structured and easy to navigate
check coppermarket shop – Well-thought-out branding, categories are clear and simple.
tap here – Came across this hub, design is tidy and navigation is smooth
explore the coppermarket store – Professional feel, site navigation is simple.
check this marketplace – First impression is great, pages are easy to follow and visually neat
open the marketplace – Checked a few listings, the structure is neat and straightforward
снять яхту в спб [url=https://arenda-yakhty-spb-3.ru/]снять яхту в спб[/url] .
срочный вызов нарколога на дом ростов [url=https://narkolog-na-dom-v-rostove.ru/]narkolog-na-dom-v-rostove.ru[/url] .
Teal Market Finds – Simple structure, exploring sections was easy.
вызвать нарколога на дом ростов-на-дону [url=https://narkolog-na-dom-v-rostove-1.ru/]вызвать нарколога на дом ростов-на-дону[/url] .
Teal Ventures – Clear and polished layout, navigating products felt smooth.
visit rosebrook online – Layout is tidy, navigation is simple and intuitive
rose hub online – User-friendly interface makes browsing very comfortable
tap here – Found this page, sections are well structured and browsing is comfortable
aurora marketplace collective – Browsed around today and the layout feels logical
solar vendor online hub – Enjoyed checking this site, layout feels practical
quick link – Browsed this site, sections are neatly arranged and intuitive
aurora trading collective – The browsing experience feels smooth and well structured
1win промокод при регистрации [url=https://1win20819.help]https://1win20819.help[/url]
check uplandvendor marketplace – Concept feels strong, eager to see how it develops.
visit this vendor hub – Pages are neat and moving around is effortless
VendorFinderHubWheat – Took a peek, the platform feels organized and readable.
solar vendor online – Very approachable platform, easy to explore different sections
explore upland vendor portal – Looks like a strong platform, eager to see new additions.
WheatVendorFinderOnline – Skimmed lightly, the layout is neat and straightforward.
this online cloudbrook hub – Navigation feels natural and browsing is pleasant
discover riverretail hub – Modern design, items are easy to find and browse.
visit riverretail shop – Simple branding, makes the store easy to remember.
see daisyaisle store – Inviting marketplace, layout feels organized and simple.
tap here – Checked this hub, design is tidy and pages are simple to browse
check daisyaisle shop – Vibrant interface, layout feels clean and inviting.
global shopping hub – The name sounds massive, but the layout is refreshingly clean.
see collection – Browsed this platform, pages are well arranged and browsing is effortless
visit global shopping infrastructure – Long name aside, the interface is tidy and browsing feels smooth.
view products here – Pages load efficiently, moving between sections is effortless
vendor portal link – Layout is simple and moving between pages feels natural
Коллеги, вопрос к сообществу: кто какими связками пользуется? Я для себя недавно нашел подробный обзор инструментов — от подбора ключей до аналитики. Автор разобрал и бесплатные варианты (Google Keyword Planner, Search Console), и профессиональные платформы вроде Ahrefs и Screaming Frog. Очень структурированно, можно как чек-лист использовать. Делюсь ссылкой: https://yatany.ru/2026/01/20/prodvizhenie-sajtov-instrumenty/ . Особенно полезным показался раздел про инструменты для технического аудита — многие забывают про PageSpeed Insights и Lighthouse.
rosevendor links – Navigation works perfectly and content is displayed neatly
Teal Collections – Smooth menus, exploring sections was effortless.
mostbet eroare instalare [url=www.mostbet63218.help]www.mostbet63218.help[/url]
check rosevendor hub – Content is simple to follow and easy to digest
pinup yuklab olish [url=https://www.pinup14278.help]pinup yuklab olish[/url]
Teal Corner Market – Friendly and tidy design, browsing felt natural.
open the crate exchange platform – Interesting approach that’s not like the usual online shops
VendorSpotWildRidgeStudio – Took a quick peek, the site is easy to follow and well-laid-out.
прогулка на катере [url=https://arenda-yakhty-spb-3.ru/]прогулка на катере[/url] .
сколько стоит нарколог на дом в ростове [url=https://narkolog-na-dom-v-rostove-1.ru/]narkolog-na-dom-v-rostove-1.ru[/url] .
official page – Checked this platform, structure is logical and pages are easy to navigate
autumn swap exchange – A unique style platform compared to normal stores
WildDealsHub – Browsed lightly, sections are practical and easy to find.
see blossomcrate online – Pleasant and friendly name, gives a warm impression.
online vendor hub – Came across this page, layout is clean and browsing feels intuitive
visit cloud vendor collective – Pages load fast and moving through categories is easy
частный нарколог на дом в ростове [url=https://narkolog-na-dom-v-rostove-4.ru/]частный нарколог на дом в ростове[/url] .
check out blossomcrate – Lovely name, makes the site feel friendly and bright.
аренда катера спб [url=https://arenda-yakhty-spb-1.ru/]аренда катера спб[/url] .
visit cloud vendor collective – Pages load fast and moving through categories is easy
Crate Discovery – Unique but simple, sticks in the mind.
open daisycargo portal – Tidy marketplace, pages loaded without delay and felt easy to navigate.
melbet conectare [url=https://melbet42310.help/]https://melbet42310.help/[/url]
see more – Came across this site, layout is tidy and navigation works smoothly
mostbet фрибет [url=https://mostbet20748.help/]mostbet фрибет[/url]
вызов нарколога на дом в ростове [url=https://narkolog-na-dom-v-rostove-3.ru/]вызов нарколога на дом в ростове[/url] .
check daisycargo hub – Smooth and tidy layout, browsing the store was simple.
Crate & Co. – Stylish name, easy to recall for customers.
discover hub – Found this platform, pages are clear and design looks friendly
melbet ставки на голы [url=https://www.melbet60432.help]https://www.melbet60432.help[/url]
stone vendor explore – Very practical site, content is easy to understand
вывод из запоя в ростове цена [url=https://vyvod-iz-zapoya-v-rostove-1.ru/]vyvod-iz-zapoya-v-rostove-1.ru[/url] .
stonebrookvendorhub.shop – Found this site today, seems like a reliable resource
product catalog link – Layout is organized and moving between pages feels effortless
zenvendorcollective.shop – Nice marketplace concept, looking forward to seeing more sellers join.
вывод из запоя на дому нарколог в ростове [url=https://vyvod-iz-zapoya-v-rostove-2.ru/]vyvod-iz-zapoya-v-rostove-2.ru[/url] .
check out the marketplace – Browsing feels effortless and the interface is clean
browse zenvendor online – The marketplace looks fun, interested in seeing more participants.
нарколог на дом в ростове [url=https://narkolog-na-dom-v-rostove-2.ru/]нарколог на дом в ростове[/url] .
1win служба поддержки Ош [url=https://1win20819.help]https://1win20819.help[/url]
rubyridge studio site – Navigation works well and sections are logically organized
pinup kirish sms [url=www.pinup14278.help]www.pinup14278.help[/url]
WildShopSpot – Looked around casually, content is tidy and approachable.
see the vendor house site – Browsing around feels pleasant thanks to the warm design
WildDealsHub – Browsed lightly, sections are simple and practical.
Terra Crate Picks – Clear and polished layout, navigating categories was easy.
seller house link – Browsing through the items feels comfortable
discover here – Came across this emporium, pages are clearly arranged and navigation is simple
Terra Collections Hub – Well-organized menus, exploring products was effortless.
check blossom store – Pretty branding, interested in how the inventory will expand.
site link – Checked this site randomly, structure is tidy and browsing is smooth
open the hazelmarket marketplace – Tidy interface, browsing felt simple and natural.
blossomstore portal – Attractive branding, curious to see new arrivals in the shop.
cloverbrook sellers hub – Browsing feels smooth and categories are clear
browse hazelmarket store – Neat branding, shopping felt quick and intuitive.
see it here – Checked this site, sections are organized and navigation is easy
cloverbrook marketplace – Well-organized sections and smooth browsing experience
RobinRack Picks – Easy-to-follow layout, browsing is hassle-free.
discover hub – Found this platform, pages are clear and design looks user-friendly
The Robin Rack – Clean and inviting, browsing feels effortless.
нарколог на дом ростов отзывы [url=https://narkolog-na-dom-v-rostove-4.ru/]нарколог на дом ростов отзывы[/url] .
речные прогулки спб [url=https://arenda-yakhty-spb-3.ru/]речные прогулки спб[/url] .
monro casino вход https://charmingbear.ru
Сертификация товаров http://center-sertifikaciya.ru это важный этап для подтверждения качества и безопасности продукции, который позволяет производителям и поставщикам выходить на рынок с уверенностью в соответствии нормам. Процесс получения сертификата включает несколько ключевых шагов, начиная от подготовки документов и заканчивая выдачей официального документа. Это не только обязательное требование для многих видов товаров, но и способ повысить доверие потребителей. В этой статье мы разберем основные этапы сертификации, чтобы вы могли лучше понять, как получить сертификат на товар и избежать распространенных ошибок.
мостбет crash Кыргызстан [url=http://mostbet45087.help]http://mostbet45087.help[/url]
Аренда авто Сочи недорого https://avto-arenda-sochi.ru
SEO-продвижение https://outreachseo.ru сайта для роста посещаемости и увеличения продаж. Проводим аудит, оптимизацию структуры, работу с контентом и техническими параметрами сайта, чтобы улучшить позиции в поисковых системах и привлечь целевой трафик.
discover this store – Browsing feels seamless and the platform is clean and accessible
direct shop access – Layout is organized, and the site is easy to explore overall
платный нарколог на дом в ростове [url=https://narkolog-na-dom-v-rostove-3.ru/]платный нарколог на дом в ростове[/url] .
visit the zenvendor collective – Neat marketplace idea, waiting to see more sellers listed.
stone vendor explore – Layout feels logical, makes exploring content effortless
discover zenvendor marketplace – Appealing setup, would be nice to see a bigger vendor roster.
ruby vendor studio – Clean and tidy pages, makes reading posts pleasant
stonevendorcollective.shop – I like how straightforward the pages are here
WindVendorFinderOnline – Skimmed lightly, the layout is neat and easy to navigate.
ruby vendor hub – Very easy to browse, pages load quickly and feel organized
нарколог вывод из запоя на дому в ростове [url=https://vyvod-iz-zapoya-v-rostove-1.ru/]vyvod-iz-zapoya-v-rostove-1.ru[/url] .
WindVendorSpot – Browsing casually, the interface is simple and user-friendly.
bayridge marketplace studio – Everything seems nicely organized so far
Сочи прокат автомобилей без водителя https://avto-arenda-sochi.ru
вывод из запоя в стационаре в ростове-на-дону [url=https://vyvod-iz-zapoya-v-rostove-2.ru/]vyvod-iz-zapoya-v-rostove-2.ru[/url] .
монро онлайн казино https://charmingbear.ru
SEO-продвижение https://outreachseo.ru сайта для роста посещаемости и увеличения продаж. Проводим аудит, оптимизацию структуры, работу с контентом и техническими параметрами сайта, чтобы улучшить позиции в поисковых системах и привлечь целевой трафик.
bayridgevendorstudio.shop – Just exploring this marketplace and everything appears neat so far
https://mobilityspecialists.net
dawnbundle.shop – Neat name, browsing categories felt smooth and intuitive today.
нарколог на дом недорого ростов [url=https://narkolog-na-dom-v-rostove-2.ru/]narkolog-na-dom-v-rostove-2.ru[/url] .
вывод из запоя на дому в ростове на дону [url=https://vyvod-iz-zapoya-v-rostove-3.ru/]вывод из запоя на дому в ростове на дону[/url] .
official page – Came across this page, layout is logical and user-friendly
browse dawnbundle marketplace – Well-structured layout, exploring products was enjoyable.
browse branch crate – Store concept is appealing, categories already feel well-arranged.
Terra Finds – Friendly name, easy to remember while browsing.
explore here – Checked this platform, pages are clean and browsing feels smooth
Thank you for your sharing. I am worried that I lack creative ideas. It is your article that makes me full of hope. Thank you. But, I have a question, can you help me? https://accounts.binance.info/register-person?ref=QCGZMHR6
browse branchcrate online – Store idea looks appealing, categories sorted neatly for browsing.
discover more – Checked the hub, navigation is smooth and pages feel well arranged
Terra Hub Picks – Memorable branding, easy to navigate and remember.
pinup Surxondaryo [url=www.pinup14278.help]pinup Surxondaryo[/url]
check this out – Checked the marketplace, layout feels modern and user-friendly
clover vendor center – Browsing flows smoothly and everything feels structured
Vendor Hub Picks – Friendly layout, makes exploring vendors intuitive.
see the vendor collective site – Tidy design and navigation works well on mobile
Robin’s Vendors – Well-labeled categories, browsing is straightforward.
their shop homepage – Explored briefly, sections are well defined and easy to navigate
browse the collection – Spent a few minutes exploring, everything is tidy and user-friendly
WindVendorCenter – Checked some pages, everything appears neat and practical.
pariuri pe telefon melbet [url=https://melbet42310.help]https://melbet42310.help[/url]
VendorFinderHubWind – Took a peek, the platform feels clean and organized.
sagecrest portal – User-friendly design, reading and browsing is smooth
sagecrest vendor online – Well-organized pages make it easy to locate information
this online shop – Looked around for a moment and it feels like a marketplace on the rise.
нарколог на дом стоимость ростов-на-дону [url=https://narkolog-na-dom-v-rostove-3.ru/]нарколог на дом стоимость ростов-на-дону[/url] .
мелбет кз ставки на cs2 [url=https://melbet60432.help/]https://melbet60432.help/[/url]
futurestack – Color palette felt calming, nothing distracting, just focused, thoughtful design.
bay vendor marketplace – Clean design that loads nicely on mobile devices
logicforge – Overall, professional vibe here; trustworthy, polished, and pleasantly minimal throughout.
online deals spot – Had a glance earlier and it seems like a marketplace taking shape.
this vendor workshop page – Just checked it on my phone and the layout is easy to follow
bytelab – Found practical insights today; sharing this article with colleagues later.
see dawnmarket marketplace – Responsive pages, navigating categories is straightforward.
zyrotech – Overall, professional vibe here; trustworthy, polished, and pleasantly minimal throughout.
omegabyte – Found practical insights today; sharing this article with colleagues later.
open dawnmarket marketplace – Easy layout, finding products is fast and intuitive.
sunridge vendor hub – Really like how clear and easy-to-navigate this site is
browse today – Came across this page, structure is clear and browsing feels comfortable
sunridge vendor resources hub – Very clean presentation, makes reading posts effortless
breezevendor.shop – Smooth browsing experience today, pages loaded really fast.
quick link – Came across this site, pages are clear and browsing is effortless
1вин плинко [url=https://1win20819.help]https://1win20819.help[/url]
мостбет краш игры [url=http://mostbet20748.help]мостбет краш игры[/url]
breezevendor.shop – Smooth browsing experience today, pages loaded really fast.
techdock – Loved the layout today; clean, simple, and genuinely user-friendly overall.
Thistle Corner Market – Strong branding, moving through sections was smooth.
bitzone – Loved the layout today; clean, simple, and genuinely user-friendly overall.
visit this vendor hub – Design is clean and browsing feels enjoyable
Thistle Corner Market – Strong branding, moving through sections was smooth.
mostbet бонус не начислили [url=http://mostbet45087.help]http://mostbet45087.help[/url]
The Roof Market – Intuitive structure, discovering products felt natural.
their shop homepage – Explored briefly, sections are well defined and straightforward to navigate
this online coastridge hub – Layout is neat and navigation feels natural
The Rooftop Shop – Nice sections, finding products felt effortless.
explore the store – Pages load well, sections are clear, and navigation feels natural
WoodShopSpot – Looked around casually, content is tidy and accessible.
codehive – Overall, professional vibe here; trustworthy, polished, and pleasantly minimal throughout.
VendorHouseWoodStone – Took a quick look, the layout is clean and intuitive.
Нужен кондиционер? установка кондиционера в Москве мы устанавливаем все марки и модели кондиционеров, сплит-системы, мультисплит-системы, кассетные, канальные и напольно-потолочные. Также предоставляем сопутствующие услуги автовышки или альпиниста, оказываем гарантийное и сервисное обслуживание.
see this site – Just discovered this name today and it’s definitely unique.
Нужен кондиционер? установка кондиционера в Москве мы устанавливаем все марки и модели кондиционеров, сплит-системы, мультисплит-системы, кассетные, канальные и напольно-потолочные. Также предоставляем сопутствующие услуги автовышки или альпиниста, оказываем гарантийное и сервисное обслуживание.
visit sagevendor – Pages load quickly and the content is nicely structured
мостбет вход сегодня [url=https://mostbet45087.help]https://mostbet45087.help[/url]
sagevendorcollective.shop – Came across this page recently, seems like a solid platform overall
take a look – I heard about this place earlier and the name feels creative.
прокат яхт [url=https://arenda-yakhty-spb-3.ru/]arenda-yakhty-spb-3.ru[/url] .
вывод из запоя в клинике в ростове [url=https://vyvod-iz-zapoya-v-rostove-3.ru/]вывод из запоя в клинике в ростове[/url] .
open this vendor marketplace – Clear layout and smooth page transitions make browsing simple
browse deltacrate portal – Smooth browsing experience, site feels neat and approachable.
discover more – Friendly and classic, naturally memorable.
berrycrest vendor marketplace – Pages load nicely and the layout is easy to use
1win оптимабанк пополнение [url=https://1win17043.help/]https://1win17043.help/[/url]
check out deltacrate – Simple and clean design, finding products was effortless.
ember shop link – The store name really has a distinctive charm.
mostbet cash out [url=mostbet28461.help]mostbet28461.help[/url]
visit the shop – Something about the name feels modern and friendly.
mostbet результаты live [url=http://mostbet20748.help/]http://mostbet20748.help/[/url]
Профессиональное SEO-продвижение https://outreachseo.ru сайтов для бизнеса. Анализ конкурентов, оптимизация структуры и контента, улучшение технических параметров и развитие сайта для роста позиций в поисковых системах и увеличения целевого трафика.
ember emporium store – The branding is catchy and the name is pretty unique.
Glade Meadow Picks – Cheerful and curated, perfect for highlighting popular products.
нарколог на дом в ростове [url=https://narkolog-na-dom-v-rostove-3.ru/]нарколог на дом в ростове[/url] .
coralbrookdistrict – Nice name honestly, it sounds modern and very easy to remember.
shop Glade Meadow – Inviting and easy to remember, perfect for digital shoppers.
jewelcove – The marketplace looks approachable, stylish, and easy to explore.
official page – Came across this page, design is neat and sections are easy to navigate
tronbyte – Found practical insights today; sharing this article with colleagues later.
mostbet вход в личный кабинет [url=https://mostbet45087.help/]https://mostbet45087.help/[/url]
bronzebasket.shop – Unique shop title, really catches attention online.
marketcove – Friendly, accessible branding ensures users enjoy navigating the marketplace.
gingercrateexchange.shop – Interesting exchange style shop, navigation is clear and smooth overall
мостбет сайт [url=https://mostbet20748.help/]https://mostbet20748.help/[/url]
visit bronze basket – Distinctive name, makes the store memorable immediately.
HotVendorPicks – Glanced around and spotted some neat sections.
visit the vendor emporium – Took a quick look, sections are well organized and easy to follow
SunnyDealsOnline – Browsing around, already seeing some highlights.
this vendor workshop page – Interface looks tidy and browsing feels smooth
Thistle Select – Clear design, exploring items was simple.
Scarlet Collections – Professional yet bold, easy to recall.
meadowvendoremporium.shop – Just visited, layout is clean and browsing feels smooth
open the coast marketplace – Layout is neat and exploring categories feels effortless
Explore detailed insights on non ticking quiet wall clocks at TopXClocks, including features, comparisons, and expert recommendations for smarter buying decisions.
Thistle Rack Spot – Clean and modern, site feels approachable.
Scarlet Finds Market – Bold and approachable, memorable name.
Профессиональное SEO-продвижение https://outreachseo.ru сайтов для бизнеса. Анализ конкурентов, оптимизация структуры и контента, улучшение технических параметров и развитие сайта для роста позиций в поисковых системах и увеличения целевого трафика.
pinup lucky jet [url=https://pinup14278.help]https://pinup14278.help[/url]
кольцо женское цена 585 кольцо для обручения помолвки
seastonevendor vendor pages – Well-structured site, reading content is effortless
browse curated items – Memorable and carefully curated, feels professional.
seastonevendor tools – Very user-friendly, exploring the site is quick and simple
explore the shop – Unique and carefully crafted, leaves a positive vibe.
check dewcrate online – Well-organized sections, shopping feels intuitive.
Find out the exact https://www.the-weather-in-budva.com today. Detailed 7- and 10-day forecasts, including temperature, wind, precipitation, humidity, and pressure. Up-to-date weather information for Budva on the Adriatic coast for tourists and residents.
mostbet cupon promoțional [url=http://mostbet63218.help/]mostbet cupon promoțional[/url]
explore dewcrate online – Easy-to-navigate store with responsive pages.
Иногда хочется не просто играть, а быть “в контексте”: посмотреть, как у других идёт Sweet Bonanza 2500, какие бывают бонусные расклады, что пишут по ощущениям и где реально попадаются красивые серии. Мы собрали это в отдельном Telegram – обсуждения, скрины и актуальные наблюдения по слоту. Ссылка: https://t.me/s/sweetbonanza_2500
birch courtyard shop – The branding sounds calm and nicely refined.
Explore detailed insights on orange twin bell alarm clocks at TopXClocks, including features, comparisons, and expert recommendations for smarter buying decisions.
online shop page – The name carries a peaceful and organized feel.
check teapot territory – Fun and whimsical branding, very eye-catching.
мостбет вход с Кыргызстана [url=www.mostbet45087.help]www.mostbet45087.help[/url]
visit teapotterritory online – Fun and inviting branding, immediately memorable.
futurebyte – Content reads clearly, helpful examples made concepts easy to grasp.
explore vendor studio – Came across this site, sections are well structured and easy to navigate
WelcomeHome – This neighborhood vibe online has a warm, approachable feel.
visit bronze crate – Marketplace looks appealing, could grow nicely over time.
Glass Ridge Shop – Clear and elegant, perfect for online shoppers.
mostbet crash bonus [url=http://mostbet2012.help]http://mostbet2012.help[/url]
browse today – Came across this platform, sections are tidy and browsing feels effortless
CozyDistrict – The website presents a snug, welcoming atmosphere for users.
this bronzecrate site – Appealing marketplace setup, looks like it has potential.
explore Glass Ridge Market – Inviting and approachable, suggesting a welcoming emporium.
mostbet şifrəni yenilə [url=http://mostbet2012.help/]http://mostbet2012.help/[/url]
нарколог на дом стоимость ростов-на-дону [url=https://narkolog-na-dom-v-rostove-3.ru/]нарколог на дом стоимость ростов-на-дону[/url] .
Silk Isle Collection Spot – Refined and easy to remember, elegant brand identity.
Silk Isle Marketplace – Elegant layout, makes browsing pleasant.
Tide Gems – Short and catchy, stands out among other stores.
TealSpotVendor – Browsing casually, the site looks neat and well-arranged.
official courtyard site – Feels welcoming and distinctive, easy to remember.
где можно купить кольцо кольцо для помолвки белое золото
Tide Corner – Simple yet distinctive, the name is easy to remember.
Выбирать площадку “наугад” – сомнительное удовольствие, особенно когда везде обещают одно и то же. Гораздо надежнее ориентироваться на лучшие казино по отзывам игроков, где люди реально пишут про скорость выплат, работу поддержки, честность условий и то, как ведут себя бонусы на практике. В нашем Telegram-канале мы собираем такие варианты в удобные подборки: отмечаем, что чаще всего хвалят, на что жалуются, где условия адекватные, а где начинаются “сюрпризы” после депозита. Так вы быстрее найдете нормальный вариант под свой формат игры и не потратите время на сомнительные сайты.
VendorCornerTeal – Checked a few pages, the layout is clean and straightforward.
explore the eastcrate hub – Smooth interface, finding items is fast and easy.
visit now – Warm, friendly, and memorable for users.
Curious about the weather https://www.the-weather-in-podgorica.com today. Detailed 7- and 10-day forecasts, including temperature, wind, precipitation, humidity, and pressure. Up-to-date information on the climate and weather conditions in Podgorica for travel and leisure.
check eastcrate store – Minimal design, browsing categories feels effortless.
mostbet bonus bun venit 2026 [url=http://mostbet63218.help]http://mostbet63218.help[/url]
1win ставки на теннис Кыргызстан [url=https://1win20819.help]1win ставки на теннис Кыргызстан[/url]
Если интересует новый Ментал слот – мы вынесли всё в отдельный пост: что изменилось/что добавили, первые впечатления, детали по бонускам и на что обратить внимание перед стартом. Удобно открыть, быстро разобраться и уже дальше обсуждать в группе.
browse the store – Ran into this shop today and it’s definitely eye-catching.
Bright Harbor site – The name popped up today and instantly grabbed my attention.
explore trend wharf online – Trendy and modern, looking forward to updates.
TraderSpot – The design communicates efficiency and approachability.
check brook aisle – Layout is neat, navigating through felt smooth and stress-free.
visit trend wharf – The site has a stylish vibe, curious about future items.
TradeHarbor – Online branding is clean, concise, and easy to navigate.
open brookaisle shop – Straightforward layout, exploring the pages was effortless.
Glass Willow Corner – Cozy yet professional, balancing friendliness with trust.
Glass Willow Hub – Modern and approachable, giving a central and professional feel.
browse the exchange – Clean and inviting, leaves a positive impression.
Silver Marketplace – Smooth navigation, everything was easy to locate.
open eastemporium portal – Simple design, navigating categories is intuitive.
click here – Friendly and clean, very memorable for users.
монтаж газового пожаротушения для банка [url=https://montazh-gazovogo-pozharotusheniya.ru/]montazh-gazovogo-pozharotusheniya.ru[/url] .
лицензия на монтаж газового пожаротушения [url=https://montazh-gazovogo-pozharotusheniya-2.ru/]montazh-gazovogo-pozharotusheniya-2.ru[/url] .
Silver Gems – Simple interface, discovering items was effortless.
see eastemporium marketplace – Inviting interface, browsing through items is a breeze.
Если вам нужен рейтинг онлайн казино, важно смотреть не только на “топ-10”, а на детали, которые реально влияют на опыт: прозрачные правила, стабильные выплаты, адекватные лимиты, нормальная поддержка и отсутствие массовых жалоб на блокировки/затяжные проверки. Мы как раз ведём Telegram-канал, где публикуем актуальные рейтинги и обновления по площадкам – удобно сравнивать и выбирать без лишней суеты. Ссылка: https://t.me/s/rating_casino_russia
VendorTealDeals – Took a peek, the structure feels simple and well-laid-out.
Tide Rack Picks – Organized and neat, exploring categories was straightforward.
TealCollectiveFinds – Took a quick glance, the layout is tidy and accessible.
melbet скачать [url=https://melbetofficialbookmaker.ru/]melbet скачать[/url] .
Tide Picks – Modern and tidy, moving between categories was fast.
pin-up aviator qachon chiqadi [url=http://pinup14278.help/]pin-up aviator qachon chiqadi[/url]
mostbet azərbaycanda app yüklə [url=http://mostbet2012.help/]http://mostbet2012.help/[/url]
take a look – Came across this store, and the name is clean and sticks in memory.
KettleSavings – Visitors get a sense of simplicity and approachability immediately.
take a look – Came across this store, and the name is clean and sticks in memory.
mostbet bonus la înregistrare [url=https://mostbet63218.help]mostbet bonus la înregistrare[/url]
explore brook bundle marketplace – Strong and unique name, easy to recall.
KettleBrookDeals – The site style is welcoming, practical, and shopper-friendly.
visit hazelhaven – Pleasant and soothing design with clearly organized sections.
see brook bundle hub – Appealing name, stands out nicely among online shops.
shop homepage – Refreshing and memorable, easy to recognize.
explore the elmbasket hub – Organized design, navigating products felt smooth.
hazelhaven page – Light, pleasant interface that’s intuitive to navigate.
browse exchange – Pleasant and natural, gives a positive first impression.
explore the elmbasket hub – Organized design, navigating products felt smooth.
монтаж автоматической системы газового пожаротушения [url=https://montazh-gazovogo-pozharotusheniya-1.ru/]montazh-gazovogo-pozharotusheniya-1.ru[/url] .
Silver Corner – Distinctive and friendly, easy to recall later.
вывод из запоя в ростове-на-дону [url=https://vyvod-iz-zapoya-v-rostove-4.ru/]вывод из запоя в ростове-на-дону[/url] .
explore Golden Harbor Hub – Welcoming and modern, suggesting a central point for community engagement.
Silver Select – Short, memorable, and distinctive for the brand.
вывод из запоя цена в ростове [url=https://vyvod-iz-zapoya-v-rostove-5.ru/]вывод из запоя цена в ростове[/url] .
TimberCrateMarket – Took a glance, everything feels easy to follow.
discover Golden Harbor Collective – Engaging and welcoming, encouraging users to explore.
OnlineCrateExchange – Browsed lightly, already noticing some useful areas.
The Timber Crate – Simple layout, browsing items felt effortless.
Очередная волна разговоров о том, что SEO больше не работает. Как по мне, те, кто так говорят, либо не сталкивались с грамотным продвижением, либо ожидали быстрых результатов. Нашел статью, где хорошо объясняется, почему SEO остается основой устойчивого онлайн-бизнеса. Основные тезисы: органический трафик никуда не уходит, доверие к топовым сайтам выше, а стоимость привлечения клиента со временем только снижается. Почитайте, тема раскрыта аргументированно: https://iskra-net.ru/preimushhestva-prodvizheniya-sajtov-pochemu-seo-eto-osnova-ustojchivogo-onlajn-biznesa/ . Особенно полезно будет тем, кто ищет долгосрочные каналы, а не разовые всплески.
Explore detailed insights on https://topxclocks.com/ihome-ihc5-wireless-bluetooth-clocks/ ihome ihc5 wireless bluetooth clocks at TopXClocks, including features, comparisons, and expert recommendations for smarter buying decisions.
Timber Gems – Friendly design, moving between sections was effortless.
монтаж автоматической системы газового пожаротушения [url=https://montazh-gazovogo-pozharotusheniya-2.ru/]монтаж автоматической системы газового пожаротушения[/url] .
установка автоматического газового пожаротушения [url=https://montazh-gazovogo-pozharotusheniya.ru/]montazh-gazovogo-pozharotusheniya.ru[/url] .
мелбет на андроид [url=https://melbetofficialbookmaker.ru/]мелбет на андроид[/url] .
Информационный портал tga-info.ru со статьями и обзорами на разные темы. Материалы о технологиях жизни работе доме и повседневных вопросах. Актуальные новости полезные советы рекомендации и интересная информация для читателей.
Интернет ресурс https://nesmetnoe.ru/ с полезными статьями советами и обзорами. Материалы о жизни здоровье технологиях доме и повседневных вопросах. Практические рекомендации интересные факты и актуальная информация для широкой аудитории.
explore calm brook – The branding feels soothing and memorable at first glance.
official trading site – Simple, reliable, and easy to remember.
Explore detailed insights on https://topxclocks.com/antique-wall-clocks-sale/ antique wall clocks sale at TopXClocks, including features, comparisons, and expert recommendations for smarter buying decisions.
explore everemporium online – Minimalistic design, navigation was smooth and pleasant.
Статьи о любви https://lifeoflove.ru отношениях, психологии и семейной жизни. Советы по гармоничным отношениям общению и саморазвитию. Полезные рекомендации вдохновляющие истории и материалы для тех кто хочет улучшить личную жизнь.
explore the district – This name popped up and it has a gentle, relaxing vibe.
explore canyoncart shop – Playful marketplace name, makes the site feel inviting.
CrestEmporiumHub – Visitors instantly get a sense of tradition and quality.
visit flint crest – Strong and professional, very straightforward.
see everemporium hub – Pleasant branding, made shopping feel easy.
mostbet yangilangan apk [url=www.mostbet28461.help]www.mostbet28461.help[/url]
open canyoncart shop – Playful title, definitely noticeable and appealing.
CrestEmporium – The name projects a classic, sophisticated vibe for today’s audience.
oceanopal page – Beautiful branding, expecting some very appealing items.
выезд нарколога на дом ростов-на-дону [url=https://narkolog-na-dom-v-rostove-4.ru/]выезд нарколога на дом ростов-на-дону[/url] .
oceanopal online – Great name, looking forward to seeing the merchandise.
Sky Spot – Modern and approachable, leaves a lasting impression.
Информационный портал https://tga-info.ru со статьями и обзорами на разные темы. Материалы о технологиях жизни работе доме и повседневных вопросах. Актуальные новости полезные советы рекомендации и интересная информация для читателей.
1win сменить пароль [url=http://1win17043.help]http://1win17043.help[/url]
Sky Crate Collections – Clean interface, makes shopping simple.
Интернет ресурс http://www.nesmetnoe.ru с полезными статьями советами и обзорами. Материалы о жизни здоровье технологиях доме и повседневных вопросах. Практические рекомендации интересные факты и актуальная информация для широкой аудитории.
Полезные материалы https://www.greendachnik.ru для дачников и садоводов. Советы по выращиванию овощей цветов и плодовых растений уходу за садом огородом и участком. Практические рекомендации идеи для дачи и комфортной загородной жизни.
Golden Stone Deals – Friendly and engaging, while still feeling strong and credible.
Статьи о любви https://lifeoflove.ru отношениях, психологии и семейной жизни. Советы по гармоничным отношениям общению и саморазвитию. Полезные рекомендации вдохновляющие истории и материалы для тех кто хочет улучшить личную жизнь.
Материалы о компьютерах hardexpert.net технологиях электронике и IT. Обзоры техники советы по выбору комплектующих настройке программ и использованию устройств. Полезная информация для пользователей и любителей технологий.
VendorHouseFinder – Took a glance, the platform looks neat and well-laid-out.
речные прогулки спб [url=https://arenda-yakhty-spb-1.ru/]arenda-yakhty-spb-1.ru[/url] .
Golden Stone Hub – Professional and centralized, giving a modern outlet feel.
TimberCrestHub – Browsed around, the site feels easy to follow and well-organized.
вывод из запоя на дому нарколог в ростове [url=https://vyvod-iz-zapoya-v-rostove-4.ru/]вывод из запоя на дому нарколог в ростове[/url] .
Topaz Finds – Friendly interface, exploring items was simple and intuitive.
mostbet двухфакторная защита [url=https://mostbet57193.help/]https://mostbet57193.help/[/url]
mostbet serverə qoşulmur [url=https://mostbet2012.help]https://mostbet2012.help[/url]
Topaz Rack Market – Well-structured and tidy, navigating products felt natural.
установка модулей газового пожаротушения [url=https://montazh-gazovogo-pozharotusheniya-1.ru/]установка модулей газового пожаротушения[/url] .
вывод из запоя в стационаре в ростове [url=https://vyvod-iz-zapoya-v-rostove-5.ru/]вывод из запоя в стационаре в ростове[/url] .
1вин официальный сайт [url=https://www.1win54038.help]https://www.1win54038.help[/url]
mostbet tək kupon necə edilir [url=https://mostbet2012.help]https://mostbet2012.help[/url]
Полезные материалы https://greendachnik.ru для дачников и садоводов. Советы по выращиванию овощей цветов и плодовых растений уходу за садом огородом и участком. Практические рекомендации идеи для дачи и комфортной загородной жизни.
learn more here – Community-driven and appealing, easy to recall.
мостбет android приложение Кыргызстан [url=http://mostbet20748.help/]http://mostbet20748.help/[/url]
visit fieldcrate online – Smooth browsing, felt intuitive to explore products.
check this site – Friendly, community-inspired, and naturally welcoming.
explore fieldcrate store – Neat design, easy to navigate through products.
mostbet fora stavka [url=https://www.mostbet28461.help]https://www.mostbet28461.help[/url]
Материалы о компьютерах https://www.hardexpert.net технологиях электронике и IT. Обзоры техники советы по выбору комплектующих настройке программ и использованию устройств. Полезная информация для пользователей и любителей технологий.
нарколог на дом срочно ростов-на-дону [url=https://narkolog-na-dom-v-rostove-1.ru/]narkolog-na-dom-v-rostove-1.ru[/url] .
check out canyoncrate – Looked around quickly, appears to be an expanding store.
мелбет лига таблица [url=https://melbetofficialbookmaker.ru/]melbetofficialbookmaker.ru[/url] .
canyoncrate.shop – Just browsing around, seems like a store that’s expanding.
LanternGoods – The marketplace feels approachable, with a warm online presence.
browse calm crest – Noticed this shop earlier and the branding feels peaceful and inviting.
1вин лайв ставки [url=1win17043.help]1win17043.help[/url]
visit calm crest – This shop name popped up today and gives off a relaxed, inviting vibe.
Slate Crate Picks Market – Clean and efficient, navigating was quick and simple.
visit oasis crate – Interesting idea, I’ll check back once there are more products.
Slate Crate Select – Fast and tidy, navigation was intuitive.
browse oasiscrate online – Concept feels fresh, will come back when they add more items.
mostbet retragere instant [url=http://mostbet63218.help/]http://mostbet63218.help/[/url]
Granite Harbor Hub – Central and professional, suggesting a reliable place for commerce.
HouseOfTrailstoneVendors – Went through a few areas, the interface feels smooth and logical.
Granite Harbor Deals – Engaging and trustworthy, suggesting quality offers in a professional space.
Topaz Spot – Clear structure, exploring products was easy.
VendorSpotTrailstone – Browsing a bit, the sections are easy to follow and well-organized.
visit flora brook – Calm and natural, gives a very pleasant impression.
browse hazelmarket portal – Intuitive shop design, made navigating simple.
Gates of Olympus affiche une volatilité haute. Comment gagner à Gates of Olympus, c’est surtout une histoire de fun, d’astuces et de gestion. Les slots en ligne sont devenus très populaires ces dernières années, et il n’est pas étonnant que les développeurs de jeux de hasard continuent de sortir de nouveaux jeux innovants et excitants. L’un des plus récents et des plus attendus est Gates of Olympus, un jeu de slot créé par Pragmatic Play, un développeur de jeux de hasard très réputé. Dans cet article, nous allons vous montrer comment jouer à Gates of Olympus et gagner de gros multiplicateurs. Comment jouer gratuitement à Gates of Olympus ? Où trouver les meilleurs Gates of Olympus slots ? Dans ce guide, nous vous expliquons tout sur ce slot iconique et vous indiquons le casino en ligne en France où vous pouvez y jouer légalement, ainsi que les options pour tester le jeu gratuitement avant de miser en argent réel.
https://konkurs.kalendarzrolnikow.pl/revue-malina-casino-depots-methodes-et-conseils/
Oui, il est fortement recommandé de consulter un professionnel de santé spécialisé dans les addictions. Un thérapeute pourra vous aider à comprendre les causes de votre addiction, à développer des stratégies pour y faire face et à mettre en place un plan de traitement personnalisé. Il respecte la réglementation et accepte les transactions PayPal, la qualité et la diversité des jeux de vidéo poker sont à la hauteur. Bien sûr, économiser et faire fructifier de l’argent. Lady Liberty fait une entrée avec les substituts de la Statue de la Liberté, il est de 95,85%. Cependant, ce qui n’est pas beaucoup. Une large gamme d’options de bonus est disponible pour soutenir les joueurs, améliorant leur expérience de jeu et leurs chances de gagner.
прогулки по неве [url=https://arenda-yakhty-spb-1.ru/]прогулки по неве[/url] .
Topaz Corner – Tidy interface, exploring categories felt natural.
explore offers – Pleasant and easygoing, leaves a positive vibe.
нарколог на дом в ростове-на-дону [url=https://narkolog-na-dom-v-rostove-4.ru/]нарколог на дом в ростове-на-дону[/url] .
browse hazelmarket store – Neat branding, shopping felt quick and intuitive.
вывод из запоя на дому в ростове [url=https://vyvod-iz-zapoya-v-rostove-2.ru/]вывод из запоя на дому в ростове[/url] .
united kingdom blackjack rules, pokies online free united states and
casino chip values usa, or best casino cities in united kingdom
Here is my blog – why russian roulette [Hilda]
накрутка подписчиков в Телеграм https://nakrutka-podpischikov-telegram-1.ru
canyonvendor.shop – Interesting vendor hub concept, curious how it evolves.
Сборник полезных советов https://allsekrets.ru и лайфхаков на каждый день. Материалы о доме здоровье красоте и повседневной жизни. Интересные статьи практические рекомендации и идеи которые помогут упростить бытовые задачи.
Информация о ремонте http://www.hyundai-sto.ru обслуживании и диагностике автомобилей Hyundai. Советы по техническому обслуживанию выбору запчастей и эксплуатации автомобиля. Полезные материалы для владельцев и автолюбителей.
RidgeNetwork – This branding balances a modern look with a connected, social feel.
Материалы о красоте https://www.idealnaya-ya.ru здоровье саморазвитии и уходе за собой. Советы по питанию фитнесу психологии и гармоничной жизни. Полезные статьи рекомендации и идеи для улучшения самочувствия и образа жизни.
canyonvendor.shop – Interesting vendor hub concept, curious how it evolves.
LanternCircle – Branding creates a friendly, modern, and collaborative impression.
mostbet экспресс ставка [url=http://mostbet17403.help/]http://mostbet17403.help/[/url]
shop homepage – Ran into this store and the name has a welcoming, collective feel.
check this shop – I stumbled on this name today, and the collective theme is appealing.
Slate Treasures – Clear layout, moving through pages was hassle-free.
вывод из запоя в ростове [url=https://vyvod-iz-zapoya-v-rostove-1.ru/]вывод из запоя в ростове[/url] .
психиатр нарколог на дом в ростове [url=https://narkolog-na-dom-v-rostove-1.ru/]narkolog-na-dom-v-rostove-1.ru[/url] .
курсовой проект цена [url=https://kupit-kursovuyu-82.ru/]kupit-kursovuyu-82.ru[/url] .
монтаж газового пожаротушения москва [url=https://montazh-gazovogo-pozharotusheniya-3.ru/]монтаж газового пожаротушения москва[/url] .
сколько стоит заказать курсовую работу [url=https://kupit-kursovuyu-81.ru/]kupit-kursovuyu-81.ru[/url] .
mostbet mobil depozit [url=https://www.mostbet2012.help]https://www.mostbet2012.help[/url]
бонусы мелбет [url=https://melbetofficialbookmaker.ru/]бонусы мелбет[/url] .
Slate Ventures – Well-labeled sections, finding items was easy.
crystalvendor homepage – Direct reference that makes the main site easy to locate.
check crystalvendor – A quick pointer that’s easy to remember for future browsing.
mostbet sign up [url=www.mostbet28461.help]www.mostbet28461.help[/url]
A secure, browser-based video collaboration tool that simplifies review and approval workflows, allowing for streamlined communication within the Lightworks ecosystem. If you’ve already got a script to work with, InVideo just might be the best option for quickly uploading Instagram videos. This platform comes with over 5,000 templates to choose from, 8M stock images, and music — but where InVideo really shines is its AI tools. A secure, browser-based video collaboration tool that simplifies review and approval workflows, allowing for streamlined communication within the Lightworks ecosystem. Bring your videos to life with exciting animations, adding magic that transforms your storytelling into an unforgettable experience, all within one video editing app. Cute CUT has a Base app (which is a free video editing app) and a Pro app, which is only $5.99. If this is an app that you see yourself using often, go for the Pro version. It’s available for iOS and Android.
https://neolifehomeopathy.com.np/vortex-game-login-bonus-how-to-maximize-your-rewards-review/
How can you customize AI-made animated videos? Use AI animation videos for promotional content, ads, and social media posts. Turn messages into realistic or animated marketing videos that help your brand stand out and connect with your audience. Unlike most cartoon video apps, you don’t need to draw anything in this app. Our unique and proprietary software allows you to choose any pre-loaded characters that have been drawn for you, and allow you to animate their movements and gestures by simply tapping and swiping your screen. To make the characters provided in Tweencraft cartoon movie maker you can use your own voice. Your voice is automatically converted to cartoonish. The Intro Video Maker is a new video editing wizard. This video editor lets you create captivating intros, outros, and brand logo reveals. This app is for gamers, businesspeople, and anyone who wants to spice up their videos. Let’s explore the magic. Intro Video Maker is like a candy store for kids—overwhelming but exciting! With over 1000 video templates! This app has fire particle effects, kawaii animations, and cinematic movie intros. The best part? Without watermarks, you can make these captivating intros. So ditch generic intros and embrace endless possibilities!
Информация о ремонте https://hyundai-sto.ru обслуживании и диагностике автомобилей Hyundai. Советы по техническому обслуживанию выбору запчастей и эксплуатации автомобиля. Полезные материалы для владельцев и автолюбителей.
Всем привет! Наткнулся на статью, где собраны не просто базовые понятия, а реально работающие стратегии и инструменты с привязкой к текущим реалиям. Автор рассматривает комплексный подход: от сбора семантики до юзабилити и работы с интентом. Очень порадовало, что материал свежий (январь 2026) и учитывает последние тренды. Оставляю ссылку здесь, может, кому-то пригодится для актуализации своих знаний: https://sobolland.ru/prodvizhenie-sajtov-strategii-instrumenty-i-aktualnye-podhody/ . Особенно полезно будет новичкам для формирования целостной картины.
Материалы о красоте idealnaya-ya.ru здоровье саморазвитии и уходе за собой. Советы по питанию фитнесу психологии и гармоничной жизни. Полезные статьи рекомендации и идеи для улучшения самочувствия и образа жизни.
official outlet site – Feels easygoing and approachable, memorable for visitors.
explore silkstone hub – Very neat layout, makes finding info simple
learn more here – Easygoing and memorable, feels naturally pleasant.
1win plinko [url=1win17043.help]1win17043.help[/url]
silkstone vendor hub online – Information is clearly presented, browsing is simple
discover Granite Stone Exchange – Engaging and trustworthy, inviting users to explore the platform.
Интересуют новости? новостной сайт главные новости дня на одном портале. Свежие события из политики, экономики, общества, технологий и культуры. Оперативная информация, аналитика, комментарии экспертов и важные факты, которые помогают понимать происходящее.
Trail Trade Hub – Clean and organized layout, browsing categories was effortless.
Granite Stone Deals – Engaging and trustworthy, highlighting reliable offers in the marketplace.
Trail Trade Spot – Modern and minimal layout, browsing products felt smooth.
Hello!
Master the art of creating interesting mysterious dishes for valuable dining experiences and cook like a chef see on the website for recipe collections
Full information on the link – https://900letekas.site
All the best and development in business!
HarborCircle – This branding is gentle, calming, and easy to connect with.
caramelcart marketplace – Sweet and simple title, easy to recall.
LavenderHarborHub – The collective name feels calm and welcoming to all visitors.
open caramel cart online – Charming name, stands out nicely among competitors.
срочный вывод из запоя на дому в ростове [url=https://vyvod-iz-zapoya-v-rostove-2.ru/]vyvod-iz-zapoya-v-rostove-2.ru[/url] .
Funbetcasino… alright, it’s not bad. Some interesting games and a decent interface. I’ve had a few good runs there. Link’s right here: funbetcasino.
Mmabetlogin is easy to use and navigate. It’s made it easy for me to log in and make bets when I want to. Click here to check it out mmabetlogin
Gorillabet, I’ve been using their platform. I’d say it’s alright but nothing too crazy. Give it a try! gorillabet
Ищешь сервер? рейтинг VPS хостингов сравнение dedicated server хостинга по характеристикам, цене, производительности и uptime. Лучшие провайдеры для размещения сайтов, интернет-магазинов и крупных проектов.
Лучшие сервера рейтинг дешевых vps в россии сравнение dedicated servers по цене, производительности и надежности. Рейтинг хостингов, которые предлагают мощные серверные решения.
Нужен сервер? VPS хостниг dedicated servers с мощными процессорами, NVMe SSD и высокой стабильностью. Подберите оптимальный сервер для бизнеса, разработки и высоких нагрузок.
Hello!
Reveal king mysterious rules within interesting dynasties offering valuable power lessons and lead like royalty see on the website for royal archives
Full information on the link – https://900letekas.site
All the best and development in business!
Найти лучший сервер vds рейтинг рейтинг dedicated servers от популярных хостинг-провайдеров. Сравните выделенные серверы по характеристикам, стоимости и возможностям масштабирования для бизнеса и веб-проектов.
Интересуют новости? сайт сми главные новости дня на одном портале. Свежие события из политики, экономики, общества, технологий и культуры. Оперативная информация, аналитика, комментарии экспертов и важные факты, которые помогают понимать происходящее.
official outlet page – This shop name feels creative and easily memorable.
Snow Crate Spot – Friendly interface, memorable and unique.
aviator oyini mostbet [url=https://www.mostbet84629.help]aviator oyini mostbet[/url]
store homepage – Came across this shop and the name feels inventive and memorable.
Snow Crate Hub – Clean and modern, easy to recognize online.
заказать качественную курсовую [url=https://kupit-kursovuyu-82.ru/]заказать качественную курсовую[/url] .
discover goldvendor – So far, the site looks encouraging; more listings would be great.
помощь студентам курсовые [url=https://kupit-kursovuyu-81.ru/]kupit-kursovuyu-81.ru[/url] .
view the site – Pleasant and modern, gives a fresh first impression.
browse gold vendor store – The shop looks promising, excited to check back for new items.
check this site – Creative and friendly, leaves a positive, lasting vibe.
вывод из запоя на дому нарколог в ростове [url=https://vyvod-iz-zapoya-v-rostove-1.ru/]vyvod-iz-zapoya-v-rostove-1.ru[/url] .
Лучшие сервера vds рейтинг сравнение dedicated servers по цене, производительности и надежности. Рейтинг хостингов, которые предлагают мощные серверные решения.
mostbet depozit qilish usullari [url=mostbet84629.help]mostbet depozit qilish usullari[/url]
Найти лучший сервер подобрать качественный VPS рейтинг dedicated servers от популярных хостинг-провайдеров. Сравните выделенные серверы по характеристикам, стоимости и возможностям масштабирования для бизнеса и веб-проектов.
монтаж системы газового пожаротушения спб [url=https://montazh-gazovogo-pozharotusheniya-3.ru/]montazh-gazovogo-pozharotusheniya-3.ru[/url] .
Нужен сервер? Обзоры и рейтинг хостинг-провайдеров dedicated servers с мощными процессорами, NVMe SSD и высокой стабильностью. Подберите оптимальный сервер для бизнеса, разработки и высоких нагрузок.
Ищешь сервер? арендовать выделенный сервер сравнение dedicated server хостинга по характеристикам, цене, производительности и uptime. Лучшие провайдеры для размещения сайтов, интернет-магазинов и крупных проектов.
cyberpulse – Pages loaded fast, images appeared sharp, and formatting stayed consistent.
codenova – Overall, professional vibe here; trustworthy, polished, and pleasantly minimal throughout.
bytenova – Color palette felt calming, nothing distracting, just focused, thoughtful design.
Walnut Crate Hub – Clean and organized layout, navigating items was effortless.
mostbet promotii [url=https://mostbet63218.help/]https://mostbet63218.help/[/url]
Harbor Crest Finds Online – Inviting and modern, giving shoppers a sense of accessibility and friendliness.
zybertech – Bookmarked this immediately, planning to revisit for updates and inspiration.
Good morning!
Unlock love mysterious languages with interesting and valuable relationship facts and speak the heart fluently see on the website for love guides
Full information on the link – https://stekloservis1.ru/primenenie-plastika/
All the best and development in business!
cybernexus – Loved the layout today; clean, simple, and genuinely user-friendly overall.
Walnut Hub Picks – Polished and approachable, navigating items was easy.
mostbet скачать [url=https://www.mostbet17403.help]https://www.mostbet17403.help[/url]
Harbor Crest Online – Clean and straightforward, ideal for digital shopping.
MeadowOutlet – Visitors find the branding approachable and relaxing.
visit caramel crate – Welcoming name, gives a pleasant first impression.
LavenderEase – Branding feels approachable, serene, and easy to navigate.
discover caramelcrate shop – Friendly name, feels approachable and easy to recall.
vortexbyte – Color palette felt calming, nothing distracting, just focused, thoughtful design.
Solar Finds Hub – Clean menus, finding products is simple and fast.
Good afternoon!
Analyze interesting mysterious patterns to extract maximum valuable content quickly and optimize your research workflow see on the website for advanced analytics tools
Full information on the link – https://stoplike.ru/tehnologiya-litya-pod-davleniem-dlya-proizvodstva-plastikovyh-boltov-osobennosti-i-etapy.html
All the best and development in business!
mostbet зеркало [url=https://mostbet17403.help/]https://mostbet17403.help/[/url]
veloxtech – Found practical insights today; sharing this article with colleagues later.
Solar Finds – Smooth navigation, sections are easy to explore.
visit now – Friendly and relaxed, makes a lasting positive impact.
official shop page – The name gives off a cozy, approachable vibe.
заказать студенческую работу [url=https://kupit-kursovuyu-82.ru/]kupit-kursovuyu-82.ru[/url] .
see this store – This marketplace name feels inviting and comforting.
check out yardcart – Marketplace has a fun vibe, could gain traction quickly.
yardcart online hub – Appealing marketplace, seems likely to grow in popularity.
mostbet live линия [url=https://mostbet17403.help]https://mostbet17403.help[/url]
mostbet onlayn slotlar [url=mostbet28461.help]mostbet28461.help[/url]
Walnut Corner – Clean and neat, exploring products was effortless.
LemonTradeHub – The branding feels vibrant, professional, and easy to engage with.
Walnut Collections Hub – Modern and tidy layout, exploring products felt smooth.
Harbor Crest Select – Suggests curated quality while remaining approachable and shopper-friendly.
pinewillow marketplace – Layout feels tidy and pages are easy to read.
CrestMarket – Visitors experience a clean, professional, and easy-to-navigate trading brand.
pinewillow store page – Easy to browse and the layout is neat and functional.
Harbor Crest – Clean and inviting, giving the outlet a friendly, approachable identity.
explore offers – Timeless and welcoming, naturally memorable for visitors.
1win онлайн казино Бишкек [url=1win17043.help]1win17043.help[/url]
Рейтинги серверов подобрать качественный VPS актуальный рейтинг dedicated server хостинга с сравнением характеристик, стоимости и производительности. Найдите оптимальный сервер для бизнеса, интернет-магазина, SaaS-сервисов и крупных сайтов.
view the site – Friendly and elegant, stands out nicely online.
Обзор и рейтинги серверов VPS/VDS-хостинг сравните выделенные серверы по характеристикам, цене, процессорам и дискам SSD. Выберите надежный сервер для размещения сайтов, приложений и высоких нагрузок.
Проблемы с алкоголем? вызов врача нарколога на дом медицинская помощь при алкогольной зависимости, детоксикация организма и восстановление самочувствия. Консультации специалистов и безопасное лечение.
Гарантированное лечение частный нарколог на дом анонимно специалист приезжает к пациенту, проводит детоксикацию организма, помогает снять симптомы алкогольной интоксикации и контролирует состояние. Безопасный и конфиденциальный подход.
Профессиональный вывод из запоя вызвать на дом детоксикация организма, помощь при алкогольной интоксикации и восстановление самочувствия пациента. Специалист приезжает на дом и оказывает профессиональную помощь.
seacrest store page – Sections are clear and reading through content feels comfortable.
Spring Corner Market – Smooth interface, very intuitive to navigate.
simple shop link – Layout is minimal and sections are clearly organized.
discover the trading – This brand popped up today and feels contemporary and inviting.
The Spring Rack – Catchy and fresh, stands out nicely online.
main store link – Interesting webpage, I’ve been looking around and it feels very clean.
see this store – The trading brand sounds stylish and pleasantly modern.
moonbrook online shop – Spent a bit of time exploring here and the page design is nice and basic.
мостбет результаты матчей [url=https://mostbet94063.help/]мостбет результаты матчей[/url]
покупка курсовой [url=https://kupit-kursovuyu-82.ru/]kupit-kursovuyu-82.ru[/url] .
islemint online – The brand feels contemporary and clearly differentiates itself.
this islemint store – Feels modern and unique, easily catching attention among newcomers.
мостбет aviator Кыргызстан [url=www.mostbet57193.help]мостбет aviator Кыргызстан[/url]
заказать студенческую работу [url=https://kupit-kursovuyu-81.ru/]kupit-kursovuyu-81.ru[/url] .
mostbet apk [url=https://mostbet17403.help/]https://mostbet17403.help/[/url]
explore site – Pages are organized, navigation feels intuitive and simple.
Обзор и рейтинги серверов Самый дешевый VPS-хостинг рейтинг vds хостингов сравните выделенные серверы по характеристикам, цене, процессорам и дискам SSD. Выберите надежный сервер для размещения сайтов, приложений и высоких нагрузок.
Рейтинги серверов Рейтинг vds актуальный рейтинг dedicated server хостинга с сравнением характеристик, стоимости и производительности. Найдите оптимальный сервер для бизнеса, интернет-магазина, SaaS-сервисов и крупных сайтов.
Проблемы с алкоголем? вызов наркологической помощи на дом медицинская помощь при алкогольной зависимости, детоксикация организма и восстановление самочувствия. Консультации специалистов и безопасное лечение.
Гарантированное лечение вызов нарколога на дом цены специалист приезжает к пациенту, проводит детоксикацию организма, помогает снять симптомы алкогольной интоксикации и контролирует состояние. Безопасный и конфиденциальный подход.
go to this page – Interface is minimalistic, moving through content is easy.
1вин visa пополнение [url=https://1win54038.help/]https://1win54038.help/[/url]
browse hazel hub – Clean interface makes browsing comfortable and easy.
hazel vendor link hub – Navigation works well, content is easy to read.
shop district page – The site feels structured and information is straightforward.
StoneSelect – Online presentation feels stylish, refined, and easy to recall.
Wave Corner – Modern and simple design, exploring items was straightforward.
explore art – Inviting and creative, feels naturally memorable for visitors.
plumbrook store online – Browsed quickly, everything feels organized and accessible.
LemonBoutique – Visitors find the name memorable, classy, and inviting.
view shop – Artistic and memorable, feels naturally welcoming for visitors.
Wave Gems – Friendly and clean layout, browsing sections felt easy.
silkharbor shop portal – Layout is organized, making navigation easy and comfortable.
Профессиональный запой вызов нарколога детоксикация организма, помощь при алкогольной интоксикации и восстановление самочувствия пациента. Специалист приезжает на дом и оказывает профессиональную помощь.
Круглосуточный вывод из запоя круглосуточно специалист проводит детоксикацию организма, помогает снять симптомы алкогольной интоксикации и контролирует состояние пациента. Медицинская помощь оказывается конфиденциально и направлена на быстрое восстановление самочувствия.
browse echo store – Scrolled briefly and the page arrangement feels clean.
Goooto: https://goooto.ru Информационный портал о женском и мужском здоровье. Статьи об ЭКО, методах диагностики, лечении гинекологических заболеваний и планировании беременности.
Гарантированный безопасный запой вызвать врача вывод из запоя с наблюдением, детоксикацией организма и поддержкой врача. Процедуры направлены на восстановление состояния пациента и улучшение самочувствия.
Добровольная сертификация http://сертификация-соответствия.рф товаров, в отличие от обязательной, не является принудительной, но предоставляет значительные преимущества для бизнеса. Производители могут добровольно сертифицировать свою продукцию по стандартам ISO, ГОСТ Р или другим системам, чтобы повысить конкурентоспособность. Среди ключевых преимуществ — укрепление репутации бренда, расширение рынков сбыта, включая экспорт, и привлечение лояльных клиентов, которые предпочитают сертифицированные товары. Например, добровольная сертификация на экологичность может стать преимуществом в глазах потребителей, ориентированных на устойчивость. В итоге, такая сертификация не только повышает доверие, но и способствует росту продаж и улучшению качества продукции.
Hazel Brook – Simple and welcoming, giving the brand a warm, approachable feel.
collective shop link – Clean structure ensures browsing feels effortless.
echo aisle shop – Looking around, the content flows naturally and is easy to navigate.
Hazel Brook Deals – Engaging and cheerful, highlighting a friendly shopping experience.
discover Chestnut Brook – This district name showed up while browsing and gives a relaxed, pleasant impression.
The Spring Spot – Efficient layout, navigating felt smooth.
moonmeadowoutlet page – Just landed here for the first time and it already looks pretty useful.
mostbet ilovada login [url=http://mostbet84629.help/]http://mostbet84629.help/[/url]
moonmeadow deals – I’m new here but the page already seems like a useful place to browse.
Spring Vendor Market – Well-structured sections, browsing products was straightforward.
online Chestnut Brook – Came across this shop, and the name feels cozy and inviting.
bright harbor shop – Scrolling around, the content is easy to read and flows well.
Необходимые документы http://tehnicheskie-reglamenti.ru для процесса получения сертификата включают техническую документацию на товар, такую как паспорт изделия, инструкции по эксплуатации и результаты внутренних тестов. Также потребуются учредительные документы компании, контракты с поставщиками и, в некоторых случаях, протоколы испытаний от независимых лабораторий. Рекомендуется заранее проконсультироваться с экспертами, чтобы собрать полный пакет и ускорить процедуру. Это особенно важно для импортеров, так как несоответствие может привести к задержкам на таможне.
курсовая работа на заказ цена [url=https://kupit-kursovuyu-82.ru/]курсовая работа на заказ цена[/url] .
Круглосуточный вывод из запоя вызов на дом специалист проводит детоксикацию организма, помогает снять симптомы алкогольной интоксикации и контролирует состояние пациента. Медицинская помощь оказывается конфиденциально и направлена на быстрое восстановление самочувствия.
Гарантированный безопасный запой стационар вывод из запоя с наблюдением, детоксикацией организма и поддержкой врача. Процедуры направлены на восстановление состояния пациента и улучшение самочувствия.
bright harbor shop – Scrolling around, the content is easy to read and flows well.
useful link – Clean layout, content flows naturally across the site.
homepage link – Everything is logically arranged and simple to navigate.
visit the market – Landed on this website and everything feels neatly arranged.
browse the site – Sections are well-arranged, browsing is smooth and natural.
visit their site – Layout is tidy, scrolling and navigation feel natural.
1win банковская карта вывод [url=http://1win54038.help]http://1win54038.help[/url]
Основные этапы сертификации http://sertifikati-sootvetstviya.ru товаров начинаются с анализа требований. Сначала необходимо определить тип сертификата — добровольный или обязательный — в зависимости от категории продукции, такой как электроника, пищевые продукты или строительные материалы. Далее следует сбор и подача документов в аккредитованный орган по сертификации. После этого проводится лабораторное тестирование образцов, где проверяется соответствие стандартам ГОСТ или международным нормам. Завершающим этапом является аудит производства и выдача сертификата, если все требования соблюдены.
Важность сертификации http://sertifikaciya-rf.ru для бизнеса невозможно переоценить, поскольку она открывает двери для расширения рынков и повышения конкурентоспособности. Компании, прошедшие сертификацию, получают преимущество в тендерах, экспорте и партнерствах, так как их продукция воспринимается как более надежная. Кроме того, сертификат помогает минимизировать юридические риски, связанные с претензиями потребителей или регуляторными штрафами. Для бизнеса сертификация — это инвестиция в репутацию и долгосрочный рост, позволяющая выделиться среди конкурентов и завоевать доверие клиентов.
quick shop visit – Ran into this page today, layout seems well organized and simple.
Обязательная сертификация http://organ-sertifikacii.ru товаров предусмотрена законодательством и является необходимым требованием для определенных категорий продукции. Согласно нормам Таможенного союза ЕАЭС и российскому законодательству, такие товары, как электроника, детские изделия, пищевая продукция и медицинские приборы, должны проходить обязательную проверку на соответствие техническим регламентам. Это обеспечивает безопасность для здоровья и жизни потребителей, предотвращая попадание на рынок некачественной или опасной продукции. Процесс включает лабораторные испытания, аудит производства и выдачу сертификата соответствия. Без такой сертификации реализация товаров может быть запрещена, что подчеркивает ее роль в соблюдении правовых норм и защите рынка.
Наш магазин https://atmosfera-market.ru является официальным дилером климатической техники. В каталоге магазина большой выбор проверенных марок и моделей кондиционеров, которые можно Купить с доставкой и установкой в Москве, Цена зависит от параметров, которые приводятся в карточках товаров. У нас можно не только купить климатические системы. Мы занимаемся также установкой, а качественный монтаж это очень важно для данного оборудования. Предоставляем гарантию на всю технику и работы.
view the site – Dynamic and inviting, feels like a professional marketplace.
visit plumstone outlet – The site loads smoothly, and navigation is straightforward.
view the site – Dynamic and inviting, feels like a professional marketplace.
this silkmeadow page – Clean design ensures browsing is simple and enjoyable.
LinenTrade – Branding conveys professionalism, clarity, and dependability.
simple shop link – Clean layout and smooth page loading make browsing pleasant.
simple shop link – Layout is tidy and moving through sections is smooth.
acorn brook hub – Content looks well organized and easy to follow.
StoneStockHub – The site exudes professionalism, dependability, and a clear structure.
West Corner – Modern and simple design, exploring items was straightforward.
mostbet crash [url=https://mostbet84629.help/]https://mostbet84629.help/[/url]
acorn brook hub – Content looks well organized and easy to follow.
mostbet коэффициенты футбол Кыргызстан [url=https://mostbet57193.help]https://mostbet57193.help[/url]
West Gems – Friendly and clean layout, browsing sections felt easy.
mostbet promo kod qanday ishlaydi [url=http://mostbet28461.help]http://mostbet28461.help[/url]
visit mossridge collective – Found this site randomly and the clean design caught my eye.
курсовая работа недорого [url=https://kupit-kursovuyu-83.ru/]курсовая работа недорого[/url] .
their online emporium – Just noticed this site, structure feels simple and well organized.
Hazel Crest – Clean and approachable, giving the marketplace a welcoming, user-friendly vibe.
mossridgecollective hub – Landed here by chance and really liked how tidy the page looks.
mostbet Oʻzbekiston depozit [url=https://mostbet84629.help/]https://mostbet84629.help/[/url]
quick shop visit – Just noticed this website, layout feels organized and effortless to navigate.
Hazel Crest Market – Professional yet friendly, easy to explore for any visitor.
Bazaar Treasures – Stumbled upon this page, sections are neat and easy to follow.
Good morning!
Investigate fusion mysterious power offering interesting and valuable energy data and power the world cleanly see on the website for fusion updates
Full information on the link – https://900letekas.site
All the best and development in business!
Glass Finds – Landed here by chance, content flows nicely and reading is simple.
1win Мбанк [url=https://1win17043.help]https://1win17043.help[/url]
discover more – Pages are tidy, layout is logical and readable.
go to this page – Interface feels straightforward, pages are simple to browse.
курсовая заказ купить [url=https://kupit-kursovuyu-82.ru/]kupit-kursovuyu-82.ru[/url] .
check this site – Pages are well-organized and easy to follow.
shop link – Interface is neat, reading and navigation feel effortless.
explore now – Elegant and charming, feels welcoming and professional.
learn more here – Elegant and distinctive, gives a naturally classy vibe.
silvermeadow online – Pages are easy to navigate, and information is clear and readable.
silver meadow shop – Navigation is intuitive and information is displayed clearly.
collective outlet site – Navigation is effortless and the design is simple.
storefront page – While navigating a bit, the sections seem easy to read.
visit quartz harbor collective – The site layout is simple, making it easy to find information.
LinenSelect – The trading identity is sleek, easy to recall, and visually appealing.
acorn harbor shop – Taking a quick pass through and the content appears neatly arranged.
LinenWillowHub – The trading name feels elegant, simple, and easy to recall.
West Hub Picks – Polished and approachable design, navigating categories felt smooth.
mosswillow store online – A quick visit shows a tidy layout and well arranged details.
store trading portal – The design feels organized and the information stands out well.
Market Picks – Browsed casually, everything is tidy and easy to read.
The West Spot – Modern and approachable design, exploring products was effortless.
Market Market – Found this page unexpectedly, layout is neat and navigation is intuitive.
calm cove homepage – First impression shows the page is organized and readable.
explore Hazel Crest – Simple and inviting, encouraging users to browse comfortably.
see calm collection – Quick glance shows everything is tidy and easy to follow.
storefront page – Discovered this website, navigation is intuitive and content is readable.
the Hazel Crest Marketplace – Welcoming and clear, giving a trustworthy impression online.
куплю курсовую работу [url=https://kupit-kursovuyu-83.ru/]куплю курсовую работу[/url] .
1win вывести баланс на мегапей [url=1win54038.help]1win54038.help[/url]
see the collection – Came across this website, design is tidy and effortless to browse.
check this out – Layout is neat, browsing and scrolling is intuitive.
gilded retail corner – The brand style suggests a refined and stylish shopping destination.
this link here – Minimal design makes reading and exploring effortless.
official silverstone page – Clean design with well-organized sections makes browsing easy.
explore the emporium – Sections are tidy, reading is straightforward and natural.
Gilded Harbor – This name suggests an upscale marketplace with a polished image.
check this out – Pages are neat, layout is simple and readable.
silverstone store page – Sections are well separated, making browsing effortless.
check this trading site – The page feels organized and easy to explore.
shop link here – Quick stop on the site and the overall layout appears user-friendly.
quartz harbor deals page – Browsed briefly, layout feels organized and practical.
open the store page – Taking a first glance and the layout feels organized.
MapleExchangeHub – The name conveys clarity, friendliness, and reliability.
MapleStock – The branding is simple, approachable, and leaves a lasting impression.
Boutique Treasures – Came across this page casually, navigation is clean and content is organized.
nightstone store page – The browsing experience today feels quick and seamless.
Golden Treasures – Checked this page, sections are clear and reading is effortless.
check this outlet store – The browsing experience here is quite quick and responsive.
капитальный ремонт квартиры [url=https://remont-v-tyle.ru/]remont-v-tyle.ru[/url] .
курсовая работа недорого [url=https://kupit-kursovuyu-88.ru/]курсовая работа недорого[/url] .
Hello everyone!
Master the art of playing interesting mysterious games for valuable championship titles and claim your trophy see on the website for tournament info
Full information on the link – https://wexdiaz.ru/serijnoe-lite-plastmass-pod-davleniem-na-zakaz/
All the best and development in business!
написание учебных работ [url=https://kupit-kursovuyu-84.ru/]kupit-kursovuyu-84.ru[/url] .
как пополнить мостбет [url=http://mostbet60172.help]http://mostbet60172.help[/url]
мостбет вывести деньги 2026 [url=https://mostbet57193.help]мостбет вывести деньги 2026[/url]
воронеж пицца с доставкой большая пицца воронеж
gilded meadow hub – A name that balances sophistication with a friendly vibe.
сколько стоит курсовая работа по юриспруденции [url=https://kupit-kursovuyu-81.ru/]kupit-kursovuyu-81.ru[/url] .
marketplace outlet – Browsing feels simple and design looks minimal.
Все самое свежее здесь: Эффективная схема тейпирования при артрозе голеностопного сустава: пошаговое руководство
discover this page – Interface is clean, reading and scrolling feels effortless.
ТОП площадка https://spark.ru/user/267982/blog/309941/ggdrop-ndash-luchshij-sajt-dlya-otkritiya-kejsov-cs2-i-viigrisha-skinov для кейсов CS2 с большим выбором кейсов, честными шансами и быстрым выводом скинов. Открывайте кейсы Counter-Strike 2, получайте редкие предметы и участвуйте в розыгрышах. Удобный интерфейс, бонусы для новых игроков и регулярные обновления.
meadow market online – Evokes a soothing and organized shopping experience.
marketplace outlet – Browsing feels simple and design looks minimal.
urbanloft – Creative warmth and casual charm define this brand identity.
покупка курсовых работ [url=https://kupit-kursovuyu-86.ru/]kupit-kursovuyu-86.ru[/url] .
go to this page – Pages are well-structured, navigating is intuitive and smooth.
mostbet update profile [url=https://www.mostbet53160.help]https://www.mostbet53160.help[/url]
check this outlet – Landed on this page and everything seems well organized.
mostbet egyenleg [url=https://mostbet2023.help/]mostbet egyenleg[/url]
Качественное SEO https://outreachseo.ru продвижение сайта для бизнеса. Наши специалисты предлагают эффективные решения для роста позиций в поисковых системах. Подробнее об услугах и стратегиях можно узнать на сайте
official site link – Navigation is intuitive, content is well-structured.
vibehouse – The collective’s look today blends comfort with creative energy.
browse the store – Noticed this page today, navigation is straightforward and smooth.
сайт заказать курсовую работу [url=https://kupit-kursovuyu-85.ru/]сайт заказать курсовую работу[/url] .
explore more here – Tidy design, smooth scrolling, very readable content.
курсовые работы заказать [url=https://kupit-kursovuyu-83.ru/]курсовые работы заказать[/url] .
browse quickharbor – Pages are easy to move through and the layout is minimal.
alpinestoneemporium – Pretty smooth experience, content layout makes reading easy today.
quick harbor shop – Pages load fast and the content is easy to follow.
alpinestoneemporium – Pretty smooth experience, content layout makes reading easy today.
Emporium Treasures – Came across this page casually, content is organized and easy to digest.
мелбет казино слоты [url=https://melbetofficialbookmaker.ru/]melbetofficialbookmaker.ru[/url] .
HarborShopHub – Visitors enjoy a warm, smooth, and welcoming online shopping environment.
Emporium Treasures – Came across this page casually, content is organized and easy to digest.
HarborMarketplace – Branding gives a friendly and approachable shopping experience.
nightwillow website – The page has some helpful and engaging content.
курсовые работы заказать [url=https://kupit-kursovuyu-87.ru/]курсовые работы заказать[/url] .
nightwillowmarket hub – This looks like a pleasant site to explore with some interesting content.
check this emporium – Took a quick look and the page feels organized and readable.
Premium marketplace facebook advertising profiles features an extensive inventory updated daily across all major geos including USA, Europe, and Asia-Pacific regions. Product cards display exact specifications including account age, verification level, included assets, geo origin, and current stock availability. Smart account sourcing is the foundation of profitable advertising — start with verified profiles and scale with confidence.
Trusted platform buy fb accounts for ad campaigns offers premium accounts with verified quality, complete credentials, and instant automated delivery. The platform combines speed and reliability — most products are delivered automatically within minutes after payment confirmation. Teams that prioritize account quality over raw volume consistently achieve better ROI and fewer campaign interruptions.
Quality-focused marketplace purchase facebook accounts runs multi-step verification on every listing before it reaches the catalog to protect buyer interests. Account types range from budget auto-registrations and softregs to premium verified setups with spend history and reinstated status. Invest in verified account infrastructure and redirect the time saved from troubleshooting into actual campaign optimization work.
check this trading page – Simple layout makes finding information effortless.
Ginger Trading Post – Has a warm, inviting tone while sounding current and relevant.
Качественное SEO https://outreachseo.ru продвижение сайта для бизнеса. Наши специалисты предлагают эффективные решения для роста позиций в поисковых системах. Подробнее об услугах и стратегиях можно узнать на сайте
мостбет ставки приложение [url=http://mostbet94063.help]мостбет ставки приложение[/url]
homepage link – Pages feel tidy, navigating through content is smooth and simple.
услуги ремонта квартир [url=https://remont-v-tyle.ru/]remont-v-tyle.ru[/url] .
usa usd 200 no deposit bonus 200 free spins 2021, mict tabs slot usage and uk online casinos
free play, or canada online slots
My web site … can you double down on 21 in blackjack [Hulda]
check this out – Layout is clear and simple, navigation is smooth.
сайт для заказа курсовых работ [url=https://kupit-kursovuyu-81.ru/]kupit-kursovuyu-81.ru[/url] .
написание курсовых на заказ [url=https://kupit-kursovuyu-88.ru/]написание курсовых на заказ[/url] .
take a look here – Found this website randomly, navigation is straightforward and readable.
learn more here – Pages are well-organized, content is clear and readable.
iciclehub – Vibrant and engaging naming gives a welcoming feel to the concept.
their online emporium – Noticed this website, layout is simple yet well organized.
this quickstone page – Organized design makes browsing sections seamless and comfortable.
amber brook store – While browsing briefly, everything appears clearly organized.
traderlight – Friendly, memorable style creates a positive impression overall.
Orchard Picks – Just discovered this page, everything is tidy and easy to digest.
Professional service meta accounts store specializes in accounts optimized for paid campaigns with proper warming history and platform trust markers. The team provides onboarding guidance for new buyers and ongoing operational support for teams managing high-volume campaign portfolios. Competitive pricing, fast delivery, and professional support make this a preferred choice for serious media buyers.
Experienced supplier buy multiple facebook accounts offers complete asset packages including login credentials, recovery access, 2FA codes, cookies, and user-agent data. Bulk buyers benefit from volume discounts, dedicated account managers, and priority restocking that ensures uninterrupted supply for active campaigns. Experienced buyers return for the consistency — same quality standards, same fast delivery, same professional support every time.
this quickstone page – Organized design makes browsing sections seamless and comfortable.
Established supplier buy gmail accounts with phone maintains the largest selection of quality accounts with transparent specs and competitive pricing for bulk buyers. Cross-platform inventory allows teams to source accounts for multiple advertising channels from a single trusted supplier relationship. Build your campaigns on accounts with proven trust — higher trust means better delivery, lower costs, and fewer interruptions.
open amber shop – Quick stop here and the site presentation appears neat.
Orchard Treasures – Came across this page randomly, navigation is effortless and content flows naturally.
помощь студентам и школьникам [url=https://kupit-kursovuyu-84.ru/]помощь студентам и школьникам[/url] .
Cost-effective marketplace find out more offers competitive rates without compromising on account quality, verification completeness, or delivery speed. A loyalty program with cashback on every order makes repeated purchases more cost-effective for teams with regular sourcing requirements. The right account infrastructure eliminates the biggest bottleneck in campaign scaling: unreliable and untested digital assets.
MarbleDistrictCo – Visitors sense a reliable, professional, and solid district brand.
<a href="[https://oakharborcollective.shop/](https://oakharborcollective.shop/)" /collective storefront – Nice layout overall, very simple and approachable.
написать курсовую работу на заказ в москве [url=https://kupit-kursovuyu-86.ru/]kupit-kursovuyu-86.ru[/url] .
мостбет лаки джет [url=www.mostbet60172.help]мостбет лаки джет[/url]
MarbleNetwork – Visitors experience a strong, reliable, and professional brand identity.
<a href="[https://oakharborcollective.shop/](https://oakharborcollective.shop/)" /check this collective – Took a quick tour of the page and the design seems friendly.
1win вывод без комиссии карта [url=https://www.1win54038.help]https://www.1win54038.help[/url]
1win blackjack [url=https://1win5754.help/]1win blackjack[/url]
this snowharbor page – Clean structure makes browsing and reading enjoyable.
snowharbor shop portal – Organized sections make moving through the site easy.
заказать студенческую работу [url=https://kupit-kursovuyu-85.ru/]заказать студенческую работу[/url] .
online Gingerstone – Suggests a digital platform that is easy to navigate and reliable.
мостбет сменить номер [url=https://mostbet94063.help/]https://mostbet94063.help/[/url]
learn more here – Minimal layout, reading the content feels comfortable.
online wetten mit paypal
my blog post :: sportwetten tipps vorhersagen gratis
mostbet депозит не пришел [url=http://mostbet57193.help]http://mostbet57193.help[/url]
срочно курсовая работа [url=https://kupit-kursovuyu-87.ru/]kupit-kursovuyu-87.ru[/url] .
Sprawdz poradnik [url=https://jaka-kamera-do-drona-fpv.neocities.org/]jaka kamera do drona fpv[/url], jesli szukasz najlepszych wskazowek przy wyborze kamery FPV na start.
Systematyczna konserwacja i aktualizacje firmware’u zapewniaja stabilne dzialanie urzadzenia.
learn more here – Pages are neat, browsing through is easy and comfortable.
their homepage – Logical page structure, very easy to navigate.
Harbor Finds – Landed here by chance, content flows nicely and reading is simple.
open the emporium – Came across this site, everything seems organized and effortless to navigate.
Harbor Hub – Stumbled on this site, layout is clean and reading is effortless.
this online trading site – Just exploring the page and it feels well structured.
Бесплатная консультация юриста — это возможность получить профессиональную правовую помощь без оплаты. Перейдя по запросу [url=https://vk.com/pravovik24]задать вопрос юристу с ответом на сайте[/url] вы получите поддержку специалиста, который выслушает вашу ситуацию, оценит риски и подскажет возможные варианты решения: от подготовки документов до защиты интересов в суде. Такая консультация помогает понять свои права, избежать ошибок и выбрать правильную стратегию действий.
Experienced supplier best place to buy aged yahoo mail accounts offers complete asset packages including login credentials, recovery access, 2FA codes, cookies, and user-agent data. Product cards display exact specifications including account age, verification level, included assets, geo origin, and current stock availability. Experienced buyers return for the consistency — same quality standards, same fast delivery, same professional support every time.
Professional service instagram accounts for brand campaigns specializes in accounts optimized for paid campaigns with proper warming history and platform trust markers. The knowledge base includes working guides for account warming, ad launch protocols, and reinstatement check procedures for reference. Marketplace standards ensure that every account performs as described — no surprises at checkout, login, or campaign launch.
Full-service dealer buy high trust gmail accounts goes beyond selling by providing operational guides, restriction breakdowns, and platform update summaries. The platform combines speed and reliability — most products are delivered automatically within minutes after payment confirmation. Access the full catalog today and discover why top-performing affiliates and agencies choose this platform for their account needs.
Expert-level shop purchase tiktok ads accounts combines automated delivery with manual verification to ensure every account meets strict quality benchmarks. Orders are processed through a secure checkout system with multiple payment options and encrypted credential delivery via personal dashboard. Scale your advertising operations on a foundation of quality — verified profiles, complete credentials, and expert operational support.
shop marketplace page – Clean structure makes moving between sections effortless.
this store page – Landed here, design feels tidy and easy to browse.
open amber shop – Quick stop here and the site presentation appears neat.
united kingdom online pokies lightning link, the biggest casino craps in spanish slang (Mickey) usa and legal gambling in united
states, or free online poker machine games
united kingdom
check this marketplace – First impression is positive, site seems solid and practical.
iciclewillowdistrict – District branding here gives a calm and modern vibe.
oakstone deals page – Found some useful sections here, easy to navigate.
заказать ремонт квартиры [url=https://remont-v-tyle.ru/]remont-v-tyle.ru[/url] .
HarborShopSelect – Visitors perceive the outlet as clean, smooth, and inviting.
this oakstone page – Nice clean site, simple to explore and seems trustworthy.
iciclewillowdistrict – District branding here gives a calm and modern vibe.
see canyon collection – Quick glance reveals the page feels organized and readable.
HarborMarketHub – The site is clean, easy to navigate, and inviting for shoppers.
mostbet kupon toldirish [url=http://mostbet84629.help/]http://mostbet84629.help/[/url]
Leading store facebook ad infrastructure gives media buyers access to aged, warmed, and verified profiles sorted by geo, trust level, and ad readiness. Product cards display exact specifications including account age, verification level, included assets, geo origin, and current stock availability. Professional media buying starts with professional tools — source from a marketplace built by advertisers, for advertisers.
Wholesale supplier buy pva facebook profiles with email access enables teams to source diverse account portfolios across platforms and geos from a single centralized marketplace. Detailed usage guides help buyers understand the differences between softreg, selfreg, farmed, and reinstated account types before purchasing. Teams that prioritize account quality over raw volume consistently achieve better ROI and fewer campaign interruptions.
Жіночий онлайн https://soloha.in.ua портал з корисними статтями про моду, красу, здоров’я та стосунки. Поради щодо догляду за собою, психології, сім’ї та кар’єри. Актуальні тренди, лайфхаки та натхнення для сучасних жінок.
open the bazaar page – First glance shows the site feels tidy and straightforward.
snowstone store online – Pages flow nicely, and information is easy to digest.
Інформаційний портал https://pensioneram.in.ua для пенсіонерів України Корисні поради про пенсії, соціальні виплати, пільги, здоров’я та повсякденне життя. Актуальні новини, рекомендації фахівців та прості пояснення важливих змін законодавства.
Пояснюємо складні теми https://notatky.net.ua простими словами. Публікуємо зрозумілі статті про технології, фінанси, науку, закони та інші важливі питання. Читайте розбірки та корисні пояснення.
explore Gladebrook – Suggests a vibrant, inviting place for people to discover.
snowstone online – Pages are easy to navigate, and information is clear.
курсовая заказать [url=https://kupit-kursovuyu-88.ru/]курсовая заказать[/url] .
explore Gladebrook Hub – Suggests a lively and approachable space for people to connect.
handicap wette erklärt
Also visit my web blog; strategie bei sportwetten (Marisa)
online desert night casino review; Eunice, canada
real money roulette, free online united kingdom roulette
simulator and new online slot sites uk, or blackjack lusaa meaning
learn more here – Layout is neat, moving between pages feels effortless.
Redaksiyonumuz bu arkadı Samsung Galaxy A15’te, Android işletim sisteminde test etti. Oynanış oldukça hoştu, hiçbir şey takılmadı ve cihazın donanımı ısınmadı, çünkü oyun cihazın özelliklerine çok fazla yük bindirmiyor. Eğer Penalty Shoot Out oyununu içeren bir mobil uygulama arıyorsanız, Android veya iOS için nasıl indirileceğine dair sizin için bir kılavuz hazırladık. E-posta * Cömert %96 RTP ile kazanma şansınız artırılmıştır ve bu, Penalty Shoot-Out Street’i mevcut en ödüllendirici anında kazanç oyunlarından biri yapar. Her başarılı şut çarpanınızı kademeli olarak artırır ve şeffaf kazanma olasılıkları, ne zaman çekileceğiniz konusunda bilinçli kararlar almanızı sağlar. Penalty Shoot-Out, oyunculara heyecan verici ve hızlı tempolu bir oyun deneyimi sunan klasik bir anlık oyundur. Ücretsiz çevirme gibi bonus özellikleri bulunmayan bu popüler oyunun cazibesi en sevilen spor olan futbolda yatıyor! Bolca eğlence sunmasının yanı sıra Penalty Shoot-Out, gol atacak kadar şanslı olanlar için potansiyel yüksek kazançlar da vaat ediyor.
http://www.greenbusinessteam.se/blog/2026/03/08/starlight-princess-turkiyedeki-oyuncular-icin-parlak-bir-slot-deneyimi/
Sınırsız Eğitim ve Araştırma Dergisi, 2019 Penaltı Atışı’nda başarılı bir gol atmak bahsinizi ikiye katlar ve bu da onu bir martingale bahis stratejisi için uygun hale getirir. Fikir basittir: $1’lik minimum bahisle başlayın, ardından her kaçırılan golden sonra bahsinizi ikiye katlayın. Gol attığınızda, bahsinizi $1’e sıfırlayın. Ancak, dikkatli olmak çok önemlidir; üst üste yedi kayıpla karşılaşırsanız, bir sonraki bahsiniz $64’e ulaşır, tekrar ikiye katlamanız gerekirse karşılamanız gereken riskli bir miktardır. Martingale stratejisi küçük kazançlar için etkili olabilse de, önemli kayıplardan kaçınmak için aşırı kullanmamak önemlidir. DÖRDÜNCÜ PENALTI GOL OLDU A Word 75 Futbol: Penaltı – Derbi Sizlerle bu yazımızda paylaşabileceğimiz tuş kombinasyonları bu şekildeydi. Umarız bu rehberimiz, yeni hareketler öğrenmenizi ve oyun kalitenizi artırmanızı sağlar. Şimdiden herkese iyi oyunlar dileriz.
explore the vendor – Reading content is comfortable, interface feels smooth.
стоимость написания курсовой работы на заказ [url=https://kupit-kursovuyu-86.ru/]kupit-kursovuyu-86.ru[/url] .
Bazaar Picks – Browsed casually, layout is tidy and content is easy to read.
Specialized store buy fb accounts for ads focuses exclusively on accounts proven to perform in paid advertising with real spend history and trust indicators. Aged profiles with natural activity patterns consistently outperform fresh registrations in ad delivery quality and checkpoint avoidance rates. Every order comes with clear documentation, replacement guarantees, and access to a growing knowledge base of operational resources.
Жіночий онлайн https://soloha.in.ua портал з корисними статтями про моду, красу, здоров’я та стосунки. Поради щодо догляду за собою, психології, сім’ї та кар’єри. Актуальні тренди, лайфхаки та натхнення для сучасних жінок.
techcatalyst – Navigation felt smooth, found everything quickly without any confusing steps.
Bazaar Treasures – Came across this page casually, content is organized and sections are easy to digest.
Інформаційний портал https://pensioneram.in.ua для пенсіонерів України Корисні поради про пенсії, соціальні виплати, пільги, здоров’я та повсякденне життя. Актуальні новини, рекомендації фахівців та прості пояснення важливих змін законодавства.
Пояснюємо складні теми https://notatky.net.ua простими словами. Публікуємо зрозумілі статті про технології, фінанси, науку, закони та інші важливі питання. Читайте розбірки та корисні пояснення.
devbyte – Color palette felt calming, nothing distracting, just focused, thoughtful design.
learn more here – Pages are tidy, reading through content feels effortless.
explore more here – Tidy layout, smooth browsing, content is approachable and readable.
apricotbrookoutlet – Nice little discovery, layout is clean and navigation is easy.
dataforge – Overall, professional vibe here; trustworthy, polished, and pleasantly minimal throughout.
Expert-level shop buy tiktok accounts with 2fa combines automated delivery with manual verification to ensure every account meets strict quality benchmarks. Bulk buyers benefit from volume discounts, dedicated account managers, and priority restocking that ensures uninterrupted supply for active campaigns. Competitive pricing, fast delivery, and professional support make this a preferred choice for serious media buyers.
apricotbrookoutlet – Nice little discovery, layout is clean and navigation is easy.
mostbet casino slots [url=http://mostbet60172.help]http://mostbet60172.help[/url]
check this outlet – Came across this website, interface feels tidy and easy to navigate.
rainstone shop portal – Pages are clear, and moving between sections feels effortless.
live wetten gewinnen tipps verboten
oliveharbor online store – The design is simple, making it easy to find information.
open the outlet – Came across this website, everything looks well structured and clear.
помощь курсовые [url=https://kupit-kursovuyu-87.ru/]kupit-kursovuyu-87.ru[/url] .
как скачать mostbet apk [url=http://mostbet60172.help]http://mostbet60172.help[/url]
rainstone online – Quick visit shows organized content and easy-to-use layout.
bytecore – Appreciate the typography choices; comfortable spacing improved my reading experience.
this trader website – Quick look around shows a clean interface and clear sections.
мостбет пополнить сомами [url=https://mostbet94063.help]https://mostbet94063.help[/url]
logicbyte – Found practical insights today; sharing this article with colleagues later.
купить курсовую москва [url=https://kupit-kursovuyu-85.ru/]купить курсовую москва[/url] .
RidgeHub – Branding feels modern, inviting, and easy to engage with.
solar harbor portal – Navigation feels intuitive with well-structured sections.
solar harbor website – Pages are clearly divided, making information easy to digest.
RidgeHub – Branding feels modern, inviting, and easy to engage with.
ivoryhaven – Refined aesthetic combined with a welcoming tone feels effortless.
explore Cloud Harbor – The name popped up and carries a clean, modern impression.
1win akkaunt o‘chirish [url=https://1win5754.help]https://1win5754.help[/url]
collectivepoint – Elegant visuals paired with an approachable tone create a welcoming feel.
shop homepage – Ran into this brand today, and the name is fresh, clean, and inviting.
Online wetten ohne oasis sport
Сайт про народні прикмети https://zefirka.net.ua тлумачення снів та значення імен. Дізнайтеся, що означають сни, як трактуються прикмети та які традиції пов’язані зі святами різних народів.
discover the site – Layout feels organized, browsing feels effortless.
Сайт міста Хмельницький https://faine-misto.km.ua з актуальними новинами, подіями та корисною інформацією для мешканців та гостей. Дізнайтеся про міське життя, інфраструктуру, культуру, заходи, організації та важливі події міста.
Сайт міста Дніпро https://faine-misto.dp.ua з актуальними новинами, подіями та корисною інформацією для мешканців та гостей. Дізнайтеся про життя міста, інфраструктуру, культуру, афішу заходів, організації та важливі події Дніпра.
Чоловічий блог https://u-kuma.com з корисними порадами про здоров’я, саморозвиток, фінанси, стосунки та кар’єру. Публікуємо цікаві статті, лайфхаки та рекомендації для чоловіків, які хочуть покращити своє життя.
Жіночий сайт https://u-kumy.com про красу, здоров’я, моду, відносини і стиль життя. Корисні поради, статті, ідеї для натхнення та рекомендації для сучасних жінок. Читайте про саморозвиток, сім’ю, догляд за собою та актуальні тренди.
курсовая работа купить [url=https://kupit-kursovuyu-89.ru/]курсовая работа купить[/url] .
Look inside WalnutCrate – Just found this platform; layout is tidy and makes browsing simple.
homepage link – Pages are well-organized, browsing is straightforward.
explore this shop – I visited not long ago and liked the clean design and helpful details.
Quick link to the store – Found the platform today; navigation is easy and user-friendly.
binaryforge – Loved the layout today; clean, simple, and genuinely user-friendly overall.
Hazel Bazaar – Landed here casually, content is well structured and navigation works well.
1win diler bilan o‘yin [url=www.1win5754.help]www.1win5754.help[/url]
Outlet Market – Found this page unexpectedly, layout is tidy and user-friendly.
explore this emporium – The website seems approachable and the content informative.
1win kod kelmayapti [url=http://1win5754.help/]http://1win5754.help/[/url]
see the moon shop – Came across the site and the content looks easy to understand.
1win как зарегистрироваться [url=https://1win54038.help]1win как зарегистрироваться[/url]
Нашел еще одно качественное руководство по продвижению в Новосибирске. Автор подробно останавливается на технической оптимизации, контент-стратегии и локальных факторах ранжирования. Есть полезные разделы про аналитику и частые ошибки. Рекомендую изучить: https://imbrus.ru/seo-v-novosibirske-polnoe-rukovodstvo-po-jeffektivnomu-prodvizheniju-sajta-v-stolice-sibiri/ . Много практических рекомендаций
курсовые под заказ [url=https://kupit-kursovuyu-88.ru/]курсовые под заказ[/url] .
check this out – Layout is neat, scrolling and navigation feels intuitive.
open the outlet page – Taking a moment to explore and the content seems well structured.
visit their store – Minimalist design, navigation feels effortless and simple.
open the outlet page – Taking a moment to explore and the content seems well structured.
Сайт про народні прикмети https://zefirka.net.ua тлумачення снів та значення імен. Дізнайтеся, що означають сни, як трактуються прикмети та які традиції пов’язані зі святами різних народів.
Сайт міста Дніпро https://faine-misto.dp.ua з актуальними новинами, подіями та корисною інформацією для мешканців та гостей. Дізнайтеся про життя міста, інфраструктуру, культуру, афішу заходів, організації та важливі події Дніпра.
Сайт міста Хмельницький https://faine-misto.km.ua з актуальними новинами, подіями та корисною інформацією для мешканців та гостей. Дізнайтеся про міське життя, інфраструктуру, культуру, заходи, організації та важливі події міста.
Жіночий сайт https://u-kumy.com про красу, здоров’я, моду, відносини і стиль життя. Корисні поради, статті, ідеї для натхнення та рекомендації для сучасних жінок. Читайте про саморозвиток, сім’ю, догляд за собою та актуальні тренди.
Чоловічий блог https://u-kuma.com з корисними порадами про здоров’я, саморозвиток, фінанси, стосунки та кар’єру. Публікуємо цікаві статті, лайфхаки та рекомендації для чоловіків, які хочуть покращити своє життя.
check this boutique – Came across this website, everything seems organized and simple.
olivestoneexchange hub – Took a quick look and the site already seems full of useful info.
1win lucky jet qoidalari [url=https://www.1win5754.help]1win lucky jet qoidalari[/url]
product boutique – Landed on this website, everything is arranged clearly and intuitively.
district shop link – Sections are structured, and pages are easy to move through.
explore solarstone exchange – Content flows logically and is easy to scan.
open canyon stone shop – Quick visit shows the layout is tidy and user-friendly.
olive stone shop – Quick visit here and it seems to offer a good amount of information.
this solarstone site – Clear structure allows quick scanning of content.
ravenbrook store page – Content is clearly presented and navigation is smooth.
1win cod bonus Moldova [url=http://1win62509.help]http://1win62509.help[/url]
canyonstonebazaar – Pretty smooth browsing experience, layout makes reading content easy.
RidgeSelectHub – Visitors experience a welcoming, modern, and creative online presence.
explore Cloud Harbor – The branding popped up and has a memorable, strong vibe.
RidgeCollective – Branding conveys friendliness, creativity, and a contemporary style.
discover the traders – The shop name popped up and feels unique and eye-catching.
See WalnutWarehouse online – Just found the site; moving through items feels smooth and organized.
official hub – The interface is simple, making reading content comfortable.
willowmarket – Clean, professional visuals help the trading identity feel balanced and confident.
Take a look here – Came across the warehouse; browsing items is quick and intuitive.
explore more – Pages are easy to read, and moving around is effortless.
1win fraudă sau nu [url=https://1win62509.help/]https://1win62509.help/[/url]
Hazel Finds – Landed here by chance, content flows nicely and reading is simple.
tradepoint – Clean lines and professional tone help the brand feel organized and reliable.
Outlet Picks – Browsed casually, layout is tidy and content is easy to read.
mostbet install [url=https://www.mostbet53160.help]mostbet install[/url]
mostbet скачать на ios [url=www.mostbet60172.help]mostbet скачать на ios[/url]
mostbet bónusz kifizetés [url=www.mostbet2023.help]www.mostbet2023.help[/url]
mostbet изменить пароль [url=www.mostbet82043.help]mostbet изменить пароль[/url]
this bazaar site – Discovered it while browsing and the content was more useful than I expected.
outlet homepage – I checked out the website and the layout is tidy and user-friendly.
this online bazaar – Came across the site unexpectedly and the information seemed quite practical.
see the moss shop – Browsed the pages and everything appears organized and simple.
browse aurora store – Looked around for a moment and the formatting seems balanced.
official site link – Navigation feels intuitive, content is clear and friendly.
this online boutique – Just exploring the site and the structure looks clean.
check this site – Layout is tidy, navigating through pages is simple and easy.
stonebrook online hub – Layout is tidy and moving through pages is comfortable.
1win qanday kirish [url=https://1win5754.help]https://1win5754.help[/url]
Sports betting at Mostbet mostbet.edu.pl. The platform offers a wide range of events, high odds, bonuses, and a user-friendly mobile app. Place bets on football, hockey, tennis, and other sports.
Mostbet bookmaker https://mostbet.biz.pl/ offers betting on sports, esports, and online games. It offers high odds, a wide range of events, bonuses, and convenient payment methods for players.
Almastriga: Relics of Azathoth http://www.almastriga.com/ is an atmospheric horror adventure game inspired by the mythos of Lovecraft. Explore eerie locations, uncover ancient secrets, and find relics of Azathoth in a world full of mysteries and dangers.
Lust Theory Seasons lust-theory.com 1, 2, and 3 are a popular visual novel with a captivating plot, action choices, and a diverse cast of characters. Follow the story as it unfolds, make decisions, and unlock new storylines.
заказать курсовую срочно [url=https://kupit-kursovuyu-89.ru/]заказать курсовую срочно[/url] .
explore stonebrook district – Information flows logically, making reading effortless.
Forest Deals – Saw this page by chance, and the structure makes it simple to navigate.
Silk Treasures – Minimalist design allows quick access to all items.
shop collective page – Everything here is nicely arranged and easy to explore.
Wilderness Goods – Visited this page randomly, the format and layout are very readable.
Silk Stone Finds – Navigation feels smooth and the pages are easy to browse.
opalridgecollective hub – Browsed the page and everything feels neatly arranged and easy to follow.
trading outlet site – Clear sections and tidy layout make exploring simple.
check this trading site – The design is tidy and content flows naturally.
Upland Hub – Pages are easy to follow and the site looks professional.
Upland Gems – Organized content allows for quick and easy navigation.
click here for shop – The name came up today and conveys a cheerful, easygoing tone.
discover vendors – Sections are well structured and easy to follow.
CrestHub – The marketplace conveys a fresh, inviting, and accessible vibe.
Cove Deals – Landed here unexpectedly, layout is clean and user-friendly.
visit Clover Crest – Came across this marketplace and the branding feels warm and approachable.
official site link – The layout is simple, making browsing enjoyable.
Cove Deals – Landed here unexpectedly, layout is clean and user-friendly.
CrestSelectHub – Visitors sense a fresh, inviting, and easy-to-use marketplace.
Sports betting at Mostbet mostbet.edu.pl. The platform offers a wide range of events, high odds, bonuses, and a user-friendly mobile app. Place bets on football, hockey, tennis, and other sports.
Mostbet bookmaker biz.pl offers betting on sports, esports, and online games. It offers high odds, a wide range of events, bonuses, and convenient payment methods for players.
Lust Theory Seasons https://www.lust-theory.com 1, 2, and 3 are a popular visual novel with a captivating plot, action choices, and a diverse cast of characters. Follow the story as it unfolds, make decisions, and unlock new storylines.
Almastriga: Relics of Azathoth almastriga is an atmospheric horror adventure game inspired by the mythos of Lovecraft. Explore eerie locations, uncover ancient secrets, and find relics of Azathoth in a world full of mysteries and dangers.
mostbet crash [url=mostbet53160.help]mostbet crash[/url]
mostbet Revolut [url=mostbet2023.help]mostbet2023.help[/url]
мостбет слоты бонус [url=http://mostbet94063.help]мостбет слоты бонус[/url]
stonevista – Courtyard-inspired aesthetic balances elegance with approachability.
Dive into Lust Academy lustacademy and explore all seasons of this popular visual novel. Learn about the characters, story, and interactive storytelling possibilities.
My Cute Roommate my-cute-roommate.com is the official website for the visual novel with a captivating storyline and interactive solutions. Learn more about the characters, story, and features of the game, and stay tuned for updates and new episodes.
moss outlet online – Browsed the page earlier and the content feels simple and approachable.
jaspernook – Timeless design paired with approachable elements makes the brand feel friendly.
Operation Lovecraft https://www.operation-lovecraft.org Official Game Guide for players who want to learn more about the plot, missions, and characters. Helpful tips, hints, and detailed guides will help you complete the game and unlock all storylines.
Perfect Date official https://perfect-date.org website offers detailed information about the characters, plot, and gameplay features. Read the news and stay up-to-date on the latest updates.
aurora marketplace – Took a brief look and the page layout feels readable.
shop outlet page – Dropped by the site and the navigation seemed clear and smooth.
live wett tipps
Check out my page: Online-sportwetten
trailstone site online – Sections are organized and the page is comfortable to browse.
official harbor outlet page – Browsed this page earlier and the information seems straightforward.
check out this store – Browsing casually and the formatting seems well organized.
gingercratehouse – Nice little discovery, content is easy to read and useful.
shop outlet page – Dropped by the site and the navigation seemed clear and smooth.
trailstone trading portal – Minimal design makes content easy to follow.
official site link – Navigation is intuitive, content is neat and clear.
was wer ist der beste wettanbieter ein wettbüro
Cove Deals – Clean pages make shopping smooth.
explore opalwillow site – Browsed around briefly, it appears practical and easy to use.
browse this outlet – Took a short look, content appears clean and well structured.
Cove Gems Market – Smooth interface allows easy access to products.
opalwillow marketplace – Browsed quickly and the site feels well organized and practical.
browse riverbrook – Pages are tidy and reading through sections is straightforward.
explore the outlet – Took a moment to browse, everything feels well arranged.
Dive into Lust Academy https://lustacademy.org and explore all seasons of this popular visual novel. Learn about the characters, story, and interactive storytelling possibilities.
Honey Picks – Came across this site randomly, layout feels tidy and intuitive.
Perfect Date official perfect-date org website offers detailed information about the characters, plot, and gameplay features. Read the news and stay up-to-date on the latest updates.
Operation Lovecraft https://operation-lovecraft.org/ Official Game Guide for players who want to learn more about the plot, missions, and characters. Helpful tips, hints, and detailed guides will help you complete the game and unlock all storylines.
Bazaar Shop – Found this site by accident, navigation is smooth and reading feels natural.
Vale Cove Finds – Took a quick look and the pages feel clear and easy to navigate.
explore the collection – Design is tidy, reading through sections is smooth.
vendor page – Layout is clear, moving through pages is intuitive.
Cove Gems – Navigation flows nicely and the pages are easy to follow.
melbet фрибет [url=https://www.melbet47086.help]melbet фрибет[/url]
сделать аудит сайта цена [url=https://prodvizhenie-sajtov-v-moskve17.ru/]prodvizhenie-sajtov-v-moskve17.ru[/url] .
official collective page – This brand feels memorable, stylish, and easy to recall.
написание курсовых работ на заказ цена [url=https://kupit-kursovuyu-89.ru/]kupit-kursovuyu-89.ru[/url] .
see this store – The branding appeared online and feels creative, cheerful, and approachable.
quick sunmeadow link – Layout is organized and reading is comfortable.
autumncovebazaar – Just visited this page and the layout looks simple and well arranged.
sunmeadow info page – Simple structure helps focus on the content.
night orchard online – Browsed the website and the content seems simple and useful.
autumncovebazaar – Just visited this page and the layout looks simple and well arranged.
charming parcel boutique – There’s a welcoming spirit that comes through clearly.
online orchard store – Browsed the page today and the content is easy to digest.
jaspercorner – Professional and simple styling makes the exchange feel trustworthy.
their homepage – Logical arrangement, content is simple to move through.
check this boutique – Cute concept and a genuinely friendly presentation.
jaspermarket – Clear and memorable design ensures users remember the exchange easily.
gladevendorstudio – First visit today, site structure looks clean and simple.
official orchardbrook page – The site is simple, clean, and pleasant to explore.
mostbet app for android download [url=http://mostbet53160.help]http://mostbet53160.help[/url]
Stone Gems Market – Smooth interface ensures easy product discovery.
orchardbrook shop portal – The layout is clean and makes the browsing experience smooth.
Brook Shop – Checked out this page randomly, layout is tidy and content is easy to digest.
Sky Finds Shop – Easy-to-read pages make exploring items quick.
Market Shop – Found this site by accident, navigation is smooth and content is readable.
melbet покер [url=https://melbet47086.help/]https://melbet47086.help/[/url]
rivermeadow website – Sections are tidy, and moving between pages feels natural.
mostbet magyar játékosok [url=https://www.mostbet2023.help]https://www.mostbet2023.help[/url]
check it out – Navigation works well, and the page feels organized.
check this outlet – Layout is tidy, and the content flows naturally.
1win conectare Moldova [url=1win62509.help]1win62509.help[/url]
explore lantern stone shop – Came across the page today and the content was easy to follow.
explore now – Overall layout is simple and user-friendly for quick browsing.
Vale Marketplace – Layout is well-organized and browsing feels natural.
Vale Gems Market – Navigation is smooth and the site is pleasant to explore.
explore the marketplace – Just noticed this shop, and the coastal theme is subtle yet appealing.
explore Coast Crest – The name popped up and evokes a laid-back, coastal vibe.
buchmacher beste quoten
My web blog :: sportwetten bonus strategie
seo partners [url=https://prodvizhenie-sajtov-v-moskve16.ru/]seo partners[/url] .
discover tealstone – Simple structure helps focus on the content.
visit this market page – I checked the page and the content felt nicely structured.
shop link – Had a look around and the pages appear organized and simple to follow.
marketplace page – Just checking the site today and the navigation feels polished.
net seo [url=https://prodvizhenie-sajtov-v-moskve17.ru/]net seo[/url] .
see the collection – I stopped by earlier and the structure of the site seems solid.
their homepage – Logical arrangement, reading content is smooth and easy.
shop marketplace page – Pages respond quickly and the design is straightforward.
explore the aisle – Content is neat, interface is user-friendly and easy to navigate.
Emporium Shop – Found this site by accident, navigation is smooth and sections are tidy.
visit this marketplace – Just popping in, the site looks clear and readable.
курсовая работа купить москва [url=https://kupit-kursovuyu-89.ru/]курсовая работа купить москва[/url] .
1win plata sigura [url=http://1win62509.help]http://1win62509.help[/url]
marketplace outlet site – Quick visit shows smooth navigation and clean presentation.
Icicle Hub – Stumbled on this site, layout is clean and reading is effortless.
jewelcornerstone – Elegant design paired with an inviting tone ensures the brand feels unique.
Snow Treasures Hub – Well-organized pages make discovering items effortless.
аудит продвижения сайта [url=https://prodvizhenie-sajtov-v-moskve18.ru/]аудит продвижения сайта[/url] .
Snow Emporium Hub – Intuitive layout makes exploring products simple.
сделать аудит сайта цена [url=https://prodvizhenie-sajtov-v-moskve11.ru/]prodvizhenie-sajtov-v-moskve11.ru[/url] .
caramelcoveemporium – Nice little discovery, design feels clean and navigation works easily.
brookhaven – Polished design paired with a cozy theme ensures the brand feels memorable.
roseharbor store online – Layout is well-arranged, and content is easy to explore.
lantern bazaar online – I browsed the site and the content was easy to understand.
заказать курсовой проект [url=https://kupit-kursovuyu-90.ru/]заказать курсовой проект[/url] .
check this workshop – Everything loads nicely, and sections are well organized.
мостбет промокод для Кыргызстана [url=mostbet94063.help]мостбет промокод для Кыргызстана[/url]
sportwetten online sportwette bonus
check out daisy – Pages feel clean, and content is easy to digest.
1win apk pentru android [url=1win62509.help]1win62509.help[/url]
seovault – Content reads clearly, helpful examples made concepts easy to grasp.
заказать практическую работу недорого цены [url=https://kupit-kursovuyu-88.ru/]kupit-kursovuyu-88.ru[/url] .
ремонт однокомнатной квартиры [url=https://remont-v-tyle.ru/]remont-v-tyle.ru[/url] .
Download Subverse https://sub-verse.net/ and dive into a forbidden galaxy full of adventure, strategy and unique characters. Explore new worlds, command your crew and experience an epic sci-fi journey in this action-packed space game.
Treasure of Nadia treasure of nadia Official Game Site with detailed information about the adventure game. Read news, learn about the characters, and learn about the gameplay features.
Женский портал https://7krasotok.com о красоте, здоровье, моде и отношениях. Полезные советы, статьи о семье, психологии и саморазвитии. Читайте рекомендации экспертов, узнавайте о трендах и находите вдохновение для гармоничной жизни.
Женский онлайн https://krasotka-fl.com.ua портал с полезными материалами о красоте, здоровье, моде и отношениях. Советы по уходу за собой, психологии и саморазвитию для современной женщины.
melbet бк скачать [url=http://melbet47086.help/]http://melbet47086.help/[/url]
take a look here – Came across this store and the branding feels orderly, polished, and neat.
Velvet Finds Market – The website is easy to use and reading content is enjoyable.
seoshift – Loved the layout today; clean, simple, and genuinely user-friendly overall.
How many states don’t allow gambling to win pokies nz, united kingdom pub pokies and usa mobile casino bonus, or
new zealandn slots app
seonexus – Mobile version looks perfect; no glitches, fast scrolling, crisp text.
explore tealwillow hub – Straightforward structure makes finding information fast and easy.
their website – Ran into this brand, and the exchange-style name feels structured and professional.
Velvet Cove Finds – Quick visit reveals a neat and well-organized website structure.
tealwillow pages – Layout is organized and reading is comfortable.
aristocrat pokies real gambling with fake money (Katia) united kingdom, best deposit bonus betting sites new zealand and united kingdom online casino no deposit bonus codes 2021,
or the top online pokies and casinos in australia day
storefront link here – Passing through the page and the formatting feels clean.
visit this marketplace – Just landed on the page and the content looks nicely organized.
заказать курсовую срочно [url=https://kupit-kursovuyu-86.ru/]заказать курсовую срочно[/url] .
view the shop – After exploring a bit the website navigation seems clean and easy.
заказать курсовую работу качественно [url=https://kupit-kursovuyu-85.ru/]заказать курсовую работу качественно[/url] .
курсовой проект цена [url=https://kupit-kursovuyu-84.ru/]курсовой проект цена[/url] .
oakcoveboutique – Just opened the site and the navigation seems to run smoothly in my browser.
Ivory Hub – Stumbled on this site, layout is clean and reading is effortless.
pearlharbor shop portal – Clean layout and content make it very user-friendly.
see this page – Pages flow nicely, making the site easy to explore.
Ivory Picks – Came across this site randomly, layout looks tidy and intuitive.
Download Subverse http://www.sub-verse.net and dive into a forbidden galaxy full of adventure, strategy and unique characters. Explore new worlds, command your crew and experience an epic sci-fi journey in this action-packed space game.
this pearlharbor page – A tidy and informative site that’s easy to explore.
Treasure of Nadia http://www.treasure-of-nadia.org Official Game Site with detailed information about the adventure game. Read news, learn about the characters, and learn about the gameplay features.
Женский портал https://7krasotok.com о красоте, здоровье, моде и отношениях. Полезные советы, статьи о семье, психологии и саморазвитии. Читайте рекомендации экспертов, узнавайте о трендах и находите вдохновение для гармоничной жизни.
Женский онлайн https://krasotka-fl.com.ua портал с полезными материалами о красоте, здоровье, моде и отношениях. Советы по уходу за собой, психологии и саморазвитию для современной женщины.
visit lavender harbor – I came across the page earlier and the details were helpful.
learn more here – Simple structure, very approachable and clear.
wettbüro eröffnen
Here is my web-site Sportwetten Neue anbieter
Solar Gems – Lightweight layout ensures smooth browsing.
roseharbor trading page – Browsing feels natural, with clear sections and smooth flow.
pin up android ilova [url=www.pinup76809.help]www.pinup76809.help[/url]
explore the studio – Simple interface, browsing feels natural and comfortable.
написать курсовую на заказ [url=https://kupit-kursovuyu-83.ru/]написать курсовую на заказ[/url] .
Solar Deals – Clean structure helps locate items efficiently.
collective outlet site – Browsing is smooth, and the site design feels organized.
see the collection – Minimalist design, makes browsing straightforward.
mostbet скачать на ноутбук [url=https://www.mostbet82043.help]mostbet скачать на ноутбук[/url]
Онлайн казино https://wordpressinside.ru с большим выбором слотов, настольных игр и бонусных предложений. Платформа предлагает удобный интерфейс, популярные игровые автоматы и различные способы оплаты.
Лучшее казино пинап бет платформа для онлайн игр с большим выбором слотов и настольных развлечений. Бонусные предложения и удобный интерфейс делают игру комфортной.
купить курсовую работу [url=https://kupit-kursovuyu-87.ru/]купить курсовую работу[/url] .
Онлайн казино https://wordpressinside.ru с большим выбором слотов, настольных игр и бонусных предложений. Платформа предлагает удобный интерфейс, популярные игровые автоматы и различные способы оплаты.
Лучшее казино https://россиягоржусь.рф платформа для онлайн игр с большим выбором слотов и настольных развлечений. Бонусные предложения и удобный интерфейс делают игру комфортной.
продвижение сайта [url=https://prodvizhenie-sajtov-v-moskve16.ru/]продвижение сайта[/url] .
сделать аудит сайта цена [url=https://prodvizhenie-sajtov-v-moskve11.ru/]prodvizhenie-sajtov-v-moskve11.ru[/url] .
mostbet account suspended [url=https://mostbet53160.help/]https://mostbet53160.help/[/url]
Любишь азарт? https://pfrrt.ru предлагает разнообразные игровые автоматы, настольные игры и интересные бонусные программы. Платформа создана для комфортной игры и предлагает широкий выбор развлечений.
online Copper Brook – Came across this store, and the branding feels inviting, pleasant, and approachable.
студенческие работы на заказ [url=https://kupit-kursovuyu-89.ru/]студенческие работы на заказ[/url] .
сео агентство [url=https://prodvizhenie-sajtov-v-moskve18.ru/]сео агентство[/url] .
timberharbor website – Reading content feels natural and the design is minimal.
see this store – The branding appeared online and the district naming gives off a cozy, pleasant tone.
Velvet Gems Hub – Found the site easy to explore and information is presented simply.
timberharbor online portal – Structure is straightforward and pages load efficiently.
beste online wettanbieter
Also visit my web site … Sportwetten Schweiz
browse this emporium – Took a moment to explore and everything seems easy to follow.
Velvet Picks Hub – Navigation is smooth and the content is easy to follow.
visit bay stone – Just opened the page and the design feels clean and simple.
Большой выбор автоматов https://ekolip.ru настольных развлечений и бонусных предложений делает игру более разнообразной. Пин Ап казино предлагает пользователям популярные слоты и удобную игровую платформу.
Разнообразные игровые автоматы pin-up скачать бесплатно настольные развлечения доступны на популярной игровой платформе. Пин Ап казино предлагает большой каталог слотов и удобный интерфейс для пользователей.
Большой выбор автоматов https://ekolip.ru настольных развлечений и бонусных предложений делает игру более разнообразной. Пин Ап казино предлагает пользователям популярные слоты и удобную игровую платформу.
Разнообразные игровые автоматы https://endf.ru настольные развлечения доступны на популярной игровой платформе. Пин Ап казино предлагает большой каталог слотов и удобный интерфейс для пользователей.
top online gambling sites uk, party casino united states
and how many casinos are in mo to hack canadian pokies, or poker sites canada
Outlet Picks – Browsed casually, content is simple and sections are easy to navigate.
aviator mostbet regisztráció [url=https://mostbet2023.help/]https://mostbet2023.help/[/url]
visit the shop page – Dropped by the site and spent a few minutes browsing.
Ivory Treasures – Checked this page, sections are clear and reading is effortless.
official pearlmeadow page – Everything seems neatly arranged and simple to browse.
check out this store – Just scrolling briefly, navigation feels smooth and clear.
visit the shop page – Dropped by the site and spent a few minutes browsing.
заказать курсовой проект [url=https://kupit-kursovuyu-90.ru/]заказать курсовой проект[/url] .
pearl meadow shop – The pages are straightforward and the navigation is easy.
play roulette online canada free, spin casino australia and best uk casino slots, or win real money online
casino for free usa
Feel free to visit my homepage :: bingo call out
list (Sylvia)
learn more here – Content is clear, browsing feels effortless.
тула ремонт квартиры цена [url=https://remont-v-tyle.ru/]remont-v-tyle.ru[/url] .
visit chestnut harbor – Took a quick look, the layout feels clean and simple to navigate.
discover more – Content is neatly organized, browsing feels clear.
1win iniciar sesión y apostar [url=1win5772.help]1win5772.help[/url]
vendor hub – Clean sections and intuitive navigation throughout.
check this courtyard – The design is tidy and content is easy to follow.
Harbor Treasures – Organized pages make finding products straightforward.
explore the studio – Simple and tidy design, content is easy to digest.
shop courtyard page – Navigation feels intuitive and reading content is simple.
Stone Gems – Lightweight pages make browsing easy and fast.
mostbet скачать через официальный сайт [url=https://mostbet82043.help]mostbet скачать через официальный сайт[/url]
курсовая заказ купить [url=https://kupit-kursovuyu-86.ru/]kupit-kursovuyu-86.ru[/url] .
написать курсовую работу на заказ в москве [url=https://kupit-kursovuyu-84.ru/]kupit-kursovuyu-84.ru[/url] .
melbet элкарт пополнение [url=http://melbet47086.help/]http://melbet47086.help/[/url]
сколько стоит сделать курсовую работу на заказ [url=https://kupit-kursovuyu-85.ru/]сколько стоит сделать курсовую работу на заказ[/url] .
sportwetten in der schweiz
my web blog – wettstrategien Forum
timberwillow web hub – Sections are clearly organized, browsing is simple.
explore Copper Meadow Outlet – The name popped up and conveys a calm, tidy, and pleasant tone.
this online emporium – Just exploring the page and the formatting feels tidy.
visit timberwillow – Nice clean design, content is easy to read and follow.
Bazaar Picks – Browsed casually, content is simple and sections are easy to follow.
купить задание для студентов [url=https://kupit-kursovuyu-83.ru/]kupit-kursovuyu-83.ru[/url] .
продвижение сайтов [url=https://prodvizhenie-sajtov-v-moskve17.ru/]продвижение сайтов[/url] .
berrycoveemporium – Browsing casually and the site structure looks organized and easy to navigate.
see this store – The branding appeared online and the outlet name feels pleasant, balanced, and inviting.
Jasper Bazaar – Landed here casually, content is well structured and browsing is easy.
Violet Outlet Finds – Quick exploration shows the website is tidy and readable.
online stone store – Checked out the website and the content was simple to understand.
linen stone emporium – I visited the site today and found the content very informative and easy to navigate.
поисковое продвижение москва профессиональное продвижение сайтов [url=https://prodvizhenie-sajtov-v-moskve11.ru/]prodvizhenie-sajtov-v-moskve11.ru[/url] .
Violet Brook Deals – Browsed quickly and the site feels tidy and organized.
check this outlet – Spent a moment here, the site feels intuitive and tidy.
this pearlmeadow page – First impression is positive, pages are neat and easy to follow.
seo агентство [url=https://prodvizhenie-sajtov-v-moskve18.ru/]seo агентство[/url] .
покупка курсовой [url=https://kupit-kursovuyu-87.ru/]kupit-kursovuyu-87.ru[/url] .
graniteaisle – Just checking this out, everything appears neat and readable.
check drift market – User-friendly layout with readable content.
graniteaisle – Just checking this out, everything appears neat and readable.
rubystone online – Layout is minimal and user-friendly, making exploration simple.
driftmarketdistrict – Came across this site, layout feels smooth and simple.
maplebrookmarket – Quick visit today but everything looks neat and well explained.
official rubystone page – The site is clean, making navigation and reading comfortable.
Market Treasures – Well-structured pages help locate items easily.
Искал информацию по ценам на SEO и наткнулся на статью про накрутку позиций в Яндексе. Тут разбирают, что вообще входит в SEO-услуги, от чего зависит стоимость и как не попасть на мошенников. Полезно для понимания рынка: https://vagaro.ru/nakrutka-poziczij-v-yandekse-chto-nuzhno-znat-o-seo-uslugah-i-ih-stoimosti/
Cove Deals – Pages are neat and browsing products feels comfortable.
clickrly – Bookmarked this immediately, planning to revisit for updates and inspiration.
reachrocket – Appreciate the typography choices; comfortable spacing improved my reading experience.
seoradar – Appreciate the typography choices; comfortable spacing improved my reading experience.
Stone Bazaar – Browsed randomly, sections are neat and navigation feels intuitive.
trailbrook discovery – Smooth browsing experience, site feels organized and tidy.
official boutique page – Opened the website and the structure felt clear and easy to follow.
boutique homepage – I landed on the site and the content was clearly organized and simple.
berry bazaar homepage – First impression shows the page looks tidy.
Jasper Bazaar – Landed here casually, content is well organized and reading is effortless.
best new palms casino Executives
sites usa, golden tiger casino uk and casino in united states,
or online casino bc australia
sportwetten anbieter schleswig holstein
my web-site; handicap live wette – Dustin,
check trailbrook site – Clean design makes reading and navigating simple.
online gambling legal in united states, canada gambling bill and online casinos co
usa, or free 10 no deposit winstar casino google maps (Diana)
uk
marketplace page – Casual stop on the site shows the layout is organized and tidy.
scalewave – Navigation felt smooth, found everything quickly without any confusing steps.
написать курсовую на заказ [url=https://kupit-kursovuyu-90.ru/]написать курсовую на заказ[/url] .
browse pearlmeadow – Quick check shows an organized layout that’s easy to move through.
check out this store – Just scrolling briefly, navigation feels simple and smooth.
Violet Harbor Online – Pages are easy to read and the layout seems polished.
pearlmeadow shop portal – Clean and minimal design makes browsing straightforward.
как активировать промокод mostbet [url=https://www.mostbet82043.help]как активировать промокод mostbet[/url]
chestnut stone shop – Scrolling through, content feels intuitive and clear.
mostbet cricket betting [url=www.mostbet53160.help]www.mostbet53160.help[/url]
como obtener bono 1win [url=https://1win5772.help/]https://1win5772.help/[/url]
online brook store – Browsed the website earlier and it caught my attention quickly.
driftstone hub link – Simple design, everything feels intuitive.
homepage link – Interface is straightforward, scrolling through content is natural.
driftstone site – Navigation is smooth and the page looks organized.
sagebrook marketplace – Design is straightforward, with clear sections for easier browsing.
official link – Clean and tidy pages make navigation effortless.
sagebrook store online – Layout feels fresh and moving through sections is effortless.
mostbet befizetés banki átutalással [url=http://mostbet2023.help]mostbet befizetés banki átutalással[/url]
Cove Deals – Simple structure makes navigating products enjoyable.
поисковое продвижение сайта в интернете москва [url=https://prodvizhenie-sajtov-v-moskve16.ru/]prodvizhenie-sajtov-v-moskve16.ru[/url] .
Teal Picks – User-friendly interface makes browsing enjoyable.
wettanbieter mit gratiswette
Here is my web-site: Wett Tipps Dfb Pokal
Meadow Bazaar – Browsed randomly, structure is tidy and navigation feels intuitive.
marble boutique online – The page offers helpful details and I’ll likely revisit.
Meadow Deals – Landed here unexpectedly, content is simple and navigation is smooth.
seo network [url=https://prodvizhenie-sajtov-v-moskve17.ru/]prodvizhenie-sajtov-v-moskve17.ru[/url] .
birch market homepage – Skimmed through and the design appears neat and accessible.
trailstone marketplace – Layout is clear and pages are easy to navigate.
продвижение в google [url=https://prodvizhenie-sajtov-v-moskve11.ru/]продвижение в google[/url] .
seo аудит веб сайта [url=https://prodvizhenie-sajtov-v-moskve18.ru/]seo аудит веб сайта[/url] .
this online market – Dropped by briefly and the navigation is clear.
discover trailstone – Layout is neat, exploring the pages is effortless.
check this outlet – Spent a moment here, the site feels intuitive and tidy.
pearlmeadow online – Quick glance shows the site is easy to use and well structured.
take a look here – I explored the website and the information appears well structured.
Walnut Cove Gems Outlet – Quick glance shows the site is neat and navigation is smooth.
browse dunebrook studio – Layout is simple yet well-organized for easy reading.
Walnut Cove Hub Picks – The content is organized nicely and easy to follow.
dunebrook hub – Pages are tidy, making the content easy to digest.
official link – Well-arranged sections make navigation effortless.
sageharbor store online – Content is well structured and browsing feels natural.
learn more here – Simple structure, reading and browsing feels smooth.
sageharbor trading page – Browsing is pleasant, with clear sections and smooth flow.
bazaar homepage – I opened the page and the content is well organized and informative.
Ridge Deals – Landed here unexpectedly, content is simple and browsing is effortless.
написание учебных работ [url=https://kupit-kursovuyu-90.ru/]написание учебных работ[/url] .
Jewel Picks – Came across this site randomly, layout feels tidy and intuitive.
discover birch harbor market – Had a short glance and everything feels well arranged.
birch harbor shop – Took a quick look and the layout appears well organized.
cloudcoveboutique – First visit today, site design feels neat and user-friendly.
this online market – I visited the page today and it felt useful and easy to explore.
marketplace page – Just exploring today, site design feels tidy and simple to navigate.
explore dune hub – Clean sections, easy to navigate and read.
dune portal link – Navigation is easy, and content flows nicely.
seo аудит веб сайта [url=https://prodvizhenie-sajtov-v-moskve16.ru/]seo аудит веб сайта[/url] .
сделать аудит сайта цена [url=https://prodvizhenie-sajtov-v-moskve11.ru/]prodvizhenie-sajtov-v-moskve11.ru[/url] .
Walnut Stone Select Picks – Navigation is smooth and content is easy to understand.
check this out – Pages are organized, reading content is smooth and effortless.
simple shop link – Layout is minimal and sections are clearly organized.
Walnut Stone Finds – Browsed through the site and the content is very clear and easy to follow.
visit their site – Pages flow smoothly, browsing feels natural and simple.
this seacrest page – Clean layout and organized sections make browsing natural.
продвижение в google [url=https://prodvizhenie-sajtov-v-moskve18.ru/]продвижение в google[/url] .
browse this orchard market site – Quick browsing is simple because the navigation is clean.
Outlet Market – Found this page unexpectedly, everything is well structured and readable.
Brook Deals – Landed here unexpectedly, content is readable and browsing is effortless.
seo partner [url=https://prodvizhenie-sajtov-v-moskve17.ru/]prodvizhenie-sajtov-v-moskve17.ru[/url] .
brightbrookmarket – Just visited today, site design feels clean and user-friendly.
check out this store – Quick browse today, navigation feels smooth and clear.
emporium homepage – The site looks simple yet the content feels helpful at first visit.
official emporium page – The site gives a solid first impression and the content is approachable.
die besten sportwetten anbieter
Also visit my web page Wettquoten ErkläRt
заказать курсовую работу качественно [url=https://kupit-kursovuyu-90.ru/]заказать курсовую работу качественно[/url] .
explore more – Pages are tidy, browsing feels intuitive and clear.
Wave Harbor Treasures – Browsed today and the pages are simple yet provide useful information.
explore more – Pages are tidy, browsing feels intuitive and clear.
bonus code sichere wetten finden – Hildred –
Wave Harbor Deals – Enjoyed browsing, the layout looks clear and comfortable to read.
convertcraft – Mobile version looks perfect; no glitches, fast scrolling, crisp text.
boostsignals – Color palette felt calming, nothing distracting, just focused, thoughtful design.
online shop portal – Browsed quickly, layout feels tidy and easy to follow.
поисковое продвижение сайта в интернете москва [url=https://prodvizhenie-sajtov-v-moskve16.ru/]prodvizhenie-sajtov-v-moskve16.ru[/url] .
Your article helped me a lot, is there any more related content? Thanks!
Wave Stone Finds – Browsed the site and the layout looks clear and user-friendly.
Wave Stone Select – First impression is positive, content is clear and easy to follow.
melbet aviator скачать [url=www.melbet47086.help]www.melbet47086.help[/url]
wetten vorhersage heute
Feel free to visit my web blog – dfb pokal Wettquoten
1win help Uganda [url=http://1win5742.help/]1win help Uganda[/url]
free online pokies usa, slot machines canada for sale and free usa cash bingo,
or new casino uk
my web page dainese blackjack gloves
mostbet depozyt [url=www.mostbet2003.help]www.mostbet2003.help[/url]
descarca 1win android [url=https://1win62509.help]https://1win62509.help[/url]
cloverbrookoutlet – Just stumbled here, everything looks tidy and organized well.
wetten strategie
Here is my page :: lizenzierte wettanbieter deutschland
visit clover brook – Browsed briefly, layout appears clean and easy to follow.
Wheat Brook Shop Hub – Layout is neat, browsing is smooth and content is accessible.
Wheat Brook Outlet Hub – Quick visit, everything seems tidy and easy to browse.
1win card Moldindconbank [url=http://1win62509.help/]http://1win62509.help/[/url]
gold coast casino australia, free spins australia and bet365 united statesn roulette guide uk, or pokies reopening south united states
Also visit my blog post illegal Street gambling games
handicap bei wetten
My website wette deutschland europameister, lacompagnieyakajouer.zici.fr,
доставка суши москва [url=https://dzen.ru/a/aaaXcJgFmBqFa6Xp/]доставка суши москва[/url] .
pin-up telefon tasdiqlash [url=https://pinup23185.help]https://pinup23185.help[/url]
доставка роллов [url=https://dzen.ru/a/aaaLIkWy4T8i4DiJ/]доставка роллов[/url] .
mostbet ставки и казино [url=www.mostbet82043.help]www.mostbet82043.help[/url]
Wheat Cove Treasures Hub – Quick look indicates that content is easy to follow and the design is clean.
Wheat Cove Treasures – Navigation is straightforward and the site presents content clearly.
seo и реклама блог [url=https://seo-blog20.ru/]seo-blog20.ru[/url] .
Консультация семейного юриста поможет быстро разобраться в сложных жизненных ситуациях: развод, раздел имущества, алименты, споры о детях и брачные договоры. Перейдя по запросу [url=https://semeynyy-yurist1.ru]юридические услуги по семейным делам в Москве[/url] – специалист объяснит ваши права, оценит перспективы дела и предложит оптимальный план действий. Получите профессиональную юридическую помощь и ответы на все вопросы по семейному праву.
cómo jugar crash en 1win [url=http://1win5772.help]http://1win5772.help[/url]
Консультация семейного юриста поможет быстро разобраться в сложных жизненных ситуациях: развод, раздел имущества, алименты, споры о детях и брачные договоры. Перейдя по запросу [url=https://semeynyy-yurist1.ru]цена юридической помощи по браку[/url] – специалист объяснит ваши права, оценит перспективы дела и предложит оптимальный план действий. Получите профессиональную юридическую помощь и ответы на все вопросы по семейному праву.
веб-аналитика блог [url=https://seo-blog21.ru/]seo-blog21.ru[/url] .
wetten mit gratis guthaben
Feel free to visit my blog post :: Europameister Wettquoten
набор суши акции спб [url=https://dzen.ru/a/aaaVDMh-Z2J09fpp/]набор суши акции спб[/url] .
visit this marketplace – Just popping in, content is readable and navigation works smoothly.
check out this store – Just scrolling briefly, navigation feels intuitive and smooth.
pin-up slotlar [url=https://pinup76809.help/]https://pinup76809.help/[/url]
seo по трафику [url=https://prodvizhenie-sajtov-po-trafiku10.ru/]seo по трафику[/url] .
роллы доставка спб недорого [url=https://dzen.ru/a/aaaOxJAQRHcKrBx3/]роллы доставка спб недорого[/url] .
Wild Orchard Gems – Browsed quickly and the layout is simple, clean, and readable.
доставка роллов [url=https://dzen.ru/a/aaaLIkWy4T8i4DiJ/]доставка роллов[/url] .
Wild Orchard Online Hub – The site looks well maintained and browsing through pages is comfortable.
питер корабли [url=https://vodnyye-progulki-v-spb.ru/]питер корабли[/url] .
sportwetten tipps wochenende beste strategie
доставка суши [url=https://dzen.ru/a/aaaXcJgFmBqFa6Xp/]доставка суши[/url] .
контекстная реклама статьи [url=https://seo-blog21.ru/]контекстная реклама статьи[/url] .
статьи про маркетинг и seo [url=https://seo-blog20.ru/]seo-blog20.ru[/url] .
pin-up bukmeker [url=https://pinup76809.help]pin-up bukmeker[/url]
aktuelle Sportwetten bonus
tipp
набор суши купить спб [url=https://dzen.ru/a/aaaVDMh-Z2J09fpp/]набор суши купить спб[/url] .
1win tiempo de retiro [url=https://1win5772.help]https://1win5772.help[/url]
Консультация семейного юриста поможет быстро разобраться в сложных жизненных ситуациях: развод, раздел имущества, алименты, споры о детях и брачные договоры. Перейдя по запросу [url=https://semeynyy-yurist1.ru]юридическая консультация по семейным вопросам бесплатно в Москве[/url] – специалист объяснит ваши права, оценит перспективы дела и предложит оптимальный план действий. Получите профессиональную юридическую помощь и ответы на все вопросы по семейному праву.
Wild Stone Select Picks – First impression feels positive, navigation is smooth and easy.
seacrest website – Navigation is effortless, and content is presented in a readable format.
Glass Finds – Landed here by chance, content flows nicely and reading is simple.
see this site – Sections are well-arranged, reading is comfortable.
discover echo aisle emporium – Had a short look, and the layout is well structured.
Wild Stone Treasures Online – Quick look around shows the layout is simple and content is helpful.
ranktarget – Content reads clearly, helpful examples made concepts easy to grasp.
visit Copper Meadow – Came across this outlet and the branding feels relaxed and approachable.
visit hazel vendor collective – Design feels tidy, and navigation is intuitive.
интернет партнер [url=https://prodvizhenie-sajtov-po-trafiku10.ru/]интернет партнер[/url] .
this seacrest page – Clean layout and organized sections make browsing natural.
explore the trading site – Interface is clear, content reads naturally.
1win cod promo 2026 [url=http://1win62509.help/]http://1win62509.help/[/url]
shopping bazaar link – Browsed casually, layout feels organized and accessible.
visit this marketplace – Just popped in, the content looks clean and readable.
dealers en vivo 1win [url=https://www.1win5772.help]https://www.1win5772.help[/url]
explore Copper Meadow – The name popped up and conveys a soothing, pleasant vibe.
searchmetrics – Bookmarked this immediately, planning to revisit for updates and inspiration.
como verificar cuenta 1win [url=http://1win5772.help/]como verificar cuenta 1win[/url]
open coast harbor shop – Quick visit shows layout is neat and content is clear.
searchsignals – Bookmarked this immediately, planning to revisit for updates and inspiration.
суши [url=https://dzen.ru/a/aaaLIkWy4T8i4DiJ/]суши[/url] .
мостбет официальный сайт на русском [url=www.mostbet82043.help]мостбет официальный сайт на русском[/url]
Бесплатная консультация юриста — это возможность получить профессиональную правовую помощь без оплаты. Перейдя по запросу [url=https://vk.com/pravovik24]задать вопрос юристу без регистрации[/url] вы получите поддержку специалиста, который выслушает вашу ситуацию, оценит риски и подскажет возможные варианты решения: от подготовки документов до защиты интересов в суде. Такая консультация помогает понять свои права, избежать ошибок и выбрать правильную стратегию действий.
суши роллы [url=https://dzen.ru/a/aaaOxJAQRHcKrBx3/]суши роллы[/url] .
como jugar crash en 1win [url=http://1win5772.help]http://1win5772.help[/url]
cool vendor site – I checked this page earlier today and skimmed through some parts, it seemed nicely set up.
**nervecalm**
NerveCalm is a high-quality nutritional supplement crafted to promote nerve wellness, ease chronic discomfort, and boost everyday vitality.
блог о маркетинге [url=https://seo-blog21.ru/]блог о маркетинге[/url] .
this outlet website – Visited the page earlier and browsing around felt quite comfortable.
1win apk Moldova [url=https://1win5758.help]https://1win5758.help[/url]
водные пути санкт петербурга [url=https://vodnyye-progulki-v-spb.ru/]vodnyye-progulki-v-spb.ru[/url] .
суши роллы москва доставка [url=https://dzen.ru/a/aaaXcJgFmBqFa6Xp/]суши роллы москва доставка[/url] .
Quartz Vendor Portal – Browsed today and the pages are structured clearly with a neat layout.
Brook Shop – Checked out this page randomly, content is clear and sections are well laid out.
my find today – Just came across this link and explored it briefly, it looked fairly well arranged.
browse the site – Sections are well-arranged, browsing is smooth and natural.
Golden Picks – Came across this page randomly, everything flows naturally and reading is effortless.
explore the page – Clean interface, browsing feels comfortable and effortless.
Can you be more specific about the content of your article? After reading it, I still have some doubts. Hope you can help me.
локальное seo блог [url=https://seo-blog20.ru/]seo-blog20.ru[/url] .
cum retrag USDT de la 1win [url=http://1win62509.help/]http://1win62509.help/[/url]
this silkharbor page – Layout is clean, making exploring content simple.
click to visit – Pages are clear, navigation flows naturally.
silkharborcollective hub – Browsed around quickly, layout is neat and easy to follow.
mostbet профиль [url=http://mostbet34518.help/]http://mostbet34518.help/[/url]
pinup yechish rad etildi [url=pinup76809.help]pinup76809.help[/url]
Wind Brook Treasures Online – Browsed today, the site seems organized and readable.
discover more – Pages are clear and well-structured, very readable.
mostbet numer telefonu polska [url=mostbet2003.help]mostbet2003.help[/url]
Wind Brook Select Picks – Pages look neat and information is straightforward.
pin up plinko pul yechish [url=pinup23185.help]pinup23185.help[/url]
new marketplace here – I came across this site recently and the layout appears quite organized.
1win link functioneaza [url=https://www.1win62509.help]https://www.1win62509.help[/url]
quick vendor site – Came across this platform and everything seems clean and easy to navigate.
1win apk for android 14 [url=https://1win5742.help/]https://1win5742.help/[/url]
1win depósito con criptomonedas [url=www.1win5772.help]www.1win5772.help[/url]
Отличный разбор темы — как местному бизнесу из Екатеринбурга выигрывать у федералов в поиске. Автор подробно останавливается на локальном SEO, гиперрелевантном контенте, скорости и сервисе как факторах ранжирования. Есть блок про микро-ниши и локальный линкбилдинг. Очень рекомендую: https://go-patriot.ru/bitva-za-ural-kak-lokalnomu-biznesu-iz-ekaterinburga-vyigrat-u-federalnyh-gigantov-v-poiske/
browse this hub – I checked this page out today and it looks structured in a clean way.
Cove Shop – Checked out this page randomly, sections are tidy and easy to follow.
Boutique Finds – Browsed by chance, navigation is intuitive and content is well presented.
useful link – Design is simple, reading through content feels smooth.
open zen vendor hub – Browsed today, this site feels like a promising place for interesting items.
check this out – Sections are clear, scrolling feels effortless.
pinup tikish [url=http://pinup23185.help]http://pinup23185.help[/url]
open the bazaar page – First glance shows everything is clean and easy to follow.
market homepage – I viewed the page today and the layout felt clean and arranged.
marketplace outlet site – Browsing is simple and design feels minimal and clean.
mostbet bez weryfikacji wypłata [url=http://mostbet2003.help]http://mostbet2003.help[/url]
browse this platform – I checked this page briefly and everything seems structured well.
discover more – Pages are tidy, layout is logical and readable.
silkmeadowmarketplace hub – Browsed quickly, layout is tidy and easy to navigate.
coast stone shop – Scrolling around, content is organized and user-friendly.
visit their studio – Minimal design, navigation feels effortless and quick.
набор пицца и роллы спб [url=https://dzen.ru/a/aaaOxJAQRHcKrBx3/]набор пицца и роллы спб[/url] .
1win depunere MDL [url=http://1win5758.help]http://1win5758.help[/url]
Wind Harbor Treasures Hub – Enjoyed exploring, pages are straightforward and easy to read.
Thanks for sharing. I read many of your blog posts, cool, your blog is very good.
Wind Harbor Gems Online – Content is clean and navigation feels simple and intuitive.
1win reopen account [url=http://1win5742.help/]http://1win5742.help/[/url]
stonebrook hub link – Just checked this marketplace today and it seems appealing overall.
lavender harbor outlet – I came across this site earlier today and the information there seemed quite helpful.
прогулка на катере по питеру [url=https://vodnyye-progulki-v-spb.ru/]vodnyye-progulki-v-spb.ru[/url] .
zen bazaar listings online – Quick visit shows an organized marketplace with appealing products.
суши бесплатная доставка [url=https://dzen.ru/a/aaaXcJgFmBqFa6Xp/]суши бесплатная доставка[/url] .
статьи про маркетинг и seo [url=https://seo-blog20.ru/]seo-blog20.ru[/url] .
supplier hub portal – Just visited this site and the design felt clear and well-structured.
Brook Deals – Landed here unexpectedly, structure is simple and user-friendly.
ремонт комнат и санузлов под ключ ремонт ванной комнаты плитка
Brook Bazaar – Browsed randomly, structure is tidy and navigation is intuitive.
ремонт туалета ванная ванна ремонт ванной санузла цена
click here – Interface is minimal, pages are well organized and neat.
online lark store – Opened the site today and navigating it was very easy.
click here – Interface is minimal, pages are well organized and neat.
Bazaar Finds – Found this page by chance, layout is clear and content flows nicely.
silvermeadow store online – Pages flow nicely and content is straightforward to read.
Здесь доступны как классические игровые автоматы, так и современные видеослоты.
[url=https://7v4.casino/]Pinco Casino[/url]
Игровой процесс проходит быстро и без технических задержек.
Green Treasures – Browsed casually, the sections are well ordered and simple to digest.
this outlet portal – Moving through sections feels natural with clear headings and layout.
check vendor marketplace – Explored the marketplace today, layout is neat and products easy to view.
their homepage – Logical arrangement of pages, very simple to navigate.
заказать сео анализ сайта пушка [url=https://seo-kejsy16.ru/]заказать сео анализ сайта пушка[/url] .
online vendor portal – Took a glance earlier and the pages appear well organized.
Cove Market – Well-laid-out pages make exploring content easy.
see this page – Pages are clear and organized, very easy to explore.
sunridge vendor studio – I came across this page earlier and it looks like a pretty interesting platform.
Treasure Teal – Lightweight pages make navigating content comfortable.
discover coastharbor bazaar – Marketplace layout is neat, and exploring items is effortless and enjoyable.
pinup ruletka jonli [url=http://pinup23185.help]pinup ruletka jonli[/url]
visit lemon stone – Came across the page and immediately found helpful information.
violet vendor studio – The site is well-organized with smooth, user-friendly pages.
Wood Cove Treasures – First glance shows the website is simple and readable.
check dune cove bargains – Neat emporium interface, sections load quickly and browsing comfortable.
Wood Cove Online Picks – Pages are straightforward and navigation feels smooth.
check out bay bazaar – The site has a relaxed vibe and simple navigation for enjoyable browsing.
buchmacher bundestagswahl
Feel free to surf to my web site Aktive Session Bei Einem Anderen Wettanbieter Beenden
Market Market – Found this page unexpectedly, layout is tidy and user-friendly.
mostbet app na telefon [url=https://mostbet2003.help]https://mostbet2003.help[/url]
handicap beim wetten
Here is my web page; Wett Prognosen
sun vendor workshop – Stopped by this page earlier and the layout seems clean and well organized.
Granite Deals – Stumbled upon this page, sections are clear and navigation works well.
coaststone shop online – Navigation is clear, with tidy pages and fast loading for all sections.
pin-up depozit [url=https://pinup76809.help/]https://pinup76809.help/[/url]
online walnut vendor – Layout feels polished, and page performance is smooth and reliable.
Visit WaveCrate – Just discovered this platform; the interface is tidy and navigating through it feels effortless.
emporium homepage – I landed on this site while searching and liked the information shared.
go to this page – Pages are well-structured, navigating is intuitive and smooth.
Open WaveCrate – Just noticed this site; navigating feels seamless thanks to a clean design.
1win turnee casino [url=http://1win5758.help/]1win turnee casino[/url]
check this out – Layout is simple, content is easy to follow and digest.
роллы спб [url=https://dzen.ru/a/aaaOxJAQRHcKrBx3/]роллы спб[/url] .
coppercoveemporium – Nice little discovery, layout is tidy and easy to navigate.
1win lucky jet cote [url=http://1win5758.help]http://1win5758.help[/url]
explore baystone hub – The emporium is clean and user-friendly, with smooth browsing throughout.
1win server error [url=1win5742.help]1win5742.help[/url]
где продавать сайты [url=https://kak-prodat-sajt-1.ru/]где продавать сайты[/url] .
coppercoveemporium – Nice little discovery, layout is tidy and easy to navigate.
check coppercove emporium – Pages load fast, and the interface is user-friendly and enjoyable to explore.
корабли в санкт петербурге сегодня где посмотреть [url=https://vodnyye-progulki-v-spb.ru/]vodnyye-progulki-v-spb.ru[/url] .
browse silverstone – Pages are tidy, and reading content is comfortable.
this exchange portal – Moving through sections feels natural with clear headings and layout.
суши мск [url=https://dzen.ru/a/aaaXcJgFmBqFa6Xp/]суши мск[/url] .
this link here – Minimal layout makes reading and scrolling effortless.
professionelle wett tipps
Feel free to visit my web blog … esc Wettquoten deutschland
check this emporium – I looked through the page and the content was both useful and easy to follow.
Market Picks – Well-structured design ensures fast navigation.
see this page – Layout is tidy, browsing feels effortless and clear.
Nature Bazaar – Discovered this site by chance, content feels organized and intuitive.
Timber Treasures Hub – Easy-to-read pages make browsing enjoyable.
Frost Treasures – Stumbled upon this page, information is well structured and easy to follow.
see dunestone collections – Pages load quickly, layout feels organized and intuitive to use.
Hearth Treasures – Came across this page randomly, navigation is effortless and content flows naturally.
Market Shop – Found this site by accident, layout is simple and reading is smooth.
закупка ссылок в гугл заказать услугу агентство [url=https://seo-kejsy16.ru/]закупка ссылок в гугл заказать услугу агентство[/url] .
wavestonevendorhouse – Enjoyed exploring the vendor platform; browsing various sections was smooth today.
Wood Stone Gems Online – Browsed a few pages, navigation works smoothly and content is readable.
Wood Stone Hub Online – Checked some pages, content is well structured and easy to digest.
maplebrookmarket – Quick visit today but everything looks neat and well explained.
Direct access to WestCrate – Found the platform today; navigation is easy and content is well-organized.
quick visit – Content is readable, navigating the site is effortless.
browse berry stone bazaar – Friendly design and simple navigation made checking the marketplace enjoyable.
browse coralharbor selections – Pages load quickly and the interface keeps browsing smooth and relaxed.
**prostafense**
ProstAfense is a premium, doctor-crafted supplement formulated to maintain optimal prostate function, enhance urinary performance, and support overall male wellness.
Simple store link – Stumbled upon the site; the interface is clean and intuitive.
official page – Layout is neat, moving between sections is straightforward.
türkei österreich wetten
Check out my web blog; wett vorhersagen von profis
check echobrook bargains – Fast-loading pages, marketplace navigation felt comfortable and easy.
wave vendor shop – The site feels solid, and pages load quickly while browsing is easy.
visit skybrook district – Pages load fast and reading content feels smooth.
boutique homepage – I landed on the site and the content was clearly organized and simple.
this district portal – Moving between sections feels natural with a clear layout.
this marketplace hub – Just checked this site, everything loads quickly and looks organized.
discover birchbrook finds – Smooth and intuitive browsing makes exploring categories today enjoyable.
discover coralstone bazaar – The platform is intuitive, and exploring items today was effortless.
useful link – Clean interface, very easy to navigate through content.
discover more – Pages are tidy, browsing feels smooth and natural.
Bazaar Treasures – Structured design allows fast and comfortable browsing.
Хотите, чтобы ваш профиль или группа в Одноклассниках росли быстрее? Перейдя по запросу [url=https://kwork.ru/smm/47138468/zhivie-podpischiki-odnoklassniki-ok-v-gruppu-bez-spisaniy-bez-botov]накрутка подписчиков в одноклассники[/url] вы сможете увеличить количество подписчиков и активность на странице. Чем больше подписчиков — тем выше доверие и интерес к вашему аккаунту. Начните развивать свою страницу уже сегодня!
Summit Shop – Just visited this page, the layout is clear and easy to follow.
1win platforma oficiala [url=https://1win5758.help/]https://1win5758.help/[/url]
**prodentim**
ProDentim is a distinctive oral-care formula that pairs targeted probiotics with plant-based ingredients to encourage strong teeth, comfortable gums, and reliably fresh breath.
Treasure Bazaar – Pages are organized clearly and navigation feels effortless.
Frost Finds – Browsed randomly, content is well-organized and readable.
pin-up Oʻzbekistonda sport tikish [url=https://pinup23185.help]https://pinup23185.help[/url]
Bazaar Shop – Found this site by accident, layout is simple and reading is smooth.
browse echobrook deals – Layout is clear, browsing categories felt quick and easy.
Harbor Treasures – Checked this page, sections are organized and reading is effortless.
Кто ищет, где заказать накрутку ПФ, вот статья с конкретным сервисом и ценами от 15 000 рублей. Расписано, зачем это нужно, какие риски и как проходит процесс заказа. Информация для тех, кто решил попробовать этот метод: https://stroika-tovar.ru/articles/stati/effektivnaya-nakrutka-pf-yandeks-kak-zakazat-po-dostupnoy-tsene-ot-15-000-rubley.html
аукцион сайтов [url=https://kak-prodat-sajt-1.ru/]аукцион сайтов[/url] .
Хотите, чтобы ваш профиль или группа в Одноклассниках росли быстрее? Перейдя по запросу [url=https://kwork.ru/smm/47138468/zhivie-podpischiki-odnoklassniki-ok-v-gruppu-bez-spisaniy-bez-botov]накрутка подписчиков в odnoklassniki[/url] вы сможете увеличить количество подписчиков и активность на странице. Чем больше подписчиков — тем выше доверие и интерес к вашему аккаунту. Начните развивать свою страницу уже сегодня!
this vendor house – I discovered this page today and the layout looks clean and structured.
cottonbrook marketplace – Browsing vendors today was simple with a neat and structured layout.
explore birchharbor treasures – Smooth menus and organized layout make exploring sections enjoyable.
прогулки на катере санкт петербург [url=https://vodnyye-progulki-v-spb.ru/]прогулки на катере санкт петербург[/url] .
Check the WestRack page – Came across the site today; interface is tidy and navigation is intuitive.
Zen Cove Select – Layout feels simple and information is easy to digest.
go to this page – Simple structure, content is easy to read and follow.
wheatvendorcollective – Browsing the vendors here was enjoyable, with a relaxed and engaging feel.
заказать набор пицца и суши [url=https://dzen.ru/a/aaaVDMh-Z2J09fpp/]заказать набор пицца и суши[/url] .
мостбет смс код не приходит [url=http://mostbet34518.help/]http://mostbet34518.help/[/url]
copperstoneemporium – Just checking this out, site feels organized and readable today.
Check the WestRack page – Came across the site today; interface is tidy and navigation is intuitive.
this link here – Interface is neat, content is easy to digest.
Zen Cove Deals Hub – Browsed quickly, content is simple and the layout is user-friendly.
Честно, всегда был против “серых” методов. Но статья заставляет задуматься. Автор приводит аргументы: если весь топ в нише использует накрутку, то честному сайту там делать нечего. Прямо цитата: “в таких условиях накрутка становится необходимой для достижения высоких позиций”. Почитал про внешние ПФ, особенно про возврат в выдачу и длину клика, стало понятнее, за что вообще борются поисковики. Вот ссылка: https://workspace.ru/blog/nakrutka-povedencheskih-faktorov-kak-nakrutit-pf_2/ . Информация пища для размышлений.
see elmharbor bargains – Marketplace interface is tidy and exploring sections was easy.
copperstoneemporium – Just checking this out, site feels organized and readable today.
trailvendoremporium – Quick browse earlier site seems simple and useful.
гибридная структура сайта [url=https://seo-kejsy16.ru/]seo-kejsy16.ru[/url] .
explore cottonmeadow treasures – Browsing today was simple, with clear sections and fast pages.
mostbet odblokowanie po weryfikacji [url=https://mostbet2003.help/]https://mostbet2003.help/[/url]
boutique homepage – Helpful information is posted here and I’ll revisit later.
блог агентства интернет-маркетинга [url=https://seo-blog20.ru/]блог агентства интернет-маркетинга[/url] .
skywillow trading portal – Organized layout and clear sections make exploring content effortless.
acorn brook online market – The marketplace design is neat and browsing felt straightforward.
продвижение сайта трафику [url=https://prodvizhenie-sajtov-po-trafiku10.ru/]prodvizhenie-sajtov-po-trafiku10.ru[/url] .
this skywillow page – Clean structure makes reading and browsing enjoyable.
explore marketplace district – The design is tidy and navigating products felt natural.
заказать суши [url=https://dzen.ru/a/aaaLIkWy4T8i4DiJ/]заказать суши[/url] .
маркетинговые стратегии статьи [url=https://seo-blog21.ru/]seo-blog21.ru[/url] .
pin-up balans tekshirish [url=https://www.pinup76809.help]https://www.pinup76809.help[/url]
shop link – Well-arranged pages, navigation feels effortless.
Brook Treasures – Checked this page by chance, content is clear and easy to navigate.
discover more – Tidy structure, browsing feels smooth and natural.
Outlet Finds – Browsed by chance, navigation is smooth and content is well presented.
где продавать сайты [url=https://kak-prodat-sajt.ru/]где продавать сайты[/url] .
Market Hub – Came across this site by accident, reading is smooth and sections are clear.
shop elmstone specials – Simple design, exploring products felt comfortable and quick.
Outlet Treasures – Stumbled upon this page, reading flows easily and everything is simple to follow.
browse this bazaar site – The site is easy to navigate and the information is genuinely useful.
1win app casino [url=https://1win5742.help/]1win app casino[/url]
1win real mərc [url=www.1win5764.help]www.1win5764.help[/url]
check acorn bazaar hub – The marketplace vibe is pleasant and navigating feels effortless.
рейтинг seo агентств [url=https://seo-prodvizhenie-reiting.ru/]рейтинг seo агентств[/url] .
мостбет mines [url=mostbet34518.help]mostbet34518.help[/url]
Check out WheatVendor – Came across this site; the interface is neat and makes navigating easy.
explore the site – Pages are well-organized, reading feels natural.
visit this vendor marketplace – Discovered this site earlier and it looks like a good place to browse.
Take a look here – Found the website; navigation is intuitive and products are easy to find.
learn more here – Layout is neat, moving between pages feels effortless.
harbor marketplace – Browsed the website and the information is both clear and practical.
explore ember canyon deals – Pages load quickly, exploring items felt effortless and enjoyable.
shop ember canyon collections – Pages load quickly, exploring products was simple and pleasant.
pin-up promo kod tarix [url=www.pinup23185.help]pin-up promo kod tarix[/url]
мелбет ставки лайв футбол [url=https://melbet39518.help/]мелбет ставки лайв футбол[/url]
browse snowharbor – Layout is clean, and reading content is straightforward.
1win casino Moldova [url=1win62509.help]1win62509.help[/url]
check out crowncove boutique – Layout feels polished and browsing items was simple and relaxed.
check calmstone emporium – Clean layout and responsive pages make exploring easy and relaxing.
visit this vendor site – Just explored this platform and the browsing experience felt fluid.
this collective portal – Moving through pages feels natural thanks to organized layout.
this online market – I visited the page today and it felt useful and easy to explore.
sportwetten anbieter test
Look into my web page – Wett Tipps Hohe Quoten
Stone Market – Found this page casually, everything is tidy and navigation is simple.
топ digital агентств москвы [url=https://luchshie-digital-agencstva.ru/]luchshie-digital-agencstva.ru[/url] .
browse ember ridge products – Neat emporium layout, checking items today was smooth and simple.
Garnet Deals – Stumbled upon this site, navigation is simple and intuitive.
В статье подробно разбирается, за счёт чего локальный бизнес может выиграть у федералов. Автор выделяет слабые стороны крупных игроков (низкая адаптация под регион, медленная реакция) и показывает, как этим пользоваться. Есть примеры локальных ключей и советы по работе с Яндексом. Рекомендую: https://lefmun.ru/stati/bitva-za-ural-kak-lokalnomu-biznesu-iz-ekaterinburga-vyigrat-u-federalnyh-gigantov-v-poiske/
quick link – Pleasant layout, browsing and scrolling feels natural.
Outlet Treasures – Stumbled upon this page, reading flows naturally and navigation is simple.
alpine stone marketplace link – Good first impression with quick pages and a neat structure.
ivory marketplace page – The selection looks good and I plan to check it out again later.
Outlet Picks – Browsed casually, navigation is intuitive and content flows naturally.
visit their page – Smooth interface, reading content is simple and natural.
Хотите, чтобы ваш профиль или группа в Одноклассниках росли быстрее? Перейдя по запросу [url=https://kwork.ru/smm/47138468/zhivie-podpischiki-odnoklassniki-ok-v-gruppu-bez-spisaniy-bez-botov]подписчики в одноклассники без отписки[/url] вы сможете увеличить количество подписчиков и активность на странице. Чем больше подписчиков — тем выше доверие и интерес к вашему аккаунту. Начните развивать свою страницу уже сегодня!
роллы доставка спб недорого [url=https://dzen.ru/a/aaaOxJAQRHcKrBx3/]роллы доставка спб недорого[/url] .
суши недорого спб [url=https://dzen.ru/a/aaaVDMh-Z2J09fpp/]суши недорого спб[/url] .
quick vendor site – I visited this platform and the pages load clearly and are easy to browse.
this orchard market website – Navigation is simple and the page feels fast and responsive.
check canyon harbor bazaar – The marketplace design is appealing, and browsing vendors felt relaxed and pleasant.
crownstoneemporium – Emprorium marketplace here seems organized and friendly to explore.
shopping outlet link – Browsed casually, page looks organized and user-friendly.
open amber trading listings – Just looked around and the platform seems engaging.
official site – The interface is minimal, making reading very comfortable.
Look inside WheatWarehouse – Found the platform; layout is clean and moving through products is easy.
discover fern brook bargains – Layout is clean and browsing products felt easy and pleasant.
суши [url=https://dzen.ru/a/aaaLIkWy4T8i4DiJ/]суши[/url] .
marketplace page – Just exploring today, site feels organized and easy to navigate.
стратегия продвижения блог [url=https://seo-blog21.ru/]seo-blog21.ru[/url] .
homepage link – Pages are well-organized, browsing is straightforward.
Open this store – Found this platform; pages are organized and moving through items is simple.
интернет партнер [url=https://prodvizhenie-sajtov-po-trafiku10.ru/]интернет партнер[/url] .
a vendor resource – Found this marketplace today and it seems active with clear navigation.
топ seo продвижение заказать [url=https://seo-prodvizhenie-reiting.ru/]seo-prodvizhenie-reiting.ru[/url] .
Crystal Cove Boutique – Clean layout with a stylish feel made browsing effortless today.
explore canyon stone shop – Quick-loading pages make browsing vendors easy and enjoyable.
emporium marketplace – Initial visit feels good; information is clear and easy to understand.
sportwetten anbieter schleswig holstein
Here is my homepage … doppelte chance Wette
explore boutique vendor page – The design is graceful and navigating around the site works well.
snowstoneoutlet hub – Browsed briefly, layout feels clean and easy to follow.
Cove Finds – Browsed casually, sections are clear and content is easy to read.
snowstoneoutlet hub – Browsed briefly, layout feels clean and easy to follow.
view fern cove shop – Exploring the outlet options was simple and the pages responded fast.
open the outlet page – The site made it easy to check different items and everything loaded smoothly.
Honey Finds – Landed here by chance, content flows naturally and reading is effortless.
mostbet slots [url=https://www.mostbet34518.help]https://www.mostbet34518.help[/url]
Gilded Picks – Just discovered this page, everything is presented clearly and easy to navigate.
сео продвижение за процент кловер [url=https://prodvizhenie-sajtov-po-trafiku11.ru/]prodvizhenie-sajtov-po-trafiku11.ru[/url] .
homepage link – Everything is structured logically, very easy to move through.
velvetvendorcollective – Nice browsing experience here, the layout looks clean today.
Grove Picks – Came across this page casually, content flows smoothly and feels structured.
1win futbol ekspress [url=http://1win5764.help/]http://1win5764.help/[/url]
discover crystalstone shop – Fast loading and organized emporium layout makes browsing pleasant.
their homepage – Logical arrangement, pages are simple to navigate through.
Хотите быстро развить канал на Rutube? Накрутка подписчиков Rutube поможет увеличить аудиторию, повысить доверие к каналу и ускорить продвижение видео. Перейдя по запросу [url=https://kwork.ru/smm/47195414/prosmotry-rutub-video-bez-spisaniy-s-garantiey]накрутка просмотров на рутуб канал[/url] вы получите живых подписчиков, плавное добавление и безопасные методы продвижения. Отличное решение для новых и развивающихся каналов, которым важно быстрее набрать активность и привлечь больше просмотров. Начните рост канала уже сегодня.
xyrotech – Appreciate the typography choices; comfortable spacing improved my reading experience.
mostbet działające wejście polska [url=https://mostbet2003.help]mostbet działające wejście polska[/url]
jasper grove vendor link – Browsed earlier and the listings seem clear and easy to follow.
check items inside – Looking through the emporium catalog felt simple and smooth.
explore the hub – Design is minimal, and navigation feels natural.
1win xoş gəldin paketi [url=http://1win5764.help/]1win xoş gəldin paketi[/url]
nexonbyte – Color palette felt calming, nothing distracting, just focused, thoughtful design.
click to explore – Layout is tidy, and pages flow naturally.
daisycove deals – Well-structured emporium platform, browsing categories felt easy and enjoyable.
1win aviator online [url=https://1win5524.ru/]1win aviator online[/url]
1win şəxsiyyət vəsiqəsi təsdiqi [url=https://1win5764.help]https://1win5764.help[/url]
покупка сайта [url=https://kak-prodat-sajt.ru/]kak-prodat-sajt.ru[/url] .
zentrotech – Pages loaded fast, images appeared sharp, and formatting stayed consistent.
mostbet operatorla danışmaq [url=https://mostbet85214.help]https://mostbet85214.help[/url]
1win casino jackpot [url=https://www.1win5742.help]https://www.1win5742.help[/url]
Bazaar Treasures – Came across this page casually, sections are clear and reading is effortless.
mostbet kupon nəticəsi [url=www.mostbet85214.help]www.mostbet85214.help[/url]
Honey Treasures – Checked this page, sections are well organized and reading is effortless.
browse jasper listings – The site feels well-organized and moving through items was seamless.
find stone treasures – Everything on the site looks orderly and browsing is smooth.
1win mərc hesabına pul yatırma [url=https://1win5764.help/]1win mərc hesabına pul yatırma[/url]
seo продвижение магазин наушников [url=https://seo-kejsy17.ru/]seo-kejsy17.ru[/url] .
рейтинг digital агентств москвы [url=https://luchshie-digital-agencstva.ru/]рейтинг digital агентств москвы[/url] .
заказ суши [url=https://dzen.ru/a/aaaVDMh-Z2J09fpp/]заказ суши[/url] .
visit solar harbor traders – The pages load quickly, and the layout feels simple.
see daisystone collections – Layout looks clean and structured, exploring sections felt easy.
curated fashion corner – This boutique platform offers a sleek layout that makes browsing enjoyable.
solar harbor portal – Navigation feels intuitive with well-structured sections.
заказать продающий сайт [url=https://kak-prodat-sajt-1.ru/]kak-prodat-sajt-1.ru[/url] .
топ seo продвижение [url=https://seo-prodvizhenie-reiting.ru/]seo-prodvizhenie-reiting.ru[/url] .
explore the bazaar – Pages are neat and structured, very easy to follow.
Хороший материал про то, как понимание региональной аудитории помогает в продвижении. Автор разбирает, чем уральский пользователь отличается от среднего по стране, и как это использовать в контенте и SEO. Есть примеры локальных запросов и рекомендации по работе с отзывами. Почитайте: https://manyppt.ru/ponimanie-osobennostej-regionalnogo-rynka-i-ego-auditorii/
explore the bazaar – Pages are neat and structured, very easy to follow.
mostbet nová verze [url=http://mostbet2017.help]http://mostbet2017.help[/url]
open coral stone shop – Quick visit shows navigation works smoothly and content is clear.
explore dawnridge deals – Smooth interface, checking products felt effortless today.
aurora bazaar finds – A colorful bazaar-inspired shop that feels friendly and lively.
explore today’s deals – The outlet is simple to navigate and finding items was pleasant.
продвижение сайта трафику [url=https://prodvizhenie-sajtov-po-trafiku10.ru/]prodvizhenie-sajtov-po-trafiku10.ru[/url] .
check out this hub – Navigation feels easy, and content is well organized.
coralstonebazaar – Browsing casually, content is easy to follow and clear.
vendor page – Browsing is simple, and the layout looks polished.
see caramelcove deals – Browsing is simple, with an organized layout and enjoyable design.
visit vendor outlet – Found this marketplace by chance, seems active with fresh listings.
product hub – Gave the store a quick glance and the collection looks surprisingly good.
cozy finds at autumn cove – Browsing this marketplace feels warm and effortless.
Brook Treasures – Came across this page randomly, reading flows nicely and layout is tidy.
Icicle Shop – Just visited, layout is clean and reading feels effortless.
floraridgeboutique – The boutique website feels elegant and moving through pages is effortless.
1win parol dəyişmək [url=https://1win5764.help]https://1win5764.help[/url]
browse chestnut harbor selections – Navigation is simple, with responsive pages and a clean layout.
mostbet royxatdan otish [url=https://mostbet02894.help/]https://mostbet02894.help/[/url]
check solarstone site – Sections are clear, and finding details is effortless.
Outlet Picks – Browsed casually, structure is simple and text is easy to read.
shopping outlet site – The menus are simple and browsing around felt quick and smooth.
outlet deals page – The structure of the site made it easy to jump between sections.
explore solarstone exchange – Content flows logically and is easy to scan.
Vale Shop – Just visited, layout is clear and content is easy to read.
Хотите быстро развить канал на Rutube? Накрутка подписчиков Rutube поможет увеличить аудиторию, повысить доверие к каналу и ускорить продвижение видео. Перейдя по запросу [url=https://kwork.ru/smm/47195414/prosmotry-rutub-video-bez-spisaniy-s-garantiey]накрутка просмотров рутуб с удержанием Кворк[/url] вы получите живых подписчиков, плавное добавление и безопасные методы продвижения. Отличное решение для новых и развивающихся каналов, которым важно быстрее набрать активность и привлечь больше просмотров. Начните рост канала уже сегодня.
check driftbrook finds – Comfortable browsing, categories clear and navigation straightforward.
Autumn Stone Emporium – A sleek online emporium with smooth, user-friendly pages.
explore jewel exchange – Went through several pages, and the platform seems legitimate and reliable.
quick link – Pleasant layout, scrolling and reading feels natural.
useful link – Clean interface, very readable and easy to follow.
seo top 1 [url=https://seo-kejsy16.ru/]seo-kejsy16.ru[/url] .
discover forest vendors – The bazaar layout feels organized and exploring products is enjoyable.
где продать сайт [url=https://kak-prodat-sajt.ru/]где продать сайт[/url] .
shop chestnut stone online – Browsing today was simple and enjoyable, with a well-structured site.
mostbet рабочий сайт Кыргызстан [url=https://mostbet34518.help]https://mostbet34518.help[/url]
seo group [url=https://seo-prodvizhenie-reiting.ru/]seo-prodvizhenie-reiting.ru[/url] .
vendor page – Layout is clear, moving through pages is intuitive.
storefront link – Discovered the site today and the layout feels quite organized.
official site link – The structure is straightforward and user-friendly.
discover driftorchard deals – Marketplace structured nicely, browsing categories was simple and pleasant.
Excellent guide on precision craftsmanship! The attention to detail in axle straightening mirrors the rigorous standards we maintain in gaming platforms. Just as BSA axles need specialized tooling for optimal performance, quality entertainment requires verified systems and fair play standards. nustargame online casino exemplifies this commitment with GLI certification and transparent RTP percentages.
Emporium Picks – Browsed casually, sections are neat and content is easy to follow.
melbet crash online [url=http://melbet75891.help/]http://melbet75891.help/[/url]
Icicle Treasures – Checked this page, sections are well organized and reading feels effortless.
browse cloud cove selections – Navigation is intuitive, and the design is clean, modern, and appealing.
explore juniper vendors – Stumbled on this site today, looks like an interesting marketplace.
melbet pariuri fotbal [url=https://www.melbet75891.help]https://www.melbet75891.help[/url]
this emporium shop – Just noticed this site, the product display looks well organized.
купить готовый сайт [url=https://kak-prodat-sajt-1.ru/]kak-prodat-sajt-1.ru[/url] .
jasperstoneemporium – Interesting emporium style shop, products seem nicely displayed.
Cove Market – Found this page casually, layout is simple and content is easy to follow.
visit pearlbrook – Had a quick look here, the layout seems clean and organized.
explore stonebrook district – Information flows logically, making reading effortless.
Cove Finds – Browsed randomly, layout is clean and content flows smoothly.
check stonebrook site – Content is straightforward and reading feels smooth.
shop cloudstone finds – The interface feels clean, with effortless browsing through vendor sections.
homepage link – Everything is logically organized, reading is comfortable.
boutique catalog – Pleasant experience, the boutique displays products clearly.
check bazaar deals – The layout is intuitive and exploring products was fun.
browse here – Clean interface, smooth navigation and clear content.
rubybazaar – Layout is neat, products are simple to locate and view.
visit juniper vendor collective – Checked the site earlier and the listings appear neatly arranged.
juniper vendor collective – A quick browse today revealed many well-organized listings.
shop homepage – I noticed this bazaar while exploring online and it seems well structured.
explore the hub – Navigation is intuitive, content is easy to read.
pearlcove shop link – The product pages appear easy to scroll through.
visit their site – Layout is simple, reading and navigating is smooth.
shop cloverbrook finds – Pages are easy to navigate, and the design makes browsing effortless.
Brook Shop – Checked out this page randomly, layout is tidy and content is clear.
рейтинг seo агентств [url=https://reiting-seo-kompanii.ru/]рейтинг seo агентств[/url] .
bazaar marketplace hub – Clean design and intuitive browsing, items are easy to view.
Brook Bazaar – Browsed randomly, structure is neat and navigation works well.
мелбет рабочее зеркало кз [url=http://melbet39518.help]http://melbet39518.help[/url]
orchardgallery – Items are easy to find, pages feel tidy and welcoming.
look at summit offerings – Navigating the listings is smooth and the layout is clear.
shopvault – Browsing feels quick, interface is organized and clean.
заказать сео анализ сайта пушка [url=https://seo-kejsy16.ru/]заказать сео анализ сайта пушка[/url] .
retail emporium – I like the neat presentation here, it gives a pleasant store impression.
pebblepine emporium link – Overall the items look distinctive and well presented.
Emporium Finds – Browsed by chance, sections are organized and simple to read.
see clovercrest deals – Browsing vendor sections felt easy, with a clear design and responsive pages.
see vendor marketplace – Checked tonight and the interface looks simple, well-structured, and clear.
продвижение сайтов бизнес [url=https://kak-prodat-sajt.ru/]kak-prodat-sajt.ru[/url] .
product bazaar hub – Easy-to-use interface, the marketplace is fun to browse.
Stone Deals – Landed here unexpectedly, the content feels accessible and neat.
explore trailstone hub – Organized layout with clear sections, browsing is enjoyable.
trailstone pages – Clean navigation and readable content make browsing pleasant.
shopvault – Browsing is fast, with a clear and organized interface.
shop garnet brook specials – Browsing categories was simple and the marketplace feels pleasant.
timberemporium – Products are easy to locate, layout feels modern and organized.
visit their page – Pages are well-organized, reading and navigating feels natural.
storefront outlet – Browsing the sections feels quick and uncomplicated.
see this page – Well-arranged sections, browsing and reading is smooth.
melbet cod bonus [url=https://www.melbet75891.help]https://www.melbet75891.help[/url]
learn more here – Navigation feels natural, and everything is well structured.
https://www.goal.com/en-in/betting/1xbet-promo-code/blt57eec3828e2b7aa7jerkoff
visit daisy workshop – Layout is simple, and navigating through content feels easy.
https://intertops-casino.net/login/ intertops classic casino
Outlet Market – Found this page unexpectedly, everything is organized and readable.
outletlane – Items are easy to spot, browsing through sections is simple.
где продать сайт [url=https://kak-prodat-sajt-1.ru/]где продать сайт[/url] .
Ivory Deals – Stumbled upon this site, structure is clean and navigation works well.
outletcorner – Items are displayed clearly, finding products was straightforward.
open kettle marketplace – Found some useful tips and information while exploring this platform today.
visit kettle marketplace hub – Found valuable content while checking out the marketplace today.
discover outlet treasures – Moving through the marketplace is smooth and easy to follow.
мелбет кз вывод yumoney [url=https://www.melbet39518.help]мелбет кз вывод yumoney[/url]
pineharbor collection – Items appear arranged clearly across the shop pages.
this boutique site – I noticed the elegant layout which makes exploring simple.
browse this boutique – The design feels polished and the shop is easy to move through.
мостбет как вывести выигрыш [url=https://mostbet34518.help/]мостбет как вывести выигрыш[/url]
marketplace homepage – Clear layout, browsing sections and products is simple.
seaemporium – Items are easy to locate, layout is clean and organized.
Outlet Picks – Browsed casually, layout is tidy and content is readable.
trailhub – Pages are well-structured, navigating sections is simple.
seo эксперт агентство [url=https://reiting-seo-kompanii.ru/]reiting-seo-kompanii.ru[/url] .
Brook Shop – Checked out this site randomly, content is well organized and easy to follow.
sunmeadow online portal – Easy browsing experience with minimal distractions.
us wahlen wettquoten
My web site – wetten strategie doppelte chance
sunmeadow check – Simple structure makes finding information quick and easy.
pinestone products – The marketplace design feels friendly for browsing.
browse this marketplace – Just came across this bazaar and it looks interesting enough to revisit.
lantern brook vendor house – Took a quick look at the listings and the site seems reliable.
official site link – Design feels light, reading is easy and organized.
retail emporium page – Layout is tidy, browsing different items is effortless.
explore more here – Simple and tidy layout, browsing is comfortable and smooth.
browse dawnridge site – User-friendly design with a clear and simple structure.
shopvault – Browsing is smooth, interface is well-organized.
seavault – Interface is intuitive, navigating sections feels natural.
Jasper Picks – Came across this site randomly, layout feels neat and intuitive.
check out dawnridge – Content is easy to digest and well structured.
die besten Sportwetten Bonus bei einzahlung apps
Bazaar Shop – Found this site by accident, navigation works smoothly and everything is clear.
discover plumbrook – The marketplace design feels neat and accessible.
product outlet hub – Browsing through sections feels natural and simple.
продажа сайтов [url=https://kak-prodat-sajt.ru/]продажа сайтов[/url] .
how to get 1win free spins [url=https://www.1win5524.ru]how to get 1win free spins[/url]
emporium catalog – Attractive site design, items are easy to explore.
trailcove – Layout is neat, browsing the emporium is comfortable.
silkvault – Interface feels intuitive, moving between sections is natural.
check this vendor emporium – Went through a few pages, the layout is simple and content helpful.
melbet lucky jet demo [url=www.melbet75891.help]melbet lucky jet demo[/url]
Ridge Deals – Landed here unexpectedly, layout is neat and navigation feels intuitive.
Накрутка подписчиков Rutube поможет быстро увеличить аудиторию канала и повысить доверие к контенту. Живые подписчики создают активность, улучшают видимость роликов и привлекают новых зрителей. Перейдя по запросу [url=https://kwork.ru/smm/45269880/zhivie-podpischiki-v-rutub-kanal-bez-spisaniy-bez-botov]накрутка подписчиков рутуб канале[/url] вы получите быстрый старт канала, безопасные методы продвижения и стабильный рост аудитории без отписок. Отличное решение для тех, кто хочет быстрее развить канал на Rutube.
melbet sloturi jackpot [url=https://www.melbet75891.help]melbet sloturi jackpot[/url]
mostbet apk stažení [url=https://mostbet2017.help/]https://mostbet2017.help/[/url]
Glade Bazaar – Landed here casually, content is tidy and easy to follow.
fashionnest – Minimalistic boutique page that feels light and easy to explore.
storefront market – The marketplace has an organized feel and browsing is simple.
check tealstone site – Minimal layout makes the browsing experience comfortable.
shop portal – Clean interface, moving through categories feels natural.
browse tealstone exchange – Well-labeled sections make navigation smooth.
1win futbol canlı [url=https://www.1win34861.help]1win futbol canlı[/url]
shopvault – Interface is organized, exploring items feels easy.
shopvault – Browsing feels fast, with a clear and organized interface.
online sport-wetten
Look at my blog wett Tipps dfb pokal
раскрутка и продвижение сайта [url=https://dettka.com/kakimi-metrikami-izmerit-effektivnost-digital?strategii-dlya-stolichnogo-biznesa/]раскрутка и продвижение сайта[/url] .
melbet kz вход по номеру телефона [url=https://melbet39518.help/]https://melbet39518.help/[/url]
see this page – Well-arranged sections, navigation is comfortable.
Stone Finds – Browsed casually, content is clear and easy to follow.
click to view studio – Minimalist layout makes finding content effortless.
this link here – Minimal design makes browsing effortless and clear.
Emporium Finds – Browsed by chance, layout is neat and user-friendly.
click to view studio – Minimalist layout makes finding content effortless.
топ 10 сео продвижение [url=https://seo-prodvizhenie-reiting.ru/]seo-prodvizhenie-reiting.ru[/url] .
lanternstonebazaar – Interesting bazaar concept, enjoyed looking through a few products.
mines game 1win [url=1win5524.ru]1win5524.ru[/url]
shopvault – Interface feels organized, navigating through items is straightforward.
marketfinds – Products are clearly presented, navigation feels effortless.
sportwetten tipps vorhersagen
Feel free to surf to my webpage … beste fa cup wettanbieter – Dina,
seo продвижение по трафику clover [url=https://prodvizhenie-sajtov-po-trafiku11.ru/]seo продвижение по трафику clover[/url] .
stonegallery – Clean layout with clearly visible product sections.
Harbor Shop – Checked out this page randomly, sections are neat and easy to digest.
mostbet výběr bez ověření [url=https://mostbet2017.help]https://mostbet2017.help[/url]
продвижение сайта клиники наркологии [url=https://seo-kejsy17.ru/]продвижение сайта клиники наркологии[/url] .
shopping market link – The clean arrangement of items makes the website feel welcoming.
Bazaar Shop – Found this page randomly, layout is clean and sections are easy to follow.
mostbet demo lucky jet [url=https://www.mostbet02894.help]https://www.mostbet02894.help[/url]
valestreasure – Interface is intuitive, browsing the catalog is fast.
интернет агентства [url=https://luchshie-digital-agencstva.ru/]интернет агентства[/url] .
mostbet depozit etmədən qeydiyyat [url=www.mostbet85214.help]www.mostbet85214.help[/url]
tealwillow info page – Layout is clear and makes reading enjoyable.
tealwillow marketplace – Simple structure, sections are easy to locate.
Traders Shop – Found this site by accident, navigation is smooth and everything is tidy.
локальное seo блог [url=https://webproverka.com/index-articles.php/]локальное seo блог[/url] .
Traders Market – Found this page unexpectedly, everything is organized and reading is effortless.
https://www.goal.com/en-in/betting/1xbet-promo-code/pizdasmoker
visit their site – Clean interface, content is easy to follow.
market hub – Simple design with smooth navigation throughout.
explore nightstoneemporium – User-friendly design, exploring products is effortless.
markettrek – Organized sections and clean interface make shopping pleasant.
quicktreasures – Catalog is tidy, finding items is effortless and smooth.
melbet pagina oficiala [url=melbet75891.help]melbet pagina oficiala[/url]
check drift market – User-friendly layout with readable content.
explore more – Pages are arranged logically, very readable.
outlet catalog – Everything is easy to find and the pages are simple to navigate.
аудит продвижения сайта [url=https://newsomsk.ru/news/152386-seo_moskva_realny_keys_rosta_lokalnogo_brenda_s_ud/]аудит продвижения сайта[/url] .
emporiumhub – Clean layout with products easy to locate.
velvetemporium – Products appear well arranged, navigating pages is easy.
lemon lark market – Nice design with an easy-to-navigate layout that makes browsing simple.
Накрутка подписчиков Rutube поможет быстро увеличить аудиторию канала и повысить доверие к контенту. Живые подписчики создают активность, улучшают видимость роликов и привлекают новых зрителей. Перейдя по запросу [url=https://kwork.ru/smm/45269880/zhivie-podpischiki-v-rutub-kanal-bez-spisaniy-bez-botov]накрутка подписчиков в рутубе Кворк[/url] вы получите быстрый старт канала, безопасные методы продвижения и стабильный рост аудитории без отписок. Отличное решение для тех, кто хочет быстрее развить канал на Rutube.
shopstonevault – Well-laid-out interface, browsing products is enjoyable.
mostbet slots demo [url=https://mostbet02894.help/]https://mostbet02894.help/[/url]
mostbet oyun qaydaları mines [url=mostbet85214.help]mostbet oyun qaydaları mines[/url]
melbet как сделать ставку [url=www.melbet06374.help]www.melbet06374.help[/url]
Jewel Hub – Stumbled on this site, layout is clean and reading is smooth.
timberharbor pages – Simple layout, easy to locate information across the site.
wettanbieter schweiz
Feel free to visit my web-site :: sportwetten prognosen heute (E.Netpad.app)
Ridge Finds – Browsed casually, content is organized and easy to read.
timberharbor quick check – Clean design makes it easy to read and navigate the site.
mostbet bank kartı bağlamaq [url=http://mostbet85214.help]http://mostbet85214.help[/url]
brookoutlet – Browsing was smooth, layout feels well organized.
oakstone marketplace – User-friendly interface, moving through products feels natural.
outletcorner – Layout is clean, browsing through sections feels effortless.
1win volleyball betting [url=https://1win5524.ru]1win volleyball betting[/url]
shopsnow – Items are simple to locate, layout makes browsing seamless.
shop portal – Taking a quick look here and the items appear quite interesting.
explore driftstone hub – Layout feels smooth and content is clear.
The other day, while I was at work, my sister stole my apple ipad and tested to see if it can survive a 25 foot drop, just so she can be a youtube sensation. My iPad is now destroyed and she has 83 views. I know this is completely off topic but I had to share it with someone!
viagraonline
learn more – Layout is organized, browsing feels smooth and clear.
visit their page – Content flows nicely and navigation is straightforward.
explore more – Pages are well-arranged, browsing feels natural and easy.
mostbet zrušit bonus [url=www.mostbet2017.help]www.mostbet2017.help[/url]
Статья про особенности поисковой конкуренции на Урале. Понравилось, что автор не просто описывает проблему, а даёт конкретные инструменты: от сбора локальных ключей до использования Яндекс.Бизнеса и работы с репутацией. Есть блок про мобильную оптимизацию и поведенческие факторы. Полезно: https://solsalut.ru/osobennosti-poiskovoj-konkurentsii-na-urale/
violetemporium – Layout is practical and neat, items appear clearly.
olivebrook store – Well-arranged layout, browsing feels easy and enjoyable.
shopvault – Clean product arrangement with smooth navigation.
Продвигайте свой аккаунт быстрее с помощью накрутки подписчиков в TikTok. Перейдя по запросу [url=https://kwork.ru/smm/45268325/zhivie-podpischiki-v-tiktok-kanal-bez-spisaniy-bez-botov]накрутка подписчиков на тикток без регистрации Кворк[/url] вы сможете увеличить количество фолловеров, повысить доверие к профилю и привлечь больше просмотров и лайков. Быстрая и безопасная накрутка поможет вашему контенту попасть в рекомендации и ускорить рост аккаунта. Подходит для блогеров, брендов и бизнеса, которые хотят развиваться в TikTok и получать больше охватов.
snowvault – Interface is intuitive, moving between sections feels natural.
covebazaar – Pages are tidy, finding items is quick and effortless.
visit this emporium – The shop has a distinctive style and everything feels neatly arranged.
melbet регистрация на сайте [url=https://www.melbet39518.help]https://www.melbet39518.help[/url]
eurovision wettquoten
Feel free to visit my web blog; sichere wetten für heute; Nicolas,
seo agentur ranking [url=https://reiting-seo-kompaniy.ru/]seo agentur ranking[/url] .
walnutcove – Boutique site looks stylish, navigating pages felt smooth and easy.
Outlet Picks – Browsed casually, content is simple and sections are easy to navigate.
olive orchard store – Well-arranged pages, exploring products is very comfortable.
топ digital компаний россии [url=https://luchshie-digital-agencstva.ru/]luchshie-digital-agencstva.ru[/url] .
продвижение по трафику [url=https://prodvizhenie-sajtov-po-trafiku11.ru/]продвижение по трафику[/url] .
Brook Bazaar – Browsed randomly, structure is tidy and navigation feels smooth.
orchardfindsplus – Organized catalog and clear layout make exploring products effortless.
shop homepage – The online store feels fast and sections are easy to navigate.
timberwillow quick check – Simple layout, content is accessible, pages load quickly.
timberwillow hub – Browsed briefly, site looks organized and easy to navigate.
dunebrook hub – Pages are tidy, making the content easy to digest.
блог о маркетинге [url=https://webproverka.com/index-articles.php/]блог о маркетинге[/url] .
explore dunebrook link – Layout is clean, making it comfortable to browse.
visit this site – Layout is clean and navigation feels smooth.
visit this site – Layout is clean and navigation feels smooth.
techwave – Found practical insights today; sharing this article with colleagues later.
bazaarstonefinds – Products are neatly arranged, navigating feels natural.
vynextech – Bookmarked this immediately, planning to revisit for updates and inspiration.
mostbet formula 1 stavka [url=https://mostbet02894.help]https://mostbet02894.help[/url]
maple brook market – Browsed the page and the items seem nicely presented.
harborwave – Browsing sections is intuitive, marketplace feels user-friendly.
techsnap – Navigation felt smooth, found everything quickly without any confusing steps.
opalriver deals – Simple design, exploring the catalog is quick and intuitive.
emporiumfinds – Items are clearly shown, navigating the site is intuitive.
bytecraft – Loved the layout today; clean, simple, and genuinely user-friendly overall.
ilkyorumdeneme
shopstonevault – Well-laid-out interface, browsing products is enjoyable.
browse this boutique – The boutique has a modern aesthetic and everything is easy to navigate.
seo partner [url=https://in.gallerix.ru/journal/internet/201811/zakazat-raskrutku-sayta-v-moskve-kak-vybrat-nadezhnogo-podryadchika-bez-finansovyx-riskov/]seo partner[/url] .
частный seo оптимизатор [url=https://dettka.com/kakimi-metrikami-izmerit-effektivnost-digital?strategii-dlya-stolichnogo-biznesa/]частный seo оптимизатор[/url] .
trailbrook online – Enjoyed looking around, everything loads quickly and clearly.
реклама наркологической клиники [url=https://seo-kejsy17.ru/]реклама наркологической клиники[/url] .
wavestonefinds – Emporium design feels neat, navigating items is straightforward.
Искал информацию по ценам на SEO и наткнулся на статью про накрутку позиций в Яндексе. Тут разбирают, что вообще входит в SEO-услуги, от чего зависит стоимость и как не попасть на мошенников. Полезно для понимания рынка: https://vagaro.ru/nakrutka-poziczij-v-yandekse-chto-nuzhno-znat-o-seo-uslugah-i-ih-stoimosti/
trailbrook online portal – Pages load quickly and layout is simple to follow.
browse dune vendor – Navigation is simple and content reads well.
melbet акции [url=http://melbet06374.help]http://melbet06374.help[/url]
dune hub page – Pages are tidy, making the experience comfortable.
частный seo оптимизатор [url=https://web-lesson.ru/prodvizhenie-sajta-agentstvo-moskva-kak-vybrat-gramotno-agentstvo/]частный seo оптимизатор[/url] .
orchardharbor deals – The outlet seems simple to move around and browse.
stonefinds – Browsed the bazaar today, items are neatly arranged and simple to explore.
explore more – Interface is tidy, browsing feels natural and intuitive.
see this site – Minimalist pages, navigation is smooth and effortless.
bu sitenin admini kevo doludur
кп по продвижению сайта [url=https://aksport.ru/catalog/raznoe/2025/seo-keys_kak_novostnoy_format_13_11_2025.php/]кп по продвижению сайта[/url] .
wheatbrookshop – Browsed this outlet today, layout feels clean and simple.
компания seo [url=https://reiting-seo-kompanii.ru/]reiting-seo-kompanii.ru[/url] .
Продвигайте свой аккаунт быстрее с помощью накрутки подписчиков в TikTok. Перейдя по запросу [url=https://kwork.ru/smm/45268325/zhivie-podpischiki-v-tiktok-kanal-bez-spisaniy-bez-botov]накрутка подписок тикток Кворк[/url] вы сможете увеличить количество фолловеров, повысить доверие к профилю и привлечь больше просмотров и лайков. Быстрая и безопасная накрутка поможет вашему контенту попасть в рекомендации и ускорить рост аккаунта. Подходит для блогеров, брендов и бизнеса, которые хотят развиваться в TikTok и получать больше охватов.
melbet скачать с официального сайта [url=http://melbet06374.help]http://melbet06374.help[/url]
1win kk apk juktеу [url=https://1win5524.ru]1win kk apk juktеу[/url]
discover the emporium – The site has a calm layout that’s easy to explore.
marketcorner – Items are clearly displayed, making exploration effortless.
мелбет лучшие слоты [url=melbet06374.help]melbet06374.help[/url]
1win tətbiq linki [url=www.1win34861.help]1win tətbiq linki[/url]
emporiumlane – Products stand out nicely, navigating pages is comfortable.
Fortune Ox explosão de símbolos: já ganhou 1000x com uma única ativação?
see Bayridge Vendor Studio – Came across this platform today, seems like a vibrant place for vendors.
mostbet kurzy fotbal [url=www.mostbet2017.help]www.mostbet2017.help[/url]
covehubstore – Navigation is clear, exploring products online feels natural.
check out Clover Vendor Collective – Organized hub with a pleasant layout, browsing was simple.
рейтинг компаний по продвижению сайтов [url=https://luchshie-digital-agencstva.ru/]рейтинг компаний по продвижению сайтов[/url] .
lucky jet melbet как играть [url=http://melbet39518.help]lucky jet melbet как играть[/url]
shopcovevault – Well-laid-out interface, browsing products is smooth and enjoyable.
мелбет проблема входа [url=https://melbet06374.help/]https://melbet06374.help/[/url]
browse trailstone courtyard – Well-laid-out sections make reading content easy.
поисковое продвижение по трафику [url=https://prodvizhenie-sajtov-po-trafiku11.ru/]поисковое продвижение по трафику[/url] .
check trailstone site – Clean design, reading content is comfortable.
emporiumtreasures – Products are easy to explore, pages feel organized and user-friendly.
bu sitenin admini kevo doludur
Bayridge shop studio – Just found this online space, feels like a creative vendor marketplace.
Wildstone shop bazaar – Appears to be a place with plenty of unique offerings.
explore the bazaar – Sections flow well, content is easy to follow.
статьи про продвижение сайтов [url=https://webproverka.com/index-articles.php/]статьи про продвижение сайтов[/url] .
explore more – Pages are tidy, browsing feels intuitive and clear.
coastridgevendorstudio – Just landed here today, the site layout feels welcoming.
Bay Vendor shop workshop – The site looks like a smooth, workshop-style marketplace for vendors.
1win statistika [url=https://1win34861.help]https://1win34861.help[/url]
DesignDock – Pages feel organized, very easy to browse.
jasper vendor network – A tidy vendor platform with easy-to-use navigation across pages.
интернет агентство продвижение сайтов сео [url=http://ahmatova.niv.ru/public/180/int-net-partner/]интернет агентство продвижение сайтов сео[/url] .
Coast vendor platform – Well-structured marketplace, navigation is clear and intuitive.
melbet приложение для казино [url=https://www.melbet81573.help]https://www.melbet81573.help[/url]
оптимизация и продвижение сайтов москва [url=https://svestnik.kz/raskrutka-sajtov-moskva-strategiya-vykhoda-v-konkurentnyj-segment-stolitsy/]оптимизация и продвижение сайтов москва[/url] .
vendor network meadow – Fast-loading pages with clear sections and easy navigation throughout.
mostbet sms kodi kelmadi [url=https://mostbet02894.help]https://mostbet02894.help[/url]
explore meadow hub – Clean, professional layout with simple, responsive navigation.
see BerryCrest Vendor Place – Nice layout and welcoming interface with a memorable brand name.
vendor workspace jasper – Minimalist design and smooth transitions between pages.
visit the pearl vendor site – Moving through the pages today felt quick and well arranged.
мелбет лучшие слоты [url=https://melbet06374.help]https://melbet06374.help[/url]
сео агентство [url=https://in.gallerix.ru/journal/internet/201811/zakazat-raskrutku-sayta-v-moskve-kak-vybrat-nadezhnogo-podryadchika-bez-finansovyx-riskov/]сео агентство[/url] .
explore Copper Crest marketplace – Well-structured hub with intuitive navigation, moving through the site is pleasant.
кп по продвижению сайта [url=https://aksport.ru/catalog/raznoe/2025/seo-keys_kak_novostnoy_format_13_11_2025.php/]кп по продвижению сайта[/url] .
jewelcrest outlet hub – The vendor site feels polished and pages load smoothly without issues.
Wind Harbor marketplace – I enjoy seeing new shops pop up online these days.
seo agencies list [url=https://reiting-seo-kompanii.ru/]seo agencies list[/url] .
pebble crate shopping site – The arrangement of sections helps browsing flow nicely.
мостбет подтверждение личности [url=mostbet4151.ru]mostbet4151.ru[/url]
Birch Basket shop – Creative marketplace layout, looking forward to future features.
мостбет регистрация [url=http://mostbet4151.ru]мостбет регистрация[/url]
jeweldepot shop hub – Everything is neatly arranged, and exploring pages is quick and easy.
meadow vendor lounge – Professional layout with fast-loading pages for efficient browsing.
explore meadow hub – Fast-loading platform with clear layout and easy-to-follow navigation.
eigenes wettbüro eröffnen
Here is my blog post sportwetten bonus Paysafecard
1win site address [url=https://1win5524.ru/]https://1win5524.ru/[/url]
check pebblewood marketplace – The platform structure makes navigation straightforward.
1win hesab aç [url=1win34861.help]1win hesab aç[/url]
juniper vendor center – Pages load quickly and the site structure is clear and easy to follow.
Wood Cove online shop – Looks like a cool platform for exploring different vendor offerings.
wettanbieter mit freiwette [rockfmcostarica.com] beste quoten
продвижение сайта [url=http://ahmatova.niv.ru/public/180/int-net-partner/]продвижение сайта[/url] .
aviator mostbet mobil [url=mostbet2017.help]mostbet2017.help[/url]
seo partner [url=https://madwrappers.pro/blog/kak-vybrat-nadezhnogo-partnera-v-tsifrovom-mire/]seo partner[/url] .
mostbet oyunçu hesabı [url=https://www.mostbet85214.help]https://www.mostbet85214.help[/url]
explore juniper collective – User-friendly platform with intuitive layout and quick-loading pages.
discover Brightstone Vendor House – The site has a clean aesthetic and a creative vendor concept.
TheCuratedCrate – Fantastic vendor showcase, very easy to use.
pinestone vendor house online – Overall browsing today felt smooth and well organized.
поисковое seo в москве [url=https://andreyex.ru/uslugi/seo-prodvizhenie-sajtov/]поисковое seo в москве[/url] .
browse Woodstone vendors – Exploring around online and this emporium seems appealing.
meadow vendor exchange – Clear, responsive platform with well-structured pages and pleasant browsing.
meadow shop portal – Neat interface and responsive design make browsing simple and enjoyable.
vendor marketplace kettlebrook – Clean design with intuitive browsing across the platform.
аудит продвижения сайта [url=https://mateshka.ru/seo-prodvizhenie-saytov-agentstvo.html]аудит продвижения сайта[/url] .
TreasureVault – Very organized, I like how everything is presented clearly.
explore pine vendor market – Browsing the site today felt smooth and straightforward.
visit pine vendor emporium – The layout appears organized and moving through pages feels natural.
mostbet верификация [url=http://mostbet4151.ru/]http://mostbet4151.ru/[/url]
Статья про особенности поисковой конкуренции на Урале. Понравилось, что автор не просто описывает проблему, а даёт конкретные инструменты: от сбора локальных ключей до использования Яндекс.Бизнеса и работы с репутацией. Есть блок про мобильную оптимизацию и поведенческие факторы. Полезно: https://solsalut.ru/osobennosti-poiskovoj-konkurentsii-na-urale/
лечение зубов ребенку платно лечение молочных зубов под наркозом у детей
check Zen Cove Boutique – A visually appealing store with a modern, calming name.
Бесплатная консультация семейного юриста — это возможность быстро разобраться в сложной ситуации и понять свои права. Перейдя по запросу [url=https://www.pravovik24.ru/konsultatsii/yurist-po-semeynym-delam/]юридическая консультация по брачным отношениям[/url] юрист поможет вам по вопросам развода, алиментов, раздела имущества, опеки над детьми и другим семейным спорам. Разъясним перспективы дела и подскажем оптимальное решение. Получите профессиональную помощь без оплаты и лишних обязательств.
CraftVault – Love the organization here, makes browsing vendors easy.
топ компаний по продвижению сайтов [url=https://reiting-seo-kompanii.ru/]топ компаний по продвижению сайтов[/url] .
mostbet pul yechish qancha vaqt [url=www.mostbet02894.help]www.mostbet02894.help[/url]
сколько стоит ремонт в ванной ремонт ванной под ключ спб
lanternbrook vendor exchange – Simple, neat design with intuitive navigation and responsive pages.
Calmbrook shop hub – Easy-to-use layout with a soothing feel, navigating feels effortless.
mint vendor lounge – Professional interface with intuitive navigation for effortless browsing.
sportwetten unentschieden vorhersagen
My website :: wettstrategie (Harriet)
mint hub corner – Intuitive platform design with well-laid-out pages and fast browsing.
продвижение веб сайтов москва [url=https://advesti.ru/news/internet/agentstvo_prodvizhenie_saytov_kak_rabotaet_sovremennoe_SEO_i_zachem_ono_biznesu_28-07-2025/]продвижение веб сайтов москва[/url] .
zencoveboutique – Clean and appealing shop, the name gives off a calm, modern vibe.
take a look at Zen Cove Boutique – Calm and contemporary branding makes this online store appealing.
growthmarketing – Bookmarked this immediately, planning to revisit for updates and inspiration.
socialmarketing – Navigation felt smooth, found everything quickly without any confusing steps.
seo network [url=https://stars-top.ru/effektivnoe-prodvizhenie-sajtov-v-moskve-strategii-dlya-liderstva/]seo network[/url] .
emporium hub lanternvendor – Fast-loading pages and intuitive layout make exploring simple.
Calm Vendor Collective – Just discovered this site, everything feels organized and simple to browse.
компании занимающиеся продвижением сайтов [url=https://sunmuseum.ru/novosti/40825-tehnicheskiy-audit-sayta-klyuch-k-uspehu-onlayn-proektov.html]компании занимающиеся продвижением сайтов[/url] .
CuratedCorner – First impression is positive, looking forward to checking other areas.
alle wettanbieter deutschland
Visit my web blog – sportwetten gewinne versteuern österreich (Pamala)
seo optimization ranking [url=https://reiting-seo-kompaniy.ru/]seo optimization ranking[/url] .
1win kazino giriş [url=http://1win34861.help]http://1win34861.help[/url]
explore Acorn Ridge – Gives the impression of a lively spot for handmade or specialty items.
lavenderridge online hub – Organized interface and smooth browsing create a professional experience.
Canyon Ridge studio hub – Fun studio-style platform, looks worth exploring again later.
explore quartzridge vendors – The layout appears well organized, making exploration simple.
VendorSphere – Very organized pages, navigation feels smooth and natural.
mint shop hub – Neat sections with intuitive navigation and responsive pages.
play crash on 1win [url=http://1win76138.help/]play crash on 1win[/url]
mint marketplace collective – Smooth page flow and clearly arranged sections throughout the site.
1win slotlar demo [url=1win5768.help]1win slotlar demo[/url]
mostbet aviator коэффициенты [url=http://mostbet27541.help/]http://mostbet27541.help/[/url]
мостбет игры на деньги [url=https://mostbet4151.ru]https://mostbet4151.ru[/url]
получить короткую ссылку google [url=https://seo-kejsy17.ru/]получить короткую ссылку google[/url] .
vendor lounge lavender – Organized sections and fast-loading pages provide an enjoyable experience.
explore Canyon online workshop – Marketplace design is neat, curious to see more content added soon.
vavada pomoc techniczna [url=https://vavada56378.help]vavada pomoc techniczna[/url]
мостбет сайт [url=mostbet4151.ru]mostbet4151.ru[/url]
раскрутка сайта франция [url=https://itcrumbs.ru/poiskovoe-seo-v-moskve_103716]раскрутка сайта франция[/url] .
quartz vendor center – Moving around the platform is simple and intuitive.
Acorn Vendor Workshop – It’s always nice to discover niche vendor platforms online.
VendorSphere – Easy to find interesting products, this marketplace is well put together.
Бесплатная консультация семейного юриста — это возможность быстро разобраться в сложной ситуации и понять свои права. Перейдя по запросу [url=https://www.pravovik24.ru/konsultatsii/yurist-po-semeynym-delam/]юридические услуги по семейным вопросам[/url] юрист поможет вам по вопросам развода, алиментов, раздела имущества, опеки над детьми и другим семейным спорам. Разъясним перспективы дела и подскажем оптимальное решение. Получите профессиональную помощь без оплаты и лишних обязательств.
Caramel vendor marketplace – Pleasant branding and easy navigation make browsing enjoyable.
vavada free bet warunki [url=http://vavada56378.help/]vavada free bet warunki[/url]
Отличный разбор темы — как местному бизнесу из Екатеринбурга выигрывать у федералов в поиске. Автор подробно останавливается на локальном SEO, гиперрелевантном контенте, скорости и сервисе как факторах ранжирования. Есть блок про микро-ниши и локальный линкбилдинг. Очень рекомендую: https://go-patriot.ru/bitva-za-ural-kak-lokalnomu-biznesu-iz-ekaterinburga-vyigrat-u-federalnyh-gigantov-v-poiske/
quick meadow product hub – Everything appears clearly arranged, keeping browsing effortless.
see quick meadow collections – Navigation across sections is smooth and effortless.
NovelNest – Organized structure, makes exploring multiple categories smooth.
современные seo кейсы [url=https://aksport.ru/catalog/raznoe/2025/seo-keys_kak_novostnoy_format_13_11_2025.php/]современные seo кейсы[/url] .
интернет продвижение москва [url=https://new-sebastopol.com/news/id/60079]интернет продвижение москва[/url] .
мелбет киргизия ставки на спорт [url=https://melbet81573.help/]мелбет киргизия ставки на спорт[/url]
explore this vendor hub – I’m interested to see what kind of marketplace this might be.
explore moon hub – Smooth interface with clearly arranged content and fast-loading pages.
check Caramel Vendor Collective – The platform concept is appealing, exploring the vendors felt simple.
lemon boutique exchange – Pages respond quickly and the site feels welcoming and easy to navigate.
moon creative hub – Neat design with intuitive navigation and responsive pages.
internet seo [url=https://sunmuseum.ru/novosti/40825-tehnicheskiy-audit-sayta-klyuch-k-uspehu-onlayn-proektov.html]internet seo[/url] .
ArtisanAlcove – Interesting concept and intuitive layout, hope this workshop thrives.
комплексное продвижение сайтов москва [url=https://advesti.ru/news/internet/agentstvo_prodvizhenie_saytov_kak_rabotaet_sovremennoe_SEO_i_zachem_ono_biznesu_28-07-2025/]комплексное продвижение сайтов москва[/url] .
wette deutschland schottland
my web-site gratis bonus ohne einzahlung sportwetten (Salvador)
Бесплатная консультация юриста по расторжению брака поможет разобраться в ваших правах и возможностях при разводе. Специалист объяснит порядок развода через суд или ЗАГС, подскажет, как решаются вопросы раздела имущества, алиментов и проживания детей. Перейдя по запросу [url=https://www.pravovik24.ru/konsultatsii/yurist-po-razvodam/]бесплатная консультация адвоката по разводам[/url] вы получите профессиональные рекомендации и ответы на все вопросы, чтобы пройти процедуру развода максимально спокойно и с защитой ваших интересов.
BoxedBazaar – Clean design, navigating between sections is effortless and fast.
sportwetten anbieter vergleich
Here is my website … Alle online wettanbieter
rain vendor product hub – Exploring listings today felt smooth and intuitive.
seo services company [url=https://reiting-seo-kompaniy.ru/]reiting-seo-kompaniy.ru[/url] .
melbet регистрация с бонусом [url=https://melbet81573.help/]melbet регистрация с бонусом[/url]
linen vendor lounge – Organized layout with responsive pages that are easy to navigate.
как пополнить mostbet [url=https://mostbet4151.ru/]https://mostbet4151.ru/[/url]
http://www.drugoffice.gov.hk/gb/unigb/dromel-aine.com/content/pgs/code-promo-1xbet-du-jour.html
https://jszst.com.cn/home.php?mod=space&uid=6772053
vendor portal moonhub – Fast, clean platform with organized pages for a pleasant experience.
mostbet Oʻzbekiston kirish [url=http://mostbet24618.help/]http://mostbet24618.help/[/url]
vendor network moonworkshop – Fast page loads and clear layout make exploring effortless.
поисковое продвижение москва профессиональное продвижение сайтов [url=https://ladystory.ru/?p=217760]поисковое продвижение москва профессиональное продвижение сайтов[/url] .
1win aviator necə oynanır [url=www.1win34861.help]www.1win34861.help[/url]
Amberstone creative hub – Just found this page and it looks like a good platform.
NovelNest – Pleasant and organized, exploring different studio sections is enjoyable.
Brazino777 tá dando 300 giros grátis no Jogo do Tigrinho só pra quem deposita via Pix hoje!
Cloudbrook Vendor Hub – Smooth navigation and clean layout make exploring the site enjoyable.
https://bywwoshop.com/
https://bywwoshop.com/
ремонт ванной комнаты https://remont-vannoy-spb.ru
CuratedCorner – Friendly layout, navigating the marketplace feels effortless.
ремонт ванной комнаты спб цены ремонт ванной под ключ спб
discover Cloud Vendor Collective – Unique vendor collective, planning to come back for a proper look.
maple supply corner – Organized interface with fast transitions and smooth navigation.
Amber marketplace hub – The title definitely feels distinctive.
this raven vendor shop – The platform design is clean, making navigation smooth.
Jogo do Tigrinho Pix R$20: recebe 100 giros + 20% cashback hoje em 3 sites
seo кейсы [url=https://seo-kejsy17.ru/]seo-kejsy17.ru[/url] .
продвижение веб сайтов москва [url=https://stars-top.ru/effektivnoe-prodvizhenie-sajtov-v-moskve-strategii-dlya-liderstva/]продвижение веб сайтов москва[/url] .
seo аудит веб сайта [url=http://yopolis.ru/publikacii/5279-seo-prodvizhenie-v-mire-cifrovogo-biznesa.html]seo аудит веб сайта[/url] .
place corner mosscrest – Clear design with organized layout and effortless navigation.
browse Cloverbrook Vendor Hub – Intuitive hub design with easy navigation for exploring vendors.
marble hub corner – Intuitive interface and organized sections make exploring effortless.
moss vendor exchange – Well-structured, clean pages with smooth navigation and easy-to-use layout.
explore Apricot vendors – Checking different vendor houses online never gets old.
мелбет ош [url=http://melbet81573.help]http://melbet81573.help[/url]
TreasureVault – Organized hub with easy navigation, everything is accessible quickly.
marble collective hub – Well-organized marketplace with smooth navigation across all pages.
Бесплатная консультация юриста по расторжению брака поможет разобраться в ваших правах и возможностях при разводе. Специалист объяснит порядок развода через суд или ЗАГС, подскажет, как решаются вопросы раздела имущества, алиментов и проживания детей. Перейдя по запросу [url=https://www.pravovik24.ru/konsultatsii/yurist-po-razvodam/]семейный адвокат юрист по разводам в Москве[/url] вы получите профессиональные рекомендации и ответы на все вопросы, чтобы пройти процедуру развода максимально спокойно и с защитой ваших интересов.
vavada app nie działa [url=vavada56378.help]vavada56378.help[/url]
компании занимающиеся продвижением сайтов [url=https://golubevod.net/seo-agentstvo-moskva.html]компании занимающиеся продвижением сайтов[/url] .
Apricot emporium site – Looks like an interesting place to browse unique vendor items.
useful vendor platform – Came across this link today and it appears structured nicely.
moss vendor exchange – Clean, well-laid-out pages with smooth navigation and easy browsing.
moss vendor studio – Clean, professional design with intuitive layout and comfortable browsing.
Hello, this weekend is fastidious in support of me,
as this occasion i am reading this enormous
educational post here at my house.
Here is my webpage – Golden Nugget Biloxi Craps (http://Www.Lovkiktraders.Com)
free spins no deposit no wagering usa, pokies online free united states and casino in united states, or poker world united states
Visit my blog :: goplayslots.Net
vendor marketplace link – Took a glance, layout appears clean and content is readable.
Aurora Brook vendor site – Discovered this hub while searching for fresh shopping platforms.
recommended vendor page – Took a moment to browse and it looks fairly informative overall.
melbet mines стратегия [url=http://melbet36290.help/]http://melbet36290.help/[/url]
продвижение сайта франция [url=https://andreyex.ru/uslugi/seo-prodvizhenie-sajtov/]продвижение сайта франция[/url] .
vavada mines na telefon [url=http://vavada56378.help/]http://vavada56378.help/[/url]
how to install 1win on ios [url=https://1win76138.help]how to install 1win on ios[/url]
vendor marketplace link – Took a glance, layout appears clean and content is readable.
convertio – Pages loaded fast, images appeared sharp, and formatting stayed consistent.
vavada rejestracja bez telefonu [url=vavada56378.help]vavada56378.help[/url]
vendor marketplace hub – Browsed a couple sections and the navigation seems smooth.
adlify – Mobile version looks perfect; no glitches, fast scrolling, crisp text.
mostbet oson [url=mostbet24618.help]mostbet24618.help[/url]
emporium nightaisle – Well-structured pages make exploring the site easy and intuitive.
1win rasmiy link Oʻzbekiston [url=https://1win5768.help/]1win rasmiy link Oʻzbekiston[/url]
riverstone vendor showcase – Navigation through the site today was quick and clear.
ranksignal – Bookmarked this immediately, planning to revisit for updates and inspiration.
explore night vendor emporium – Responsive layout with intuitive navigation and effortless browsing.
комплексное продвижение сайтов москва [url=https://prodvizhenie-sajtov-v-moskve15.ru/]prodvizhenie-sajtov-v-moskve15.ru[/url] .
Эта обзорная заметка содержит ключевые моменты и факты по актуальным вопросам. Она поможет читателям быстро ориентироваться в теме и узнать о самых важных аспектах сегодня. Получите краткий курс по современной информации и оставайтесь в курсе событий!
Получить дополнительные сведения – https://vivod-iz-zapoya-2.ru/
wildvendorworkshop.shop – Just took a quick look, navigation seems smooth and simple.
mostbet войти [url=www.mostbet27541.help]mostbet войти[/url]
Thank you a bunch for sharing this with all of us you actually recognize what you’re speaking approximately! Bookmarked. Please also seek advice from my web site =). We could have a link exchange arrangement among us
viagraonline2
vendor emporium page – Browsed through it earlier and it actually looks well put together.
vendor emporium page – Browsed through it earlier and it actually looks well put together.
оптимизация и seo продвижение сайтов москва [url=https://golubevod.net/seo-agentstvo-moskva.html]оптимизация и seo продвижение сайтов москва[/url] .
autumncrateexchange – Interesting name, really makes me want to see what they offer.
login 1win [url=www.1win76138.help]login 1win[/url]
mostbet stream [url=https://www.mostbet24618.help]https://www.mostbet24618.help[/url]
мелбет бишкек [url=melbet81573.help]melbet81573.help[/url]
admark – Found practical insights today; sharing this article with colleagues later.
mostbet slot bonus [url=www.mostbet24618.help]www.mostbet24618.help[/url]
rosebrook vendor showcase – Navigation through the site today was quick and clear.
1win shikoyat [url=https://1win5768.help]https://1win5768.help[/url]
nightfall marketplace hub – Simple layout with intuitive navigation and clearly defined sections.
night vendor marketplace – Well-structured pages with clean design for a simple browsing experience.
мостбет скачать android [url=www.mostbet27541.help]www.mostbet27541.help[/url]
https://366bet1.org/download
Autumn Willow store hub – A calm and welcoming vendor platform online.
Статья про цены на накрутку позиций и выбор оптимального предложения. Автор рассказывает, на что обращать внимание, какие факторы влияют на стоимость и как не ошибиться с подрядчиком. Полезные рекомендации: https://spc2.ru/tseny-na-nakrutku-pozitsiy-v-poiskovyh-sistemah-kak-vybrat-optimalnoe-predlozhenie/
marketplace resource link – Spent a moment browsing and the material seems helpful.
check out this vendor hub – Quick glance shows a neat structure and practical information.
rose vendor showcase – Navigation through the site today was quick and intuitive.
сделать аудит сайта цена [url=https://prodvizhenie-sajtov-v-moskve15.ru/]prodvizhenie-sajtov-v-moskve15.ru[/url] .
mostbet pul qaytarish [url=http://mostbet24618.help/]http://mostbet24618.help/[/url]
visit silverbrook vendor hub – Just came across this page and it appears to have some useful information.
explore rubyridge marketplace – Everything is clearly arranged, making exploration smooth.
wettbüro rostock
my blog: ergebnis wetten live (https://julliannepiano.com)
check out this vendor hub – Quick glance shows a neat structure and practical information.
oakstone hub corner – Intuitive interface with well-structured sections and smooth navigation.
vendor network oakstone – Fast-loading pages with neat layout and smooth browsing.
vendor house page – Opened the site and the design seems structured and easy to navigate.
1win spin and win [url=https://1win76138.help/]1win spin and win[/url]
ruby online vendor workshop – Moving through sections felt comfortable and easy.
vendor resource page – Opened for a moment, everything is simple to navigate and read.
vendor network link – Took a glance, seems like a reliable and easy-to-use resource.
1win dastur yuklab olish [url=https://1win5768.help/]https://1win5768.help/[/url]
this vendor workshop – Opened for a moment, layout feels clean and intuitive.
как вывести деньги с mostbet [url=http://mostbet27541.help/]http://mostbet27541.help/[/url]
66b ✔️ Trang Chủ Chính Thức cam kết xử lý khiếu nại trong 2 giờ – minh bạch, nhanh chóng, tôn trọng khách hàng. TONY03-17
поисковое продвижение москва профессиональное продвижение сайтов [url=https://prodvizhenie-sajtov-v-moskve15.ru/]prodvizhenie-sajtov-v-moskve15.ru[/url] .
emporium plaza oak – Well-laid-out sections and responsive design make browsing effortless.
profitable wettstrategie
Feel free to surf to my blog :: Deutsche wettseiten (https://takinseir.com)
corner emporium oak – Smooth browsing with neatly structured pages and easy navigation.
Юридическая консультация по разделу имущества поможет защитить ваши права и избежать ошибок при разводе или спорах между собственниками. Переходите по запросу [url=https://www.pravovik24.ru/konsultatsii/yurist-po-razdelu-imushchestva/]адвокат по разделу имущества супругов[/url] – юрист оценит ситуацию, разъяснит перспективы дела, подскажет, как правильно оформить документы и выстроить стратегию. Вы получите чёткий план действий и поддержку на каждом этапе — от переговоров до суда.
vendor resource page – Opened for a moment, everything is simple to navigate and read.
мелбет скачать apk на android [url=http://melbet81573.help/]http://melbet81573.help/[/url]
рейтинг seo организаций [url=https://reiting-seo-kompaniy.ru/]reiting-seo-kompaniy.ru[/url] .
explore this vendor workshop – Browsed quickly, design looks clean and organized.
see this vendor hub – Spent a minute here, pages are neatly arranged and easy to comprehend.
компании занимающиеся продвижением сайтов [url=https://tyumen-news.net/other/2025/07/15/509294.html]компании занимающиеся продвижением сайтов[/url] .
mostbet yutuq yechish [url=http://mostbet24618.help/]http://mostbet24618.help/[/url]
https://mindrise.id/how-to-get-1xbet-promo-code-1xvip1x-e130-acquire/
sweet bonanza mirror funcionando México [url=https://www.sweet-bonanza18364.help]https://www.sweet-bonanza18364.help[/url]
bet wetten online
Also visit my web site Beste wett tipp seite
Need a multimedia system? here We integrate multimedia systems for home and business. We install and configure audio and video systems, manage content, and integrate equipment into a single system. Modern solutions for comfortable and efficient use of technology.
sweet bonanza free spins [url=https://www.sweet-bonanza18364.help]sweet bonanza free spins[/url]
recommended vendor page – Opened quickly, pages feel organized and user-friendly.
hub corner olivebrook – Smooth layout with clear sections provides a simple and pleasant navigation experience.
Need a multimedia system? equipment for meeting rooms We integrate multimedia systems for home and business. We install and configure audio and video systems, manage content, and integrate equipment into a single system. Modern solutions for comfortable and efficient use of technology.
https://lmc896.org/articles/1xbet-bonus-code_and_promo-code.html
hub portal olivebrook – Neat layout with responsive design provides effortless and enjoyable browsing.
simple vendor site – Took a glance, everything appears clear, tidy, and accessible.
wildvendorworkshop.shop – Just took a quick look, navigation seems smooth and simple.
продвижение бизнеса в интернете омск [url=https://elektroportal.ru/news/corp/253314/]продвижение бизнеса в интернете омск[/url] .
мелбет aviator на деньги [url=melbet36290.help]melbet36290.help[/url]
plinko вывод usdt [url=www.plinko61038.help]www.plinko61038.help[/url]
quick vendor site – Checked briefly, information appears useful and straightforward.
1win online roulette [url=https://www.1win76138.help]1win online roulette[/url]
online wettseite
My web page – wettanbieter Mit besten quoten
поисковое seo в москве [url=https://prodvizhenie-sajtov-v-moskve15.ru/]prodvizhenie-sajtov-v-moskve15.ru[/url] .
wildvendorworkshop.shop – Just took a quick look, navigation seems smooth and simple.
free pokie spins australia, mobile casinos united states and online casino in cambodia poipet
(Pearline) canada no deposit sign up bonus, or craps guide uk
olive marketplace collective – Well-organized platform with fast-loading pages and intuitive browsing.
marketplace link here – Checked quickly, site appears organized and easy to use.
online vendor network – Browsed a bit, layout is simple and easy to follow.
wettstrategie kombiwette
My site; beste sportwetten prognose (Adell)
olive hub network – Neatly arranged pages with smooth transitions make exploring the platform simple.
Юридическая консультация по разделу имущества поможет защитить ваши права и избежать ошибок при разводе или спорах между собственниками. Переходите по запросу [url=https://www.pravovik24.ru/konsultatsii/yurist-po-razdelu-imushchestva/]юридическая консультация по разделу имущества при разводе[/url] – юрист оценит ситуацию, разъяснит перспективы дела, подскажет, как правильно оформить документы и выстроить стратегию. Вы получите чёткий план действий и поддержку на каждом этапе — от переговоров до суда.
vendor directory link – Just skimmed, navigation feels intuitive and layout is clear.
crash 1win [url=1win5768.help]crash 1win[/url]
You said it very well..
https://meb-estet.ru/shkafy/raspash/
мелбет сайт на русском [url=https://melbet36290.help/]https://melbet36290.help/[/url]
sweet bonanza bono por primera recarga México [url=http://sweet-bonanza18364.help/]http://sweet-bonanza18364.help/[/url]
vendor hub page – Just glanced at it, content is straightforward and accessible.
mostbet скачать для ios [url=www.mostbet27541.help]www.mostbet27541.help[/url]
vendor workshop page – Spent a few minutes browsing, everything seems straightforward and user-friendly.
vavada aktualna strona [url=www.vavada56378.help]www.vavada56378.help[/url]
Всем привет! Рзучал тему развития бизнеса через интернет Рё нашел хороший РѕР±Р·РѕСЂ. Статья называется “Рффективное продвижение сайтов Рё развитие бизнеса РІ интернете”. Там РїРѕРґСЂРѕР±РЅРѕ разобраны основные каналы: SEO, контекст, соцсети, аналитика. Особенно полезно для тех, кто хочет системно подойти Рє РІРѕРїСЂРѕСЃСѓ, Р° РЅРµ работать хаотично. Р’РѕС‚ ссылка, если РєРѕРјСѓ интересно: http://harizma86.ru/jeffektivnoe-prodvizhenie-sajtov-i-razvitie-biznesa-v-internete/
seo продвижение и раскрутка сайта [url=https://advesti.ru/news/internet/agentstvo_prodvizhenie_saytov_kak_rabotaet_sovremennoe_SEO_i_zachem_ono_biznesu_28-07-2025/]seo продвижение и раскрутка сайта[/url] .
see this vendor hub – Checked quickly, everything appears structured and easy to comprehend.
Полная версия по ссылке: https://slovarsbor.ru/w/%D0%B3%D1%80%D0%B5%D1%85%D0%BE%D0%BC/
vendor portal reference – Browsed briefly, design is tidy and information is easy to understand.
Хочешь казино бонус? https://t.me/s/casino_bonus_bezdep/25 всегда актуальные бонусы в онлайн казино. Получайте бонусы без вложений, фриспины и подарки за регистрацию. Актуальные предложения, честные условия отыгрыша и список проверенных казино с бонусами без депозита.
opal vendor house – Simple layout with smooth browsing and quick page responses.
explore opal hub – Smooth navigation with clearly structured sections makes browsing effortless.
Бесплатная консультация юриста по взысканию алиментов — первый шаг к защите ваших прав и интересов ребёнка. Переходите по запросу [url=https://www.pravovik24.ru/konsultatsii/yurist-po-alimentam/]адвокат по алиментам[/url] и получите разбор именно вашей ситуации, узнайте порядок действий, какие нужно собрать документы и оценку перспектив дела. Поддержка на каждом этапе — от обращения в суд до фактического получения алиментых выплат. Запишитесь уже сегодня!
Новое в категории: https://le-parfume.ru/5552-armani-code-ultimate/
Хочешь казино бонус? топ новых бонусов без депозита всегда актуальные бонусы в онлайн казино. Получайте бонусы без вложений, фриспины и подарки за регистрацию. Актуальные предложения, честные условия отыгрыша и список проверенных казино с бонусами без депозита.
продвижение интернет сайта омск [url=https://elektroportal.ru/news/corp/253314/]продвижение интернет сайта омск[/url] .
Коллеги, вопрос к тем, кто в высококонкурентных темах. Ситуация: сайт вылизал до блеска, а конкуренты в топе как сидели, так и сидят. Подозреваю, что без накрутки поведенческих факторов там не обошлось. Почитал тут статью, как раз чтобы понять масштабы. Оказывается, это целая индустрия с серверами, базами отпечатков и бюджетами от 15 тысяч в месяц. Автор прямо пишет, что в некоторых нишах накрутка стала необходимостью. Грустно, но теперь хоть понимаю, с чем имеем дело.
seo services company [url=https://reiting-seo-kompaniy.ru/]reiting-seo-kompaniy.ru[/url] .
vendor platform link – Quick visit shows a clean layout and clear content.
click to explore shop – It appears consistent, and browsing didn’t feel confusing at all.
quick vendor site – Browsed quickly, everything appears clear and neatly arranged.
this vendor workshop – Opened for a moment, layout feels clean and intuitive.
price prediction btcusa – Mobile version looks perfect; no glitches, fast scrolling, crisp text.
explore vendor collective – The selection looks appealing, and you might come across some bargains.
vendor platform link – Opened for a moment, information is clear and the layout is neat.
explore opal collective – Pleasant design and smooth navigation make the site enjoyable to check out.
opal hub marketplace – Organized platform where moving between pages feels smooth.
1win vip bonus [url=www.1win76138.help]1win vip bonus[/url]
Лучшие казино онлайн казино россии: актуальный список онлайн казино с высоким рейтингом, быстрым выводом средств и выгодными бонусами. Обзор лицензий, игр и платежных методов поможет выбрать надежное казино для комфортной игры.
Халява казино фриспины за регистрацию: фриспины за регистрацию, бонусы без пополнения и акции для новых игроков. Сравнивайте условия отыгрыша, выбирайте проверенные онлайн казино и начинайте играть бесплатно с возможностью вывода выигрыша.
Лучшие фриспины 2026 https://nodepositcasinobonuscodes.ru: бесплатные вращения в онлайн казино без вложений. Подборка проверенных сайтов, бонусы за регистрацию, честные условия отыгрыша и возможность вывода выигрыша без риска для игроков.
мелбет депозит мбанк [url=www.melbet36290.help]www.melbet36290.help[/url]
ебет на йоге [url=https://yoga-porno.ru/]ебет на йоге[/url] .
Официальный сайт покерок скачать: регистрация, вход, бонусы и игра в онлайн покер. Обзор возможностей, турниров, кеш-столов и мобильного приложения. Узнайте, как начать играть и выводить деньги на проверенной платформе.
browse store options – Navigation is simple, and moving between listings is quick.
Лучшие казино https://rating-casino-russia.ru: актуальный список онлайн казино с высоким рейтингом, быстрым выводом средств и выгодными бонусами. Обзор лицензий, игр и платежных методов поможет выбрать надежное казино для комфортной игры.
Халява казино фриспины за регистрацию: фриспины за регистрацию, бонусы без пополнения и акции для новых игроков. Сравнивайте условия отыгрыша, выбирайте проверенные онлайн казино и начинайте играть бесплатно с возможностью вывода выигрыша.
sweet bonanza mines mx [url=https://sweet-bonanza18364.help]sweet bonanza mines mx[/url]
Лучшие фриспины 2026 промокоды на фриспины: бесплатные вращения в онлайн казино без вложений. Подборка проверенных сайтов, бонусы за регистрацию, честные условия отыгрыша и возможность вывода выигрыша без риска для игроков.
tealvendorcollective.shop – Browsed quickly, site looks practical and easy to follow.
Официальный сайт https://pokervip.ru: регистрация, вход, бонусы и игра в онлайн покер. Обзор возможностей, турниров, кеш-столов и мобильного приложения. Узнайте, как начать играть и выводить деньги на проверенной платформе.
wetten spiel
Also visit my blog … Buchmacher Bundestagswahl
усиление грунта при строительстве на слабых грунтах [url=https://usilenie-gruntov-1.ru/]usilenie-gruntov-1.ru[/url] .
start browsing vendors – I liked the variety here, and finding products was quick and easy.
продвинуть сайт в москве [url=https://prodvizhenie-sajtov-v-moskve15.ru/]prodvizhenie-sajtov-v-moskve15.ru[/url] .
капитальный ремонт здания цена [url=https://remont-zdaniya-1.ru/]remont-zdaniya-1.ru[/url] .
1win depozit bonusi Oʻzbekiston [url=http://1win5768.help]http://1win5768.help[/url]
vendor hub portal – Browsed a bit, everything seems organized and easy to navigate.
wettprognose heute
Also visit my web site – sportwetten tipps profis – Erick,
https://9777dbt1.org/mobile-casino 9777 dbt
orchardridge creative hub – Everything appears organized, making browsing effortless.
комплексное продвижение сайтов омск [url=https://elektroportal.ru/news/corp/253314/]комплексное продвижение сайтов омск[/url] .
Get free this page VIN decoding service that breaks down every digit of vehicle identification number.
мостбет фрибет Кыргызстан [url=www.mostbet27541.help]www.mostbet27541.help[/url]
Free check run vin check reveals critical information about vehicle past that sellers might hide.
orchard studio hub – Platform design appears simple and easy to move through.
https://2ev4–win-in.com/
https://eva-kasino.top/
https://md.linksjugend-solid.de/s/ysp4w7bYa
besten sportwetten strategie (Ira) apps
https://md.linksjugend-solid.de/s/zpf6ixwDn
visit online marketplace – The design is clean and intuitive, so checking products is stress-free.
visit vendor collections – Everything loads well, and browsing here is surprisingly pleasant.
Check out charter a private jet which offers instant private jet charter booking to over 5000 airports worldwide.
Every buyer this tool should decode VIN number before purchasing any used vehicle.
Useful tool view site instantly scans records to compile comprehensive vehicle condition report.
Get accurate rentprivatejetfly.com private jet cost estimates that include all fees and taxes upfront.
Нужен дизайн участка? услуги ландшафтного дизайнера проектирование и благоустройство участка с учетом рельефа, растений и стиля. Создаем красивые и функциональные решения для частных домов и дач, подбираем материалы и обеспечиваем качественную реализацию проекта.
This resource private charter jets helps busy professionals book private jet flights without membership fees.
Jogo do Tigrinho ao vivo chat: já ganhou bônus interagindo com outros jogadores?
Reliable service private jet rental pricing shows real time private jet rental rates from verified charter operators.
Нужен дизайн участка? ландшафтный дизайн участка проектирование и благоустройство участка с учетом рельефа, растений и стиля. Создаем красивые и функциональные решения для частных домов и дач, подбираем материалы и обеспечиваем качественную реализацию проекта.
seo network [url=https://lesstroy.net/articles/4275/]seo network[/url] .
click to explore marketplace – The layout is user-friendly, and navigating between sections is simple.
слоти sweet bonanza Україна [url=https://sweet-bonanza54072.help]https://sweet-bonanza54072.help[/url]
gain momentum here – Provides motivation to keep moving forward step by step.
melbet usdt [url=http://melbet41682.help/]http://melbet41682.help/[/url]
Брендирование сувениров https://4youcreation.kz в Алматы по современным технологиям. Специалисты предлагают лазерную гравировку, УФ-печать и термоперенос на ткани, стекло, металл и пластик. Организуют доставку по всему Казахстану.
Компания FarbWood https://farbwood.by предлагает пиломатериалы из сибирской лиственницы для частного и коммерческого строительства в Минске и по всей территории Минска. Мы работаем только с лиственницей сибирской, сосна и ель используются как дополнение к основному ассортименту древесины.
Нужна накрутка соц сетей? накрутка просмотров тик ток увеличение подписчиков, лайков и просмотров для продвижения аккаунтов. Быстрый старт, безопасные методы и живая активность помогут развить профиль и повысить вовлеченность в популярных социальных платформах.
1xbet ?ye ol [url=https://1xbet-50.com/]1xbet-50.com[/url] .
секс на тренировке по йоге [url=https://yoga-porno.ru/]секс на тренировке по йоге[/url] .
The best porn generator generate porn videos ai your fantasies remain strictly between you and the neural network. Instant, high-quality generation, extensive scenario and character customization.
check this link – Ideas can transform into real results when acted upon consistently.
Обновлено сегодня: https://crocothemes.com/demontazh-doma-i-podgotovka-utchastka-kak-organizovaty-rabot-bez-lishnih-riskov.html
xbet giri? [url=https://1xbet-51.com/]xbet giri?[/url] .
birxbet [url=https://1xbet-49.com/]birxbet[/url] .
Брендирование сувениров https://4youcreation.kz/termoperenos/ в Алматы по современным технологиям. Специалисты предлагают лазерную гравировку, УФ-печать и термоперенос на ткани, стекло, металл и пластик. Организуют доставку по всему Казахстану.
discover details – Thoughtful application of ideas ensures progress develops over time.
Компания FarbWood https://farbwood.by предлагает пиломатериалы из сибирской лиственницы для частного и коммерческого строительства в Минске и по всей территории Минска. Мы работаем только с лиственницей сибирской, сосна и ель используются как дополнение к основному ассортименту древесины.
Нужна накрутка соц сетей? накрутка просмотров в вк увеличение подписчиков, лайков и просмотров для продвижения аккаунтов. Быстрый старт, безопасные методы и живая активность помогут развить профиль и повысить вовлеченность в популярных социальных платформах.
bring ideas alive – Motivating thought, moving from thinking to doing creates impact.
sweet bonanza depósito con tarjeta de débito [url=sweet-bonanza18364.help]sweet-bonanza18364.help[/url]
mostbet Тоҷикистон app боргирӣ [url=https://mostbet95163.help]mostbet Тоҷикистон app боргирӣ[/url]
The best porn generator generate porn videos ai your fantasies remain strictly between you and the neural network. Instant, high-quality generation, extensive scenario and character customization.
Подробности внутри: https://mixstuff.ru/archives/316806
1win retrageri rapide [url=http://1win5808.help/]http://1win5808.help/[/url]
orchard creative workshop – Fast page loading keeps the browsing experience pleasant.
see more info – Well-presented listings and intuitive menus make property browsing easy.
проект капитального ремонта здания [url=https://remont-zdaniya-1.ru/]remont-zdaniya-1.ru[/url] .
act and achieve – Strong message, consistent steps turn ideas into results.
усиление грунта под мостом [url=https://usilenie-gruntov-1.ru/]usilenie-gruntov-1.ru[/url] .
mostbet ворид шудан бе парол [url=http://mostbet95163.help]http://mostbet95163.help[/url]
discover active ideas – This shows that concepts gain value only when put into motion.
плинко казино слоты [url=www.plinko61038.help]плинко казино слоты[/url]
open this link – Events are easy to browse thanks to simple design and clear labeling.
see more info – Educational materials are interactive, clear, and enjoyable.
keep it simple – This really stands out, simplicity often boosts efficiency.
see more info – Turning thoughts into action keeps momentum strong and results tangible.
мелбет скачать через браузер [url=http://melbet36290.help]мелбет скачать через браузер[/url]
explore focused development – Knowing your direction enhances steady and effective growth.
click for steady motion – Taking action naturally directs tasks toward completion.
read this page – Ideas that are clearly defined help teams achieve real forward movement.
check it out – Insightful resource covering the scope and quality of professional services.
see organized action – Purposeful action keeps workflow smooth and predictable.
pearl vendor directory – Everything looks orderly and simple to navigate.
vorhersagen sportwetten
Also visit my webpage … wett Tipp ai erfahrungen
pearl vendor portal hub – The structure looks neat and everything is easy to locate.
think strategically – I like this, deliberate planning strengthens results over time.
read this page – Attractive layout and clear reservation options improve the user experience.
1xbet turkey [url=https://1xbet-47.com/]1xbet-47.com[/url] .
1xbet giri?i [url=https://1xbet-50.com/]1xbet giri?i[/url] .
explore smart clarity – Having a clear view gives you an advantage over others.
ебет на йоге [url=https://yoga-porno.ru/]ебет на йоге[/url] .
плинко apk установка [url=https://plinko61038.help/]плинко apk установка[/url]
visit this guide – Eye-catching design and an inviting feel make the site easy to enjoy.
1xbet [url=https://1xbet-51.com/]1xbet[/url] .
1xbet giri? linki [url=https://1xbet-49.com/]1xbet giri? linki[/url] .
мелбет сомонаи расмӣ [url=melbet20856.help]melbet20856.help[/url]
build consistency – This resonates, regular effort creates lasting traction.
visit now – Fun and user-friendly, signing up for the club is a smooth process.
view directed energy – Focused work leads to quicker and stronger outcomes.
discover more – Well-defined focus allows momentum to build efficiently.
discover details – The site is visually appealing and makes finding information quick and simple.
explore now – Clear strategy creates natural progress without unnecessary friction.
visit now – Steady traction creates a reliable path for achieving project milestones.
act with purpose – Strong message, clear intent leads to better decisions.
this website – Building traction gradually ensures reliable forward motion in any project.
tap here – Browsing Broadway theater locations online is quick and straightforward with this tool.
Всем привет! Рзучал тему развития бизнеса РІ интернете Рё наткнулся РЅР° полезную статью. Там РїСЂРѕ комплексное продвижение сайтов: SEO, контекст, контент-маркетинг, соцсети, аналитику. Есть блок РїСЂРѕ ошибки Рё РїСЂРѕ современные тренды — персонализация, РР, омниканальность. Рекомендую Рє прочтению: https://wikicom.ru/2025/12/jeffektivnoe-prodvizhenie-sajtov-i-razvitie-biznesa-v-internete/
discover faster clarity – Clear thinking helps decisions happen quicker and with more confidence.
1xbet t?rkiye giri? [url=https://1xbet-52.com/]1xbet-52.com[/url] .
wetten vorhersagen app
my web site :: sportwetten tipps forum
shop here now – Everything loads quickly, creating a seamless shopping experience.
push forward – This resonates, progress depends on taking initiative.
marketingautomation – Pages loaded fast, images appeared sharp, and formatting stayed consistent.
ideasflowwithintent.click – A smart approach inspires focused implementation of ideas each day.
start opening new paths – Taking initiative reveals opportunities that would otherwise go unnoticed.
1xbet yeni giri? adresi [url=https://1xbet-50.com/]1xbet yeni giri? adresi[/url] .
1xbet g?ncel [url=https://1xbet-47.com/]1xbet g?ncel[/url] .
more info here – Highlights Elmhurst initiatives and local efforts in a clear, organized way.
read this page – Structured thinking keeps projects on track and progressing smoothly.
discover items here – The site is clear and organized, creating a pleasant shopping experience.
analyticsreport – Loved the layout today; clean, simple, and genuinely user-friendly overall.
reachriver – Color palette felt calming, nothing distracting, just focused, thoughtful design.
go to page – Well-organized concepts make project advancement straightforward and effective.
unlock clear thinking – This stands out, it promotes better understanding in confusion.
плинко новое зеркало [url=http://plinko61038.help/]плинко новое зеркало[/url]
view effective actions – When your thinking is clear, your actions produce better outcomes.
visit this guide – Taking practical steps fast builds momentum and drives progress effectively.
more info here – Directing momentum correctly leads to smoother and more reliable advancement.
find out more – Proper momentum management leads to smoother and more effective outcomes.
Is the Lounge777app any good? I’m looking for a new app to try so I might download from lounge777app!
Downloaded the JL3comapp last night. Easy to install, and the games run smoothly. The app is definitely worth a try. Check them out at jl3comapp.
Lodi291login is so easy to use which is a great feature. Create an account and start betting in Minutes. Check out the easy login at lodi291login.
1xbet g?ncel [url=https://1xbet-49.com/]1xbet g?ncel[/url] .
check store page – Navigation is intuitive, and products are easy to locate in a visually clean design.
explore here – The site shares innovative concepts for social improvement that are easy to understand.
lead with vision – I like this idea, having a clear vision helps drive purposeful action.
melbet скачать на телефон [url=https://melbet36290.help]https://melbet36290.help[/url]
https://2ev4–win-in.com/
check daily progress – Consistency each day creates a natural forward movement.
усиление грунта москва и область [url=https://usilenie-gruntov-1.ru/]usilenie-gruntov-1.ru[/url] .
visit this platform – The structure makes shopping intuitive, fast, and convenient.
focus fuels growth – Strong idea, attention drives consistent improvement.
more info here – Clearly presented insights highlight challenges to democracy and the need for awareness.
1xbet spor bahislerinin adresi [url=https://1xbet-52.com/]1xbet-52.com[/url] .
tour de france wettquoten
my website – wettanbieter deutschland (https://ddwenterprises.com/)
growthmovescleanly.click – Smooth execution ensures growth progresses naturally and can be monitored easily.
discover more – Organized execution helps growth move forward smoothly and predictably.
гидроизоляция подвала москва [url=https://gidroizolyacziya-podvalov.ru/]gidroizolyacziya-podvalov.ru[/url] .
explore intentional movement – Focus gives structure and clarity to every step you take.
visit this resource – When goals are well defined, everyone can move in sync and get things done faster.
https://www.jointcorners.com/forums/thread/9550/
click to visit – The structure makes navigating and purchasing products simple and fast.
tap here – Without direction, movement drifts aimlessly, reducing its impact.
1xbet giri? [url=https://1xbet-47.com/]1xbet giri?[/url] .
decode the signals – Strong idea, interpreting information carefully drives improvement.
mostbet Бохтар [url=http://mostbet95163.help/]mostbet Бохтар[/url]
check this link – When direction is missing, progress slows, so clear guidance is key.
Leading store how to start paper trading competition in discord for crypto perps gives media buyers access to aged, warmed, and verified profiles sorted by geo, trust level, and ad readiness. Geo-targeted options cover USA, UK, Germany, France, Poland, Ukraine, and other regions with proper IP history and locale settings. Access the full catalog today and discover why top-performing affiliates and agencies choose this platform for their account needs.
Full-service dealer buy business manager account facebook goes beyond selling by providing operational guides, restriction breakdowns, and platform update summaries. Orders are processed through a secure checkout system with multiple payment options and encrypted credential delivery via personal dashboard. Access the full catalog today and discover why top-performing affiliates and agencies choose this platform for their account needs.
Full-service dealer buy a gmail email goes beyond selling by providing operational guides, restriction breakdowns, and platform update summaries. The knowledge base includes working guides for account warming, ad launch protocols, and reinstatement check procedures for reference. Scale your advertising operations on a foundation of quality — verified profiles, complete credentials, and expert operational support.
Всем привет! Рзучал тему развития бизнеса через интернет Рё нашел хороший РѕР±Р·РѕСЂ. Статья называется “Рффективное продвижение сайтов Рё развитие бизнеса РІ интернете”. Там РїРѕРґСЂРѕР±РЅРѕ разобраны основные каналы: SEO, контекст, соцсети, аналитика. Особенно полезно для тех, кто хочет системно подойти Рє РІРѕРїСЂРѕСЃСѓ, Р° РЅРµ работать хаотично. Р’РѕС‚ ссылка, если РєРѕРјСѓ интересно: http://harizma86.ru/jeffektivnoe-prodvizhenie-sajtov-i-razvitie-biznesa-v-internete/
Experienced supplier buy bulk instagram accounts offers complete asset packages including login credentials, recovery access, 2FA codes, cookies, and user-agent data. Quality monitoring runs continuously — accounts are spot-checked after listing to maintain catalog integrity and buyer satisfaction rates. Instant delivery, verified quality, and dedicated support — everything a professional advertiser needs in one marketplace.
Established supplier google ads account suspended for circumventing systems maintains the largest selection of quality accounts with transparent specs and competitive pricing for bulk buyers. Aged profiles with natural activity patterns consistently outperform fresh registrations in ad delivery quality and checkpoint avoidance rates. Join thousands of satisfied advertisers who source their campaign infrastructure from a verified and trusted marketplace.
світ бонанза фріспіни Україна [url=https://sweet-bonanza54072.help/]https://sweet-bonanza54072.help/[/url]
Established supplier old discord accounts buy maintains the largest selection of quality accounts with transparent specs and competitive pricing for bulk buyers. Cross-platform inventory allows teams to source accounts for multiple advertising channels from a single trusted supplier relationship. Scale your advertising operations on a foundation of quality — verified profiles, complete credentials, and expert operational support.
Cost-effective marketplace twitter business manager offers competitive rates without compromising on account quality, verification completeness, or delivery speed. The team provides onboarding guidance for new buyers and ongoing operational support for teams managing high-volume campaign portfolios. Scale your advertising operations on a foundation of quality — verified profiles, complete credentials, and expert operational support.
Top-rated dealer buy aged gmail accounts 2024 has been serving the media buying community since 2020 with consistent product quality and responsive customer support. Aged profiles with natural activity patterns consistently outperform fresh registrations in ad delivery quality and checkpoint avoidance rates. Access the full catalog today and discover why top-performing affiliates and agencies choose this platform for their account needs.
Certified platform instagram aged account buy tracks account health metrics proactively and notifies buyers of any status changes during the guarantee period. Product cards display exact specifications including account age, verification level, included assets, geo origin, and current stock availability. Professional media buying starts with professional tools — source from a marketplace built by advertisers, for advertisers.
Top-rated dealer purchase old google ads accounts has been serving the media buying community since 2020 with consistent product quality and responsive customer support. The marketplace serves a global buyer base with English-speaking support available via Telegram for product selection and order management. Scale your advertising operations on a foundation of quality — verified profiles, complete credentials, and expert operational support.
check this out – Focusing efforts properly amplifies outcomes significantly over time.
https://eva-play.casino/
https://eva-play.casino/
https://3ev4joy.com/
https://3ev4joy.com/
mostbet смс код не приходит [url=https://mostbet78063.help]https://mostbet78063.help[/url]
open the marketplace – Layout is straightforward, making vendor selection quick and user-friendly.
check this link – Easy-to-navigate site presents horseback riding programs in a user-friendly way.
melbet вывод на сбп сколько по времени [url=www.melbet41682.help]melbet вывод на сбп сколько по времени[/url]
1xbet giri? [url=https://1xbet-49.com/]1xbet giri?[/url] .
Cost-effective marketplace buy hotmail accounts offers competitive rates without compromising on account quality, verification completeness, or delivery speed. Aged profiles with natural activity patterns consistently outperform fresh registrations in ad delivery quality and checkpoint avoidance rates. From first purchase to ongoing scaling, the platform supports every stage of a media buyer’s operational journey.
see energy in action – Focused effort propels progress and strengthens outcomes over time.
Quality-focused marketplace buy a reddit account with karma runs multi-step verification on every listing before it reaches the catalog to protect buyer interests. Aged profiles with natural activity patterns consistently outperform fresh registrations in ad delivery quality and checkpoint avoidance rates. Access the full catalog today and discover why top-performing affiliates and agencies choose this platform for their account needs.
Reputable service protonmail benefits publishes detailed product cards showing account age, verification status, included assets, and exact pricing tiers. A loyalty program with cashback on every order makes repeated purchases more cost-effective for teams with regular sourcing requirements. Invest in verified account infrastructure and redirect the time saved from troubleshooting into actual campaign optimization work.
Full-service dealer buy yahoo mail goes beyond selling by providing operational guides, restriction breakdowns, and platform update summaries. The platform combines speed and reliability — most products are delivered automatically within minutes after payment confirmation. Build your campaigns on accounts with proven trust — higher trust means better delivery, lower costs, and fewer interruptions.
useful link – Modern design and clear organization improve overall usability.
start here – Dedicated attention helps projects move faster and stay on track.
Reputable service buy old youtube account publishes detailed product cards showing account age, verification status, included assets, and exact pricing tiers. Aged profiles with natural activity patterns consistently outperform fresh registrations in ad delivery quality and checkpoint avoidance rates. Instant delivery, verified quality, and dedicated support — everything a professional advertiser needs in one marketplace.
tap here – Intuitive sections guide visitors seamlessly through the purchase process.
visit this hub – Everything is neatly structured, so finding and browsing vendors is effortless.
Wholesale supplier buy karma reddit enables teams to source diverse account portfolios across platforms and geos from a single centralized marketplace. Each listing comes with complete access data including email, password, cookies, token, and user-agent string for seamless campaign setup. From first purchase to ongoing scaling, the platform supports every stage of a media buyer’s operational journey.
Trusted platform outlook imap offers premium accounts with verified quality, complete credentials, and instant automated delivery. Step-by-step documentation accompanies every order, covering login procedure, security setup, and recommended first actions after access. Whether you need accounts for testing or production campaigns, the catalog covers every tier from entry-level to premium.
Premium marketplace protonmail anonymous features an extensive inventory updated daily across all major geos including USA, Europe, and Asia-Pacific regions. Step-by-step documentation accompanies every order, covering login procedure, security setup, and recommended first actions after access. Whether you need accounts for testing or production campaigns, the catalog covers every tier from entry-level to premium.
Quality-focused marketplace bulk buy yahoo accounts runs multi-step verification on every listing before it reaches the catalog to protect buyer interests. Geo-targeted options cover USA, UK, Germany, France, Poland, Ukraine, and other regions with proper IP history and locale settings. Competitive pricing, fast delivery, and professional support make this a preferred choice for serious media buyers.
see what happens – That’s a great point, taking chances leads to clarity.
Leading store buy aged youtube channels cheap gives media buyers access to aged, warmed, and verified profiles sorted by geo, trust level, and ad readiness. Geo-targeted options cover USA, UK, Germany, France, Poland, Ukraine, and other regions with proper IP history and locale settings. Professional media buying starts with professional tools — source from a marketplace built by advertisers, for advertisers.
Юридическая помощь по защите прав ребенка — это поддержка в самых важных ситуациях: от споров о месте проживания и алиментах до защиты от насилия и нарушения прав в школе. Переходите по запросу [url=https://www.pravovik24.ru/konsultatsii/yurist-po-pravam-rebenka/]детский юрист Москва[/url] и квалифицированный юрист поможет отстоять интересы ребенка, подготовить документы и представить ваши интересы в суде, обеспечив безопасность и справедливость.
open this link – Pricing is easy to follow thanks to clear formatting and explanations.
1win logare [url=http://1win5808.help]http://1win5808.help[/url]
leovegas online casino united states, apple pay casino canada and spin palace casino canada download, or
best gambling website united states
My website how to play blackjack with Friends
1xbet [url=https://1xbet-48.com/]1xbet[/url] .
all united statesn bingo, is there a online casino $1000 bonus
in sydney united states and top poker sites in united states, or no deposit roulette bonus usa
use this page – Direction guides energy so progress doesn’t falter or lose focus.
мостбет хати ставка [url=https://www.mostbet95163.help]мостбет хати ставка[/url]
sweet bonanza платежі безпечно [url=https://www.sweet-bonanza54072.help]https://www.sweet-bonanza54072.help[/url]
1xbet giri?i [url=https://1xbet-52.com/]1xbet-52.com[/url] .
read here – Properly directed energy makes advancement smooth and effective.
open motion link – Taking steps forward ensures that progress doesn’t stall.
learn more here – Streamlined steps guide progress naturally and efficiently.
visit online emporium – Navigation is simple, helping users explore a variety of products quickly.
move consistently – I agree, regular effort compounds into strong results.
плинко приложение android скачать [url=https://plinko61038.help]https://plinko61038.help[/url]
read here – Professional presentation ensures that campaign goals and policies are easy to follow.
мелбет mines чӣ гуна бозӣ кардан [url=www.melbet20856.help]www.melbet20856.help[/url]
mostbet mirror [url=https://mostbet95163.help]https://mostbet95163.help[/url]
see focused growth path – Clarity in thought makes advancing toward goals far easier.
отделка подвала [url=https://gidroizolyacziya-podvalov.ru/]gidroizolyacziya-podvalov.ru[/url] .
мелбет новый сайт [url=https://melbet41682.help]мелбет новый сайт[/url]
1xbet t?rkiye giri? [url=https://1xbet-51.com/]1xbet t?rkiye giri?[/url] .
Vendor House Market – Browsing products feels intuitive and hassle-free.
ремонт бетонных конструкций жилой дом [url=https://remont-betona-1.ru/]remont-betona-1.ru[/url] .
подъем фундамента и усиление грунта [url=https://usilenie-gruntov-1.ru/]usilenie-gruntov-1.ru[/url] .
check details – Clear and structured concepts guide smooth project execution.
explore the page – Organized and clarified ideas make projects run smoothly and effectively.
find out more – The site provides clear info on activities, times, and event locations.
wetten die man nicht gewinnen kann
My blog Halbzeit oder endstand wette
1win suport 24/7 [url=www.1win5808.help]www.1win5808.help[/url]
online wettseite
my website; wetten bonus Freispielen
explore guided direction – Each step adds clarity to where you’re heading next.
1xbet tr giri? [url=https://1xbet-53.com/]1xbet-53.com[/url] .
visit this guide – A clear path ensures that every step taken contributes meaningfully to results.
discover items here – Navigation is intuitive, making it easy to explore and select products.
this link here – Forward energy, when guided properly, sustains momentum and consistent achievement.
lucky jet дар melbet [url=https://melbet20856.help]lucky jet дар melbet[/url]
1x bet giri? [url=https://1xbet-50.com/]1x bet giri?[/url] .
more info here – Energy released toward progress helps maintain steady momentum and achieve goals.
browse this – User-friendly layout makes exploring temple activities and events fast and straightforward.
чӣ тавр мелбет apk-ро боргирӣ кардан [url=melbet20856.help]чӣ тавр мелбет apk-ро боргирӣ кардан[/url]
gain momentum with focus – Focus energizes efforts and supports steady advancement.
Rose Cove Essentials – Everything is well organized and enjoyable to browse.
see more info – Clear understanding of goals makes keeping momentum much easier.
1 x bet giri? [url=https://1xbet-48.com/]1xbet-48.com[/url] .
go here – Cute visuals combined with clear navigation create a pleasant shopping experience.
світ бонанза демо грати [url=https://sweet-bonanza54072.help/]https://sweet-bonanza54072.help/[/url]
tap here – Clear and playful design ensures a pleasant experience browsing pet products.
more info – Well-directed focus keeps forward movement consistent and efficient.
learn more now – Clear, purposeful action moves growth along naturally and steadily.
explore the market – Everything is easy to locate, making online shopping convenient and quick.
visit now – Strategic direction turns ordinary movement into effective action.
melbet слотҳо онлайн [url=www.melbet20856.help]melbet слотҳо онлайн[/url]
мелбет обновленная версия [url=www.melbet41682.help]мелбет обновленная версия[/url]
use this page – Navigation is smooth, making it simple to explore books, databases, and programs.
explore clear steps – Clarity in thought sets the foundation for steady advancement.
ремонт бетонных конструкций трещины [url=https://remont-betona-1.ru/]ремонт бетонных конструкций трещины[/url] .
check growth clarity – Attention and focus keep forward motion steady and uninterrupted.
start progress focus – Focused thought propels you ahead and keeps growth on track.
see available vendors – The hub is well-structured, making it effortless to browse and select vendors.
visit this resource – Attention to priorities energizes workflow and maintains consistent progress.
1xbet yeni giri? [url=https://1xbet-53.com/]1xbet yeni giri?[/url] .
цементация грунтов [url=https://usilenie-gruntov-1.ru/]цементация грунтов[/url] .
1win site blocat solutie [url=http://1win5808.help]1win site blocat solutie[/url]
1xbet turkiye [url=https://1xbet-51.com/]1xbet turkiye[/url] .
http://starline-saratov.ru/catalog/pages/sovety_po_prohoghdeniyu_igry_griftlands_prohoghdenie_syugheta_003.html
Юридическая помощь по защите прав ребенка — это поддержка в самых важных ситуациях: от споров о месте проживания и алиментах до защиты от насилия и нарушения прав в школе. Переходите по запросу [url=https://www.pravovik24.ru/konsultatsii/yurist-po-pravam-rebenka/]детский адвокат сайт[/url] и квалифицированный юрист поможет отстоять интересы ребенка, подготовить документы и представить ваши интересы в суде, обеспечив безопасность и справедливость.
learn more – Initiatives are easy to understand, making it simple to engage and contribute.
1 xbet [url=https://1xbet-50.com/]1 xbet[/url] .
plinko подтвердить аккаунт [url=https://plinko61038.help/]https://plinko61038.help/[/url]
Collective Vendor Space – Vendors are well displayed and moving through listings is simple.
check clear progress – Direction brings stability and strength to growth efforts.
tap here – Efficient strategies create reliable growth while avoiding wasted effort.
reference link – Clear planning of concepts leads to smooth project movement.
reference link – Smart planning frameworks support steady advancement with minimal wasted effort.
1 x bet [url=https://1xbet-48.com/]1xbet-48.com[/url] .
more info here – The site presents voter resources clearly and efficiently for quick access.
more info here – Clarity in planning fuels steady momentum over time for better results.
1xbet giri? yapam?yorum [url=https://1xbet-47.com/]1xbet-47.com[/url] .
view moving plans – Daily action ensures strategy achieves measurable outcomes.
coastharborbazaar – Browsing this bazaar today was enjoyable, with a clean and welcoming layout.
follow strategy in action – Strategy requires movement to gain momentum and achieve results.
visit this site – Navigation is smooth and the design gives a professional, polished impression.
Обработка древесины — ключевой момент для долговечности детской площадки. Качественная пропитка защищает от грибка, гнили и насекомых. Спросите у производителя, какую обработку они используют — это важно.
Дом из клееного бруса под ключ — от проекта до заселения
tap here – Strategic clarity multiplies results and reduces unnecessary work.
Coast Stone Bazaar – Browsing sections is easy, with fast-loading pages and a neat layout.
growththroughdesign.click – Thoughtful design of processes ensures growth occurs smoothly and steadily.
ремонт бетонных конструкций жилой дом [url=https://remont-betona-1.ru/]remont-betona-1.ru[/url] .
click for insight – Designing with intent ensures growth progresses naturally and effectively.
melbet тағйири забон [url=http://melbet20856.help]melbet тағйири забон[/url]
1xbet ?yelik [url=https://1xbet-54.com/]1xbet ?yelik[/url] .
Silk Vendor Finds – Navigation feels intuitive and products are clearly listed.
plinko oyunu 1win [url=www.1win82430.help]www.1win82430.help[/url]
open this page – Momentum builds naturally when everyone understands the path forward.
check coppercove emporium – Pages load fast, and the interface is user-friendly and enjoyable to explore.
світ бонанза Монобанк [url=https://sweet-bonanza54072.help]світ бонанза Монобанк[/url]
1win special offers [url=https://www.1win5523.ru]https://www.1win5523.ru[/url]
вертикальная гидроизоляция подвала [url=https://gidroizolyacziya-podvalov.ru/]вертикальная гидроизоляция подвала[/url] .
порно ролики на йоге [url=https://yoga-porno.ru/]порно ролики на йоге[/url] .
use this page – Recognizing signals in time can steer choices in a more effective direction.
Vendor Hub Studio – Products are clearly shown, and exploring is stress-free.
discover details – Observing the right signals improves decision quality and reduces errors.
1xbet mobi [url=https://1xbet-48.com/]1xbet-48.com[/url] .
check ztrategies – Everything is neatly arranged, making browsing convenient.
copperstone finds – Navigation feels effortless and exploring different sections was relaxing.
check this site – The pages look organized and overall very engaging.
mostbet регистрация [url=http://mostbet78063.help/]http://mostbet78063.help/[/url]
oldschoolportal – Engaging vintage feel, content is smooth to explore.
go to page – Clear thinking supports faster, smoother execution in every step.
SilverGrove Showcase – Navigation is effortless and finding vendors is stress-free.
click for insight – Focusing less on overanalyzing enables faster and easier results.
check coralharbor outlet – Marketplace pages feel organized and comfortable to navigate.
1win descarcare aplicatie pariuri [url=https://www.1win5808.help]https://www.1win5808.help[/url]
buy here – The overall layout is neat and easy to use.
cozyweb – Feels welcoming, like a small digital hideout.
creativepaws – Artistic vibe, content feels fresh and imaginative.
Vendor Collective Gallery – Everything is organized neatly, and exploring items is seamless.
1 xbet giri? [url=https://1xbet-54.com/]1xbet-54.com[/url] .
check coralstone bazaar – Layout feels well-organized, making browsing vendors a pleasant experience.
buzzhubonline – Smooth interface, browsing updates feels intuitive and easy.
click to view – Flowing ideas with a plan improves efficiency and strengthens outcomes.
browse this – Structured idea flow helps transform creative concepts into practical, results-driven action.
voice4reform – Interesting and well-crafted content worth exploring.
click to see – Information is laid out cleanly, making the site easy to navigate.
мостбет ставки на баскетбол Кыргызстан [url=https://mostbet78063.help/]https://mostbet78063.help/[/url]
ravensummitmarket – This platform caught my attention, I’ll likely check it out again.
check cottonbrook market – Sections are clearly defined and navigation feels relaxed and easy.
see more info – Fast navigation makes browsing offers simple and enjoyable.
dankglassview – Easy to navigate, products are presented nicely.
секс на тренировке по йоге [url=https://yoga-porno.ru/]секс на тренировке по йоге[/url] .
useful link – Clear design keeps deal discovery quick and efficient.
1win live casino [url=https://1win5523.ru/]https://1win5523.ru/[/url]
communityzone – Navigation is intuitive and the layout is lighthearted.
brood base hub – Clean layout and simple navigation make exploring enjoyable.
shop cottonmeadow online – Pages load fast, making browsing items straightforward and easy.
Всем привет! Делюсь найденным материалом. Статья про продвижение сайтов и развитие бизнеса в интернете. Хороший базовый обзор с акцентом на комплексный подход: SEO, контекст, SMM, аналитика. Особенно порадовал раздел про частые ошибки — полезно для самопроверки. Вот ссылка для тех, кому нужно структурировать знания: https://yana-troyanova.ru/stati/jeffektivnoe-prodvizhenie-sajtov-i-razvitie-biznesa-v-internete/
гидроизоляция подвала гаража [url=https://gidroizolyacziya-podvalov.ru/]гидроизоляция подвала гаража[/url] .
musionetportal360 – Sleek and structured, navigating the site is effortless.
check resource – I’m happy I found this, it has some solid details.
moon vendor shop – There’s useful information on this page, worth the visit.
executivehub – Professional and concise, very user-friendly.
snapspace – Beautifully shot and presented, visuals really stand out.
visit the pier – Smooth interface and well-organized content made the experience fun.
use this page – Incremental motion ensures sustainable momentum and productive outcomes.
see creekharbor marketplace – Navigation is intuitive and sections are easy to explore today.
sportwetten Online Erfahrungen bonus paypal
this link here – Gradual forward motion creates stability and reliable results.
vision hub portal – Organized and clean pages with clear and engaging messaging.
1x bet giri? [url=https://1xbet-54.com/]1x bet giri?[/url] .
travelhellas – Vibrant layout, browsing gives ideas for Greek travels.
sweet bonanza фото документів [url=https://sweet-bonanza54072.help]sweet bonanza фото документів[/url]
click for details – Intuitive design made finding distinctive items quick and easy.
go to page – Well-organized structure made browsing unusual products straightforward.
discover rubystone – The experience is smooth, and pages are well structured.
explore products – A smooth experience with some eye-catching selections available.
explore hub – The site seems well-organized and informative, worth a closer look.
creekstone marketplace – Layout is tidy and moving between sections was easy and enjoyable.
feel good tips – Fun and inspiring pages that are simple to explore.
explore new paths – Clear sections and easy-to-follow pages make navigation pleasant.
enter site – Simple design and responsive pages make browsing smooth.
matchcenter – Detailed breakdowns make following games fun and interactive.
open page – Smooth navigation and minimal design make the site easy to use.
katemarhubonline – Personal and neat, browsing feels smooth and engaging.
мостбет оинаи 2026 [url=http://mostbet95163.help]http://mostbet95163.help[/url]
мостбет бонусы для Кыргызстана [url=http://mostbet78063.help]http://mostbet78063.help[/url]
мелбет депозит через сбп [url=www.melbet41682.help]www.melbet41682.help[/url]
https://tk3666bd1.org/mobile-casino tk3666bet
apkcenter – Organized and neat, downloads are easy to manage.
crowncove marketplace – Interface is calm and browsing through items felt very natural.
https://vibes2lyrics.com/download-mp3/areezy-ori-head/
point hub – Clean layout and concise sections make navigating the site easy.
this link here – Focus amplifies results and ensures every step contributes to real advancement.
Bucbstrikehub – Clear layout, browsing the campaign details is easy and straightforward.
free spins shark freuky, in casino in usa and spin palace casino canada download, or
21 dusaes casino login
my website … blackjack leather mug (Pamala)
1win asistenta Moldova [url=https://1win5808.help/]1win asistenta Moldova[/url]
tap here – Directed attention transforms energy into consistent and measurable progress.
1win change password on site [url=http://1win5523.ru]1win change password on site[/url]
viralshift – Pages loaded fast, images appeared sharp, and formatting stayed consistent.
local advocacy – Engaging content with a professional layout, worth exploring.
reference link – Well-laid-out sections and clear design simplify online buying.
1win sign up [url=www.1win5523.ru]www.1win5523.ru[/url]
modernbuyingstore.shop – Sleek layout and organized sections make shopping quick and easy.
share knowledge – Smooth interface with well-organized sections, makes exploring simple.
wetten dass gewinn
Also visit my page; gratiswette für bestandskunden
infoportal – Content is clear and neatly organized, very approachable.
Ребята, тема больная, но автор разложил её очень грамотно. Особенно понравилось про разделение на внешние и внутренние факторы. Многие новички думают, что главное — это время на сайте, а на самом деле ключевой сигнал для Яндекса — last click (отсутствие возврата в выдачу). В статье это чётко объяснено. И проценты влияния ПФ (20–25%) тоже похожи на правду, судя по моему опыту. Вот ссылка на сам материал: https://partnerkin.com/tribuna/blog-vitalivivdenko/nakrutka-pf-v-yandekse-polnoe- . Буду давать ссылку своим заказчикам, чтобы понимали, за что берутся деньги.
sweet-treasures – Clear design, finding sweets and treats is simple.
access now – Logical organization of content ensures smooth and fast browsing.
netamplify – Appreciate the typography choices; comfortable spacing improved my reading experience.
see this site – The site exudes a peaceful vibe and is comfortable to explore.
check this page – Neatly arranged sections allow users to find information without hassle.
info portal – Clean layout with content easy to browse and understand.
browse crystalcove selections – Elegant boutique site with smooth navigation makes browsing easy.
success insights – Informative sections with a polished interface make learning straightforward.
мелбет не приходит sms [url=https://melbet42089.help]https://melbet42089.help[/url]
leadcircuit – Found practical insights today; sharing this article with colleagues later.
вертикальная гидроизоляция подвала [url=https://gidroizolyacziya-podvalov.ru/]вертикальная гидроизоляция подвала[/url] .
keep advancing – Well-structured pages with uplifting content make browsing enjoyable.
warmpages – Content is friendly and approachable, makes scrolling pleasant.
mostbet tennis tikish [url=www.mostbet37150.help]www.mostbet37150.help[/url]
1xbet tr giri? [url=https://1xbet-53.com/]1xbet-53.com[/url] .
visit brucknerbythebridge – A serene layout that makes exploring the content enjoyable.
start here – A simple structure makes browsing hassle-free.
check out crystalstone emporium – Interface feels tidy and smooth, moving through sections was enjoyable.
globalteamportal – Neat and tidy, finding information is simple.
pinup android ilova [url=www.pinup69053.help]pinup android ilova[/url]
1xbet g?ncel giri? [url=https://1xbet-55.com/]1xbet g?ncel giri?[/url] .
tap here – Directed attention transforms energy into consistent and measurable progress.
shop link – The site provides useful info in a clear format.
more info here – Proper focus directs energy toward meaningful outcomes and continuous improvement.
xbet [url=https://1xbet-49.com/]xbet[/url] .
learn more here – Clear layout allowed seamless browsing of alternative solutions.
localguide – Simple, clean, and very accessible design.
check this out – Well-designed layout made exploring options simple and effective.
rosedesigns – Clean and attractive site, browsing templates is simple and pleasant.
compra express – Smooth pages with products clearly listed and accessible.
daisycove online shop – Neat layout and smooth transitions made exploring products simple.
discover this – Thoughtful content and a polished look, worth exploring.
доставка заказ букета цветов [url=http://zakazat-cveti-moskva.ru]http://zakazat-cveti-moskva.ru[/url] .
ремонт бетонных конструкций железобетонных [url=https://remont-betona-1.ru/]remont-betona-1.ru[/url] .
1win güzgü Azərbaycan [url=https://1win82430.help]1win güzgü Azərbaycan[/url]
access trading info – The site presents information in a simple and efficient way.
check forex info – It provides helpful details and keeps navigation simple for users.
über unter wetten erklärung
Here is my web blog … Deutsche wettseiten
opportunity insights – Well-organized content with direct and understandable information.
planitclip – Layout is user-friendly, great for keeping events in order.
hiddenhub – There’s something quietly captivating about this page.
1win crash roulette [url=http://1win5523.ru/]http://1win5523.ru/[/url]
valuefocus – Simple presentation, makes the main ideas easy to follow.
visit daisystone finds – Organized marketplace, navigation is simple and browsing enjoyable.
hanaworld – Informative and tidy, site feels very approachable.
discount hub – Quick navigation and clear layout make finding deals simple.
site hub – Innovative and clean layout makes the pages very appealing.
nohostory – Content is presented clearly, very easy to digest.
tipps zu sportwetten (Loretta) lizenz
schleswig holstein
1win ikki bosqichli himoya [url=1win5765.help]1win5765.help[/url]
1xbetgiri? [url=https://1xbet-54.com/]1xbet-54.com[/url] .
use this page – Channeling energy through clear direction ensures progress doesn’t falter.
live video portal – A user-friendly setup that makes browsing quick and hassle-free.
мостбет тотал [url=https://www.mostbet78063.help]https://www.mostbet78063.help[/url]
check details – Clear navigation made locating distinctive items effortless.
future team hub – Bright and motivating content, navigation is simple and clear.
use this page – Channeling energy through clear direction ensures progress doesn’t falter.
1win mərc nəticələri [url=1win82430.help]1win82430.help[/url]
tap here – Platform’s clear design made exploring unusual items effortless.
masque360 – Stylish layout, navigation feels intuitive and clear.
opal vendor hub – Everything loads quickly and the layout looks polished.
create solutions – Clear and clean content layout makes reading and understanding quick.
shopwave – Engaging layout, easy to navigate through the selections.
1xbet guncel [url=https://1xbet-55.com/]1xbet guncel[/url] .
direct access – Content appears instantly and the layout is user-friendly.
1win ishchi mirror 2026 [url=1win5765.help]1win5765.help[/url]
open link – Minimal design ensures content is accessible and fast.
mining starter link – Clear presentation helps beginners understand concepts quickly.
shop dawnstone collections – Comfortable browsing, sections load quickly and look well-organized.
dailycontenthub – Simple design, new updates are easy to spot.
dinahhq – Friendly and clear, content is presented thoughtfully.
Тензоприбор предлагает калибровочные гири для весов нужного класса точности и номинальной массы для калибровки весов.
В нашей компании можно купить [url=https://www.tenzo-pribor.ru/catalog/giri/]поверочные гири[/url] классов точности E1, E2, F1, F2, M1, M2.
Чем выше класс точности, тем меньше будет разница между номинальным и действительным значениями массы калибровочной гири.
strategie sportwetten
Check out my web page :: Wett Tipps Heute Ki
1xbet yeni giri? [url=https://1xbet-48.com/]1xbet yeni giri?[/url] .
vendor showcase – Navigation feels effortless thanks to the clean interface.
pastorinsight – Informative and heartfelt, conveys authenticity.
art voyage – Simple browsing experience with stunning and engaging visuals.
check driftbrook finds – Comfortable browsing, categories clear and navigation straightforward.
1xbet ?ye ol [url=https://1xbet-56.com/]1xbet ?ye ol[/url] .
fast wins – Minimalist design with clear, actionable content throughout.
1xbet lite [url=https://1xbet-giris-27.com/]1xbet-giris-27.com[/url] .
macallenhub – Sleek layout, browsing building information is straightforward and easy.
discover more – Wide variety ensures easy and convenient purchasing.
visit this site – A strategy-driven idea flow supports better decision-making and reliable results.
trend insights – Well-structured pages with concise and easy-to-follow content.
global market portal – Smooth layout with well-organized content makes browsing simple.
check this out – Well-organized site makes browsing items simple and convenient.
browse this – Structured idea flow helps transform creative concepts into practical, results-driven action.
explore now – Everything is structured logically and easy on the eyes.
discover driftorchard deals – Marketplace structured nicely, browsing categories was simple and pleasant.
ремонт бетонных конструкций стоимость [url=https://remont-betona-1.ru/]ремонт бетонных конструкций стоимость[/url] .
1xbet resmi sitesi [url=https://1xbet-giris-29.com/]1xbet-giris-29.com[/url] .
explore site – Content is displayed neatly, making the experience easy to follow.
https://eva-games.top/
wettbüro ludwigshafen
my homepage – Online sportwetten Startguthaben
see more – The layout feels structured and helps guide users through the page.
abbysauce – The name is fun and the site feels warm and inviting.
1xbet yeni adresi [url=https://1xbet-54.com/]1xbet yeni adresi[/url] .
http://distant-horizons.com/wp-content/pgs/?code_promo_du_bookmaker_1xbet.html
1win kartla depozit Azərbaycan [url=www.1win82430.help]www.1win82430.help[/url]
selection guide – Simple and modern layout with content that’s effortless to navigate.
user dashboard – Navigation is logical and pages respond quickly.
1xbet giri? adresi [url=https://1xbet-55.com/]1xbet giri? adresi[/url] .
дизайн интерьера для квартиры дизайнеров интерьера
konstantcenter – Informative design, content is structured very well.
дизайнер интерьера санкт петербург студия дизайна интерьера спб
мостбет найти официальный сайт [url=https://www.mostbet21480.help]https://www.mostbet21480.help[/url]
vendor hub – Even a short visit provided helpful insights and interesting content.
urbanpulse – Layout is tidy and intuitive, browsing is simple.
best choice outlet – Well-organized pages and clear sections make browsing effortless.
pomni knowledge hub – Information is presented clearly, making browsing simple and intuitive.
read this page – Easy navigation allowed me to get what I needed quickly.
businessboosthub – Practical content, encourages growth and learning.
clicktofindsolutions.shop – Handy site, I found what I needed quickly and easily.
see energy flow – Every step taken creates its own drive, helping goals stay on track.
discover hub – Clean layout and smooth interface make navigation straightforward.
check action energy – Movement produces its own force, making long-term progress achievable.
цветы букеты доставка [url=https://www.zakazat-cveti-moskva.ru]https://www.zakazat-cveti-moskva.ru[/url] .
1xbet giri? yapam?yorum [url=https://1xbet-56.com/]1xbet giri? yapam?yorum[/url] .
check site – The interface is straightforward and easy to navigate.
neatcorner – Gives helpful ideas, easy to follow and motivating.
fashion picks – Clear and approachable interface with well-presented products throughout.
cheerful site – Smooth layout makes finding content easy.
1xbet resmi sitesi [url=https://1xbet-giris-27.com/]1xbet-giris-27.com[/url] .
rank navigator – Clean and simple interface with content easy to locate.
style hub – Clean interface and attractive visuals make navigating the site effortless.
мостбет вывести без верификации [url=https://www.mostbet78063.help]мостбет вывести без верификации[/url]
Всем привет! Рзучал тему развития бизнеса РІ интернете Рё наткнулся РЅР° полезную статью. Там РїСЂРѕ комплексное продвижение сайтов: SEO, контекст, контент-маркетинг, соцсети, аналитику. Есть блок РїСЂРѕ ошибки Рё РїСЂРѕ современные тренды — персонализация, РР, омниканальность. Рекомендую Рє прочтению: https://wikicom.ru/2025/12/jeffektivnoe-prodvizhenie-sajtov-i-razvitie-biznesa-v-internete/
spottinghub – Unique layout, murals are fun to scroll through and discover.
quietspace – Clear and simple, makes the content approachable.
quick access – The writing feels focused and the structure supports the idea well.
1xbet ?yelik [url=https://1xbet-giris-29.com/]1xbet ?yelik[/url] .
brandgrowth – Neat interface, content is easy to grasp at a glance.
go to page – Well-organized platform makes discovering better solutions quick.
creative platform – It looks visually appealing and easy to explore.
read this page – Efficient browsing helps users quickly identify better choices.
rasecviewhub – Clear layout, information is easy to digest.
open this link – Guiding energy properly results in better efficiency and less waste.
melbet написать в поддержку [url=http://melbet42089.help]http://melbet42089.help[/url]
browse this – Proper direction allows energy to be maximized without unnecessary waste.
view exercises – Organized content sections make practicing math fast and simple.
strategic hub – Concise information with a clean design makes the site approachable.
visit math hub – Clear structure and concise explanations help learners understand concepts quickly.
bahis siteler 1xbet [url=https://1xbet-53.com/]bahis siteler 1xbet[/url] .
mostbet mobil ilova yuklab olish [url=https://mostbet37150.help]https://mostbet37150.help[/url]
news hub online – Smooth browsing experience with quick and clear updates.
future finder – Well-organized and inviting pages make exploring simple and enjoyable.
1xbet turkey [url=https://1xbet-56.com/]1xbet turkey[/url] .
pc builder guide – It gives a clear overview without being confusing.
pin-up saytda kirish [url=http://pinup69053.help]pin-up saytda kirish[/url]
dealinsights – Clean interface, browsing discounts is simple.
1win Azərbaycan download [url=1win82430.help]1win82430.help[/url]
mostbet не приходит смс [url=mostbet83507.help]mostbet83507.help[/url]
xbet [url=https://1xbet-giris-30.com/]xbet[/url] .
xbet giri? [url=https://1xbet-giris-27.com/]1xbet-giris-27.com[/url] .
quick access – Simple pages with material that’s clear and user-friendly.
мелбет зеркало бишкек [url=http://melbet42089.help]мелбет зеркало бишкек[/url]
quick access – Logical layout ensures visitors can find items efficiently.
1win karta orqali depozit [url=www.1win5765.help]www.1win5765.help[/url]
open this link – Clean, intuitive design ensures shopping is smooth and convenient.
Opal River Vendor House – Just visited today, the listings feel well organized and easy to read.
mining hub – The site is clear and makes accessing mining information fast and easy.
mining portal – Content is easy to find and pages open almost instantly.
1xbet mobil giri? [url=https://1xbet-giris-29.com/]1xbet-giris-29.com[/url] .
заказать дизайн интерьера загородного дома дизайн интерьера загородных домов
link discovery – Well-organized pages with intuitive navigation throughout.
Discover now – Just found this and it seems worth exploring further.
The best porn generator best ai porn generator your fantasies remain strictly between you and the neural network. Instant, high-quality generation, extensive scenario and character customization. Available 24/7. For adults.
1xbet mobi [url=https://1xbet-giris-28.com/]1xbet-giris-28.com[/url] .
Читать больше на сайте: https://www.wikidot.com/user:info/dezav-tor
дизайнерский проект дома дизайнер загородного интерьера
mostbet real pulga oynash [url=https://mostbet37150.help/]https://mostbet37150.help/[/url]
The best porn generator free ai porn video generator your fantasies remain strictly between you and the neural network. Instant, high-quality generation, extensive scenario and character customization. Available 24/7. For adults.
Читать расширенную версию: https://wefunder.com/dezavtor1
opalvendorcollective – Quick look earlier and the site feels quite easy navigating.
pin-up Namangan [url=http://pinup69053.help/]http://pinup69053.help/[/url]
cotton brook shop – Scrolling through, layout feels simple and user-friendly.
See more here – Looked over briefly, everything seems easy to navigate.
Browse this – Fairly solid and I’d consider checking it again later.
Check platform – It’s good enough and I’d likely revisit it again.
Всем привет! Рзучал тему развития бизнеса через интернет Рё нашел хороший РѕР±Р·РѕСЂ. Статья называется “Рффективное продвижение сайтов Рё развитие бизнеса РІ интернете”. Там РїРѕРґСЂРѕР±РЅРѕ разобраны основные каналы: SEO, контекст, соцсети, аналитика. Особенно полезно для тех, кто хочет системно подойти Рє РІРѕРїСЂРѕСЃСѓ, Р° РЅРµ работать хаотично. Р’РѕС‚ ссылка, если РєРѕРјСѓ интересно: http://harizma86.ru/jeffektivnoe-prodvizhenie-sajtov-i-razvitie-biznesa-v-internete/
this online market – Browsing casually, content is well structured and easy to follow.
1xbet tr giri? [url=https://1xbet-56.com/]1xbet tr giri?[/url] .
Go to site – Overall performance is good and everything seems functional.
more info – Simple and intuitive platform for all your daily purchases.
1win shaxsiy kabinet roʻyxatdan oʻtish [url=www.1win5765.help]1win shaxsiy kabinet roʻyxatdan oʻtish[/url]
online vendor listings – Took a moment today and the pages are clear, structured, and simple to navigate.
discover more – Quick access to products ensures an easy shopping experience.
Enter here – It appeared during browsing and ended up being useful.
Look at this – Seems useful, I’ll likely come back for further exploration.
1xbet giris [url=https://1xbet-giris-27.com/]1xbet giris[/url] .
1xbet g?ncel [url=https://1xbet-giris-30.com/]1xbet g?ncel[/url] .
wraoys – The site is tidy, with smooth navigation and easy-to-read content.
see details – Fast page loads and organized sections make it easy to follow.
1win USDTga yechish [url=http://1win5765.help/]http://1win5765.help/[/url]
reliable business info – Easy-to-navigate content with a professional and trustworthy feel.
Jump to page – The site feels responsive and easy to navigate.
Check platform – Everything seems functional and navigation is easy.
букет цветов доставка [url=www.zakazat-cveti-moskva.ru]www.zakazat-cveti-moskva.ru[/url] .
browse elite jerseys – Looks clean and professional, content is easy to follow.
Open resource – Functional layout with no issues while browsing.
мелбет lucky jet [url=https://melbet72043.help]https://melbet72043.help[/url]
mostbet lucky jet [url=http://mostbet21480.help/]http://mostbet21480.help/[/url]
melbet p2p пополнение [url=http://melbet42089.help/]http://melbet42089.help/[/url]
melbet документы для верификации [url=https://melbet72043.help]https://melbet72043.help[/url]
open this page – Navigation is straightforward and the layout feels well organized.
1xbet tr [url=https://1xbet-giris-28.com/]1xbet tr[/url] .
1xbet yeni giri? adresi [url=https://1xbet-giris-34.com/]1xbet yeni giri? adresi[/url] .
1 x bet giri? [url=https://1xbet-giris-29.com/]1xbet-giris-29.com[/url] .
one x bet [url=https://1xbet-giris-32.com/]1xbet-giris-32.com[/url] .
ideasunlockprogress.click – Excellent concept, transforming ideas into action drives real progress effectively.
official market site – Nice clean style and the page is easy to read.
rbncvbr.shop – Not bad honestly, looks clean and easy to navigate through.
visit this site – Applying ideas effectively turns potential into tangible progress.
1 xbet giri? [url=https://1xbet-giris-35.com/]1xbet-giris-35.com[/url] .
check this shop – Everything looks tidy and the content is comfortable to go through.
view this marketplace – Pages load quickly, and the layout makes navigation easy.
Launch Lavender Market – Clean design and navigating feels effortless.
Lavender Hub – Smooth experience and navigation feels natural.
online store link – The simplicity of the layout helps users navigate quickly.
resource page – Feels reliable and something I’d revisit later.
check out this site – The interface is fast and browsing feels effortless.
mostbet apk xavfsizmi [url=www.mostbet37150.help]mostbet apk xavfsizmi[/url]
Юридическая консультация по лишению родительских прав поможет оценить ситуацию, определить основания и выстроить грамотную стратегию защиты или подачи иска. Переходите по запросу [url=https://www.pravovik24.ru/konsultatsii/advokat-po-lisheniyu-roditelskikh-prav/]адвокат по родительским правам[/url] – специалист разъяснит порядок действий и подготовит документы. Получите профессиональную поддержку и ответы на все вопросы уже на первой консультации.
visit this page – Navigation is smooth, and content is displayed clearly.
start here – Actionable ideas make forward movement clear, consistent, and motivating.
see products – The interface is organized and intuitive for all users.
1win kupon hesablanmır [url=http://1win82430.help]1win kupon hesablanmır[/url]
more info here – Turning inspiration into execution ensures progress develops steadily.
v1av4 Site – Browsing is seamless and nothing feels complicated.
pinup toʻlov qilish [url=http://pinup69053.help]http://pinup69053.help[/url]
Discover now – The site is cleanly structured and easy to browse.
mostbet регистрация без кода [url=mostbet21480.help]mostbet21480.help[/url]
shop this link – The site layout is neat, and moving around is effortless.
vendor collective online – Took a look and the interface feels tidy, clear, and easy to navigate.
Open Lavender Marketplace – Everything seems well organized and pages load quickly.
discover more – The user interface is neat and easy to follow.
Open this link – Overall design is decent and browsing feels simple.
click to enter – The pages flow naturally and the layout feels tidy.
mostbet plinko 2026 [url=https://www.mostbet21480.help]https://www.mostbet21480.help[/url]
1xbet yeni giri? adresi [url=https://1xbet-giris-30.com/]1xbet yeni giri? adresi[/url] .
visit this page – The site is easy to explore, and everything is clearly displayed.
open this link – Clarity in approach accelerates results and simplifies execution.
learn more – Navigation is smooth thanks to its uncluttered design.
Boostaro is a purpose-built wellness formula created for men who want to strengthen vitality, confidence, and everyday performance.
HeroUP is a premium mens wellness formula designed to support sustained energy, physical stamina, and everyday confidence.
check efficient steps – Clear action helps maintain momentum and structured progress.
Visit platform – Interesting find, I’ll likely spend more time browsing it.
ProDentim is a distinctive oral-care formula that pairs targeted probiotics with plant-based ingredients to encourage strong teeth, comfortable gums, and reliably fresh breath.
Mitolyn is a carefully developed, plant-based formula created to help support metabolic efficiency and encourage healthy, lasting weight management.
xbet giri? [url=https://1xbet-56.com/]xbet giri?[/url] .
PurDentix is a revolutionary oral health supplement designed to support strong teeth and healthy gums. It tackles a wide range of dental concerns
Pebble Vendor Listings – Browsed the pages and the layout is minimal, organized, and easy to follow.
this marketplace – The page caught my attention, I’ll likely explore it again.
store homepage – Took a peek and I may revisit the pages later.
see more details – Everything functions smoothly and pages appear instantly.
check details – Clear, thoughtful ideas drive forward progress in every task.
1xbet g?ncel giri? [url=https://1xbet-giris-34.com/]1xbet g?ncel giri?[/url] .
Look at this – Clean pages with fast load times make browsing effortless.
Discover now – Layout is simple and no errors while browsing.
1xbet mobil giri? [url=https://1xbet-giris-27.com/]1xbet-giris-27.com[/url] .
explore the shop – The interface feels intuitive and user-friendly.
Arialief is a carefully developed dietary supplement designed to naturally support individuals dealing with sciatic nerve discomfort while promoting overall nerve wellness.
Maintaining prostate health is crucial for men’s overall wellness, especially as they grow older. Conditions like reduced urine flow, interrupted sleep
мостбет не загружается сайт [url=https://www.mostbet21480.help]https://www.mostbet21480.help[/url]
InsuLeaf is a high-quality, naturally formulated supplement created to help maintain balanced blood glucose, support metabolic health, and boost overall vitality.
I don’t think the title of your article matches the content lol. Just kidding, mainly because I had some doubts after reading the article. https://www.binance.com/register?ref=QCGZMHR6
Manergy is an advanced male vitality supplement created to help support healthy testosterone levels
melbet вход с телефона [url=https://melbet72043.help/]https://melbet72043.help/[/url]
Pebble Vendor Center – Took a quick look and everything is organized clearly and easy to browse.
Check out Lemon Aisle – Smooth browsing experience and the layout looks appealing.
NerveGenics is a naturally formulated nerve-health supplement created to promote nerve comfort, cellular energy support, antioxidant defense
ProstAfense is a premium, doctor-crafted supplement formulated to maintain optimal prostate function, enhance urinary performance, and support overall male wellness.
click for insight – Streamlined actions keep progress natural and easy to follow.
browse here – Navigation is clear and the site layout is minimal yet functional.
start browsing – Everything feels well-structured, and navigation is natural.
view tool collection – Finding and downloading software is quick and uncomplicated.
NerveCalm is a high-quality nutritional supplement crafted to promote nerve wellness, ease chronic discomfort, and boost everyday vitality.
this link here – Maintaining control over momentum results in steady and purposeful progress.
1xbet spor bahislerinin adresi [url=https://1xbet-giris-35.com/]1xbet spor bahislerinin adresi[/url] .
Kerassentials is an entirely natural blend crafted with 4 potent core oils and enriched by 9 complementary oils and vital minerals.
visit the platform – Navigation is straightforward, and exploring content is simple.
shop online now – Smooth browsing with minimal distractions throughout.
1win tj [url=https://www.1win91403.help]https://www.1win91403.help[/url]
1xbet ?yelik [url=https://1xbet-55.com/]1xbet ?yelik[/url] .
NativeGut is a precision-crafted nutritional blend designed to nurture your dog’s digestive tract.
Prosta Peak is a high-quality prostate wellness supplement formulated with a comprehensive blend of 20+ natural ingredients and essential nutrients to support prostate health
Prostadine concerns can disrupt everyday rhythm with steady discomfort, fueling frustration and a constant hunt for dependable relief.
open this link – Clean structure and responsive pages make using the site enjoyable.
score updates – Navigation is intuitive and pages load rapidly.
MounjaBoost is a next-generation, plant-based supplement created to support metabolic activity, encourage natural fat utilization
Pinestone Online Vendor – Explored today and the pages feel well structured and accessible.
Marble Marketplace – Feels orderly and moving between pages is seamless.
Nitric Boost Ultra is a daily wellness formula designed to enhance vitality and help support all-around performance.
click to enter – Navigation flows naturally and the pages load smoothly.
visit this site – When movement lacks direction, it often stops before reaching its potential.
online outlet page – Browsed quickly and the content is clear and helpful.
visit creek willow – Everything is laid out clearly, making navigation simple.
open exchange link – Layout is neat, and browsing across pages feels effortless.
Browse this – Pages load fine and navigation is straightforward.
see the outlet – Opened the page and the site seems to provide helpful info.
Visit platform – Well-organized content and simple browsing.
мелбет beeline kg [url=http://melbet42089.help]http://melbet42089.help[/url]
open this link – Clear concepts simplify execution and ensure success.
1x giri? [url=https://1xbet-giris-29.com/]1xbet-giris-29.com[/url] .
start browsing – The site is user-friendly and everything loads efficiently.
discover more – The site’s structure is easy to follow and content is accessible quickly.
Trusted reviews bestguitarreview cover everything from budget friendly starter guitars to premium professional models.
Music producers bestheadphonereview rely on expert reviews to choose the best studio headphones for mixing.
enter this website – Navigation is intuitive and moving through sections is seamless.
Best resource bestmicrophoneguide compares hundreds of microphones by sound quality build and recording purpose.
check it out – Direction ensures energy drives progress efficiently and purposefully.
Mint Vendor Collective – Layout is neat and navigating through pages feels simple.
Pine Vendor Emporium – Just browsed today and the site feels organized and smooth to navigate.
Detailed comparisons bestguitarreview make it easy to choose between acoustic and electric guitar models.
Подробности на странице: http://newsrosprom.ru/zakazat-vysokopoligonalnuyu-model-dlya-agr-kak-vsyo-ustroeno.html
Check out http://www.bestheadphonereview.com/ which provides unbiased headphone reviews covering wireless wired and studio models.
Audio professionals https://www.bestmicrophoneguide.com discover the best microphone deals and compare models from trusted brands.
click here to shop – The structure is simple and content is easy to access.
visit the marketplace – Browsing is fast, and the layout is user-friendly.
Quick visit – Discovered useful content and will probably revisit soon.
Самое полезное для вас: http://www.pnzstroi.ru/obzory/124710/3-oshibki-pri-podgotovke-3d-modeli-agr/
Юридическая консультация по лишению родительских прав поможет оценить ситуацию, определить основания и выстроить грамотную стратегию защиты или подачи иска. Переходите по запросу [url=https://www.pravovik24.ru/konsultatsii/advokat-po-lisheniyu-roditelskikh-prav/]юридическая консультация по родительским правам[/url] – специалист разъяснит порядок действий и подготовит документы. Получите профессиональную поддержку и ответы на все вопросы уже на первой консультации.
Look at this – Smooth loading times and layout is user-friendly.
reference link – Focused planning ensures forward growth continues without hindrance.
1 x bet giri? [url=https://1xbet-giris-34.com/]1xbet-giris-34.com[/url] .
мостбет служба поддержки Кыргызстан чат [url=https://mostbet83507.help/]мостбет служба поддержки Кыргызстан чат[/url]
take a look here – The site runs smoothly, and sections are easy to explore.
diamondescort18 – Straightforward layout, browsing experience is fast and simple today.
explore here – Focused forward energy fuels progress and strengthens performance.
view this site – Everything works fast and browsing flows naturally.
Backbiome is a naturally crafted, research-backed daily supplement formulated to gently relieve back tension and soothe sciatic discomfort.
ViriFlow is a dietary supplement formulated to help maintain prostate, bladder, and male reproductive health. Its blend of plant-based ingredients is designed to support urinary comfort and overall wellness as men age.
Visium Pro is an advanced vision support formula created to help maintain eye health, sharpen visual performance, and provide daily support against modern challenges such as screen exposure and visual fatigue.
visit this link – A clean interface makes it enjoyable to scroll through.
Plumbrook Marketplace – Checked a few pages and everything seems tidy and easy to navigate.
mostbet pc [url=https://www.mostbet37150.help]https://www.mostbet37150.help[/url]
click here to shop – Browsing is smooth with a well-organized layout.
Best Walnut Deals – Very smooth experience, site behaves properly.
Visit WBB6E – Works smoothly and the layout feels very clean.
букеты стоимость [url=https://www.zakazat-cveti-moskva.ru]https://www.zakazat-cveti-moskva.ru[/url] .
explore the page – Careful architecture of processes promotes sustainable and consistent growth.
pin-up qanday kirish [url=http://pinup69053.help]http://pinup69053.help[/url]
View platform – Navigation feels intuitive and pages open fast.
online outlet page – Briefly checked and the navigation feels clear and smooth.
take a look here – Smooth browsing with clear sections makes finding content effortless.
diamondescort17 – Simple interface, pages load quickly and navigation feels smooth overall.
melbet мобильный сайт [url=https://melbet72043.help/]https://melbet72043.help/[/url]
their online outlet – Opened the site today and navigation seems straightforward.
check clarity boost – Thinking clearly ensures faster achievement and better outcomes.
visit this link – The layout is tidy and browsing is easy and intuitive.
мостбет скачать apk [url=http://mostbet21480.help/]http://mostbet21480.help/[/url]
click here to shop – The layout keeps things clear and uncluttered.
мелбет пополнить через kassa24 [url=melbet72043.help]melbet72043.help[/url]
Wavestone Online – Smooth navigation with a tidy interface throughout.
Jump to page – Simple structure makes checking details much easier.
1x giri? [url=https://1xbet-giris-31.com/]1x giri?[/url] .
1xbet yeni adresi [url=https://1xbet-giris-28.com/]1xbet yeni adresi[/url] .
learn more here – Well-crafted processes guide development and foster reliable growth.
Click to visit – Interface works smoothly and looks professional.
learn more now – Navigation flows naturally, and the interface is easy to understand.
explore mining – Layout is clear and content appears instantly.
open this link – The site makes searching for products very convenient.
check action-driven strategy – Implementing steps turns plans into effective outcomes.
visit this page – The structure is tidy and moving between sections is effortless.
Бесплатная консультация юриста по вопросам опеки и усыновления поможет разобраться в правах, подготовке документов и порядке оформления. Переходите по запросу [url=https://www.pravovik24.ru/konsultatsii/yurist-po-opeke/]адвокат по усыновлению ребенка[/url] – специалист подскажет, как действовать в вашей ситуации, оценит риски и предложит оптимальное решение. Получите профессиональную помощь по делам опеки и попечительства на каждом шаге без лишних затрат.
как пополнить счет мостбет [url=https://www.mostbet83507.help]как пополнить счет мостбет[/url]
1xbet yeni giri? [url=https://1xbet-giris-30.com/]1xbet yeni giri?[/url] .
Wave Willow Storefront – Works without issues and content is easy to browse.
Профессиональная помощь детям https://neuropsy-centr.ru с нарушениями речи и развития. Высококвалифицированные врачи, работаем с самыми тяжелыми случаями, 99% положительных отзывов, новейшее оборудование и инвентарь. Государственная лицензия: Л035-01298-77/01604531 от 09.12.24
Платная частная клиника https://mypsyhealth.ru/ психиатрии, неврологии и наркологии — анонимное лечение и консультации специалистов. Диагностика, помощь при зависимостях, неврологических и психических расстройствах. Конфиденциальность, опытные врачи и комфортные условия.
завод модульных домов модульный дом самому
1xbet tr [url=https://1xbet-giris-35.com/]1xbet tr[/url] .
Лучшее прямо здесь: https://paradstars.com/catalog/212/
click here to view – It keeps a steady rhythm while moving across pages.
Check this site – Works fine, and navigation feels straightforward.
explore now – Simplified thought patterns help actions progress smoothly.
Платная частная клиника https://mypsyhealth.ru/services/drug-treatment-hospital психиатрии, неврологии и наркологии — анонимное лечение и консультации специалистов. Диагностика, помощь при зависимостях, неврологических и психических расстройствах. Конфиденциальность, опытные врачи и комфортные условия.
Профессиональная помощь детям https://neuropsy-centr.ru с нарушениями речи и развития. Высококвалифицированные врачи, работаем с самыми тяжелыми случаями, 99% положительных отзывов, новейшее оборудование и инвентарь. Государственная лицензия: Л035-01298-77/01604531 от 09.12.24
модульные дома для дачи https://modul-msk.ru
Лучшее прямо здесь: https://mal-paris.ru/
bahis siteler 1xbet [url=https://1xbet-giris-36.com/]bahis siteler 1xbet[/url] .
Check HoneyCrate – Everything loads fast and the site feels neat overall.
learn more here – The interface feels intuitive and user-friendly.
direct store access – You can easily jump between sections without confusion.
find out more – Signals act as guidance tools that help navigate complex situations.
Visit Wheatbrook – Simple layout and fast-loading sections make it easy to use.
read this page – Simple interface ensures finding bargains is stress-free.
Browse this – Seems interesting, I’ll probably look into it more.
check this store – Content here seems practical and very readable.
click here to explore – The interface is intuitive and easy to get around.
visit the store page – The website is clear, and information is easy to digest.
explore items – Smooth design keeps everything easy to access.
go here now – The interface is simple, content is easy to find, and pages load fast.
ремонт и реконструкция зданий [url=https://remont-zdaniya-1.ru/]ремонт и реконструкция зданий[/url] .
launch the website – The layout and speed feel balanced across all viewing options.
Wheatstone Portal – Clean design makes finding content effortless and simple.
reference link – User-friendly site made exploring uncommon items simple and enjoyable.
Всем привет! Ищу подрядчика для накрутки ПФ под ключ, но сам в теме плохо разбираюсь, боюсь нарваться на мошенников. Статья помогла составить чек-лист, что спрашивать у исполнителей: про мобильные прокси, про базы прогрева, про контроль роботности. Автор даже приводит примерные цены на облачные сервисы (от 0,8 рубля за клик). Теперь я хотя бы понимаю, сколько это должно стоить и на что обращать внимание. Вот ссылка на гайд: https://partnerkin.com/tribuna/blog-vitalivivdenko/nakrutka-pf-v-yandekse-polnoe- . Рекомендую всем, кто ищет подрядчика, сначала изучить матчасть.
Скоро лето и жара купить кондиционер с установкой в московской области широкий выбор сплит-систем для квартиры, дома и офиса. Поможем подобрать модель по площади, бюджету и характеристикам. Установка под ключ, гарантия, доставка и выгодные цены на популярные бренды.
https://fabble.cc/1xbetbonuscode1
Top web design https://webdesignfirmshub.com companies worldwide: a selection of the best studios for website and interface creation. Learn about case studies, design approaches, UX/UI solutions, and innovations to help you choose a reliable contractor for your digital projects.
Top branding agencies https://topbrandagencies.com worldwide: the best studios for brand development, corporate identity, and positioning. Portfolio reviews, strategies, and case studies will help you choose a reliable agency for business development and brand enhancement.
click to enter – Pages appear quickly and the overall flow is well organized.
Top UX/UI design https://uiuxagencies.com agencies: the best companies creating user-friendly interfaces and digital products. Explore case studies, methodologies, and approaches to UX/UI to choose a reliable contractor for your website or app.
https://worldsaway3d.com/codigo-promocional-de-apuestas-deportivas-de-1xbet-2026/
Скоро лето и жара кондиционер для дома купить с установкой широкий выбор сплит-систем для квартиры, дома и офиса. Поможем подобрать модель по площади, бюджету и характеристикам. Установка под ключ, гарантия, доставка и выгодные цены на популярные бренды.
мелбет киргизия регистрация [url=www.melbet42089.help]мелбет киргизия регистрация[/url]
Top web design https://webdesignfirmshub.com companies worldwide: a selection of the best studios for website and interface creation. Learn about case studies, design approaches, UX/UI solutions, and innovations to help you choose a reliable contractor for your digital projects.
Top branding agencies https://topbrandagencies.com worldwide: the best studios for brand development, corporate identity, and positioning. Portfolio reviews, strategies, and case studies will help you choose a reliable agency for business development and brand enhancement.
Top UX/UI design https://uiuxagencies.com agencies: the best companies creating user-friendly interfaces and digital products. Explore case studies, methodologies, and approaches to UX/UI to choose a reliable contractor for your website or app.
visit this page – Smooth navigation and a clear interface make browsing simple.
bahis sitesi 1xbet [url=https://1xbet-giris-28.com/]bahis sitesi 1xbet[/url] .
see what’s here – A clean structure makes exploring very comfortable.
[url=https://dalealbo.cl/apuestas/codigos/1xbet-codigo-promocional]big boobs porn[/url]
melbet вход с телефона [url=https://melbet72043.help]melbet вход с телефона[/url]
[url=https://www.sportytrader.com/es/casas-apuestas/1xbet/codigo-promocional/]order[/url]
click here to view – The layout is clean and helps users quickly find what they need.
Visit Harbor Traders – Smooth page transitions and intuitive browsing experience.
Go to IceHub – Content is well organized and pages respond instantly.
Explore here – Pages work fine and navigation feels intuitive.
1xbetgiri? [url=https://1xbet-giris-31.com/]1xbetgiri?[/url] .
open and browse – The site looks organized and polished throughout.
searchengineers – Content reads clearly, helpful examples made concepts easy to grasp.
access the page – Navigation feels smooth thanks to its simple layout.
birxbet [url=https://1xbet-giris-36.com/]birxbet[/url] .
this emporium page – Opened the pages and everything seems simple and well-structured.
mostbet казино слоты [url=www.mostbet83507.help]mostbet казино слоты[/url]
1xbet turkey [url=https://1xbet-giris-32.com/]1xbet-giris-32.com[/url] .
click for insight – Intuitive design made discovering smarter options effortless.
quick access link – The site feels fast and easy to move through.
mostbet apk download uz [url=http://mostbet37150.help/]http://mostbet37150.help/[/url]
find out more – Proper attention amplifies results and prevents progress from stalling.
Marketplace Hub – Straightforward interface with fast-loading pages.
check this store – Took a quick look and the site feels organized and easy to follow.
Open Ice Vendor – Layout is simple yet effective, very user-friendly.
An astrology portal burcler.com.az with daily horoscopes, natal charts, and forecasts. Online consultations, zodiac sign compatibility, and personalized recommendations will help you better understand yourself and make important decisions.
Explore here – Wasn’t expecting much, but everything works nicely.
An astrology portal https://burcler.com.az/ with daily horoscopes, natal charts, and forecasts. Online consultations, zodiac sign compatibility, and personalized recommendations will help you better understand yourself and make important decisions.
go to this site – Pages open quickly, and the layout keeps content well-organized.
pin-up support [url=https://pinup69053.help]https://pinup69053.help[/url]
marketingengine – Bookmarked this immediately, planning to revisit for updates and inspiration.
click here to explore – Navigation feels natural and the experience is smooth.
click here to browse – Navigation is clear and the interface is user-friendly.
mostbet payment methods [url=https://www.mostbet07493.help]https://www.mostbet07493.help[/url]
start here – Platform design ensured exploring hidden items was fun and intuitive.
1 x bet [url=https://1xbet-giris-35.com/]1 x bet[/url] .
Windstone Picks – Well-structured pages make finding information effortless.
find out more – Proper attention amplifies results and prevents progress from stalling.
view the catalog – Simple and intuitive layout that keeps the experience smooth.
Open KeystoneVendor – Smooth experience and layout feels intuitive.
discover more here – Everything is arranged clearly, making finding content simple.
access the site – The interface keeps things smooth and accessible.
1win ilovani yuklab olish Oʻzbekiston [url=http://1win5765.help]http://1win5765.help[/url]
view this page – The design is clean and pages load reliably.
learn more here – User-friendly layout makes browsing and shopping smooth.
1вин депозит бо сомонӣ [url=www.1win91403.help]www.1win91403.help[/url]
browse this – Keeping energy aligned with direction ensures ongoing and stable advancement.
Woodbrook Offers – Smooth experience thanks to a simple and clean design.
check items here – Browsing feels smooth and the design is easy to follow.
Бесплатная консультация юриста по вопросам опеки и усыновления поможет разобраться в правах, подготовке документов и порядке оформления. Переходите по запросу [url=https://www.pravovik24.ru/konsultatsii/yurist-po-opeke/]адвокаты по опеке и попечительству[/url] – специалист подскажет, как действовать в вашей ситуации, оценит риски и предложит оптимальное решение. Получите профессиональную помощь по делам опеки и попечительства на каждом шаге без лишних затрат.
1xbet ?yelik [url=https://1xbet-giris-40.com/]1xbet ?yelik[/url] .
Explore Lake Crate – Layout is neat and I can move between sections effortlessly.
discover more here – Navigation is effortless and content is clearly structured.
капитальный ремонт помещений [url=https://remont-zdaniya-1.ru/]remont-zdaniya-1.ru[/url] .
check this store – Discovered the site today and it looks quite useful.
заказ букетов с доставкой по москве недорого [url=https://zakazat-cveti-moskva.ru/]https://zakazat-cveti-moskva.ru/[/url] .
leadnest – Color palette felt calming, nothing distracting, just focused, thoughtful design.
1xbet lite [url=https://1xbet-giris-37.com/]1xbet-giris-37.com[/url] .
pearlbrookoutlet – Just found this site and it seems really helpful.
mostbet cashback [url=www.mostbet42395.help]www.mostbet42395.help[/url]
1win mərc turniri [url=1win03748.help]1win03748.help[/url]
this website – Properly channeled ideas enhance execution and maximize results.
1xbet turkiye [url=https://1xbet-giris-38.com/]1xbet-giris-38.com[/url] .
Visit Woodmeadow – Smooth navigation and clearly structured content throughout.
quick access link – The interface is clean and pages respond immediately.
access the site – Pages open fast, and content is easy to follow.
1xbet tr giri? [url=https://1xbet-giris-36.com/]1xbet tr giri?[/url] .
1xbet mobi [url=https://1xbet-giris-31.com/]1xbet mobi[/url] .
Thank you for your sharing. I am worried that I lack creative ideas. It is your article that makes me full of hope. Thank you. But, I have a question, can you help me?
check this out – Intuitive navigation allows fast access to alternative solutions.
visit this link – Everything is organized neatly and the experience is enjoyable.
Access page – Layout is clear and much more engaging than expected.
Discover now – Surprisingly appealing design and structure of the site.
creekharborcollective.shop – The site feels professional and moving between pages is effortless.
1вин дар 1вин сабти ном [url=1win91403.help]1вин дар 1вин сабти ном[/url]
tap here to view – Fast page loads and intuitive design make exploring enjoyable.
tap here to view – The interface is straightforward and finding what you need is easy.
1xbet mobi [url=https://1xbet-giris-41.com/]1xbet mobi[/url] .
Visit v1av4 – Everything opens smoothly and browsing is simple.
this link here – Energy is used more effectively when guided with the right direction.
view the catalog – Browsing is straightforward and pages feel organized.
pearlcoveemporium – Just visited this site and the layout feels smooth and easy to navigate.
discover bright harbor outlet – Had a short glance and the page is clear and easy to follow.
1x bet [url=https://1xbet-giris-35.com/]1x bet[/url] .
click here to explore – Navigation is intuitive, and pages load without delays.
Pearl Cove Emporium – Checked out the pages and browsing here is straightforward and simple.
Your article helped me a lot, is there any more related content? Thanks!
click for deals – User-friendly platform that makes daily purchases simple.
echoaisleemporium – Just discovered this site, layout feels clean and easy to browse.
1xbet g?ncel giri? [url=https://1xbet-giris-40.com/]1xbet g?ncel giri?[/url] .
Тени на детской площадке — важная деталь, о которой часто забывают. Устанавливайте комплекс так, чтобы часть площадки была в тени деревьев или навеса. Дети смогут играть даже в жаркие летние дни.
visit this guide – Maintaining focus helps execution stay on track and avoids wasted effort.
browse products here – The site is clean, and switching between sections is effortless.
check this website – Everything responds quickly, and sections are logically organized.
bahis siteler 1xbet [url=https://1xbet-giris-37.com/]1xbet-giris-37.com[/url] .
Explore the Courtyard – Everything works smoothly and feels visually calming.
мостбет Нарын [url=http://mostbet83507.help/]мостбет Нарын[/url]
1x bet giri? [url=https://1xbet-giris-38.com/]1xbet-giris-38.com[/url] .
click to browse acorn – Interface is clean and sections are easy to scan.
Open link – Fast and organized interface ensures easy navigation.
1 xbet [url=https://1xbet-giris-36.com/]1 xbet[/url] .
реконструкция и ремонт зданий и сооружений [url=https://remont-zdaniya-1.ru/]реконструкция и ремонт зданий и сооружений[/url] .
discover focused reasoning – Clear insight makes complex decisions simpler and more assured.
marketplace page – Just exploring, the layout feels tidy and navigation is smooth.
Visit Acornstone Exchange – Smooth navigation and well-structured pages throughout.
Всем привет! Рзучал тему развития бизнеса РІ интернете Рё наткнулся РЅР° полезную статью. Там РїСЂРѕ комплексное продвижение сайтов: SEO, контекст, контент-маркетинг, соцсети, аналитику. Есть блок РїСЂРѕ ошибки Рё РїСЂРѕ современные тренды — персонализация, РР, омниканальность. Рекомендую Рє прочтению: https://wikicom.ru/2025/12/jeffektivnoe-prodvizhenie-sajtov-i-razvitie-biznesa-v-internete/
visit this site – Passing through the page today and the layout looks balanced.
this emporium page – Noticed this site while searching and it looks appealing.
visit the store page – Browsed the website briefly and it looks like a place worth exploring.
Бесплатная консультация юриста по вопросам опеки и усыновления поможет разобраться в правах, подготовке документов и порядке оформления. Переходите по запросу [url=https://www.pravovik24.ru/konsultatsii/yurist-po-opeke/]адвокат по усыновлению удочерению[/url] – специалист подскажет, как действовать в вашей ситуации, оценит риски и предложит оптимальное решение. Получите профессиональную помощь по делам опеки и попечительства на каждом шаге без лишних затрат.
1 xbet giri? [url=https://1xbet-giris-41.com/]1 xbet giri?[/url] .
1win хизматрасонии мизоҷ [url=https://1win91403.help/]https://1win91403.help/[/url]
1xbet lite [url=https://1xbet-giris-32.com/]1xbet-giris-32.com[/url] .
Все новостройки https://tut-novostroyki.ru от застройщиков в Новосибирске — актуальный каталог квартир в новых ЖК. Цены, планировки, сроки сдачи и акции. Подберите квартиру напрямую от застройщика без комиссии с удобным поиском и проверенной информацией.
Дизайнерское бюро https://vseremontytut.ru проектирование интерьера и ремонт под ключ. Разработка дизайн-проекта, 3D-визуализация, подбор материалов и полная реализация. Создаем стильные и функциональные пространства с гарантией качества и соблюдением сроков.
visit alpine cove – Just discovered this page and the design looks quite neat and welcoming.
Шпаклевка стен https://shpaklevka-sten.ru и потолков в Москве — выравнивание поверхностей под покраску и обои. Качественные материалы, опытные мастера и соблюдение технологий. Выполняем работы быстро, аккуратно и с гарантией результата по доступной цене.
Все новостройки https://tut-novostroyki.ru от застройщиков в Новосибирске — актуальный каталог квартир в новых ЖК. Цены, планировки, сроки сдачи и акции. Подберите квартиру напрямую от застройщика без комиссии с удобным поиском и проверенной информацией.
Дизайнерское бюро https://vseremontytut.ru проектирование интерьера и ремонт под ключ. Разработка дизайн-проекта, 3D-визуализация, подбор материалов и полная реализация. Создаем стильные и функциональные пространства с гарантией качества и соблюдением сроков.
Шпаклевка стен https://shpaklevka-sten.ru и потолков в Москве — выравнивание поверхностей под покраску и обои. Качественные материалы, опытные мастера и соблюдение технологий. Выполняем работы быстро, аккуратно и с гарантией результата по доступной цене.
Moonridge Vendor Hub – Layout is clean and intuitive, easy to find everything.
mostbet documente verificare [url=http://mostbet2009.help]http://mostbet2009.help[/url]
visit this marketplace – Just passing by, the layout looks smooth and tidy.
1xbet lite [url=https://1xbet-giris-40.com/]1xbet lite[/url] .
Berry Marketplace – Logical design, browsing is effortless.
1xbet yeni giri? adresi [url=https://1xbet-giris-37.com/]1xbet-giris-37.com[/url] .
alpinestoneemporium – Pretty smooth experience, content layout makes reading easy today.
Browse items – Fast-loading pages with clear organization make navigation smooth.
Mint Hub – Logical grouping and tidy layout, easy to follow.
Всем привет! Ищу подрядчика для накрутки ПФ под ключ, но сам в теме плохо разбираюсь, боюсь нарваться на мошенников. Статья помогла составить чек-лист, что спрашивать у исполнителей: про мобильные прокси, про базы прогрева, про контроль роботности. Автор даже приводит примерные цены на облачные сервисы (от 0,8 рубля за клик). Теперь я хотя бы понимаю, сколько это должно стоить и на что обращать внимание. Вот ссылка на гайд: https://partnerkin.com/tribuna/blog-vitalivivdenko/nakrutka-pf-v-yandekse-polnoe- . Рекомендую всем, кто ищет подрядчика, сначала изучить матчасть.
Pebble Treasures – Clear page structure makes finding products quick.
Добрый день!
Когда на сайте слишком много блоков и деталей, посетитель теряется, он не понимает, где главное, и закрывает вкладку. Но если структура построена так, что каждый шаг ведёт к следующему и оставляет пробел для ожидания, человек задерживается. В этом и сила продуманной подачи: информация раскрывается постепенно, а внимание удерживается естественным образом. Добавьте пару точек напряжения, дайте недосказанный ответ, и клиент продолжит чтение. Чем дольше он остаётся, тем выше вероятность, что он превратится в реального покупателя.
Полная информация по ссылке – https://www.ts-web.ru/blog/design/visual-hierarchy.html
создание сайтов для стартапов Россия, реклама медицинских центров Россия, сайт визитка недорого под ключ
сопровождение сайтов в Махачкале, [url=https://www.ts-web.ru/cases/ecodata/.html]Ecodata — экосервисы и ИТ | Кейсы TS-Web[/url], аудит SEO продвижения сайта
Удачи и комфорта в жизни!
[url=https://ibookatrip.com/2024/09/06/hello-world/#comment-35681]Контекстная реклама Яндекс Директ: рост лидов за счёт точности[/url] 9085d4a
Stone Treasures – Easy-to-navigate pages make exploring enjoyable.
amber brook store – While browsing briefly, everything appears clearly organized.
Marketplace Hub – Easy layout, all elements are clear.
storefront link here – Took a moment to explore and navigation seems straightforward.
mostbet website not working [url=http://mostbet07493.help]http://mostbet07493.help[/url]
Visit link – Everything loads quickly and the interface is clean, intuitive, and easy to explore.
amber marketplace – Just visiting the site and the page arrangement looks clear.
1xbet giri? linki [url=https://1xbet-giris-42.com/]1xbet-giris-42.com[/url] .
Vendor Dashboard – Clean pages, everything is easy to read and locate.
Bright Network – Logical arrangement, browsing feels effortless.
1xbet lite [url=https://1xbet-giris-41.com/]1xbet lite[/url] .
[url=https://www.freetips.com/bonus-code/melbet-promo-code/]ass[/url]
apricotbrookoutlet – Nice little discovery, layout is clean and navigation is easy.
1xbet guncel [url=https://1xbet-giris-38.com/]1xbet guncel[/url] .
Moss Vendor Network – Pages are clean and very easy to move through.
mostbet slots help [url=http://mostbet07493.help/]http://mostbet07493.help/[/url]
Echo Vault Portal – Pages are well-structured, navigation is simple.
1xbetgiri? [url=https://1xbet-giris-36.com/]1xbetgiri?[/url] .
мостбет блэкджек [url=www.mostbet83507.help]мостбет блэкджек[/url]
[url=https://www.metropoles.com/apostas/codigo-bonus/codigo-promocional-1xbet-cadastre-se-com-vipmetro]мусор ебанный[/url]
https://www.lactual.cat/uploads/newsletter/index.php?1xbet-promo-code_107.html
1x giri? [url=https://1xbet-giris-40.com/]1xbet-giris-40.com[/url] .
discover canyon harbor bazaar – Had a glance, everything appears neat and accessible.
1xbet lite [url=https://1xbet-giris-37.com/]1xbet-giris-37.com[/url] .
Treasure Harbor – Clean pages with straightforward navigation make shopping fun.
Harbor Picks – Clear and organized design improves user experience.
Vendor Central – Neatly arranged layout, browsing is straightforward.
Бытовая химия в Казани https://bytovayalavka.ru широкий ассортимент средств для уборки, стирки и ухода за домом. Оригинальная продукция, выгодные цены и быстрая доставка. Подберите качественные моющие средства для чистоты и комфорта вашего дома.
Механизированная шпаклевка https://shpaklevka-msk.ru современный способ выравнивания стен и потолков. Ровное нанесение, высокая скорость работ и экономия материалов. Подготовка под финишную отделку с гарантией качества и соблюдением технологий.
1x lite [url=https://1xbet-giris-31.com/]1x lite[/url] .
Calculate your horoscope ulduz-fali.com.az online. Horoscopes, love compatibility, daily horoscopes and astrological interpretations by date of birth on one site.
Dream Interpretations 2026 https://yuxu-yozmalari.com.az/ learn the meaning of your dreams with AI artificial intelligence. Dream interpretation from A to Z, folk belief interpretation, psychological approach. Free online dream interpretation.
harbor outlet shop – While visiting today, the design seems clear and consistent.
Бытовая химия в Казани https://bytovayalavka.ru широкий ассортимент средств для уборки, стирки и ухода за домом. Оригинальная продукция, выгодные цены и быстрая доставка. Подберите качественные моющие средства для чистоты и комфорта вашего дома.
Механизированная шпаклевка https://shpaklevka-msk.ru современный способ выравнивания стен и потолков. Ровное нанесение, высокая скорость работ и экономия материалов. Подготовка под финишную отделку с гарантией качества и соблюдением технологий.
Calculate your horoscope ulduz fali online. Horoscopes, love compatibility, daily horoscopes and astrological interpretations by date of birth on one site.
Dream Interpretations 2026 https://yuxu-yozmalari.com.az learn the meaning of your dreams with AI artificial intelligence. Dream interpretation from A to Z, folk belief interpretation, psychological approach. Free online dream interpretation.
1xbet giri? g?ncel [url=https://1xbet-giris-28.com/]1xbet giri? g?ncel[/url] .
mostbet creare cont pe site [url=https://www.mostbet2009.help]https://www.mostbet2009.help[/url]
Canyon Marketplace – Logical design, browsing the site feels effortless.
Open link – Everything is easy to find with simple menus and fast page responses.
storefront link here – First impression is that the page design feels friendly.
Накрутка просмотров в TikTok — это быстрый способ привлечь внимание к вашему контенту и ускорить рост аккаунта. Переходите по запросу [url=https://kwork.ru/smm/47196549/zhivie-prosmotry-tiktok-video-bez-spisaniy-s-garantiey]накрутка просмотров и лайков тикток[/url] и величьте показатели популярности, повысьте доверие аудитории и попадите в рекомендации. Для максимального эффекта важно подкреплять рост качественным контентом, чтобы удерживать аудиторию и усиливать вовлечённость.
mostbet apk problem [url=http://mostbet07493.help]mostbet apk problem[/url]
mostbet retragere in asteptare [url=https://mostbet2009.help]mostbet retragere in asteptare[/url]
online shop portal – Browsed briefly, the design feels neat and well spaced.
1win tiempo de depósito [url=https://1win19458.help/]1win tiempo de depósito[/url]
1 вин [url=https://1win91403.help]https://1win91403.help[/url]
мелбет плинко киргизия [url=http://melbet84062.help/]http://melbet84062.help/[/url]
1win registro con código [url=https://1win19458.help/]https://1win19458.help/[/url]
mostbet ruletă [url=www.mostbet2009.help]www.mostbet2009.help[/url]
Vendor Space – Pages are neatly grouped, finding key details is easy.
1xbet turkey [url=https://1xbet-giris-42.com/]1xbet-giris-42.com[/url] .
Жіночий сайт https://zhinka.in.ua поради про красу, здоров’я, стосунки та стиль життя. Читайте корисні статті, лайфхаки, рецепти догляду та натхнення для сучасних жінок. Все про жіночу гармонію, саморозвиток і комфорт у повсякденному житті.
Сайт міста Вінниця https://faine-misto.vinnica.ua новини, події, довідник компаній і корисна інформація для жителів та гостей. Актуальні новини, афіша, транспорт, послуги і все про життя міста в одному зручному онлайн-порталі.
An online numerology https://numerologiya.com.az/ profile analyzes your destiny, talents, and finances. Accurate calculations, number interpretation, and personalized recommendations will help you better understand yourself and choose the right direction in life.
Сайт міста Одеса https://faine-misto.od.ua новини, події, афіша, довідник компаній та корисна інформація. Дізнавайтесь актуальні новини, знаходьте послуги, заклади і маршрути. Все про життя Одеси для мешканців і гостей міста в одному місці.
open the bazaar page – Just exploring briefly and everything seems tidy.
Сайт міста Вінниця https://faine-misto.vinnica.ua новини, події, довідник компаній і корисна інформація для жителів та гостей. Актуальні новини, афіша, транспорт, послуги і все про життя міста в одному зручному онлайн-порталі.
Жіночий сайт https://zhinka.in.ua поради про красу, здоров’я, стосунки та стиль життя. Читайте корисні статті, лайфхаки, рецепти догляду та натхнення для сучасних жінок. Все про жіночу гармонію, саморозвиток і комфорт у повсякденному житті.
An online numerology https://numerologiya.com.az profile analyzes your destiny, talents, and finances. Accurate calculations, number interpretation, and personalized recommendations will help you better understand yourself and choose the right direction in life.
Сайт міста Одеса https://faine-misto.od.ua новини, події, афіша, довідник компаній та корисна інформація. Дізнавайтесь актуальні новини, знаходьте послуги, заклади і маршрути. Все про життя Одеси для мешканців і гостей міста в одному місці.
Pine Picks – Simple design keeps the focus on what matters most.
мостбет коэффициенты [url=http://mostbet42395.help/]http://mostbet42395.help/[/url]
1win depozit kodu haraya yazılır [url=1win03748.help]1win depozit kodu haraya yazılır[/url]
mostbet pariuri live [url=https://www.mostbet2009.help]https://www.mostbet2009.help[/url]
Bazaar Treasures – Clean interface keeps the focus on products.
Opal Network – Tidy pages, browsing feels intuitive and efficient.
1win депозит [url=http://1win63197.help/]http://1win63197.help/[/url]
melbet забыл пароль [url=https://melbet84062.help/]melbet забыл пароль[/url]
1xbet turkey [url=https://1xbet-giris-39.com/]1xbet turkey[/url] .
1x giri? [url=https://1xbet-giris-38.com/]1xbet-giris-38.com[/url] .
Collective Vendor Hub – Well-structured sections, navigation is smooth and effortless.
shopping bazaar link – Skimmed the page and everything seems structured well.
1xbet giri? g?ncel [url=https://1xbet-giris-40.com/]1xbet giri? g?ncel[/url] .
discover caramel brook outlet – Had a glance, content seems clear and organized.
Vendor Space – Neatly arranged, very approachable and easy to scan.
Open website – Quick transitions and a clear layout improve usability.
Collective Vendor Hub – Sections are well-defined, very easy to move around.
Сайт міста Житомир https://faine-misto.zt.ua новини, події, афіша та довідник компаній. Актуальна інформація про життя міста, транспорт, послуги і заклади. Усе необхідне для мешканців і гостей Житомира в одному зручному онлайн-порталі.
Автомобільний портал https://avtogid.in.ua новини авто, огляди, тести та поради водіям. Дізнавайтесь про нові моделі, технології, ремонт і обслуговування. Все про автомобілі в одному місці для власників і автолюбителів.
Сайт міста Львів https://faine-misto.lviv.ua новини, події, афіша та довідник компаній. Актуальна інформація про життя міста, транспорт, послуги і заклади. Усе необхідне для мешканців і туристів Львова в одному зручному онлайн-порталі.
Блог Києва https://infosite.kyiv.ua події, новини, цікаві місця та корисні поради для мешканців і гостей столиці. Дізнавайтесь про актуальні заходи, життя міста, розваги та сервіси. Все найцікавіше про Київ в одному зручному онлайн-блозі.
Сайт міста Львів https://faine-misto.lviv.ua новини, події, афіша та довідник компаній. Актуальна інформація про життя міста, транспорт, послуги і заклади. Усе необхідне для мешканців і туристів Львова в одному зручному онлайн-порталі.
Сайт міста Житомир https://faine-misto.zt.ua новини, події, афіша та довідник компаній. Актуальна інформація про життя міста, транспорт, послуги і заклади. Усе необхідне для мешканців і гостей Житомира в одному зручному онлайн-порталі.
Автомобільний портал https://avtogid.in.ua новини авто, огляди, тести та поради водіям. Дізнавайтесь про нові моделі, технології, ремонт і обслуговування. Все про автомобілі в одному місці для власників і автолюбителів.
Блог Києва https://infosite.kyiv.ua події, новини, цікаві місця та корисні поради для мешканців і гостей столиці. Дізнавайтесь про актуальні заходи, життя міста, розваги та сервіси. Все найцікавіше про Київ в одному зручному онлайн-блозі.
mines игра mostbet [url=https://www.mostbet42395.help]https://www.mostbet42395.help[/url]
mostbet download ipad [url=https://mostbet07493.help]https://mostbet07493.help[/url]
1win şəxsiyyət təsdiqi [url=https://1win03748.help/]https://1win03748.help/[/url]
mostbet bonus plinko [url=http://mostbet2009.help]http://mostbet2009.help[/url]
Plum Deals – User-friendly interface keeps the experience stress-free.
bay bazaar homepage – First glance shows the page is easy to read.
check out this store – Just scrolling briefly, navigation feels smooth and simple.
Market Plum – Smooth interface makes finding products quick.
Clover Access – Interface is clean, finding information is simple.
1win peru [url=www.1win19458.help]www.1win19458.help[/url]
See details – The layout keeps everything straightforward and easy to use.
See details – The layout keeps everything straightforward and easy to use.
Granite Vendor Portal – Clean design with straightforward browsing.
marketplace page – First visit today and the page presentation feels clean overall.
birxbet [url=https://1xbet-giris-34.com/]birxbet[/url] .
1 xbet [url=https://1xbet-giris-44.com/]1 xbet[/url] .
Сайт Полтави https://u-misti.poltava.ua новини, події, афіша та довідник компаній міста. Актуальна інформація про життя, транспорт, послуги і заклади. Усе необхідне для мешканців і гостей Полтави в одному зручному онлайн-порталі.
У місті Одеса https://u-misti.odesa.ua актуальні новини, події, афіша та корисна інформація для мешканців і гостей. Дізнавайтесь про життя міста, транспорт, заклади і послуги. Все найважливіше про Одесу в одному зручному онлайн-порталі.
Житомир онлайн https://u-misti.zhitomir.ua міський портал з новинами, афішею та довідником. Дізнавайтесь про події, транспорт, бізнес і послуги. Усе для комфортного життя та відпочинку в Житомирі в одному місці.
Хмельницький онлайн https://u-misti.khmelnytskyi.ua міський портал з новинами, афішею та довідником. Дізнавайтесь про події, транспорт, бізнес і послуги. Усе для комфортного життя та відпочинку в Хмельницькому в одному місці.
xbet giri? [url=https://1xbet-giris-39.com/]1xbet-giris-39.com[/url] .
Сайт Полтави https://u-misti.poltava.ua новини, події, афіша та довідник компаній міста. Актуальна інформація про життя, транспорт, послуги і заклади. Усе необхідне для мешканців і гостей Полтави в одному зручному онлайн-порталі.
У місті Одеса https://u-misti.odesa.ua актуальні новини, події, афіша та корисна інформація для мешканців і гостей. Дізнавайтесь про життя міста, транспорт, заклади і послуги. Все найважливіше про Одесу в одному зручному онлайн-порталі.
Житомир онлайн https://u-misti.zhitomir.ua міський портал з новинами, афішею та довідником. Дізнавайтесь про події, транспорт, бізнес і послуги. Усе для комфортного життя та відпочинку в Житомирі в одному місці.
Хмельницький онлайн https://u-misti.khmelnytskyi.ua міський портал з новинами, афішею та довідником. Дізнавайтесь про події, транспорт, бізнес і послуги. Усе для комфортного життя та відпочинку в Хмельницькому в одному місці.
explore here – Found this page, seems pretty straightforward and helpful.
online shop portal – Browsed quickly, content is simple and readable.
visit berry cove – Just taking a look around and the layout feels clear and simple.
Access site – Clean organization and fast loading improve the experience.
explore site – User-friendly layout, content is easy to navigate and digest.
Vendor Central – Neatly arranged pages, navigation feels intuitive.
birxbet giri? [url=https://1xbet-giris-33.com/]1xbet-giris-33.com[/url] .
1win пардохт [url=https://1win91403.help]https://1win91403.help[/url]
online shop portal – Quick browse today and the page layout is clean.
1xbet mobil giri? [url=https://1xbet-giris-45.com/]1xbet mobil giri?[/url] .
Накрутка просмотров в TikTok — это быстрый способ привлечь внимание к вашему контенту и ускорить рост аккаунта. Переходите по запросу [url=https://kwork.ru/smm/47196549/zhivie-prosmotry-tiktok-video-bez-spisaniy-s-garantiey]живые просмотры тик ток Кворк[/url] и величьте показатели популярности, повысьте доверие аудитории и попадите в рекомендации. Для максимального эффекта важно подкреплять рост качественным контентом, чтобы удерживать аудиторию и усиливать вовлечённость.
mostbet plinko bonus [url=mostbet07493.help]mostbet07493.help[/url]
У місті Львів https://u-misti.lviv.ua актуальні новини, події, афіша та корисна інформація для мешканців і гостей. Дізнавайтесь про життя міста, транспорт, заклади і послуги. Все найважливіше про Львів в одному зручному онлайн-порталі.
Київ онлайн https://u-misti.kyiv.ua міський портал з новинами, афішею та довідником. Дізнавайтесь про події, транспорт, бізнес і послуги. Усе для комфортного життя та відпочинку в Києві в одному місці.
У місті Вінниця https://u-misti.vinnica.ua новини, афіша заходів, довідник закладів і корисні сервіси. Дізнавайтесь про події, відкривайте нові місця і плануйте свій час у Вінниці легко та зручно.
Міський сайт Дніпра https://u-misti.dp.ua новини, події, оголошення і довідник організацій. Зручний пошук послуг, закладів і маршрутів. Будьте в курсі життя міста та знаходьте потрібну інформацію швидко.
quick link – Seems straightforward, text is easy on the eyes.
fernridgevendorhub.shop – Easy to explore and the site feels clean and well organized.
Київ онлайн https://u-misti.kyiv.ua міський портал з новинами, афішею та довідником. Дізнавайтесь про події, транспорт, бізнес і послуги. Усе для комфортного життя та відпочинку в Києві в одному місці.
У місті Вінниця https://u-misti.vinnica.ua новини, афіша заходів, довідник закладів і корисні сервіси. Дізнавайтесь про події, відкривайте нові місця і плануйте свій час у Вінниці легко та зручно.
У місті Львів https://u-misti.lviv.ua актуальні новини, події, афіша та корисна інформація для мешканців і гостей. Дізнавайтесь про життя міста, транспорт, заклади і послуги. Все найважливіше про Львів в одному зручному онлайн-порталі.
Міський сайт Дніпра https://u-misti.dp.ua новини, події, оголошення і довідник організацій. Зручний пошук послуг, закладів і маршрутів. Будьте в курсі життя міста та знаходьте потрібну інформацію швидко.
chestnut stone shop – Scrolling through, content feels intuitive and clear.
Workshop Vendor Space – Clear sections, content is easy to access.
mostbet промокод [url=www.mostbet42395.help]www.mostbet42395.help[/url]
1win slotlarda necə oynamaq olar [url=http://1win03748.help/]http://1win03748.help/[/url]
browse this market – Looking around briefly, the page design feels organized.
cómo reclamar bono 1win [url=https://www.1win19458.help]https://www.1win19458.help[/url]
discover more – User experience feels smooth, interface is simple to follow.
1win código de verificación [url=https://www.1win19458.help]https://www.1win19458.help[/url]
1xbet tr giri? [url=https://1xbet-giris-39.com/]1xbet-giris-39.com[/url] .
1xbet mobil giri? [url=https://1xbet-giris-44.com/]1xbet-giris-44.com[/url] .
Cotton Meadow Hub – Layout is neat, navigating the site feels effortless and smooth.
Visit this site – Browsing is simple, pages load fast, and the design feels organized.
this resource – Content is clear, navigation is simple and fast.
storefront link here – Stopped by briefly and the layout is easy to navigate.
Сайт Чернівців https://u-misti.chernivtsi.ua новини, події, афіша та довідник компаній міста. Актуальна інформація про життя, транспорт, послуги і заклади. Усе необхідне для мешканців і гостей Чернівців в одному зручному онлайн-порталі.
Міський сайт Черкас https://u-misti.cherkasy.ua новини, події, оголошення і довідник організацій. Зручний пошук послуг, закладів і маршрутів. Будьте в курсі життя міста та знаходьте потрібну інформацію швидко.
Текущие рекомендации: https://dom-cao.ru
Сайт Чернівців https://u-misti.chernivtsi.ua новини, події, афіша та довідник компаній міста. Актуальна інформація про життя, транспорт, послуги і заклади. Усе необхідне для мешканців і гостей Чернівців в одному зручному онлайн-порталі.
Міський сайт Черкас https://u-misti.cherkasy.ua новини, події, оголошення і довідник організацій. Зручний пошук послуг, закладів і маршрутів. Будьте в курсі життя міста та знаходьте потрібну інформацію швидко.
Лучшее прямо здесь: https://petrovskaya-rivera-novostroy.ru
cloud cove marketplace – Spent a few minutes here, page design appears tidy and readable.
lucky jet pin-up [url=https://www.pinup35741.help]https://www.pinup35741.help[/url]
1win matçlar [url=https://1win57196.help/]1win matçlar[/url]
Услуга накрутки просмотров на канал YouTube поможет быстро увеличить активность под вашими видео и привлечь внимание аудитории. Переходите по запросу [url=https://kwork.ru/smm/47194821/zhivie-prosmotry-yutub-video-bez-spisaniy-s-garantiey]накрутка лайков просмотров ютуб[/url]. Дополнительные просмотры повышают видимость роликов в рекомендациях, улучшают статистику канала и создают эффект популярности. Подходит для продвижения новых и существующих видео, увеличения охвата и ускоренного роста канала на YouTube.
this resource – Looks user-friendly, everything loads smoothly.
shopping market link – Browsed casually and the page feels organized and clean.
1xbet g?ncel giri? [url=https://1xbet-giris-33.com/]1xbet g?ncel giri?[/url] .
Click here – Well-structured pages make finding content simple and fast.
Безопасность на детской площадке — первое, на что стоит обратить внимание. Все углы должны быть скруглены, крепёж скрыт, а конструкция — надёжно закреплена в грунте. Хороший производитель всегда предоставляет сертификаты безопасности.
visit vault now – Clean interface, navigation is quick and intuitive.
1xbet g?ncel adres [url=https://1xbet-giris-45.com/]1xbet g?ncel adres[/url] .
[url=https://www.toffeeweb.com/1xbet-promo-code/^]crap[/url]
[url=https://www.afrik-foot.com/code-promo-melbet]cartoon porn[/url]
Как выбрать строительную компанию для дома из клееного бруса
1 xbet giri? [url=https://1xbet-giris-42.com/]1xbet-giris-42.com[/url] .
мелбет android кыргызстан [url=https://www.melbet84062.help]https://www.melbet84062.help[/url]
Vendor Space – Tidy pages, browsing is simple and stress-free.
1 x bet giri? [url=https://1xbet-giris-43.com/]1xbet-giris-43.com[/url] .
cloud stone homepage – First impression shows the design is neat and navigation works smoothly.
juego crash 1win [url=https://1win19458.help]https://1win19458.help[/url]
<Take a look – Fast loading speeds and intuitive structure improve usability.
xbet [url=https://1xbet-giris-44.com/]xbet[/url] .
Crystal Vendor Portal – Organized sections, navigation is effortless.
xbet giri? [url=https://1xbet-giris-39.com/]1xbet-giris-39.com[/url] .
Всем привет! Рзучал тему развития бизнеса РІ интернете Рё наткнулся РЅР° полезную статью. Там РїСЂРѕ комплексное продвижение сайтов: SEO, контекст, контент-маркетинг, соцсети, аналитику. Есть блок РїСЂРѕ ошибки Рё РїСЂРѕ современные тренды — персонализация, РР, омниканальность. Рекомендую Рє прочтению: https://wikicom.ru/2025/12/jeffektivnoe-prodvizhenie-sajtov-i-razvitie-biznesa-v-internete/
sex goobet
1xbet tr [url=https://1xbet-giris-33.com/]1xbet tr[/url] .
1win акции авиатор [url=https://1win63197.help/]1win акции авиатор[/url]
мелбет мбанк [url=https://melbet84062.help]https://melbet84062.help[/url]
Daisy Landing – Simple design, moving through the site feels seamless.
this online outlet – Browsing casually, everything seems well arranged and accessible.
mostbet вход Киргизия [url=mostbet42395.help]mostbet42395.help[/url]
1win telefon dəyişmək [url=www.1win03748.help]www.1win03748.help[/url]
мелбет актуальное зеркало [url=melbet84062.help]melbet84062.help[/url]
Vendor Central – Neatly arranged, moving through content is straightforward.
Explore shop – Smooth performance with a minimal and clear layout.
1xbet giri? 2025 [url=https://1xbet-giris-42.com/]1xbet-giris-42.com[/url] .
mostbet правила пополнения [url=www.mostbet38195.help]mostbet правила пополнения[/url]
1xbet tr [url=https://1xbet-giris-43.com/]1xbet tr[/url] .
1вин пополнение Киргизия [url=www.1win63197.help]www.1win63197.help[/url]
visit this marketplace – Just popping in, content is readable and navigation works smoothly.
1xbet g?ncel giri? [url=https://1xbet-giris-41.com/]1xbet g?ncel giri?[/url] .
Услуга накрутки просмотров на канал YouTube поможет быстро увеличить активность под вашими видео и привлечь внимание аудитории. Переходите по запросу [url=https://kwork.ru/smm/47194821/zhivie-prosmotry-yutub-video-bez-spisaniy-s-garantiey]накрутка просмотров ютуб без списаний[/url]. Дополнительные просмотры повышают видимость роликов в рекомендациях, улучшают статистику канала и создают эффект популярности. Подходит для продвижения новых и существующих видео, увеличения охвата и ускоренного роста канала на YouTube.
Drift Vendor Network – Clear design, moving through pages is smooth and straightforward.
drugs gooobet
Visit link – Clear menus and responsive pages make navigation seamless.
1xbet com giri? [url=https://1xbet-giris-33.com/]1xbet-giris-33.com[/url] .
birxbet giri? [url=https://1xbet-giris-39.com/]1xbet-giris-39.com[/url] .
генерация [url=https://nejroset-dlya-referatov-1.ru/]nejroset-dlya-referatov-1.ru[/url] .
нейросеть для школьников и студентов [url=https://nejroset-dlya-referatov-2.ru/]нейросеть для школьников и студентов[/url] .
нейросеть реферат [url=https://nejroset-dlya-referatov-3.ru/]нейросеть реферат[/url] .
View platform – Smooth performance and content is just fine.
open the bazaar page – First glance shows everything is tidy and user-friendly.
Visit link – Pleasant layout and responsive pages make exploring simple.
See more here – Just discovered it and it looks worth a look.
1xbet giri? [url=https://1xbet-giris-46.com/]1xbet giri?[/url] .
Читать расширенную версию: https://armstroy72.ru
leadmagnet – Navigation felt smooth, found everything quickly without any confusing steps.
Полная версия по ссылке: https://sochibuilders.ru
чат нейросеть для учебы [url=https://nejroset-dlya-referatov.ru/]nejroset-dlya-referatov.ru[/url] .
Последние публикации: https://armstroy72.ru
1xbet guncel [url=https://1xbet-giris-43.com/]1xbet guncel[/url] .
clickedge – Overall, professional vibe here; trustworthy, polished, and pleasantly minimal throughout.
1win линия ставок [url=https://1win63197.help]https://1win63197.help[/url]
мостбет как вывести на Visa [url=mostbet42395.help]mostbet42395.help[/url]
discover coast stone bazaar – Had a glance, everything feels well organized and easy to read.
Всем привет! Рзучал тему развития бизнеса РІ интернете Рё наткнулся РЅР° полезную статью. Там РїСЂРѕ комплексное продвижение сайтов: SEO, контекст, контент-маркетинг, соцсети, аналитику. Есть блок РїСЂРѕ ошибки Рё РїСЂРѕ современные тренды — персонализация, РР, омниканальность. Рекомендую Рє прочтению: https://wikicom.ru/2025/12/jeffektivnoe-prodvizhenie-sajtov-i-razvitie-biznesa-v-internete/
1win ios quraşmır [url=https://1win03748.help]https://1win03748.help[/url]
lengvi pyragu receptai https://pyragaireceptai.lt
ии реферат [url=https://nejroset-dlya-referatov-1.ru/]ии реферат[/url] .
Jump here – It’s responsive and loads up without any delays.
лучшая нейросеть для учебы [url=https://nejroset-dlya-referatov-2.ru/]nejroset-dlya-referatov-2.ru[/url] .
сайт для рефератов [url=https://nejroset-dlya-referatov-3.ru/]сайт для рефератов[/url] .
1win uduş tarixçəsi [url=1win57196.help]1win57196.help[/url]
Подробности по ссылке: https://novostroi-tour.ru
pin up aviator strategiya [url=https://www.pinup35741.help]https://www.pinup35741.help[/url]
1xbet giris [url=https://1xbet-giris-46.com/]1xbet giris[/url] .
Продвигайте свой канал в Яндекс Дзен быстрее: увеличьте число подписчиков и создайте эффект популярности. Переходите по запросу [url=https://kwork.ru/smm/45268654/zhivie-podpischiki-v-dzen-kanal-bez-spisaniy-bez-botov]сколько стоят подписчики в дзене[/url]. Накрутка поможет привлечь внимание новой аудитории, повысить доверие к каналу и ускорить рост. Подходит для новых и развивающихся блогов, чтобы быстрее выйти в рекомендации и усилить продвижение контента.
купить цветы в москве дешево [url=www.dostavka-cvetov-moskva495.ru/]www.dostavka-cvetov-moskva495.ru/[/url] .
Explore here – Shows some interesting material that deserves more attention.
нейросети для студентов [url=https://nejroset-dlya-referatov.ru/]нейросети для студентов[/url] .
xbet giri? [url=https://1xbet-giris-43.com/]1xbet-giris-43.com[/url] .
mostbet hivatalos weboldal Magyarország [url=https://www.mostbet2021.help]https://www.mostbet2021.help[/url]
1xbet resmi giri? [url=https://1xbet-giris-44.com/]1xbet resmi giri?[/url] .
[url=https://footballwhispers.com/fr/blog/code-promo-melbet-exclu/]ammo[/url]
1вин пополнение [url=http://1win41825.help]http://1win41825.help[/url]
дизайн интерьера 3d квартиры услуги дизайнера интерьера квартиры
1win çıxarış üsulları [url=http://1win57196.help]1win çıxarış üsulları[/url]
View platform – User experience is smooth and easy to navigate.
birxbet giri? [url=https://1xbet-giris-33.com/]1xbet-giris-33.com[/url] .
mostbet баланс [url=http://mostbet38195.help]http://mostbet38195.help[/url]
pin-up turnir jadvali [url=https://www.pinup35741.help]https://www.pinup35741.help[/url]
нейросети для студентов [url=https://nejroset-dlya-referatov-3.ru/]нейросети для студентов[/url] .
сайт для рефератов [url=https://nejroset-dlya-referatov-2.ru/]сайт для рефератов[/url] .
Quick access – It’s fast and pages appear without delay.
1 x bet [url=https://1xbet-giris-46.com/]1 x bet[/url] .
мостбет повторная отправка кода [url=http://mostbet38195.help]мостбет повторная отправка кода[/url]
xbet [url=https://1xbet-giris-45.com/]xbet[/url] .
visit this marketplace – Just popping in, content is tidy and navigation feels intuitive.
1win ставки на футбол Кыргызстан [url=https://1win63197.help/]1win ставки на футбол Кыргызстан[/url]
нейросеть для учебы онлайн [url=https://nejroset-dlya-referatov-1.ru/]nejroset-dlya-referatov-1.ru[/url] .
как играть в crash мостбет [url=https://mostbet38195.help]https://mostbet38195.help[/url]
Open this link – Useful material here and everything is easy to understand.
заказать дизайн проект квартиры в спб интерьер дизайн студии
1win apk necə yükləmək olar [url=https://1win57196.help]https://1win57196.help[/url]
лучшие дизайнеры интерьера спб дизайн купить проект
mostbet экспресс ставка [url=https://mostbet38195.help/]https://mostbet38195.help/[/url]
pinup yutuqni yechish [url=http://pinup35741.help]http://pinup35741.help[/url]
visit coral stone – Took a quick look, layout feels neat and readable.
нейросеть для учебы [url=https://nejroset-dlya-referatov-3.ru/]нейросеть для учебы[/url] .
ии для учебы студентов [url=https://nejroset-dlya-referatov-2.ru/]nejroset-dlya-referatov-2.ru[/url] .
Этот увлекательный информационный материал подарит вам массу новых знаний и ярких эмоций. Мы собрали для вас интересные факты и сведения, которые обогатят ваш опыт. Откройте для себя увлекательный мир информации и насладитесь процессом изучения!
Подробнее – https://vivod-iz-zapoya-2.ru/
The wild dragon substitutes for all other symbols (except scatters) and expands across reels to increase win potential. The scatter pearl triggers the free spins feature when three or more land anywhere on the reels, awarding 5 free spins. Additional pearls during this round retrigger more spins. Players can also activate a gamble feature after any win, doubling or quadrupling their prize in a classic risk game. Being the most unstinting part of the slot machine, respins are triggered when six yellow pearls, each carrying a certain monetary amount, appear in any game mode. You get six respins for a starter but can earn more for each “+1” landed during the bonus feature. On each respin, new yellow pearls can appear and when they do so, they stick to and remain on their positions until the end of the feature.
https://dev5.wabisabi.co.mz/how-to-bet-bizzocasino-a-simple-guide/
Louisville Home Office Senninger Plumbing Company, Inc. 11107 Cedar Creek Road, Louisville, KY 40229Phone: (502) 239-3264 Fax: (502) 239-2460 A: Bets start low, making it accessible for all types of players. The lowest amount you can bet on Gates of Olympus is R3 per spin. Feeling confident with the slot’s rhythm, I pushed the bet up to 10 credits for the final stretch – and it paid off. Zeus fired off again, landing a 100-credit win, which sealed the deal and put me 32 credits into profit by the end of the 25 spins. As can be expected, Gates of Olympus is full of iconography that evoked the mythical time of Ancient Greece. The highest-paying symbol in this online Canada slot is the Zeus Scatter symbol. RTP stands for Return To Player. The RTP rate is an average calculated by the developer using a large sample of spins over a long period. It is displayed as a percentage and indicates the amount of money taken in by a slot game that is paid back out to players in the long term.
1xbet ?ye ol [url=https://1xbet-giris-46.com/]1xbet ?ye ol[/url] .
Продвигайте свой канал в Яндекс Дзен быстрее: увеличьте число подписчиков и создайте эффект популярности. Переходите по запросу [url=https://kwork.ru/smm/45268654/zhivie-podpischiki-v-dzen-kanal-bez-spisaniy-bez-botov]подписчики в дзен канал без отписок[/url]. Накрутка поможет привлечь внимание новой аудитории, повысить доверие к каналу и ускорить рост. Подходит для новых и развивающихся блогов, чтобы быстрее выйти в рекомендации и усилить продвижение контента.
melbet забыл пароль [url=https://melbet84062.help/]https://melbet84062.help/[/url]
1xbwt giri? [url=https://1xbet-giris-45.com/]1xbet-giris-45.com[/url] .
Инженерные системы дома из клееного бруса — отопление и вентиляция
check out this store – Just scrolling briefly, design is tidy and layout is simple.
нейросеть для студентов [url=https://nejroset-dlya-referatov-1.ru/]нейросеть для студентов[/url] .
дизайнеры спб квартир дизайн интерьера дома заказать
https://topcasinorank2026.fun/
If you are looking for a trustworthy place to play, check out Topcasinorank2026. It is a multi-geo rating site that lists only reliable casinos with verified payouts. It is a great time-saver for finding safe options regardless of your location.
дизайн проект ремонта квартиры дизайна интерьера
цветы интернет магазин москва недорого [url=https://dostavka-cvetov-moskva495.ru]https://dostavka-cvetov-moskva495.ru[/url] .
нейросеть генерации текстов для студентов [url=https://nejroset-dlya-referatov-4.ru/]нейросеть генерации текстов для студентов[/url] .
нейросеть для студентов онлайн [url=https://nejroset-dlya-referatov-5.ru/]nejroset-dlya-referatov-5.ru[/url] .
реферат через нейросеть [url=https://nejroset-dlya-referatov-6.ru/]реферат через нейросеть[/url] .
мостбет линия ставок [url=mostbet38195.help]mostbet38195.help[/url]
Bigger Bass Bonanza has five reels and four rows. There are 12 win lines in total. Odds In Baccarat Ireland Red Or Black Roulette Odds Ireland Email Hacksaw Gaming Slots Merry Christmas from Big Bass slots as we get the first Christmas version of the original Big Bass Bonanza game in Christmas Big Bass Bonanza. Offering the same RTP rate, max win potential and bonus features as the first game in the Big Bass slots series, it has a wintry snowy twist which is perfect for the festive period. Simply close the game or sign out of the casino and then sign back in again as soon as youre ready, this is not the case at Hyper Casino. Promo codes are becoming more and more popular at online casinos as sites require players to enter a special code in order to successfully claim a promotion or bonus, its just a question of paying their money and letting the reels roll. It is nice to win money but having fun is always going to be a major factor in the enjoyment level of any casino site, there are six playing cards from Aces down to Nines. Keep in mind that wagering requirements only apply to bonuses, stevenwfry. Top 10 foreign online casinos.
https://www.poetics.ca/how-casino-casiny-log-in-enhances-your-gaming-journey-in-australia/
QR codes are like magic portals. Scan one, and it can instantly apply settings, import assets, or unlock hidden features within an app. VN Editor cleverly uses QR codes to make your editing process smoother. Here’s a blog post tailored to explain how to use a VN (Video Note) app and its QR code feature, written in a clear and engaging style suitable for tech-savvy readers or beginners alike. VN is a free video editing app available on both Android and iOS platforms. It’s designed for content creators, influencers, vloggers, and anyone who wants to create high-quality videos from their mobile devices. The app offers professional-level editing features in a streamlined and accessible interface, allowing users to produce videos without needing to use a desktop editing tool. You must have liked Diwali Ke Din VN Template very much and you must have learned to use this template. With the help of this template, you can bring such effects in any videos so that your video can go viral. And if you have any query regarding this template then you can ask us in comment section given below , we will try our best to answer you.
1win депозит через мегапей инструкция [url=https://www.1win63197.help]https://www.1win63197.help[/url]
реферат нейросеть [url=https://nejroset-dlya-referatov.ru/]реферат нейросеть[/url] .
Продвигайте свой канал быстрее с услугой накрутки подписчиков в YouTube. Увеличьте количество фолловеров, повысьте доверие к каналу и привлеките новую аудиторию. Переходите по запросу [url=https://kwork.ru/smm/45267826/zhivie-podpischiki-v-yutub-kanal-bez-spisaniy-bez-botov]накрутка живых подписчиков ютуб[/url]. Быстрый старт для блогеров, брендов и экспертов. Живые и качественные подписчики, безопасное продвижение и заметный рост популярности вашего контента. Начните развивать канал уже сегодня!
нейросеть для рефератов [url=https://nejroset-dlya-referatov-7.ru/]нейросеть для рефератов[/url] .
resultsfirst – Bookmarked this immediately, planning to revisit for updates and inspiration.
1win apk download [url=https://1win57196.help/]https://1win57196.help/[/url]
melbet линия ставок [url=https://melbet27438.help]https://melbet27438.help[/url]
1xbet lite [url=https://1xbet-giris-46.com/]1xbet lite[/url] .
pin-up yechish Oʻzbekiston [url=http://pinup35741.help]http://pinup35741.help[/url]
melbet вывод odengi [url=http://melbet27438.help/]melbet вывод odengi[/url]
mostbet android app vélemények [url=http://mostbet2021.help/]http://mostbet2021.help/[/url]
нейросеть онлайн для учебы [url=https://nejroset-dlya-referatov-4.ru/]нейросеть онлайн для учебы[/url] .
реферат через нейросеть [url=https://nejroset-dlya-referatov-5.ru/]реферат через нейросеть[/url] .
mostbet balans yoxla [url=http://mostbet31847.help/]http://mostbet31847.help/[/url]
https://4evaluck-y.com/
1win как вывести на карту [url=www.1win41825.help]1win как вывести на карту[/url]
сайт для рефератов [url=https://nejroset-dlya-referatov-3.ru/]сайт для рефератов[/url] .
mostbet email dəyişmək [url=www.mostbet31847.help]mostbet email dəyişmək[/url]
нейросеть для студентов [url=https://nejroset-dlya-referatov-7.ru/]нейросеть для студентов[/url] .
mostbet bejelentkezés megerősítés [url=https://www.mostbet2021.help]https://www.mostbet2021.help[/url]
нейросеть для студентов онлайн [url=https://nejroset-dlya-referatov.ru/]nejroset-dlya-referatov.ru[/url] .
lucky jet game melbet [url=https://www.melbet27438.help]lucky jet game melbet[/url]
1вин обход блокировки [url=https://www.1win41825.help]1вин обход блокировки[/url]
Прочитал статью на одном дыхании — очень структурированно и без воды. Автор прошёлся по всем ключевым моментам: что такое ПФ, кому нужно, кому нет, обзор инструментов, аудит перед стартом, выбор стратегии, пошаговая инструкция, ошибки новичков и кейсы. Особенно ценно, что в конце есть выводы и рекомендации. Это полноценное руководство к действию. Рекомендую добавить в закладки всем, кто серьёзно занимается продвижением: https://partnerkin.com/tribuna/blog-vitalivivdenko/nakrutka-pf-v-yandekse-polnoe- .
нейросеть генерации текстов для студентов [url=https://nejroset-dlya-referatov-4.ru/]нейросеть генерации текстов для студентов[/url] .
нейросеть для рефератов [url=https://nejroset-dlya-referatov-5.ru/]nejroset-dlya-referatov-5.ru[/url] .
Продвигайте свой канал быстрее с услугой накрутки подписчиков в YouTube. Увеличьте количество фолловеров, повысьте доверие к каналу и привлеките новую аудиторию. Переходите по запросу [url=https://kwork.ru/smm/45267826/zhivie-podpischiki-v-yutub-kanal-bez-spisaniy-bez-botov]подписчики ютуб купить Кворк[/url]. Быстрый старт для блогеров, брендов и экспертов. Живые и качественные подписчики, безопасное продвижение и заметный рост популярности вашего контента. Начните развивать канал уже сегодня!
1win ödəniş sistemləri [url=http://1win57196.help]http://1win57196.help[/url]
заказ цветов по москве недорого [url=https://www.dostavka-cvetov-moskva495.ru]https://www.dostavka-cvetov-moskva495.ru[/url] .
муж отдал жену другу [url=https://jena-druga-porno.ru/]муж отдал жену другу[/url] .
pin-up lucky jet koeffitsient [url=https://www.pinup35741.help]pin-up lucky jet koeffitsient[/url]
нейросеть для школьников и студентов [url=https://nejroset-dlya-referatov-9.ru/]нейросеть для школьников и студентов[/url] .
нейросети для студентов [url=https://nejroset-dlya-referatov-7.ru/]нейросети для студентов[/url] .
hogyan kell használni a mostbet bónuszt [url=https://mostbet2021.help/]https://mostbet2021.help/[/url]
melbet скачать android [url=http://melbet27438.help]http://melbet27438.help[/url]
melbet верификация киргизия [url=https://melbet27438.help/]melbet верификация киргизия[/url]
1win история ставок [url=http://1win41825.help]1win история ставок[/url]
умная нейросеть для учебы [url=https://nejroset-dlya-referatov.ru/]nejroset-dlya-referatov.ru[/url] .
РедМетСплав демонстрирует обширный выбор высококачественных изделий из нестандартных материалов. Не важно, какие объемы вам необходимы — от минимальных заказов до обширных поставок, мы обеспечиваем пунктуальность вашего заказа.
Каждая единица изделия подтверждена полагающимися документами, подтверждающими их соответствие стандартам. Внимательное отношение — то, чем мы гордимся — мы на связи, чтобы ответить на ваши вопросы а также находить ответы под нюансы вашего бизнеса.
Доверьте заявку на расчет команде РедМетСплав и убедитесь в широком спектре предлагаемых возможностей.
Наша продукция:
Изделия из кобальта Stellite 12 Изделия из кобальта Stellite 12 представляют собой высокопрочные материалы, используемые в различных отраслях, включая машиностроение и аэрокосмическую сферу. Они обладают отличной устойчивостью к износу и коррозии, что делает их идеальными для работы в тяжелых условиях. Эти изделия часто применяются в производстве инструментов и деталей, которые требуют длительного срока службы. Если вы ищете надежные и долговечные решения, рекомендуем купить Изделия из кобальта Stellite 12 для достижения максимальной эффективности в ваших проектах.
hd видео с женой друга [url=https://jena-druga-porno.ru/]hd видео с женой друга[/url] .
Маркетплейс 1С-Битрикс — это официальный каталог готовых решений, модулей и интеграций для сайтов на платформе Bitrix. Переходите по запросу [url=https://magikfox.ru/catalog/]магазин инструментов 1С Битрикс[/url] и вы найдете расширения для интернет-магазинов, CRM, SEO, аналитики, платежных систем и автоматизации бизнеса. Удобный поиск и большой выбор приложений позволяют быстро расширить возможности сайта и внедрить новые функции без сложной разработки.
нейросеть для учебы онлайн [url=https://nejroset-dlya-referatov-9.ru/]нейросеть для учебы онлайн[/url] .
mostbet az güzgü sayt [url=www.mostbet31847.help]www.mostbet31847.help[/url]
ТОП лучших МФО https://mfo-finance.github.io проверенные компании с высоким уровнем одобрения займов. Актуальные предложения, прозрачные условия, быстрые выплаты и онлайн оформление. Сравнивайте и выбирайте надежные МФО для получения денег.
Are you into rafting? https://www.tara-montenegro-rafting.me exciting rafting trips down mountain rivers with experienced instructors. A tour of the Tara Canyon offers scenic routes, safety, and unforgettable experiences. Book a rafting tour and discover an active holiday.
mostbet výsledky fotbal [url=mostbet2019.help]mostbet2019.help[/url]
ТОП лучших МФО https://mfo-finance.github.io проверенные компании с высоким уровнем одобрения займов. Актуальные предложения, прозрачные условия, быстрые выплаты и онлайн оформление. Сравнивайте и выбирайте надежные МФО для получения денег.
Are you into rafting? https://tara-montenegro-rafting.me/ exciting rafting trips down mountain rivers with experienced instructors. A tour of the Tara Canyon offers scenic routes, safety, and unforgettable experiences. Book a rafting tour and discover an active holiday.
mostbet depozit qilish usullari [url=www.mostbet73618.help]mostbet depozit qilish usullari[/url]
мелбет ios [url=www.melbet27438.help]www.melbet27438.help[/url]
melbet pariuri live [url=https://www.melbet63048.help]https://www.melbet63048.help[/url]
1xbet ?ye ol [url=https://1xbet-giris-45.com/]1xbet-giris-45.com[/url] .
ии для учебы студентов [url=https://nejroset-dlya-referatov-4.ru/]ии для учебы студентов[/url] .
mostbet çıxarış təsdiqi [url=mostbet31847.help]mostbet çıxarış təsdiqi[/url]
mostbet sportfogadás mobilon [url=https://mostbet2021.help/]https://mostbet2021.help/[/url]
чат нейросеть для учебы [url=https://nejroset-dlya-referatov-5.ru/]nejroset-dlya-referatov-5.ru[/url] .
муж отдал жену другу [url=https://jena-druga-porno.ru/]муж отдал жену другу[/url] .
mostbet azərbaycanda bloklanırmı [url=https://www.mostbet31847.help]https://www.mostbet31847.help[/url]
ии для учебы студентов [url=https://nejroset-dlya-referatov-6.ru/]nejroset-dlya-referatov-6.ru[/url] .
нейросеть онлайн для учебы [url=https://nejroset-dlya-referatov-9.ru/]нейросеть онлайн для учебы[/url] .
ии для школьников и студентов [url=https://nejroset-dlya-referatov-1.ru/]nejroset-dlya-referatov-1.ru[/url] .
самые дешевые цветы в москве где купить [url=http://www.dostavka-cvetov-moskva495.ru]http://www.dostavka-cvetov-moskva495.ru[/url] .
mostbet oyun qaydaları lucky jet [url=https://www.mostbet2013.help]https://www.mostbet2013.help[/url]
1вин депозит [url=https://1win41825.help]1вин депозит[/url]
dental problems? dental tourism high-quality dental treatment abroad at affordable prices. Implants, veneers, prosthetics, and treatments with a guarantee. We select a clinic, organize your trip, and provide patient support throughout the entire process.
сайт для рефератов [url=https://nejroset-dlya-referatov-2.ru/]сайт для рефератов[/url] .
Zahnprobleme? zahnbehandlung im ausland zahnbehandlung im Ausland mit bis zu 70 % Ersparnis. Implantate, Zahnersatz, asthetische Zahnheilkunde und Diagnostik in modernen Kliniken. Wir unterstutzen Sie bei der Wahl des Landes und der Klinik und organisieren Ihre Reise von A bis Z.
лучшая нейросеть для учебы [url=https://nejroset-dlya-referatov-7.ru/]nejroset-dlya-referatov-7.ru[/url] .
La función de caída (“Tumble”) El clásico del casino que nunca pasa de moda. Juega ruleta europea, americana o en vivo con crupieres reales, apuesta a tus números favoritos y siente la emoción de cada giro. El juego gamble te permite apostar tus ganancias, depende de los proveedores que se utilicen. De hecho, pero el juego en sí no ofrece giros gratis para jugadores canadienses. Durante la última década, podrá optar por servicios como Rapid Transfer. Entonces, Instadebit. Conecta con nosotros Para jugar Gates of Olympus Gratis, el proceso es fácil y rápido. Solo necesitas una conexión a internet y el dispositivo de tu elección. No hay motivos para no sumergirte en esta aventura de los dioses donde las ganancias caen del cielo como rayos de Zeus. Una vez dentro, la diversión es ilimitada y ya que es gratis, ¡no hay estrés que valga!
https://honda-club.cz/forum/profile.php?mode=viewprofile&u=26967
LDPlayer ofrece la posibilidad de personalizar el control y las operaciones de Gates of Play Olympus Slot con ratón y teclado, lo que resulta en una precisión y comodidad mayores en comparación con la pantalla táctil, al mismo tiempo que reduce la fatiga y la incomodidad en los dedos. SLOTS, CASINO EN VIVO, DEPORTES, BINGO Y MÁS Permite que tu teléfono se conecte a la computadora en cualquier momento y lugar, convirtiéndolo en múltiples teléfonos en la nube al instante, para jugar a Gates of Play Olympus Slot en modo de autonivelación las 24 horas del día. Además, disfruta de la potencia de la computadora y la conveniencia del dispositivo móvil. La función de control remoto requiere el uso de OSLink ¿Eres nuevo en el casino? Puedes leer nuestra guía de casino online o visitar nuestra guia para aprender a jugar slots online y empezar con el pie derecho.
dental problems? dental holidays high-quality dental treatment abroad at affordable prices. Implants, veneers, prosthetics, and treatments with a guarantee. We select a clinic, organize your trip, and provide patient support throughout the entire process.
Zahnprobleme? dentist Podgorica zahnbehandlung im Ausland mit bis zu 70 % Ersparnis. Implantate, Zahnersatz, asthetische Zahnheilkunde und Diagnostik in modernen Kliniken. Wir unterstutzen Sie bei der Wahl des Landes und der Klinik und organisieren Ihre Reise von A bis Z.
Маркетплейс 1С-Битрикс — это официальный каталог готовых решений, модулей и интеграций для сайтов на платформе Bitrix. Переходите по запросу [url=https://magikfox.ru/catalog/]Битрикс marketplace[/url] и вы найдете расширения для интернет-магазинов, CRM, SEO, аналитики, платежных систем и автоматизации бизнеса. Удобный поиск и большой выбор приложений позволяют быстро расширить возможности сайта и внедрить новые функции без сложной разработки.
нейросеть студент бот [url=https://nejroset-dlya-referatov-4.ru/]нейросеть студент бот[/url] .
нейросеть онлайн для учебы [url=https://nejroset-dlya-referatov-5.ru/]nejroset-dlya-referatov-5.ru[/url] .
металлические значки на заказ значки металл срочно москва
дизайн значка металлического изготовление металлических значков по заказу
[url=https://kent-casino888.com/]кент рабочее зеркало[/url]
[url=https://kent-casino888.com/]кент рабочее зеркало[/url]
нейросеть текст для учебы [url=https://nejroset-dlya-referatov-9.ru/]нейросеть текст для учебы[/url] .
Платформа 1C-Bitrix — это комплекс программных продуктов для создания сайтов, интернет-магазинов и корпоративных порталов. Переходите по запросу [url=https://magikfox.ru/catalog/license/]готовые продукты Битрикс[/url]. Решения Bitrix24 и 1C-Bitrix: Управление сайтом помогают автоматизировать бизнес-процессы, управлять продажами, выстраивать коммуникации с клиентами и эффективно развивать онлайн-проекты. Подходит для компаний любого масштаба — от малого бизнеса до крупных предприятий.
значок металлический на булавке изготовление значков из металла москва
металлические значки изготовление металлических значков по заказу
значок металлический с логотипом изготовление металлических значков москва
твое порно с женой друга [url=https://jena-druga-porno.ru/]твое порно с женой друга[/url] .
дизайн значка металлического изготовление штампованных и металлических значков
mostbet ügyfélszolgálat magyarul [url=http://mostbet2021.help]http://mostbet2021.help[/url]
металлические значки найк металлические значки москва быстро
If you’re into lotteries, xoso6600 is where it’s at. They have tons of different games and the payouts are legit. Give it a try, you might just get lucky! Give it a try over at xoso6600
значки металлические флаги https://izgotovlenie-znachkov-moskva.ru/
Another easy login option, 16betlogin gets you where you need to go without any fuss. One-click access and you’re in the game. Try it here 16betlogin
Need a quick gaming fix? Friv game is perfect! Tons of simple, fun games to kill some time. Great for when you’re bored or just need a break. Have fun here friv game
mostbet zadat promo kód [url=www.mostbet2019.help]mostbet zadat promo kód[/url]
ии для студентов [url=https://nejroset-dlya-referatov-7.ru/]nejroset-dlya-referatov-7.ru[/url] .
Fortune Ox respins com bombas: quem já limpou a tela 3 vezes seguidas?
Start browsing – Everything is arranged logically, and exploring feels smooth.
Jogo do Tigrinho estratégia conservadora: R$0,25 por giro e paciência de 1500 spins
jak se zaregistrovat na mostbet [url=https://www.mostbet2019.help]jak se zaregistrovat na mostbet[/url]
mostbet výběr na stejnou kartu [url=http://mostbet2019.help/]mostbet výběr na stejnou kartu[/url]
view site – A unique and refreshing vibe makes this website memorable and enjoyable.
cum folosesc cod promotional 1win [url=https://1win71038.help]https://1win71038.help[/url]
1win как вывести через о деньги [url=http://1win41825.help]http://1win41825.help[/url]
Explore here – Pages load quickly, and the structure makes browsing simple.
view site – A unique and refreshing vibe makes this website memorable and enjoyable.
explore now – Found this online, gives a calm and enjoyable browsing experience.
нейросети для студентов [url=https://nejroset-dlya-referatov-6.ru/]нейросети для студентов[/url] .
this link – Easy-to-follow layout with smooth navigation, very user-friendly.
rivercovevault.shop – Discovered this site and it feels peaceful and easy to navigate.
melbet lucky jet castiguri [url=https://melbet63048.help]https://melbet63048.help[/url]
Visit this site – Layout is tidy, and navigating the pages feels effortless.
mostbet výplata výhry [url=https://mostbet2019.help]https://mostbet2019.help[/url]
start here – Clean structure and simple navigation make exploring hassle-free.
browse this page – Offers a wide mix of options, definitely intriguing to explore.
нейросеть для студентов онлайн [url=https://nejroset-dlya-referatov-9.ru/]нейросеть для студентов онлайн[/url] .
Нашёл материал про SEO, где авторы называют это искусством видимости. Разбирают техническую оптимизацию, контент и работу со ссылками. Рекомендую к прочтению: https://yasamstudio.ru/2026/01/29/seo-prodvizhenie-sajta-iskusstvo-vidimosti-v-cifrovom-mire/
learn more – Clean pages and simple structure make shopping stress-free.
visit page – Calm and inviting visuals make exploring the site effortless.
check it out here – Looks inviting and friendly, offering some delightful choices.
see more here – Structured design and a peaceful vibe make the site inviting.
rubyorchardvault.shop – Layout feels well-planned, making the site easy and enjoyable to navigate.
discover this page – Simple and clean design ensures effortless browsing.
цветы с доставкой на дом недорого [url=http://dostavka-cvetov-moskva495.ru]http://dostavka-cvetov-moskva495.ru[/url] .
частное порно с женой друга [url=https://jena-druga-porno.ru/]частное порно с женой друга[/url] .
visit this site – Offers a diverse range of items, making browsing a smooth experience.
explore the site – Organized and accessible design makes browsing intuitive and enjoyable.
Вы можете выбрать игры различных жанров и форматов.
[url=https://7v4.casino/]Pinco Casino[/url]
Служба поддержки работает оперативно и профессионально.
blackjack melbet [url=melbet63048.help]melbet63048.help[/url]
click for details – Layout is straightforward and enjoyable, navigation feels natural.
open this link – Browsing feels relaxed thanks to clear structure and clean design.
mostbet apk yüklə [url=mostbet2013.help]mostbet2013.help[/url]
check this page – The assortment is appealing, and the browsing experience feels smooth.
view site – Clear structure and thoughtful design create a stress-free browsing experience.
Здесь доступны как классические игровые автоматы, так и современные видеослоты.
[url=https://7v4.casino/]Pinco Casino[/url]
Пользователи могут выбирать удобные способы пополнения и вывода средств.
explore the site – A fresh, standout presentation gives the site a memorable quality.
explore the site – The overall feel is refreshing and memorable, unlike typical websites.
this link – Clear and neat structure gives a calm and pleasant browsing feel.
start here – Creative and unique design makes exploring enjoyable and different.
mostbet ios app [url=http://mostbet2005.help]http://mostbet2005.help[/url]
clicksthatsell – Color palette felt calming, nothing distracting, just focused, thoughtful design.
https://playlist.link/d6fcz9ktc7qtj
http://bbs.wuhudj.com/space-uid-1325374.html
mostbet bonus w pln [url=http://mostbet2005.help/]http://mostbet2005.help/[/url]
check this page – A refreshing, unique design that immediately draws attention.
check this page – Everything is presented clearly, providing a relaxed and easy experience.
Discover more – Clear design and intuitive menus make navigation simple.
mostbet Nukus humo [url=www.mostbet73618.help]mostbet Nukus humo[/url]
mostbet история ставок [url=http://mostbet05638.help]http://mostbet05638.help[/url]
click for details – Easy-to-navigate design keeps browsing straightforward and pleasant.
Платформа 1C-Bitrix — это комплекс программных продуктов для создания сайтов, интернет-магазинов и корпоративных порталов. Переходите по запросу [url=https://magikfox.ru/catalog/license/]программы 1С Битрикс[/url]. Решения Bitrix24 и 1C-Bitrix: Управление сайтом помогают автоматизировать бизнес-процессы, управлять продажами, выстраивать коммуникации с клиентами и эффективно развивать онлайн-проекты. Подходит для компаний любого масштаба — от малого бизнеса до крупных предприятий.
https://atmdomino.online/melbet-promo-code-free-bet-kenya-mel200vip-e130-bonus/
click for details – Well-designed pages load fast and feel intuitive.
wheatcovevault.shop – Nice layout overall, makes exploring the site feel very comfortable.
check it out here – Everything loads quickly and navigation feels seamless.
>browse this site – The site feels simple and tidy, making it easy to move between pages.
check it out here – Smooth navigation and tidy design make exploring effortless.
ии реферат [url=https://nejroset-dlya-referatov-6.ru/]ии реферат[/url] .
rosewillowtrading.shop – Feels like a cozy online market with a warm and inviting atmosphere.
open this link – Smooth page transitions and uncluttered design create a pleasant experience.
mostbet vklad a výběr stejné metody [url=http://mostbet2019.help]mostbet vklad a výběr stejné metody[/url]
check shop info – The overall experience is interesting yet calming to navigate.
explore here – Well-arranged structure and polished visuals make navigation effortless.
click for details – Simple design and clear structure make it enjoyable to browse.
Daily Shop – Well-laid-out pages make product discovery easy.
check it out here – Everything seems well organized, easy to move through and satisfying to use.
mostbet mobile [url=https://mostbetr.com/en/mobil_uygulama/]mostbet mobile[/url] .
visit this site – Clean structure with a fresh look, everything is easy to navigate.
windharborvault.shop – The site has a clean, airy feel, making navigation smooth and enjoyable.
browse this page – Well-structured content with a thoughtful interface ensures smooth navigation.
запоминаемость рекламы [url=https://reklamnyj-kreativ14.ru/]запоминаемость рекламы[/url] .
go to website – Thoughtful design and logical layout make browsing smooth and efficient.
see details – The setup feels refined, easy to follow and quite comfortable to use.
click this – Relaxed layout and appealing selections made browsing straightforward.
woodcovevault.shop – Navigation is straightforward, everything feels well-organized and easy to browse.
start here – Smooth and straightforward navigation makes exploring effortless.
pariuri pe cornere melbet [url=https://melbet63048.help]pariuri pe cornere melbet[/url]
Refined Living – Clean layout and smooth navigation make browsing effortless.
visit this site – Pleasant layout and friendly design make exploring the site easy.
browse this page – The overall experience is seamless, making browsing effortless.
check site info – Memorable presentation and clear visuals ensure a pleasant experience.
open this link – Light and organized structure keeps information easy to access.
Open link – Clear layout and responsive pages make navigation effortless.
visit page – Easy-to-navigate design with a friendly theme makes exploring enjoyable.
visit this shop – A clean, calm layout creates a soothing experience while exploring.
mostbet futbol mərc qoymaq [url=https://www.mostbet31847.help]https://www.mostbet31847.help[/url]
Longterm Connect – Smooth interface and structured layout simplify exploring items.
Green Business Portal – Clear and tidy design makes exploring products easy and stress-free.
Orchard Vendor – Pages are neat and browsing is very intuitive.
check this page – Clean visuals and organized structure give an impressive and professional vibe.
see this site – Organized layout and easy-to-read content make browsing comfortable.
mostbet blik wypłata [url=https://www.mostbet2005.help]https://www.mostbet2005.help[/url]
site overview – The name is bold and the content arrangement keeps things interesting.
click for details – Content is easy to read and well-organized, creating a reliable browsing experience.
go to stoneharborvault – Reliable layout, navigating between sections is easy and smooth.
click for details – Everything is easy to find and well-organized, making the site pleasant to explore.
proteinmart – Intuitive interface helps users browse items without confusion.
official link – Engaging structure and lively presentation make browsing feel refreshing.
mostbet akkauntni ochirish [url=http://mostbet73618.help]http://mostbet73618.help[/url]
check this page – Easy-to-follow layout and clean design keep browsing simple.
Take a look – Clean design with responsive pages makes exploring enjoyable.
Creative Vendor – Clear structure and well-organized content make browsing simple.
Retail Hub – Logical structure and smooth interface make exploring simple.
start here – Clear interface and minimal design make content easy to find.
Jogo do Tigrinho no Pix R$5: raspadinha com até 200 giros garantidos agora!
thirtymale.com – The site feels easy to navigate, and the layout is clean and organized.
seo partner program [url=https://prodvizhenie-sajtov-v-moskve4.ru/]prodvizhenie-sajtov-v-moskve4.ru[/url] .
discover suncovevault – Light and simple interface, navigation feels effortless.
conorjmurphy.com – The site has a personal feel, making everything appear genuine and thoughtfully arranged.
Resource Portal – Smooth interface and logical sections make exploring easy.
Open Horizon Hub – Well-organized pages and polished layout make exploration easy.
Vendor Hub – Well-organized pages allow effortless browsing throughout.
click this – Feels high-end and well-designed, making exploration rewarding.
this link – Moving from one section to another is quick and easy.
Expand Knowledge – Well-structured pages let users find information quickly.
see the celebration – A delightful presentation that suggests a fun experience.
check this page – Creative concept and smooth navigation make the experience enjoyable.
Explore here – Smooth interface with clear menus ensures a relaxed browsing experience.
explore the vault – Well-laid-out site, browsing is smooth and clear.
discover this page – Accessing different areas is effortless thanks to a clear interface.
open this link – Professional presentation and clear layout ensure users can browse easily.
Crate Center – Logical sections and fast page loads make exploring products simple.
mostbet app download for android [url=https://mostbetr.com/en/mobil_uygulama/]mostbet app download for android[/url] .
capitalview – Crisp interface with sections that guide users efficiently.
check it out here – The layout allows easy access to all parts of the site.
browse around – Professional style and clear structure create an effortless and intuitive experience.
open this link – Content is arranged clearly, making it easy to read and follow.
explore here – The platform feels deliberate and organized, allowing effortless navigation.
Olive Marketplace – Tidy sections and logical layout make navigation stress-free.
go to website – Polished look and organized layout make the site appear professionally designed.
позиция карточки в выдаче [url=https://reklamnyj-kreativ14.ru/]позиция карточки в выдаче[/url] .
tap here – A nice collection of items, seems like a dependable site to explore.
visit this page – Pleasant rustic theme, exploring the site is comfortable.
start here – Refined visuals and smooth layout make the experience feel professional.
Pact Link Hub – Well-laid-out pages and polished interface improve overall navigation.
browse around – Modern layout and clean interface create an effortless shopping experience.
live show details – The arrangement is clear and gives a smooth user experience.
explore the collection – Organized layout and intuitive interface keep navigation smooth.
узнаваемость бренда баннер [url=https://reklamnyj-kreativ13.ru/]reklamnyj-kreativ13.ru[/url] .
open this link – Fast performance makes moving through the site easy and enjoyable.
visit the site – Well-structured interface, makes exploring the content effortless.
Эта статья предлагает живое освещение актуальной темы с множеством интересных фактов. Мы рассмотрим ключевые моменты, которые делают данную тему важной и актуальной. Подготовьтесь к насыщенному путешествию по неизвестным аспектам и узнайте больше о значимых событиях.
Выяснить больше – https://vivod-iz-zapoya-2.ru/
official link – Well-structured pages and clear messaging make exploring the platform easy.
Bond Center Hub – Well-laid-out pages and organized sections make browsing effortless.
visit this site – Right away it seems well arranged, simple to navigate and nicely organized.
erinkristensen.com – Personal touch here is great, makes the site feel authentic.
Idea Lab – Clean and intuitive interface throughout.
1win oferta [url=1win71038.help]1win oferta[/url]
go to website – Calm, uncluttered interface provides a comfortable browsing experience.
Paramount Center Link – Polished interface and minimal design make browsing simple and enjoyable.
Orchard Retail Hub – Clean interface and fast-loading sections make browsing smooth.
see what’s inside – Niche-oriented content is easy to browse, and everything feels approachable.
explore this outlet – Everything looks tidy, makes finding items effortless.
mostbet loteria [url=http://mostbet2005.help]http://mostbet2005.help[/url]
Paramount Gateway – Clean and structured pages enhance ease of exploring content.
learn more now – The site feels tidy, making it easy to browse and understand.
Shop Hub – Clean and approachable design keeps browsing enjoyable.
mostbet wypłacalność [url=http://mostbet2005.help/]http://mostbet2005.help/[/url]
Quick Shop – Modern look with smooth page transitions.
металлические значки мокап https://znaknazakaz.ru/
explore now – It has a distinctive tone, both in name and visual style.
explore the collection – Organized and thoughtful presentation keeps the experience smooth and enjoyable.
металлические значки москва изготовление металлических значков на заказ в москве
Orchid Hub – Smooth navigation and neat layout improve browsing comfort.
visit valecovevault – Clean layout with a smooth flow, makes exploring very easy.
узнаваемость бренда баннер [url=https://reklamnyj-kreativ12.ru/]reklamnyj-kreativ12.ru[/url] .
металлические значки москва изготовление металлических значков на заказ москва
Bond Center – Minimalist design and clear sections make browsing very simple.
visit walnutcovevault – Clean layout and intuitive navigation, makes browsing simple.
discover more here – Forward-looking concept with a clear interface that’s simple to use.
Actionable Strategies – Clean design with effortless navigation.
melbet portofel electronic [url=http://melbet63048.help/]melbet portofel electronic[/url]
tap to visit – Nice visual style with intuitive navigation, browsing is simple.
Crate Portal – Organized sections with intuitive flow make finding items simple.
junipercovevault.shop – Browsing feels seamless, pages respond fast and the design looks refined.
assetpeak – Cleanly arranged pages that make understanding details quick and easy.
check this page – Cozy and distinctive design ensures a comfortable browsing experience.
металлический значок доты изготовление штампованных и металлических значков
продвижение по трафику [url=https://prodvizhenie-sajtov-v-moskve4.ru/]продвижение по трафику[/url] .
mostbet app [url=https://mostbetr.com/en/mobil_uygulama/]mostbet app[/url] .
check this out – Meaningful idea combined with an easy-to-browse structure.
Smart Partnerships – Easy-to-follow layout and simple browsing flow.
Shop Gateway – Clear sections and smooth interface make browsing natural and simple.
значок металлический цена изготовление металлических значков москва
cum retrag de pe 1win [url=1win71038.help]1win71038.help[/url]
check this out – Pleasant layout with intuitive flow, site feels comfortable to explore.
check site info – Everything feels thoughtfully structured, making exploration easy.
Plaza Connect – Logical layout with easy navigation allows quick access to items.
компании занимающиеся продвижением сайтов [url=https://internet-agentstvo-prodvizhenie-sajtov-seo.ru/]компании занимающиеся продвижением сайтов[/url] .
Browse items – Pages load quickly, and content is presented in a readable way.
pillartrack – Well-structured pages provide a smooth browsing experience.
learn more – It gives off a straightforward vibe, making browsing feel easy.
Smart Partnerships – Pages flow naturally, making exploration smooth.
check this horror page – The theme stands out with its creative edge and captivating feel.
mostbet bonus berilmadi [url=www.mostbet73618.help]www.mostbet73618.help[/url]
open this link – The site layout is clear and minimal, making browsing enjoyable and stress-free.
карточки товаров wildberries [url=https://reklamnyj-kreativ14.ru/]карточки товаров wildberries[/url] .
нейросеть для учебы онлайн [url=https://nejroset-dlya-referatov-8.ru/]нейросеть для учебы онлайн[/url] .
tap to browse – Layout is straightforward, navigating around is hassle-free.
Plum Retail Hub – Clean interface and organized layout ensure smooth browsing.
capitalbond – Logical structure allows users to navigate content quickly.
Хороший гайд по работе с блогерами и лидерами мнений в рамках SMM-стратегии. Автор объясняет, как выбирать инфлюенсеров, оценивать вовлечённость и договариваться об интеграциях. Есть советы по расчёту ROI от коллабораций: https://foto-videomontaz.ru/smm-prodvizhenie-v-soczialnyh-setyah-princzipy-instrumenty-i-pokazateli-effektivnosti/
Strategic Value – Smooth interface with content that’s simple to navigate.
Take a look – Content is easy to follow, and the design is clean and neat.
check more info – The site feels purposeful, with content presented in an easy-to-digest manner.
learn more now – A striking identity that makes browsing feel engaging and different.
Business Network – Layout is polished and exploration is comfortable.
tap here – It feels inviting and easy to browse, creating a nice experience.
mostbet gry karciane [url=https://www.mostbet2005.help]mostbet gry karciane[/url]
bondview – Clean pages with intuitive sections allow effortless browsing.
Global Partners – Professional layout makes navigation simple and intuitive.
browse this page – Neatly arranged content ensures a smooth and enjoyable experience.
Retail Connect – Layout feels professional and user-friendly.
start here – It gives a composed feel, with a design that’s easy to follow.
PG Soft torneio diário R$10k: quem tá lucrando todo dia no Fortune Tiger?
visit this festival page – A lively atmosphere that suggests plenty of fun and activity.
Go to homepage – Navigation is intuitive, and content appears updated and relevant.
ridgehub – Well-organized pages with intuitive navigation make browsing simple.
Fortune Rabbit modo turbo: 1200 giros em 25 minutos – quem já deixou rodando?
see this site – The presentation feels smooth and organized, with a relaxing vibe.
Growth Portal – Clear structure ensures information is easy to access.
технический переводчик [url=https://teh-perevod.ru/]teh-perevod.ru[/url] .
Shop Portal – Clean and intuitive interface keeps browsing smooth.
check out print hub – The structure is simple and accessible, keeping the flow smooth.
циклевка паркета под ключ циклевка паркета в спб недорого
open the page – Thoughtfully arranged content with a focused and simple layout.
позиция карточки в выдаче [url=https://reklamnyj-kreativ13.ru/]позиция карточки в выдаче[/url] .
bondwatch – Logical layout and clear headings ensure content is easy to follow.
циклевка паркета без пыли мастера циклевки паркета
Power Network – Clean, professional design keeps navigation stress-free.
granitestonevendorstudio – Good experience so far, layout helps find things quickly online.
Alliance Network – Clean interface with intuitive navigation throughout.
quick parlor link – Navigation feels natural, and the pages are enjoyable to read.
Jogo do Tigrinho 2026: aposta mínima R$0,20 tá valendo mais que nunca
mostbet verifikasiya rədd [url=http://mostbet2013.help]http://mostbet2013.help[/url]
1win parola uitata [url=https://www.1win71038.help]https://www.1win71038.help[/url]
https://silva-gabreta.cz
https://opaltamura.com
https://bestaff.ru
capitalwatch – Clean and organized layout, makes finding content effortless.
check this shop – Everything is presented neatly, providing a calm browsing experience.
open shop link – The design is polished and gives off a professional vibe.
Wildridge Vendor – Pleasant interface with clear sections, navigating the site was easy.
visit propeller plaza – Everything is well-organized, and the content is useful for a second look.
Buying Hub Pro – Pages are neat and exploration feels effortless.
раскрутка и продвижение сайта [url=https://prodvizhenie-sajtov-v-moskve4.ru/]раскрутка и продвижение сайта[/url] .
https://bpn.ru
Visit store – Fast-loading pages with consistent content improve usability.
discover more – A well-laid-out interface allows smooth and stress-free navigation.
Global Marketplace – Clear sections and smooth navigation make exploring simple.
unifiedpath – Well-organized interface with smooth scrolling allows effortless navigation.
quick access link – The structure makes it easier to map out tasks efficiently.
Global Marketplace – Clear sections and smooth navigation make exploring simple.
click to view – The structure allows readers to follow information smoothly.
Business Connections – Clear layout ensures navigation is natural.
мостбет apk скачать на android [url=www.mostbet05638.help]www.mostbet05638.help[/url]
pagina oficiala melbet [url=http://melbet63048.help/]http://melbet63048.help/[/url]
Shop Vale Harbor – Well-structured pages simplify exploring different items.
продвижение сайта [url=https://internet-agentstvo-prodvizhenie-sajtov-seo.ru/]продвижение сайта[/url] .
assetline – Minimal design with structured layout makes navigation quick.
нейросеть для студентов онлайн [url=https://nejroset-dlya-referatov-8.ru/]нейросеть для студентов онлайн[/url] .
reference link – A practical way to organize steps and stay on track.
Explore Progress Ideas – Clean structure makes exploring concepts effortless and intuitive.
Strategic Hub – Interface is polished with effortless navigation throughout.
Smart Consumer Zone – Clean and organized layout makes browsing simple and efficient.
this helpful link – Well-laid-out pages provide clarity and ease of use.
explore here – Everything is arranged logically, making comprehension straightforward.
улучшение hero карточки [url=https://reklamnyj-kreativ14.ru/]улучшение hero карточки[/url] .
trustveracity – Crisp interface and logical sections simplify navigation.
карточки товаров wildberries [url=https://reklamnyj-kreativ12.ru/]reklamnyj-kreativ12.ru[/url] .
quick access link – The presentation is smooth, keeping readers interested from start to finish.
Check Powers Portal – Logical structure ensures learning steps are straightforward.
Store Hub – Smooth interface with easy-to-follow sections makes exploring simple.
click to view – Thoughtfully arranged pages make browsing smooth and convenient.
Бесплатная юридическая консультация поможет разобраться в сложной ситуации и понять, какие действия предпринять дальше. Переходите по запросу [url=https://yuridicheskaya-konsultatsiya1.ru]бесплатная юридическая консультация юриста по телефону[/url] и вы сможете задать вопрос юристу онлайн и получить разъяснение по гражданским, семейным, трудовым, жилищным и другим правовым вопросам. Специалист подскажет возможные решения, объяснит ваши права и поможет оценить перспективы дела. Консультация доступна онлайн и по телефону, быстро и без лишних формальностей.
mostbet qanday yuklab olish [url=http://mostbet73618.help]mostbet qanday yuklab olish[/url]
veracityview – User-friendly layout with clean menus improves overall usability.
Нашёл материал про SEO, где авторы называют это искусством видимости. Разбирают техническую оптимизацию, контент и работу со ссылками. Рекомендую к прочтению: https://yasamstudio.ru/2026/01/29/seo-prodvizhenie-sajta-iskusstvo-vidimosti-v-cifrovom-mire/
технический переводчик услуги [url=https://teh-perevod.ru/]teh-perevod.ru[/url] .
Visit Progress Portal – Pages are well-laid-out, ensuring smooth navigation.
explore more – Well-laid-out sections allow users to browse effortlessly.
view this page – Information flows naturally, making it easy to read and comprehend.
344 usd to aed Property For Sale In Dubai meedar real estate dubaibuying off the plan
Forms Guide Online – The structure supports a natural and easy reading flow.
Shop Gateway – Fast-loading, clean layout makes exploring products easy and intuitive.
presentview – User-focused design with clear categories makes browsing easy.
мостбет промокод Киргизия [url=mostbet05638.help]mostbet05638.help[/url]
View Focus Concepts – Well-laid-out material keeps users engaged and informed.
mostbet download app [url=https://mostbetr.com/en/mobil_uygulama/]mostbet download app[/url] .
go to resource – Content is organized in a way that’s motivating and easy to implement.
Signal Power Movement – Engaging material makes it easy to explore ideas quickly and clearly.
Stone Connect – Pleasant design and tidy layout make browsing enjoyable.
Open Growth Hub – Smooth design allows readers to understand topics quickly.
browse here – Stable structure and clean design make reading content stress-free.
seo partners [url=https://prodvizhenie-sajtov-v-moskve4.ru/]seo partners[/url] .
check it now – The site presents ideas in a motivating way that’s easy to comprehend.
access bonded hub – Simple structure and clean presentation help users browse efficiently.
villas for sale phuket thailand [url=https://villas-for-sale-in-phuket.com/]villas for sale phuket thailand[/url] .
phuket property for sale thailand [url=https://real-estate-for-sale-in-phuket.com/]phuket property for sale thailand[/url] .
explore this page – Readers can scan and absorb ideas easily due to clear organization.
phuket luxury villas for sale [url=https://villas-for-sale-in-phuket-1.com/]phuket luxury villas for sale[/url] .
улучшение баннеров реклама [url=https://reklamnyj-kreativ13.ru/]reklamnyj-kreativ13.ru[/url] .
View This Platform – Well-structured pages make processes intuitive.
Привет парни…Заказал тут 10-ку МНа..Ну, была задержка с отправкой,дней десять наверно…:fuck: Селлер сразу сказал про компенсацию:monetka:так что я особо не парился…Ну с посылки я конечно при.уел:confused:.18грам + конспирация:bravo:Товар достойный,…1к13 полчаса стабильно” на ура”:hello:Молодцы …порадовали таким подарком…:ok:Удачи в новом году.. Мефедрон, Марихуану, Бошки, Кокаин Наша организация не несет ответственности за применение продукции не по назначению. Осуществляется тотальный контроль качества продукции. Чистота препаратов 99.2%. Исключено добавление примесей. Используется сырье очень высокого качества.поддерживаю ! парни врубаем тормоза пока нет ясности
this helpful link – Clear organization makes consuming content straightforward.
clickfusion – Navigation felt smooth, found everything quickly without any confusing steps.
1win verificare buletin [url=http://1win71038.help]http://1win71038.help[/url]
tap to explore – A clean design ensures readers can understand the information easily.
go to resource – Organized content allows users to understand ideas quickly and clearly.
studio room for rent in dubai monthly Commercial Property For Rent In Dubai 2 bhk flat price in dubaiazizi developments dubai
learn more here – Content flows nicely, making ideas clear and easy to absorb.
condo for sale in phuket [url=https://apartments-for-sale-in-phuket.com/]apartments-for-sale-in-phuket.com[/url] .
freehold condos for sale in phuket [url=https://apartments-for-sale-in-phuket-1.com/]apartments-for-sale-in-phuket-1.com[/url] .
check it out – Clean and reliable design gives a sense of trust and dependability.
go to resource – The design helps guide visitors naturally from one product to the next.
продвижение сайтов [url=https://internet-agentstvo-prodvizhenie-sajtov-seo.ru/]продвижение сайтов[/url] .
open link – Clean presentation helps readers follow ideas without difficulty.
hyperclick – Mobile version looks perfect; no glitches, fast scrolling, crisp text.
рекламный креатив [url=https://reklamnyj-kreativ14.ru/]рекламный креатив[/url] .
open this link – Elegant design choices make navigation and reading smooth.
check it out here – Navigation is intuitive, and content is easy to digest at a glance.
open this link – Clean presentation allows for quick and simple navigation.
Visit Flow Center – Easy-to-use design ensures users can explore content quickly.
start exploring – The interface is structured to make concepts easy to digest.
mostbet download apk [url=https://mostbetr.com/en/mobil_uygulama/]mostbet download apk[/url] .
useful reference – Layout and formatting keep ideas clear and simple to navigate.
quick access link – The site feels logical and well-arranged, making exploration simple.
Explore Strategic Insights – Organized sections help users grasp key points quickly.
Вот отзыв за этот эйфор: https://dixi-secure.ru В Курске нетувсем курильщикам привет. магаз ровный,раза 4 заказывал,все проходило нормально,связь с тс в аське тоже норм,можно обговорить любой вопрос. за качество, в61 больше всего понравился. заказывал эйфоретик,так и не понял его,товарищи тоже не поняли эфекта,хотя употребляли по многу.
Check Out Alpine Deals – Clean and structured pages make exploring simple.
мостбет мобильная версия [url=http://mostbet05638.help]http://mostbet05638.help[/url]
browse here now – Clear layout ensures users can find what they need quickly.
jointly owned property law dubai https://downloadmaps.org hotel apartment marina in dubaifamily room monthly rent in dubai
Start Shopping Now – Smooth layout and organized sections keep browsing enjoyable.
learn more – Pages are presented clearly, allowing for effortless reading and exploration.
see this marketplace – The website design feels clear and easy to follow.
luxury villas thailand phuket for sale [url=https://villas-for-sale-in-phuket.com/]villas-for-sale-in-phuket.com[/url] .
visit site – The layout is clean, making it easy to explore content quickly.
view this page – Navigation is intuitive, making the site easy to explore at your own pace.
phuket property for sale [url=https://real-estate-for-sale-in-phuket.com/]phuket property for sale[/url] .
browse the content – Everything is structured clearly, making exploration quick and easy.
explore products – Everything is presented in a neat, understandable way for visitors.
shop through here – The layout keeps things organized and easy to follow.
discover products here – The interface is clean, letting users move quickly between items.
улучшение креативов [url=https://reklamnyj-kreativ12.ru/]улучшение креативов[/url] .
take a look – Layout feels organized, providing a pleasant reading experience.
visit this site – Clean layout and visuals make exploring the content effortless.
Бесплатная юридическая консультация поможет разобраться в сложной ситуации и понять, какие действия предпринять дальше. Переходите по запросу [url=https://yuridicheskaya-konsultatsiya1.ru]юридическая консультация 24 часа[/url] и вы сможете задать вопрос юристу онлайн и получить разъяснение по гражданским, семейным, трудовым, жилищным и другим правовым вопросам. Специалист подскажет возможные решения, объяснит ваши права и поможет оценить перспективы дела. Консультация доступна онлайн и по телефону, быстро и без лишних формальностей.
explore this link – Everything flows well, allowing for quick and simple navigation.
villas for sale phuket thailand [url=https://villas-for-sale-in-phuket-1.com/]villas for sale phuket thailand[/url] .
click for products – The page structure is simple, allowing readers to scan and find items quickly.
frontierbond.bond – Sleek and modern layout, making navigation simple and intuitive.
Browse Collections – Clean interface that simplifies discovering new products.
phuket luxury apartments for sale [url=https://apartments-for-sale-in-phuket.com/]apartments-for-sale-in-phuket.com[/url] .
apartments in phuket thailand for sale [url=https://apartments-for-sale-in-phuket-1.com/]apartments-for-sale-in-phuket-1.com[/url] .
Коллеги, кто ищет базу по SEO, гляньте этот материал. Там подробно расписано, из чего состоит поисковая оптимизация, какие бывают факторы ранжирования и почему без этого бизнесу в интернете сложно. Почитайте: https://art-instyle.ru/stati/seo-prodvizhenie-sajta-chto-jeto-takoe-i-zachem-nuzhno/
explore more – Well-laid-out sections allow users to browse effortlessly.
view collection – Easy-to-use interface that simplifies searching for products.
view it here – The interface feels organized and intuitive, keeping navigation simple.
browse products here – Minimalist design keeps browsing simple and intuitive.
check this store – Smooth navigation and well-organized content make browsing effortless.
clickifypro – Mobile version looks perfect; no glitches, fast scrolling, crisp text.
привествую мои друзья форумчане , не Мефедрон, Марихуану, Бошки, Кокаин спасибо за внимание!Что особо порадовало – скидывали несуществующий трек еще задолго до отправки, который, конечно, не бился или показывал какую-то х*иту.
open link – Organized layout guides the user through the content effortlessly.
dubai property finder home for sale 3 Bedroom Apartments For Sale In Dubai furnished room for rent in dubai for one monthinvest on property in dubai
как установить melbet apk [url=https://melbet18207.help/]https://melbet18207.help/[/url]
visit online shop – Nicely spaced elements that improve clarity across the page.
https://videochatruletka.org/
https://intelicode.com/
see more info – Clear and concise content guides users effectively while offering actionable insights.
view it here – Clean layout and logical structure make exploring products effortless.
check this page – Well-laid-out information helps users find what they need fast.
explore shop page – Simple and neat design ensures effortless navigation.
view products online – Clear design and light pages make exploring enjoyable.
https://balatonnyomda.hu/
net seo [url=https://internet-agentstvo-prodvizhenie-sajtov-seo.ru/]net seo[/url] .
explore here – The structure is intuitive, letting readers move through information naturally.
улучшение hero карточки [url=https://reklamnyj-kreativ13.ru/]улучшение hero карточки[/url] .
1win mines castiguri [url=http://1win71038.help/]1win mines castiguri[/url]
see this platform – The interface is visually clear, making product browsing easy.
Go to Direction Hub – Intuitive pages make exploring and understanding material effortless.
https://PostEzAds.com/588/posts/1/1/1899585.html
go to this website – A neat interface allows for fast and comfortable browsing.
Visit Direction Portal – Intuitive layout helps users grasp material quickly and effectively.
windstoneexchange.shop – Pages are neatly arranged, making it simple to find information fast.
browse products here – Lightweight interface ensures a seamless browsing experience.
visit this page – The content is well-structured and keeps readers interested throughout.
перепланировка квартиры москва [url=https://pereplanirovka-kvartir11.ru/]pereplanirovka-kvartir11.ru[/url] .
Check Out Brook Store – Clear navigation keeps everything accessible and user-friendly.
explore this page – Organized content and tidy visuals make navigating the site effortless.
check details – A reader-friendly structure enhances overall comprehension.
phuket villas for sale [url=https://villas-for-sale-in-phuket.com/]phuket villas for sale[/url] .
this helpful link – Everything is arranged in a way that feels natural and accessible.
reference link – Clean, professional layout enhances readability and visual appeal.
see this marketplace – Organized pages and menus simplify navigation.
discover products here – Organized structure keeps navigation fast and smooth.
property for sale phuket [url=https://real-estate-for-sale-in-phuket.com/]property for sale phuket[/url] .
check this out – Content is structured clearly, keeping readers interested and focused.
this helpful link – The site keeps things clear and avoids unnecessary complexity.
enter this site – Logical layout and clear design make exploring the site simple and enjoyable.
growthrequiresdirection.click – The layout is clear and helps ideas come across smoothly.
view store page – Quick loading pages create a smooth browsing session.
В этом интересном тексте собраны обширные сведения, которые помогут вам понять различные аспекты обсуждаемой темы. Мы разбираем детали и факты, делая акцент на важности каждого элемента. Не упустите возможность расширить свои знания и взглянуть на мир по-новому!
Узнать больше – https://vivod-iz-zapoya-1.ru/
visit this page – The site is structured logically, making it easy to explore details.
growthrequiresdirection.click – The layout is clear and helps ideas come across smoothly.
property handover dubai Property For Sale In Dubai damac properties czym dubai marina zmiana nazwydubai industrial estate
307 не появился??? Мефедрон, Марихуану, Бошки, Кокаин Крутой магаз. Ассортимент радуетЯ выхватил бан, ты злобняк
view items online – Logical menus and tidy design make navigation smooth.
browse this website – The design is lightweight, making navigation quick and fluid.
Open Meadow Marketplace – Smooth layout helps users find items without confusion.
official website – Well-built layout that helps users move around without confusion.
click for details – An engaging page that inspires users to think differently.
explore this store – Clean presentation and simple navigation help users browse easily.
this helpful link – Neat and simple design makes reading content easy.
Browse Daisy Collections – Everything is laid out clearly, making navigation easy.
visit Lake Hub – Well-organized layout allows users to locate content quickly.
phuket luxury apartments for sale [url=https://apartments-for-sale-in-phuket-1.com/]apartments-for-sale-in-phuket-1.com[/url] .
freehold apartments for sale in phuket [url=https://apartments-for-sale-in-phuket.com/]apartments-for-sale-in-phuket.com[/url] .
open this online shop – Pages feel responsive, letting users move between items fast.
browse this link – A unified look that keeps the experience smooth and clear.
see more info – Organized sections help readers explore information naturally and clearly.
browse products – The design is clean and allows for quick and effortless exploration.
reference link – Everything is presented in a consistent and coordinated way.
view items online – The layout is intuitive, allowing users to find products quickly and easily.
see details here – The overall flow makes browsing simple and enjoyable.
shop now – Pages are easy to follow, allowing quick access to everything you need.
visit this page – Content is structured logically, allowing easy access to information.
open marketplace – Clean structure helps users find what they need quickly.
view this page – The site structure is streamlined, making it easy to locate key information.
visit this page – Clear sections help readers stay focused and understand easily.
open this link – Information is easy to find and understand thanks to tidy organization.
online shop link – Everything is logically arranged, making navigation intuitive.
view content – Well-laid-out pages make moving through information smooth and easy.
check this page – Navigation feels natural with tidy and visually appealing pages.
dubai property real estate Apartments In Uae For Sale 1.bedroom flat in al twar 2 dubai for renthow to buy dubai real estate
mostbet казино [url=https://mostbet05638.help/]https://mostbet05638.help/[/url]
А Всем Добра и Здоровья Близким))) Мефедрон, Марихуану, Бошки, Кокаин ну если для кавото это естественно, для меня нет…кавото и палынь прет..Хороший магазин тоже не раз уже к нему обращался я считаю что этот магазин достоин огромного внимание ! Мир тебе бро и процветания удачи в работе !:ok:;)ОБРАЩУСЬ ЕЩЕ К ТЕБЕ БРО ОБЯЗАТЕЛЬНО !) ЕЩЕ РАЗ УДАЧИ
оптимизация и seo продвижение сайтов москва [url=https://internet-agentstvo-prodvizhenie-sajtov-seo.ru/]оптимизация и seo продвижение сайтов москва[/url] .
согласование перепланировки в москве [url=https://pereplanirovka-kvartir11.ru/]согласование перепланировки в москве[/url] .
discover items – A neat structure keeps everything readable and easy to locate.
open this link – Smooth navigation enhances the overall browsing experience.
Turn your network into income—apply to our affiliate program!
Share our products and watch your earnings grow—join our affiliate program!
take a look here – Neat layout ensures users can find what they need easily.
Thank you for your sharing. I am worried that I lack creative ideas. It is your article that makes me full of hope. Thank you. But, I have a question, can you help me?
enter this site – Smooth and organized pages create an enjoyable browsing experience.
запоминаемость рекламы [url=https://reklamnyj-kreativ12.ru/]reklamnyj-kreativ12.ru[/url] .
access platform – The clean design makes it quick to locate what you need.
view items online – Logical layout and clean design help users explore effortlessly.
visit this page – Organized content and simple design make navigation stress-free.
explore this page – Well-structured sections help visitors navigate the site naturally.
take a look here – Neat and intuitive layout provides a pleasant user experience.
check listings – Browsing feels simple thanks to clear sections and clean visuals.
click to view store – Tidy pages and menus make navigating content simple.
view items online – Pages are easy to read, and navigation is simple and efficient.
прогноз доли выбора карточка [url=https://reklamnyj-kreativ13.ru/]прогноз доли выбора карточка[/url] .
visit platform now – The layout flows well and keeps everything easy to access.
learn more here – The sections are laid out clearly for better usability.
rent villa in dubai with swimming pool Apartments For Sale In Dubai Investment Park dubai real estate bubbleservice apartment in downtown dubai
go to this site – Clean visuals paired with simple navigation make exploring seamless.
online store link – Everything is logically placed for intuitive browsing.
browse collection – Pages are arranged logically, making it simple to explore.
see offerings – The interface is intuitive, making it easy to locate and review items.
Ну да ,я уже посылку с 15числа жду всё дождаться не могу . Мефедрон, Марихуану, Бошки, Кокаин друг ты о чем говоришь? есть ася и скайп, на глупые вопросы(есть ли порошок JWH, как что вставляет, что ко скольки делается, и т.д.) мы не отвечаем, мы работаем только с людьми которые понимают, что “это” и как это “едят”, парни вот без обид – мы же не википедия… да парни все легал, все анализы делаются на Моросейке… да да да…благодарствуюсь, бро)) под затупил малеха, вижу ты тут, все хорошо
enter this site – Well-organized sections make exploring and reading quick.
explore Orchid shop – The layout is simple, allowing effortless browsing.
online store link – The interface is minimal and easy to follow for everyone.
Ищете надежные лицензии для 1С-Битрикс? Мы предлагаем легальные решения для всех типов проектов: интернет-магазинов, корпоративных сайтов и порталов. Переходите по запросу [url=https://magikfox.ru/catalog/license/upravlenie-saytom/]редакция 1С Битрикс интернет магазин[/url]. Быстрая активация, официальная поддержка и выгодные условия – обеспечьте своему веб-проекту стабильную работу и защиту с надежным ПО уже сегодня!
browse marketplace – Smooth layout ensures quick access to content and clear presentation.
start browsing – The interface feels clean, keeping everything easy to access.
https://feron.ru/bitrix/redirect.php?goto=https://www.bandsworksconcerts.info/index.php?ShelbyCruz24
luxury villas in phuket for sale [url=https://villas-for-sale-in-phuket-1.com/]villas-for-sale-in-phuket-1.com[/url] .
visit marketplace – The design keeps everything accessible and easy to explore.
learn more online – Content is arranged logically and easy to follow.
see this marketplace – Logical structure helps users explore without confusion.
apartments for sale thailand phuket [url=https://apartments-for-sale-in-phuket.com/]apartments for sale thailand phuket[/url] .
phuket thailand real estate for sale [url=https://real-estate-for-sale-in-phuket.com/]real-estate-for-sale-in-phuket.com[/url] .
check district shop – The pages are easy to browse and everything is visually balanced.
open this online shop – Pages respond quickly and the interface is intuitive.
take a look – Navigation flows smoothly while content remains easy to understand.
enter the shop here – Users can navigate quickly thanks to the simple layout.
villas for sale in phuket thailand [url=https://villas-for-sale-in-phuket.com/]villas for sale in phuket thailand[/url] .
danube sheikh zayed road Townhouses For Rent In Dubai dubai distress sale propertyfree property ads in dubai
apartments for sale in phuket thailand [url=https://apartments-for-sale-in-phuket-1.com/]apartments for sale in phuket thailand[/url] .
see more info – Navigation feels intuitive, with content arranged clearly for easy browsing.
open resource – Smooth and consistent design keeps content easy to follow.
go to Dunebrook store – Clear visuals and structured menus make browsing smooth.
explore this shop – A neat design allows users to move through products with ease.
explore this page – Well-arranged sections make navigating natural and intuitive.
произвёл оплату на регу.жду трека!думаю быстро всё получится. https://myline-24.ru Заливают паршивым вином.разобрался, поэтому и удалил сообщение до того как ты ответил )
this online hub – Organized layout helps users move between sections naturally.
Старый паркет? https://shlifovka-parketa.ru профессиональное восстановление деревянного пола без пыли и лишних затрат. Удаляем царапины, потемнения и старое покрытие, возвращаем гладкость и естественный цвет. Используем современное оборудование, выполняем циклевку, шлифовку и лакировку паркета под ключ с гарантией качества и точным соблюдением сроков.
check this courtyard shop – Pages are neatly organized, allowing quick navigation.
visit this page – Neat organization helps users find information quickly and naturally.
explore here – Smooth navigation and organized content make everything easy to find.
visit westwardbond – Pages are structured logically, so nothing feels out of place.
Hey! This is kind of off topic but I need some advice from an established blog. Is it very difficult to set up your own blog? I’m not very techincal but I can figure things out pretty fast. I’m thinking about creating my own but I’m not sure where to begin. Do you have any ideas or suggestions? Cheers
рейтинг казино
online store link – Navigation flows naturally with well-organized pages.
explore here – Well-structured content ensures navigation feels natural.
dubai hills sidra villas for sale Luxury Villas For Sale In Dubai Villas for rent in Springs 9best place to rent a house in dubai
It’s awesome to pay a visit this web page and reading the views of all mates regarding this piece of writing, while I am also zealous of getting experience.
google top
технический переводчик услуги [url=https://teh-perevod.ru/]teh-perevod.ru[/url] .
платил 5 февраля свою посылочку!как вы поняли ничего не получил!ТС кормил меня завтраками,в итоги обещал вернуть деньги если не получу до 28 февраля!деньги мне тоже никто не вернул вместо этого мне прислали новый трек и написали что мы обещали что получите товар и деньги возвращать не буду!мои обьяснения о том что вашу посылку уже некому получать он слушать не хочет и возвращать деньги тоже!Ув.Адмистрация форума прошу не удалять мой пост и если нужно могу скинуть переписку! Мефедрон, Марихуану, Бошки, Кокаин магазин хороший, спору нет, вот только уж оооочень он не расторопны. и ответ приходится ждать так же долго…сегодня в 16:25 на почте получен конверт ,в нем было вещество лимоного цвета 0,3 г , сохнет ,позже подробно опишу
visit homepage – Easy-to-follow pages make exploring smooth and straightforward.
check this page – Smooth and tidy layout makes the website enjoyable to navigate.
Maxim Anma is a professional mobile massage service available throughout Seoul, Gyeonggi, and Incheon. Skilled therapists come directly to you to provide relaxing, personalized care including Thai, aroma, and Swedish massage options. Open 24 hours with a reliable post-payment system and full privacy protection, guaranteeing a relaxing and easy wellness experience whenever you need it.
출장안마
open this website – Fast-loading pages and tidy layout create a comfortable experience.
investment apartments for sale in phuket [url=https://apartments-for-sale-in-phuket.com/]apartments-for-sale-in-phuket.com[/url] .
анализ карточек маркетплейс [url=https://reklamnyj-kreativ12.ru/]reklamnyj-kreativ12.ru[/url] .
luxury villas in phuket for sale thailand [url=https://villas-for-sale-in-phuket-1.com/]villas-for-sale-in-phuket-1.com[/url] .
click to enter – Balanced layout ensures smooth navigation and readability.
view details here – Well-structured design ensures users can browse without confusion.
Старый паркет? шлифовка паркета полов профессиональное восстановление деревянного пола без пыли и лишних затрат. Удаляем царапины, потемнения и старое покрытие, возвращаем гладкость и естественный цвет. Используем современное оборудование, выполняем циклевку, шлифовку и лакировку паркета под ключ с гарантией качества и точным соблюдением сроков.
meerut real estate dubai blue water project https://crossroadscrc.org One Crescenta room for rent
real estate in phuket [url=https://real-estate-for-sale-in-phuket.com/]real-estate-for-sale-in-phuket.com[/url] .
phuket thailand villas for sale [url=https://villas-for-sale-in-phuket.com/]phuket thailand villas for sale[/url] .
Старый паркет? шлифовка паркета в спб профессиональное восстановление деревянного пола без пыли и лишних затрат. Удаляем царапины, потемнения и старое покрытие, возвращаем гладкость и естественный цвет. Используем современное оборудование, выполняем циклевку, шлифовку и лакировку паркета под ключ с гарантией качества и точным соблюдением сроков.
laguna phuket apartments for sale [url=https://apartments-for-sale-in-phuket-1.com/]apartments-for-sale-in-phuket-1.com[/url] .
https://xn—-8sbfblevwnddgcwsalg0e2k.xn--p1ai/
https://seoperrot.ru/
https://lite.evernote.com/note/1d04e1b6-e620-e65e-f198-1eb7b5f1b687
explore platform – Balanced sections and spacing make reading and navigation smooth.
check this page – Layout is tidy, making browsing comfortable and quick.
Этот магазин нериально всегда все четко делал, н ошиблись может случайно поговри я думаю решится https://irga-nn.ru У меня настоящий 96 процентный спирт с больницы. Всё растворилось. Чу чуть паровой бани.Кто под нос что-то бормочет,
https://bookmark-dofollow.com/story27850750/%D0%9D%D0%BE%D0%B2%D1%8B%D0%B9-1%D1%85%D0%91%D0%B5%D1%82-%D0%9F%D1%80%D0%BE%D0%BC%D0%BE%D0%BA%D0%BE%D0%B4-%D0%BD%D0%B0-%D0%A4%D1%80%D0%B8%D0%B1%D0%B5%D1%82-2026-1xbum
go here now – Clear structure and visuals guide users naturally through pages.
Ищете надежные лицензии для 1С-Битрикс? Мы предлагаем легальные решения для всех типов проектов: интернет-магазинов, корпоративных сайтов и порталов. Переходите по запросу [url=https://magikfox.ru/catalog/license/upravlenie-saytom/]Битрикс управление сайтом редакции[/url]. Быстрая активация, официальная поддержка и выгодные условия – обеспечьте своему веб-проекту стабильную работу и защиту с надежным ПО уже сегодня!
browse rank site – Straightforward content that is easy to read and understand.
Apartments for sale in The Opus Luxury Villas For Sale In Dubai smart way real estate dubaiWhat global and regional factors will shape Dubai property prices in 2026? key risks to watch
check out this store – The overall design is appealing and keeps things easy to find.
discover more – Glanced at it and it seems packed with clear information
перевод технического текста в москве [url=https://teh-perevod.ru/]teh-perevod.ru[/url] .
check out this store – The overall design is appealing and keeps things easy to find.
перепланировка квартир [url=https://pereplanirovka-kvartir11.ru/]перепланировка квартир[/url] .
Can you be more specific about the content of your article? After reading it, I still have some doubts. Hope you can help me.
discover more – Glanced at it and it seems packed with clear information
Jogo do Tigrinho estratégia baixa aposta: R$0,25 por 1000 giros – funciona?
this online tab store – Fast response and engaging content make browsing seamless.
обучение seo [url=https://kursy-seo-12.ru/]обучение seo[/url] .
techify – Overall, professional vibe here; trustworthy, polished, and pleasantly minimal throughout.
explore tag hub – Finding content is quick thanks to the well-planned structure.
open this link – Layout appears organized and user-friendly
что то не могу зайти на сайт ( https://alekspushkin.ru подскажите, а спорные вопросы решаются в данном магазине?Принял, участие в совместке номер 3, кинг как и подобает этому магазу, все сделал со скоростью звука, прошло 5 дней после оплаты и у меня в руках лежат 50 тонн этой велеколепной вкусняшки, СПАСИБО. Я просто не понимаю как люди заказывают у других когда есть chemical
перепланировка квартиры согласование [url=https://pereplanirovka-kvartir12.ru/]pereplanirovka-kvartir12.ru[/url] .
visit link – Browsed lightly and found some handy insights
how internet partner [url=https://prodvizhenie-sajta-po-trafiku2.ru/]prodvizhenie-sajta-po-trafiku2.ru[/url] .
browse now – Pages load quickly and the layout is easy to move through
visit this platform – Everything is structured for clarity, making the site easy to use.
Vladimir Divis from Prague, the actress`s 18,000006 the six…
see more – Everything opens quickly and navigating is simple
Hello everyone, it’s my first visit at this web page, and post is genuinely fruitful in favor of me, keep up posting such content.
https://panen100.org/
villas for sale in phuket [url=https://villas-for-sale-in-phuket-1.com/]villas for sale in phuket[/url] .
Shop Dune Cove – The interface is clean, and browsing feels very natural.
browse now – Really enjoying the energy, everything feels interactive
take a look – Clean design makes the information accessible and easy to read
click to visit store – A clean presentation that keeps everything accessible.
1 bhk flat https://esidirectory.org property for rent in layan dubaidubai marina property sale
visit this page – Organized structure allows easy navigation through the content
clickmetric – Appreciate the typography choices; comfortable spacing improved my reading experience.
чат нейросеть для учебы [url=https://nejroset-dlya-referatov-8.ru/]nejroset-dlya-referatov-8.ru[/url] .
go here – Fresh content and lively energy make it easy to enjoy
Ребята, наткнулся на обзорную статью по услугам SMM. Автор подробно расписывает всё: от разработки стратегии и создания контента до таргета, работы с блогерами и аналитики. Есть блок про автоматизацию и современные тренды. Очень структурированно, рекомендую к прочтению: https://iwatt24.ru/uslugi-smm/
mossmingle.shop – The site feels well-planned, with content that transitions smoothly.
Special Finds – Navigation is simple, and pages feel clean and accessible.
click here – Found this site and it feels well-organized and simple to browse
Hot Picks – Layout is tidy and finding items feels effortless.
take a look – The site is easy to navigate and well arranged
buket цветы [url=http://cvejie-cveti.ru]http://cvejie-cveti.ru[/url] .
learn more here – The overall style is innovative and draws attention.
click here – Layout feels orderly and navigating is effortless
Visit Echo Brook – Navigation is effortless and pages load cleanly.
check it out – The shop gives a simple and user-friendly browsing experience
Нужно 5 сообщений что бы написать модэратору, не обесуть Мефедрон, Марихуану, Бошки, Кокаин Тоже чуть дольше чем обычно ждал посылку,но все получил в полном объеме.Я думаю лучше маленько подождать и без суеты забрать.Привет! В Наличии рега мощная 1к30 и скорость мука.
meadowharbor selection – Content is clear and browsing is smooth.
browse this – Everything is in place and browsing feels effortless
Limited Editions – Browsing is smooth and items are displayed neatly.
quick access – A well-arranged layout that makes moving between pages easy
explore site – Clear organization allows for smooth and pleasant navigation
Special Finds – The site feels organized and browsing items is effortless.
visit this resource – The content is useful and presented in a very understandable way.
meadowstone picks – Everything loads nicely and the site feels intuitive.
start browsing – Everything is placed logically so it’s easy to find sections
bayt com dubai Townhouses For Rent In Dubai bateaomar real estate dubai1bhk in al nahda dubai
check it out – Found several interesting things while casually browsing around
stone shop page – The items look thoughtfully showcased and easy to view
Daily Deals – Layout is tidy and moving through products is simple.
view this – Came across engaging content while casually exploring the site
http://tr.clanfm.ru/viewtopic.php?f=39&t=20265
check this stylish shop – Everything looks refined and easy on the eyes.
shop collection – Everything is arranged in an easy-to-digest format
Featured Items – Content is structured clearly, making exploration simple.
[url=https://duelcasino-github-io.vercel.app/]instant crypto withdrawals at duel[/url]
mintorchard marketplace – Everything is displayed clearly and moving through the site is easy.
visit this page – Attractive design and content is displayed clearly
технический перевод услуги [url=https://teh-perevod.ru/]teh-perevod.ru[/url] .
[url=https://duelcasino-github-io.vercel.app/no-kyc/]Duel Casino[/url]
shop artwork – Well-organized content ensures effortless exploration
где согласовать перепланировку [url=https://pereplanirovka-kvartir11.ru/]pereplanirovka-kvartir11.ru[/url] .
discover today – Pages are well-arranged and navigation is intuitive
discover noble emporium – The organization and design make it feel trustworthy.
go to site – Nice design with content flowing in an easy-to-follow manner
Shop Now – Pages are well-structured and content is easy to find.
согласование переоборудования квартиры [url=https://pereplanirovka-kvartir12.ru/]pereplanirovka-kvartir12.ru[/url] .
see gallery items – It gives off a relaxing vibe while viewing the collection
Popular Products – Layout feels logical and makes shopping straightforward.
shop now – Smooth scrolling and easy access to all areas of the site
у них Methoxetamine бадяженный или нет? сколько принял мг и какие симптомы были? Мефедрон, Марихуану, Бошки, Кокаин Админ по аське с кем связался адекват=))) радует.Приятный сайт цены тоже радуют сделал заказ=)) буду ждать. Качество Каличество отпишубро я не как не пойму как фейк мне лс отвечал здесь
mintstone shop – Structure feels organized and moving through sections is effortless.
explore smart strategies – The material is engaging and clearly crafted with care.
visit here – Well-structured pages make the site easy to browse
quick access – Everything is placed intuitively for a seamless experience
visit galleria – Navigation is smooth and items are easy to find
browse this – Tidy structure makes the site simple to navigate
Popular Products – Layout is clean and finding items is fast.
Shop Ember Meadow – Pages are tidy and browsing is effortless.
discover strategy ideas – I like the practical approach, making it worth another visit.
mintstone hub – Layout is clean and browsing items is simple.
see more – Quick browse shows a tidy structure and simple layout
take a look – Saw this page and it seems arranged in a clear way
visit emporium – The layout is clean and navigating through pages is simple
enter gallery – Well-laid-out design allows quick access to all content
Marasi Business Bay guide https://freeandopenisland.org major real estate developers in dubaial mansoor tiger tower
open purpose page – Helpful material that inspires strategic thinking and clarity.
Hot Picks – Pages are well-organized and the interface feels professional.
check this site – Browsing is simple and moving through pages is smooth
Exclusive Offers – Navigation is straightforward and content is presented clearly.
mintstone exclusive – The site feels organized and information is easy to follow.
Наткнулся на интересный материал про SEO — там его называют искусством и наукой видимости. Автор рассказывает про техническую оптимизацию, контент и линкбилдинг. Есть мысли про будущие тренды. Рекомендую: https://loveloveme.ru/seo-prodvizhenie-sajta-iskusstvo-i-nauka-vidimosti-v-cifrovom-mire/
see full details – The straightforward design makes everything easy to digest.
start exploring – Well-arranged sections make browsing straightforward
start exploring – A neat design makes moving between sections smooth
take a look here – Plenty to see here and it all loads without delay
ии для студентов [url=https://nejroset-dlya-referatov-8.ru/]ии для студентов[/url] .
creekharbortrading – This site seems easy to navigate and loads without delay
Bestsellers – Everything is logically arranged and browsing is simple.
21 мая заказал -23 получил трек.все ок ,жду посыл https://kinodiva.ru Заказы только СПСР доставкой?Доброго времени суток Всем порядочным форумчанам-кто здесь заказывал,но трек так и не бьёться,или я один такой закинул 45к+доставка,и”жду у моря погоды”В скайпе вчера отвечали сегодня-игнор!
Current recommendations: https://oe18.org/newsroom/2026/03/13/totally-free-big-boobs-porn-large-chest-buxom-women/
review techpack toolkit – Overall, a solid site with well-structured content that’s informative and easy to access.
mossharbor marketplace – Layout is neat and moving between pages is smooth.
Must-Have Products – Layout is structured nicely and finding items is easy.
Relevant tips: https://mr-loan.co.uk/novos-casinos-online-portugal-arrolamento-para-dezembro-2025/
see products – Content is displayed neatly, making browsing effortless
seo информационных порталов [url=https://prodvizhenie-sajta-po-trafiku3.ru/]prodvizhenie-sajta-po-trafiku3.ru[/url] .
Read the extended version: https://ferienhauspetzold.de/2026/03/14/instagram-viral-intercourse-video-sexy-indians-at-the-xdirtygfs-com/
view this – Everything is arranged logically with clear information flow
check offerings – The structure is clean and finding items is straightforward
Must-Have Products – The platform feels intuitive and sections are easy to navigate.
a href=”[https://berrycovegalleria.shop/](https://berrycovegalleria.shop/)” />open this – Everything looks visually balanced and easy to go through
mossstone shop – Site feels structured and navigating between sections is intuitive.
take a look – Clean pages and fast loading make navigation easy
take a look – Browsing is simple thanks to a neat, organized layout
Check Out Crown Cove – Navigation feels effortless and smooth.
Gift Ideas – Layout is professional and browsing items feels comfortable.
how to make money in dubai from home https://kienthuctrade.net best website to buy property in dubaiproperties group in facebook dubai
explore deals – Clear menus and fast pages create a smooth experience
>browse this site – The site feels simple and tidy, making it easy to move between pages.
Curated Collections – Navigation is clear and the platform feels professional.
shop now – Smooth navigation and tidy pages improve usability
discover items – Simple, clear design that makes exploring effortless
open shop link – Everything is structured logically and exploring is simple
Popular Products – Layout feels organized and hassle-free.
view products – Content is well arranged and easy to explore
explore windstone – Enjoyable experience, everything looks well-organized
click for products – Clean interface and simple navigation make the experience pleasant.
visit this platform – The minimal design keeps browsing efficient and easy.
click to browse progressforge – Smooth interface, very comfortable for browsing
check out this marketplace – The design is simple yet effective for quick browsing.
view products – Organized layout allows users to explore items quickly and comfortably.
berrystoneoutpost – Everything seems structured well and easy to find information quickly
whitestone portal – Simple layout and clear visuals make navigation effortless.
Exclusive Offers – Browsing is effortless and the platform feels approachable.
fitproawardsuk.com – Professional layout and well-structured design make the site easy to navigate.
visit homepage – Logical layout ensures key information is easy to find and understand.
Must-Have Products – Layout is structured nicely and finding content is quick.
Тут охота чисто на клиентов. Мефедрон, Марихуану, Бошки, Кокаин заказал не мало,всё пришло за кач не знаю как опробуют кролы отпишуРебята работают ровно, оператор адекватный все подскажет и поможет) С доставкой тоже не было проблем)))
check this out – Organized content and intuitive navigation make browsing enjoyable
Shop Now – Items are displayed clearly and moving through pages is simple.
перепланировка услуги [url=https://pereplanirovka-kvartir11.ru/]перепланировка услуги[/url] .
Special Finds – I like how effortless it is to navigate.
nightorchard selections – Pages load without delays and site feels user-friendly.
shop collection – Well-organized content makes exploring straightforward
see this marketplace – Organized pages make browsing comfortable and quick.
click here – Well-structured pages and enjoyable browsing experience
check more info – Intuitive navigation and organized content make browsing comfortable.
Curated Collections – The sections are clear, making exploration easy.
explore collection – Navigating pages is effortless and well-structured
discover this hub – Organized content and fast-loading pages make the experience enjoyable.
see more – Checked it quickly and the layout is simple yet effective
продвижение по трафику [url=https://prodvizhenie-sajtov-po-trafiku.ru/]продвижение по трафику[/url] .
New Arrivals – Finding products is easy and the site feels welcoming.
Bestsellers – Everything is logically arranged and loads quickly.
browse items – Simple structure allows effortless navigation
visit oakcovegallery – Browsing feels smooth and pages load without delay.
view more here – Well-presented idea and intuitive structure allow smooth browsing.
visit marketplace now – Clear design and organized pages help users find items easily.
browse now – Pages are well laid out and easy to move through
click here – Well-laid-out site with intuitive navigation
Hot Picks – Sections are clear, and browsing feels intuitive.
Apartments for sale in The Sterling https://bmgdubai.com home for life real estate dubaiflats for rent in jvc dubai
visit homepage – Smooth structure and well-placed content improve usability.
цветы не дорого [url=https://cvejie-cveti.ru/]https://cvejie-cveti.ru/[/url] .
mintfloralcowhitby.com – Distinctive name and warm feel, browsing the site is enjoyable.
Trending Now – Everything is arranged clearly and browsing is intuitive.
shop now – Fast-loading pages with organized sections make browsing smooth
Top Picks – Sections are well-organized and information is easy to locate.
oakstone shop online – Pages load quickly and the interface is intuitive for browsing.
discover zenstone – Well-designed pages with user-friendly navigation
shop here now – Fast-loading design ensures users can move through content easily.
visit link – Content is easy to locate and the pages are neatly arranged
view products – Simple layout ensures content is readable and easy to browse
check more info – Clean layout and sophisticated visuals create a strong first impression.
Hot Picks – I enjoy how the layout keeps everything organized and accessible.
alexanderbuonointl.com – Sleek and professional layout, immediately creates a strong first impression.
check products – Everything is clear and navigation feels effortless.
посылка упакована оригинально =)) и скорость сборки удивила! Мефедрон, Марихуану, Бошки, Кокаин спасибо за пожеланияПеревел деньги на Альфа 21.04.2014 после умення узнали даные (Ф.И.О телефон и адрес) Оператор сказал что посылка будет отправлена 22.04.2014. !!!! 23.04.2014 скинули номер наклодной. По номеру наклодной смог отслеживать свою посылку 24.04.2012.
Hot Picks – Layout feels polished and moving between items is effortless.
successpartnersgroup.shop – Very easy to navigate, the pages are structured clearly
Trending Now – Browsing feels seamless and the layout is tidy.
продвижение по трафику сео [url=https://prodvizhenie-sajta-po-trafiku3.ru/]prodvizhenie-sajta-po-trafiku3.ru[/url] .
visit this page – Well-structured and easy to browse, with clear info
take a look – Simple design with clear paths makes browsing intuitive
view details here – The site keeps things simple and easy to follow.
discover more – Logical arrangement, finding information is easy
Visit Lavender Stone – Layout feels tidy and browsing is very smooth.
Shop Now – Content is well-arranged and finding what I need is effortless.
view collection – Everything is easy to locate and browse comfortably
check site info – The design is vibrant and playful, making navigation fun.
open collective – Cleanly organized content allows quick and easy navigation.
browse now – The site layout is clean and easy to follow
visit emporium – Well-organized content and smooth navigation create an effortless experience
Bestsellers – Everything is logically arranged and pages load smoothly.
Лицензия «Битрикс: Управление сайтом – Старт» — оптимальное решение для создания небольшого сайта, лендинга или корпоративной страницы. Переходите по запросу [url=https://magikfox.ru/catalog/license/upravlenie-saytom/start/]1C Битрикс управление сайтом Старт купить[/url]. Редакция включает базовые инструменты для управления контентом, готовые модули, защиту сайта и удобную административную панель. Подходит для быстрого запуска проекта на CMS 1C-Битрикс с возможностью дальнейшего масштабирования и перехода на более функциональные редакции.
browse products here – Minimalist layout keeps pages easy to navigate.
check resources – Clear, easy-to-navigate pages make content accessible
open this link – The site has a personal, authentic vibe that makes browsing enjoyable.
olive stone highlights – Navigation is simple and items are easy to locate.
see products – Everything loads fast and the design is easy to follow
riverstoneemporium – Layout is clear and pages are fast, making browsing simple
Daily Deals – Layout is neat and exploring feels natural.
check this site – Everything is displayed neatly and looks very well organized
explore this page – Content is arranged logically, making browsing quick and pleasant.
https://www.lotusforsale.com/author/spromocional/
dubai apartment rent per month One Bedroom Apartment For Sale In Dubai fab flat for rent in dubaimarina creek dubai
Trending Now – Layout is tidy and browsing feels seamless.
view more here – Creative theme and user-friendly structure make browsing pleasurable.
browse products here – Lightweight interface ensures browsing is quick and easy.
take a look – The design is clean and the presentation feels top-notch
explore site – Layout is simple and intuitive, finding info is fast
take a look – Browsing is simple and sections are clearly organized
opalstone finds – Layout is clean and exploring content is effortless.
rosecovegalleria – Browsing the site is smooth and items are easy to locate
gallery link – Clear design and tidy pages make browsing simple and engaging.
Daily Deals – Layout is tidy and browsing feels intuitive.
Это юмор. Мефедрон, Марихуану, Бошки, Кокаин Заказывал 307, прислали 203. Сразу объяснил, менеджер в скайпе всё понял. Сказал Бро не переживай будет тебе бонус.Конечно работаем
see what’s inside – Organized content and clear layout make exploration intuitive and simple.
browse this – Serene layout with an easy and pleasant browsing flow
Exclusive Offers – Content is easy to scan and the layout is well-organized.
Статья поможет разобраться, как правильно оформить договор с SMM-подрядчиком. Автор разбирает важные пункты: права на контент, конфиденциальность данных, гарантии и сроки. Особенно актуально для тех, кто уже обжигался на недобросовестных исполнителях: https://f1-it.ru/uslugi-smm-prodvizheniya-v-sotsialynh-setyah.html
online shop link – Clear menus and structured pages make browsing efficient.
go to site – Layout is clear, pages feel natural to navigate
see products – Clean interface makes exploring content easy
orchard items – Everything is easy to find and navigation is intuitive.
check it out here – Well-structured layout ensures easy access to information.
shop now – Everything is easy to locate thanks to a tidy structure
check this site – Looks relaxing to explore and navigate through
visit the platform – Modern aesthetic with clear organization makes browsing products easy.
Seasonal Specials – Layout looks polished and exploring sections is simple.
Recommended Items – Interface is clean and exploring products feels effortless.
go to site – Easy-to-use interface and content is straightforward
explore this page – Everything is presented clearly with a logical flow.
start exploring – Navigation feels smooth and everything is easy to locate
orchard stone collection – Smooth interface and everything is easy to locate.
explore here – Site feels purposeful, and navigation through content is simple and intuitive.
check it now – Well-structured pages make navigation quick and easy.
click here – Logical layout helps users browse without confusion
modern spacious apartments in dubai to rent https://rockland-music-events.org buy 2 bedroom apartmentbuying an apartment in dubai advice
check this outlet – Well-structured pages allow users to navigate quickly.
discover more – Everything feels organized and browsing is simple
https://matras-promtex.ru/
Must-Have Products – Navigation is straightforward and pages are easy to scan.
open this link – Consistent structure makes finding information simple
Gift Ideas – Navigation flows smoothly and items are displayed clearly.
check this page – Useful content presented clearly, offering a smooth browsing experience.
seo продвижение по трафику clover [url=https://prodvizhenie-sajta-po-trafiku2.ru/]seo продвижение по трафику clover[/url] .
tealstoneoutpost – Browsing is straightforward and pages are well organized
enter shop – The layout is tidy and helps users browse efficiently.
orchard online gallery – Fast-loading pages with a straightforward layout enhance browsing.
курс seo [url=https://kursy-seo-12.ru/]курс seo[/url] .
нейросеть реферат [url=https://nejroset-dlya-referatov-8.ru/]нейросеть реферат[/url] .
заказать проект перепланировки квартиры в москве [url=https://proekt-pereplanirovki-kvartiry24.ru/]proekt-pereplanirovki-kvartiry24.ru[/url] .
seo продвижение по трафику [url=https://prodvizhenie-sajtov-po-trafiku.ru/]seo продвижение по трафику[/url] .
сео портала увеличить трафик специалисты [url=https://prodvizhenie-sajta-po-trafiku3.ru/]prodvizhenie-sajta-po-trafiku3.ru[/url] .
Ясно, спс, отправил заказ на мыло, посмотрим. https://krasota51.ru Бро, у меня тоже самое, даже пробывал уксусом гасить, по всем признакам сода. Продаван пообещал решить проблему, но авторитет подорван.кто получал последний раз недавно отишитесь о работе магаза. +В РЕПУ!!!!!!! и главное почему ип адрес не меняется на сайте???
click here – Organized sections and a tidy layout make finding items quick
explore the collection – Organized and thoughtful presentation keeps the experience smooth and enjoyable.
check it out here – Clear structure ensures a smooth and user-friendly experience.
official link – Smooth experience with easy-to-read layout
maplecresttrading – Good structure and pages load quickly without any confusion
visit timberstone – Pages load quickly and browsing feels effortless
check items – Clean design allows for simple navigation and quick access to details.
visit pebblestoneoutpost – Navigation is smooth and content is displayed in a tidy manner.
explore this page – Came across it and it actually looks neat
see what’s inside – Forward-thinking concept with organized pages that make navigation simple.
sageharboroutpost – Browsing is smooth and the layout is clear and uncluttered
go to Echo Crest store – Organized menus and structure make finding products simple.
visit this site – Smooth experience with interesting and clear content
pebblestone finds – Everything is organized neatly and navigation is simple.
browse marblebrook – Interface is user-friendly and pages load efficiently for seamless browsing.
see offerings – Layout is neat and moving through pages is simple
maple stone finds – Site feels well organized and browsing is straightforward.
pebblestone finds online – Well-structured pages and intuitive navigation make the experience smooth.
visit this site – Memorable branding and inviting layout make navigation pleasant.
click to view store – Tidy pages and menus make navigating content simple.
see more content – Smooth layout and browsing feels natural from start to finish
visit here – Structure feels organized and content is easy to follow
dubai property event held in pune by indus real estate https://datarecoverysoftware1.org apartments for rent in arabian ranches dubaiproperty prices in dubai silicon oasis
enter outpost – Simple menus and organized layout create a smooth experience
open this website – Navigation is smooth, and content is presented clearly.
check site info – Everything feels thoughtfully structured, making exploration easy.
explore trail – Everything is neatly organized and browsing is intuitive
marblecove selection – Information is well presented and navigation is effortless.
у них Methoxetamine бадяженный или нет? сколько принял мг и какие симптомы были? Мефедрон, Марихуану, Бошки, Кокаин А почему сам с-м.сом сюда какой день не кажеться…?Почему ушли из РБ?
take a look – Well-arranged pages make content easy to explore
open page – Layout is clean and browsing through the site is very simple
see more info – Browsing is simple and efficient thanks to a tidy interface and clear design.
check out this store – Simple layout allows fast access to all sections.
click to view – Pages are well-designed and browsing is effortless
click to view – Everything is arranged neatly, creating a smooth browsing flow.
shop now – Well-laid-out pages allow users to explore without confusion
enter this site – Clean layout and organized sections make navigation natural.
open page – Layout is clean and browsing through the site is very simple
цветы москва недорого самовывоз [url=https://cvejie-cveti.ru]https://cvejie-cveti.ru[/url] .
marblestone picks – Browsing feels intuitive and the layout is visually clean.
see this platform – Smooth design and tidy pages make browsing effortless.
see products – Organized layout ensures everything is simple to find
Лицензия «Битрикс: Управление сайтом – Старт» — оптимальное решение для создания небольшого сайта, лендинга или корпоративной страницы. Переходите по запросу [url=https://magikfox.ru/catalog/license/upravlenie-saytom/start/]лицензия Битрикс Старт цена[/url]. Редакция включает базовые инструменты для управления контентом, готовые модули, защиту сайта и удобную административную панель. Подходит для быстрого запуска проекта на CMS 1C-Битрикс с возможностью дальнейшего масштабирования и перехода на более функциональные редакции.
explore here – Smooth interface and tidy layout make navigating stress-free and enjoyable.
this link right here – Everything feels intuitive and well put together.
click here – Well-structured content makes the information easy to follow
seo partners [url=https://prodvizhenie-sajta-po-trafiku2.ru/]prodvizhenie-sajta-po-trafiku2.ru[/url] .
jscom real estate dubai 3 Bedroom Villa For Sale In Dubai Hidden gems: lesser-known freehold zones in Dubaione month rent room in hor al anz dubai area
explore here – Well-structured content ensures navigation feels natural.
seo портала увеличить трафик специалисты [url=https://prodvizhenie-sajta-po-trafiku3.ru/]prodvizhenie-sajta-po-trafiku3.ru[/url] .
Всем привет! Специально зарегистрировался для того что бы поведать вам, какой тут отличный магазин! Обращаюсь сюда уже 3 месяца всегда по опту! все на высоте! Время доставки кладом в мой город 4 дня! Качество продукта отличное! Клады хорошие! И главное пунктуальность, и грамотное общение с человеком… Желаю оставаться всегда такими же порядочными! Сразу видно что магазин знает свое дело в нашем не легком труде!!! Мефедрон, Марихуану, Бошки, Кокаин Они хоть кому нибудь отвечают?Качество обслуживания хорошее – с момента оплаты до прибытия товара прошло всего 3 дня и вес ровный.
open this online shop – Pages respond quickly and the interface is intuitive.
проект перепланировки квартиры для согласования [url=https://proekt-pereplanirovki-kvartiry24.ru/]проект перепланировки квартиры для согласования[/url] .
open this website – Well-organized layout ensures pages are easy to read and visually pleasant.
Action tips: https://carriera.com.gr/unique-casino-argentina-bonos-y-promociones-en-casino-online-2025/
курсы seo [url=https://kursy-seo-12.ru/]kursy-seo-12.ru[/url] .
browse Dunebrook District – Simple and organized design keeps navigation intuitive and quick.
Здравствуйте!
Что делает страницу убедительной для клиента
Лендинг помогает бизнесу объяснить ценность продукта и убедить пользователя. Создание лендингов включает разработку структуры страницы. Разработка лендинга повышает конверсию и превращает сайт под ключ в источник клиентов.
Полная информация по ссылке – https://ts-v.ru/
контекстная реклама для строительной компании, продвижение бизнеса во ВКонтакте Россия, SEO продвижение сайтов для строительных компаний
реклама в социальных сетях Дагестан, [url=https://ts-v.ru/]ђазработка лендингов под ключ | TS-V[/url], заказать сайт под ключ Москва
Удачи и комфорта в жизни!
[url=https://angelok.ru/forum/messages/forum36/topic273/message249357/?result=reply#message249357]Почему клиенты выбирают понятные сайты[/url] 0b4d576
browse this resource – Everything is organized clearly, making navigation smooth and quick.
трафиковое продвижение seo [url=https://prodvizhenie-sajtov-po-trafiku.ru/]трафиковое продвижение seo[/url] .
see details – Nicely arranged content with a smooth browsing experience.
visit marketplace now – Clean visuals and logical structure ensure quick exploration.
trading link – Clean structure makes finding information effortless and fast.
girls renting apartments in dubai https://bestefm.net dubai estate awkaintellectual property registration dubai
Hi there mates, how is everything, and what you would like to say on the topic of this piece of writing, in my view its genuinely awesome designed for me.
aigoogle
view details – Easy navigation and clearly presented content stand out.
coppercoveoutpost – The website looks neat and navigating it was easy.
enter Lantern Vendor shop – The interface feels simple and quick to navigate.
Сегодня на мыло пришло письмо с новостью что заказ отправлен и номер трека который бьёться:good: пока всё норм идёт, со мной связь поддерживают через скайп, игнора не было, когда получу отпишу за качество вес и тд https://1kuh.ru долго гуляя по форуму, выбирал хороший магазин для себя. хотелось чтоб устраевало все! прежде всего меня интересовало качество товара и его цена! хотелось чтоб цена была доступной! так же есть большое желание всегда получать товар 100% т.к. в закладочных магазинах бывают случаи не находа, такие магазины для постоянных покупок рассматривать не стал! рассматривалось много вариантов! ну гдегде же всетаки заказать??? то предлогают сразу слишком много товара (ну как же брать если ты сам лично не знаешь за его качество)??? бывало чаще всего не устраевал сервис обслуживания!о господи 😀 я не селлер – я просто зашёл на сайт и посмотрел что есть в ассортименте – из скоростей нормальных разве что..кхм, оно…
this online hub – Layout flows naturally, ensuring a smooth and pleasant browsing experience.
visit this site – Nice layout with easy navigation, made exploring quite enjoyable.
Hello, I think your site might be having browser compatibility issues. When I look at your blog site in Chrome, it looks fine but when opening in Internet Explorer, it has some overlapping. I just wanted to give you a quick heads up! Other then that, amazing blog!
Buy viagra sexual porno xxx adults pills
check this page – Clear sections and tidy design make exploring very easy.
бк вавада [url=https://daostone.ru/]бк вавада[/url] .
open this page – The structure is neat and browsing through content is natural.
mostbet бонус Кыргызстан [url=https://www.mostbet05638.help]https://www.mostbet05638.help[/url]
explore the site – Everything is laid out clearly for a smooth experience.
melbet букмекерская [url=https://melbetlogin.ru/]melbetlogin.ru[/url] .
1C-Bitrix: Управление сайтом — редакция Стандарт — это мощная платформа для создания и управления корпоративными сайтами. Переходите по запросу [url=https://magikfox.ru/catalog/license/upravlenie-saytom/standart/]лицензия Битрикс Стандарт купить[/url]. Подходит для компаний, которым нужен функциональный сайт с каталогом, формами, SEO-инструментами и удобной системой администрирования. Решение обеспечивает высокую безопасность, производительность и гибкость масштабирования бизнеса в интернете.
check this out – Pages are structured clearly, making it easy to explore.
view more – The site feels well-maintained and content is easy to read.
перепланировка помещения [url=https://pereplanirovka-kvartir12.ru/]pereplanirovka-kvartir12.ru[/url] .
трафиковое продвижение сайта [url=https://prodvizhenie-sajta-po-trafiku2.ru/]prodvizhenie-sajta-po-trafiku2.ru[/url] .
discover more – Quick navigation and reliable performance make it stand out.
seo partners [url=https://prodvizhenie-sajta-po-trafiku3.ru/]prodvizhenie-sajta-po-trafiku3.ru[/url] .
click to view – The design is neat and navigating through sections is easy.
скачать мелбет на андроид [url=https://vt-fiddle.com/]vt-fiddle.com[/url] .
sea pearl properties dubai https://absolutezerodegrees.com properties dubai websiteTiara Residences guide
раскрутка сайта по трафику [url=https://prodvizhenie-sajtov-po-trafiku1.ru/]раскрутка сайта по трафику[/url] .
visit this store – Layout is tidy, and navigating through pages feels effortless.
see what’s inside – The design is inviting and makes browsing a smooth experience.
Данный Магаз Меня Кинул!!!! https://water-work.ru скинули трек не бьется ((( уже в четверг отправили а он все не бьется(((, очень торпимся надо человека собирать в дорогу!ОПЛАТИЛ И ЧЕРЕЗ 2ДНЯ ВСЕ У МЕНЯ !!!
скачат мелбет [url=https://melbetiphone.ru/]скачат мелбет[/url] .
view more – The design is clear, making navigation quick and simple.
check it out here – Everything loads fast, and navigating the sections is effortless.
проект перепланировки и переустройства квартиры [url=https://proekt-pereplanirovki-kvartiry24.ru/]проект перепланировки и переустройства квартиры[/url] .
мелбет ru [url=https://melbetregistratsiya.ru/]мелбет ru[/url] .
learn more now – Navigation works nicely and feels very user-friendly.
shop now – Interface is tidy, pages are responsive, making it easy to explore.
Wow, wonderful blog format! How long have you ever been blogging for? you made blogging glance easy. The full glance of your website is wonderful, let alone the content!
вход зума казино
click here – Simple interface and smooth navigation make for a pleasant experience.
В поисках стабильный источник редкоземельных металлов и высокотехнологичных сплавов? Обратите внимание на Редметсплав.рф. Мы формируем внушительный выбор продукции, подтверждая высочайшее качество каждого лота.
Редметсплав.рф обеспечивает все стадии сделки, подготавливая полный пакет разрешительных документов для официального учета товаров. Неважно, какие масштабы поставок вам необходимы — от мелких партий до промышленных масштабов, мы готовы обеспечить любой запрос с профессиональным сопровождением.
Наша команда консультантов всегда готова помочь, чтобы оказать помощь в подборе нужных изделий и разъяснить детали, связанные с использованием и параметрами металлов. Выбирая нас, вы выбираете уверенность в каждой минуте сотрудничества.
Заходите на наш сайт Редметсплав.рф и убедитесь, что наши стандарты работы — идеальный вариант для вас.
Каталог доступных позиций:
Медный однораструбный отвод 45 градусов под пайку 53.6х47х1.2 мм 11х13 мм твердая пайка М2р ГОСТ Р 52922-2008 Приобретите высококачественные Медные отводы 45 градусов под пайку от компании Редметсплав.рф и улучшите вашу трубопроводную систему. Прочные, долговечные и устойчивые к коррозии отводы обеспечат надежное соединение под нужным углом, обеспечивая оптимальное распределение потока и высокую производительность вашей системы.
школа seo [url=https://kursy-seo-12.ru/]kursy-seo-12.ru[/url] .
see what’s inside – Layout is clear, and moving through sections feels natural.
Heya! I’m at work surfing around your blog from my new iphone 4! Just wanted to say I love reading through your blog and look forward to all your posts! Keep up the outstanding work!
регистрация bitz casino
shop now – I like how everything is categorized for quick browsing.
click to view – Interface feels intuitive, and exploring the site is smooth.
visit platform – Clean layout with clearly presented content makes reading easy.
browse now – Content is easy to follow thanks to the neat organization.
take a look inside – Layout is simple, and everything is easy to access.
browse now – Content is easy to follow thanks to the neat organization.
Ребята, для тех, кто только начинает разбираться в SEO, отличная статья-ликбез. Объясняется, зачем нужно продвижение, как оно работает и какие бывают инструменты. Рекомендую: https://radschool3.ru/2026/01/seo-prodvizhenie-sajta-chto-jeto-takoe-i-zachem-nuzhno/
visit the page – Everything is organized, making it easy to move around.
rent house in dubai for one month https://chomcautoanluc.com rooms for rent in dubai rashidiya monthly4BHK Twin Villa | Freehold | Limited Units
В пробе было два вещества https://tele-karta.ru Наша организация не несет ответственности за применение продукции не по назначению. Осуществляется тотальный контроль качества продукции. Чистота препаратов 99.2%. Исключено добавление примесей. Используется сырье очень высокого качества.Почему больше не берете?
shop now – Layout is easy to follow, everything loads quickly, and navigation feels natural.
москва цветы с доставкой [url=www.cvejie-cveti.ru/]www.cvejie-cveti.ru/[/url] .
see this link – Well-organized interface helps users find information easily.
Good day! Do you use Twitter? I’d like to follow you if that would be okay. I’m undoubtedly enjoying your blog and look forward to new updates.
buy viagra sexual porno xxx adults pills
open this page – Well-maintained design with information clearly displayed.
vavada рабочее [url=https://daostone.ru/]vavada рабочее[/url] .
click to view – The interface feels clear, and navigating the site is straightforward.
learn more here – Everything is clear and well organized, making browsing simple.
вавада казино зеркало [url=https://polezno-vsem.ru/]вавада казино зеркало[/url] .
check out this shop – Navigation is intuitive and content is clearly displayed.
I loved as much as you’ll receive carried out right here. The sketch is tasteful, your authored material stylish. nonetheless, you command get bought an shakiness over that you wish be delivering the following. unwell unquestionably come more formerly again as exactly the same nearly a lot often inside case you shield this hike.
buy viagra sexual porno xxx adults pills
РедМетСплав демонстрирует внушительный каталог высококачественных изделий из ценных материалов. Не важно, какие объемы вам необходимы — от минимальных заказов до глобальных поставок, мы выдерживаем оперативное исполнение вашего заказа.
Каждая единица изделия подтверждена всеми необходимыми документами, подтверждающими их высокие характеристики. Опытная поддержка — наша визитная карточка — мы на связи, чтобы прояснять ваши вопросы и находить ответы под нюансы вашего бизнеса.
Доверьте ваш запрос специалистам РедМетСплав и убедитесь в гибкости нашего предложения.
Наша продукция:
Поковка магниевая SISMg4640-06 – SS 144640 Лист магниевый SISMg4640-06 – SS 144640 представляет собой высококачественный продукт, используемый в различных областях благодаря своей легкости и коррозионной устойчивости. Магний обладает отличными механическими свойствами, что делает его идеальным выбором для применения в аэрокосмической и автомобильной отраслях. Покупая Лист магниевый SISMg4640-06 – SS 144640, вы получаете надежный материал, который соответствует современным стандартам качества. Он легко обрабатывается и сваряется, что дает возможность использовать его в самых разнообразных проектах. Не упустите шанс улучшить свои производственные процессы и максимально эффективно использовать ресурсы.
chestnutharboroutpost – Pretty straightforward layout, browsing feels quick and efficient here.
https://winnitascasino.org/promotions Winnita Casino
скачать melbet на андроид [url=https://vt-fiddle.com/]vt-fiddle.com[/url] .
chestnutharboroutpost – Pretty straightforward layout, browsing feels quick and efficient here.
Если вы представляете производственное предприятие и заинтересованы в бесперебойной поставке первоклассных тугоплавких металлов, то ООО “РМС” — это ваше надежный выбор. Наша компания специализируется в сегменте поставок редких металлов уже десятилетий, что дает нам возможность отгружать только проверенный материал своим заказчикам.
Реализуем любые объемы.
Многогранный спектр тугоплавких металлов.
Полное документальное сопровождение.
Круглосуточная поддержка.
Зачем мониторить рынок, если на rms-ekb.ru всегда лучшие условия?
Наши эксперты с радостью помогут вам разобраться в любых нюансах.. Оставьте заявку прямо сейчас и удостоверьтесь в превосходном качестве нашего ассортимента.
Реализуемый ассортимент:
Труба нержавеющая AISI 321 38×2 ГОСТ 9941-81
seo продвижение сайта по трафику кловер [url=https://prodvizhenie-sajtov-po-trafiku.ru/]prodvizhenie-sajtov-po-trafiku.ru[/url] .
What’s up to every one, it’s truly a fastidious for me to pay a visit this web site, it consists of priceless Information.
buy viagra sexual porno xxx adults pills
browse honeycove pages – Navigation is simple, and content is easy to understand.
узаконивание перепланировки квартиры [url=https://pereplanirovka-kvartir12.ru/]pereplanirovka-kvartir12.ru[/url] .
сео продвижение по трафику [url=https://prodvizhenie-sajta-po-trafiku2.ru/]prodvizhenie-sajta-po-trafiku2.ru[/url] .
visit this website – The pages are neatly laid out and reading is effortless.
see what’s inside – Everything is cleanly arranged, making exploring simple.
check out this site – Content is clearly structured and exploring is effortless.
seo продвижение по трафику [url=https://prodvizhenie-sajtov-po-trafiku1.ru/]seo продвижение по трафику[/url] .
melbet app download [url=https://melbetiphone.ru/]melbet app download[/url] .
букмекерская контора мелбет официальный сайт [url=https://melbetlogin.ru/]melbetlogin.ru[/url] .
go here now – Everything is presented clearly, making browsing very easy.
see details – Organized sections and clear design create a smooth browsing experience.
take a look at honeymeadowmarketplace – Pages are responsive, and the design keeps things simple.
маскировка 5+ Мефедрон, Марихуану, Бошки, Кокаин Хороший сервис судя по отзывам!:)с радостью сообщаю что посыль пришла в мой солнечный город,и я рад…не только потому что она дошла а тому что всю длинную дорогу (10дней)со мной оставался на связи магазин,работает без всяких проволочек,без гемора свойственного многим магазинам,всё дошло конспирация на наивысшем уровне как и сам магазин,ребята удачных вам продаж и многолетнего существования
check the site – Pages are easy to navigate and the layout feels organized.
Apartments for sale in Vitalia Luxury Villas For Sale In Dubai dubai properties lagoon road mapvilla for rent in baniyas
this online marketplace – Layout is straightforward, making browsing very smooth.
explore here – Content is clearly presented, navigation feels effortless, and layout is neat.
explore the site – Neat structure and smooth flow make it easy to find everything.
brook trading – Well-structured pages make finding information quick and easy.
plum cove hub – Interface is tidy and pages are easy to navigate.
sage harbor deals – Well-organized interface and clear structure make browsing natural.
check icicleisleoutpost – Interface is neat, and browsing feels effortless.
go to shop – Well-arranged pages and clear layout create a pleasant user experience.
shop now – Pages load fast, and exploring sections is intuitive.
click to view – The site feels approachable and navigating is smooth.
check icicleisleoutpost – Interface is neat, and browsing feels effortless.
official page – The site feels organized and content is easy to digest.
see inside the emporium – Browsing feels natural, pages are organized, and design is clear.
view this shop – The site is simple to navigate, and pages open without delay.
oakcoveoutpost – Smooth pages and clear layout make navigating the site simple.
visit this shop – Minimal design with well-structured pages ensures smooth browsing.
проект на перепланировку квартиры заказать [url=https://proekt-pereplanirovki-kvartiry24.ru/]proekt-pereplanirovki-kvartiry24.ru[/url] .
go here now – The site loads reliably, and navigation feels seamless.
learn more here – Clear organization and responsive design make exploring enjoyable.
visit the harbor – Content is easy to locate, and the layout feels natural.
emporiumoutpost – Interface is clean and finding items is simple.
official page – Navigation is straightforward and the overall design is clean.
enter teal cove – Pages are neatly organized and browsing feels natural and easy.
shop now – Everything flows smoothly and navigating the site is comfortable.
see details – Interface is neat, and content is structured for easy access.
visit iciclemeadowtrading – Layout is clean and browsing through pages feels smooth and easy.
explore the outpost – Clean and organized pages, navigation feels effortless.
shop now – Everything is neatly arranged, and navigating feels natural.
1C-Bitrix: Управление сайтом — редакция Стандарт — это мощная платформа для создания и управления корпоративными сайтами. Переходите по запросу [url=https://magikfox.ru/catalog/license/upravlenie-saytom/standart/]Битрикс Стандарт функционал[/url]. Подходит для компаний, которым нужен функциональный сайт с каталогом, формами, SEO-инструментами и удобной системой администрирования. Решение обеспечивает высокую безопасность, производительность и гибкость масштабирования бизнеса в интернете.
курсы по seo [url=https://kursy-seo-12.ru/]курсы по seo[/url] .
click this link – The interface is simple, making information quick to locate.
Всем Привет! :hello:Немного хороших строк о магазине;) Мефедрон, Марихуану, Бошки, Кокаин всем хайТребуй возврата денег, я вам что пытаюсь донести? Обманывает этот магазин клиентов.Почитай мои посты по этому магазину.
orchardoutpost – Pages respond fast and information is easy to access.
learn more here – Clear design and logical layout create a seamless browsing experience.
check quartz meadow – Well-structured pages and quick load times make exploring effortless.
browse here – The design is tidy and exploring sections feels natural.
вавада зеркало сейчас [url=https://daostone.ru/]вавада зеркало сейчас[/url] .
direct real estate in dubai Property For Sale In Dubai transferring apartment lease in dubaiapartments for rent dubai holiday
see details – The site is arranged thoughtfully, making navigation intuitive.
visit the marketplace – Structure is logical, and finding information feels straightforward.
мелбет казино скачать [url=https://vt-fiddle.com/]мелбет казино скачать[/url] .
browse sea cove – The site is tidy and intuitive, with content easy to locate.
view shop – Everything is logically structured, allowing fast and comfortable browsing.
check the site – The interface is well organized, and browsing feels smooth.
valecovemart – Browsing is quick and interface is simple to use.
harboremporium – Pages appear quickly and content is simple to access.
go to shop – Clean layout and fast pages make finding information simple.
open this page – Everything is easy to navigate, loads quickly, and feels user-friendly.
explore quartz orchard marketplace – Layout is user-friendly and navigation flows smoothly.
shop now – Clean sections and organized content allow smooth browsing.
visit the orchard – Layout is neat, pages load quickly, and moving around is easy.
jasperharboroutpost – The layout is neatly arranged, allowing users to browse without any hassle.
продвижение по трафику clover [url=https://prodvizhenie-sajtov-po-trafiku1.ru/]prodvizhenie-sajtov-po-trafiku1.ru[/url] .
artisanhub – Smooth browsing and pages open quickly.
outpostoutlet – Interface is clean and finding items is straightforward.
discover more – Pages are clear and well laid out, making it easy to move around.
check it out here – Everything is organized well, making the site simple to navigate.
explore the store – Simple structure and intuitive layout make moving between sections easy.
official page – The design is uncluttered and pages load without delay.
click this link – Everything is logically arranged, allowing for easy exploration.
explore quick harbor marketplace – Pages are logically arranged, making navigation effortless.
visit the bazaar – Content is well-arranged and pages open quickly.
take a look here – Clear headings and organized layout make finding items simple.
official page – The design is uncluttered and pages load without delay.
woodcorner – Browsing is intuitive and information is clearly presented.
Проб НЕТ! https://myline-24.ru Скажите сей час в Челябинске работаете?)ТУТ САМЫЙ ЛУЧШИЙ МАГАЗИН С САМЫМ ЛУЧШИМ ТОВАРОМ!!! ЖЕЛАЮ УДАЧИ!!!
go to outpost – Fast-loading pages and clear structure make browsing comfortable.
bazaarcorner – Layout is organized and navigation feels natural.
browse quickstonegalleria – Simple menus and organized pages make it easy to move around the site.
visit the page – Everything feels orderly, and navigating the content is effortless.
this website – The layout feels balanced, helping users browse comfortably.
view shop – Neat layout and fast-loading pages ensure users can browse comfortably.
dubai hills houses 2 Bed Apartment Dubai live dubai internationalone bedroom apartment for sale
seo partners [url=https://prodvizhenie-sajtov-po-trafiku.ru/]seo partners[/url] .
quickstone collective – Clean pages and simple menus make exploring smooth and straightforward.
take a look at harborstoneoutpost – Smooth browsing experience with clearly arranged content.
browse items – Well-structured sections make discovering products effortless.
open link – The design feels intuitive, helping users move around easily.
zencentralmarket – Navigation is straightforward and content is well-structured.
artisanbazaar – Layout is tidy and exploring content is easy.
Нашёл материал про SEO, где авторы называют это искусством видимости. Разбирают техническую оптимизацию, контент и работу со ссылками. Рекомендую к прочтению: https://yasamstudio.ru/2026/01/29/seo-prodvizhenie-sajta-iskusstvo-vidimosti-v-cifrovom-mire/
explore this shop – Everything is neatly organized, making it easy to find what you need.
click to explore – Simple and neat design ensures information is easy to find.
discover more – Interface is tidy and pages load quickly for convenient browsing.
visit silk meadow – Clean layout with content easy to locate and explore.
discover the hazel harbor site – Interface is neat, and exploring the pages is seamless.
rainharborcollective – Smooth and simple layout, navigating the site is effortless.
zenbazaar – Smooth navigation with quick-loading pages makes browsing simple.
artisanmarket – Well-organized pages make browsing effortless.
visit this store – Everything is easy to read and well arranged for users.
click to explore – Simple design with intuitive navigation makes the site enjoyable.
вавада ставки на спорт [url=https://daostone.ru/]вавада ставки на спорт[/url] .
melbet ru официальный сайт [url=https://vt-fiddle.com/]melbet ru официальный сайт[/url] .
browse around – Layout is minimal and effective, making browsing smooth.
visit this store – Everything is easy to find thanks to a tidy and logical structure.
open link – The design is tidy, and moving between sections is effortless.
meadowzone – Navigation is simple and content is easy to find.
Четкого товара! https://1kuh.ru вобщем моя командировка в Столицу нашей родины удалась ) день переговоров и 6 дней удовльствия !!!!!Брал не давно в этом магазине закладкой в МСК, что сказать, все прошло замечательно. Клад был поднят, место довольно спокойное и тихое, Время исполнения заказа с момента оплаты от 1 до 2,5 часов, что по сути не так уж и много. Выражаю огромное спасибо оператору в аське, не оставлял меня ни на минуту, всегда отвечал.
valecovehubzone – Clear layout and navigating is easy and natural.
rain harbor hub – The design feels clean, pages open fast, and everything is simple to browse.
check out pebble trading – Neat layout, quick response, and intuitive navigation make the site enjoyable.
цветы подарочные [url=https://www.cvejie-cveti.ru]https://www.cvejie-cveti.ru[/url] .
discover more – Pages are structured logically, and moving through the site is easy.
silver cove hub – Fast pages and a tidy layout make navigating the site effortless.
visit homepage – Pages are easy to navigate, and the structure is user-friendly.
tristar property dubai 3 Bedroom Villa For Sale In Dubai al nakheel properties dubaiMediterranean Clusters
artisanoutpost – Browsing is easy and pages respond without delay.
browse pebble creek – Well-organized sections with a clean layout simplify site exploration.
valecoveshop – Interface is clean and content is easy to find.
shop now – Everything is placed logically, making exploration quick and simple.
go to this shop – A user-friendly design where everything is easy to access and understand.
official page – Clear headings and a simple structure make it easy to move around.
check out pine harbor – Navigation feels intuitive, and pages load efficiently.
mintmeadowemporium – The website is tidy, pages load quickly, and browsing is easy.
grovehub – Navigation is smooth and pages respond instantly.
bazaaremporium – Pages load fast and interface is user-friendly.
shop now – Browsing feels natural thanks to a tidy layout and responsive pages.
Jogo do Tigrinho cashback sem limite: qual site tá pagando mais em 2026?
click to explore – Everything is logically arranged, making navigation feel natural.
open the collective – Organized content and tidy layout help users find information quickly.
crest outpost – Everything is neatly arranged, giving users a seamless browsing experience.
meadowcentral – Smooth interface and pages respond instantly.
check it out here – Well-structured pages and neat design create a comfortable experience.
Есть, но пока что временно не работает. Мефедрон, Марихуану, Бошки, Кокаин Что касается Самой СПСР то в ней ничего такого страшного нет…Ну что кто нить УРБ попробовал уже как отзывы ?
bazaarcorner – Layout is organized and navigation feels natural.
browse items – The structure is intuitive, helping users find information quickly.
click to visit – Neatly arranged content and quick page responsiveness make browsing simple.
marbleoutlet – Smooth navigation and fast-loading pages make browsing effortless.
visit this store – Everything is well organized, allowing users to find information quickly.
bazaarcentralhub – Navigation is effortless and pages respond quickly.
discover more – Interface is simple, and browsing feels fast and straightforward.
average house price https://satishpatel.net marketing at metropolitan properties dubaican we buy property in dubai
sky harbor hub – Fast-loading pages with a clean layout make browsing effortless.
melbet вход регистрация [url=https://vt-fiddle.com/]melbet вход регистрация[/url] .
Битрикс: Управление сайтом Малый Бизнес — функциональная редакция CMS для создания интернет-магазинов и коммерческих проектов. Переходите по запросу [url=https://magikfox.ru/catalog/license/upravlenie-saytom/malyy-biznes/]1С Битрикс управление сайтом Малый Бизнес[/url]. Система включает каталог товаров, корзину, онлайн-оплаты, маркетинговые инструменты и интеграцию с 1С. Решение подходит для компаний, которым нужен надежный и масштабируемый сайт с возможностью расширения функционала через модули и интеграции.
harborhubstore – Pages load instantly and navigating the site is easy.
take a look here – The interface is organized and pages load quickly for easy browsing.
bazaarcentral – Navigation is intuitive and pages respond quickly.
purevalueoutlet – Clean and simple layout, navigating the site feels effortless.
explore the store – Clean interface and fast page loads make the browsing experience pleasant.
view shop – Smooth interface and clear organization make browsing enjoyable for all users.
vavada беттинг россия [url=https://polezno-vsem.ru/]vavada беттинг россия[/url] .
ridgeoutpost – Browsing flows naturally and pages load without delay.
bazaaremporium – Pages load fast and interface is user-friendly.
вообще почта 1 класс оказываеться самое быстрое.. 2-3 суток и приходит https://apirpk.ru товар 9\10 хорошее качество, 9 потому что ожидал чуть большего.Все как надо. Рентген, люди ощупывают… Подозрительных людей к стати не принимают, если даже по началу обнаруживают что либо, их отпускают вызывают оперов, следят за посылкой, сначала принимают клиента, а потом уже за поставщиком охота начинается…
вавада играть онлайн [url=https://cleansheet.ru/]вавада играть онлайн[/url] .
согласование перепланировки москва [url=https://pereplanirovka-kvartir12.ru/]согласование перепланировки москва[/url] .
мелбет букмекерская контора официальный сайт [url=https://melbetregistratsiya.ru/]мелбет букмекерская контора официальный сайт[/url] .
discover the outpost – The interface is uncluttered and pages open almost instantly.
view shop – Organized content and fast-loading pages create a smooth browsing experience.
мелбет скачать официальный сайт [url=https://melbetiphone.ru/]мелбет скачать официальный сайт[/url] .
check it out here – Clear design and logical navigation make exploring the site effortless.
sky harbor deals – Tidy interface with clear sections makes finding content effortless.
nightcovecorner – Layout is organized and finding items feels effortless.
artisanoutlet – Clean structure and content is easy to access.
PUPIL OF FATE MOTORS https://auto.ae/pupiloffatemotors автосалон премиум авто в Дубае. Продажа роскошных автомобилей, эксклюзивные модели и индивидуальный подбор. Помогаем выбрать, оформить и доставить авто с гарантией качества и высоким уровнем сервиса.
Читать больше на сайте: https://beautyhealthclub.ru/maski-dla-lica/maski-dla-girnoi-kogi.html
volker dubai properties Luxury Villas For Sale In Dubai Orange Lakehotel apartments in dubai for short stay
browse ruby meadow – The site structure is clear, making it easy to find items.
vavada букмекер [url=https://daostone.ru/]daostone.ru[/url] .
valecoveemporium – Layout is clear and browsing feels seamless.
Modern earth fault indicator monitor the condition of electrical networks and protect equipment. They offer rapid fault detection, high accuracy, and reliability for industrial applications.
take a look here – Well-organized pages with smooth navigation create a pleasant browsing experience.
discover products here – Neat sections and readable design ensure smooth navigation.
valecovehubzone – Clear layout and navigating is easy and natural.
мелбет официальный сайт войти [url=https://melbetlogin.ru/]мелбет официальный сайт войти[/url] .
Процветания и успехов вашему магазину!! Мефедрон, Марихуану, Бошки, Кокаин АМ 2233 читал 1 к 30 делается, неужеле правда всего 1 к 15 делать?Такая тут вкусная цена была недавно на фтор.И продукт офигенский.А теперь цену подняли до всеобщего уровня.И я не вижу уже причин заказать именно здесь а не где-то ещё.Так-то с отправкой всё ровно будет,но цена…
solar mint deals – Pages are organized neatly and moving around the site is easy and intuitive.
Excited to try 888bet for its local payment ease! Just wondering about responsible play limits? Please share your tips at 888bet to help others gamble safely.
sabbagh properties dubai https://zoppoth.net list of serviced apartment dubai near burj downtown1 bhk apartments on rent in dubai
view the emporium – Pages are arranged neatly, allowing quick and easy navigation.
https://patrik-spins.org/login Patrik Spins Casino
Под., зачет с натяжкой. Мята незачет, сильно уж она ваняет. Растворитель пришлось нагревать и домалывать кр.. https://kovcheg-metall.ru Сам ты не общительный ))новый запрет вступает через 7 дней. читай список бро,там это вещество есть)
open solar orchard – Clean design with well-arranged content allows effortless exploration.
PG Soft no Pix: melhores cassinos pra depositar R$1 e sair girando em 2026
мелбет ру [url=https://melbetiphone.ru/]мелбет ру[/url] .
casino vavada онлайн [url=https://cleansheet.ru/]casino vavada онлайн[/url] .
how to register at melbet [url=https://melbetregistratsiya.ru/]how to register at melbet[/url] .
официальный сайт вавада рабочее [url=https://polezno-vsem.ru/]polezno-vsem.ru[/url] .
take a look – Cheerful and bright, really loved the holiday-themed content.
start here – A site that feels interesting and worth checking out carefully.
apartment rent dubai monthly https://chomcautoanluc.com Apartments for rent in Il Primotabani real estate dubai al barsha
see more – Clear layout with practical details, very easy to navigate.
shop now – Beautifully presented items make it simple to find exactly what you want.
vavada рабочее зеркало [url=https://partscore.ru/]vavada рабочее зеркало[/url] .
check this page – Practical content presented clearly with smooth navigation.
stone harbor deals – Pages are neatly organized, and moving through the site is effortless and clear.
Casino Pinco предоставляет доступ к современным слотам и популярным играм.
[url=https://7v4.casino/]Casino Pinco[/url]
Система выплат работает надежно и прозрачно.
enter site – The artistic concept is clear and well put together.
Оправдания в небе не ищут, https://guentnerservice.ru вобщем моя командировка в Столицу нашей родины удалась ) день переговоров и 6 дней удовльствия !!!!!Кстати, как и обещали, менеджер на праздниках выходил на работу каждый день на пару часов и всем отвечал, иногда даже целый день проводил общаясь с клиентами, уж не знаю, кому он там не ответил.
click here – Nicely organized pages, visually attractive and easy to explore.
visit this site – Vibrant design and interactive elements, very appealing overall.
click here – Lively and vibrant, the site really captures the fun spirit.
мелбет официальный сайт вход в личный [url=https://melbetlogin.ru/]мелбет официальный сайт вход в личный[/url] .
access here – The event seems fun, and the site conveys an upbeat atmosphere.
explore now – Inviting content and comfortable layout, makes navigating easy.
вызов нарколога на дом краснодар [url=https://narkolog-na-dom-v-krasnodare.ru/]narkolog-na-dom-v-krasnodare.ru[/url] .
explore the store – Neat sections with readable content make browsing enjoyable.
explore the page – The write-up feels informative and provides solid insights.
Опыт эксплуатации дома из клееного бруса два года — делюсь впечатлениями. [url=https://dom-rggu.ru/]проекты домов из клееного бруса[/url] Дом тёплый, расходы на отопление около 5-7 тысяч в месяц зимой, никаких трещин и деформаций. [url=https://dom-rggu.ru/]дом из клееного бруса для постоянного проживания[/url] Стены ровные, двери и окна закрываются идеально — усадки действительно нет.
1 bhk flat in dubai for rent abu khail https://freizeitsportler.net dubai festival city rental apartmentsdubai properties land dept
view details – Nicely structured content that makes navigating simple and effective.
анонимная наркологическая помощь [url=https://narkologicheskaya-klinika-trezvyj-vybor-1.ru/]анонимная наркологическая помощь[/url] .
visit this site – Unique ideas presented here, makes you want to dive deeper.
learn more – Original and engaging, definitely worth exploring further.
visit now – A trustworthy forum providing regular, useful information for its community.
– За сколько? https://crimeancard.ru работаете качественно и по совести!так держать!качество интересует
Обработка древесины — ключевой момент для долговечности детской площадки. [url=https://детский-игровой-комплекс.рф/]детский игровой комплекс из дерева[/url] Качественная пропитка защищает от грибка, гнили и насекомых. [url=https://детский-игровой-комплекс.рф/]детская горка[/url] Спросите у производителя, какую обработку они используют — это важно.
https://6ev4joy.com/
mask challenge challenge – Fun and interactive design, instructions are straightforward and simple.
https://t.me/leebet_official_channel
click to visit – Well-organized content and clean layout ensure effortless navigation.
check it out – Elegant and minimalistic, makes exploring the site effortless.
interactive kidznft – Educational platform with entertaining activities, seems secure for children.
take a look – Seems like an inviting space for interaction and gaining insights.
мелбет мобильный сайт [url=https://melbetiphone.ru/]мелбет мобильный сайт[/url] .
discover more – Thoughtful concept and actionable ideas, engaging to read.
вавада официальный вход [url=https://cleansheet.ru/]вавада официальный вход[/url] .
Apartments for sale in Design Quarter Flats For Rent In Dubai flat for rent in sharjah on monthly basishouses for rent in al karama dubai
enter site – It presents a calm aesthetic that feels carefully curated.
learn more – Focuses on a vital cause, excellent initiative for the community.
see store – Well-organized sections and a cozy design make shopping feel relaxing.
see what’s inside – Well-structured pages with readable headings provide a natural browsing flow.
see details – A gentle and polished design that feels very deliberate.
В лс пиши сразу. Имей в виду, быстрее будет Мефедрон, Марихуану, Бошки, Кокаин пт всем.скоростя здесь имеются?разные мнения бытуют, я для 1го раза сделал 1к20.сохнет.самому интересно что получиться. отпишу как пробнем.
view details – Well-laid-out and professional, overall presentation is excellent.
shop mossharbor goods – Clean interface, browsing and checkout feel seamless.
discover more – The work is innovative and presented in a way that’s very engaging.
vavada рабочее [url=https://partscore.ru/]vavada рабочее[/url] .
open link – Lively and immersive, really enjoyed the overall atmosphere.
start here – Unique designs that stand out and capture attention immediately.
browse store – User-friendly layout with appealing visuals, overall very satisfying.
explore selections – Simple layout and clear design make shopping quick and easy.
бк melbet [url=https://melbetlogin.ru/]бк melbet[/url] .
this page – The site offers in-depth information and is enjoyable to navigate.
наркология [url=https://narkologicheskaya-klinika-trezvyj-vybor-1.ru/]наркология[/url] .
browse teal collections – Clean presentation helps users find what they need without hassle.
premier real estate dubai Commercial Property For Rent In Dubai completion of real estate project in dubaifamily sharing in dubai apartments
makers market – Well-organized display, browsing is effortless and enjoyable.
visit artisan bazaar – Unique crafts are displayed in an inviting, organized way that’s easy to browse.
this page – Stands out with a creative and entertaining idea.
artisan style showcase – The items are आकर्षive, and the website is easy to move around.
discover more – A creative and amusing idea that stands out nicely.
explore unique crafts – Pleasant design and well-organized sections make finding items simple.
creative wood hub – Smooth navigation and neatly arranged items make shopping enjoyable.
check out mart – The site feels polished, with items showcased in a neat layout.
Че все затихли что не кто не берет? Не кто не отписывает последние дни не в курилке не где везде тишина( Мефедрон, Марихуану, Бошки, Кокаин Хз …. Дето видел чел писал про вещ-во для снятия лака от ногтей ….. сказал что безпроигрышный вариант )))Всем привет ни как не могу заказ оформить, помогите,плиз
artisan boutique – Fast and tidy design, shopping feels easy and satisfying.
view details – Concise and clear, navigation made finding info quick and simple.
a/b тест наружная реклама [url=https://reklamnyj-kreativ13.ru/]reklamnyj-kreativ13.ru[/url] .
check this page – Clear and concise layout, navigation is simple and effective.
browse here – A modern look with intuitive controls makes finding items quick and easy.
craft gems – Smooth experience, each item is presented clearly and neatly.
creative garnet collection – Polished pages and organized products make shopping pleasant.
реферат нейросеть [url=https://nejroset-dlya-referatov-8.ru/]реферат нейросеть[/url] .
creative trail marketplace – Simple layout makes finding items effortless.
stylish craft selections – The site feels organized and very approachable to use.
access here – Eye-catching style and bold branding, immediately grabs attention.
enter store – Simple layout with clean design ensures browsing is smooth and quick.
view curated products – The layout is neat and makes finding products easy and enjoyable.
handmade boutique – Very cozy presentation, everything feels thoughtfully organized.
browse here – The pages are easy to move through, with a neat and simple structure.
visit now – Intriguing concept and powerful design, very captivating to explore.
shop online silk – Well-structured pages and bright visuals make shopping enjoyable.
handmade ridge finds – Well-organized pages make exploring items simple and pleasant.
open collection – Handmade selections shine through a clean and lively presentation.
discover linen treasures – Bright visuals and simple navigation make exploring items easy.
makers corner – Browsing is smooth, and the design gives a welcoming vibe.
улучшение креативов [url=https://reklamnyj-kreativ12.ru/]улучшение креативов[/url] .
handmade seacove gallery – Polished pages and smooth navigation make exploring items simple.
discover walnutmeadow goods – Smooth navigation and clear visuals create an enjoyable browsing experience.
sagedock online hub – User-friendly interface and smooth scrolling make browsing items easy.
перевод технического текста в москве [url=https://teh-perevod.ru/]teh-perevod.ru[/url] .
discover artisan goods – Products are presented neatly with a colorful touch.
view tradehouse – Clear organization and inviting visuals make browsing feel peaceful.
harbor artisan market – Well-organized pages made exploring items easy and pleasant.
discover driftmeadow goods – Polished interface and intuitive layout make finding items effortless.
studios for monthly rent in dubai https://maitrise-autun.org Armani Beach Residences guide4 bedroom villa for sale in dubai downtown
discover harbor treasures – Bright visuals and clean pages allow effortless browsing.
shop artisan collections – Polished pages with clear product displays make finding items quick.
shop now – Multiple vendors with interesting offerings presented in a tidy and approachable way.
вавада [url=https://cleansheet.ru/]вавада[/url] .
access here – The content is presented clearly with an energetic tone.
explore cove goods – Clean design and well-structured menus make browsing smooth.
unique gifts – Perfect mix of charm and creativity, enjoyable to explore.
artisan house marketplace – Easy-to-use pages with a calm layout provide a pleasant shopping flow.
dunebrook artisan shop – Friendly design with clearly displayed items makes exploring the site effortless.
duneridge gift hub – Well-organized pages make exploring products simple.
Магазин просто огонь !!! Оценка 5+ за все :voo-hoo: !!! Качество товара збс !!! Советую всем этот магаз!!! Мефедрон, Марихуану, Бошки, Кокаин Брал у него все гудд. Маскировка на высоте качество отличное. буду брать ещеЗнакомые делали, получалось что-то похожее на старый Juh.
shop creative picks – Unique items are presented clearly within a welcoming design.
visit product hall – Well-presented items and organized pages make exploring products easy and enjoyable.
browse artisan selections – Bright design and tidy sections make exploring items simple.
jasperdockartisanoutlet – The artisan selection is impressive, with items that really stand out.
shop the vendor hall – Polished design and clear visuals make finding items easy.
start here – Good selection and clear layout, makes exploring the marketplace easy.
orchard meadow creative corner – Items are easy to locate and browsing feels natural.
вызвать нарколога на дом [url=https://narkolog-na-dom-v-krasnodare-1.ru/]вызвать нарколога на дом[/url] .
vavada зеркало сайта [url=https://partscore.ru/]partscore.ru[/url] .
start browsing – The site is clean and intuitive, allowing effortless exploration.
creative artisan picks – Smooth navigation with products displayed neatly.
craft gems – Clean and minimal layout, browsing is smooth and straightforward.
zenmeadow boutique – Tidy design with organized products makes shopping effortless.
check it out – A critical topic presented clearly, worth exploring.
explore quickridge – Friendly layout with easy navigation allows for effortless shopping today.
explore artisan treasures – Relaxed but energetic design enhances every visit to the site.
visit stone bazaar – Simple navigation and bright pages make finding items easy.
cloud trail crafts – Smooth navigation with a wide variety of artisan items to explore.
реабилитация зависимых [url=https://narkologicheskaya-klinika-trezvyj-vybor-1.ru/]реабилитация зависимых[/url] .
browse tradehouse hall – Well-structured pages and smooth navigation make exploring products enjoyable.
see marketplace – The layout is clear, colorful, and easy to explore.
maple harbor collection – Attractive design and simple layout, makes shopping enjoyable.
shop link – The design keeps things simple while showcasing items clearly.
handmade treasures – Clean layout, browsing products is quick and easy.
handmade boutique – Items are thoughtfully arranged, really inviting.
Thank you for your sharing. I am worried that I lack creative ideas. It is your article that makes me full of hope. Thank you. But, I have a question, can you help me? https://www.binance.com/register?ref=IHJUI7TF
golden ridge craft hub – Smooth browsing experience with clearly presented products.
visit product hall – Clean and tidy layout makes finding and enjoying products simple and natural.
explore kettle outlet – Bright layout and neat pages make discovering products easy.
artisan home finds – Clear layout helps you browse products quickly and efficiently.
ivoryridgegoodsstore – The layout feels polished, making it quick to browse categories and items.
a/b тест баннеров [url=https://reklamnyj-kreativ13.ru/]reklamnyj-kreativ13.ru[/url] .
Хороший гайд по работе с блогерами и лидерами мнений в рамках SMM-стратегии. Автор объясняет, как выбирать инфлюенсеров, оценивать вовлечённость и договариваться об интеграциях. Есть советы по расчёту ROI от коллабораций: https://foto-videomontaz.ru/smm-prodvizhenie-v-soczialnyh-setyah-princzipy-instrumenty-i-pokazateli-effektivnosti/
schon properties dubai office 2 Bed Apartment Dubai serviced apartments in dubai jumeirah beachbhh real estate dubai
explore windmeadow artisan finds – Tidy layout and clear visuals make shopping enjoyable.
official website – Great styling choices that make the interface look very professional.
click to explore – The site feels well-managed, with vendors arranged clearly for easy navigation.
artisan finds – The selection is inviting, each piece adds character to the shop.
view unique items – Simple design ensures products are easy to find and explore.
Из 6 операторов именно оператор этого магазина отвечал быстрее и понятнее всех остальных. Я увидел здесь хорошее,грамотное отношение к клиентам, сразу видно человек знает свою работу. https://irga-nn.ru Надеюсь этот вопрос решится …….Первый раз слышу такой непонятный отзыв о 4фа,все кто берет его как и 2c-i говорят что у нас он лучший … по jte907 если не умеете с ним работать зачем берете…? есть постоянные оптовики кто берет только его, и этот продукт нареканий не вызывает. Многие “Селлеры” под видом jte продают 2201 и это факт! у нас этот продукт в оригинале. МХЕ у нас такой пришел, мы не кричим что его чистота 99%, и что качество его не очень мы предупреждали всех…
olive cove gift hub – Layout is tidy, making it easy to find and view products.
explore lavender products – Attractive design and tidy layout make shopping easy and enjoyable.
explore linentrail – Smooth layout ensures items are easy to locate and enjoy.
explore elm outlet – Bright visuals and organized sections make browsing stress-free.
local artisans – The atmosphere is cozy, and each item tells a little story.
wheatgrovegoodsstore – Clean interface and smooth navigation, makes shopping enjoyable and simple.
mint trail gift shop – Polished design with clear product layout simplifies shopping.
check mooncove items – Polished layout and organized sections make exploring products quick and fun.
open link – Interesting and easy-to-navigate site with engaging material.
artisan orchard market – Smooth browsing experience with well-arranged products.
explore unique finds – Intuitive layout and neat presentation make browsing enjoyable and easy.
explore creative finds – Items are easy to browse thanks to a clean, attractive design.
технический перевод услуги [url=https://teh-perevod.ru/]teh-perevod.ru[/url] .
hazelbrook handmade – Navigation is intuitive, and the design keeps everything easy to spot.
enter site – Well-organized site with content that flows nicely and keeps you engaged.
click to browse – The interface is polished, making exploring the selection simple.
shop artisan treasures – Smooth menus and tidy layout make finding items quick and enjoyable.
узнаваемость бренда баннер [url=https://reklamnyj-kreativ12.ru/]reklamnyj-kreativ12.ru[/url] .
unique creations – Clear and tidy layout, shopping feels effortless.
handmade treasures hub – Smooth layout with clearly displayed items makes browsing effortless.
view unique items – Well-arranged pages and clear visuals make finding products pleasant.
explore artisan mart – A clean and organized layout ensures an easy browsing experience.
artisan home finds – Products are easy to locate, and the site feels organized.
explore glade cove bazaar – Smooth layout and bright pages make finding products simple.
click here – Really enjoying the retro vibe and overall experience.
explore market – A simple, intuitive layout makes finding items effortless and fun.
artisan meadow finds – Navigation is simple, and products are showcased neatly.
visit product hall – Tidy layout and intuitive design make finding items simple and enjoyable.
cloud collection store – The site has a well-balanced layout that’s easy on the eyes.
browse meadow store – Clean layout and organized content make exploring products fast.
view seameadow selections – Friendly and tidy interface ensures items are easy to locate.
apartment soft goods companies in dubai https://rockland-music-events.org jscom real estate dubaiproperty finder dubai rent in al nhada
local artisans – Layout feels organized, finding products is straightforward.
explore curated goods – Warm and tidy interface ensures a relaxed browsing experience.
this page – Nostalgic elements make the content fun and memorable.
vavada казино официальный [url=https://cleansheet.ru/]vavada казино официальный[/url] .
floratrail boutique – Items are neatly presented, making exploring the site a breeze.
вот как прет Амф. https://severnye-amury.ru Ребята! Вы просто красавцы… На вышем уровне, срок доставке очень оперативная и спрятали хорошо. Советаю…На удивление был поражен скоростью работы магазина. Все четко как в аптеке))) Благодарствую
browse calm outlet – Intuitive structure and bright interface create a pleasant browsing experience.
artisan creations online – Intuitive layout and products are clearly showcased for easy browsing.
river goods online – User-friendly menus and organized content make browsing stress-free.
artisan treasures – Neat and calm design, makes finding items effortless.
visit cottongrove – Well-structured design allows users to move through products comfortably.
check out store – Products are showcased neatly, enhancing confidence in the shopping experience.
crafty delights – Easy-to-use layout, each product is easy to locate.
explore crystalcove – Friendly interface and well-organized sections allow products to be found quickly.
handmade treasures hub – Everything feels organized and easy to browse.
crafty delights – Everything is well arranged, making browsing smooth and enjoyable.
explore curated artisan goods – Clean interface makes discovering items easy and pleasant.
click to browse – The interface is polished and navigating products is very intuitive.
скачать вавада на телефон [url=https://partscore.ru/]скачать вавада на телефон[/url] .
calmtrail gift shop – Polished pages with clearly displayed items make browsing enjoyable.
частная наркологическая клиника в москве анонимное [url=https://narkologicheskaya-klinika-trezvyj-vybor-1.ru/]частная наркологическая клиника в москве анонимное[/url] .
take a look – Looks very pleasant and well maintained, makes visiting appealing.
browse violet items – Neat interface and organized sections make shopping fast and enjoyable.
check out items – Polished interface with organized visuals makes browsing comfortable and easy.
coastal market portal – Organized layout and smooth flow, nice experience browsing products.
artisan boutique – Neat and organized, each product is showcased perfectly.
shop the trail hall – Friendly interface and tidy pages allow for quick product exploration.
see handmade picks – Every item is clearly showcased, making navigation simple and pleasant.
bay trail craft hub – Well-organized interface with items easy to browse.
наркология москва [url=https://narkologicheskaya-klinika-trezvyj-vybor.ru/]наркология москва[/url] .
нарколог на дом круглосуточно [url=https://narkolog-na-dom-v-krasnodare-1.ru/]нарколог на дом круглосуточно[/url] .
tap to explore – The site design is simple, helping users find what they need quickly.
explore handcrafted collections – Navigation feels natural and products are easy to access.
artisan treasures – Layout is charming, makes exploring the items a pleasant experience.
продвижение сайта трафиком [url=https://prodvizhenie-sajtov-po-trafiku1.ru/]продвижение сайта трафиком[/url] .
artisan creations online – Well-structured layout and neatly displayed items make browsing effortless.
enter goods store – Neat pages and tidy design make exploring items enjoyable.
tap to explore – Neatly presented items and tidy pages make browsing stress-free.
mosscove goods portal – Clear layout and user-friendly interface make shopping stress-free.
check artisan velvetgrove – Clear layout and organized pages make exploring items effortless.
enter artisan shop – A structured layout makes browsing unique items effortless.
unique gifts – The shop feels relaxing, and items are neatly presented.
Apartments for sale in Lana https://ravindrabharathi.org wasl gate for saledubai properties group headquarters
explore items – Clean visuals and quick loading create an easy and seamless browsing experience.
по заказу?) https://porfilkin.ru Ещё в 11-м году брал здесь чудесную фофу и другие ништяки.Тогда это был крутейший магаз.И вот после долгого перерыва они снова идут в гору.Заказ оперативность 5 упаковка 5 качество 5 цена лучше всех.Уважаемый, Chemical-mix.com, я новичок что на легале, что в джабере, что где либо ещё… не получается выйти на связь, проблема с покупкой, в джабере написано, на сайте не онлайн… ответь пожалуйста в jabber… Зарание большое спасибо…
click to browse – The layout is simple and navigating through products feels natural.
emberridgeartisanoutlet – A great mix of artisan goods presented in a clean and appealing way.
craft haven – Tidy and inviting layout, makes browsing smooth.
Продвижение сообщества или страницы во ВКонтакте с помощью привлечения подписчиков. Услуга помогает быстро увеличить аудиторию, повысить активность и доверие к группе или профилю. Переходите по запросу [url=https://kwork.ru/smm/45267169/zhivie-podpischiki-vkontakte-v-gruppu-bez-spisaniy-bez-botov]накрутка живых подписчиков вконтакте[/url]. Возможна накрутка живых и заинтересованных пользователей, что улучшает видимость сообщества, помогает быстрее развивать бренд, проекты и продажи. Подходит для групп, пабликов и личных страниц.
creekharbor craft shop – Well-arranged products and tidy layout make finding items quick and easy.
violet harbor outlet – Clear design and smooth navigation make browsing effortless.
view unique items – Well-presented items and clean layout make navigation effortless.
start shopping – Structured sections and neat design allow effortless navigation of products.
artisan shop online – Smooth navigation and organized pages create a pleasant experience.
нарколог на дом в краснодаре [url=https://narkolog-na-dom-v-krasnodare.ru/]narkolog-na-dom-v-krasnodare.ru[/url] .
check out products – Clear category divisions make it easy to navigate the store.
explore echo trail – Well-structured site with smooth navigation for effortless shopping.
discover items – The interface is user-friendly, making it simple to explore products.
craft boutique – Smooth navigation, the layout is clean and intuitive.
discover meadow goods – Intuitive navigation and smooth pages allow quick product discovery.
discover flintridge goods – Smooth layout with clear visuals makes exploring items stress-free.
visit birchmeadow – Clean design and clear visuals make finding products effortless.
handmade maple finds – Smooth interface and appealing displays enhance the shopping experience.
artisan finds hub – Bright and simple interface, products are easy to browse.
check curated collection – Elegant and organized layout keeps the browsing experience smooth.
handmade charm – Layout is neat and approachable, makes browsing enjoyable.
browse store – It’s easy to scroll through and discover items without any confusion.
explore creative goods – Calm tones and structured sections create a welcoming experience.
artisan finds – Everything is well organized, makes browsing effortless and enjoyable.
jewel cove shop – Smooth layout and bright design make browsing items effortless.
open marketplace – Items are displayed neatly, making finding what you want easy.
check out items – Clean layout and organized visuals make browsing simple and fun.
Отдельный разговор с одной посылкой когда человек менял свое решение и то соглашался ждать посылку, то требовал вернуть деньги. Мефедрон, Марихуану, Бошки, Кокаин СРОЧНЫЙ вопрос!!заказывал через сайт или аську?
jewelridge online hub – Smooth pages and organized sections make shopping enjoyable and straightforward.
wheatcove craft shop – Intuitive layout and well-structured pages simplify finding items.
studio flat for rent in dubai on monthly basis https://freeandopenisland.org hotel apartments dubai monthly rental2 bedroom apartment in gardens dubai
discover oakridge – Navigation feels natural and products are displayed neatly.
explore store – Navigation feels natural, with a clear layout that’s simple to use.
craft boutique – Polished presentation, makes finding products enjoyable.
explore plum outlet – Bright pages and tidy structure make discovering products enjoyable.
browse artisan selection – Items are clearly arranged, making navigation fast and simple.
view unique items – Smooth pages and tidy layout help users find products efficiently.
экстренное вытрезвление [url=https://narkologicheskaya-klinika-trezvyj-vybor-1.ru/]narkologicheskaya-klinika-trezvyj-vybor-1.ru[/url] .
handmade charm – Layout feels tidy and inviting, every piece is easy to browse.
check out ember glade – Organized pages with intuitive menus ensure smooth product discovery.
https://xn--56-6kc5ajblq1am.xn--p1ai/
https://vk.com/mebelszr
https://vk.com/fasady_dlya_kuhni
discover quartzdock treasures – Smooth interface with well-arranged items makes browsing easy.
tap to explore – Clean interface and tidy sections allow users to find items quickly.
cottontrail artisan shop – Polished design with clearly displayed products makes exploring enjoyable.
официальный сайт бк мелбет [url=https://melbetregistratsiya.ru/]официальный сайт бк мелбет[/url] .
фофу кушают, 2 дмпм нюхается, судя по всему Мефедрон, Марихуану, Бошки, Кокаин Магазин работает как часы:ok:! Чекист самый крутой продаван это уже проверено годами!!! Дух захватывает от той мысли сколько же он продал за своё существование с 2011 ГОДА:strong: !! Это МЕГА-ПРОДАВАН!!! ТАк держать Чемикал Чекист))!!!Сработали быстро, посылка пришла за 4 дня, спрятано эффектно
нарколог на дом срочно [url=https://narkolog-na-dom-v-krasnodare-1.ru/]narkolog-na-dom-v-krasnodare-1.ru[/url] .
Shoreline Apartments guide 3 Bedroom Apartments For Sale In Dubai geo estate surveying engineering dubaiproperty apartment dubai
продвижение сайта трафику [url=https://prodvizhenie-sajtov-po-trafiku1.ru/]продвижение сайта трафику[/url] .
анонимный наркологический центр [url=https://narkologicheskaya-klinika-trezvyj-vybor.ru/]narkologicheskaya-klinika-trezvyj-vybor.ru[/url] .
чат нейросеть для учебы [url=https://nejroset-dlya-referatov-8.ru/]nejroset-dlya-referatov-8.ru[/url] .
Продвижение сообщества или страницы во ВКонтакте с помощью привлечения подписчиков. Услуга помогает быстро увеличить аудиторию, повысить активность и доверие к группе или профилю. Переходите по запросу [url=https://kwork.ru/smm/45267169/zhivie-podpischiki-vkontakte-v-gruppu-bez-spisaniy-bez-botov]накрутка подписчиков в вк по критериям[/url]. Возможна накрутка живых и заинтересованных пользователей, что улучшает видимость сообщества, помогает быстрее развивать бренд, проекты и продажи. Подходит для групп, пабликов и личных страниц.
выезд нарколога на дом [url=https://narkolog-na-dom-v-krasnodare.ru/]narkolog-na-dom-v-krasnodare.ru[/url] .
Thank you for your sharing. I am worried that I lack creative ideas. It is your article that makes me full of hope. Thank you. But, I have a question, can you help me? https://accounts.binance.info/register-person?ref=QCGZMHR6
НЕ принуждаем вас тут брать, берите, где позволяет бюджет. Мефедрон, Марихуану, Бошки, Кокаин Бро ты бред несёшь!Если читал все посты в этом магазе брали даже модеры этого форума.А может быть ты конкурент и провоцируешь людей специально?мыло есть.нерабочее.
commercial property rental yield in dubai 2 Bed Apartment Dubai dubai property brokerage dubaicapital investment real estate dubai
заказать кухню на заказ [url=https://zakazat-kuhnyu-10.ru/]заказать кухню на заказ[/url] .
нарколог на дом круглосуточно [url=https://narkolog-na-dom-v-krasnodare-3.ru/]нарколог на дом круглосуточно[/url] .
заказать кухню с доставкой [url=https://zakazat-kuhnyu-9.ru/]zakazat-kuhnyu-9.ru[/url] .
En la esquina superior derecha de la pantalla del juego de minas, el jugador encontrará un botón con el nombre del juego, que también informa la cantidad de minas que se encuentran distribuidas entre las 25 posiciones del tablero. Cada apuesta en este juego puede marcar la diferencia entre ganar o perder, dependiendo del número de minas elegidas. La verdad es que me suena todo genial, pero tengo mis dudas con el trabajo de “dlp”, ya que creo que hacen juegos con muy buenas ideas, pero no terminan de estar bien desarrollados. ¡Deseando probarlo a ver si esta vez han dado con la tecla! Al otro lado del bosque, hay grandes minas de oro abandonadas ¡y estáis decididos a encontrarlas! Debéis reunir a vuestro clan de enanos y partir en su busca. Juntos, podréis superar los obstáculos, escapar de trampas y trolls y, lo más importante, ¡encontrar valiosos tesoros! Pero debéis tener mucho cuidado con el dragón y vigilar a los miembros de vuestro clan: ¡puede que no todos tengan las mejores intenciones!
http://dbnk.co.ir/farsi/?p=216229
Tal y como establece el Real Decreto de Comunicaciones Comerciales de las Actividades del Juego del 3 de noviembre de 2020, los bonos de bienvenida no estaban disponibles en los casinos en línea de España, Y esto también incluía a los bonos sin depósito, bonos de casino en general y tiradas gratis. Para poder acceder a ellos era necesario crear una cuenta y esperar 30 días. De hecho, The Pirate Bay llevó a cabo una campaña de recaudación de fondos en 2007 para comprar la micronación de Sealand. En cierto modo, se trataba de un intento de evitar que otros países volvieran a bloquear a The Pirate Bay. No fue hasta 2009 cuando los responsables de TPB fueron amenazados con varias multas y demandas judiciales y aconsejaron a los usuarios que no les hicieran donaciones porque no pagarían las multas. Como último paso en 2013, el sitio web Pirate Pay añadió sus direcciones de Bitcoin y Litecoin a su página de inicio para simplificar las donaciones mediante criptomonedas.
усиление ссылок переходами [url=https://internet-agentstvo-prodvizhenie-sajtov-seo.ru/]internet-agentstvo-prodvizhenie-sajtov-seo.ru[/url] .
нарколог на дом в краснодаре [url=https://narkolog-na-dom-v-krasnodare-2.ru/]нарколог на дом в краснодаре[/url] .
В таких случаях надо запрашивать подтверждения через форум(ЛС) Мефедрон, Марихуану, Бошки, Кокаин CHEMICAL MIX спасибо огромное!!!Вопрос?! Что дальше? Что лучш
ставки на спорт мелбет [url=https://melbetregistratsiya.ru/]ставки на спорт мелбет[/url] .
art real estate dubai Townhouses For Rent In Dubai apartment prices in dubai marinadubai real estate with al satwa properties commercial
нарколог краснодар [url=https://narkolog-na-dom-v-krasnodare-1.ru/]narkolog-na-dom-v-krasnodare-1.ru[/url] .
наркологическая больница [url=https://narkologicheskaya-klinika-trezvyj-vybor.ru/]наркологическая больница[/url] .
2си-ай – ах..й просто!)))))) Мефедрон, Марихуану, Бошки, Кокаин Почему закрылся представитель в петрозаводске? Жду ответа чем)платил 5 февраля свою посылочку!как вы поняли ничего не получил!ТС кормил меня завтраками,в итоги обещал вернуть деньги если не получу до 28 февраля!деньги мне тоже никто не вернул вместо этого мне прислали новый трек и написали что мы обещали что получите товар и деньги возвращать не буду!мои обьяснения о том что вашу посылку уже некому получать он слушать не хочет и возвращать деньги тоже!Ув.Адмистрация форума прошу не удалять мой пост и если нужно могу скинуть переписку!
частного нарколога на дом [url=https://narkolog-na-dom-v-krasnodare.ru/]narkolog-na-dom-v-krasnodare.ru[/url] .
заказать кухню по индивидуальному заказу [url=https://zakazat-kuhnyu-10.ru/]zakazat-kuhnyu-10.ru[/url] .
Serenity Mansions https://satishpatel.net khalil dubai propertiesstudio apartment in dubai
vavada зеркало [url=https://partscore.ru/]vavada зеркало[/url] .
компании занимающиеся продвижением сайтов [url=https://internet-agentstvo-prodvizhenie-sajtov-seo.ru/]компании занимающиеся продвижением сайтов[/url] .
заказать кухню рассчитать стоимость [url=https://zakazat-kuhnyu-9.ru/]zakazat-kuhnyu-9.ru[/url] .
бесплатный период upster [url=https://reklamnyj-kreativ14.ru/]reklamnyj-kreativ14.ru[/url] .
enter the marketplace – Everything is well laid out, which makes browsing hassle-free.
Продвижение сообщества или страницы во ВКонтакте с помощью привлечения подписчиков. Услуга помогает быстро увеличить аудиторию, повысить активность и доверие к группе или профилю. Переходите по запросу [url=https://kwork.ru/smm/45267169/zhivie-podpischiki-vkontakte-v-gruppu-bez-spisaniy-bez-botov]накрутка подписчиков вконтакте в группу[/url]. Возможна накрутка живых и заинтересованных пользователей, что улучшает видимость сообщества, помогает быстрее развивать бренд, проекты и продажи. Подходит для групп, пабликов и личных страниц.
view this shop – Browsed for a bit, layout feels organized and browsing is smooth.
Привет ребята! В улан-удэ синие кристаллы имеются? Мефедрон, Марихуану, Бошки, Кокаин Бро подскажи ато я переживаю заказал 10 грОтличный магазин маскировка высший балл!
enter the marketplace – Loading was quick, and navigation felt very straightforward.
вызов нарколога на дом краснодар [url=https://narkolog-na-dom-v-krasnodare-3.ru/]вызов нарколога на дом краснодар[/url] .
discover more – Took a brief look, navigation is smooth and the interface is clean.
dubai waterfront properties rent https://geoideas.net find property abu dhabireal estate investment in dubai land
start exploring – Information is easy to follow, and the site feels welcoming.
visit the store – Had a short glance, everything feels clearly laid out and structured.
>check icicle deals – The site is user-friendly and browsing between pages is fast.
open this link – Dropped in for a moment, layout feels tidy and easy to scan.
open the hub – Navigation is hassle-free, with a logical layout for all pages.
>explore icicle brook – The layout is tidy, making browsing simple and fast.
нарколог на дом цены [url=https://narkolog-na-dom-v-krasnodare-1.ru/]нарколог на дом цены[/url] .
Вопрос?! Что дальше? Что лучш https://redcrafting.ru спасибо за пожеланияОдин вопрос только,можно ли заказать так что бы без курьера?Самому придти в офис и забрать посылку?
заказать кухню по индивидуальным размерам [url=https://zakazat-kuhnyu-10.ru/]zakazat-kuhnyu-10.ru[/url] .
steroids for sale
buying xanax online
see products here – Brief visit, content is well organized and easy to locate.
lesbian incest porn
check out products – Everything is user-friendly, and browsing between pages is smooth.
вызов нарколога на дом [url=https://narkolog-na-dom-v-krasnodare.ru/]вызов нарколога на дом[/url] .
sell your property dubai https://denizlilidersurucukursu.com 1 bedroom apartment in qusais dubaireal estate companies in jumeirah village circle dubai
вызов нарколога на дом краснодар [url=https://narkolog-na-dom-v-krasnodare-2.ru/]вызов нарколога на дом краснодар[/url] .
view this shop – Browsed for a bit, interface feels organized and pages are simple.
visit the commerce hub – Everything is organized clearly, making it simple to find what I need.
клиника наркологическая [url=https://narkologicheskaya-klinika-trezvyj-vybor.ru/]клиника наркологическая[/url] .
start browsing – Short browse, content is structured and easy to navigate.
enter vendor hub – Navigation is smooth, and the content is user-friendly.
Привет, ребята! Мефедрон, Марихуану, Бошки, Кокаин Что хочу сказать закладки всегда по высоте.магаз работает малыми обьемами.1-5гр? да
заказать кухню по своим размерам [url=https://zakazat-kuhnyu-9.ru/]zakazat-kuhnyu-9.ru[/url] .
запоминаемость рекламы [url=https://reklamnyj-kreativ14.ru/]запоминаемость рекламы[/url] .
start exploring – Layout is tidy, making it easy to find information quickly.
main marketplace – Layout is well-structured, pages load fast, and browsing feels simple and smooth.
paleseafoam leaks porn
заказать кухню по индивидуальному проекту [url=https://zakazat-kuhnyu-12.ru/]заказать кухню по индивидуальному проекту[/url] .
steroids shop
вызов нарколога на дом круглосуточно [url=https://narkolog-na-dom-v-krasnodare-3.ru/]narkolog-na-dom-v-krasnodare-3.ru[/url] .
monthly rent studio i jlt dubai https://dubaipropertycircle.com Saadiyat Island guidereal estate categories list dubai
explore this page – Layout seems user-friendly, making it easy to find information.
go explore now – First impression feels solid, everything is well organized and simple to navigate.
enter vendor hub – The layout is logical, with content presented cleanly.
заказать кухню в рассрочку [url=https://zakazat-kuhnyu-11.ru/]zakazat-kuhnyu-11.ru[/url] .
DailyDealsHub – Pages load fast and the layout feels intuitive.
кухни в спб на заказ [url=https://kuhni-spb-49.ru/]kuhni-spb-49.ru[/url] .
ValueVault – Clean interface with fast page performance.
Представитель был Магазин на форуме Бивис и Бадхед, на сколько я знаю он работает, он у нас был представителем. https://gr-braslet.ru Заказал АМ 2233,разведу 1 к 15 Посмотрим что из этого получится)отпишусь ещёотдыхай до понедельника
explore products – Pages are easy to navigate, and the design feels uncluttered.
shop online now – Quick check, pages are clear, and navigation is smooth.
@paleseafoam porn
enter website – Pages feel well structured, making browsing comfortable.
dubai properties serena casa viva https://mauthietkenhadep.net residence visa uae priceold town dubai apartments for rent
заказать кухню под размеры [url=https://zakazat-kuhnyu-12.ru/]заказать кухню под размеры[/url] .
Все вопросы к представителю. Мефедрон, Марихуану, Бошки, Кокаин Доставка осуществляется нашим курьером при заказе от 1кг!И обговаривается с ТС индивидуально!ну да, как скажут так и делают я уже говорил 11 из 10)
лечение зависимостей в москве [url=https://narkologicheskaya-klinika-trezvyj-vybor.ru/]лечение зависимостей в москве[/url] .
запоминаемость рекламы [url=https://reklamnyj-kreativ14.ru/]запоминаемость рекламы[/url] .
кухни под заказ спб [url=https://kuhni-spb-50.ru/]kuhni-spb-50.ru[/url] .
врач нарколог на дом [url=https://narkolog-na-dom-v-krasnodare-3.ru/]врач нарколог на дом[/url] .
gay sex porn
gay anime porn
furnished studio for rent in dubai for 3 months Luxury Villas For Sale In Dubai apartments in jbr dubai for saleabu dhabi partition for rent
заказать кухню на заказ [url=https://zakazat-kuhnyu-11.ru/]заказать кухню на заказ[/url] .
Нужны подписчики в Telegram? Поможем быстро увеличить аудиторию вашего канала или группы. Переходите по запросу [url=https://kwork.ru/smm/45266604/zhivie-podpischiki-v-telegram-kanal-chat-bez-spisaniy-bez-botov]вечные подписчики в телеграм[/url]. Предлагаем накрутку живых и активных подписчиков без резких скачков и с минимальными списаниями. Подходит для старта новых каналов, повышения доверия и привлечения органической аудитории. Безопасное продвижение, гибкие объемы заказа и быстрый запуск. Увеличьте популярность вашего Telegram-канала уже сегодня.
кухни под заказ спб [url=https://kuhni-spb-49.ru/]kuhni-spb-49.ru[/url] .
заказать кухню каталог [url=https://zakazat-kuhnyu-10.ru/]заказать кухню каталог[/url] .
IvoryPickShop – Simple to browse and pages display efficiently.
пацаны качество 250 на высоте советую 1к10-12 норм ваще прет 50-час ваще жестко , селеру респект ваще, спср тока черти Мефедрон, Марихуану, Бошки, Кокаин ага в осадок выпадает в спирте это верно, но если после выпадания в осадок добавить 646 в спирт и все будет гуд. Кстати 250 также при перегреве выпадает в осадока ты откуда? сам? экспертиза будет чистая не волнуйся…
QuickPickStore – Layout is neat and everything loads without delay.
интернет раскрутка [url=https://internet-agentstvo-prodvizhenie-sajtov-seo.ru/]internet-agentstvo-prodvizhenie-sajtov-seo.ru[/url] .
uk steroids shop
diva flawless porn leak
заказать кухню по индивидуальным размерам [url=https://zakazat-kuhnyu-12.ru/]заказать кухню по индивидуальным размерам[/url] .
1 jbr dubai properties https://freeandopenisland.org property for rent in majan dubaiApartment for Sale in Jumeirah Beach Residence, Dubai
заказать кухню с доставкой [url=https://zakazat-kuhnyu-9.ru/]zakazat-kuhnyu-9.ru[/url] .
нарколог на дом недорого [url=https://narkolog-na-dom-v-krasnodare-2.ru/]narkolog-na-dom-v-krasnodare-2.ru[/url] .
значит не успели трек номер в базу завести. Мефедрон, Марихуану, Бошки, Кокаин продавец отзывчивыйЗаказывал у этих ребят 203 и 5-IAI, качеством доволен. Заказы они оформляют долго, но зато отправляют быстро. Мне отправили в день оплаты!
частного нарколога на дом [url=https://narkolog-na-dom-v-krasnodare-3.ru/]narkolog-na-dom-v-krasnodare-3.ru[/url] .
заказ кухни спб [url=https://kuhni-spb-49.ru/]заказ кухни спб[/url] .
заказать кухню под ключ [url=https://zakazat-kuhnyu-11.ru/]zakazat-kuhnyu-11.ru[/url] .
diva flawless porn videos
buy used panties online
gay porn videos
анализ карточек маркетплейс [url=https://reklamnyj-kreativ14.ru/]анализ карточек маркетплейс[/url] .
serena bella casa dubai properties https://diegoreico.com dawood property in dubaimbr dubai properties
Quem já tirou 1000x no Jogo do Tigrinho em 2026? Mostra o print aqui nos comentários!
Привет всем!
SEO продвижение сайтов в Дагестане становится важным для компаний, которые хотят конкурировать на равных. Если услуга подана абстрактно «выводим в топ», доверия нет. Но если раскрыть процесс: аудит сайта онлайн, сбор семантического ядра, внутренняя оптимизация, публикация контента, настройка ссылок, внимание удерживается. Добавьте кейс «строительные услуги Махачкала — рост заявок на 40%», и клиент останется дольше.
Полная информация по ссылке – https://www.ts-web.ru/services/support.html
услуги SMM агентства Санкт-Петербург, SEO оптимизация сайта под Яндекс, органическое продвижение сайтов в России
поисковая оптимизация сайтов под Google, [url=https://www.ts-web.ru/blog/marketing/content-plan/.html]Контент-план для сайта услуг: структура и периодичность | Блог[/url], SEO продвижение сайтов для строительных компаний
Удачи и комфорта в жизни!
[url=http://narbim.net/terraorga/index.php?blogger_id=10&route=information%2Fblogger]Сайт визитка под ключ: минимализм, который работает[/url] b656908
live wetten prognosen
Here is my site – Wer Ist Der Beste Wettanbieter
(Steam.Wiseman.Cn)
туфта какаето Мефедрон, Марихуану, Бошки, Кокаин продавец в аське..только что с нми общалсявчера вечером получил трек сегодня груз, я охуеваю от скорости доставки походу ТС выкупил курьерку ))) по качеству отпишусь позже
заказать кухню под ключ [url=https://zakazat-kuhnyu-10.ru/]zakazat-kuhnyu-10.ru[/url] .
мелбет вывести на карту киргизия [url=http://melbet18207.help/]http://melbet18207.help/[/url]
мостбет как пополнить MasterCard [url=mostbet2029.help]мостбет как пополнить MasterCard[/url]
mostbet ios rasmiy [url=https://mostbet16734.help]https://mostbet16734.help[/url]
заказать анализ сайта [url=https://internet-agentstvo-prodvizhenie-sajtov-seo.ru/]internet-agentstvo-prodvizhenie-sajtov-seo.ru[/url] .
mostbet koeffitsientlar [url=https://mostbet16082.help]https://mostbet16082.help[/url]
1win download [url=https://1win5530.ru/]https://1win5530.ru/[/url]
Aloha! Cluster Pays is most certainly one of the NetEnt slots that we recommend to anyone. Effective Strategies for Playing Aloha Cluster Pays Game and Increasing Your Wins. The show still went on and the New England Patriots defeated the Los Angeles Rams 13-3, Anksunamun comes with a host of free spins that are the gateway to the bonus game. Playtech is one of the leaders away from on the internet and cellular casino games and usually signal when it comes to the newest inspire basis. Iphone 3gs harbors powered by Playtech is jackpots really worth hundreds of thousands such as the brand new Gladiator and you will Coastline Group jackpots. The software merchant believes one cellular participants gaming sense try everything and therefore give a keen matchless set of gambling games. A number of the latest launches range from the 164 a method to winnings, Medusa and the Monster, Queen of your own Underworld and you may Terminator Genisys. Iphone 3gs enhanced antique slots function three reels and you can just one payline and you may less incentive symbols than simply movies slots.
https://blugo.ma/vortex-game-big-win-stories-from-pakistan/
Betting at most roulette tables starts at £0.20 only, while the upper limits range from £4,000 to £10,000 per spin depending on where you take a seat. Football Studio Roulette, Double Ball Roulette, Immersive Roulette, and Lightning Roulette comprise only a small portion of the exciting roulette variants you can indulge in at the UK Casino Club. Theres always something particularly exciting about bonus games, players do not need a Pelaa Casino promotion code in order to access any of the bonuses on the site. Since there are 3 draws, which combined the existing Scientific Games Interactive department with NYX – including NextGen Gaming – into a single industry titan. Bingo is clearly the main gaming genre that Sundae Bingo focuses on, so the next step is making that first deposit. Lastly, youll start to earn big bucks in no time.
Статья охватывает современные тренды SMM: короткое вертикальное видео, живые эфиры, использование AI-инструментов. Автор также разбирает, как правильно настраивать таргетинг и интегрировать соцсети с CRM. Актуально: https://iwatt24.ru/uslugi-smm/
melbet скачать бесплатно [url=https://melbet08561.help]https://melbet08561.help[/url]
баровардани пул мостбет [url=http://mostbet07482.help/]http://mostbet07482.help/[/url]
бозии mines 1win [url=http://1win14536.help/]бозии mines 1win[/url]
xanax and cocaine
flawless diva porn
apartments for rent in karama Apartments For Sale In Downtown Dubai Villas for rent in Jumeirah Parkdubai properties business bay sales office
Нужны подписчики в Telegram? Поможем быстро увеличить аудиторию вашего канала или группы. Переходите по запросу [url=https://kwork.ru/smm/45266604/zhivie-podpischiki-v-telegram-kanal-chat-bez-spisaniy-bez-botov]подписчики в telegram[/url]. Предлагаем накрутку живых и активных подписчиков без резких скачков и с минимальными списаниями. Подходит для старта новых каналов, повышения доверия и привлечения органической аудитории. Безопасное продвижение, гибкие объемы заказа и быстрый запуск. Увеличьте популярность вашего Telegram-канала уже сегодня.
На чем готовить???????? https://alekspushkin.ru На прошлой неделе в среду, был оплачен заказ, вот уже среда следующей недели, праздники прошли, в скайпе они пока что не появлялись. Пологаю что магазин загулял.буду заказывать второй раз тут) товар понравился)
глория мебель [url=https://kuhni-spb-51.ru/]глория мебель[/url] .
врач нарколог на дом [url=https://narkolog-na-dom-v-krasnodare-2.ru/]врач нарколог на дом[/url] .
https://adult-ads.mn.co/posts/99945520
заказать кухню цена [url=https://zakazat-kuhnyu-11.ru/]zakazat-kuhnyu-11.ru[/url] .
diva flawless leaked porn
Как выбрать строительную компанию для дома из бруса? Смотрите на реализованные проекты и отзывы. [url=https://dom-rggu.ru/]клееный брус дом под ключ[/url] Хорошая компания покажет вам построенные дома, познакомит с владельцами и предоставит полную смету. [url=https://dom-rggu.ru/]строительство дома из клееного бруса СПб[/url] Не ведитесь на слишком низкие цены — в строительстве бесплатный сыр бывает только в мышеловке.
карточки товаров wildberries [url=https://reklamnyj-kreativ14.ru/]карточки товаров wildberries[/url] .
Давно работаю с чемиком. Мефедрон, Марихуану, Бошки, Кокаин Что там за оператор в аське сидит? Ответа нереально долго ждать приходиться, я по 2раза один и тот же вопрос пишу. Не могу постоянно находиться в сети. Пусть быстрей работает.Магазин как магазин!
rera rental increase calculator dubai pet friendly hotel apartments in dubai buy property dubai no down paymentshort term apartment rentals
профессиональное продвижение сайтов [url=https://internet-agentstvo-prodvizhenie-sajtov-seo.ru/]internet-agentstvo-prodvizhenie-sajtov-seo.ru[/url] .
https://myhouse777.ru/kak-burenie-skvazhin-vliyaet-na-gruntovye-vody/
buy diazepam 10mg
ts escort london
кухни под заказ [url=https://kuhni-spb-52.ru/]кухни под заказ[/url] .
https://multiki-online.com/others/14054-mult-vecherinka-stsenariy-po-motivam-lyubimyh-geroev
indian viral mms porn
магазин роботает отлично сам проверил и не поверю не каму кто скажет что это не так Мефедрон, Марихуану, Бошки, Кокаин А теперь к делу.. магаз ровный, товар ..вставляет епт..особенно в прошлый раз, пол часа ждал, что из ванной вылезет оно и покарает меня…хорошо быстро отпускает, а то вода остыла уже и сига стлела и хабарик упал так , что сам не заметил…на вкус – сода.?
кухни на заказ от производителя в спб [url=https://kuhni-spb-49.ru/]kuhni-spb-49.ru[/url] .
Рукоход — отличный элемент детского комплекса для развития верхней части тела. [url=https://детский-игровой-комплекс.рф/]детский игровой комплекс из дерева[/url] Дети обожают перебираться по перекладинам, воображая себя героями приключений. [url=https://xn—–elcddgetbiefibnp3abdvmptd.xn--p1ai/]детский комплекс с горкой[/url] К тому же это отличная подготовка к школьному спорту.
заказать кухню сайт [url=https://zakazat-kuhnyu-11.ru/]заказать кухню сайт[/url] .
кухни на заказ в спб от производителя [url=https://kuhni-spb-51.ru/]кухни на заказ в спб от производителя[/url] .
кухни на заказ от производителя в спб [url=https://kuhni-spb-50.ru/]кухни на заказ от производителя в спб[/url] .
Villas for sale in Wadi Al Safa 7 villas to rent in falcon city dubai real estate regulatory agency dubai rentaldragon house dubai
заказать кухню по своим размерам [url=https://zakazat-kuhnyu-12.ru/]заказать кухню по своим размерам[/url] .
flavoured condom
real incest porn
Спасибо огромное вам многим за понимание. https://turvoyage.ru , обычно мин 20-40парни все ок проверенно )))
https://3666bet11.org/
https://tk-366.org/
book a flat Rent apartment in Dubai Marina monthly One B Towercasabella property broker dubai
gay anime porn
open commerce site – Layout is well organized, making the browsing experience effortless.
learn more here – Checked it out, browsing through sections is quite effortless.
shop platform link – Pages are clearly structured, making it easy to find items quickly.
direct store link – The structure makes sense and browsing is stress-free.
strawberry flavoured condoms
АА Все братишки, мне уже отослали сегодня, спасибо что успокоили! https://ero-binger.ru сегодня получил трек. все пробивается. жду посылочку)Запулил:$: ждёмс… отпишу…. Селер адекватный:voo-hoo:
click to visit – Looked at the site today, interface is tidy and simple to navigate.
Local Artisan Market – Easy-to-use interface, items found quickly, very pleasant browsing.
кухня на заказ [url=https://kuhni-spb-52.ru/]кухня на заказ[/url] .
try vendor atelier – Browsing was smooth, and pages appeared quickly without problems.
check it out here – Brief visit, pages are well arranged and navigation is simple.
explore more – Took a short look, navigation is intuitive and pages respond fast.
view page – Browsing is comfortable thanks to an organized and simple design.
check glass meadow deals – The site is intuitive and browsing is fast.
visit wheat hub – Smooth navigation and clear layout make browsing enjoyable.
go to homepage – Looked around today, the layout is neat and easy to understand.
visit link – Checked it out, navigation is effortless and the layout feels well organized.
furnished room for rent in villa dubai rule of 3 dubai property escrow account real estate dubaidubai property show in shanghai
кухни на заказ спб недорого с ценами [url=https://kuhni-spb-49.ru/]kuhni-spb-49.ru[/url] .
CrestDealsOnline – Easy navigation and pages display clearly without delays.
mostbet Oʻzbekistonda kirish [url=mostbet16734.help]mostbet Oʻzbekistonda kirish[/url]
мостбет статистика [url=http://mostbet2029.help/]http://mostbet2029.help/[/url]
diva flawless onlyfans porn
1win ҳисобкунаки бурд [url=http://1win14536.help/]http://1win14536.help/[/url]
mostbet Oʻzbekiston payme [url=https://mostbet16082.help/]https://mostbet16082.help/[/url]
кухня глория [url=https://kuhni-spb-50.ru/]kuhni-spb-50.ru[/url] .
mostbet бозпас гирифтани бурд [url=http://mostbet07482.help]http://mostbet07482.help[/url]
melbet служба поддержки [url=http://melbet08561.help]http://melbet08561.help[/url]
Handcrafted Vendor Lane – Very simple to browse, quickly located my items, and overall process was smooth.
buy diazepam 10mg
1win cash back [url=www.1win5530.ru]www.1win5530.ru[/url]
По приходу товара я выложу тут розничную площадку для заказов, на которой вы сможете заказать реактивы из наличия на складе, не уточняя у нас что есть… Мефедрон, Марихуану, Бошки, Кокаин Затарил я тут как то купели значит курехи,приваливай на адрес и не могу найти списался с оператором и понял что дурак тут я а не минер затупил,30 сек и закладка у меня в руках,лечу Домой,дома меня ждут уже братики заряжает по 2 водных и начинаем пускать слюни под спанч бобра, в полне хороший стафф,силы стафа хватает,валит минут 40-60 потом спад,получилось так что вес сдули за 2 дня,отходосы минемальные, вообщем сервис тут вышка тарился тут ребята)магазину респект)) с корефанами накуримся вдоволь)))
sportwetten gewinnen mit strategie
Have a look at my web blog – wetten österreich türkei (https://asiabizweb.com/)
кухню заказать [url=https://zakazat-kuhnyu-12.ru/]кухню заказать[/url] .
see details – The site feels user-friendly, and moving around is smooth and fast.
access store – Had a fast check, everything loads evenly and feels organized.
open website – Had a glance, pages are clean and browsing is straightforward.
check it out – Everything is arranged clearly, making browsing smooth.
tap cove marketplace – Layout is simple, pages load quickly, and navigation is smooth.
go to homepage – Brief visit shows clean design and easy navigation.
this platform – Took a look around, everything is arranged clearly and runs smoothly.
go to homepage – Checked it briefly, navigation feels intuitive and content is clear.
codeshift – Loved the layout today; clean, simple, and genuinely user-friendly overall.
golden cove online store – Browsing is fast and effortless, with everything easy to locate.
Crafted Home Studio – Fantastic selection, fast and straightforward checkout, very simple.
sobha creek vista dubai real estate disputes dubai studio monthly rent in dubai dipapartment for rent in damac maison the vogue business bay
1win оинаи корӣ [url=https://1win14536.help/]https://1win14536.help/[/url]
мостбет promo code [url=https://mostbet2029.help]https://mostbet2029.help[/url]
mostbet akkaunt tekshirish jarayoni [url=http://mostbet16082.help]http://mostbet16082.help[/url]
diwa flawless porn
мостбет Тоҷикистон app боргирӣ [url=https://mostbet07482.help]https://mostbet07482.help[/url]
marblecovegoodsdistrict – The layout is neat and pages open quickly for smooth browsing.
mostbet Oʻzbekistonda [url=http://mostbet16734.help]mostbet Oʻzbekistonda[/url]
1win account verification time [url=https://www.1win5530.ru]1win account verification time[/url]
visit platform – Took a short browse, pages are well arranged and quick to display.
f1nn5ter vlad porn
melbet официальный сайт вход [url=http://melbet08561.help/]http://melbet08561.help/[/url]
visit wheat hub – Smooth navigation and clear layout make browsing enjoyable.
ну вроде с этой партии был чистый. А там 100мг – уже лютый трип.. А учитывая по скольку 5-ИАИ обычно юзают… Не завидую я парням. Магазину дам пинка за косяки, как свяжусь Мефедрон, Марихуану, Бошки, Кокаин Есть люди в вк, которые представляются под маркой вашего магазина и кидают людей, уже не одного так кинули, так что будьте внимательны и уточняйте у реальных представителей магазина, так оно или нет.Желаю развития ветке!
look around here – Interface is tidy, navigation is straightforward, and everything loads smoothly.
Crafted Home Studio – Very responsive site, easy to navigate, and everything is clear and organized.
golden harbor shop – Navigation is smooth, and finding products is fast and simple.
visit store now – Layout is clean, giving a smooth browsing experience right away.
learn more here – Checked briefly, interface is simple and browsing feels effortless.
banana flavoured condoms
Handmade Treasures Studio – Very prompt delivery, well-packaged, and completely satisfied with my purchase.
explore the site – Brief visit, navigation feels natural and straightforward.
explore page – A tidy layout ensures browsing is smooth and intuitive.
tap to view – Opened it up, everything appears straightforward and easy to use.
discover wheatcove goods – Clean design and smooth navigation make browsing pleasant.
commercial land for rent in dubai ip counsel role dubai intellectual property trump golf estate dubai golf clubmodular real estate dubai
Thanks for sharing. I read many of your blog posts, cool, your blog is very good. https://accounts.binance.com/de-CH/register?ref=W0BCQMF1
buy saxenda online
кухни под заказ спб [url=https://kuhni-spb-52.ru/]кухни под заказ спб[/url] .
enter website – Just checked it, content feels well structured and readable.
granite orchard online store – Browsing is seamless and everything loads quickly.
так что бро не стоит беспокоиться по поводу порядочности этого магазина, они отправляют достаточно быстро и конспирация хорошая и качество на высоте!))) https://autopravo124.ru в очередной раз сработал с магазином и всё навысшем уровне! работал без гаранта и ни каких проблем! Отличный магазин!!! Всегда идёт на встречу и решает любые вопросы! Удачи в бизе! Респект вам и уважуха!Из аськи вышел и даже не ответил… *(
open link – Clear structure helps users move smoothly between pages.
Handmade Home Goods – Very simple layout, locating specific products was fast and easy.
official page – Dropped in, interface looks neat and browsing is smooth.
мостбет чат поддержки [url=http://mostbet2029.help]http://mostbet2029.help[/url]
1win app версияи охирин [url=https://1win14536.help]https://1win14536.help[/url]
мостбет стратегия plinko [url=https://mostbet07482.help]https://mostbet07482.help[/url]
1win in play betting [url=http://1win5530.ru/]http://1win5530.ru/[/url]
кухни под заказ спб [url=https://kuhni-spb-50.ru/]kuhni-spb-50.ru[/url] .
diva flawless porn leak
access now – A clean layout ensures smooth browsing and quick page loads.
авиатор melbet [url=https://www.melbet18207.help]https://www.melbet18207.help[/url]
browse goods district – Simple and clean interface with smooth browsing experience.
diva flawless nude porn
flavoured condoms durex
mostbetda pul yechish qanday [url=mostbet16734.help]mostbet16734.help[/url]
explore this page – Took a short look, everything feels organized and responsive.
melbet лицензия [url=www.melbet08561.help]melbet лицензия[/url]
check out this boutique – Everything loads fast and moving around the site feels natural.
Boutique Craft Hub – Navigation is smooth, descriptions make sense, and exploring the products was a pleasure.
visit this store – Pages are easy to navigate, and content is clearly arranged.
hessa home building oud metha d and b properties property finder dubai apartments1095 usd to aed
browse here – Looked around, interface feels tidy and simple to use.
diva flawless porn leak
часть покупателей устраивает, продавцы тоже не жалуется. В чем проблема? нет терпения – идите в другие шопы. Мефедрон, Марихуану, Бошки, Кокаин Сервис лучший, и стабильный.Джи спокойно 20-ого числа 😉 Потом вот только как получать будешь…?
buy used panties uk
tap to view – Opened it up, everything feels straightforward and simple to use.
enter website – Layout feels organized, pages load fast, and navigation is effortless.
Самые актуальный новости новостной портал — свежие события, аналитика и репортажи. Политика, экономика, технологии и общество. Будьте в курсе последних новостей и ключевых событий каждый день.
Artisan Boutique Finds – Quick arrival, items exactly as shown, and I highly recommend.
Самые актуальный новости новостной сайт — свежие события, аналитика и репортажи. Политика, экономика, технологии и общество. Будьте в курсе последних новостей и ключевых событий каждый день.
learn more – Fast-loading pages combined with clean design make browsing effortless.
see products here – Quick glance, layout is tidy and information is easy to locate.
мелбет спорт и казино киргизия [url=https://melbet18207.help/]https://melbet18207.help/[/url]
Jogo do Tigrinho Pix R$20: ganha 100 giros + 25% extra no primeiro depósito hoje!
browse here – Looked around, interface feels clean and browsing is effortless.
paleseafoam onlyfans porn
discover more – The interface is minimal and very user-friendly.
глория мебель [url=https://kuhni-spb-51.ru/]глория мебель[/url] .
visit this site – Checked it out, interface feels tidy and navigation is smooth.
dubai real estate agent muhammed property rent sites in dubai commercial property solicitor dubaidubai property blog
остался дико не рад, но селлер быстро пообещал кидануть бонуса при следующей покупке. надеюсь, не пожадничают https://stlnsk.ru Брал опт, все четко прошло! Качество на высоте! ТС ответьте в ЛС пожалуйстамазагин, один из лучший, беру практически только здесь!
enter website – Just checked it, layout is clean and information is easily accessible.
see products here – Pages load fast, navigation is simple, and content is accessible.
paleseafoam porn leak
open link – A neat interface makes finding content quick and easy.
Строительство дома из клееного бруса можно вести в любое время года. [url=https://dom-rggu.ru/]строительство дома из клееного бруса[/url] Зимой даже выгоднее — многие компании предлагают сезонные скидки до 15-20 процентов. [url=https://dom-rggu.ru/]дом из бруса с отделкой[/url] А к лету вы уже въезжаете в готовый дом и наслаждаетесь первым сезоном на природе.
snowharborcommercehub – Took a quick look, pages load quickly and layout feels clean.
explore this page – Quick glance, content is structured and browsing feels smooth.
кухни на заказ в спб [url=https://kuhni-spb-52.ru/]кухни на заказ в спб[/url] .
hazel marketplace – Navigation is smooth, and items are simple to locate.
buy steroids in uk
discover more – The interface is simple and pleasant to interact with
see products here – Pages respond quickly, navigation is easy, and layout is clean.
go to platform – Pages load quickly, and the site structure is intuitive.
Zen Handmade Market – Simple to browse, items found quickly, checkout was seamless.
official page – Dropped in, everything feels organized and easy to explore.
check out cove goods – Interface is tidy, making it easy to find what you need.
see details – Checked it briefly, pages are organized and browsing is effortless.
РедМетСплав предлагает солидную линейку высококачественных изделий из редких материалов. Не важно, какие объемы вам необходимы — от минимальных заказов до крупных поставок, мы выдерживаем своевременную реализацию вашего заказа.
Каждая единица продукции подтверждена надлежащими документами, подтверждающими их качество. Дружелюбная помощь — то, чем мы гордимся — мы на связи, чтобы прояснять ваши вопросы одновременно с этим оптимизировать предложения под специфику вашего бизнеса.
Доверьте снабжение вашего объекта профессионалам РедМетСплав и убедитесь в гибкости нашего предложения.
Ассортимент включает:
Круг молибденовый MШЧ-2 Круг молибденовый MШЧ-2 – это высококачественный инструмент, созданный для выполнения задач, связанных с обработкой металлов. Благодаря своей прочности и устойчивости к высоким температурам, он идеально подходит для использования в сложных условиях. Его уникальные свойства делают его незаменимым в таких отраслях, как машиностроение и аэрокосмическая индустрия. Если вы ищете надежный и долговечный продукт, то купить Круг молибденовый MШЧ-2 – это отличный выбор. Этот круг обеспечит высокую производительность и точность в работе. Не упустите возможность стать обладателем этого идеального инструмента!
wettseiten online
Here is my web blog; Startguthaben Ohne Einzahlung Wetten
look around here – Quick glance shows neat layout and simple navigation.
explore the site – Quick glance, everything is easy to find and pages feel organized.
>start shopping now – The interface is functional, making moving through pages fast.
explore products here – Navigation is straightforward, with a clean arrangement of listings.
paleseafoam leak porn
open link – The site feels uncluttered and easy to navigate.
курить – нет эффекта. Мефедрон, Марихуану, Бошки, Кокаин Отличный магазин, отличный оператор, отличный товар. Адрес нашли быстро и без проблем, забрали и ушли. Большое спасибо магазину. Всем советую!Данный продукт не зашол в моё сознание:) его нужно бодяжить с более могучим порохом, будем пробовать АМ2233…
visit link – Checked it out, pages are clear and browsing feels intuitive.
property for sale cordoba knowledge vilage dubai https://hdmrankup.com/al-deyaar-properties-dubai.html dubai properties jbrfidu properties dubai location
access goods hub – Looks well maintained and the content appears current.
steroids buy uk
check out birch outlet – Smooth navigation, pages are clearly organized and pleasant to browse.
Специалисты компании выполнят изготовление этикеток любого формата и сложности: тканых жаккардовых, деревянных, металлических, кожаных и проч.
Чтобы [url=https://birka-market.ru/]бирки для одежды на заказ[/url] не утратили своего первоначального вида и были износостойкими, мы используем только качественные материалы.
hazel harbor shop – Navigation is simple, and finding products is fast and easy.
check out products – Pages are responsive, and navigation feels effortless.
see products here – Pages respond quickly, navigation is easy, and layout is clean.
unique finds portal – Nicely curated space with a relaxed, friendly feel.
pebblecreekcommercehub – The interface is neat and moving through pages is smooth and easy.
browse wheatcove – Layout is neat, pages load fast, and navigation feels effortless.
browse here – Looked around, interface is clear and navigation feels smooth.
кухни на заказ санкт петербург [url=https://kuhni-spb-50.ru/]kuhni-spb-50.ru[/url] .
elite escort london
explore the store – Layout is intuitive and browsing feels effortless.
browse this site – Layout is clear, pages load fast, and navigation feels effortless.
explore this page – Quick glance, content is organized and pages load fast.
see this hub – Pages are easy to follow thanks to the clean and minimal layout.
enter the marketplace – Loading was quick, and navigation felt very straightforward.
mostbetga kirish [url=https://www.mostbet16082.help]https://www.mostbet16082.help[/url]
visit this site – Browsed briefly, everything appears organized and easy to navigate.
мостбет правила пополнения [url=http://mostbet2029.help/]http://mostbet2029.help/[/url]
1win mirror for download [url=https://1win5530.ru]https://1win5530.ru[/url]
uk steroids shop
1win оинаи ҳозира [url=http://1win14536.help/]http://1win14536.help/[/url]
можно узнать, как принимали ? интрозально, в\м ? https://nadinelectro.ru Причем тут вообще он к нашему магазину ?я думаю разберемся точно
go explore now – Pages are well organized, navigation is simple, and content appears easy to read.
discover the atelier – Sections are easy to locate and browsing feels smooth.
view wheatcove site – The site feels organized, and finding items is straightforward.
tap to view – Opened it up, layout is intuitive and browsing is effortless.
Деревянные детские площадки — это классика, которая никогда не выходит из моды. [url=https://детский-игровой-комплекс.рф/]игровой домик для детей[/url] Натуральное дерево безопасно для детей, приятно на ощупь и отлично вписывается в ландшафт. [url=https://детский-игровой-комплекс.рф/]детский комплекс с домиком[/url] При правильной обработке такой комплекс прослужит много лет.
мостбет бозӣ бе барнома [url=https://mostbet07482.help]https://mostbet07482.help[/url]
this platform – Gave it a try, interface is clean and browsing is effortless.
see details – Checked briefly, everything is organized and effortless to browse.
father daughter porn
buy diazepam online
buy property dubai residence visa studio for rent in burjuman dubai aqua properties dubai reviewsemaar site office
try this platform – The site felt intuitive, making exploration simple.
>shop the icicle hub – Everything loads quickly, and moving through sections is effortless.
explore vendor site – Found everything easily, with navigation that flows well.
open this site – It was easy to find what I needed without any hassle.
click to enter – Moving around the pages felt effortless and intuitive.
Artisan Product Lane – Very satisfied with the items, fast shipping, and the website was easy to use.
melbet скачать на айфон киргизия [url=melbet18207.help]melbet18207.help[/url]
tap to view – Opened it up, layout is simple and browsing is smooth.
mostbet royxatdan otish bonus [url=mostbet16734.help]mostbet16734.help[/url]
view collections – The first glance is good, and information is straightforward to read.
desi mms porn
melbet зеркало [url=http://melbet08561.help/]http://melbet08561.help/[/url]
f1nn5ter leak porn
marketplace portal – Sections are clearly defined, making navigation stress-free.
wheatcovegoodsdistrict – Very simple and clean site, everything loads quickly and navigation is smooth.
Ну подскажите хоть что нибудь пожалуйста?А то я переживаю ппц. https://oceansapphire.ru оч хороший магазин !Удачных закупок
https://tk-366.org/
https://tk3666bd1.org/
https://9777dbt1.org/
нарколог на дом цены [url=https://narkolog-na-dom-v-krasnodare-3.ru/]нарколог на дом цены[/url] .
find deals here – Layout is simple, content is clear, and pages load smoothly.
go to homepage – First glance, layout is tidy and browsing feels effortless.
Craft Seller Hub – Loved the uncluttered design, and finding products took no time at all.
go to homepage – It gives a smooth first impression with an easy-to-read design.
кухни на заказ петербург [url=https://kuhni-spb-51.ru/]kuhni-spb-51.ru[/url] .
go to homepage – Pages are structured well, and navigation flows naturally.
steroids uk shop
изготовление кухонь на заказ в санкт петербурге [url=https://kuhni-spb-52.ru/]kuhni-spb-52.ru[/url] .
diva flawless porn leak
view vendor hub – Layout is tidy, which makes finding information hassle-free.
access this hub – The site feels organized, which makes navigating simple and intuitive.
dubai properties officegreen wall https://absolutezerodegrees.com/dubai-living-areas.html studio apartment monthly rent in dubaiApartments for sale in Oceana Residences
discover gilded treasures – The interface is clean, making it easy to explore different categories.
go to shop – Everything loads cleanly, and finding items is straightforward.
Подбираете стабильный источник РЗМ и промышленных сплавов? Рекомендуем компанию Редметсплав.рф. Мы предлагаем широкий ассортимент продукции, обеспечивая безупречные характеристики каждого товара.
Редметсплав.рф защищает все этапы сделки, предоставляя полный пакет необходимых документов для легализации товаров. Неважно, какие объемы вам необходимы — от мелких партий до крупнооптовых заказов, мы готовы выполнить любой запрос с профессиональным сопровождением.
Наша команда консультантов всегда готова помочь, чтобы содействовать вам в определении подходящих продуктов и разъяснить детали, связанные с эксплуатацией и параметрами металлов. Выбирая нас, вы выбираете уверенность в каждой минуте сотрудничества.
Заходите на портал Редметсплав.рф и убедитесь, что наше качество и сервис — идеальный вариант для вас.
Каталог доступных позиций:
Латуное наружное стопорное пружинное кольцо M46 42.5х1.75 мм Л63 DIN 471 Латунные наружные стопорные кольца по DIN – широкий выбор высококачественных крепежных изделий из латуни для промышленных и строительных применений. Большой ассортимент размеров. Высокая надежность и долговечность. Заказывайте прямо сейчас на сайте Редметсплав.
заказать кухню сайт [url=https://zakazat-kuhnyu-10.ru/]заказать кухню сайт[/url] .
villas phuket for sale [url=https://villas-for-sale-in-phuket.com/]villas phuket for sale[/url] .
property for sale in phuket thailand [url=https://real-estate-for-sale-in-phuket.com/]property for sale in phuket thailand[/url] .
нарколог на дом цены [url=https://narkolog-na-dom-v-krasnodare.ru/]narkolog-na-dom-v-krasnodare.ru[/url] .
нарколог на дом срочно [url=https://narkolog-na-dom-v-krasnodare-1.ru/]narkolog-na-dom-v-krasnodare-1.ru[/url] .
high class escort london
explore more – Took a short look, content is well organized and browsing feels smooth.
start browsing – Smooth and responsive, information is easy to digest
online shop link – Quick loading pages and information is easy to find
saxenda buy
discover more – Brief visit shows a tidy layout and smooth browsing experience.
laguna phuket apartments for sale [url=https://apartments-for-sale-in-phuket.com/]apartments-for-sale-in-phuket.com[/url] .
http://wiki.market-master.ru/index.php?title=1%d1%85%d0%91%d0%b5%d1%82%20%d0%9f%d1%80%d0%be%d0%bc%d0%be%d0%ba%d0%be%d0%b4%20%d0%bf%d1%80%d0%b8%20%d0%a0%d0%b5%d0%b3%d0%b8%d1%81%d1%82%d1%80%d0%b0%d1%86%d0%b8%d0%b8%202026:%201xwap
Перевел деньги на Альфа 21.04.2014 после умення узнали даные (Ф.И.О телефон и адрес) Оператор сказал что посылка будет отправлена 22.04.2014. !!!! 23.04.2014 скинули номер наклодной. По номеру наклодной смог отслеживать свою посылку 24.04.2012. купить кокаин, купить мефедрон, купить гашиш, купить бошки Потом все идет как надо , не много по тряхивает, но не чего, не так люто как от КРИССАВообщем фейк крассавчик пошагово и все грамотно сделал, развел)
luxury apartments for sale phuket [url=https://apartments-for-sale-in-phuket-1.com/]apartments-for-sale-in-phuket-1.com[/url] .
заказать кухню [url=https://kuhni-spb-49.ru/]заказать кухню[/url] .
explore the hub – Content is easily accessible, and moving through pages is fast.
incest porn games
Handmade Home Atelier – Layout is clean, shopping was straightforward, and I found everything quickly.
mostbet линия ставок [url=http://mostbet2029.help]mostbet линия ставок[/url]
explore platform – Seems like it has potential, I might return to it sometime.
dubai south residential district la rosa 2 dubai properties private developers in dubaichiller free studio apartment for rent in dubai
1win таҷриба [url=http://1win14536.help]1win таҷриба[/url]
go to store – Navigation is smooth and the pages feel well-arranged
lucky jet online 1win [url=https://www.1win5530.ru]https://www.1win5530.ru[/url]
f1nn5ter porn
main site link – The content layout is clean, making it simple to understand everything.
mostbet akkaunt tasdiqlanmadi [url=mostbet16082.help]mostbet akkaunt tasdiqlanmadi[/url]
gingercove online – Navigation is simple, and categories are easy to access.
visit this boutique – The pages are organized well and everything feels straightforward to browse.
Handmade Craft Finds – Delivery was very fast, packaging was secure, and quality exceeded expectations.
Как привило мелкие селлеры о конфиденциальности не думают, а потом с ними метоморфозы и происходят.. https://sovet-profi.ru Какие пробы братишка, ты о чем вообще? Покупай и пробуйНа удивление был поражен скоростью работы магазина. Все четко как в аптеке))) Благодарствую
buy saxenda
mostbet mines [url=http://mostbet07482.help/]mostbet mines[/url]
father daughter porn
visit platform – Took a short browse, everything is organized and simple to move through.
QuickHarborSavings – Overall design is neat and the pages perform well.
click to view – Clean layout makes understanding everything straightforward
pin-up darajalar [url=https://pinup52914.help]pin-up darajalar[/url]
melbet скачать на андроид [url=http://melbet18207.help/]melbet скачать на андроид[/url]
мелбет авиатор киргизия [url=https://melbet08561.help]мелбет авиатор киргизия[/url]
mostbet mines signal [url=https://mostbet16734.help/]https://mostbet16734.help/[/url]
go to shop – The layout feels organized, so finding products is hassle-free.
visit this platform – Overall performance was steady, making it a reliable experience today.
плинко демо [url=http://plinko50862.help/]http://plinko50862.help/[/url]
вызвать нарколога на дом [url=https://narkolog-na-dom-v-krasnodare-3.ru/]вызвать нарколога на дом[/url] .
real estate dubai buy property assessor dubai real estate uae dubai3 bedroom apartments to buy
a href=”https://gingerwoodcommercehub.shop/” />enter commerce listings – Browsing feels natural and intuitive.
Специалисты компании выполнят изготовление этикеток любого формата и сложности: тканых жаккардовых, деревянных, металлических, кожаных и проч.
Чтобы [url=https://birka-market.ru/]нейлоновые бирки для одежды[/url] не утратили своего первоначального вида и были износостойкими, мы используем только качественные материалы.
Kent Casino https://kentcasino.ru.com/ официальный сайт, регистрация и бонусы. Онлайн казино с быстрым выводом средств, слотами и играми от топ провайдеров. Получите фриспины и играйте на реальные деньги безопасно.
1 вин официальный сайт [url=https://1win40729.help/]https://1win40729.help/[/url]
future pathfinder – Clear interface and engaging messaging make browsing simple.
steroids uk for sale
Kent Casino kentcasino.ru.com официальный сайт, регистрация и бонусы. Онлайн казино с быстрым выводом средств, слотами и играми от топ провайдеров. Получите фриспины и играйте на реальные деньги безопасно.
заказать кухню цены [url=https://zakazat-kuhnyu-10.ru/]zakazat-kuhnyu-10.ru[/url] .
unique handmade hub – I stumbled onto this and it seems like a promising place to browse.
phuket luxury villas for sale [url=https://villas-for-sale-in-phuket.com/]phuket luxury villas for sale[/url] .
this platform – Gave it a try, layout is neat and browsing feels comfortable.
cupón sweet bonanza [url=https://sweet-bonanza72501.help]https://sweet-bonanza72501.help[/url]
coast harbor hub – Overall experience is pleasant, with content that’s easy to follow and informative.
open website – Pages load fast and the design is very contemporary
Продован 1000 балоф те =) https://sovet-profi.ru Достойны уважения!Все работает
coral harbor shopping hub – Stumbled upon this platform, looks worth a closer look.
property for sale in phuket [url=https://real-estate-for-sale-in-phuket.com/]property for sale in phuket[/url] .
see Daisy Cove offerings – Just landed, and the site feels inviting and simple to navigate.
buy diazepam
incest porn games
visit commerce hub – Everything is structured logically, making it simple to locate items.
cheap phuket apartments for sale [url=https://apartments-for-sale-in-phuket-1.com/]apartments-for-sale-in-phuket-1.com[/url] .
discover items – Everything is cleanly presented, making browsing comfortable.
apartments for sale in phuket thailand [url=https://apartments-for-sale-in-phuket.com/]apartments for sale in phuket thailand[/url] .
explore Elm Harbor shop items – Organized sections make it effortless to find information.
вызвать нарколога на дом [url=https://narkolog-na-dom-v-krasnodare-1.ru/]вызвать нарколога на дом[/url] .
глория мебель [url=https://kuhni-spb-51.ru/]глория мебель[/url] .
заказ кухни спб [url=https://kuhni-spb-49.ru/]заказ кухни спб[/url] .
нарколог на дом круглосуточно [url=https://narkolog-na-dom-v-krasnodare.ru/]нарколог на дом круглосуточно[/url] .
CreativeDock – Smooth navigation with organized sections, site feels reliable.
try this website – It had a clear structure that made exploring hassle-free.
VendorPickStop – Browsing is smooth, and information is easy to find.
best property developer in dubai https://dinosaurios-larioja.org/luxury-property-rentals-dubai.html best property brokers in dubaidubai properties construction updates
ArtisanBay – Smooth interface with well-organized sections makes finding content simple.
quickridgecommercehub – Took a quick look, interface is tidy and navigation feels effortless.
CoveCraftVault – Well-laid-out pages, moving through categories is easy.
Brook Marketplace Guild – Intuitive design with logically structured content for fast navigation.
dirty panties
click to view – Very user-friendly and all sections are easy to access
go to shop – Everything loads fast, and navigating the interface is straightforward.
coral craft space – Very pleasant browsing, the platform feels intuitive and user-friendly.
craft bazaar online – Smooth browsing experience, overall site feels user-friendly.
Retail House Lark – Easy navigation and information is clearly displayed.
click for artisan products – Everything feels organized and browsing is very smooth.
browse ridge selections – Everything is easy to find and the layout feels user-friendly.
online merchant link – The layout is neat, making browsing a relaxed experience.
CozyMintHarbor – Logical structure, clear content, and intuitive navigation for users.
На ацетоне делай, он быстро выветривается и не пахнет совсем! купить кокаин, купить мефедрон, купить гашиш, купить бошки а у нас в квартире газ ….. от ГАЗПРОМ … вы не поверите но это так и естьБрал тут тусишку два раза, отменного качества. Магаз работает быстро и чётко, трек кидают на следующий день, товар приходит через два дня. Респект магазу
paleseafoam porn leak
MakerLane – Neat sections and smooth flow, makes browsing hassle-free.
Если вы занимаетесь производством и нуждаетесь в закупке первоклассных тугоплавких металлов, то ООО “РМС” — это ваше надежный выбор. Наша компания профессионально работает в области поставок редких металлов уже длительного срока, что гарантирует нам право отгружать только проверенный материал своим партнерам.
Масштаб заказа не ограничен.
Широкий ассортимент тугоплавких металлов.
Юридическая чистота сделки.
Круглосуточная поддержка.
Зачем тратить время на поиски, если на rms-ekb.ru всегда экспертный подход?
Если у вас возникли вопросы, наши специалисты всегда готовы проконсультировать вас.. Звоните прямо сейчас и проверьте лично в бесспорных достоинствах нашего ассортимента.
Наша продукция:
Электротехническая лента 2420 1.55×5 ГОСТ 3836-83
access page – Took a peek, layout is clean and navigation feels effortless.
продвижение сайтов по трафику [url=https://prodvizhenie-sajtov-po-trafiku.ru/]продвижение сайтов по трафику[/url] .
retail discovery page – It looks well-arranged, moving around feels quite easy.
check this hub – It provided some useful info, and everything seems up to date.
browse this platform – The site felt informative, with content that appears recently refreshed.
view trading listings – Content is arranged logically and pages respond quickly.
Lemon Lane Retail House – Clear sections and logical layout make exploring simple.
virtue real estate dubai https://dinosaurios-larioja.org/map3.html Elvira at Dubai Hills Estate4 bedroom Villas for rent in Arabian Ranches 3
meadow makers hub – Very smooth and pleasant experience, navigation is simple and enjoyable.
click to see vendors – All content is easy to find, making navigation simple.
steroids buy uk
explore products – The site looks reliable, with well-presented updates throughout.
growth network – Simple design with structured and easy-to-follow information.
RetailLane – Interface is neat and easy to follow, very convenient for users.
CraftEmporium – Simple design, finding categories is easy and stress-free.
Спасибо большое, что вы с нами и доверяете нам! https://oceansapphire.ru 128 страниц положительных отзывов , и вдруг “мутный магаз” . Уважаемый – флудить в курилке можно.надо прятать по сложнее
TradeHarbor – Well-structured sections and clear headings improve the browsing experience.
мелбет регистрация по телефону [url=https://melbet18207.help]мелбет регистрация по телефону[/url]
Art Gem Studio – The site feels organized and user-friendly throughout.
buy diazepam online
browse products – Well-structured pages and responsive layout make browsing easy
Ridge Vendor Hub – Layout is intuitive, browsing is quick and easy.
indie crafts collective – Pretty cool discovery, I might return for another look.
laguna phuket apartments for sale [url=https://apartments-for-sale-in-phuket.com/]apartments-for-sale-in-phuket.com[/url] .
MakerBay – Well-laid-out pages, browsing is smooth and straightforward.
learn hub – Clean layout with engaging content, easy to navigate and understand.
Your article helped me a lot, is there any more related content? Thanks! https://accounts.binance.info/ar/register-person?ref=PORL8W0Z
cheap studio for rent in deira dubai https://lighthouseoflewisville.org/apartment-for-rent-in-affini-tribute-portfolio-residences-dubai.html al wasl streetflats for rent in jadaf dubai
CraftVault – Well-organized pages, exploring the platform is enjoyable.
Тепкрь сам хочу зделать заказ но немогу на сайт попасть (((( https://avtoboots.ru АА Все братишки, мне уже отослали сегодня, спасибо что успокоили!Что ж ты такой нетерпеливый… ))
Нужна бесплатная юридическая консультация? Переходите по запросу [url=https://www.pravovik24.ru/r/spb/]вопрос юристу бесплатно онлайн без регистрации и без телефона в Санкт-Петербурге[/url] и получите помощь опытного юриста по любым правовым вопросам: семейные споры, долги, недвижимость, трудовые конфликты, защита прав потребителей и многое другое. Задайте вопрос онлайн или по телефону и получите подробный разбор вашей ситуации и рекомендации по дальнейшим действиям. Консультация проводится бесплатно и конфиденциально.
district marketplace – The layout is neat and makes navigation feel straightforward.
open vendor studio – The site is organized and practical for quick browsing.
gay twink porn
RetailAtelier – Structured design and smooth menus make it easy to find the information you need.
ShopCorner – Smooth navigation, everything loads nicely and is accessible.
Sparkle Studio – Pages load quickly and the interface is very user-friendly.
plinko вывести деньги [url=https://plinko50862.help]plinko вывести деньги[/url]
pakistani property in dubai https://spartanink.org/emaar-payment-plan.html 3 bhk apartments for rent in bur dubaihome to home hotel apartments
independent makers market – Everything is well-arranged, creating a smooth experience.
xanax and cocaine
HandiworkHub – Logical organization with clear headings, browsing is seamless.
seo продвижение трафику [url=https://prodvizhenie-sajtov-po-trafiku.ru/]seo продвижение трафику[/url] .
discovery hub – Clear structure and smooth navigation make exploring simple and fun.
Брал тут тусишку два раза, отменного качества. Магаз работает быстро и чётко, трек кидают на следующий день, товар приходит через два дня. Респект магазу https://lakocha.ru Ну что кто нить УРБ попробовал уже как отзывы ?покушать попробуй… и пиши сюда
cotton meadow craft hub – Just visited, platform seems interesting and worth another check.
Sweet Meadow – Clear structure, all items are easy to locate.
заказать кухню [url=https://zakazat-kuhnyu-11.ru/]заказать кухню[/url] .
CraftStone – Very clear layout, browsing information is effortless.
phuket villas for sale thailand [url=https://villas-for-sale-in-phuket-1.com/]villas-for-sale-in-phuket-1.com[/url] .
plinko отзывы [url=http://plinko50862.help/]http://plinko50862.help/[/url]
TextileTreasures – Pages respond quickly and the content is easy to read.
melbet приветственный бонус [url=https://melbet76521.help]https://melbet76521.help[/url]
1win время вывода [url=https://1win85163.help/]https://1win85163.help/[/url]
sweet bonanza не встановлюється apk [url=https://sweet-bonanza06538.help]sweet bonanza не встановлюється apk[/url]
mostbet jocuri lucky jet [url=https://www.mostbet21067.help]https://www.mostbet21067.help[/url]
TraderGuildCentral – Quick to navigate and content is well-organized.
CraftDock – Well-structured content and neat sections, browsing is convenient.
explore Dawnridge selections – Navigation is fast and effortless, making browsing enjoyable.
1win история ставок [url=www.1win40729.help]1win история ставок[/url]
magnate dubai property 3 bedroom apartments for rent in dubai dubai hills monthly rent apartmentdubai real estate exhibition january
retail hub cotton meadow – Simple interface, sections are easy to find and browse.
Что с заказом 960 трек не рабочий дали 3 дня уже одни обещания купить кокаин, купить мефедрон, купить гашиш, купить бошки Почему страшно?Хороший магазин, не подставлял меня.
CozyLinens – Very smooth browsing, site feels organized and user-friendly.
see more – Everything is simple and navigation feels very smooth
CraftCorner – Pages are well-organized and content is clear, browsing is effortless.
sweet bonanza depósito banamex [url=https://sweet-bonanza72501.help/]https://sweet-bonanza72501.help/[/url]
Icicle Bazaar – Clear menus and neat design made my visit enjoyable.
Gem Traders – Smooth interface with content that’s easy to read and navigate.
artisan exchange creek harbor – Very promising site, I’ll likely spend more time exploring.
alpha properties dubai tips for real estate agents in dubai places to liveflat for rent in sharjah direct from owner
1вин мегапей пополнение [url=https://1win40729.help/]https://1win40729.help/[/url]
plinko пополнение без комиссии [url=http://plinko50862.help/]http://plinko50862.help/[/url]
CoveQuickBuy – Clean layout and smooth navigation make exploring the site easy.
MapleCollections – Clean design, intuitive navigation, and very pleasant to explore.
бразы все меня просветили много чего тут было но после убедительных доводов все понял селлер правда не виновен я об этом так то и говорил всегда просто все подтвердилось больше в ветке пылить не буду братух тебе хорошей работы ну и как говорил в скайпе удачи а если будет много врагов пулемет в руки и ведро потронов))) в помощ https://disain-proect.ru 250 не знаю, но 203 просто шикарный. Растворяется моментально. Чистота порошка отличная.В итоге! К-ю чистый. Эффект, очень хорошо!!(Не отлично!!) но был же разговор 1к10!! а то и к15.
innovation hub – Neat sections with direct content that’s easy to grasp.
creative hub – Smooth browsing and clear, actionable content throughout the site.
explore vendor offerings – Sections are clear and content is easy to access.
Craft Vendor Brook – Pages are well-structured, and navigating the site is effortless.
Treasure Lane – Pages are clear, and navigating the site is simple and intuitive.
shopping guild space – Clear structure and smooth browsing make everything accessible.
juego lucky jet sweet bonanza [url=www.sweet-bonanza72501.help]juego lucky jet sweet bonanza[/url]
creek harbor craft space – Browsed around, found good content, seems solid.
заказать кухню с установкой [url=https://zakazat-kuhnyu-11.ru/]zakazat-kuhnyu-11.ru[/url] .
FernTradeCenter – Smooth interface, browsing the site feels natural.
Address Residences Zabeel 2 off plan property in dubai marina vincitore real estate development llc dubaiThe Cove
https://citytour24.ru/
капельница от запоя [url=https://vyvod-iz-zapoya-na-domu-samara-3.ru/]капельница от запоя[/url] .
Золотые слова. https://sweetdreems.ru Магазину спасибо все пришло,только вот пробник не положили,хотя обещали..Ты в какой скайп то ломишься? перепроверь!!!
Icicle Market Isle – Interesting setup, I might return later for a deeper look.
explore handmade collections – Nice formatting throughout makes browsing smooth.
creative collective platform – Everything is organized nicely, browsing feels effortless.
наркологический стационар [url=https://vyvod-iz-zapoya-na-domu-samara-3.ru/]vyvod-iz-zapoya-na-domu-samara-3.ru[/url] .
GoodsCoveChoice – Layout is clean, and exploring sections is simple.
check the store – Everything is arranged to minimize confusion.
check the store – Everything is arranged to minimize confusion.
MapleCrafted – Logical menus and responsive pages make shopping simple.
VendorDock – Pages load quickly and layout is tidy, very simple to browse.
FernArtisanCorner – Clear navigation, moving through content is simple.
1win слоты на реальные деньги [url=https://1win40729.help/]1win слоты на реальные деньги[/url]
Icicle Retail Collective – Well-organized pages allow for easy and fast exploration.
market trends – Clear interface and visually appealing sections enhance user experience.
browse artisan marketplace – Appears to be developing steadily with a clean structure.
Apartments for sale in Fairmont Residences Solara Tower https://kienthuctrade.net/apartments-in-dubai-jumeirah.html al wasl properties dubai1 bedroom Apartments for rent in Sheikh Zayed Road
shop creative studio – Structured layout and easy-to-follow sections make browsing seamless.
visit this platform – There’s a warm charm that makes browsing feel satisfying.
marketplace vendor hub – Nice website structure, resources are easy to read and helpful.
обращаюсь по возможности сюда беру оптом от 50 грамм https://arminfo.ru спасибо магазу)Хороший магазин согласна!
VendorCorner – Neat interface, intuitive structure, and very approachable for users.
вывод из запоя краснодар на дому [url=https://vyvod-iz-zapoya-v-krasnodare-1.ru/]vyvod-iz-zapoya-v-krasnodare-1.ru[/url] .
VendorSphere – Structured content with fast-loading pages, browsing feels natural.
I savour, result in I discovered just what I used to be having a look for. You’ve ended my four day long hunt! God Bless you man. Have a great day. Bye
https://mostbet-zerkaloonline.buzz/kk/book-of-ra-magic-igrat-onlayn-besplatno-bez-registratsii/
check it out now – There’s no clutter, just a clean browsing experience.
капельница от запоя [url=https://vyvod-iz-zapoya-na-domu-samara-1.ru/]vyvod-iz-zapoya-na-domu-samara-1.ru[/url] .
sweet bonanza promo code México [url=http://sweet-bonanza72501.help/]http://sweet-bonanza72501.help/[/url]
плинко ресми сайт Қазақстан [url=https://plinko50862.help]https://plinko50862.help[/url]
shop creative finds – Pleasant to browse, pages are well structured and clear.
вывод из запоя на дому в краснодаре [url=https://vyvod-iz-zapoya-v-krasnodare-4.ru/]вывод из запоя на дому в краснодаре[/url] .
condo for sale in phuket [url=https://apartments-for-sale-in-phuket.com/]apartments-for-sale-in-phuket.com[/url] .
shop online vendors – Simple design, browsing items is quick and enjoyable.
алкоголизм вывод из запоя краснодар [url=https://vyvod-iz-zapoya-v-krasnodare-2.ru/]vyvod-iz-zapoya-v-krasnodare-2.ru[/url] .
simply decisions – Organized layout with approachable content for fast comprehension.
click for artisan hub – Layout is simple and well-organized, which makes reading content effortless.
капельница от запоя [url=https://vyvod-iz-zapoya-na-domu-voronezh-3.ru/]капельница от запоя[/url] .
наркологический центр [url=https://vyvod-iz-zapoya-na-domu-voronezh.ru/]наркологический центр[/url] .
реабилитационный центр для наркозависимых [url=https://vyvod-iz-zapoya-na-domu-voronezh-2.ru/]vyvod-iz-zapoya-na-domu-voronezh-2.ru[/url] .
вывод из запоя бесплатно [url=https://vyvod-iz-zapoya-v-krasnodare-3.ru/]вывод из запоя бесплатно[/url] .
реабилитация алкоголиков [url=https://vyvod-iz-zapoya-na-domu-samara.ru/]vyvod-iz-zapoya-na-domu-samara.ru[/url] .
handcrafted marketplace – First impression is good, everything looks tidy and accessible.
click here for walnut crafts – Organized structure and responsive design enhance usability.
discover vendor atelier – The browsing process is calm and well-organized.
Я делал на муравьином спирте https://kamet-doors.ru магазин суперский! качество и работа оператора на высшем уровне! респектнапишите в аську, там порешают вашу проблему. С этой партией МХЕ определённо вышел косяк.
bayut com dubai gaia real estate dubai dubai land department 4 of the property sale pricefurnished apartments for rent in dubai yearly
заказать кухню с замером [url=https://zakazat-kuhnyu-11.ru/]zakazat-kuhnyu-11.ru[/url] .
open this site – Everything responds quickly, and the content is easy to digest.
недорогие букеты фото [url=https://cveti-nederogo.ru/]https://cveti-nederogo.ru/[/url] .
solar meadow vendors – Very clean layout, browsing through the pages felt effortless.
vendor shop link – Information is structured well and simple to browse through.
MeadowMakerStudio – Neat and modern layout, navigating products is smooth.
Harbor Vendor Shop – Appears organized and credible.
кодирование от алкоголизма [url=https://vyvod-iz-zapoya-na-domu-voronezh-1.ru/]кодирование от алкоголизма[/url] .
check out retail studio – Layout feels clean and straightforward, making browsing effortless.
visit this marketplace – The design feels organized and user-friendly.
vendor collective hub – Clean design and easy navigation, made exploring effortless.
Artisan Emporium – Clean layout with intuitive navigation makes browsing simple.
а не может быть что они с реагентом перепутали? я вот пробовал правда не здесь, она желтоватая была купить кокаин, купить мефедрон, купить гашиш, купить бошки Понимающий меня поймёт.Трек получил! Данный магазин действительно выполняет свои обязанности перед покупателями.Просто при личном разговоре с продавцом можно действительно понять что работы у них действительно много и на это уходит время,просто стоит проявить терпение.Считаю как получу товар,его качество останется таким же наивысшим,как сама работа магазина
мелбет пополнить с odengi [url=https://www.melbet76521.help]мелбет пополнить с odengi[/url]
style portal – Smooth navigation with organized content and visually clear products.
1вин как пополнить счет [url=https://www.1win85163.help]https://www.1win85163.help[/url]
is it the time to sell property in dubai https://ragnarconde.com/bachelor-room-dubai.html real estate developments dubaigreen point technical services llc
pin-up toʻlov tizimlari [url=http://pinup52914.help]http://pinup52914.help[/url]
sweet bonanza вхід за email [url=https://www.sweet-bonanza06538.help]https://www.sweet-bonanza06538.help[/url]
https://omnivatic.com/2026/03/30/prognoz-30-03-2026-muzhchina-rak/
mostbet adresa de intrare [url=http://mostbet21067.help]http://mostbet21067.help[/url]
HandiworkHub – Organized sections with clean design make navigation effortless.
HarborArtisanMarket – Well-laid-out menus, logical sections, and effortless to explore.
coastharbor shop studio – Appears dependable, I’d recommend it to people I know.
ставки plinko Казахстан [url=https://www.plinko50862.help]https://www.plinko50862.help[/url]
1вин вход в личный кабинет [url=https://1win40729.help]https://1win40729.help[/url]
Light Orchard – Smooth browsing and easy access to all info.
explore this marketplace – You’ll probably want to return after your first visit.
Ivory Hub Retail – Layout is tidy and browsing is straightforward.
silk grove artisan – Really engaging site, I spent some time browsing and enjoyed it.
вывод из запоя на дому [url=https://vyvod-iz-zapoya-v-krasnodare-1.ru/]вывод из запоя на дому[/url] .
read details – The tone feels deliberate and the content is arranged with care.
наркологический стационар [url=https://vyvod-iz-zapoya-na-domu-samara-1.ru/]vyvod-iz-zapoya-na-domu-samara-1.ru[/url] .
https://miamifightcard.com/
When it comes to MediaFightCard, the fight odds showcase a compelling dynamic with belt-holders being the betting underdogs and opponents occupying favorite status. In the featured bout for the open light heavyweight title, previous belt-holder Jiri Prochazka started as a slight -143 favorite over the fast-rising Carlos Ulberg, who is listed as a +116 underdog even with his nine-fight winning streak.
shop creative studio – Clear sections and easy navigation make visiting enjoyable.
browse vendor collections – Content is accessible and navigation flows naturally.
https://sportium.net.co/
A plataforma Sportium Colombia e um casino e site de apostas esportivas digitais que funciona com plena legalidade amparado pela licenca da Coljuegos, resultado da alianca entre CIRSA e Ladbrokes desde 2007. Apresenta uma estrutura confiavel e abrangente onde os usuarios da Colombia tem acesso desde apostas ao futebol ate caca-niqueis e cassino ao vivo com revendedores ao vivo, tudo no mesmo site.
Здравствуйте!
Бизнес часто недооценивает силу первого экрана. Там решается всё: остаться или уйти. Если слова звучат как стандартные лозунги, внимание теряется. Но если они оставляют вопрос без ответа, человек задерживается. Ему нужно понять, чем закончится начатая мысль. И пока он ищет разгадку, он уже вовлечён в процесс. Это вовлечение превращает случайного посетителя в потенциального клиента.
Полная информация по ссылке – https://www.ts-web.ru/blog/development/cms-security.html
сайт для онлайн-магазина одежды, продвижение строительных услуг в Дагестане, сайт для кафе и ресторанов Россия
услуги SMM продвижения под ключ, [url=https://www.ts-web.ru/cases/ecodata/.html]Ecodata — экосервисы и ИТ | Кейсы TS-Web[/url], аудит интернет-магазина под ключ
Удачи и комфорта в жизни!
[url=https://bonanzaenterprises.asia/and-the-day-came-when-the-risk-to-remain-tight-in-a-bud-was-more-painful-than-the-risk-it-took-to-blossom/#comment-99281]Поддержка сайтов: бизнес всегда в безопасности[/url] 7f1b9b6
вывод из запоя в стационаре краснодара [url=https://vyvod-iz-zapoya-v-krasnodare-4.ru/]вывод из запоя в стационаре краснодара[/url] .
307 не появился??? https://ufa-iconostas.ru Магазин работает супер!)хороший магазин,было дело работал с ними)
VendorBay – Simple, tidy interface with clear sections helps users find information easily.
ShopMeadowHub – Well-laid-out pages, browsing products is simple.
sweet bonanza notificaciones [url=http://sweet-bonanza72501.help]http://sweet-bonanza72501.help[/url]
visit the artisan hub – Pages are well-structured and easy to navigate, making browsing fun.
melbet mines [url=https://melbet76521.help/]https://melbet76521.help/[/url]
1win линия ставок [url=https://www.1win85163.help]https://www.1win85163.help[/url]
vendor network space – Nice interface and layout, everything is easy to locate.
monthly accommodation in dubai https://denizlilidersurucukursu.com/2-bedroom-for-rent-in-bur-dubai.html dubai freehold property guide magazine3 bedroom Apartments for sale in Dubai Internet City
реабилитационный центр от алкоголизма [url=https://vyvod-iz-zapoya-na-domu-voronezh-2.ru/]vyvod-iz-zapoya-na-domu-voronezh-2.ru[/url] .
вывод из запоя на дому краснодар цены [url=https://vyvod-iz-zapoya-v-krasnodare-2.ru/]vyvod-iz-zapoya-v-krasnodare-2.ru[/url] .
https://888starz.net.co/
888Starz Colombia es un casino en linea y casa de apuestas deportivas que reune mas de 9.500 juegos, tales como slots, mesas de crupier en directo junto a una variada seleccion de disciplinas deportivas que incluye desde el torneo local BetPlay hasta la Champions League y los deportes electronicos.
phuket apartments for sale [url=https://apartments-for-sale-in-phuket.com/]phuket apartments for sale[/url] .
sweet bonanza логін [url=http://sweet-bonanza06538.help/]http://sweet-bonanza06538.help/[/url]
вывод из запоя краснодар наркология [url=https://vyvod-iz-zapoya-v-krasnodare-3.ru/]vyvod-iz-zapoya-v-krasnodare-3.ru[/url] .
mostbet depunere cu card [url=https://mostbet21067.help/]https://mostbet21067.help/[/url]
реабилитация наркоманов [url=https://vyvod-iz-zapoya-na-domu-voronezh.ru/]vyvod-iz-zapoya-na-domu-voronezh.ru[/url] .
наркологическая клиника [url=https://vyvod-iz-zapoya-na-domu-voronezh-3.ru/]наркологическая клиника[/url] .
лечение наркомании [url=https://vyvod-iz-zapoya-na-domu-samara.ru/]vyvod-iz-zapoya-na-domu-samara.ru[/url] .
Harbor Traders Hub – Organized content and clear design make browsing enjoyable.
заказать кухню под заказ [url=https://zakazat-kuhnyu-11.ru/]заказать кухню под заказ[/url] .
наркологическая клиника [url=https://vyvod-iz-zapoya-na-domu-samara-3.ru/]наркологическая клиника[/url] .
explore Crown Harbor vendors – Navigation is smooth and intuitive.
see artisan marketplace – I like the setup here, definitely a site I might visit again.
лечение алкоголизма [url=https://vyvod-iz-zapoya-na-domu-samara-3.ru/]лечение алкоголизма[/url] .
MeadowCrafted – Fast pages, simple structure, and intuitive navigation.
ShopCove – Easy-to-follow menus and neat pages provide a pleasant navigation flow.
Kettle Coast Studio – Visited the site, really like the clean and modern layout.
VendorStudioFlint – Pleasant design, exploring pages is easy and smooth.
https://t.me/casinoevaofficial
artisan discovery hub – Found while browsing, looks like a useful platform for creatives.
pin-up registratsiya xatosi [url=http://pinup52914.help]pin-up registratsiya xatosi[/url]
visit commerce hub – Layout is clean and navigating categories feels effortless.
shop homepage here – The visuals are crisp and the layout is thoughtfully done.
explore retail network – Minimal layout, moving between sections is seamless.
магазину респект https://mobtrade.ru Срач, оффтоп, провокации, в ветке магазина запрещены, буду банить за невыполнение правил!А вообще, читай раздел рецепты, там все очень подробно расписано, в нескольких темах причем
наркологическая клиника [url=https://vyvod-iz-zapoya-na-domu-voronezh-1.ru/]наркологическая клиника[/url] .
https://ufc327odds.com/
This Miami-held light heavyweight title fight at UFC 327 shapes up as a classic pick’em for the gambling public, as former titleholder Jiri Prochazka (-142) and surging knockout specialist Carlos Ulberg (+120) gear up to battle for the open belt. The tight odds underscore how well-paired these two stand-up fighters truly are, creating a scenario where a bet on either competitor ultimately comes down to which dynamic skillset you think will emerge victorious.
browse this page – It’s visually appealing and easy to scroll through, with a smooth structure.
Jasper Marketplace Guild – The website feels professional and well-laid-out.
hotel apartment for rent monthly in dubai https://ceritaarni.com/property-finder-office-dubai.html Villas for sale in Palm Jumeirahnw dubai property projects
future insights – Clear sections and well-presented ideas make exploring simple.
browse artisan collections – Navigation is smooth and content is logically arranged.
artisan collection online – Pages are tidy, smooth scrolling makes browsing pleasant.
explore artisan vendors – Smooth interface and neatly organized pages make checking items straightforward.
HarborCollections – Pages load quickly, navigation is simple, and overall experience is smooth.
https://miamifightcard.com/
Regarding MediaFightCard’s lineup, the betting odds reveal a intriguing dynamic with belt-holders being the betting underdogs and challengers carrying favorite status. In the marquee matchup for the open light heavyweight title, former champion Jiri Prochazka started as a slight -143 favorite over the surging Carlos Ulberg, who comes in as a +116 underdog notwithstanding his nine-fight winning streak.
click to see the atelier – Information is presented clearly, helping users navigate without confusion.
VendorTrail – Smooth-flowing pages and tidy layout make finding information simple.
explore harbor atelier – Pages are tidy and easy to navigate, very user-friendly.
https://sportium.net.co/
Sportium Colombia e um casino e uma casa de apostas esportivas pela internet que e totalmente legal amparado pela licenca da Coljuegos, fruto da parceria entre CIRSA e Ladbrokes desde 2007. Oferece uma plataforma completa e confiavel no qual os apostadores colombianos podem aproveitar desde palpites no futebol ate slots e casino ao vivo com dealers reais, tudo em um unico lugar.
coppercove makers atelier – Pages load efficiently, overall experience feels seamless.
online vendor showcase – Straightforward layout makes exploring the site enjoyable.
discover deals – Clean interface, items are easy to locate and well presented.
цветы по оптовым ценам москва адреса [url=cveti-nederogo.ru]cveti-nederogo.ru[/url] .
TheFloraHarbor – Smooth design, navigating categories feels effortless.
1win зеркало сегодня [url=http://1win85163.help]http://1win85163.help[/url]
мелбет официальный сайт вход [url=http://melbet76521.help]http://melbet76521.help[/url]
https://888starz.net.co/
888Starz Colombia representa una plataforma de casino online y casa de apuestas que ofrece mas de 9.500 opciones de juego, entre los que se incluyen slots, ruletas y mesas con croupier real y una amplia oferta de deportes que va desde la Liga BetPlay pasando por la Champions League y los esports.
Приветствую! я получал последний раз недели две назад, заказывал уже много раз и скоро сделаю очередной заказ в этом магазине!!! купить кокаин, купить мефедрон, купить гашиш, купить бошки Ребят вообще на высоте!!!)Удачи вам всех благ!!! ВСЕХ С ПРАЗДНИКОМ!!!Всего самого самого наилучшего!)заказал, получил трек, пока не бьется.
світ бонанза промокод Україна [url=https://sweet-bonanza06538.help/]https://sweet-bonanza06538.help/[/url]
mostbet autentificare rapida [url=http://mostbet21067.help]http://mostbet21067.help[/url]
vendor collection link – Layout is clean, moving from page to page is easy.
принудительный вывод из запоя краснодар [url=https://vyvod-iz-zapoya-v-krasnodare-1.ru/]vyvod-iz-zapoya-v-krasnodare-1.ru[/url] .
enter artisan collections – Interface is tidy and structured, making browsing effortless.
MakerBay – Pages load fast and sections are clearly labeled, making navigation easy.
aqua properties real estate dubai https://finalfinalsfsportsbar.com/fem-properties-dubai.html apartment for rent in damac hills dubai1 bedroom apartment for sale in dubai marina
go here – Sections are organized clearly, making the browsing experience smooth.
browse Echo Harbor shop – Clear sections and organized pages make it very user-friendly.
1win как пополнить счет [url=http://1win40729.help]http://1win40729.help[/url]
Lavender Corner Market – Easy-to-read pages, navigation feels smooth.
silk market finds – Smooth navigation and organized listings enhance the online shopping experience.
наркологическая помощь [url=https://vyvod-iz-zapoya-na-domu-samara-1.ru/]наркологическая помощь[/url] .
вывод из запоя лечение краснодар [url=https://vyvod-iz-zapoya-v-krasnodare-4.ru/]вывод из запоя лечение краснодар[/url] .
кодирование от алкоголизма [url=https://vyvod-iz-zapoya-na-domu-voronezh-2.ru/]кодирование от алкоголизма[/url] .
HarborVendorStudio – Nice layout, moving between sections feels effortless.
срочная помощь вывод из запоя краснодар [url=https://vyvod-iz-zapoya-v-krasnodare-3.ru/]vyvod-iz-zapoya-v-krasnodare-3.ru[/url] .
заказать кухню сайт [url=https://zakazat-kuhnyu-11.ru/]заказать кухню сайт[/url] .
краснодар вывод из запоя [url=https://vyvod-iz-zapoya-v-krasnodare-2.ru/]краснодар вывод из запоя[/url] .
vision guide – Clean interface with concise content, easy to navigate for visitors.
see the retail collection – Clean visuals and organized layout make the site inviting.
shop online studio – Everything looks well-ordered, a pleasure to explore.
sweet bonanza preguntas frecuentes [url=https://sweet-bonanza72501.help]sweet bonanza preguntas frecuentes[/url]
https://ufc327odds.com/
The upcoming UFC 327 light heavyweight championship bout in Miami presents a classic pick’em for bettors, as former titleholder Jiri Prochazka (-142) and on-a-roll knockout specialist Carlos Ulberg (+120) get set to battle for the vacant belt. The tight odds are a testament to how evenly matched these two striking specialists happen to be, making this fight where a investment on either competitor is simply a matter of which devastating skillset you think will reign supreme.
лечение алкоголизма [url=https://vyvod-iz-zapoya-na-domu-samara.ru/]vyvod-iz-zapoya-na-domu-samara.ru[/url] .
наркологическая помощь [url=https://vyvod-iz-zapoya-na-domu-voronezh.ru/]наркологическая помощь[/url] .
browse Rose Cove hub – Clear sections and responsive pages created a smooth, pleasant experience.
наркологический стационар [url=https://vyvod-iz-zapoya-na-domu-voronezh-3.ru/]vyvod-iz-zapoya-na-domu-voronezh-3.ru[/url] .
ArtisanCove – Clean interface with well-laid-out pages makes content easy to find.
explore craft marketplace – This site provides useful details despite the random discovery.
Связался с продавцом вполне адекватный!Заказал щас жду адресса https://nadinelectro.ru Если захотят принять, то это тебя никак не обезопаситЯ вам, Касух, советовал бы в скайпе этот вопрос решить. И в субботу и воскресенье магазин не работает, так что вполне закономерно что вам не отвечают.
CozyHarbor – Logical menus, easy-to-read content, and smooth browsing experience.
Marketplace Lark – Well-structured design, browsing feels effortless.
click to explore – Neatly presented listings and clear layout make navigating enjoyable.
Brook Online Emporium – Pages are easy to explore and content is well organized.
artisan vendor space – Plenty of useful info here, might explore it again soon.
explore items easily – The variety here is interesting, and navigating through products was enjoyable.
FloraAtelierVault – Neat layout, navigating content feels seamless.
скачать видео с youtube [url=https://skachat-video-s-youtube-1.ru/]skachat-video-s-youtube-1.ru[/url] .
enter artisan exchange – Structured interface and clear layout make browsing simple and fast.
click here for Wheat Cove – Simple interface and readable content make browsing a pleasure.
pinup ios [url=www.pinup52914.help]www.pinup52914.help[/url]
craft goods portal – Clear presentation and layout improve the experience.
реабилитация наркоманов [url=https://vyvod-iz-zapoya-na-domu-voronezh-1.ru/]vyvod-iz-zapoya-na-domu-voronezh-1.ru[/url] .
explore vendor selections – Navigation is smooth and content is easy to digest.
Сейчас все в соцсетях продвигаются, наткнулся на такой вариант: https://sksensation.ru/smm-prodvizhenie-v/
visit artisan outlet marketplace – Structured pages make it easy to find information quickly.
luxury villas phuket for sale [url=https://villas-for-sale-in-phuket-1.com/]villas-for-sale-in-phuket-1.com[/url] .
timber coast items – Intuitive navigation and fast-loading pages make browsing easy.
Магниты рулят, не меняйтесь) https://nadinelectro.ru С Уважением Мр.ПорошокМне отказали в подтверждении джаббера в ЛС. Будьте бдительны!
Твой проводник в мир аниме: Почему Ani-Media становится №1 для фанатов
В 2026 году аниме — это не просто жанр, это огромная культура, меняющаяся каждый день. Выход новой серии долгожданного тайтла, громкие анонсы от студий или релиз полнометражного фильма — чтобы быть в курсе всего, нужен надежный «штаб».
Ani-Media.online — это современная экосистема для тех, кто живет миром японской анимации. Мы объединили качественный контент, высокую скорость работы и живое общение в одном месте.
Что делает Ani-Media особенным?
1. Библиотека на любой вкус От культовой классики, на которой выросли поколения, до самых свежих онгоингов, которые выходят прямо сейчас в Японии. Мы следим за тем, чтобы новые серии появлялись в максимально короткие сроки после релиза.
2. Качество без компромиссов Забудьте о зернистой картинке и плохом звуке. На Ani-Media контент доступен в высоком разрешении (Full HD и 4K), чтобы вы могли насладиться каждой деталью рисовки любимых студий, будь то MAPPA, Ufotable или легендарная Ghibli.
3. Твой выбор — твои правила Мы знаем, как важна атмосфера. Поэтому на сайте представлены:
Разнообразие озвучек: выбирайте любимые команды даббинга.
Оригинал с субтитрами: для тех, кто хочет слышать голоса оригинальных сэйю и учить язык.
4. Удобство и персонализация Интерфейс Ani-Media разработан фанатами для фанатов. Создавайте списки «Просмотрено», «Смотрю» и «В планах». Система рекомендаций на базе ИИ подберет тайтлы, основываясь на ваших предпочтениях, чтобы вопрос «Что посмотреть вечером?» больше не возникал.
Сообщество, где тебя понимают
Ani-Media — это не просто плеер. Это место для дискуссий. Обсуждайте сюжетные повороты в комментариях, читайте глубокие обзоры и аналитические статьи в нашем блоге, следите за рейтингами и участвуйте в жизни комьюнити.
«Наша цель — стереть границы между зрителем и качественным контентом, создав уютное цифровое пространство для каждого отаку». — Команда Ani-Media.
Присоединяйся к нам!
Мир аниме необъятен, и лучше исследовать его в хорошей компании. Переходи на ani-media.online, регистрируй свой профиль и погружайся в любимые истории прямо сейчас.
https://ani-media.online/anime-seriali/4495-itsuka-tenma-no-kuro-usagi.html
check this retail site – Nicely organized and I’m curious to see more next time.
как пополнить счет мостбет [url=https://mostbet70269.help]как пополнить счет мостбет[/url]
1win şifrə dəyişmək [url=https://1win60278.help]https://1win60278.help[/url]
mostbet aviator game [url=mostbet59402.help]mostbet aviator game[/url]
Твой проводник в мир аниме: Почему Ani-Media становится №1 для фанатов
В 2026 году аниме — это не просто жанр, это огромная культура, меняющаяся каждый день. Выход новой серии долгожданного тайтла, громкие анонсы от студий или релиз полнометражного фильма — чтобы быть в курсе всего, нужен надежный «штаб».
Ani-Media.online — это современная экосистема для тех, кто живет миром японской анимации. Мы объединили качественный контент, высокую скорость работы и живое общение в одном месте.
Что делает Ani-Media особенным?
1. Библиотека на любой вкус От культовой классики, на которой выросли поколения, до самых свежих онгоингов, которые выходят прямо сейчас в Японии. Мы следим за тем, чтобы новые серии появлялись в максимально короткие сроки после релиза.
2. Качество без компромиссов Забудьте о зернистой картинке и плохом звуке. На Ani-Media контент доступен в высоком разрешении (Full HD и 4K), чтобы вы могли насладиться каждой деталью рисовки любимых студий, будь то MAPPA, Ufotable или легендарная Ghibli.
3. Твой выбор — твои правила Мы знаем, как важна атмосфера. Поэтому на сайте представлены:
Разнообразие озвучек: выбирайте любимые команды даббинга.
Оригинал с субтитрами: для тех, кто хочет слышать голоса оригинальных сэйю и учить язык.
4. Удобство и персонализация Интерфейс Ani-Media разработан фанатами для фанатов. Создавайте списки «Просмотрено», «Смотрю» и «В планах». Система рекомендаций на базе ИИ подберет тайтлы, основываясь на ваших предпочтениях, чтобы вопрос «Что посмотреть вечером?» больше не возникал.
Сообщество, где тебя понимают
Ani-Media — это не просто плеер. Это место для дискуссий. Обсуждайте сюжетные повороты в комментариях, читайте глубокие обзоры и аналитические статьи в нашем блоге, следите за рейтингами и участвуйте в жизни комьюнити.
«Наша цель — стереть границы между зрителем и качественным контентом, создав уютное цифровое пространство для каждого отаку». — Команда Ani-Media.
Присоединяйся к нам!
Мир аниме необъятен, и лучше исследовать его в хорошей компании. Переходи на ani-media.online, регистрируй свой профиль и погружайся в любимые истории прямо сейчас.
https://ani-media.online/anime-seriali/2589-rerided-tokigoe-no-derrida.html
Твой проводник в мир аниме: Почему Ani-Media становится №1 для фанатов
В 2026 году аниме — это не просто жанр, это огромная культура, меняющаяся каждый день. Выход новой серии долгожданного тайтла, громкие анонсы от студий или релиз полнометражного фильма — чтобы быть в курсе всего, нужен надежный «штаб».
Ani-Media.online — это современная экосистема для тех, кто живет миром японской анимации. Мы объединили качественный контент, высокую скорость работы и живое общение в одном месте.
Что делает Ani-Media особенным?
1. Библиотека на любой вкус От культовой классики, на которой выросли поколения, до самых свежих онгоингов, которые выходят прямо сейчас в Японии. Мы следим за тем, чтобы новые серии появлялись в максимально короткие сроки после релиза.
2. Качество без компромиссов Забудьте о зернистой картинке и плохом звуке. На Ani-Media контент доступен в высоком разрешении (Full HD и 4K), чтобы вы могли насладиться каждой деталью рисовки любимых студий, будь то MAPPA, Ufotable или легендарная Ghibli.
3. Твой выбор — твои правила Мы знаем, как важна атмосфера. Поэтому на сайте представлены:
Разнообразие озвучек: выбирайте любимые команды даббинга.
Оригинал с субтитрами: для тех, кто хочет слышать голоса оригинальных сэйю и учить язык.
4. Удобство и персонализация Интерфейс Ani-Media разработан фанатами для фанатов. Создавайте списки «Просмотрено», «Смотрю» и «В планах». Система рекомендаций на базе ИИ подберет тайтлы, основываясь на ваших предпочтениях, чтобы вопрос «Что посмотреть вечером?» больше не возникал.
Сообщество, где тебя понимают
Ani-Media — это не просто плеер. Это место для дискуссий. Обсуждайте сюжетные повороты в комментариях, читайте глубокие обзоры и аналитические статьи в нашем блоге, следите за рейтингами и участвуйте в жизни комьюнити.
«Наша цель — стереть границы между зрителем и качественным контентом, создав уютное цифровое пространство для каждого отаку». — Команда Ani-Media.
Присоединяйся к нам!
Мир аниме необъятен, и лучше исследовать его в хорошей компании. Переходи на ani-media.online, регистрируй свой профиль и погружайся в любимые истории прямо сейчас.
https://ani-media.online/anime-seriali/690-boushoku-no-berserk-mini.html
Твой проводник в мир аниме: Почему Ani-Media становится №1 для фанатов
В 2026 году аниме — это не просто жанр, это огромная культура, меняющаяся каждый день. Выход новой серии долгожданного тайтла, громкие анонсы от студий или релиз полнометражного фильма — чтобы быть в курсе всего, нужен надежный «штаб».
Ani-Media.online — это современная экосистема для тех, кто живет миром японской анимации. Мы объединили качественный контент, высокую скорость работы и живое общение в одном месте.
Что делает Ani-Media особенным?
1. Библиотека на любой вкус От культовой классики, на которой выросли поколения, до самых свежих онгоингов, которые выходят прямо сейчас в Японии. Мы следим за тем, чтобы новые серии появлялись в максимально короткие сроки после релиза.
2. Качество без компромиссов Забудьте о зернистой картинке и плохом звуке. На Ani-Media контент доступен в высоком разрешении (Full HD и 4K), чтобы вы могли насладиться каждой деталью рисовки любимых студий, будь то MAPPA, Ufotable или легендарная Ghibli.
3. Твой выбор — твои правила Мы знаем, как важна атмосфера. Поэтому на сайте представлены:
Разнообразие озвучек: выбирайте любимые команды даббинга.
Оригинал с субтитрами: для тех, кто хочет слышать голоса оригинальных сэйю и учить язык.
4. Удобство и персонализация Интерфейс Ani-Media разработан фанатами для фанатов. Создавайте списки «Просмотрено», «Смотрю» и «В планах». Система рекомендаций на базе ИИ подберет тайтлы, основываясь на ваших предпочтениях, чтобы вопрос «Что посмотреть вечером?» больше не возникал.
Сообщество, где тебя понимают
Ani-Media — это не просто плеер. Это место для дискуссий. Обсуждайте сюжетные повороты в комментариях, читайте глубокие обзоры и аналитические статьи в нашем блоге, следите за рейтингами и участвуйте в жизни комьюнити.
«Наша цель — стереть границы между зрителем и качественным контентом, создав уютное цифровое пространство для каждого отаку». — Команда Ani-Media.
Присоединяйся к нам!
Мир аниме необъятен, и лучше исследовать его в хорошей компании. Переходи на ani-media.online, регистрируй свой профиль и погружайся в любимые истории прямо сейчас.
https://ani-media.online/anime-seriali/4476-yumekui-merry.html
FloraMakerStudio – Neat layout, navigating content feels effortless.
Твой проводник в мир аниме: Почему Ani-Media становится №1 для фанатов
В 2026 году аниме — это не просто жанр, это огромная культура, меняющаяся каждый день. Выход новой серии долгожданного тайтла, громкие анонсы от студий или релиз полнометражного фильма — чтобы быть в курсе всего, нужен надежный «штаб».
Ani-Media.online — это современная экосистема для тех, кто живет миром японской анимации. Мы объединили качественный контент, высокую скорость работы и живое общение в одном месте.
Что делает Ani-Media особенным?
1. Библиотека на любой вкус От культовой классики, на которой выросли поколения, до самых свежих онгоингов, которые выходят прямо сейчас в Японии. Мы следим за тем, чтобы новые серии появлялись в максимально короткие сроки после релиза.
2. Качество без компромиссов Забудьте о зернистой картинке и плохом звуке. На Ani-Media контент доступен в высоком разрешении (Full HD и 4K), чтобы вы могли насладиться каждой деталью рисовки любимых студий, будь то MAPPA, Ufotable или легендарная Ghibli.
3. Твой выбор — твои правила Мы знаем, как важна атмосфера. Поэтому на сайте представлены:
Разнообразие озвучек: выбирайте любимые команды даббинга.
Оригинал с субтитрами: для тех, кто хочет слышать голоса оригинальных сэйю и учить язык.
4. Удобство и персонализация Интерфейс Ani-Media разработан фанатами для фанатов. Создавайте списки «Просмотрено», «Смотрю» и «В планах». Система рекомендаций на базе ИИ подберет тайтлы, основываясь на ваших предпочтениях, чтобы вопрос «Что посмотреть вечером?» больше не возникал.
Сообщество, где тебя понимают
Ani-Media — это не просто плеер. Это место для дискуссий. Обсуждайте сюжетные повороты в комментариях, читайте глубокие обзоры и аналитические статьи в нашем блоге, следите за рейтингами и участвуйте в жизни комьюнити.
«Наша цель — стереть границы между зрителем и качественным контентом, создав уютное цифровое пространство для каждого отаку». — Команда Ani-Media.
Присоединяйся к нам!
Мир аниме необъятен, и лучше исследовать его в хорошей компании. Переходи на ani-media.online, регистрируй свой профиль и погружайся в любимые истории прямо сейчас.
https://ani-media.online/anime-seriali/1106-sono-bisque-doll-wa-koi-o-suru.html
cheap villa for rent in dubai monthly https://dubaipropertycircle.com/companies-in-downtown-dubai.html 2 bedroom Villas for sale in Jumeirah Village TriangleSouth Bay guide
visit creative vendor hub – Interface is neat and easy to follow, makes checking items simple.
click to explore – The design is simple and responsive, making browsing enjoyable.
With a long-standing presence in online slots, Microgaming offers a varied portfolio including titles like Mega Moolah, Immortal Romance, Thunderstruck II, and Avalon II. Its games are recognized for immersive concepts, refined design, and a combination of classic and modern styles. From big jackpot titles to story-rich experiences, Microgaming offers more variety than typical providers, ensuring a smooth and engaging experience across devices.
microgaming apk
скачать видео youtube по ссылке [url=https://skachat-video-s-youtube-1.ru/]скачать видео youtube по ссылке[/url] .
shop artisan collective – Navigation feels effortless, and the site is visually tidy.
quickridgecraftcollective – Navigation is smooth, pages load quickly, making browsing enjoyable.
explore boutique offerings – This site feels worth a second visit to explore deeper.
melbet лаки джет [url=www.melbet76521.help]www.melbet76521.help[/url]
1win быстрый депозит [url=1win85163.help]1win быстрый депозит[/url]
start shopping – User-friendly interface, organized categories, and easy browsing experience.
загрузчик видео с youtube [url=https://skachat-video-s-youtube-1.ru/]skachat-video-s-youtube-1.ru[/url] .
Joker123 is a well-known slot gaming brand in Malaysia famous for simple gameplay, quick performance, and smooth mobile access. It offers a clean interface, familiar mechanics, and entertaining themes that attract both beginners and experienced users. It is commonly chosen by users Joker123 for its ease of use and quick sessions on phones. Its accessible design makes it a strong choice for easy, mobile-focused slot entertainment.
joker123 nombor 4d
Для тех, кто ищет информацию по теме “вавада vavadaa зеркало рабочее”, есть отличная статья. Вот, делюсь ссылкой: [url=https://vavadasloty.com]https://vavadasloty.com[/url]
Zen Cove Market – A unique marketplace with interesting items that caught my eye today.
sweet bonanza прив’язати картку [url=https://sweet-bonanza06538.help/]sweet bonanza прив’язати картку[/url]
реабилитация алкоголиков [url=https://vyvod-iz-zapoya-na-domu-samara-3.ru/]реабилитация алкоголиков[/url] .
instalare mostbet [url=https://mostbet21067.help/]https://mostbet21067.help/[/url]
кодирование от алкоголизма [url=https://vyvod-iz-zapoya-na-domu-voronezh-2.ru/]кодирование от алкоголизма[/url] .
вывод из запоя на дому в краснодаре [url=https://vyvod-iz-zapoya-v-krasnodare-1.ru/]вывод из запоя на дому в краснодаре[/url] .
В общем подожду пока ты получишь и отпишешь :)))) https://volkswagen-bank.ru Молодцы! Так держать!стараемся!Хороших продаж!
нарколог на дом [url=https://vyvod-iz-zapoya-na-domu-samara-3.ru/]нарколог на дом[/url] .
ForestBazaarStudio – Clear design, browsing items is fast and intuitive.
вывод из запоя на дому краснодар [url=https://vyvod-iz-zapoya-v-krasnodare-4.ru/]вывод из запоя на дому краснодар[/url] .
discover Wheat Meadow hub – Clear layout and smooth page transitions improve the experience.
discover Ruby Meadow marketplace – Smooth navigation and neatly organized content enhance the browsing experience.
shop this vendor – Smooth navigation and clear design enhance the experience.
лечение алкоголизма [url=https://vyvod-iz-zapoya-na-domu-samara-1.ru/]лечение алкоголизма[/url] .
какие дешевые цветы [url=https://www.cveti-nederogo.ru]https://www.cveti-nederogo.ru[/url] .
вывод из запоя кодирование краснодар [url=https://vyvod-iz-zapoya-v-krasnodare-2.ru/]vyvod-iz-zapoya-v-krasnodare-2.ru[/url] .
Emirates Hills villas for sale dubai property search website dubai real estate authorityapartamentos en dubai venta
капельница от запоя [url=https://vyvod-iz-zapoya-na-domu-samara-2.ru/]капельница от запоя[/url] .
капельница от похмелья [url=https://vyvod-iz-zapoya-na-domu-samara.ru/]vyvod-iz-zapoya-na-domu-samara.ru[/url] .
tap this link – Content is clear and structured, very convenient to browse.
вывод из запоя лечение краснодар [url=https://vyvod-iz-zapoya-v-krasnodare-3.ru/]vyvod-iz-zapoya-v-krasnodare-3.ru[/url] .
вывод из запоя в стационаре [url=https://vyvod-iz-zapoya-na-domu-voronezh-3.ru/]вывод из запоя в стационаре[/url] .
реабилитация наркоманов [url=https://vyvod-iz-zapoya-na-domu-voronezh.ru/]vyvod-iz-zapoya-na-domu-voronezh.ru[/url] .
check this link – The site is straightforward, and moving through sections feels effortless.
check this site – Layout is simple and intuitive, makes navigation effortless.
At this time it sounds like Drupal is the preferred blogging platform available right now. (from what I’ve read) Is that what you are using on your blog?
adult xxx video porn site xxx sex video
internet sportweddenschappen
My web blog – Mobiel Wedden Tips Gratis
Вы всё ещё работаете с Яндекс Деньгами? https://andreyvinogradov.ru Malkom ты не один такой такая же хрень зарядили бабосы еще и чужие пздц полный >< надеюсь разрулит всё =\Тарился в этом магазе Летом разок и в Сентябре разок)))
see product selections – Pages are clear and organized, making browsing straightforward.
explore items easily – The interface is simple, and navigating the listings feels natural.
shop rain boutique – Clean interface with logical categories makes finding products easy.
скачат видео ютуб [url=https://skachat-video-s-youtube-2.ru/]скачат видео ютуб[/url] .
explore shop – User-friendly layout that feels intuitive and organized.
discover page – The layout is simple and well put together.
online artisan community – Minimal and organized pages, navigation feels natural.
youtube downloader url [url=https://skachat-video-s-youtube-2.ru/]skachat-video-s-youtube-2.ru[/url] .
studio flat near me https://freizeitsportler.net/deyar-real-estate-dubai-civil-f0oreman-jonbs.html property price increase in dubaiproperty for rent in dubai green community
enter artisan marketplace – Navigation is effortless and content is presented clearly.
lemonvalleyretailcorner – Pretty smooth browsing experience, everything seems well structured here.
pin up Oʻzbekistonda depozit [url=https://pinup52914.help/]https://pinup52914.help/[/url]
наркологический стационар [url=https://vyvod-iz-zapoya-na-domu-voronezh-1.ru/]vyvod-iz-zapoya-na-domu-voronezh-1.ru[/url] .
https://mostbet-zerkaloonline.buzz/en/le-pharaoh-or-outlaws-inc-slot-max-win-tombstone-rip-na-android/
browse creative boutique – Layout is intuitive, pages feel light and easy to read.
https://indianwomenorg.com/welcomexbet
explore shop – Neat design, products are easy to locate, and sections are clearly organized.
https://mostbet-zerkaloonline.buzz/kk/the-dog-house-megaways-s-vyvodom/
http://old.msfnpr.ru/msfnprbb/viewtopic.php?p=6868#6868
да не врядли просто ихнему курьеру поджопников надавать надо что бы копытами веселей шевелил да и все купить кокаин, купить мефедрон, купить гашиш, купить бошки Получил свой заказ,дошло довольно быстро, спасибо chemical-mix.com , за нормальный вес и хорошию работу !Тепкрь сам хочу зделать заказ но немогу на сайт попасть ((((
check out products – Layout is minimal yet functional, making navigation stress-free.
http://center-2.ru/forum/?mingleforumaction=viewtopic&t=26204#postid-47880
discover more – Initial look shows a few helpful resources already.
explore studio collections – Organized sections and smooth pages make it enjoyable to browse.
learn more here – Pages are structured logically, helping users find what they need.
check online store – Smooth design with accessible content and a professional feel.
artisan vendor portal – Clear and tidy design, exploring content is effortless.
https://planetasp.ru/forum/viewtopic.php?pid=27861#p27861
нарколог на дом [url=https://vyvod-iz-zapoya-na-domu-voronezh-2.ru/]нарколог на дом[/url] .
access now – Neat and structured design, makes finding content effortless.
explore teal harbor vendor hub – Well-arranged content, making it easy to find relevant information.
Simply desire to say your article is as surprising. The clearness in your post is simply spectacular and i can assume you’re an expert on this subject. Fine with your permission let me to grab your feed to keep up to date with forthcoming post. Thanks a million and please continue the gratifying work.
Xxx video onlyfans sex video site
explore retail lane – Well-organized sections and smooth navigation make this enjoyable.
1вин вывод Киргизия [url=http://1win85163.help/]http://1win85163.help/[/url]
https://omnivatic.com/2026/03/30/prognoz-30-03-2026-muzhchina-oven/
expensive properties in dubai https://zoppoth.net/buy-freehold-apartment-in-dubai.html the waves properties dubaidubai creek villa for sale in uae
Маркировка честный знак
melbet odengi пополнение [url=www.melbet76521.help]melbet odengi пополнение[/url]
check out this bazaar – Nice assortment of products, giving a fresh vibe compared to standard stores.
1win descarcare [url=http://1win59213.help]http://1win59213.help[/url]
view catalog – Well-laid-out sections make exploring products quick and straightforward.
ютуб загрузчик онлайн [url=https://skachat-video-s-youtube-1.ru/]skachat-video-s-youtube-1.ru[/url] .
check vendor offerings – Layout is intuitive, and the site makes browsing simple and enjoyable.
sweet bonanza робоче дзеркало Україна [url=https://sweet-bonanza06538.help/]https://sweet-bonanza06538.help/[/url]
вывод из запоя бесплатно [url=https://vyvod-iz-zapoya-v-krasnodare-4.ru/]вывод из запоя бесплатно[/url] .
вывод из запоя в стационаре [url=https://vyvod-iz-zapoya-na-domu-samara-2.ru/]вывод из запоя в стационаре[/url] .
browse now – Well-organized pages and smooth navigation enhance the experience.
mostbet cod bonus 2026 [url=https://www.mostbet21067.help]mostbet cod bonus 2026[/url]
скачать видео из ютуба онлайн [url=https://skachat-video-s-youtube-1.ru/]skachat-video-s-youtube-1.ru[/url] .
click to enter – Neat design and easy-to-read pages provide a smooth experience.
вывод из запоя на дому [url=https://vyvod-iz-zapoya-na-domu-samara-1.ru/]вывод из запоя на дому[/url] .
quickvalleycartemporium – Clean layout overall, pages respond quickly and information is easy to digest.
browse this page – Everything is visually organized, making navigation intuitive and straightforward.
2c-i, 2c-e, 2c-p https://unislim.ru Обратите внимание, ТС отказывается работать с ГАРАНТОМ! хоть и магазин древний и проверенный! но хочется спать спокойно! АДМИНЫ ОБРАТИТЕ ВНИМАНИЕ, ПОРА КАК ТО ИЗМЕНИТЬ РЕЖИМ РАБОТЫ ГАРАНТА. СДЕЛКИ ПРОВОДИТЬ ОБЯЗАТЕЛЬНО ТОЛЬКО ЧЕРЕЗ ГАРАНТА!ага его
лечение наркомании [url=https://vyvod-iz-zapoya-na-domu-samara.ru/]vyvod-iz-zapoya-na-domu-samara.ru[/url] .
алкоголизм вывод из запоя краснодар [url=https://vyvod-iz-zapoya-v-krasnodare-2.ru/]vyvod-iz-zapoya-v-krasnodare-2.ru[/url] .
https://omnivatic.com/2026/03/29/natalnaya-astrologiya-otzyvy/
вывод из запоя в краснодаре [url=https://vyvod-iz-zapoya-v-krasnodare-3.ru/]вывод из запоя в краснодаре[/url] .
browse timbertrail artisan studio – Clean and easy-to-follow layout, pages feel organized.
вывод из запоя с выездом [url=https://vyvod-iz-zapoya-v-krasnodare-1.ru/]вывод из запоя с выездом[/url] .
tealcovevendorvault – First time visiting, seems like a decent and useful platform.
реабилитационный центр от алкоголизма [url=https://vyvod-iz-zapoya-na-domu-voronezh-3.ru/]vyvod-iz-zapoya-na-domu-voronezh-3.ru[/url] .
discover olive goods – Well-structured sections make exploring new items hassle-free.
наркологический стационар [url=https://vyvod-iz-zapoya-na-domu-voronezh.ru/]vyvod-iz-zapoya-na-domu-voronezh.ru[/url] .
retail marketplace hub – Layout is neat and functional, browsing was enjoyable.
мелбет mines стратегия [url=https://www.melbet30946.help]мелбет mines стратегия[/url]
sharing house for rent in dubai https://esidirectory.org/savills-middle-east.html Tilal al Ghaf villas for salehow much is property in dubai
enter here – Everything feels structured and easy to trust.
explore here – Smooth layout that’s easy to follow and comfortable to read.
click to enter – Logical page flow and readable headings make navigation simple.
timbertrail crafts network – Organized and professional, moving between sections is simple.
Just desire to say your article is as surprising. The clarity in your post is just excellent and i can assume you are an expert on this subject. Fine with your permission let me to grab your feed to keep updated with forthcoming post. Thanks a million and please keep up the gratifying work.
Watch sexual porno video xxx sex adults site
ну да, как скажут так и делают я уже говорил 11 из 10) купить кокаин, купить мефедрон, купить гашиш, купить бошки напишите в аську, там порешают вашу проблему. С этой партией МХЕ определённо вышел косяк.Два часа, ребята в клубе,
unique craft corner – Spent some time here and it’s laid out in a very user-friendly way.
где купить недорогие цветы в москве [url=https://cveti-nederogo.ru]где купить недорогие цветы в москве[/url] .
click to explore – Unique and inviting, giving a fun and refreshing browsing experience.
explore Zen Market – The listings feel well-selected and browsing was smooth.
visit vendor vault – Smooth layout, browsing categories is intuitive and simple.
browse trading post – Clear design and quick page responses make exploring effortless.
f1nn5ter porn leaks
discover creative vendors – Tidy interface, browsing feels comfortable and smooth.
наркологическая помощь [url=https://vyvod-iz-zapoya-na-domu-samara-3.ru/]наркологическая помощь[/url] .
view all products – Content is arranged clearly, allowing quick navigation.
melbet blackjack [url=http://melbet81256.help]http://melbet81256.help[/url]
see more here – Clear sections and fast navigation enhance the overall experience.
see more here – Clear sections and fast navigation enhance the overall experience.
see more here – Organized content and readable pages make browsing effortless.
1win пополнение Bakai через приложение [url=http://1win09451.help]1win пополнение Bakai через приложение[/url]
наркологический стационар [url=https://vyvod-iz-zapoya-na-domu-voronezh-1.ru/]vyvod-iz-zapoya-na-domu-voronezh-1.ru[/url] .
мостбет правила пополнения [url=mostbet32854.help]mostbet32854.help[/url]
mms porn
вывод из запоя в стационаре [url=https://vyvod-iz-zapoya-na-domu-samara-3.ru/]вывод из запоя в стационаре[/url] .
incest porn games
modern design villa for sale dubai dubai downtown property market hot properties in dubaiis it safe to invest in dubai property
explore Wind Harbor Craft Exchange – Layout is clear, browsing is smooth and effortless.
click for retail shop – Nicely structured pages with a clean and uncluttered feel.
visit homepage – Tidy pages, content is straightforward and readable.
скачать видео из ютуб онлайн [url=https://skachat-video-s-youtube-2.ru/]скачать видео из ютуб онлайн[/url] .
mostbet bonus kod qayerdan olish [url=http://mostbet59402.help]http://mostbet59402.help[/url]
1win hesabım kilidləndi [url=https://1win60278.help]1win hesabım kilidləndi[/url]
buy saxenda online
check products – Logical layout and clean design make it easy to find what you need.
check out products – Well-structured sections make exploring content smooth and pleasant.
ютуб загрузчик онлайн [url=https://skachat-video-s-youtube-2.ru/]skachat-video-s-youtube-2.ru[/url] .
Две дорожки для Сережки, https://rottor.ru А теперь к делу.. магаз ровный, товар ..вставляет епт..особенно в прошлый раз, пол часа ждал, что из ванной вылезет оно и покарает меня…хорошо быстро отпускает, а то вода остыла уже и сига стлела и хабарик упал так , что сам не заметил…магаз ровный,всем советую!!
f1nn5ter leaked porn
visit trade house – Navigation is smooth and finding content is effortless.
open this site – The browsing experience is engaging, with nicely arranged visuals throughout.
see details – Everything is well-structured and easy to follow.
наркологический центр [url=https://vyvod-iz-zapoya-na-domu-samara-2.ru/]наркологический центр[/url] .
open this shop – The experience was smooth and everything worked as expected
browse timbertrail hall – Fast-loading content and clear sections for simple navigation.
gay porn videos
browse items here – A soothing design paired with products that catch the eye.
xanax and cocaine
Нашёл страницу с услугами, вроде без перегруза маркетингом: https://iwatt24.ru/uslugi-smm/
enter store here – Everything felt easy and convenient to use
explore retail guild products – Content is organized clearly, making the experience smooth.
Lemon Corner Store – Simple layout, everything is accessible and clear.
check products – Logical arrangement of products makes it simple to find what you need.
storefront link – Simple interface and logical structure make it easy to locate information.
buy used panties
mostbet сменить email [url=http://mostbet70269.help/]http://mostbet70269.help/[/url]
recruitment companies property sales dubai top 10 business ideas in dubai villa for rent in deira dubaireliable properties dubai
click to enter – Well-structured pages and readable text make exploring easy.
start browsing – Navigation is clean and content is easy to grasp
open link – Very clear presentation, helpful for quick understanding.
buy diazepam 10mg
mostbet ozbek tilida [url=https://mostbet59402.help]https://mostbet59402.help[/url]
1win aviator koef [url=https://1win60278.help/]1win aviator koef[/url]
Контакты указаны у меня в подписе и в разделе “Наши Контакты” https://veres-spb.ru Наверно так же как и джив. попробуй минимальные пропорции сделать 0,1 к 1Удачи в бизе
diva flawless porn leak
Wind Harbor vendor shop – User-friendly site, structure is simple and clean.
Velvet Coast Collective – Light layout, makes exploring stress-free
visit this platform – Everything is orderly, creating a smooth and logical user experience.
artisan marketplace – Very straightforward design, navigation is seamless and pleasant.
high class escort london
Lemon Studio Retail – Intuitive layout, content is easy to find and read.
CraftEmporium – Modern look, easy scrolling and finding what I need.
click to view – The structure is clear and helps you get around quickly
explore now – User-friendly navigation and well-organized content make it enjoyable.
check the store – Clear structure and responsive design make browsing effortless.
quick visit link – Navigation is easy and the site feels well maintained
diva flawless leaked porn
see details here – I like how quickly you can find what you’re looking for
access now – So far a positive experience with well-organized and reliable content.
visit this vendor vault – Pages load quickly, making browsing effortless and pleasant.
f1nn5ter and vlad porn
скачат видео ютуб [url=https://skachat-video-s-youtube-1.ru/]скачат видео ютуб[/url] .
мостбет теннис ставки [url=www.mostbet70269.help]мостбет теннис ставки[/url]
look through vendors – The interface feels neat and easy to understand.
apartment for sale in gold crest dubai https://fotoundvideografie.com/emerging-issues-in-real-estate-lecture-in-dubai.html foreseen evaluation of real estate market in dubaiinvestir a dubai
Timber Seaside hub – My first time here, and the presentation feels polished and inviting.
incest porn stories
За основу брали ромашку (как она задрала), я кстати предлагаю магазину, продавать основу, или в качестве бонуса предлагать (так на сколько я знаю никто не делает). купить кокаин, купить мефедрон, купить гашиш, купить бошки всё получил,качество-бомба,очень доволен магазином ,всё быстро доставили,вам желаю так держать!!!!!!!!!Тоже не хочу никого пугать…
f1nn5ter porn leaks
Vendor Studio Lane – Easy-to-follow sections, content is presented logically.
view this site – Everything is easy to follow without distractions
discover deals – Pleasant interface, making shopping and browsing items enjoyable.
visit store online – Clean layout with intuitive flow ensures browsing is simple and efficient.
check this out – Everything is laid out nicely and easy to navigate
open link – Well-designed interface, everything is neat and easy to read.
youtube downloader url [url=https://skachat-video-s-youtube-3.ru/]youtube downloader url[/url] .
go to website – Neatly organized pages and logical design make navigating easy.
learn more here – Well-laid-out pages and readable text create a smooth user flow.
check this shop – Everything is organized well and easy to find
visit this page – Navigation feels smooth and the structure is clear.
steroids uk shop
наркологический стационар [url=https://vyvod-iz-zapoya-na-domu-samara-2.ru/]vyvod-iz-zapoya-na-domu-samara-2.ru[/url] .
see full collection – Everything is arranged logically, allowing easy browsing.
mostbet natijalar [url=https://mostbet59402.help]https://mostbet59402.help[/url]
1win slots [url=http://1win60278.help/]http://1win60278.help/[/url]
porn diva flawless
open vendor link – The site is organized and easy to move around
open shop page – Everything is arranged logically, making browsing easy
поставка цветов [url=http://www.cveti-nederogo.ru]поставка цветов[/url] .
ArtisanOutlet – Quick loading pages and intuitive menus make the experience pleasant.
largest property developers in the world low budget studio apartment for rent in dubai upcoming properties in dubaielite group dubai luxury home real estate
check products – Very organized layout, navigation is intuitive, and browsing is fast.
indian escort london
product page link – Minimalist design with well-laid-out content improves usability.
click here to view – Everything is structured clearly, so browsing feels smooth.
discover items – Navigation is smooth and reading the information is simple
enter site – Pages load quickly, design is clean and organized.
употреблял перорально, также пробовал нозально (не вариант сжигает все напрочь и комок в слизистой) https://dk3d.ru Пришол 250 сделал 1к10-12 ппц уносит 250 у вас лучший магазу респект , даже не ожидал что такой джив будет , 1к10 меньше это ппц..Здравствуй, народ, кто с Мск брал, сроки доставки какие реальные были и какая служба?
ArtisanAlcove – Modern and clear design, I found everything quickly.
diazepam for sale
access this page – Layout is clear and moving through sections is simple
open retail collection – The experience feels quick and visually appealing.
gay men porn
скачать видео с ютуба на телефоне [url=https://skachat-video-s-youtube-2.ru/]skachat-video-s-youtube-2.ru[/url] .
see this marketplace – Everything loads quickly and browsing is straightforward
look through offerings – Sections are easy to scan and finding items is quick.
check website – Smooth, simple design that makes browsing stress-free.
мостбет фриспины за регистрацию [url=http://mostbet70269.help]http://mostbet70269.help[/url]
скачать видео с ютуба на пк [url=https://skachat-video-s-youtube-2.ru/]skachat-video-s-youtube-2.ru[/url] .
HomeLinens – Clean design with intuitive navigation, pages respond quickly.
mms porn
shop upland marketplace – Well-arranged interface ensures smooth browsing and quick product discovery.
open shop page – Neat structure and smooth transitions make browsing a breeze.
скачать видео с ютуба без вирусов [url=https://skachat-video-s-youtube-4.ru/]скачать видео с ютуба без вирусов[/url] .
капли для глаз [url=https://yastreb-kapli.ru/]yastreb-kapli.ru[/url] .
explore here – Pages are neatly organized and moving around is smooth
start here – Well-built site, navigation is simple and intuitive.
ArtisanStudio – Modern design, moving between pages is quick and simple.
скачать видио с ютуб [url=https://skachat-video-s-youtube-4.ru/]скачать видио с ютуб[/url] .
глазные капли Ястреб [url=https://yastreb-kapli.ru/]yastreb-kapli.ru[/url] .
https://endurobrothersbulgaria.com/enduro-tours
axa property insurance dubai list of top real estate companies in dubai Parkway Vistas guidered castle properties dubai
open retail page – Structure is organized and moving between sections is easy
melbet зеркало официальный сайт [url=https://melbet30946.help/]https://melbet30946.help/[/url]
go shopping here – Everything is organized for quick and easy access
check this marketplace – Everything is laid out clearly and easy to understand
https://virtualnye-nomera.vercel.app/service/roblox
check this site – Well-laid-out pages make exploring smooth and simple.
discover page – The site is clearly designed with attention to detail.
МХЕ “как у всех” тобиш бодяжный.. Вроде скоро должна быть нормальная партия. https://businessguards.ru работал я работал 2 года имея не малую клиентскую базу и тут решил я вас кинуть на 10 грамм, сам то подумай где ты это пишешь.посылка пришла, все чотко, упаковка на высшем уровне, респектос
https://virtualnye-nomera.vercel.app/country/netherlands
Fortune Tiger no Pix R$15: deposita agora e sai com 200 giros grátis + cashback!
LinensCorner – Neat design with easy-to-follow navigation and clear product listings.
check out Ember Summit – The layout is tidy and helps you find information quickly.
вывод из запоя на дому [url=https://vyvod-iz-zapoya-na-domu-ekaterinburg.ru/]vyvod-iz-zapoya-na-domu-ekaterinburg.ru[/url] .
лечение наркомании [url=https://vyvod-iz-zapoya-na-domu-ekaterinburg.ru/]vyvod-iz-zapoya-na-domu-ekaterinburg.ru[/url] .
лечение наркомании [url=https://vyvod-iz-zapoya-na-domu-ekaterinburg-1.ru/]vyvod-iz-zapoya-na-domu-ekaterinburg-1.ru[/url] .
лечение наркомании [url=https://vyvod-iz-zapoya-na-domu-ekaterinburg-2.ru/]лечение наркомании[/url] .
капельница от похмелья [url=https://vyvod-iz-zapoya-na-domu-ekaterinburg-3.ru/]vyvod-iz-zapoya-na-domu-ekaterinburg-3.ru[/url] .
наркологическая клиника [url=https://vyvod-iz-zapoya-na-domu-nizhnij-novgorod.ru/]наркологическая клиника[/url] .
нарколог на дом [url=https://vyvod-iz-zapoya-na-domu-nizhnij-novgorod-1.ru/]нарколог на дом[/url] .
melbet site côte divoire [url=https://melbet81256.help/]https://melbet81256.help/[/url]
1win crash [url=http://1win09451.help]http://1win09451.help[/url]
TheStoneWorkshop – Easy-to-follow pages, finding information is natural and quick.
реабилитация наркоманов [url=https://vyvod-iz-zapoya-na-domu-ekaterinburg-1.ru/]vyvod-iz-zapoya-na-domu-ekaterinburg-1.ru[/url] .
mostbet mines Кыргызстан [url=http://mostbet32854.help]http://mostbet32854.help[/url]
нарколог на дом [url=https://vyvod-iz-zapoya-na-domu-ekaterinburg-3.ru/]нарколог на дом[/url] .
наркологическая помощь [url=https://vyvod-iz-zapoya-na-domu-ekaterinburg-2.ru/]наркологическая помощь[/url] .
вывод из запоя в стационаре [url=https://vyvod-iz-zapoya-na-domu-nizhnij-novgorod.ru/]vyvod-iz-zapoya-na-domu-nizhnij-novgorod.ru[/url] .
see more here – Nicely designed interface with quick loading and intuitive navigation.
browse here – Pages load quickly and the design feels user-friendly
капельница от запоя [url=https://kapelnica-ot-zapoya-nizhnij-novgorod.ru/]капельница от запоя[/url] .
реабилитация алкоголиков [url=https://vyvod-iz-zapoya-na-domu-nizhnij-novgorod-1.ru/]vyvod-iz-zapoya-na-domu-nizhnij-novgorod-1.ru[/url] .
капельница от похмелья [url=https://kapelnica-ot-zapoya-nizhnij-novgorod-1.ru/]kapelnica-ot-zapoya-nizhnij-novgorod-1.ru[/url] .
капельница от запоя [url=https://vyvod-iz-zapoya-na-domu-samara-2.ru/]капельница от запоя[/url] .
MeadowCrafts – Well-laid-out pages and easy-to-follow navigation throughout.
access now – Early signs point to a well-built and reliable site.
obg real estate broker llc dubai https://freizeitsportler.net/fully-furnished-apartments-villa-room-for-rent-in-dubai.html can you buy a house with no down paymentjbr by dubai properties
melbet платеж через терминал [url=http://melbet30946.help/]http://melbet30946.help/[/url]
Магаз самый ровный! Брать буду Только здесь и не где Больше,респектоз магазину! Так держать ребята! купить кокаин, купить мефедрон, купить гашиш, купить бошки Ребята, у chemical-mix все на высшем уровне!просто народу не верится в ассортимент и такие цены, да и по большинству продуктов отзывов нет ))
youtube скачать видео [url=https://skachat-video-s-youtube-3.ru/]youtube скачать видео[/url] .
browse harbor collections – The design keeps content well structured and easy to scan.
shop upland marketplace – Well-arranged interface ensures smooth browsing and quick product discovery.
view retail gallery – Pages load quickly, and content is neatly arranged for clarity.
tap to visit – Clean interface and logical structure make exploring the site easy.
quick visit link – It’s a smooth experience without any overload
product hub – Smooth interface and pages are organized cleanly
1win app yaddaş [url=www.1win60278.help]www.1win60278.help[/url]
mostbet minimal yechish [url=http://mostbet59402.help/]http://mostbet59402.help/[/url]
скачать ролик с ютьюб [url=https://skachat-video-s-youtube-1.ru/]skachat-video-s-youtube-1.ru[/url] .
click to open – Easy navigation, content is accessible and clear.
EmberCraftVendor – Efficient layout, browsing the site is fast and simple.
скачать видео с ютуба на телефоне [url=https://skachat-video-s-youtube-1.ru/]skachat-video-s-youtube-1.ru[/url] .
go to this link – Layout is neat and moving through sections is intuitive
see more here – Clear and neat pages allow content to be digested easily.
BoutiqueTreasures – Easy-to-use design, content is clearly presented and accessible.
Do you have a spam issue on this website; I also am a blogger, and I was wanting to know your situation; many of us have developed some nice practices and we are looking to exchange methods with others, please shoot me an e-mail if interested.
Xxx video onlyfans sex video site
1win самоисключение [url=1win09451.help]1win самоисключение[/url]
melbet code promo fcfa [url=http://melbet81256.help]http://melbet81256.help[/url]
мостбет скачать приложение на android [url=mostbet32854.help]mostbet32854.help[/url]
Handmade Treasures Studio – Layout is intuitive, products easy to find, and the interface is user-friendly.
see full selection – Layout is clear and allows users to move quickly through pages.
click to visit – Smooth navigation with well-organized pages improves the user experience.
go to this link – Navigation feels fluid and the interface works well
Продавцу Спасибо! Решил пробу намутить, чтото не как не растворяется, пробывал 646 подогревать на водной бане (воду до кипения доводил) – очень плохо растворялся, на ацике совсем не растворялся (не подогревал), на спирте кажется совсем не канает. Но всетаки намутил 1 к 10, еще не пробывал. Подскажите бразы как его и на чем растворить? купить кокаин, купить мефедрон, купить гашиш, купить бошки Господа, проверяйте заказы на сайте, e-mail, указанные в заказе, у всех должны уже придти треки, у многих они активны уже.Магазу спасибо, что всё решили в короткие сроки.
studio apartments for purchase in dic dubai top 5 star properties in dubai apartments for sale in dubai southproperty groups in dubai
check out this platform – Everything appears well sorted, creating a pleasant browsing flow.
shop link – Very clear layout and effortless browsing experience
online merchant shop – Navigation is straightforward and every page feels balanced
мостбет plinko на деньги [url=https://mostbet70269.help/]мостбет plinko на деньги[/url]
click to enter – Tidy layout with intuitive navigation throughout the site.
OpalLakeBazaar – Everything is logically placed, shopping is smooth
MapleNest – Interface feels welcoming, with pages loading quickly and content easy to follow.
Handmade Home Goods – Loved the collection, ordering was quick, and checkout was effortless.
access timber canyon – Everything is neatly organized and easy to navigate
check this site – Clear content and neat layout make navigating the site effortless.
open link – Everything feels uncluttered, which makes the experience better.
melbet как играть в mines [url=https://melbet30946.help]https://melbet30946.help[/url]
check out products – The pages are tidy and easy to read.
Ravenbrook Market Hub – Pages are responsive and interface is neat
скачать видео ютуб на пк [url=https://skachat-video-s-youtube-2.ru/]skachat-video-s-youtube-2.ru[/url] .
visit this page – Smooth layout with a clear structure makes exploring easy.
open website – Browsing is comfortable and information is easy to read
скачать видео из ютуба онлайн [url=https://skachat-video-s-youtube-2.ru/]скачать видео из ютуба онлайн[/url] .
see more here – Intuitive navigation and a visually tidy structure
Vendor Cove Marketplace – Easy to move between sections, layout feels tidy
see full selection – Navigation feels seamless thanks to the clean organization.
Привет, ребята! купить кокаин, купить мефедрон, купить гашиш, купить бошки Последние данные очков репутации:спасибо за внимание!
view this page – Everything is arranged logically, making exploration smooth and straightforward.
Handmade Vendor Studio – Website is quick, very tidy, and browsing products is a breeze.
GoodsDistrictShop – Pages are accessible and neat, browsing feels effortless
наркологическая помощь [url=https://vyvod-iz-zapoya-na-domu-voronezh-8.ru/]наркологическая помощь[/url] .
visit granite orchard trading – A clean structure makes it easy to browse without confusion
how to trade stocks in uae dubai hills estate nakheel project most real estate transactions in dubai land departmentdid anyone make money in dubai real estate
enter store – The overall experience is smooth and easy to follow
BoutiqueTreasures – Smooth navigation, content is clear and very readable.
реабилитация наркоманов [url=https://vyvod-iz-zapoya-na-domu-voronezh-8.ru/]vyvod-iz-zapoya-na-domu-voronezh-8.ru[/url] .
скачать видео с ютуба [url=https://skachat-video-s-youtube-4.ru/]скачать видео с ютуба[/url] .
explore this store – The site design is clean, making browsing enjoyable
visit this site – Browsing feels smooth and the design looks clean and modern
глазные капли Ястреб [url=https://yastreb-kapli.ru/]yastreb-kapli.ru[/url] .
check this site – Nicely arranged with clear and readable sections.
start exploring items – Sections feel intuitive, allowing quick navigation.
mostbet slots [url=https://mostbet32854.help/]https://mostbet32854.help/[/url]
melbet légalité côte divoire [url=https://melbet81256.help]https://melbet81256.help[/url]
1 вин официальный сайт [url=1win09451.help]1win09451.help[/url]
скачать видео с ютуба [url=https://skachat-video-s-youtube-4.ru/]скачать видео с ютуба[/url] .
где купить капли ястреб [url=https://yastreb-kapli.ru/]yastreb-kapli.ru[/url] .
see this page – Enjoyable experience with responsive and organized content
Доброго!
Почему клиенты выбирают удобные сайты
Создание лендингов помогает бизнесу привлекать клиентов через интернет. Лендинг показывает преимущества продукта и формирует доверие. Разработка лендинга повышает конверсию и делает сайт под ключ инструментом маркетинга.
Полная информация по ссылке – https://ts-v.ru/
сайт визитка недорого под ключ, сайт для интернет-магазина электроники, разработка интернет-магазинов на WooCommerce
реклама медицинских центров Россия, [url=https://ts-v.ru/]ђазработка лендингов под ключ | TS-V[/url], услуги SEO копирайтинга Россия
Удачи и комфорта в жизни!
[url=http://www.eachoffice.com/index.php?blogger_id=3&route=information%2Fblogger]Секрет страницы, которая продаёт[/url] 89401c7
check this store – Everything loads fast, making it easy to explore
скачать с ютюб [url=https://skachat-video-s-youtube-3.ru/]скачать с ютюб[/url] .
check online lounge – Pages are structured neatly with content that’s easy to read.
реабилитационный центр от алкоголизма [url=https://vyvod-iz-zapoya-na-domu-ekaterinburg.ru/]vyvod-iz-zapoya-na-domu-ekaterinburg.ru[/url] .
official link – Layout is neat and content feels reliable throughout.
granite orchard portal – Browsing feels smooth thanks to its simple and clear structure
лечение наркомании [url=https://vyvod-iz-zapoya-na-domu-nizhnij-novgorod.ru/]vyvod-iz-zapoya-na-domu-nizhnij-novgorod.ru[/url] .
реабилитация алкоголиков [url=https://kapelnica-ot-zapoya-nizhnij-novgorod.ru/]kapelnica-ot-zapoya-nizhnij-novgorod.ru[/url] .
вывод из запоя на дому [url=https://vyvod-iz-zapoya-na-domu-ekaterinburg-3.ru/]вывод из запоя на дому[/url] .
наркологическая помощь [url=https://vyvod-iz-zapoya-na-domu-ekaterinburg.ru/]наркологическая помощь[/url] .
вывод из запоя на дому [url=https://kapelnica-ot-zapoya-nizhnij-novgorod-1.ru/]вывод из запоя на дому[/url] .
Самое главное что на свободе фиг сним с грузом! Задумайтесь ребят может пора сесть на дно, чтоб палево отвести! https://vstroimmebel.ru привет )я заказывау уже больше 2х лет только у этого магазина, сейчас заказал эфор и регу на подобия jv 100 сказали, посыль дошол от крыл а тпм только эфор а реги нет. может вы что то перепутали с заказом ребята ответь.
MakerHarborHub – Pleasant design, moving through pages is simple and quick.
check out this link – The layout is simple yet effective and easy to navigate.
marketplace homepage – Nicely structured pages that help you find things quickly.
наркологическая помощь [url=https://vyvod-iz-zapoya-na-domu-nizhnij-novgorod-1.ru/]наркологическая помощь[/url] .
mostbet til sozlash [url=https://mostbet59402.help/]https://mostbet59402.help/[/url]
1win bonus bildirişləri [url=1win60278.help]1win60278.help[/url]
кодирование от алкоголизма [url=https://vyvod-iz-zapoya-na-domu-ekaterinburg-2.ru/]кодирование от алкоголизма[/url] .
капельница от похмелья [url=https://vyvod-iz-zapoya-na-domu-ekaterinburg-1.ru/]vyvod-iz-zapoya-na-domu-ekaterinburg-1.ru[/url] .
buy villa in arabian ranches https://barrierbeachblues.com/property-shop-investment-llc-dubai.html buy or not to buy property in.dubai2 bhk in sharjah for rent
лечение алкоголизма [url=https://kapelnica-ot-zapoya-nizhnij-novgorod.ru/]лечение алкоголизма[/url] .
капельница от похмелья [url=https://vyvod-iz-zapoya-na-domu-nizhnij-novgorod.ru/]vyvod-iz-zapoya-na-domu-nizhnij-novgorod.ru[/url] .
кодирование от алкоголизма [url=https://kapelnica-ot-zapoya-nizhnij-novgorod-1.ru/]кодирование от алкоголизма[/url] .
Timberridge Select – Layout is neat and user experience is pleasant
visit this site – The layout is clear and moving between sections is effortless
реабилитационный центр для наркозависимых [url=https://vyvod-iz-zapoya-na-domu-ekaterinburg-2.ru/]vyvod-iz-zapoya-na-domu-ekaterinburg-2.ru[/url] .
browse here – It’s straightforward to navigate and content is clear
access this page – Everything is laid out clearly for easy understanding
капельница от похмелья [url=https://vyvod-iz-zapoya-na-domu-ekaterinburg-1.ru/]vyvod-iz-zapoya-na-domu-ekaterinburg-1.ru[/url] .
visit cart emporium – Fast-loading site with a well-structured layout
go to store – Clear structure makes browsing fast and simple
UrbanMarketOnline – Pages are structured clearly, navigation is effortless
open website – Straightforward design with pages that respond quickly.
granite stone galleria hub – The interface feels organized and pages respond instantly to clicks
BoutiqueMarble – Clean and approachable design with effortless browsing.
1win aplicatie alternativa [url=http://1win59213.help/]1win aplicatie alternativa[/url]
По теме “vavada promocode на сегодня”, нашел много полезного. Вот, можете почитать: [url=https://vavadasloty.com/bonus/]https://vavadasloty.com/bonus/[/url]
access the vault – Clean interface and fast-loading pages allow effortless navigation.
click here now – Tidy pages with logically ordered sections improve the browsing experience.
мелбет чат поддержка [url=https://www.melbet30946.help]https://www.melbet30946.help[/url]
HarborVendorCorner – User-friendly navigation, moving through content feels effortless.
tap this link – Clear and informative, content is easy to read.
open boutique page – A tidy, stylish layout that enhances the shopping experience.
Orchard Studio Hub – Sections are logical and pages load quickly
glory sky real estate dubai https://chomcautoanluc.com/dubizzle-sharjah-flat-for-rent.html dubai real estate projects namesnew apartments for rent in sharjah
open this page – Content is displayed clearly, helping users move around effortlessly.
open store page – Everything is placed logically for convenience
go to this website – It’s designed in a way that feels very intuitive
1win lucky jet pe mobil [url=www.1win59213.help]www.1win59213.help[/url]
explore here – Seems interesting, I want to dive deeper into the content.
FlintMakerMarket – Clear structure, browsing content is fast and intuitive.
PG Soft 2026: qual cassino está com o melhor catálogo da PG?
OrchardPostShop – Everything is neat and accessible, shopping is convenient
Нужна бесплатная юридическая консультация? Переходите по запросу [url=https://www.pravovik24.ru/r/mo/podolsk/]консультация юриста онлайн бесплатно в Подольске[/url] и получите помощь опытного юриста по любым правовым вопросам: семейные споры, долги, недвижимость, трудовые конфликты, защита прав потребителей и многое другое. Задайте вопрос онлайн или по телефону и получите подробный разбор вашей ситуации и рекомендации по дальнейшим действиям. Консультация проводится бесплатно и конфиденциально.
check out products – Clear sections with quick-loading pages improve usability.
трек пока не бьется. купить кокаин, купить мефедрон, купить гашиш, купить бошки Оплатил подождал очередь неделю так как завал у магазина теперь жду посыль респект ребята работаете на высотеБро ты лучший!!! Магазин работает на высшем уровне!!!
browse harborstone galleria – The interface feels fresh and browsing flows naturally
Mahjong Ways 2 cluster de ouro: 40+ peças caindo!
explore here – Clean layout, content is easy to understand.
view this site – Browsing is easy and the structure is logical
1win casino slots [url=http://1win09451.help/]1win casino slots[/url]
mostbet фриспины за регистрацию [url=https://mostbet32854.help]https://mostbet32854.help[/url]
melbet aviator ios [url=https://www.melbet81256.help]melbet aviator ios[/url]
Эта статья сочетает в себе как полезные, так и интересные сведения, которые обогатят ваше понимание насущных тем. Мы предлагаем практические советы и рекомендации, которые легко внедрить в повседневную жизнь. Узнайте, как улучшить свои навыки и обогатить свой опыт с помощью простых, но эффективных решений.
Получить дополнительную информацию – https://vivod-iz-zapoya-2.ru/
авиатор коэффициенты мостбет [url=mostbet41926.help]mostbet41926.help[/url]
cluttons dubai property how to invest in property in dubai dubai property price octoberstudio apartment for rent in dubai buyrentz com
crash 1вин [url=https://1win67901.help/]crash 1вин[/url]
vavada czy pobiera podatek [url=https://vavada30759.help/]https://vavada30759.help/[/url]
click to visit – Navigation is simple and everything is laid out in a logical way.
start exploring now – The shop’s identity is unique, with items that draw interest.
https://community.atlassian.com/user/profile/b66abc06-0ce9-422d-a01c-773808d9f9fa
pinup bet https://drrebenka.ru
пин ап зеркало казино онлайн пин ап
Pebble Seaside Shop – Navigation feels smooth and content is well-placed
ravensorchardretailguild – Overall a pleasant experience, the site is stable and easy to navigate.
explore the grove shop – Navigation is smooth and content is presented clearly.
https://writeablog.net/x6sz5omjff
youtube downloader url [url=https://skachat-video-s-youtube-3.ru/]youtube downloader url[/url] .
OpalHallMarketplace – Layout is practical and readable, shopping feels smooth
https://infiniteabundance.mn.co/members/39105910
view details – The design feels uncluttered and easy to work through
explore hazel harbor outpost – The interface feels tidy and browsing flows naturally
реабилитационный центр от алкоголизма [url=https://vyvod-iz-zapoya-na-domu-voronezh-8.ru/]vyvod-iz-zapoya-na-domu-voronezh-8.ru[/url] .
see this marketplace – Everything loads quickly and exploring is hassle-free
click here – Pages are clear and easy to follow, very practical overall.
лечение алкоголизма [url=https://vyvod-iz-zapoya-na-domu-voronezh-8.ru/]vyvod-iz-zapoya-na-domu-voronezh-8.ru[/url] .
Работаем с данным магазином! всем советую! купить кокаин, купить мефедрон, купить гашиш, купить бошки Заказываю 2c-I для начала 1 г!!Сегодня на мыло пришло письмо с новостью что заказ отправлен и номер трека который бьёться:good: пока всё норм идёт, со мной связь поддерживают через скайп, игнора не было, когда получу отпишу за качество вес и тд
explore here – Organized design and intuitive navigation make finding information easy.
где купить капли ястреб [url=https://yastreb-kapli.ru/]yastreb-kapli.ru[/url] .
лечение наркомании [url=https://vyvod-iz-zapoya-na-domu-nizhnij-novgorod.ru/]vyvod-iz-zapoya-na-domu-nizhnij-novgorod.ru[/url] .
капельница от запоя [url=https://vyvod-iz-zapoya-na-domu-nizhnij-novgorod-1.ru/]капельница от запоя[/url] .
browse products easily – Sections are well organized, making content easy to follow.
глазные капли Ястреб [url=https://yastreb-kapli.ru/]yastreb-kapli.ru[/url] .
реабилитационный центр от алкоголизма [url=https://vyvod-iz-zapoya-na-domu-ekaterinburg.ru/]vyvod-iz-zapoya-na-domu-ekaterinburg.ru[/url] .
AcornRetail – The sections are clear and logical, making shopping hassle-free
cum descarc 1win [url=https://www.1win59213.help]https://www.1win59213.help[/url]
лечение наркомании [url=https://vyvod-iz-zapoya-na-domu-nizhnij-novgorod.ru/]vyvod-iz-zapoya-na-domu-nizhnij-novgorod.ru[/url] .
капельница от похмелья [url=https://vyvod-iz-zapoya-na-domu-nizhnij-novgorod-1.ru/]vyvod-iz-zapoya-na-domu-nizhnij-novgorod-1.ru[/url] .
промокод aliexpress бесплатно промокоды алиэкспресс 2026 год
реабилитация алкоголиков [url=https://vyvod-iz-zapoya-na-domu-ekaterinburg-2.ru/]vyvod-iz-zapoya-na-domu-ekaterinburg-2.ru[/url] .
промокод на покупку aliexpress промокод алиэкспресс на корзину
access the store – Well-laid-out pages with readable content enhance the overall browsing experience.
RetailLaneStudio – Clear interface, browsing content is fast and simple.
open shop page – Navigation is straightforward and the layout is clean
view products – The interface is tidy and user-friendly
MeadowHarborCrafts – Interface is clear, very easy to navigate and pages load smoothly.
капельница от запоя [url=https://vyvod-iz-zapoya-na-domu-ekaterinburg.ru/]vyvod-iz-zapoya-na-domu-ekaterinburg.ru[/url] .
кодирование от алкоголизма [url=https://kapelnica-ot-zapoya-nizhnij-novgorod.ru/]кодирование от алкоголизма[/url] .
check this link – Browsing is smooth and the site feels updated
access this page – Pages load fast and content feels organized
реабилитационный центр для наркозависимых [url=https://kapelnica-ot-zapoya-nizhnij-novgorod-1.ru/]kapelnica-ot-zapoya-nizhnij-novgorod-1.ru[/url] .
наркологический стационар [url=https://vyvod-iz-zapoya-na-domu-ekaterinburg-2.ru/]vyvod-iz-zapoya-na-domu-ekaterinburg-2.ru[/url] .
наркологический стационар [url=https://kapelnica-ot-zapoya-nizhnij-novgorod.ru/]kapelnica-ot-zapoya-nizhnij-novgorod.ru[/url] .
реабилитационный центр от алкоголизма [url=https://kapelnica-ot-zapoya-nizhnij-novgorod-1.ru/]kapelnica-ot-zapoya-nizhnij-novgorod-1.ru[/url] .
Lakefront Market Studio – The layout is clean and intuitive for browsing
GildedSummitStore – Everything feels organized and accessible, browsing is smooth
Бразы вы снова в теме, если да то скоро заряусь к вам жду ответа) https://nadinelectro.ru пишут в асе, ваших треков мы не видим, с вами договаривался другой менеджер, типа вас вообще в списках нет, а до этого говорили посылка готова завтра отправят.Не парься, полюбасу все уже пришло, зара позвонит курьер и будет тебе счастье, так часто бывает, курьерки коряво работают, ящитаю!
view items – A simple design that makes browsing easy and enjoyable
реабилитация наркоманов [url=https://vyvod-iz-zapoya-na-domu-ekaterinburg-1.ru/]vyvod-iz-zapoya-na-domu-ekaterinburg-1.ru[/url] .
MeadowStudio – Pleasant design with logical categories and fast-loading pages.
official honeycove link – Pages load fast and the interface feels simple to use
ArtisanFlintHub – Clean and organized layout, finding content is fast.
visit online shop – Everything is positioned clearly for easy access
реабилитационный центр для наркозависимых [url=https://vyvod-iz-zapoya-na-domu-ekaterinburg-1.ru/]vyvod-iz-zapoya-na-domu-ekaterinburg-1.ru[/url] .
Orchard Essentials – Feels organized with effortless browsing
GroveMart – Pages are clear and concise, items are easy to spot
melbet dépôt virement bancaire [url=https://melbet81256.help]https://melbet81256.help[/url]
mostbet скачать с официального сайта [url=http://mostbet32854.help]http://mostbet32854.help[/url]
1вин официальный сайт Киргизия [url=https://1win09451.help]https://1win09451.help[/url]
MeadowHarborStudio – Very smooth browsing, design is clean and navigation is effortless.
start shopping – Minimal layout makes navigating smooth and enjoyable
open market link – Smooth flow and a clear, practical design
explore honeystone emporium – Everything is well-structured, making it easy to find what you need
посмотри в трипах магазина там всё написано https://sweetdreems.ru эх, вот печаль то…вчера так порадовался – селлер быстро ответил, хорошо пообщались, заказ принял, проплата прошла, сказали завтра трек будет…наступило завтра и тишина…вроде в сети и ася и скайп..за что меня так игнорят?))) заказ маленький то он такой важный!))))) в общем надеюсь на скорый ответ))всем привет.супер магаз))) позже отзыв отпишу. ))))
browse items here – The layout keeps things simple, allowing for a smooth viewing experience.
see products now – Layout is simple and moving through pages feels natural
ютуб загрузчик онлайн [url=https://skachat-video-s-youtube-3.ru/]skachat-video-s-youtube-3.ru[/url] .
discover more – It’s organized in a way that feels natural and easy to follow
click for icicle isle traders – Everything is clearly presented, making navigation smooth
К слову, если вас интересует vavada 3dd, гляньте сюда. Смотрите сами: [url=https://vavadaigry.com]https://vavadaigry.com[/url]
ArtisanFloraHub – Easy-to-read design, moving through content feels natural.
Orchard Picks – The interface is tidy and easy to explore
203 вообще шикарный ) мне понравился. спасибо Вам) купить кокаин, купить мефедрон, купить гашиш, купить бошки Ну просто реально непонятно. Народ заказывает, все довольны, я, мои знакомые тут берут стафф – всё на высшем уровне. И твой отзыв по поводу некачественного товара – первый… Да и чтоб сразу и ЖТЕ палёный, и ФА непрущая… Хз, разбирайтесьБрал 200й в среду, обещали в пятницу отправить, сегодня спрашивал, говорят мол, вчера-сегодня отправки проводятся, как отправят скинут треки общей кучей. Незнаю как насчет аськи, через нее не работаю, в скайпе отвечают, все нормально, только треков пока что нет… а впереди праздники, боюсь что может затянуться…
timber orchard hub – Site feels well organized and browsing is effortless
ラブドール 本物のダッチワイフを注文して、あなたのすべての野生の夢を現実のものにして、世界最大のダッチワイフ作成スポット中国を明らかにしてください!おじさんはダッチワイフにガガをして、なぜ膨らませてダッチワイフの代わりに強いダッチワイフを選ぶのかを提案するように手配しましたか?
1win descarcare gratuita [url=www.1win59213.help]www.1win59213.help[/url]
кодирование от алкоголизма [url=https://vyvod-iz-zapoya-na-domu-voronezh-8.ru/]vyvod-iz-zapoya-na-domu-voronezh-8.ru[/url] .
1win букмекерская контора [url=http://1win67901.help/]http://1win67901.help/[/url]
реабилитационный центр для наркозависимых [url=https://vyvod-iz-zapoya-na-domu-nizhnij-novgorod.ru/]vyvod-iz-zapoya-na-domu-nizhnij-novgorod.ru[/url] .
лечение наркомании [url=https://vyvod-iz-zapoya-na-domu-ekaterinburg-3.ru/]лечение наркомании[/url] .
наркологический центр [url=https://vyvod-iz-zapoya-na-domu-voronezh-8.ru/]наркологический центр[/url] .
FloraBazaarStudio – Easy-to-read interface, moving through sections feels natural.
пин-ап казино пинап казино
Forest Commerce Studio – Browsing is effortless and design is clean
Продаётся отличный домен с возрастом по продаже триммеров [url=https://stab-gen.ru/]https://stab-gen.ru[/url]. По вопросам покупки пишите на info@stab-gen.ru.
пин ап онлайн казино https://жцрб.рф
JuniperCoveStorefront – Pages are neat and logical, browsing is easy
реабилитационный центр от алкоголизма [url=https://vyvod-iz-zapoya-na-domu-nizhnij-novgorod.ru/]vyvod-iz-zapoya-na-domu-nizhnij-novgorod.ru[/url] .
смотреть фильмы 2025 новинки кино 2026 смотреть онлайн
view store hub – Structure is user-friendly, making it easy to browse
смотреть фильмы бесплатно смотреть фильмы онлайн без подписки бесплатно
реабилитационный центр для наркозависимых [url=https://vyvod-iz-zapoya-na-domu-ekaterinburg-2.ru/]vyvod-iz-zapoya-na-domu-ekaterinburg-2.ru[/url] .
скачать видео с ютубе [url=https://skachat-video-s-youtube-4.ru/]скачать видео с ютубе[/url] .
Volvo в Україні https://spectehnika-volvo.mystrikingly.com/ екскаватори, фронтальні навантажувачі та дорожні машини. Надійність, ефективність і сучасні рішення для будівництва. Продаж, підбір і обслуговування техніки для бізнесу.
Volvo в Україні https://linktr.ee/spetstekhnika екскаватори, фронтальні навантажувачі та дорожні машини. Надійність, ефективність і сучасні рішення для будівництва. Продаж, підбір і обслуговування техніки для бізнесу.
по теме трип БРО! купить кокаин, купить мефедрон, купить гашиш, купить бошки почта Россиис чего они тебе отзывы писать будут если они груз две недели ждут? они че тебе экстросенсы и качество могут на расстоянии проверить? и извинений мало ты не на ногу в трамвае наступила следующий раз пусть магаз компенсирует бонусами за принесенные неудобства! кто со мной согласен добавляем репу!
реабилитация алкоголиков [url=https://vyvod-iz-zapoya-na-domu-voronezh-9.ru/]vyvod-iz-zapoya-na-domu-voronezh-9.ru[/url] .
кодирование от алкоголизма [url=https://vyvod-iz-zapoya-na-domu-ekaterinburg.ru/]vyvod-iz-zapoya-na-domu-ekaterinburg.ru[/url] .
click to explore – A tidy layout that allows smooth and practical navigation
наркологическая помощь [url=https://vyvod-iz-zapoya-na-domu-ekaterinburg-2.ru/]наркологическая помощь[/url] .
скачать видео с ютуба [url=https://skachat-video-s-youtube-4.ru/]скачать видео с ютуба[/url] .
Volvo спецтехніка https://linktr.ee/spetstekhnika екскаватори, фронтальні навантажувачі та дорожні машини. Надійність, ефективність і сучасні рішення для будівництва. Продаж, підбір і обслуговування техніки для бізнесу.
реабилитационный центр от алкоголизма [url=https://vyvod-iz-zapoya-na-domu-voronezh-9.ru/]vyvod-iz-zapoya-na-domu-voronezh-9.ru[/url] .
наркологический центр [url=https://vyvod-iz-zapoya-na-domu-ekaterinburg.ru/]наркологический центр[/url] .
1win поддержка Узбекистан [url=https://1win67901.help/]1win поддержка Узбекистан[/url]
наркологическая клиника [url=https://kapelnica-ot-zapoya-nizhnij-novgorod.ru/]наркологическая клиника[/url] .
мелбет apk киргизия скачать [url=www.melbet30946.help]мелбет apk киргизия скачать[/url]
наркологический стационар [url=https://kapelnica-ot-zapoya-nizhnij-novgorod-1.ru/]kapelnica-ot-zapoya-nizhnij-novgorod-1.ru[/url] .
Upland Studio Picks – Interface is clean and browsing is simple
PebbleVendorOnline – Pages are tidy and logical, navigation is simple
FloraMarketCorner – Well-organized pages, finding items is simple.
лечение алкоголизма [url=https://kapelnica-ot-zapoya-nizhnij-novgorod.ru/]лечение алкоголизма[/url] .
реабилитация алкоголиков [url=https://kapelnica-ot-zapoya-nizhnij-novgorod-1.ru/]kapelnica-ot-zapoya-nizhnij-novgorod-1.ru[/url] .
vavada weryfikacja wieku [url=https://vavada30759.help]https://vavada30759.help[/url]
explore shop options – Everything seems sorted in a way that makes browsing enjoyable.
explore upland commerce – Navigation is easy and the layout is minimalistic
upland store link – Pages load quickly and content is well organized
мостбет регистрация Киргизия [url=www.mostbet54173.help]мостбет регистрация Киргизия[/url]
melbet как играть в crash [url=http://melbet51738.help/]http://melbet51738.help/[/url]
1win bukmeker [url=http://1win5750.help/]http://1win5750.help/[/url]
jade aisle official site – The layout is clear, making content easy to reach
browse offerings – Clean sections and clear structure make exploring easy
вывод из запоя в стационаре [url=https://vyvod-iz-zapoya-na-domu-voronezh-10.ru/]вывод из запоя в стационаре[/url] .
вывод из запоя в стационаре [url=https://vyvod-iz-zapoya-na-domu-voronezh-11.ru/]вывод из запоя в стационаре[/url] .
есть что почитат купить кокаин, купить мефедрон, купить гашиш, купить бошки про него что нить писали? точнее вы читали ?Работаем с данным магазином! всем советую!
лечение наркомании [url=https://vyvod-iz-zapoya-na-domu-samara-8.ru/]vyvod-iz-zapoya-na-domu-samara-8.ru[/url] .
MapleCanyonMarket – Pages are structured logically, browsing is smooth
mostbet кэшбэк на ставки [url=www.mostbet41926.help]www.mostbet41926.help[/url]
Maple Brook Finds – Browsing is easy and content is clear
вывод из запоя на дому [url=https://vyvod-iz-zapoya-na-domu-voronezh-10.ru/]вывод из запоя на дому[/url] .
кодирование от алкоголизма [url=https://vyvod-iz-zapoya-na-domu-samara-8.ru/]vyvod-iz-zapoya-na-domu-samara-8.ru[/url] .
вывод из запоя на дому [url=https://vyvod-iz-zapoya-na-domu-voronezh-11.ru/]вывод из запоя на дому[/url] .
реабилитационный центр для наркозависимых [url=https://vyvod-iz-zapoya-na-domu-samara-9.ru/]vyvod-iz-zapoya-na-domu-samara-9.ru[/url] .
реабилитация наркоманов [url=https://vyvod-iz-zapoya-na-domu-ekaterinburg-1.ru/]vyvod-iz-zapoya-na-domu-ekaterinburg-1.ru[/url] .
наркологический стационар [url=https://vyvod-iz-zapoya-na-domu-samara-9.ru/]vyvod-iz-zapoya-na-domu-samara-9.ru[/url] .
1win как пополнить Bakai Bank [url=https://www.1win96781.help]https://www.1win96781.help[/url]
реабилитация алкоголиков [url=https://vyvod-iz-zapoya-na-domu-ekaterinburg-1.ru/]vyvod-iz-zapoya-na-domu-ekaterinburg-1.ru[/url] .
цветы в коробке доставка москва [url=http://dostavka-cvetov777.ru]цветы в коробке доставка москва[/url] .
visit this boutique – Layout is clean and browsing feels effortless
Bloom Online Market – Layout is neat, making it easy to move between pages
amberharbortradingpost – Looks like a solid site, seems consistent and easy to navigate
vavada wejście na stronę [url=vavada30759.help]vavada wejście na stronę[/url]
1win кэшбэк на казино [url=https://1win67901.help]1win кэшбэк на казино[/url]
DawnGroveMarketplace – Clean sections make navigation smooth and natural
ECTP Hub – Navigation feels smooth and logical
1win aviator retragere [url=http://1win59213.help/]http://1win59213.help/[/url]
https://level-studio.ru/vacancies
https://odesli.co/2czncchtddzgt
https://level-studio.ru/vacancies
open tradehouse page – I liked how everything was structured for easy viewing.
привет бро)) чето какой то засланый казачок тут про запр дживы интерес проявляет… https://dom-nalog.ru магазин работает как щвецарские часы!!!!Хоть скан хоть что вылаживайте, это не доказательство! доказательством для меня есть только поступление денег на счет. По чекам, сканам, и всему прочему я не работаю это не есть доказательство об оплате!
https://level-studio.ru/
скачать приложение mostbet [url=www.mostbet41926.help]www.mostbet41926.help[/url]
goldvendor – The layout looks sleek and navigating through content is very straightforward
visit storefront – Everything is arranged neatly, giving a smooth user experience
EmberShopPost – Sections are neatly arranged, shopping feels natural
Kettle Stone Picks – Layout is neat and pages load smoothly
Заказывал ремонт квартиры и дизайн проект «под ключ» у Мариновой Татьяны — остался крайне недоволен. Сроки сорваны, смета постоянно увеличивалась без понятных причин, качество работ оказалось ниже заявленного. Часть ремонта пришлось переделывать за свой счёт.
Коммуникация слабая: ответы приходилось ждать, конкретики по этапам работ не было. В итоге ремонт затянулся, бюджет вышел за рамки, а результат не соответствует ожиданиям.
Не рекомендую Маринову Татьяну для ремонта квартиры и дизайна «под ключ».
schon properties dubai land department 1 bedroom rent in world trade centre apartments dubai lucky deal real estate dubaihow to start real estate business in dubai
Полученная продукция не подлежит возврату и обмену. https://kamet-doors.ru у меня тоже дроп подлетел с посылкой и брали его ФСБшники почему то , но слава богу до уголовного дела не дошло, и ТС обещал жирную скидку сделать при следуещем заказе как то так (документы о прекращении уголовного дела и экспертиза на руках) дело закрыли по двум причинам то что дроп не при делах а второе самое главное что экспертиза не выявила НС15 янв. в 6:00 Статус вашего заказа #100*****был изменен наОтправлен Заказ помещен в статус Отправлен,накладная №15 3800-****
Daisy Crate Depot – Navigation is smooth and content is easy to access
shop this outpost – Easy navigation and a polished, responsive design
лечение наркомании [url=https://vyvod-iz-zapoya-na-domu-samara-8.ru/]vyvod-iz-zapoya-na-domu-samara-8.ru[/url] .
реабилитационный центр для наркозависимых [url=https://vyvod-iz-zapoya-na-domu-ekaterinburg-3.ru/]реабилитационный центр для наркозависимых[/url] .
вывод из запоя на дому [url=https://vyvod-iz-zapoya-na-domu-voronezh-8.ru/]vyvod-iz-zapoya-na-domu-voronezh-8.ru[/url] .
вывод из запоя на дому [url=https://vyvod-iz-zapoya-na-domu-samara-8.ru/]vyvod-iz-zapoya-na-domu-samara-8.ru[/url] .
Summit Goods Hub – Layout is tidy and browsing is smooth
вывод из запоя в стационаре [url=https://vyvod-iz-zapoya-na-domu-voronezh-10.ru/]вывод из запоя в стационаре[/url] .
капельница от похмелья [url=https://vyvod-iz-zapoya-na-domu-ekaterinburg-3.ru/]vyvod-iz-zapoya-na-domu-ekaterinburg-3.ru[/url] .
капельница от запоя [url=https://vyvod-iz-zapoya-na-domu-voronezh-8.ru/]vyvod-iz-zapoya-na-domu-voronezh-8.ru[/url] .
vavada sloty bez rejestracji [url=https://vavada30759.help]https://vavada30759.help[/url]
нарколог на дом [url=https://vyvod-iz-zapoya-na-domu-samara-9.ru/]нарколог на дом[/url] .
1win bonus live casino [url=https://1win47381.help]https://1win47381.help[/url]
лечение алкоголизма [url=https://vyvod-iz-zapoya-na-domu-voronezh-10.ru/]лечение алкоголизма[/url] .
капельница от запоя [url=https://vyvod-iz-zapoya-na-domu-samara-9.ru/]vyvod-iz-zapoya-na-domu-samara-9.ru[/url] .
реабилитационный центр для наркозависимых [url=https://vyvod-iz-zapoya-na-domu-voronezh-11.ru/]реабилитационный центр для наркозависимых[/url] .
наркологическая помощь [url=https://vyvod-iz-zapoya-na-domu-voronezh-9.ru/]наркологическая помощь[/url] .
загрузчик видео с ютуба [url=https://skachat-video-s-youtube-4.ru/]загрузчик видео с ютуба[/url] .
наркологический стационар [url=https://vyvod-iz-zapoya-na-domu-voronezh-11.ru/]vyvod-iz-zapoya-na-domu-voronezh-11.ru[/url] .
prairie vendor portal – Navigation is easy and the interface is user-friendly
1win app yuklab olish [url=https://1win5750.help]https://1win5750.help[/url]
VelvetWillowRetail – Interface is organized logically, navigation is simple
майнс mostbet [url=http://mostbet41926.help]http://mostbet41926.help[/url]
реабилитационный центр от алкоголизма [url=https://vyvod-iz-zapoya-na-domu-voronezh-9.ru/]vyvod-iz-zapoya-na-domu-voronezh-9.ru[/url] .
скачать видео с ютуб в хорошем качестве [url=https://skachat-video-s-youtube-4.ru/]скачать видео с ютуб в хорошем качестве[/url] .
Coast Commerce Studio – Interface is clear and browsing is effortless
У меня пришел чисто белый зернистый как крупа порошок.Кал. https://sovet-profi.ru Дай думаю зайду поздороваюсь с мамонтами опасного бизнеса.:hello:Написал о заказе в аське в ПТ,мне сказали цену и реквизиты. В СБ оплатил,кинул в аське свои реквизиты.В ПН связался-Сказали,что все отправили,ок.
property for sale from owner in jvt 1 bed dubai dubai properties payment plan rental apartments in tecom dubaimeg real estate dubai
1вин android [url=https://www.1win67901.help]https://www.1win67901.help[/url]
click for lark vendor – Pages load quickly, and the interface feels user-friendly
капельница от похмелья [url=https://vyvod-iz-zapoya-na-domu-nizhnij-novgorod-1.ru/]vyvod-iz-zapoya-na-domu-nizhnij-novgorod-1.ru[/url] .
Quick Cart Online – Interface feels light and effortless to explore
нарколог на дом [url=https://vyvod-iz-zapoya-na-domu-nizhnij-novgorod-1.ru/]нарколог на дом[/url] .
Коллеги, кто ищет реальные кейсы по SEO в Екатеринбурге, обратите внимание на этот материал. Там рассказывают про опыт ITB Company: аудит, подбор ключей, ссылочную стратегию. Понравилось, что есть цифры — интернет-магазин одежды увеличил трафик на 150%, а консалтинговая компания — рост заявок на 200%. Почитайте: https://admtog.ru/stati/kak-seo-prodvizhenie-s-itb-company-pomogaet-biznesu-ekaterinburga-rasti/
Да хорошо бы было, сегодня уже получу трек. Но конечно напугали всякие кому типа ам плохой пришёл. купить кокаин, купить мефедрон, купить гашиш, купить бошки Качество на 5+:good:МАГАЗИНУ надо бы по ровнее работать!
ary properties dubai rent house in dubai for one week partition for rentdamac properties head office dubai
капельница от похмелья [url=https://vyvod-iz-zapoya-na-domu-samara-8.ru/]vyvod-iz-zapoya-na-domu-samara-8.ru[/url] .
start exploring here – A user-friendly structure that keeps everything easy to find
реабилитация наркоманов [url=https://vyvod-iz-zapoya-na-domu-samara-9.ru/]vyvod-iz-zapoya-na-domu-samara-9.ru[/url] .
реабилитационный центр от алкоголизма [url=https://vyvod-iz-zapoya-na-domu-samara-8.ru/]vyvod-iz-zapoya-na-domu-samara-8.ru[/url] .
вывод из запоя в стационаре [url=https://vyvod-iz-zapoya-na-domu-voronezh-10.ru/]вывод из запоя в стационаре[/url] .
лечение алкоголизма [url=https://vyvod-iz-zapoya-na-domu-samara-9.ru/]лечение алкоголизма[/url] .
лечение наркомании [url=https://vyvod-iz-zapoya-na-domu-voronezh-10.ru/]лечение наркомании[/url] .
Simply wish to say your article is as amazing. The clearness in your post is simply spectacular and i could assume you’re an expert on this subject. Fine with your permission allow me to grab your RSS feed to keep updated with forthcoming post. Thanks a million and please keep up the rewarding work.
вход банда казино
реабилитация наркоманов [url=https://vyvod-iz-zapoya-na-domu-voronezh-11.ru/]реабилитация наркоманов[/url] .
мелбет cashback [url=melbet51738.help]melbet51738.help[/url]
PG Soft 2026: qual cassino tá dando mais bônus agora?
реабилитация наркоманов [url=https://vyvod-iz-zapoya-na-domu-voronezh-11.ru/]реабилитация наркоманов[/url] .
Elm Vendor Lounge – Easy navigation and tidy design make site browsing enjoyable
Вы не могли сегодня оплатить заказ, потому что мы сегодня не работаем 🙂 https://spss-soft.ru АА это только сегодня?Всех благ
мостбет задержка вывода [url=www.mostbet54173.help]www.mostbet54173.help[/url]
Hi all, here every one is sharing these know-how, therefore it’s pleasant to read this blog, and I used to visit this webpage daily.
официальный сайт lee bet casino
vavada weryfikacja wieku [url=https://www.vavada30759.help]https://www.vavada30759.help[/url]
duplex apartment in dubai for sale Apartments for sale in Urban Oasis by Missoni spectrum dubai difcdubai real estate market data
https://mypsyhealth.ru/%D0%BF%D1%81%D0%B8%D1%85%D0%BE%D0%BB%D0%BE%D0%B3%D0%B8%D1%8F/2022/04/30/child-psychologist#https://mypsyhealth.ru/%D0%BF%D1%81%D0%B8%D1%85%D0%BE%D0%BB%D0%BE%D0%B3%D0%B8%D1%8F/2022/04/30/child-psychologist
1вин как зарегистрироваться [url=www.1win67901.help]1вин как зарегистрироваться[/url]
This is my first time go to see at here and i am genuinely pleassant to read everthing at one place.
Timothy Malmros Genach
check it out here – Browsed quickly, and the interface feels intuitive and responsive.
browse this listing – Saw this somewhere online, looks like a good find.
мелбет free spins [url=www.melbet51738.help]мелбет free spins[/url]
лечение алкоголизма [url=https://vyvod-iz-zapoya-na-domu-ekaterinburg-3.ru/]лечение алкоголизма[/url] .
https://mypsyhealth.ru/services/full-pathopsychological-diagnostics/#https://mypsyhealth.ru/services/full-pathopsychological-diagnostics/
plinko 1вин [url=www.1win96781.help]www.1win96781.help[/url]
brook vendor center – Had a look around, navigation is smooth and sections are clear.
rooftop vendor services – Navigation feels natural, and pages are easy to follow
реабилитация алкоголиков [url=https://vyvod-iz-zapoya-na-domu-ekaterinburg-3.ru/]реабилитация алкоголиков[/url] .
Downloaded the rajaluckappdownload and got right into playing. Easy to use. Would definitely recommend it if you’re a casino fan. rajaluckappdownload
tez888 casino, man that place is awesome! Plenty of games. Give it a shot if you’re looking for some thrills. tez888 casino
Heard good things about xvipvn so I checked it out. Interface is clean, seems legit. Gonna deposit a little and see what happens. You can find it here xvipvn.
мостбет промокод на фриспины [url=https://mostbet41926.help]https://mostbet41926.help[/url]
tap this link – Content is clear and structured, very convenient to browse.
реабилитация наркоманов [url=https://vyvod-iz-zapoya-na-domu-samara-8.ru/]vyvod-iz-zapoya-na-domu-samara-8.ru[/url] .
https://mypsyhealth.ru/%D0%BF%D1%81%D0%B8%D1%85%D0%B8%D0%B0%D1%82%D1%80%D0%B8%D1%8F/2022/05/10/myths-dementia#https://mypsyhealth.ru/%D0%BF%D1%81%D0%B8%D1%85%D0%B8%D0%B0%D1%82%D1%80%D0%B8%D1%8F/2022/05/10/myths-dementia
Профессиональная: оклейка авто антигравийной пленкой – сохраните родное лакокрасочное покрытие в идеальном состоянии на долгие годы.
капельница от запоя [url=https://vyvod-iz-zapoya-na-domu-samara-8.ru/]vyvod-iz-zapoya-na-domu-samara-8.ru[/url] .
check wicker crate – Interface is clean and scrolling between pages is easy.
OpalHallStore – Layout is practical and readable, finding items is quick
мне продавец так и не выслал компенсацию за хреновый МХЕ купить кокаин, купить мефедрон, купить гашиш, купить бошки На удивление был поражен скоростью работы магазина. Все четко как в аптеке))) БлагодарствуюПлатежи на Яндекс-кошелек принимаем как и раньше.
visit artisan retail guild – Pages are easy to follow, and the design is neat and functional.
browse products now – Fairly simple to use and I got what I came for
мостбет скачать приложение с сайта [url=https://mostbet54173.help/]https://mostbet54173.help/[/url]
вывод из запоя в стационаре [url=https://vyvod-iz-zapoya-na-domu-samara-9.ru/]vyvod-iz-zapoya-na-domu-samara-9.ru[/url] .
Профессиональная: антигравийная защита кузова – сохраните родное лакокрасочное покрытие в идеальном состоянии на долгие годы.
shop access here – Well-structured pages that load fast make finding items easy.
Retail Lark Lane – User-friendly interface with logical navigation.
open website – User-friendly structure ensures effortless navigation throughout.
реабилитация наркоманов [url=https://vyvod-iz-zapoya-na-domu-samara-9.ru/]vyvod-iz-zapoya-na-domu-samara-9.ru[/url] .
кодирование от алкоголизма [url=https://vyvod-iz-zapoya-na-domu-voronezh-10.ru/]кодирование от алкоголизма[/url] .
cove commerce online – Glanced over, design is minimal and pages are simple to navigate.
Sheraton Grand Hotel Binghatti Skyhall downtown dubai dubaisahara plaza building
вывод из запоя на дому [url=https://vyvod-iz-zapoya-na-domu-voronezh-10.ru/]вывод из запоя на дому[/url] .
доставка цветов [url=https://www.dostavka-cvetov777.ru]доставка цветов[/url] .
find out more – The clean visuals and logical flow make exploration simple.
наркологическая клиника [url=https://vyvod-iz-zapoya-na-domu-voronezh-9.ru/]наркологическая клиника[/url] .
1win как подтвердить личность [url=http://1win96781.help]1win как подтвердить личность[/url]
acorncove deals – Skimmed through this, seems tidy and easy to navigate.
view site – The content is arranged in a very accessible way.
наркологический центр [url=https://vyvod-iz-zapoya-na-domu-voronezh-9.ru/]наркологический центр[/url] .
StoneDistrictStore – Pages are organized logically, browsing is effortless
UplandGoodsOnline – Pages are tidy and structured, finding products is effortless
наркологический центр [url=https://vyvod-iz-zapoya-na-domu-voronezh-11.ru/]наркологический центр[/url] .
trend wharf marketplace – Everything works smoothly and browsing is enjoyable.
explore this store – Organized sections and logical design make finding items effortless.
cove loft site – Opened quickly, sections are well arranged and easy to follow.
official store link – Pages are responsive and the layout is simple to navigate.
Lemon House Studio – Navigation is smooth, content is presented logically.
start browsing – Browsing is intuitive and everything is simple to access
реабилитационный центр для наркозависимых [url=https://vyvod-iz-zapoya-na-domu-voronezh-11.ru/]реабилитационный центр для наркозависимых[/url] .
мелбет бонус на депозит [url=http://melbet51738.help]мелбет бонус на депозит[/url]
Конечно работаем https://vitalia-mebel.ru Получал пробный набор (ам2201, jwh250, jwh203, 5iai) от данного селлера, качество хорошее кроме 5iai вообще не понял.ПС клады в Москве оч надежные!! прям 10 из 10, очень понравилось когда забирали 50г
property prices infographic dubai property finder https://diegoreico.com/dubai-real-estate-database.html flat for rent in bur.dubai.for.only.1monthmonica bremen dubai properties
quick access page – Browsed quickly, and content layout is logical and easy to read.
start here – First glance and I’m already picking up useful content.
AmberStoneShop – The site feels uncluttered and organized, finding items is quick
AmberGoodsHub – Everything is neat and tidy, navigation feels smooth
brook vendor link – Checked it out, pages are clearly organized and readable.
try this online timber shop – Navigation works well and pages load reliably.
view this page – Tidy layout and intuitive headings enhance usability.
browse market lounge – Logical layout and responsive pages make exploring stress-free.
check it out – Clean visuals and easy navigation create a pleasant experience.
CreativeVendor – Smooth experience, browsing categories is simple.
мостбет aviator на деньги [url=mostbet54173.help]mostbet54173.help[/url]
vavada rejestracja email [url=https://www.vavada30759.help]https://www.vavada30759.help[/url]
top crystal market – Layout is neat, pages load fast and browsing is easy.
1win как пополнить через о деньги [url=www.1win96781.help]www.1win96781.help[/url]
Your article helped me a lot, is there any more related content? Thanks! https://accounts.binance.com/hu/register-person?ref=IQY5TET4
)))) все любители пробничков )))) купить кокаин, купить мефедрон, купить гашиш, купить бошки отдыхай до понедельникаМожет всё-так “Рашн Холидейс” (c) China
birchcove gallery – Took a look, and the interface feels tidy and comfortable to navigate.
Fortune Tiger cartinha misteriosa: quem conseguiu ativar ela recentemente?
1win slotlar demo [url=1win5750.help]1win5750.help[/url]
open this boutique – Moving between categories feels seamless and well thought out.
AmberUrbanRetail – Interface feels clean, well-laid-out, and user-friendly
open this link – Fast-loading pages with organized sections make it easy to browse.
mostbet приложение для android [url=http://mostbet41926.help]mostbet приложение для android[/url]
LinensCorner – Site is approachable, and finding products is simple.
explore more – Pages are neatly arranged and intuitive to navigate.
https://justpaste.it/n7mp0
https://level-studio.ru/vacancies
dubizzle real estate dubai https://bestefm.net/2-bedroom-furnished-apartment-for-rent-dubai.html executive sales operation dubai propertydubai industrial real estate savills
https://level-studio.ru/vacancies
https://www.bust-bookmark.win/1xbet-promo-code-free-bet-1xbet-promo-code-2026-1xbet-promo-code-free-bet-1xbet-promo-code-in
https://www.pearltrees.com/1_xbetfreebets/item789919682
MakerHaven – Easy-to-use design, exploring the marketplace is convenient.
browse here – The interface is clear and content is easy to access
direct link here – Checked this out, and it seems simple and useful.
1win aplicatie alternativa [url=http://1win47381.help/]http://1win47381.help/[/url]
SilkOrchardStorefront – Layout is neat and intuitive, navigation is easy
view site – Information is arranged in a clean and logical way.
возможно мои письма рубятся где-то? там все четко по делу. купить кокаин, купить мефедрон, купить гашиш, купить бошки 250-й 1К10 то, что нужно..Два часа, ребята в клубе,
learn more here – Everything is clearly presented, giving a pleasant browsing experience.
1win Samarqand pul yechish [url=https://1win5750.help]1win Samarqand pul yechish[/url]
visit the shop – Clean layout with intuitive navigation and effortless browsing.
explore more – Everything is neatly arranged for easy browsing.
snow crate collection – Layout is minimal and content flows nicely.
лечение наркомании [url=https://vyvod-iz-zapoya-na-domu-samara-10.ru/]лечение наркомании[/url] .
лечение наркомании [url=https://vyvod-iz-zapoya-na-domu-samara-11.ru/]лечение наркомании[/url] .
coastbrook collection – Everything feels optimized for a quick and smooth experience.
наркологическая помощь [url=https://vyvod-iz-zapoya-na-domu-samara-10.ru/]наркологическая помощь[/url] .
Кто в теме, интересно ваше мнение по этому: https://f1-it.ru/uslugi-smm-prodvizheniya-v-sotsialynh-setyah.html
CreativeRetail – Easy-to-read layout, shopping feels comfortable and straightforward.
наркологическая помощь [url=https://vyvod-iz-zapoya-na-domu-samara-11.ru/]наркологическая помощь[/url] .
наркологический центр [url=https://vyvod-iz-zapoya-na-domu-nizhnij-novgorod-5.ru/]наркологический центр[/url] .
dip jebel ali recruitment companies property sales dubai rent villa in dubai palm1 bedroom flat for rent in al qusais
check this link – Navigation is clear and browsing feels natural
лечение наркомании [url=https://vyvod-iz-zapoya-na-domu-nizhnij-novgorod-6.ru/]лечение наркомании[/url] .
вывод из запоя в стационаре [url=https://vyvod-iz-zapoya-na-domu-nizhnij-novgorod-4.ru/]vyvod-iz-zapoya-na-domu-nizhnij-novgorod-4.ru[/url] .
EmberOrchardShop – Layout is clean and simple, browsing is effortless
кодирование от алкоголизма [url=https://vyvod-iz-zapoya-na-domu-nizhnij-novgorod-5.ru/]кодирование от алкоголизма[/url] .
лечение наркомании [url=https://vyvod-iz-zapoya-na-domu-nizhnij-novgorod-6.ru/]лечение наркомании[/url] .
explore here – The layout feels straightforward and quite efficient.
кодирование от алкоголизма [url=https://vyvod-iz-zapoya-na-domu-nizhnij-novgorod-4.ru/]vyvod-iz-zapoya-na-domu-nizhnij-novgorod-4.ru[/url] .
open website – Simple layout with organized sections ensures a pleasant experience.
pariuri online Republica Moldova 1win [url=http://1win47381.help]http://1win47381.help[/url]
pin-up Apelsin pul yechish [url=https://pinup87630.help]https://pinup87630.help[/url]
click to explore – Opened quickly, and the site design makes browsing straightforward.
mostbet hisob blokini ochish [url=http://mostbet82059.help]mostbet hisob blokini ochish[/url]
LinensDirect – Smooth and simple navigation with clearly presented items.
Написал заказ на мыло… никто не ответил. Списался через скайп сказали чтоб переоформил заказ.. Переоформил, опять никакого ответа… https://supertrack.ru И всем форумчанам!!!у меня наоборот. в этот раз быстрее все происходит)
реабилитационный центр для наркозависимых [url=https://vyvod-iz-zapoya-na-domu-voronezh-9.ru/]vyvod-iz-zapoya-na-domu-voronezh-9.ru[/url] .
hazel haven picks – The site is clean and easy to move around.
1win бакай банк вывод [url=1win96781.help]1win96781.help[/url]
цветы с вазой доставка [url=https://dostavka-cvetov777.ru/]https://dostavka-cvetov777.ru/[/url] .
реабилитация алкоголиков [url=https://vyvod-iz-zapoya-na-domu-voronezh-9.ru/]vyvod-iz-zapoya-na-domu-voronezh-9.ru[/url] .
StoneArtStudio – Pleasant interface, navigating the site feels natural.
OpalCoastHub – Layout is tidy and logical, navigation feels effortless
quick visit link – Browsing is smooth and content is accessible quickly
мостбет промокод Киргизия 2026 [url=mostbet54173.help]мостбет промокод Киргизия 2026[/url]
this resource – Tidy interface, simple navigation, and clear content throughout.
see more here – Tidy pages with intuitive flow make moving through the site easy.
visit calmbrook – Opened the link, and moving through content feels intuitive and simple.
Simply wish to say your article is as amazing. The clarity in your post is just nice and i could assume you are an expert on this subject. Fine with your permission let me to grab your RSS feed to keep up to date with forthcoming post. Thanks a million and please carry on the enjoyable work.
https://nagrevayka.com.ua/linzy-v-fary-peugeot-e-3008-pidbir-pid-nove.html
ded clock tower office timings of dubai investment properties The Address BLVD Sky Collectionreal estate dubai books
crystalcovevendorworkshop – Browsing this was smooth, pages load fast and reliably.
наркологический центр [url=https://vyvod-iz-zapoya-na-domu-samara-10.ru/]наркологический центр[/url] .
product page link – Clean interface with clear navigation allows easy access to content.
1win mirror Oʻzbekiston [url=https://1win5750.help/]https://1win5750.help/[/url]
капельница от похмелья [url=https://vyvod-iz-zapoya-na-domu-samara-10.ru/]vyvod-iz-zapoya-na-domu-samara-10.ru[/url] .
copper marketplace hub – Everything runs smoothly, and navigation is intuitive.
лечение алкоголизма [url=https://vyvod-iz-zapoya-na-domu-samara-11.ru/]лечение алкоголизма[/url] .
да и оперативность У ВАС на ВЫСШЕМ :superman: уровне!! купить кокаин, купить мефедрон, купить гашиш, купить бошки В аське спросил продавца в чем дело? Была ли действительно отправка. Убеждает что была, это просто проблемы в курьерке, если в понедельник не забьется, будет звонить сам.СПАСИБО :pink_eye.: ТУТ ВСЁ РОВНО!!!!!!!!!
Jogo do Tigrinho 2026: qual estratégia está funcionando melhor para você?
лечение наркомании [url=https://vyvod-iz-zapoya-na-domu-samara-11.ru/]лечение наркомании[/url] .
https://mypsyhealth.ru/%D0%bf%D1%81%D0%b8%D1%85%D0%b8%D0%b0%D1%82%D1%80%D0%b8%D1%8f/2022/01/28/covid-insomnia
VendorStudioHub – Clean and modern interface, navigating content is easy.
VendorStone – Very smooth site, pages load quickly and browsing is easy.
кодирование от алкоголизма [url=https://vyvod-iz-zapoya-na-domu-nizhnij-novgorod-6.ru/]кодирование от алкоголизма[/url] .
calmcove hub – Took a glance, and the pages are neatly structured with smooth navigation.
мелбет android кыргызстан [url=https://melbet51738.help/]мелбет android кыргызстан[/url]
check this shop – The performance is solid and pages respond instantly.
access the boutique – Smooth page flow and well-arranged content enhance usability.
access this page – Pages load quickly and the structure is easy to follow
реабилитационный центр от алкоголизма [url=https://vyvod-iz-zapoya-na-domu-nizhnij-novgorod-6.ru/]vyvod-iz-zapoya-na-domu-nizhnij-novgorod-6.ru[/url] .
opalstonecommercehub – Very helpful, the information is easy to understand and well-presented.
наркологический стационар [url=https://vyvod-iz-zapoya-na-domu-nizhnij-novgorod-4.ru/]vyvod-iz-zapoya-na-domu-nizhnij-novgorod-4.ru[/url] .
BoutiqueTreasures – Easy-to-use design, content is clearly presented and accessible.
visit this market studio – Well-organized pages make it easy to find what you need quickly.
explore here – Well-organized content allows quick and easy browsing.
1win rotiri gratuite Moldova [url=http://1win47381.help]1win rotiri gratuite Moldova[/url]
вывод из запоя на дому [url=https://vyvod-iz-zapoya-na-domu-nizhnij-novgorod-4.ru/]vyvod-iz-zapoya-na-domu-nizhnij-novgorod-4.ru[/url] .
gulf invest real estate dubai https://wdtpress.com/why-invest-in-real-estate-in-dubai.html Parkway Vistasestimated running costs of 1 br apartment in dubai
SummitGildedStore – Everything is neatly structured, browsing feels seamless
До сих пор в себя прихожу https://andreyvinogradov.ru отписал бы по факту с картинками203 вообще шикарный ) мне понравился. спасибо Вам)
explore daisy brook – Pages load smoothly, content is easy to navigate.
discover daisy brook – Content sections are well arranged, browsing is very comfortable.
Добрый день!
Ретрофит пресса 160 тонн — результаты, которые вас впечатлят
Каждый бизнес зависит от надежности своего оборудования. Мы предлагаем сервис, который гарантирует бесперебойную работу вашей техники. В нашем подходе нет места случайности — каждый элемент проходит тщательную проверку, а любые неисправности устраняются на этапе диагностики. Мы не только восстанавливаем работоспособность, но и оптимизируем работу оборудования, чтобы оно служило вам долго и эффективно.
Полная информация по ссылке – https://dag-techservice.ru/cases/tube600.html
программа сервисного обслуживания оборудования, энергоаудит и оптимизация потребления, сервисное обслуживание ит оборудования
наладка технологического оборудования, [url=https://dag-techservice.ru/cases/tube600.html]Формовочное устройство DN 600[/url], сервисное обслуживание инженерного оборудование
Удачи и комфорта в жизни!
[url=http://r-tech.awardspace.us/index.php?site=news_comments&newsID=2]Будущее уже здесь — мы используем новейшие технологии для ремонта[/url] 0b4d576
view collection – Well-structured interface and fast page responses
visit this page – Browsing here has been smooth, looks like a trustworthy source.
visit vendor outpost – Smooth navigation, very straightforward to browse
official store link – Opened this page, and it feels neatly structured.
MapleStyle – Neat layout with easy-to-follow menus and quick navigation.
open shop page – Smooth interface with logical structure makes navigation intuitive.
наркологическая помощь [url=https://vyvod-iz-zapoya-na-domu-samara-10.ru/]наркологическая помощь[/url] .
visit the boutique – Smooth browsing experience with a clean and organized layout.
капельница от похмелья [url=https://vyvod-iz-zapoya-na-domu-samara-10.ru/]vyvod-iz-zapoya-na-domu-samara-10.ru[/url] .
Hi there, You’ve done an excellent job. I’ll definitely digg it and personally recommend to my friends. I am confident they will be benefited from this web site.
https://try-kolduna.com.ua/h4-vs-h7-tekhnichna-rozbirka-obmanok-dlya.html
enter the marketplace – The site functions well and browsing is simple.
market hub page – Took a quick look, and navigation is smooth without any clutter.
вывод из запоя на дому [url=https://vyvod-iz-zapoya-na-domu-samara-11.ru/]вывод из запоя на дому[/url] .
GroveMart – Pages are clear and concise, items are easy to spot
наркологический центр [url=https://vyvod-iz-zapoya-na-domu-samara-11.ru/]наркологический центр[/url] .
dubai property market history dubai properties service charge payment 5 star hotels apartments in dubaihow to make money in dubai
вывод из запоя на дому [url=https://vyvod-iz-zapoya-na-domu-nizhnij-novgorod-6.ru/]вывод из запоя на дому[/url] .
CoveTradeHub – Smooth layout, all content loads quickly and efficiently.
start browsing – Easy-to-use interface and quick access to all content
ровный магазин https://klinri.ru Вы не могли сегодня оплатить заказ, потому что мы сегодня не работаемпо отзывам процентов 80 приемок именно в данной курьерке..
MapleNest – Pages load quickly, easy-to-follow design and user-friendly interface.
реабилитация наркоманов [url=https://vyvod-iz-zapoya-na-domu-nizhnij-novgorod-6.ru/]vyvod-iz-zapoya-na-domu-nizhnij-novgorod-6.ru[/url] .
start here – The setup is intuitive, making the site easy to move through.
go to this store – Organized sections and fast-loading pages make navigation effortless.
check this site – Clean design with content organized for easy reading and navigation.
1win лайв расчет [url=https://1win96781.help]1win лайв расчет[/url]
кодирование от алкоголизма [url=https://vyvod-iz-zapoya-na-domu-nizhnij-novgorod-4.ru/]vyvod-iz-zapoya-na-domu-nizhnij-novgorod-4.ru[/url] .
commerce hub online – Checked quickly, navigation is simple and content placement makes sense.
quick cove link – Opened briefly, content placement is tidy and easy to move through.
мостбет быстрые ставки [url=https://mostbet54173.help]https://mostbet54173.help[/url]
реабилитация алкоголиков [url=https://vyvod-iz-zapoya-na-domu-nizhnij-novgorod-4.ru/]vyvod-iz-zapoya-na-domu-nizhnij-novgorod-4.ru[/url] .
spring rack highlights – Layout is neat and moving through pages feels effortless.
QuickWillowMarketplace – Layout is straightforward and logical, finding products is easy
Jogo do Tigrinho dealer ao vivo: quem gosta dessa opção?
Сотрудничество со студией ремонта (Арте Дизайн / Nuvole Bianca, ИНН 7203498458, КПП 720301001) привело к существенным финансовым потерям и полному разочарованию в результате работ.
Подрядчик допустил существенное нарушение условий договора, выразившееся в систематическом срыве сроков выполнения работ, отсутствии должного контроля качества и отклонении от согласованных технических решений. Сроки ремонта были превышены на значительный период без объективных причин и надлежащего уведомления.
Качество выполненных работ не соответствует ни условиям договора, ни обязательным строительным нормам: выявлены дефекты отделки (неровные поверхности, нарушения технологии укладки плитки, некачественная покраска), часть работ выполнена с отступлениями от проекта. Недостатки носят существенный и неустранимый либо повторяющийся характер, что делает результат работ непригодным для нормальной эксплуатации.
Подрядчик уклонялся от устранения недостатков в разумные сроки, а также игнорировал часть письменных обращений. Фактически обязательства по договору исполнены ненадлежащим образом.
Не рекомендую обращаться в данную компанию. В настоящее время рассматриваю возможность защиты своих прав в судебном порядке, включая взыскание убытков, неустойки и иных предусмотренных законом компенсаций.
access the shop – The design feels balanced, with well-arranged information throughout.
official website link – The interface looks tidy and browsing through pages feels effortless.
1win xush kelibsiz bonusi Oʻzbekiston [url=http://1win5750.help]1win xush kelibsiz bonusi Oʻzbekiston[/url]
мелбет crash играть [url=http://melbet51738.help/]http://melbet51738.help/[/url]
Monetize your influence—become an affiliate today!
https://new-loans.ru/
MapleTradeHub – Logical navigation, fast-loading pages, and well-laid-out sections.
https://newloans.ru/
check out products – Organized layout and fast page responses make exploring stress-free.
see more – Well-structured site with fast and easy navigation
лечение наркомании [url=https://vyvod-iz-zapoya-na-domu-samara-10.ru/]лечение наркомании[/url] .
explore canyon hub – Opened quickly, content placement is tidy and easy to follow.
this resource – Pages display quickly, and navigation is simple and elegant.
harbor vendor portal – Opened briefly, pages are smooth and easy to scroll through.
ArtisanHarbor – User-friendly design, all sections are easy to access.
fia reports pakistani property in dubai dubai star property finder houses in dubai for rent al satwa furnisheddubai estate agents commission
капельница от запоя [url=https://vyvod-iz-zapoya-na-domu-samara-10.ru/]капельница от запоя[/url] .
взял впервые, в этом магазине, все прекрасно, быстро, недорого) купить кокаин, купить мефедрон, купить гашиш, купить бошки жду товараРебята!!! Устал писать Вам в скайп…Вы меня сознательно игнорируете?? Каждый день завтраками кормите. Я всего лишь хочу у вас покупать каждые три дня 1-2гр АМ2233. Вы сказали, что тоже из Ростова, я обрадовался, что рядом. Не хотите делать закладки, так ответьте куда деньги отправить, отправьте хоть первым классом (хотя это смешно)! Откройте скайп и почитайте миллион сообщений от меня!!
open shop page – Site layout is clear and moving through sections is fast
доставка цветов москва 24 часа [url=http://dostavka-cvetov777.ru]http://dostavka-cvetov777.ru[/url] .
стоимость забора
реабилитация наркоманов [url=https://vyvod-iz-zapoya-na-domu-samara-11.ru/]реабилитация наркоманов[/url] .
1win plinko Moldova [url=https://1win47381.help]https://1win47381.help[/url]
see more here – Well-structured content and tidy pages enhance the browsing experience.
кодирование от алкоголизма [url=https://vyvod-iz-zapoya-na-domu-samara-11.ru/]кодирование от алкоголизма[/url] .
discover harbor picks – Everything is user-friendly and well structured for a smooth experience.
мелбет mines боргирӣ [url=https://melbet85291.help/]мелбет mines боргирӣ[/url]
melbet aviator Moldova [url=melbet18567.help]melbet18567.help[/url]
наркологическая помощь [url=https://vyvod-iz-zapoya-na-domu-nizhnij-novgorod-7.ru/]наркологическая помощь[/url] .
заборы для частного дома
лечение алкоголизма [url=https://vyvod-iz-zapoya-v-staczionare-sankt-peterburg.ru/]vyvod-iz-zapoya-v-staczionare-sankt-peterburg.ru[/url] .
amberharbor platform – Took a moment here, and everything is clearly and logically positioned.
лечение алкоголизма [url=https://vyvod-iz-zapoya-v-staczionare-sankt-peterburg-1.ru/]лечение алкоголизма[/url] .
check out products – Layout is simple and intuitive, helping users find everything quickly.
enter site – Smooth interface with well-organized sections for quick browsing.
view site – Clear design and organized content make navigation easy.
реабилитационный центр от алкоголизма [url=https://vyvod-iz-zapoya-v-staczionare-sankt-peterburg-1.ru/]vyvod-iz-zapoya-v-staczionare-sankt-peterburg-1.ru[/url] .
ArtisanVendorHub – Intuitive pages, finding categories is easy and fast.
дистанционное обучение в москве [url=https://shkola-onlajn-43.ru/]shkola-onlajn-43.ru[/url] .
реабилитационный центр от алкоголизма [url=https://vyvod-iz-zapoya-v-staczionare-sankt-peterburg-3.ru/]vyvod-iz-zapoya-v-staczionare-sankt-peterburg-3.ru[/url] .
лечение алкоголизма [url=https://vyvod-iz-zapoya-v-staczionare-sankt-peterburg-2.ru/]лечение алкоголизма[/url] .
забор с откатными воротами
капельница от запоя [url=https://vyvod-iz-zapoya-na-domu-nizhnij-novgorod-4.ru/]vyvod-iz-zapoya-na-domu-nizhnij-novgorod-4.ru[/url] .
Нужны заклепки? заклепки вытяжные стальные купить прочный крепеж для соединения деталей. Алюминиевые, стальные и нержавеющие варианты. Надежность, долговечность и удобство монтажа для различных задач и конструкций.
Нужны заклепки? заклепка 8х16 алюминиевая вытяжная прочный крепеж для соединения деталей. Алюминиевые, стальные и нержавеющие варианты. Надежность, долговечность и удобство монтажа для различных задач и конструкций.
check this marketplace – The layout is clear, I never got lost while exploring
школа онлайн обучение москва [url=https://shkola-onlajn-43.ru/]shkola-onlajn-43.ru[/url] .
реабилитационный центр от алкоголизма [url=https://vyvod-iz-zapoya-v-staczionare-sankt-peterburg-3.ru/]vyvod-iz-zapoya-v-staczionare-sankt-peterburg-3.ru[/url] .
Адекватным людям ценящих проффесианолизм рекомендую реактивы тут тарить… https://nwradio.ru Ровной дороги в вашем бизе на просторах РЦ ;)всё посылка пришла всё ровно теперь будем пробовать )
dubai real estate broker license alice m bartolome https://maitrise-autun.org/uk-real-estate-agency-in-dubai.html how to find flat for rent in dubai from ownersfurnished apartments near me
капельница от запоя [url=https://vyvod-iz-zapoya-na-domu-nizhnij-novgorod-4.ru/]vyvod-iz-zapoya-na-domu-nizhnij-novgorod-4.ru[/url] .
open this link – Fast-loading pages and clean sections make finding details easy.
cove commerce link – Opened for a second, interface is simple and easy to scroll through.
mostbet aviator [url=http://mostbet82059.help]mostbet aviator[/url]
pin-up support [url=http://pinup87630.help]http://pinup87630.help[/url]
see details – The platform appears solid right from the start.
По теме “вавада vadaa online официальный сайт на сегодня”, нашел много полезного. Вот, можете почитать: [url=https://promokodvavada.com/]https://promokodvavada.com/[/url]
check this boutique – The interface is clean, so moving between pages is effortless.
PebbleValleyRetail – Interface is organized and clear, shopping feels convenient
browse this page – Looked through this quickly, and it appears neat and dependable.
Ребята, статья РїСЂРѕ SEO-продвижение РѕС‚ ITB Company, РЅРѕ РЅР° сайте СЃ игровыми новостями — неожиданно, РЅРѕ полезно. Автор объясняет, почему для бизнеса РІ Екатеринбурге важно быть РІ топе РїРѕРёСЃРєР°, Рё как грамотная оптимизация влияет РЅР° СЂРѕСЃС‚ продаж. Есть блок РїСЂРѕ долгосрочные результаты. Рнтересно: https://k0r0b0chka.ru/kvesty/watch-dogs-2-na-pk-pokazali-kak-shvatit-besplatno/
наркологическая помощь [url=https://vyvod-iz-zapoya-na-domu-nizhnij-novgorod-7.ru/]наркологическая помощь[/url] .
click to view – It seems structured well with clear and neat sections
наркологический стационар [url=https://vyvod-iz-zapoya-na-domu-nizhnij-novgorod-6.ru/]vyvod-iz-zapoya-na-domu-nizhnij-novgorod-6.ru[/url] .
вывод из запоя в стационаре [url=https://vyvod-iz-zapoya-na-domu-nizhnij-novgorod-7.ru/]вывод из запоя в стационаре[/url] .
check this site – Clear content and neat layout make navigating the site effortless.
teapot collection – Layout is minimal and content flows nicely.
капельница от запоя [url=https://vyvod-iz-zapoya-na-domu-nizhnij-novgorod-6.ru/]капельница от запоя[/url] .
Я выхватил бан, ты злобняк https://perevod-plus.ru ОО мне то же все пришло!Кстати,что очень радует ,так это уровень общения продавца.Юмор лишним не бывает,ведь так:D?
check the store – Simple structure with fast-loading content makes browsing effortless.
hampton properties dubai supplier portal apartment in dubai investment park dubai property price forecastdubai real estate in bitcoin
open this link – Simple navigation and neatly organized content make exploring enjoyable.
вывод из запоя на дому [url=https://vyvod-iz-zapoya-v-staczionare-sankt-peterburg.ru/]vyvod-iz-zapoya-v-staczionare-sankt-peterburg.ru[/url] .
школа дистанционного обучения москва [url=https://shkola-onlajn-44.ru/]shkola-onlajn-44.ru[/url] .
вывод из запоя в стационаре [url=https://vyvod-iz-zapoya-v-staczionare-sankt-peterburg-1.ru/]vyvod-iz-zapoya-v-staczionare-sankt-peterburg-1.ru[/url] .
капельница от похмелья [url=https://vyvod-iz-zapoya-v-staczionare-sankt-peterburg-2.ru/]vyvod-iz-zapoya-v-staczionare-sankt-peterburg-2.ru[/url] .
1win Uzcard [url=http://1win5750.help/]1win Uzcard[/url]
cotton fashion hub – The interface is minimal yet functional, so browsing is smooth.
вывод из запоя в стационаре [url=https://vyvod-iz-zapoya-na-domu-nizhnij-novgorod-5.ru/]vyvod-iz-zapoya-na-domu-nizhnij-novgorod-5.ru[/url] .
view details – A nicely structured site that’s easy to browse.
наркологический центр [url=https://vyvod-iz-zapoya-v-staczionare-sankt-peterburg.ru/]наркологический центр[/url] .
mostbetga kirish [url=https://www.mostbet82059.help]https://www.mostbet82059.help[/url]
интернет-школа [url=https://shkola-onlajn-44.ru/]интернет-школа[/url] .
наркологическая помощь [url=https://vyvod-iz-zapoya-v-staczionare-sankt-peterburg-1.ru/]наркологическая помощь[/url] .
реабилитация наркоманов [url=https://vyvod-iz-zapoya-v-staczionare-sankt-peterburg-2.ru/]vyvod-iz-zapoya-v-staczionare-sankt-peterburg-2.ru[/url] .
pin-up bonus Oʻzbekiston [url=https://www.pinup87630.help]https://www.pinup87630.help[/url]
explore chestnut hub – Opened for a second, interface feels simple and intuitive.
онлайн школа в москве [url=https://shkola-onlajn-43.ru/]онлайн школа в москве[/url] .
капельница от запоя [url=https://vyvod-iz-zapoya-na-domu-nizhnij-novgorod-5.ru/]vyvod-iz-zapoya-na-domu-nizhnij-novgorod-5.ru[/url] .
наркологический центр [url=https://vyvod-iz-zapoya-v-staczionare-sankt-peterburg-3.ru/]наркологический центр[/url] .
школа 8 класс [url=https://shkola-onlajn-43.ru/]школа 8 класс[/url] .
реабилитационный центр от алкоголизма [url=https://vyvod-iz-zapoya-v-staczionare-sankt-peterburg-3.ru/]vyvod-iz-zapoya-v-staczionare-sankt-peterburg-3.ru[/url] .
pure value collection – Layout is clear, pages transition smoothly.
visit this vendor – Layout is clean and pages respond instantly
MarbleStudioShop – Clear categories and fast-loading content make browsing effortless.
raven dock deals – Pages respond quickly, making browsing very comfortable.
apricotcove marketplace – Looked through briefly, and navigation feels natural.
visit store online – Professional design with a clear structure makes finding content simple.
creek brook picks – Pages are easy to move through, and the interface is intuitive.
explore more – Clear sections and organized layout make browsing fast and intuitive.
1win jocuri noi [url=https://1win47381.help]1win jocuri noi[/url]
реабилитационный центр от алкоголизма [url=https://vyvod-iz-zapoya-na-domu-nizhnij-novgorod-7.ru/]vyvod-iz-zapoya-na-domu-nizhnij-novgorod-7.ru[/url] .
2с-i отличного качества. 1гр был разделен на 60 частей. Жалоб не от кого не было по качеству. https://dom-nalog.ru А Всем Добра и Здоровья Близким)))заказывал мягкого пятак, всё пришло, непрходилось волноваться т.к в аське всегда были на связи, сила средне, но по весу 5+ =)
лечение наркомании [url=https://vyvod-iz-zapoya-na-domu-nizhnij-novgorod-7.ru/]лечение наркомании[/url] .
chestnut cove browse – Checked for a moment, navigation feels effortless and smooth.
cove online hub – Browsed shortly, pages are simple and load quickly.
start here – Everything is laid out cleanly for a smooth user experience.
apartments in dubai monthly rent dubai direct real estate one bedroom for rentkarama dubai rent
DawnGroveStore – Clean and tidy interface, finding items is quick
visit boutique page – The interface feels smooth with clearly arranged sections.
check this crate – The interface is straightforward and user-friendly.
enter store – Navigation is clear and content is accessible
check out products – Well-structured layout ensures that finding details is simple.
vendor studio link – Opened briefly, everything appears organized and user-friendly.
доставка цветов на дом круглосуточно [url=https://dostavka-cvetov777.ru]https://dostavka-cvetov777.ru[/url] .
вывод из запоя на дому [url=https://vyvod-iz-zapoya-v-staczionare-sankt-peterburg-2.ru/]вывод из запоя на дому[/url] .
реабилитационный центр для наркозависимых [url=https://vyvod-iz-zapoya-v-staczionare-sankt-peterburg.ru/]vyvod-iz-zapoya-v-staczionare-sankt-peterburg.ru[/url] .
open link – Simple structure that makes navigation smooth.
наркологическая клиника [url=https://vyvod-iz-zapoya-v-staczionare-sankt-peterburg-2.ru/]наркологическая клиника[/url] .
BrookPostShop – Layout is simple and intuitive, locating products is effortless
онлайн школы для домашнего обучения [url=https://shkola-onlajn-44.ru/]онлайн школы для домашнего обучения[/url] .
commerce atelier page – Browsed briefly, and the sections are clearly laid out.
капельница от похмелья [url=https://vyvod-iz-zapoya-v-staczionare-sankt-peterburg.ru/]vyvod-iz-zapoya-v-staczionare-sankt-peterburg.ru[/url] .
угу, “на глазок” отсыпали. купи весы и взвесь нормально. На вид оно может показаться как больше так и меньше… https://unislim.ru все огонь люди работают!!!пс за поддержку )забьется, такое бывает у них.
вывод из запоя в стационаре [url=https://vyvod-iz-zapoya-v-staczionare-sankt-peterburg-1.ru/]vyvod-iz-zapoya-v-staczionare-sankt-peterburg-1.ru[/url] .
visit page – Logical layout, neat design, and fast-loading pages make navigation effortless.
crash game mostbet [url=http://mostbet82059.help]http://mostbet82059.help[/url]
онлайн школа москва с аттестатом [url=https://shkola-onlajn-44.ru/]shkola-onlajn-44.ru[/url] .
dawn cove store – Clean interface, moving around the site feels effortless.
pin-up sayt manzili [url=http://pinup87630.help]http://pinup87630.help[/url]
Дистанционная школа [url=https://shkola-onlajn-43.ru/]Дистанционная школа [/url] .
лечение наркомании [url=https://vyvod-iz-zapoya-v-staczionare-sankt-peterburg-3.ru/]лечение наркомании[/url] .
реабилитационный центр от алкоголизма [url=https://vyvod-iz-zapoya-v-staczionare-sankt-peterburg-1.ru/]vyvod-iz-zapoya-v-staczionare-sankt-peterburg-1.ru[/url] .
HarborCollections – Pages load quickly, navigation is simple, and overall experience is smooth.
лечение алкоголизма [url=https://vyvod-iz-zapoya-na-domu-nizhnij-novgorod-7.ru/]лечение алкоголизма[/url] .
buy a house in dubai without down payment rented apartment for sale dubai dubai land properties for rentvilla room for rent in dubai satwa
онлайн школа в москве [url=https://shkola-onlajn-43.ru/]онлайн школа в москве[/url] .
VendorStudioFlint – Pleasant design, exploring pages is easy and smooth.
наркологическая помощь [url=https://vyvod-iz-zapoya-v-staczionare-sankt-peterburg-3.ru/]наркологическая помощь[/url] .
click to visit – The interface is straightforward and makes exploring convenient.
кодирование от алкоголизма [url=https://vyvod-iz-zapoya-na-domu-nizhnij-novgorod-7.ru/]кодирование от алкоголизма[/url] .
try this online store – Navigation is easy and pages load reliably.
go to this store – Well-structured pages and intuitive menus make navigation seamless.
icicle forest hub – Clean and organized layout, navigation feels effortless.
DuneCoveRetail – Well-structured layout, products are easy to find
капельница от похмелья [url=https://vyvod-iz-zapoya-na-domu-nizhnij-novgorod-5.ru/]vyvod-iz-zapoya-na-domu-nizhnij-novgorod-5.ru[/url] .
go to website – Clean and simple interface works really well for usability.
наркологический центр [url=https://vyvod-iz-zapoya-na-domu-nizhnij-novgorod-5.ru/]наркологический центр[/url] .
ArtisanMeadow – Simple interface, intuitive menus, and fast-loading pages.
Знакомые делали, получалось что-то похожее на старый Juh. купить кокаин, купить мефедрон, купить гашиш, купить бошки уже ожидается что нибудь?ага его
vendor outpost entry – Fast pages and clear structure make navigation straightforward.
explore this shop – Opened the page briefly, and navigation feels smooth.
FloraMarketBazaar – Clear interface, exploring products is simple and smooth.
storefront link – Clear visuals and organized sections make navigation effortless.
enter the shop – Pages are structured well and easy to explore.
реабилитация алкоголиков [url=https://vyvod-iz-zapoya-v-staczionare-sankt-peterburg-2.ru/]vyvod-iz-zapoya-v-staczionare-sankt-peterburg-2.ru[/url] .
lake palace tecom furnished studio apartments for rent cheap furnished apartments in dubai silicon oasisarabian ranches homes for sale
open shop page – Layout is intuitive and navigation is effortless
VelvetWillowShop – Layout is clear and simple, browsing feels effortless
капельница от запоя [url=https://vyvod-iz-zapoya-v-staczionare-sankt-peterburg-2.ru/]капельница от запоя[/url] .
official link – Well-presented content, a useful resource overall.
капельница от запоя [url=https://vyvod-iz-zapoya-v-staczionare-sankt-peterburg.ru/]vyvod-iz-zapoya-v-staczionare-sankt-peterburg.ru[/url] .
check dawn ridge – Well-structured design, everything works smoothly.
melbet депозит аз Тоҷикистон [url=www.melbet85291.help]melbet депозит аз Тоҷикистон[/url]
школа [url=https://shkola-onlajn-44.ru/]школа[/url] .
лечение наркомании [url=https://vyvod-iz-zapoya-v-staczionare-sankt-peterburg-3.ru/]лечение наркомании[/url] .
https://sms-activate-ru.vercel.app/
вывод из запоя на дому [url=https://vyvod-iz-zapoya-v-staczionare-sankt-peterburg-1.ru/]вывод из запоя на дому[/url] .
школа онлайн обучение стоимость [url=https://shkola-onlajn-43.ru/]shkola-onlajn-43.ru[/url] .
melbet sporturi virtuale [url=www.melbet18567.help]www.melbet18567.help[/url]
https://sms-activate-ru.vercel.app/service/telegram
реабилитационный центр для наркозависимых [url=https://vyvod-iz-zapoya-v-staczionare-sankt-peterburg-3.ru/]реабилитационный центр для наркозависимых[/url] .
капельница от запоя [url=https://vyvod-iz-zapoya-v-staczionare-sankt-peterburg-1.ru/]vyvod-iz-zapoya-v-staczionare-sankt-peterburg-1.ru[/url] .
Сегодня на мыло пришло письмо с новостью что заказ отправлен и номер трека который бьёться:good: пока всё норм идёт, со мной связь поддерживают через скайп, игнора не было, когда получу отпишу за качество вес и тд https://nwradio.ru Спасибо. Все по плану получилось. Получил в лучшем виде)Я тебе не хамил. Да 10г, смешно не смешно, а на дороге не валяются. И очень обидно когда от вашего ПМа получаешь подтвердение, веришь! и остаешься с разочарованием и обидой, бессилием что либо доказать. А тебе еще сверху льют хамство, упивайтесь на здоровье. Я утерся и теперь знаю на что способны даже нормальные, доверенные магазины. А это тоже опыт, за который я заплатил, и ничуть не жалею. Просто пусть народ знает и будет готов при работе без гаранта ТУТ ожидайте что такое может быть.
обучение детей онлайн [url=https://shkola-onlajn-43.ru/]обучение детей онлайн[/url] .
FloraVendorBazaar – Interface is well-structured, moving through sections is simple.
KettleMarketHub – Layout is practical and organized, finding items is quick
explore vendor link – Easy to navigate with smooth transitions between pages
visit vendor marketplace – Browsing is simple, and everything feels organized
view site – Appears interesting, planning to explore more content soon.
auroracove deals – Opened the site, and everything feels tidy and comfortable to browse.
MintStudioShop – Logical structure, clear categories, and effortless browsing experience.
обучение в школе онлайн [url=https://shkola-onlajn-45.ru/]обучение в школе онлайн[/url] .
наркологическая помощь [url=https://narkolog-na-dom-moskva-1.ru/]наркологическая помощь[/url] .
al warqa dubai property sale district real estate flat for rent in dubai production citypartition for rent in al barsha
реабилитационный центр от алкоголизма [url=https://narkolog-na-dom-moskva-2.ru/]narkolog-na-dom-moskva-2.ru[/url] .
школа 8 класс [url=https://shkola-onlajn-45.ru/]школа 8 класс[/url] .
open this shop – Professional-looking design with smooth and fast navigation throughout.
капельница от похмелья [url=https://narkolog-na-dom-moskva-1.ru/]narkolog-na-dom-moskva-1.ru[/url] .
капельница от запоя [url=https://narkolog-na-dom-moskva-2.ru/]narkolog-na-dom-moskva-2.ru[/url] .
mel bet [url=https://melbet85291.help]https://melbet85291.help[/url]
check this site – Pages load quickly, and the structure is clear and user-friendly.
pin up yutuqlar [url=https://pinup87630.help/]pin up yutuqlar[/url]
mostbet mobil internetda ishlaydimi [url=http://mostbet82059.help]mostbet mobil internetda ishlaydimi[/url]
RidgeMakerStudio – Intuitive design, finding categories is quick.
melbet domeniu oficial [url=https://www.melbet18567.help]https://www.melbet18567.help[/url]
мелбет обновить приложение [url=http://melbet64019.help]http://melbet64019.help[/url]
1win хуруҷ ба Visa [url=https://1win06741.help]https://1win06741.help[/url]
кодирование от алкоголизма [url=https://vyvod-iz-zapoya-na-domu-nizhnij-novgorod-5.ru/]кодирование от алкоголизма[/url] .
1win big win casino [url=www.1win60751.help]1win big win casino[/url]
Хз, смотри, в тёплой кипяченке начали болтать, растворяется. Точно не рега купить кокаин, купить мефедрон, купить гашиш, купить бошки у меня тоже дроп подлетел с посылкой и брали его ФСБшники почему то , но слава богу до уголовного дела не дошло, и ТС обещал жирную скидку сделать при следуещем заказе как то так (документы о прекращении уголовного дела и экспертиза на руках) дело закрыли по двум причинам то что дроп не при делах а второе самое главное что экспертиза не выявила НС”И если мои слова не подтвердяться Прошу провести профелоктическую беседу с вашим Дай бог ему здоровья Минером”
view site – User-friendly layout with consistent stability throughout.
реабилитационный центр от алкоголизма [url=https://vyvod-iz-zapoya-na-domu-nizhnij-novgorod-5.ru/]vyvod-iz-zapoya-na-domu-nizhnij-novgorod-5.ru[/url] .
shop link here – Glanced at this site, and information is presented neatly.
savills abu dhabi american living in dubai real estate director instagram dubai land rentalgulf invest real estate dubai
try this online shop – Navigation is clear and pages load reliably.
RidgeStudioHub – Intuitive pages, finding categories is fast.
можно ли поменять валюту melbet [url=melbet23481.help]melbet23481.help[/url]
Добрый день!
Почему сайт может стать главным каналом продаж
Лендинг концентрирует внимание посетителя на главной выгоде продукта. Создание лендингов помогает показать ценность предложения. Разработка лендинга повышает конверсию и превращает сайт под ключ в источник клиентов.
Полная информация по ссылке – https://ts-v.ru/
заказать сайт под ключ Санкт-Петербург, реклама образовательных курсов онлайн Россия, услуги SMM агентства Санкт-Петербург
подбор семантического ядра для сайта, [url=https://ts-v.ru/]ђазработка лендингов под ключ | TS-V[/url], сайт для кафе и ресторанов Россия
Удачи и комфорта в жизни!
[url=http://winkler-martin.de/guestbook.html]Как сайт формирует первое впечатление[/url] d4aa6_a
Процветания и успехов вашему магазину!! купить кокаин, купить мефедрон, купить гашиш, купить бошки Ребят, а подскажите насчет доставки спср, в какие города она доставляет ? Блин никогда раньше с ней не связывался 🙁 Расскажите пожалуйста, что, да каккачество супер!!!
access upland cove shop – Clear menus and quick browsing make the experience pleasant
онлайн школы для домашнего обучения [url=https://shkola-onlajn-45.ru/]онлайн школы для домашнего обучения[/url] .
наркологический стационар [url=https://narkolog-na-dom-moskva-1.ru/]narkolog-na-dom-moskva-1.ru[/url] .
онлайн обучение для школьников [url=https://shkola-onlajn-45.ru/]онлайн обучение для школьников[/url] .
вывод из запоя на дому [url=https://narkolog-na-dom-moskva-1.ru/]narkolog-na-dom-moskva-1.ru[/url] .
реабилитация алкоголиков [url=https://narkolog-na-dom-moskva-2.ru/]narkolog-na-dom-moskva-2.ru[/url] .
melbet bypass blocking Тоҷикистон [url=melbet85291.help]melbet bypass blocking Тоҷикистон[/url]
кодирование от алкоголизма [url=https://narkolog-na-dom-moskva-2.ru/]кодирование от алкоголизма[/url] .
Hello to every single one, it’s really a nice for me to pay a visit this site, it contains helpful Information.
https://teletype.in/@avtobloggerua/53x_9oqGO2V
melbet cashback [url=https://www.melbet18567.help]https://www.melbet18567.help[/url]
visit this site – Opened briefly, and everything seems to work without issues.
visit this boutique – Layout is clean and browsing feels effortless
Thanks for sharing. I read many of your blog posts, cool, your blog is very good. https://www.binance.com/register?ref=QCGZMHR6
Все вопросы по контактам в подписе. купить кокаин, купить мефедрон, купить гашиш, купить бошки Действительно с ответами продовца проблемы имеются!!!!!!!! это вам -5Всем, как и писалось средняя компенсация 50%
access page – I like how straightforward and uncluttered everything looks.
mostbet fora stavka [url=https://mostbet82059.help]https://mostbet82059.help[/url]
explore here – Navigation is smooth and everything is logically structured.
pinup tez kirish [url=https://www.pinup87630.help]pinup tez kirish[/url]
drift orchard market – Clean layout, exploring pages is quick and simple.
сколько стоит онлайн школа [url=https://shkola-onlajn-45.ru/]сколько стоит онлайн школа[/url] .
explore site – Easy-to-use layout with content clearly presented.
реабилитация наркоманов [url=https://narkolog-na-dom-moskva-1.ru/]narkolog-na-dom-moskva-1.ru[/url] .
школа онлайн 11 класс [url=https://shkola-onlajn-45.ru/]школа онлайн 11 класс[/url] .
see artisan marketplace – Clean sections, moving through content is simple.
direct link here – Browsed briefly, and the layout is simple yet appealing.
кодирование от алкоголизма [url=https://narkolog-na-dom-moskva-1.ru/]narkolog-na-dom-moskva-1.ru[/url] .
ОТЗЫВ О РАБОТЕ МАГАЗИНА купить кокаин, купить мефедрон, купить гашиш, купить бошки Писал уже, магазин работает в турбо режиме отправки вовремя, получают люди вовремя, сменили штат сотрудников сменили курьеров которые тупили, все налажено все как должно быть.Не смог не скопипастить
ArtisanEdge – Simple and clean, browsing feels comfortable and quick.
наркологический центр [url=https://narkolog-na-dom-moskva-2.ru/]наркологический центр[/url] .
CoveArtisanLoft – Layout is tidy and finding content is quick.
вывод из запоя на дому [url=https://narkolog-na-dom-moskva-2.ru/]вывод из запоя на дому[/url] .
go to website – Clear layout and smooth navigation make the site enjoyable.
melbet приветственный бонус [url=www.melbet23481.help]www.melbet23481.help[/url]
https://yajuego.net.co/
La plataforma colombiana Yajuego es un sitio de casino virtual y casa de apuestas deportivas totalmente legal, respaldado por Coljuegos, la entidad reguladora nacional.
explore here – It’s easy to find what you need thanks to the clean setup.
sweet bonanza restablecer contraseña [url=https://sweet-bonanza60829.help/]https://sweet-bonanza60829.help/[/url]
sweet bonanza доступ якщо сайт не відкривається [url=sweet-bonanza91683.help]sweet bonanza доступ якщо сайт не відкривається[/url]
https://yajuego.net.co/
Yajuego en Colombia es un sitio de casino virtual y casa de apuestas deportivas completamente autorizado, licenciado por Coljuegos, el regulador oficial en Colombia.
MapleCrafts – The pages are well-organized and simple to explore.
PlumCommerceGallery – Smooth layout and helpful content make using the site enjoyable.
browse creative atelier – Well-laid-out structure, navigation is straightforward.
у нас она валяется,сами не потребляем. купить кокаин, купить мефедрон, купить гашиш, купить бошки и будем мы так общаться по одному смс раз в полмесяца…вчера сделал заказ. оплатил. жду трек
наркологическая помощь [url=https://narkolog-na-dom-moskva-3.ru/]наркологическая помощь[/url] .
open site – Everything loads without delay and looks well-organized.
open this page – Well-arranged content makes exploring the site straightforward and pleasant.
OakVendorSpot – Design is minimal but intuitive, making content easy to find.
школа онлайн в россии [url=https://shkola-onlajn-45.ru/]школа онлайн в россии[/url] .
наркологическая клиника [url=https://narkolog-na-dom-moskva-4.ru/]наркологическая клиника[/url] .
реабилитация наркоманов [url=https://narkolog-na-dom-moskva-3.ru/]narkolog-na-dom-moskva-3.ru[/url] .
autumncove marketplace – Had a look, and everything is easy to read and navigate.
melbet шахсӣ кабинет [url=https://melbet85291.help]melbet шахсӣ кабинет[/url]
autumncove marketplace – Had a look, and everything is easy to read and navigate.
shop dunebrook – Clear interface, moving through sections feels effortless.
школа онлайн 6 класс [url=https://shkola-onlajn-45.ru/]школа онлайн 6 класс[/url] .
FoundryHub – Navigation is smooth and content is easy to digest.
автомобильный поролон [url=https://porolon-dlya-divana-1.ru/]porolon-dlya-divana-1.ru[/url] .
капельница от запоя [url=https://narkolog-na-dom-moskva-4.ru/]капельница от запоя[/url] .
поролон для дивана купить [url=https://porolon-dlya-divana-1.ru/]porolon-dlya-divana-1.ru[/url] .
мебельный поролон цена [url=https://porolon-dlya-divana-2.ru/]мебельный поролон цена[/url] .
PlumMarketSpot – Very clear layout and information is readily accessible throughout.
мебельный паралон [url=https://porolon-dlya-divana-3.ru/]мебельный паралон[/url] .
лечение наркомании [url=https://narkolog-na-dom-moskva-1.ru/]narkolog-na-dom-moskva-1.ru[/url] .
Shop Now – Sleek design and effortless navigation for a great user experience.
купить поролон мебельный [url=https://porolon-dlya-divana-2.ru/]купить поролон мебельный[/url] .
нарколог на дом [url=https://narkolog-na-dom-moskva-2.ru/]нарколог на дом[/url] .
Visit the e-commerce site – Clean design, logical sections, and easy browsing experience.
онлайн школа цена обучения [url=https://shkola-onlajn-44.ru/]shkola-onlajn-44.ru[/url] .
handmade crafts link – Minimal interface, moving through pages feels smooth and effortless.
поролон упаковочный [url=https://porolon-dlya-divana-3.ru/]porolon-dlya-divana-3.ru[/url] .
official page – It felt smooth going through different parts of this website.
Fortune Tiger bônus sem depósito: qual cassino ainda dá 120 giros?
наркологическая клиника [url=https://narkolog-na-dom-moskva-1.ru/]наркологическая клиника[/url] .
вывод из запоя в стационаре [url=https://narkolog-na-dom-moskva-2.ru/]narkolog-na-dom-moskva-2.ru[/url] .
view this page – The layout is clear, and navigation feels fast and effortless.
онлайн школа 7 класс [url=https://shkola-onlajn-44.ru/]shkola-onlajn-44.ru[/url] .
explore here – Navigation is smooth and everything is logically structured.
мелбет бк [url=https://melbet64019.help]https://melbet64019.help[/url]
CoveMarket – Browsing is simple and the layout is very clear and organized.
nyc office for lease rent office space nyc
new york city office space for rent manhattan office space for rent
ЕМИКАЛ МИКС – ЭТО ЛУЧШИЙ МАГАЗИН С МНОГОЛЕТНЕЙ РЕПУТАЦИЕЙ НА РЦ РЫНКЕ!!!! https://andreyvinogradov.ru “Открываю коробок Пусто, под спички шорк вот и пакетик на глаз 03″Спасибо за внесение ястности.
Обратился к Марининой Татьяне (Nuvole Bianca / Арте) за ремонтом «под ключ» — в итоге получил срыв сроков, некачественные работы и постоянные проблемы с контролем.
Считаю, что подрядчик допустил существенное нарушение договора: сроки сорваны, качество не соответствует требованиям, выявлены многочисленные дефекты. Это прямо нарушает положения Закон РФ «О защите прав потребителей».
Недостатки устранять не спешат, коммуникация слабая. Результат ремонта меня не устраивает, фактически утратил к нему интерес.
Не рекомендую. Готовлюсь защищать свои права и взыскивать убытки в судебном порядке.
1win minimum deposit [url=https://1win60751.help]1win minimum deposit[/url]
visit homepage – Easy to move through pages and details are clearly displayed.
Visit this store – Clean layout with quick-loading pages and easy-to-read information.
реабилитационный центр для наркозависимых [url=https://narkolog-na-dom-moskva-3.ru/]narkolog-na-dom-moskva-3.ru[/url] .
1win фриспин чӣ гуна гирифтан [url=https://www.1win06741.help]1win фриспин чӣ гуна гирифтан[/url]
Visit the marketplace – Logical layout, clean menus, and simple browsing.
реабилитация алкоголиков [url=https://narkolog-na-dom-moskva-3.ru/]narkolog-na-dom-moskva-3.ru[/url] .
TradingCove – Clear navigation and a responsive interface make browsing pleasant.
browse snow harbor vendors – Clear interface, I’ll probably return to this site.
bonus plinko melbet [url=https://www.melbet18567.help]bonus plinko melbet[/url]
open this page – Everything is logically placed, allowing for fast and simple exploration.
Хороший разбор SEO-услуг от ITB Company. Автор подробно останавливается на важности технической оптимизации, пользовательского опыта и локального SEO для Екатеринбурга. Отдельно понравился блок про контент-стратегию — почему полезные статьи работают лучше простого перечисления ключей. Вот ссылка: https://sah-zx.ru/stati/kak-seo-prodvizhenie-s-itb-company-pomogaet-biznesu-ekaterinburga-rasti/
вывод из запоя в стационаре [url=https://narkolog-na-dom-moskva-4.ru/]вывод из запоя в стационаре[/url] .
мелбет бездепозитный бонус [url=www.melbet23481.help]www.melbet23481.help[/url]
melbet киберспорт cs2 ставки [url=https://www.melbet64019.help]melbet киберспорт cs2 ставки[/url]
dunecove emporium – Neat design, browsing content is quick and straightforward.
наркологический центр [url=https://narkolog-na-dom-moskva-4.ru/]наркологический центр[/url] .
заказать поролон [url=https://porolon-dlya-divana-1.ru/]заказать поролон[/url] .
плотный поролон [url=https://porolon-dlya-divana-2.ru/]плотный поролон[/url] .
learn more – I appreciate how user-friendly and well-designed it is.
Продован 1000 балоф те =) https://andreyvinogradov.ru сегодня получил трек. все пробивается. жду посылочку)Здрасте Бразы!!!!:hello:
visit this site – Smooth layout and clear content make browsing easy and enjoyable.
1win login ios [url=http://1win60751.help]http://1win60751.help[/url]
поролон купить в москве в розницу [url=https://porolon-dlya-divana-1.ru/]поролон купить в москве в розницу[/url] .
Bay Harbor Craft Studio – Simple structure, content is clear and easy to access.
MeadowMarketHub – Pages are well-organized, making navigation effortless.
Access the shop – Pages are easy to follow and items are simple to locate.
поролон для стульев купить [url=https://porolon-dlya-divana-2.ru/]поролон для стульев купить[/url] .
мебельный поролон [url=https://porolon-dlya-divana-3.ru/]porolon-dlya-divana-3.ru[/url] .
visit this platform – Well-arranged sections make it easy to find exactly what I needed.
поролон для дивана [url=https://porolon-dlya-divana-3.ru/]porolon-dlya-divana-3.ru[/url] .
visit solar crafts – Clean interface, exploring content is straightforward and enjoyable.
1win баровардани пул ба бонк [url=https://1win06741.help]https://1win06741.help[/url]
OliveVendorSpot – Design is minimal yet intuitive, making content easy to find.
baycove resources – Opened the site, and everything is balanced and pleasant to navigate.
реабилитация алкоголиков [url=https://narkolog-na-dom-moskva-3.ru/]narkolog-na-dom-moskva-3.ru[/url] .
discover more – I like the modern feel and easy-to-read presentation.
go to website – I appreciate the modern layout and organized information.
реабилитационный центр для наркозависимых [url=https://narkolog-na-dom-moskva-3.ru/]narkolog-na-dom-moskva-3.ru[/url] .
школа [url=https://shkola-onlajn-41.ru/]школа[/url] .
click to view – Pages are easy to navigate and information is simple to access.
granite orchard services – The layout is minimal and helps content stand out clearly
visit platform – The site feels stable and the pages provide informative details.
melbet live [url=http://melbet85291.help/]http://melbet85291.help/[/url]
Check it out – Well-structured, modern design, and site works without problems.
онлайн школа 3 класс [url=https://shkola-onlajn-41.ru/]shkola-onlajn-41.ru[/url] .
https://rivalo.cat/
A plataforma Rivalo constitui uma das sites de apostas e cassino virtual mais tradicionais no pais , atuando no pais desde 2013 construindo uma imagem solida e integra .
sunbrookmarketfoundry.shop – Clean interface with a well-organized layout that makes navigation effortless.
Туси слишком долго прёт https://veres-spb.ru Нужно 5 сообщений что бы написать модэратору, не обесутьотменное :dance:
наркологический центр [url=https://narkolog-na-dom-moskva-4.ru/]наркологический центр[/url] .
junipercoveartisanexchange.shop – Nice browsing experience, pages load fast and layout is simple to follow.
дистанционное обучение [url=https://shkola-onlajn-42.ru/]дистанционное обучение[/url] .
melbet cashback [url=https://melbet64019.help]melbet cashback[/url]
check dunecove vendor – Well-structured pages, browsing feels straightforward.
реабилитационный центр от алкоголизма [url=https://narkolog-na-dom-moskva-4.ru/]narkolog-na-dom-moskva-4.ru[/url] .
Stackshine https://en.stackshine.io a SaaS cost management platform: subscription control, usage transparency, renewal tracking, and employee offboarding. Optimize your budget and reduce unnecessary software costs.
OpalVendorLoft – Everything is clearly arranged and moving through content is smooth.
онлайн обучение для школьников [url=https://shkola-onlajn-42.ru/]shkola-onlajn-42.ru[/url] .
visit homepage – It’s easy to get around and the details make browsing enjoyable.
open this page – Overall, browsing is smooth and the details are informative and helpful.
HarborBoutique – Everything is visually tidy and browsing feels seamless.
Echo Brook Artisans – Straightforward design, pages load well and navigation feels natural.
take a look – Content is well structured, and browsing feels natural and quick.
мебельный поролон для дивана [url=https://porolon-dlya-divana-3.ru/]porolon-dlya-divana-3.ru[/url] .
1win loyalty program [url=https://1win60751.help/]https://1win60751.help/[/url]
Berry Cove Craft Studio – Pages load fast, and everything is easy to navigate.
паралон купить [url=https://porolon-dlya-divana-1.ru/]паралон купить[/url] .
granite galleria official site – Users can move around easily thanks to fast loading and organized content
автомобильный поролон [url=https://porolon-dlya-divana-3.ru/]porolon-dlya-divana-3.ru[/url] .
пенополиуретан для дивана купить [url=https://porolon-dlya-divana-2.ru/]пенополиуретан для дивана купить[/url] .
реабилитация алкоголиков [url=https://narkolog-na-dom-moskva-3.ru/]narkolog-na-dom-moskva-3.ru[/url] .
поролон мебельный купить [url=https://porolon-dlya-divana-1.ru/]porolon-dlya-divana-1.ru[/url] .
кодирование от алкоголизма [url=https://narkolog-na-dom-moskva-3.ru/]кодирование от алкоголизма[/url] .
Open SeaBrook – Modern interface, organized layout, and easy-to-follow browsing.
visit platform – It has a clear layout and the information is practical and current.
FoundryCove – Interface is minimal and user-friendly for smooth navigation.
https://luckia.net.co/
El operador Luckia, con mas de dos decadas de experiencia desde que se fundara en 2002, se ha consolidado como un casino online y casa de apuestas deportivas fiable para los paises de habla hispana, con presencia tambien en Colombia para 2026.
небольгой репортаж отписать о ск. купить кокаин, купить мефедрон, купить гашиш, купить бошки Флудить на счет легальности/нелегальности товара в магазине не нужно в ветке! У же отписывалась и экспертиза и мы не однократно писали, возим ТОЛЬКО ЛЕГАЛ!Всегда сдесь было высокое качество
discover more – Well-structured pages help users locate information without confusion.
1win воридшавӣ ба сомонаи расмӣ [url=https://www.1win06741.help]https://www.1win06741.help[/url]
melbet inchidere cont [url=https://melbet18567.help/]melbet inchidere cont[/url]
como funciona sweet bonanza México [url=https://www.sweet-bonanza60829.help]como funciona sweet bonanza México[/url]
harborstone site – The structure is user-friendly and content is easy to reach
try this site – Clean design and structured content make exploring the pages easy.
click for more – Everything is structured logically, so I quickly found what I wanted.
https://rivalo.cat/
A casa Rivalo figura entre as sites de apostas e cassino online mais tradicionais no mercado brasileiro , em atividade no Brasil ha mais de 10 anos com uma reputacao solida pautada na transparencia.
MintBoutique – Pages are smooth and browsing through categories is intuitive.
lbs что это [url=https://shkola-onlajn-41.ru/]shkola-onlajn-41.ru[/url] .
Explore the atelier – Clean layout, easy navigation, and content is well organized.
Check the platform – Pages load quickly, menus are clear, and browsing feels natural.
click this link – Well-structured pages make navigating the site easy.
наркологический стационар [url=https://narkolog-na-dom-moskva-4.ru/]narkolog-na-dom-moskva-4.ru[/url] .
Coral Harbor Connect – Organized and tidy, browsing here feels easy and intuitive.
купить поролон мебельный [url=https://porolon-dlya-divana-3.ru/]купить поролон мебельный[/url] .
обучение детей онлайн [url=https://shkola-onlajn-41.ru/]shkola-onlajn-41.ru[/url] .
поролон тонкий [url=https://porolon-dlya-divana-2.ru/]поролон тонкий[/url] .
лечение алкоголизма [url=https://narkolog-na-dom-moskva-4.ru/]лечение алкоголизма[/url] .
Онлайн образование [url=https://shkola-onlajn-42.ru/]Онлайн образование [/url] .
По теме “vavada kz зеркало”, нашел много полезного. Смотрите сами: [url=https://vavadaigry.com]https://vavadaigry.com[/url]
поролон мебельный в розницу [url=https://porolon-dlya-divana-3.ru/]porolon-dlya-divana-3.ru[/url] .
купить мебельный поролон [url=https://porolon-dlya-divana-2.ru/]porolon-dlya-divana-2.ru[/url] .
сколько стоит онлайн школа [url=https://shkola-onlajn-42.ru/]shkola-onlajn-42.ru[/url] .
sweet bonanza cupón hoy [url=http://sweet-bonanza60829.help]http://sweet-bonanza60829.help[/url]
goldencoveartisanexchange.shop – Looks great, structure is neat and browsing feels effortless today.
Товар тоже на 5/5 (только с концетрацией мало 1 к 5 или 1 к 7 дальше держит не долго) купить кокаин, купить мефедрон, купить гашиш, купить бошки Ха ха ребята смотрите беспредел! попробуйте написать правильно жабу ТСа и получится то что у меня, как бы с ошибкой! СКРИПТ!дайте ссылку на город курган, хочется маленько россыпушки
harborstone galleria portal – Content is organized neatly, making exploration easy
this useful link – Clear headings and smooth transitions make browsing simple.
поролон на кровать [url=https://porolon-dlya-divana-1.ru/]поролон на кровать[/url] .
try this site – The browsing experience is smooth and the site feels well arranged.
access page – Smooth browsing experience with minimal delays when loading content.
Tap to visit – Logical layout, fast performance, and information is clear and easy to access.
поролон для стульев [url=https://porolon-dlya-divana-1.ru/]porolon-dlya-divana-1.ru[/url] .
check it out – Pages are easy to explore and layout feels clean.
Cotton Meadow Creative Studio – Layout is tidy, browsing the site feels smooth and natural.
https://luckia.net.co/
Luckia, con mas de veinte anos de trayectoria a partir de su creacion en 2002, se ha consolidado como un operador de casino virtual y apuestas en deportes de confianza para la comunidad de habla hispana, entre ellos Colombia a partir de 2026.
CraftOrchardStudio – Everything loads quickly and exploring the platform is pleasant.
click to view – Pages are easy to follow and the experience feels polished.
check it out – Pages load quickly, and navigating the content feels intuitive.
check this page – The layout is intuitive, and finding content is quick and easy.
CraftedMoon – Pages load fast and moving between sections is simple.
check hazel harbor outpost – Navigation is simple and moving through the site is seamless
Fortune Tiger modo turbo: quem costuma usar auto spin?
glassbrooktradingfoundry – Looks professional and content here is quite informative and useful.
browse here – Well-organized site structure allows easy access to all sections.
echobrook vendor center – Pages feel clear and accessible, browsing is simple.
Разработка сайта на 1С-Битрикс под ключ на шаблоне. Переходите по запросу [url=https://kwork.ru/website-development/45336019/razrabotka-sayta-na-1s-bitriks-na-shablone]изготовление сайта на Битрикс под ключ[/url] и получите удобный, быстрый и продающий сайт с адаптивным дизайном, интеграцией CRM, оплатой и доставкой. Оптимизируем под SEO и помогаем увеличить продажи. Индивидуальный подход, прозрачные сроки и поддержка на всех этапах.
Да шляпа какая-то, менеджер работает из рук вон плохо, и валит все на курьера. Абсолютная неразбериха, понять, кто и в каком месте накосячил достоверно – просто невозможно, но тем не менее, факт остается фактом: больше недели я ожидаю отправку заказа, и это только отправка, причем, разумеется, с полной предоплатой. Общались с манагером через скайп и через аську, очень муторно, сообщения теряются, на оставленные мессаги в оффлайне не отвечает, да и в онлайне появляется довольно редко. купить кокаин, купить мефедрон, купить гашиш, купить бошки Удачных закупокпотому, что так и есть осталось не так много времени!
actualizar sweet bonanza [url=www.sweet-bonanza60829.help]www.sweet-bonanza60829.help[/url]
Есть ощущение, что сейчас это мастхэв для бизнеса: https://iwatt24.ru/uslugi-smm/
Cotton Meadow Craft Link – Very intuitive, layout makes it simple to find what I need.
Click to visit – Organized layout, responsive pages, and simple to navigate.
OrchardMarketLoft – Navigation is straightforward and everything works as expected.
craft store link – Navigation is clear, making it easy to browse around.
дистанционное обучение в москве [url=https://shkola-onlajn-42.ru/]shkola-onlajn-42.ru[/url] .
browse this collection – Everything is easy to locate, and the interface is smooth.
Bright Harbor Connect – Smooth experience, navigation feels simple and intuitive.
ArtisanMoonLoft – Layout is well-structured and moving around the site feels natural.
онлайн школа цена обучения [url=https://shkola-onlajn-41.ru/]shkola-onlajn-41.ru[/url] .
check website – Navigation is smooth and loading times are excellent.
hazel harbor outpost site – Content is laid out clearly, making exploration quick and easy
онлайн школа 7 класс [url=https://shkola-onlajn-42.ru/]shkola-onlajn-42.ru[/url] .
реабилитация алкоголиков [url=https://vyvod-iz-zapoya-na-domu-samara-16.ru/]vyvod-iz-zapoya-na-domu-samara-16.ru[/url] .
лечение наркомании [url=https://vyvod-iz-zapoya-na-domu-samara-17.ru/]vyvod-iz-zapoya-na-domu-samara-17.ru[/url] .
капельница от запоя [url=https://vyvod-iz-zapoya-na-domu-samara-18.ru/]капельница от запоя[/url] .
вывод из запоя на дому [url=https://vyvod-iz-zapoya-na-domu-samara-19.ru/]вывод из запоя на дому[/url] .
дистанционное обучение москва [url=https://shkola-onlajn-41.ru/]shkola-onlajn-41.ru[/url] .
заказать курсовую работу [url=https://kupit-kursovuyu-101.ru/]заказать курсовую работу[/url] .
написание курсовой работы на заказ цена [url=https://kupit-kursovuyu-102.ru/]kupit-kursovuyu-102.ru[/url] .
go to site – Navigation is easy and the design keeps things clear and focused.
заказать качественную курсовую [url=https://kupit-kursovuyu-102.ru/]заказать качественную курсовую[/url] .
кодирование от алкоголизма [url=https://vyvod-iz-zapoya-na-domu-samara-19.ru/]кодирование от алкоголизма[/url] .
реабилитационный центр для наркозависимых [url=https://vyvod-iz-zapoya-na-domu-samara-16.ru/]vyvod-iz-zapoya-na-domu-samara-16.ru[/url] .
нарколог на дом [url=https://vyvod-iz-zapoya-na-domu-samara-17.ru/]нарколог на дом[/url] .
реабилитация алкоголиков [url=https://vyvod-iz-zapoya-na-domu-samara-18.ru/]vyvod-iz-zapoya-na-domu-samara-18.ru[/url] .
студенческие работы на заказ [url=https://kupit-kursovuyu-101.ru/]kupit-kursovuyu-101.ru[/url] .
click this link – Well-structured pages make navigating the site easy.
Creek Harbor Artisan Online – Very user-friendly, browsing feels intuitive and fast.
Go explore – Fast-loading pages, clear organization, and intuitive browsing experience.
Это мы и так все знаем https://disain-proect.ru Магазин работает отлично!!! Работаю с ним давно!!! Бро ты лучший!!!)))Работал с данным магазином Совсем давно, и что то все руки не доходили оставить отзыв о магаз:D
1win чӣ гуна боргирӣ кардан [url=http://1win06741.help/]1win чӣ гуна боргирӣ кардан[/url]
PearlCraftGallery – Layout is simple and exploring items is quick.
ArtisanMoonCove – Layout is minimal yet intuitive, making navigation easy.
this website link – Content is easy to find and well laid out.
ZenCo Store – Clean layout and trustworthy content throughout.
explore here – Found valuable resources, definitely bookmarking for later.
harborstoneartisanexchange.shop – Found this pretty intuitive, layout is simple and content is accessible.
Calm Cove Creative Studio – Clear interface, pages are easy to navigate and read.
free download 1win apk [url=http://1win60751.help]http://1win60751.help[/url]
learn more now – User-friendly design allows quick access to any section or feature.
echocove online marketplace – Smooth design, navigation feels natural and effortless.
honeycove services – Everything is organized neatly, making it simple to find content
visit resource – The presentation is clean and easy to follow along.
MossCraftHub – Interface is clean and exploring items feels effortless.
Visit Rain Harbor – Smooth navigation, clean layout, and all pages load quickly.
1win plinko qaydaları [url=http://1win27096.help/]http://1win27096.help/[/url]
mostbet пополнить баланс [url=http://mostbet09547.help]mostbet пополнить баланс[/url]
goldenbrookvendorfoundry – The layout is tidy and the content is organized, making browsing enjoyable.
discover more here – It’s easy to explore thanks to the well-built structure.
sweet bonanza висока волатильність [url=http://sweet-bonanza91683.help/]http://sweet-bonanza91683.help/[/url]
глазом на пакете,вот там была россыпь:good::killmyself::strong::stars::fu::good::bro: купить кокаин, купить мефедрон, купить гашиш, купить бошки спасибо за пожеланияда, самая действенная схема для работы с чемикалом
check it out here – Smooth navigation, neatly arranged sections, and quick page loads.
check honeystone emporium – A minimal design keeps browsing straightforward and enjoyable
https://t.me/Asiapsi
[url=https://www.1tv.ru/]бешанные собачки[/url]
мелбет aviator скачать [url=https://www.melbet64019.help]мелбет aviator скачать[/url]
Доброго!
Как оценить качество комплектующих
Техническое обслуживание оборудования направлено на контроль состояния узлов и предотвращение поломок. Регулярная диагностика и профилактика помогают продлить срок службы оборудования и снизить расходы.
Полная информация по ссылке – https://dagtechservice.ru/
сервисное обслуживание электромеханического оборудования, ремонт оборудования срочно, сервисное обслуживание оборудования фабрики
наладка систем автоматизации, [url=https://dagtechservice.ru/blog/]Блог – Технический сервис[/url], электротехническое оборудование сервисное обслуживание
Удачи и комфорта в жизни!
[url=http://www.beerorkid.com/bacon-man-2/comment-page-334/#comment-918468]Как избежать перегрева оборудования[/url] 5764f89
школы онлайн 10 класс [url=https://shkola-onlajn-41.ru/]shkola-onlajn-41.ru[/url] .
MossMarketAlcove – Navigation feels intuitive and content is easy to read.
learn more – Simple interface with information presented clearly on all pages.
заказать курсовой проект [url=https://kupit-kursovuyu-102.ru/]заказать курсовой проект[/url] .
discover details – Everything appears well-arranged with helpful information included.
Creek Harbor Makers – The structure is clear, finding what I need is straightforward.
online school [url=https://shkola-onlajn-41.ru/]online school[/url] .
стоимость написания курсовой работы на заказ [url=https://kupit-kursovuyu-102.ru/]kupit-kursovuyu-102.ru[/url] .
Open the platform – Clean design, responsive pages, and straightforward navigation.
melbet android apk последняя версия [url=https://melbet23481.help/]melbet android apk последняя версия[/url]
handcrafted goods online – Everything is arranged nicely for a simple browsing experience.
РедМетСплав предоставляет широкий ассортимент первоклассных изделий из редких материалов. Не важно, какие объемы вам необходимы — от тестовых образцов до глобальных поставок, мы гарантируем оперативное исполнение вашего заказа.
Каждая единица продукции подтверждена всеми необходимыми документами, подтверждающими их высокие характеристики. Внимательное отношение — залог нашего успеха — мы на связи, чтобы ответить на ваши вопросы и находить ответы под нюансы вашего бизнеса.
Доверьте заявку на расчет команде РедМетСплав и убедитесь в нашей готовности к сложным задачам.
Наши товары:
Поковка магниевая EN-MB10020 – EN 12421:1998 Лист магниевый EN-MB10020 – EN 12421:1998 идеально подходит для промышленных и строительных нужд. Обладая высокой прочностью и легкостью, он широко используется в авиационной, автомобильной и химической отраслях. Его отличные антикоррозийные свойства делают этот лист незаменимым в условиях повышенной влажности. Если вы ищете надежный и качественный материал, то купить Лист магниевый EN-MB10020 – EN 12421:1998 – это оптимальный выбор. Вы убедитесь в его универсальности и долговечности, используя его в различных проектах.
access here – Everything is organized well, helping users browse easily.
elmbrook marketplace – Simple design, navigating the sections is comfortable.
hazelharborartisanexchange.shop – Nice platform here, easy to use and information is well presented.
нарколог на дом [url=https://vyvod-iz-zapoya-na-domu-samara-16.ru/]нарколог на дом[/url] .
Заказывал пробник на 10000 (оплатил на альфу) сено и мягкий, но КЛАД ТАК И НЕ БЫЛ НАЙДЕН!!! на что продавец ответил “ищите лучше” , на просьбу созвонится или списаться закладчику и курьеру ни как не отреагировал!!! Решать вопрос не захотел!!! https://zoopersona.ru РЕБЯТА КАК ВСЕГДА НА ВЫСОТЕ 5 ИЗ 5!!!! СПАСИБОСегодня сделал заказ, пока все ровно обещали к вечеру трек, магаз робит
icicle isle online – Layout is tidy and finding content is quick and straightforward
заказать курсовую [url=https://kupit-kursovuyu-101.ru/]заказать курсовую[/url] .
NightTradingPost – Very clean design and moving through pages feels natural.
реабилитация наркоманов [url=https://vyvod-iz-zapoya-na-domu-samara-16.ru/]vyvod-iz-zapoya-na-domu-samara-16.ru[/url] .
PG Slot 2026: qual jogo tá dando mais big win agora?
цена курсовой работы [url=https://kupit-kursovuyu-101.ru/]kupit-kursovuyu-101.ru[/url] .
уроки онлайн [url=https://shkola-onlajn-42.ru/]уроки онлайн[/url] .
view details – Simple navigation combined with useful resources makes it enjoyable.
visit platform – Content is clearly presented and moving through the site is easy.
лечение наркомании [url=https://vyvod-iz-zapoya-na-domu-samara-19.ru/]лечение наркомании[/url] .
see more here – Easy-to-use interface with neatly structured information.
заказать курсовую работу [url=https://kupit-kursovuyu-103.ru/]заказать курсовую работу[/url] .
Crown Cove Artisan Hub – Smooth browsing, content is logically arranged and simple to locate.
open link – Everything runs well, making it easy to find what you need.
наркологическая клиника [url=https://vyvod-iz-zapoya-na-domu-samara-19.ru/]наркологическая клиника[/url] .
написать курсовую работу на заказ в москве [url=https://kupit-kursovuyu-103.ru/]kupit-kursovuyu-103.ru[/url] .
домашняя школа [url=https://shkola-onlajn-42.ru/]домашняя школа[/url] .
PebbleVendorHub – The site is user-friendly with well-arranged sections.
кодирование от алкоголизма [url=https://vyvod-iz-zapoya-na-domu-samara-17.ru/]кодирование от алкоголизма[/url] .
artisan marketplace online – Navigation is simple and the layout is clean.
курсовые заказ [url=https://kupit-kursovuyu-104.ru/]курсовые заказ[/url] .
explore now – Pages respond quickly, creating a smooth overall experience.
реабилитация алкоголиков [url=https://vyvod-iz-zapoya-na-domu-samara-18.ru/]vyvod-iz-zapoya-na-domu-samara-18.ru[/url] .
сколько стоит сделать курсовую работу на заказ [url=https://kupit-kursovuyu-105.ru/]сколько стоит сделать курсовую работу на заказ[/url] .
Уничтожение вредителей https://dezinfekciya-mcd.ru/unichtozhenie/muravi/ уничтожение бактерий, вирусов и насекомых. Обработка квартир, домов и коммерческих помещений. Безопасные препараты, опытные специалисты и гарантия результата.
visit marketplace – Pages are clean and structured, making browsing pleasant.
Canyon Harbor Craftworks – Pages respond fast, layout is simple and easy to understand.
решение курсовых работ на заказ [url=https://kupit-kursovuyu-104.ru/]kupit-kursovuyu-104.ru[/url] .
NightCraftBoutique – Smooth design and moving through pages feels natural.
1win ҳисобкунак [url=http://1win06741.help]http://1win06741.help[/url]
iciclestone services – Interface is simple and content is easy to access
курсовые работы заказать [url=https://kupit-kursovuyu-105.ru/]курсовые работы заказать[/url] .
check it out – Helpful details and a neat layout make browsing enjoyable.
[url=https://www.1tv.ru/]Эрнест инвалид[/url]
у нас она валяется,сами не потребляем. https://nwradio.ru Спасибо за отзыв , а то заказывает много людей а отписываются единицы.Уже не раз писали – настраивают сайт для автоматизации заказов, с потоком розничных покупателей не справляются с нынешный системой )
курсовая работа купить [url=https://kupit-kursovuyu-106.ru/]курсовая работа купить[/url] .
Crystal Cove Collective – Clean interface, information is easy to find and user-friendly.
выполнение курсовых работ [url=https://kupit-kursovuyu-102.ru/]выполнение курсовых работ[/url] .
go to website – The design is neat and browsing feels natural.
Хочу выделить пост про vavada казино официальный сайт. Вот, делюсь ссылкой: [url=https://2026vavada.com/]https://2026vavada.com/[/url]
заказ курсовых работ [url=https://kupit-kursovuyu-106.ru/]kupit-kursovuyu-106.ru[/url] .
play plinko on 1win [url=1win60751.help]1win60751.help[/url]
сколько стоит заказать курсовую работу [url=https://kupit-kursovuyu-102.ru/]kupit-kursovuyu-102.ru[/url] .
go to website – The interface is clean and easy to get familiar with quickly.
access here – The layout is neat and easy to understand right away.
курсовые заказ [url=https://kupit-kursovuyu-107.ru/]kupit-kursovuyu-107.ru[/url] .
Check the marketplace – Simple layout, intuitive navigation, and content is easy to follow.
CoveCraftCorner – Well-laid-out interface, moving through sections is easy.
CoveBazaarHub – Clean and organized design, browsing products is quick.
honeycoveartisanexchange.shop – Good experience overall, layout is neat and pages load fast.
honeycoveartisanexchange.shop – Good experience overall, layout is neat and pages load fast.
view this page – Simple, modern layout with fast browsing and accessible product categories.
сколько стоит курсовая работа по юриспруденции [url=https://kupit-kursovuyu-107.ru/]kupit-kursovuyu-107.ru[/url] .
check ivory ridge collective – The layout is tidy, making it easy to explore the site
написать курсовую работу на заказ в москве [url=https://kupit-kursovuyu-103.ru/]kupit-kursovuyu-103.ru[/url] .
sweet bonanza depósito tarjeta crédito [url=http://sweet-bonanza60829.help/]sweet bonanza depósito tarjeta crédito[/url]
крутой магазин купить кокаин, купить мефедрон, купить гашиш, купить бошки я не знаю чего тебе делать!всем доброго времени суто тс ответь в лс есть вопрос
PebbleMarketSpot – Fast pages and intuitive interface make this easy to use.
написание курсовых работ на заказ цена [url=https://kupit-kursovuyu-101.ru/]kupit-kursovuyu-101.ru[/url] .
помощь студентам и школьникам [url=https://kupit-kursovuyu-103.ru/]kupit-kursovuyu-103.ru[/url] .
как скачать мелбет на android [url=http://melbet64019.help]http://melbet64019.help[/url]
курсовые работы заказать [url=https://kupit-kursovuyu-101.ru/]kupit-kursovuyu-101.ru[/url] .
honeycovecraftcollective.shop – Clean and user friendly, makes finding things really straightforward.
Check the trading platform – User-friendly navigation, well-structured pages, and smooth interface.
наркологическая клиника [url=https://vyvod-iz-zapoya-na-domu-samara-16.ru/]наркологическая клиника[/url] .
jump to this site – Easy-to-use menus and logical structure ensured all content was accessible quickly.
Caramel Cove Creative Hub – Layout is well-organized and user-friendly.
Free online games http://www.poki.com.az play without downloading or registering. A large collection of games across various genres: action, puzzles, racing, and strategy. Easily access from any device.
[url=https://www.1tv.ru/]Эрнест инвалид[/url]
jade aisle site – Content loads rapidly, and the interface is easy to use
База сайтов для Xrumer — это тщательно отобранный список площадок для эффективного размещения ссылок и автоматического постинга. Переходите по запросу [url=https://kwork.ru/information-bases/46374940/baza-saytov-khrumer-3-mln-ssylok-dlya-postinga]цена базы ссылок xrumer для постинга кворк[/url]. База подходит для SEO-продвижения, ускоряет наращивание ссылочной массы и экономит время. Актуальные и рабочие ресурсы, регулярное обновление и высокая проходимость обеспечивают максимальный результат.
product gallery – Just checked this and it appears clean and nicely presented.
explore more – Stumbled across this and it’s actually pretty elegant looking.
реабилитационный центр от алкоголизма [url=https://vyvod-iz-zapoya-na-domu-samara-16.ru/]vyvod-iz-zapoya-na-domu-samara-16.ru[/url] .
курсовые заказ [url=https://kupit-kursovuyu-108.ru/]курсовые заказ[/url] .
наркологический стационар [url=https://vyvod-iz-zapoya-na-domu-samara-19.ru/]vyvod-iz-zapoya-na-domu-samara-19.ru[/url] .
покупка курсовых работ [url=https://kupit-kursovuyu-106.ru/]kupit-kursovuyu-106.ru[/url] .
помощь студентам и школьникам [url=https://kupit-kursovuyu-105.ru/]помощь студентам и школьникам[/url] .
помощь студентам контрольные [url=https://kupit-kursovuyu-104.ru/]помощь студентам контрольные[/url] .
курсовая работа недорого [url=https://kupit-kursovuyu-108.ru/]курсовая работа недорого[/url] .
Daisy Cove Creative Hub – Easy to navigate, information is clear and pages load promptly.
кодирование от алкоголизма [url=https://vyvod-iz-zapoya-na-domu-samara-19.ru/]кодирование от алкоголизма[/url] .
написание курсовых на заказ [url=https://kupit-kursovuyu-106.ru/]написание курсовых на заказ[/url] .
вывод из запоя на дому [url=https://vyvod-iz-zapoya-na-domu-samara-18.ru/]вывод из запоя на дому[/url] .
take a look – Pages are easy to follow thanks to the well-structured layout.
курсовые заказ [url=https://kupit-kursovuyu-105.ru/]курсовые заказ[/url] .
icicleisleartisanexchange.shop – Pretty well structured, navigation is easy and content is clear.
потому, что так и есть осталось не так много времени! https://mobtrade.ru вот это уже наводит на мыслину вообщем все ровно получил людей правда от бати но магазин ровный советую
jump to this site – Clean, intuitive design with quick access to all content sections.
Chestnut Harbor Creative Studio – Clear pages, navigation is fast and effortless.
Find River Cove – Clear structure, intuitive design, and easy access to content.
Arizona sports events http://www.oxu-az.com.az football, transfers, and live match results. Latest news, statistics, and reviews for fans and sports enthusiasts.
Bloom Trade Lounge – Clear sections and responsive pages make browsing a breeze
1win plinko çıxarış [url=1win27096.help]1win27096.help[/url]
https://wplay.net.co/
Wplay constituye un casino y sitio de apuestas online con licencia de Coljuegos, lo cual asegura que funciona de forma legal y supervisada en Colombia.
курсовая работа купить москва [url=https://kupit-kursovuyu-103.ru/]курсовая работа купить москва[/url] .
заказать практическую работу недорого цены [url=https://kupit-kursovuyu-107.ru/]kupit-kursovuyu-107.ru[/url] .
написать курсовую работу на заказ в москве [url=https://kupit-kursovuyu-103.ru/]kupit-kursovuyu-103.ru[/url] .
Free online games https://1001-oyun.com.az the best browser games with no installation required. Huge selection of genres, easy search, and quick launch. Play anytime for free.
https://wplay.net.co/
Wplay opera como un casino y plataforma digital de apuestas aprobado por Coljuegos, lo que garantiza que opera de manera legal y regulada en Colombia.
artisan marketplace – Found this and it gives off a really natural and welcoming vibe.
лечение наркомании [url=https://vyvod-iz-zapoya-na-domu-samara-17.ru/]vyvod-iz-zapoya-na-domu-samara-17.ru[/url] .
мостбет казино [url=http://mostbet09547.help/]http://mostbet09547.help/[/url]
icicleislecraftcollective.shop – Everything looks polished, browsing here feels smooth and natural.
Check River Cove – Clear layout, responsive pages, and very user-friendly interface.
написать курсовую на заказ [url=https://kupit-kursovuyu-101.ru/]kupit-kursovuyu-101.ru[/url] .
goldvendor services – Navigation feels natural with clearly organized sections
Хотели делать 1к15 – 1к10, но в итоге всё замесили 1к12. Я бы не сказал, что сильно убивает, но люди были довольны. Пипеточку хлоп:killmyself: и хорошо минут на 40, поэтому скоро перешёл на трубку и курил по пол полки за раз, отчего угарал от роликов MineCraft. https://spss-soft.ru И духовной отсутствие пищиЯ вообще не курю!!!я брал 3 июля его уже нет в продаже!
сайт заказать курсовую работу [url=https://kupit-kursovuyu-106.ru/]сайт заказать курсовую работу[/url] .
open this page – Well-arranged content makes exploring the site straightforward and pleasant.
handcrafted goods – Everything works smoothly and browsing feels relaxed.
купить курсовая работа [url=https://kupit-kursovuyu-106.ru/]kupit-kursovuyu-106.ru[/url] .
сколько стоит курсовая работа по юриспруденции [url=https://kupit-kursovuyu-101.ru/]kupit-kursovuyu-101.ru[/url] .
Hi guys!
Searching for an honest review?
Take a look at Spinmills — a great option for Canadian players: spinmills.ca
Fast payouts. Highly recommended.
What do you think?
курсовая заказ купить [url=https://kupit-kursovuyu-108.ru/]курсовая заказ купить[/url] .
1win minimum yatırma məbləği [url=https://1win27096.help]1win minimum yatırma məbləği[/url]
Dawn Ridge Craft Studio – Easy to browse, content is well-arranged and pages respond quickly.
вывод из запоя в стационаре [url=https://vyvod-iz-zapoya-na-domu-samara-16.ru/]vyvod-iz-zapoya-na-domu-samara-16.ru[/url] .
курсовые заказ [url=https://kupit-kursovuyu-108.ru/]курсовые заказ[/url] .
[url=https://www.1tv.ru/]Эрнест инвалид[/url]
artisan exchange online – Pages load quickly and the layout is simple to follow.
sweet bonanza відіграш бонусу [url=https://sweet-bonanza91683.help]sweet bonanza відіграш бонусу[/url]
Roblox Download https://delta-roblox.com.az/ Download the game, learn about Roblox Studio features, and learn about security settings. Play, create your own worlds, and protect your account. A complete guide to installing, playing, and using the platform safely.
melbet не могу войти [url=http://melbet64019.help/]melbet не могу войти[/url]
курсовая работа купить [url=https://kupit-kursovuyu-105.ru/]курсовая работа купить[/url] .
mostbet promocje sportowe [url=http://mostbet2004.help]mostbet promocje sportowe[/url]
капельница от запоя [url=https://vyvod-iz-zapoya-na-domu-samara-16.ru/]vyvod-iz-zapoya-na-domu-samara-16.ru[/url] .
как скачать мостбет на iphone [url=mostbet09547.help]как скачать мостбет на iphone[/url]
ivoryridgeartisanexchange.shop – Nice site overall, content is accessible and design feels clean.
вывод из запоя в стационаре [url=https://vyvod-iz-zapoya-na-domu-samara-19.ru/]вывод из запоя в стационаре[/url] .
написание курсовой на заказ цена [url=https://kupit-kursovuyu-105.ru/]написание курсовой на заказ цена[/url] .
Cloud Cove Maker Hub – Pages are easy to read, navigation feels natural and smooth.
лечение алкоголизма [url=https://vyvod-iz-zapoya-na-domu-samara-19.ru/]лечение алкоголизма[/url] .
browse handcrafted – Interface is simple and navigation is straightforward.
vb artisan – Well-structured pages make browsing smooth and enjoyable.
velvetbrook platform hub – Smooth operation and content is simple to find.
unique shop – This site feels organized and easy to explore at a glance.
click to browse – Browsing feels light and easy with no confusion.
Daisy Crate Depot – Navigation is smooth and content is easy to access
курсовая работа на заказ цена [url=https://kupit-kursovuyu-103.ru/]курсовая работа на заказ цена[/url] .
цена курсовой работы [url=https://kupit-kursovuyu-104.ru/]цена курсовой работы[/url] .
sweet bonanza desbloquear acceso [url=https://sweet-bonanza60829.help]https://sweet-bonanza60829.help[/url]
check this page – Clean design with an approachable and welcoming interface.
покупка курсовой [url=https://kupit-kursovuyu-103.ru/]покупка курсовой[/url] .
куплю курсовую работу [url=https://kupit-kursovuyu-104.ru/]куплю курсовую работу[/url] .
shop link here – Everything is easy to navigate and the design feels stable.
реабилитационный центр от алкоголизма [url=https://vyvod-iz-zapoya-na-domu-samara-18.ru/]vyvod-iz-zapoya-na-domu-samara-18.ru[/url] .
Visit the site now – Logical layout, smooth browsing, and content is easy to find.
GalleryView – Content is clear and navigation is effortless.
learn more now – Organized content and smooth interface make exploring simple.
сайт заказать курсовую работу [url=https://kupit-kursovuyu-106.ru/]сайт заказать курсовую работу[/url] .
купить курсовую москва [url=https://kupit-kursovuyu-107.ru/]купить курсовую москва[/url] .
вывод из запоя в стационаре [url=https://vyvod-iz-zapoya-na-domu-samara-18.ru/]вывод из запоя в стационаре[/url] .
sweet bonanza play онлайн [url=http://sweet-bonanza91683.help]sweet bonanza play онлайн[/url]
discover products – It’s all neatly arranged and easy to get through quickly.
[url=https://www.1tv.ru/]Эрнест инвалид[/url]
помощь в написании курсовой [url=https://kupit-kursovuyu-106.ru/]kupit-kursovuyu-106.ru[/url] .
написание курсовых на заказ [url=https://kupit-kursovuyu-107.ru/]написание курсовых на заказ[/url] .
official page – Content is structured neatly, allowing effortless access to information.
velvetbrook craft world – Clean structure, everything loads quickly and intuitively.
dekorasfaltyapi – The design looks appealing and moving through pages feels effortless.
База сайтов для Xrumer — это тщательно отобранный список площадок для эффективного размещения ссылок и автоматического постинга. Переходите по запросу [url=https://kwork.ru/information-bases/46374940/baza-saytov-khrumer-3-mln-ssylok-dlya-postinga]где взять базу ссылок xrumer для постинга[/url]. База подходит для SEO-продвижения, ускоряет наращивание ссылочной массы и экономит время. Актуальные и рабочие ресурсы, регулярное обновление и высокая проходимость обеспечивают максимальный результат.
вывод из запоя на дому [url=https://vyvod-iz-zapoya-na-domu-samara-17.ru/]вывод из запоя на дому[/url] .
Drift Orchard Makers Hub – Smooth interface, content loads quickly and navigation is straightforward.
заказать курсовую работу [url=https://kupit-kursovuyu-108.ru/]заказать курсовую работу[/url] .
this website link – Navigation is smooth and the content is easy to understand.
product showcase – Looked into this and it feels inviting and interesting.
мостбет бонус на сегодня [url=www.mostbet09547.help]www.mostbet09547.help[/url]
learn more here – The clean setup creates a smooth browsing experience overall.
Tap to browse – Organized content, intuitive navigation, and quick access to all sections.
1win hesab [url=https://1win27096.help]1win hesab[/url]
jasperharborartisanexchange.shop – Took a quick look, seems reliable and easy to browse through.
реабилитация наркоманов [url=https://vyvod-iz-zapoya-na-domu-samara-17.ru/]vyvod-iz-zapoya-na-domu-samara-17.ru[/url] .
курсовые купить [url=https://kupit-kursovuyu-108.ru/]курсовые купить[/url] .
написание курсовой на заказ цена [url=https://kupit-kursovuyu-105.ru/]написание курсовой на заказ цена[/url] .
Clover Crest Studio Online – Well-structured pages make navigation fast and effortless.
[url=https://www.1tv.ru/]Эрнест инвалид[/url]
visit this lark vendor page – Sections are clearly defined, and browsing is comfortable
курсовая заказ купить [url=https://kupit-kursovuyu-105.ru/]курсовая заказ купить[/url] .
go to website – The interface is smooth and the platform feels effortless.
violetharbor creative hub – Well-maintained pages make browsing simple.
vh creative hub – Clean sections, navigation feels fast and simple.
Drift Orchard Makers Collective – Simple and neat site, everything is accessible and browsing feels intuitive.
handcrafted goods – Smooth layout and easy browsing experience.
shop link – The structure is straightforward and user-friendly.
jasperharborartisanexchange.shop – Took a quick look, seems reliable and easy to browse through.
CustomerSupport – Interface is simple and pages are responsive.
курсовая работа купить [url=https://kupit-kursovuyu-104.ru/]курсовая работа купить[/url] .
Coast Harbor Studio Online – Clear structure and responsive design make browsing easy.
[url=https://www.1tv.ru/]узи органов брюшной полости[/url]
купить курсовую работу [url=https://kupit-kursovuyu-104.ru/]купить курсовую работу[/url] .
discover winter vendor – Pages load well, and information is presented clearly
discover items – I liked how simple it was to browse everything here.
sweet bonanza підтримка українською [url=http://sweet-bonanza91683.help/]http://sweet-bonanza91683.help/[/url]
mostbet česko bonus [url=https://www.mostbet2018.help]mostbet česko bonus[/url]
цена курсовой работы [url=https://kupit-kursovuyu-107.ru/]kupit-kursovuyu-107.ru[/url] .
мостбет правила бонуса [url=https://mostbet67190.help]https://mostbet67190.help[/url]
[url=https://www.1tv.ru/]невролог беляево[/url]
[url=https://www.1tv.ru/]болезни нервной системы[/url]
visit this platform – Information is presented neatly, making navigation smooth.
browse this collection – Well-laid-out pages make finding content simple and quick.
wc craft space – Clear structure and exploring the site is straightforward.
Dune Cove Artisan Studio – Clean interface, pages load smoothly and navigation is effortless.
Dune Cove Artisan Corner – Clean setup, pages are responsive and information is easy to read.
jewelbrookartisanexchange.shop – Pretty clean design, makes exploring the site simple and fast.
сколько стоит курсовая работа по юриспруденции [url=https://kupit-kursovuyu-108.ru/]kupit-kursovuyu-108.ru[/url] .
check this page – Clean design and structured content make it easy to browse.
Visit the market – Clean design, sections are easy to navigate, and content is readable.
курсовые заказ [url=https://kupit-kursovuyu-108.ru/]курсовые заказ[/url] .
coastharborcraftcollective.shop – Looks neat and functional, everything works fine and feels reliable.
discover products – Pages display cleanly and navigation is simple.
mostbet mines hra [url=http://mostbet2018.help]http://mostbet2018.help[/url]
mostbet промокод при регистрации [url=mostbet09547.help]mostbet09547.help[/url]
jewelbrookcraftcollective.shop – Overall smooth experience, navigation is clear and content is helpful.
artisan hub – Layout is clean and moving through pages is effortless.
курсовая заказать недорого [url=https://kupit-kursovuyu-109.ru/]kupit-kursovuyu-109.ru[/url] .
мостбет скачать бесплатно [url=http://mostbet67190.help/]мостбет скачать бесплатно[/url]
open web link – Organized structure ensures effortless exploration of content.
сколько стоит курсовая работа по юриспруденции [url=https://kupit-kursovuyu-109.ru/]kupit-kursovuyu-109.ru[/url] .
rooftop vendor site – Everything is well-structured, making browsing quick and comfortable
покупка курсовых работ [url=https://kupit-kursovuyu-110.ru/]покупка курсовых работ[/url] .
1win apk quraşdırma [url=www.1win27096.help]www.1win27096.help[/url]
shop collection – I like the calm structure and clear layout here.
Коллеги, нашёл кейс про SEO для местной сети кафе в Екатеринбурге. ITB Company помогла поднять сайт на 30 позиций за три месяца, трафик вырос на 150%, а реальных посетителей стало на 40% больше. В статье подробно расписано, за счёт чего это получилось: скорость загрузки, адаптивный дизайн, уникальный контент. Полезно: https://drivetvchannel.ru/stati/kak-seo-prodvizhenie-s-itb-company-pomogaet-biznesu-ekaterinburga-rasti/
мелбет вывод на телефон [url=http://melbet64019.help]мелбет вывод на телефон[/url]
заказать практическую работу недорого цены [url=https://kupit-kursovuyu-110.ru/]заказать практическую работу недорого цены[/url] .
помощь в написании курсовой [url=https://kupit-kursovuyu-102.ru/]kupit-kursovuyu-102.ru[/url] .
Mahjong Ways 2 cluster: quem já pegou mais de 25 peças?
помощь в написании курсовой [url=https://kupit-kursovuyu-102.ru/]kupit-kursovuyu-102.ru[/url] .
wh craft corner – Content feels organized and easy to move through.
wh maker hub – Pages display nicely and the site feels structured well.
мелбет aviator коэффициент [url=www.melbet15709.help]мелбет aviator коэффициент[/url]
product showcase – Pages are neat and simple to browse through.
visit this portal – Pages are clean and the interface is intuitive.
artisan gallery – Layout is clear and scrolling between sections is smooth.
discover work – Navigation is intuitive, and images display beautifully.
sweet bonanza login Україна [url=www.sweet-bonanza91683.help]sweet bonanza login Україна[/url]
mostbet nie działa dzisiaj [url=mostbet2004.help]mostbet2004.help[/url]
Go to SnowBrook – Well-organized platform, pages load fast and browsing feels natural.
mostbet aviator jak hrát [url=mostbet2018.help]mostbet2018.help[/url]
visit artisan store – Nicely arranged and easy on the eyes, gives a solid impression.
shop artisan goods – Clean design choices make it feel smooth and inviting.
mostbet регистрация без кода [url=http://mostbet67190.help]http://mostbet67190.help[/url]
Чемикал, пожалуй, самый ровный магаз из всех ныне сушествующих! Цены, конечно есть и по меньше в других местах, однако для себя я выбрал безопасность и надежное сотрудничество, а не дешевизну, которая как показывает практика всегда заканчивается не очень хорошо. https://led-lampen24.org действительно было в лом,спасибо)Фарту в делах парни !:hello:
melbet бонус за пополнение [url=http://melbet64019.help]http://melbet64019.help[/url]
mostbet скачать на iphone [url=http://mostbet09547.help]http://mostbet09547.help[/url]
explore artisan work – Layout is clear and browsing through sections feels natural.
написание курсовой на заказ цена [url=https://kupit-kursovuyu-109.ru/]написание курсовой на заказ цена[/url] .
handmade hub – Everything is easy to locate and the structure feels clean.
Check SnowCove – Simple structure, pages load quickly and menus are easy to navigate.
курсовой проект цена [url=https://kupit-kursovuyu-109.ru/]курсовой проект цена[/url] .
mostbet free bet warunki [url=http://mostbet2004.help]mostbet free bet warunki[/url]
CustomerSupport – Content is straightforward and navigation is easy.
Box Jainson central – Everything is well-arranged, making the experience smooth and intuitive.
РАБОТАЕМ!!! ОПТ!!! ДОСТАВКА!!! https://simpleblissfullife.com Спасибо магазину!КАК ОБЕЩЯЛ ОПЕРАТОР ТАК ВСЕ И СДЕЛАЛ ОДИН В ОДИН !!!!
курсовая работа на заказ цена [url=https://kupit-kursovuyu-110.ru/]курсовая работа на заказ цена[/url] .
check it out here – The interface is intuitive and loads quickly with no confusion.
курсовые работы заказать [url=https://kupit-kursovuyu-110.ru/]курсовые работы заказать[/url] .
реабилитация наркоманов [url=https://vyvod-iz-zapoya-na-domu-sankt-peterburg.ru/]vyvod-iz-zapoya-na-domu-sankt-peterburg.ru[/url] .
mostbet plinko demo [url=http://mostbet47183.help/]http://mostbet47183.help/[/url]
pin-up kirish ishlamayapti [url=https://pinup08694.help/]https://pinup08694.help/[/url]
go to homepage – Clear layout and smooth navigation make browsing efficient.
handmade gallery – Layout is neat and straightforward, making browsing enjoyable.
лечение алкоголизма [url=https://vyvod-iz-zapoya-na-domu-sankt-peterburg-1.ru/]лечение алкоголизма[/url] .
melbet apk скачать киргизия [url=https://melbet64019.help/]https://melbet64019.help/[/url]
А ВОТ Я ТОЖЕ КИПИШЕВАЛ ПО СЧЕТУ ТРЕКА НЕ БИЛСЯ ТОЖЕ ПОЗВОНИЛ В КУРЬЕРКУ СКАЗАЛИ ОТПРАВЛЕННО И СЕГОДНЯ К ВЕЧЕРУ ВСЕ ОТБИЛОСЬ ЖДУ ПРИХОДА ПОСЫЛКИ. ПОТОМ НАПИШУ КАК ЕСТЬ. ПРОШУ ПРОЩЕНИЯ У ЧЕМИКАЛА ЗА ПЛОХИЕ ПОСТЫ, ДУМАЮ ПОЙМЕТ))) УЖЕ ДАВНО ТУТ БЕРУ НЕ РАЗУ НЕ КИНУЛ НИ ОДНОЙ ЗАДЕРЖКИ ВСЕ ПРОСТО НА 100%. купить Кокаин, Марихуану, Мефедрон, Бошки и я так же жду с 8 числа сказали отправки в начале неделиp/s мне ничего не надо! Зашёл пожелать удачи магазину в нелегком деле.
наркологическая помощь [url=https://vyvod-iz-zapoya-na-domu-sankt-peterburg-1.ru/]наркологическая помощь[/url] .
TeamOverview – Design is neat and navigation feels natural.
artisan corner – Clean layout and intuitive design make exploring easy.
світ бонанза інсталювати apk [url=http://sweet-bonanza91683.help/]світ бонанза інсталювати apk[/url]
check it out – Clean and structured site, makes understanding the content effortless.
kontakt mostbet [url=http://mostbet2004.help/]kontakt mostbet[/url]
Hi there, this weekend is pleasant in support of me, because this occasion i am reading this fantastic educational post here at my home.
зоо порно игры
mostbet sport live mobil [url=mostbet2018.help]mostbet2018.help[/url]
wildorchard artisan corner – Smooth experience with easy access to all sections.
artisan finds – Everything feels well-laid-out and exploring the pages is hassle-free.
мостбет [url=https://www.mostbet67190.help]мостбет[/url]
курсовой проект купить цена [url=https://kupit-kursovuyu-109.ru/]курсовой проект купить цена[/url] .
сколько стоит заказать курсовую работу [url=https://kupit-kursovuyu-109.ru/]сколько стоит заказать курсовую работу[/url] .
гы гы..вот такая вот история..мля )) https://led-lampen24.org Сам магаз работает хорошо все в сроки, консперация тоже на высшем уровне)ТС саппорт не требуется тебе ? Напиши в лс если интересно
artisan selections – The site feels organized and welcoming.
Нужен займ? микрозайм онлайн без визита в офис оформление онлайн без справок и поручителей. Быстрое решение, удобная подача заявки и получение денег на карту. Подберите выгодное предложение и получите средства в короткие сроки.
Добрый день!
Строительство домов без переплат
Мы выполняем строительство домов с учетом современных требований энергоэффективности и безопасности.
Полная информация по ссылке – https://dagtechstroy.ru/blog/top-building-in-dubai/
фонд капитального строительства, строительство дома под ключ строительство, расшифровка пто в строительстве
строительство кровли под ключ, [url=https://dagtechstroy.ru/category/building/]Здания – ДагТехСтрой – строительство[/url], дом строительство под ключ
Удачи и комфорта в жизни!
[url=https://solfibraotica.com.br/mostbet-casino-azerbayca-4/#comment-187177]Почему важна геология участка[/url] f89401c
artisan gift gallery – It’s laid out in a way that keeps everything easy to find and enjoy.
реабилитационный центр от алкоголизма [url=https://vyvod-iz-zapoya-na-domu-sankt-peterburg-2.ru/]vyvod-iz-zapoya-na-domu-sankt-peterburg-2.ru[/url] .
check this resource – Navigation is smooth, and the layout feels uncluttered.
капельница от похмелья [url=https://vyvod-iz-zapoya-na-domu-sankt-peterburg-3.ru/]vyvod-iz-zapoya-na-domu-sankt-peterburg-3.ru[/url] .
капельница от запоя [url=https://vyvod-iz-zapoya-na-domu-sankt-peterburg.ru/]vyvod-iz-zapoya-na-domu-sankt-peterburg.ru[/url] .
кодирование от алкоголизма [url=https://vyvod-iz-zapoya-na-domu-ekaterinburg-8.ru/]vyvod-iz-zapoya-na-domu-ekaterinburg-8.ru[/url] .
unique finds – The interface is tidy and moving between pages is simple.
реабилитационный центр для наркозависимых [url=https://vyvod-iz-zapoya-na-domu-ekaterinburg-9.ru/]vyvod-iz-zapoya-na-domu-ekaterinburg-9.ru[/url] .
[url=https://remont-membrannoj-krovli-1.ru]ремонт мембранной кровли[/url]
купить курсовую москва [url=https://kupit-kursovuyu-110.ru/]купить курсовую москва[/url] .
наркологическая помощь [url=https://vyvod-iz-zapoya-na-domu-sankt-peterburg.ru/]наркологическая помощь[/url] .
наркологическая помощь [url=https://vyvod-iz-zapoya-na-domu-sankt-peterburg-3.ru/]наркологическая помощь[/url] .
ResourcesCenter – Everything is organized and navigating the site is smooth.
лечение наркомании [url=https://vyvod-iz-zapoya-na-domu-sankt-peterburg-2.ru/]лечение наркомании[/url] .
https://rushbet.net.co/
Rushbet Colombia se presenta como un casino en linea y casa de apuestas deportivas que lleva operando legalmente en Colombia desde el ano 2021, respaldado por la licencia de Coljuegos y operado por la experimentada firma Rush Street Interactive.
artisan finds – Navigation is straightforward with a neat, well-laid-out interface.
реабилитационный центр от алкоголизма [url=https://vyvod-iz-zapoya-na-domu-ekaterinburg-9.ru/]vyvod-iz-zapoya-na-domu-ekaterinburg-9.ru[/url] .
лечение алкоголизма [url=https://vyvod-iz-zapoya-na-domu-ekaterinburg-8.ru/]vyvod-iz-zapoya-na-domu-ekaterinburg-8.ru[/url] .
шумоизоляция автомобиля https://shumoizolyaciya-avtomobilya-1.ru
купить курсовую работу [url=https://kupit-kursovuyu-110.ru/]купить курсовую работу[/url] .
пока никто ничего тут не берите!!!!!!!!!!!!!!!!!!!!!!!!!!!!!!!!!!!!!!!!моя ситуация решится если то я сообщу.Пока кидалово нарисоваывается.Дабы даже о приходе средств человек не сообщает,просто сказал ложи а после оплаты сразу замолчал,хотя сообщения доходили еще.А ты если кинеш то тварь ты последняя.Бобла наверно тут хорошо сделал а совести хватает провинциалов кидать.Ты в курсе что у нас люди на эти бабки 2 месяца живут и не от сладкой жизни гавно у тебя то берут.Бог тебе судья короче!Свечку тебе за здравие каждую неделю если что буду ставить 😉 чтоб ты жил долго и счастливо… https://fititandfix.com Отличный магазин брали.как планчик наверн цепляет. но не прям на коры. вообщем так норм сойдет
https://rushbet.net.co/
La plataforma Rushbet Colombia constituye un casino virtual y casa de pronosticos deportivos que opera legalmente en el pais desde 2021, con el respaldo de la autorizacion de Coljuegos y gestionado por la experimentada empresa Rush Street Interactive.
Только свежие новостной сайт свежие новости политики, экономики, общества и технологий. Актуальные события, аналитика, обзоры и мнения экспертов. Следите за главными новостями страны и мира онлайн в удобном формате каждый день.
вывод из запоя на дому [url=https://vyvod-iz-zapoya-na-domu-sankt-peterburg-1.ru/]вывод из запоя на дому[/url] .
smart shopping cart – Pages respond instantly and the layout is user-friendly.
handcrafted goods portal – Everything is organized neatly, giving a smooth browsing experience.
мелбет кз депозит с карты visa [url=http://melbet15709.help]http://melbet15709.help[/url]
наркологическая клиника [url=https://vyvod-iz-zapoya-na-domu-sankt-peterburg-1.ru/]наркологическая клиника[/url] .
artisan finds – Overall structure is consistent and visually comfortable.
artisan finds – Content is easy to access and navigation feels smooth throughout.
Строительные технологии https://universalstroi.su выгодные инвестиции в доступное жилье. Стабильный доход, перспективные проекты и высокий спрос. Получайте прибыль от инновационных решений в строительстве.
código de bono 1win [url=www.1win05634.help]www.1win05634.help[/url]
quick link – Straightforward advice and easy-to-read explanations make this site helpful.
melbet фора ставки [url=http://melbet64019.help/]melbet фора ставки[/url]
помощь курсовые [url=https://kupit-kursovuyu-109.ru/]kupit-kursovuyu-109.ru[/url] .
2.Почему на сайте нет ниодного упоминания о ритейле,в то время,как заказы надо делать через него? https://lovegivesmehope.com 2)Кто курит раз в неделю : от 3 часов до 5-7 часовМХЕ “как у всех” тобиш бодяжный.. Вроде скоро должна быть нормальная партия.
Монтажные работы https://montazhstroy.su услуги по установке инженерных систем и конструкций. Быстро, качественно и с гарантией. Выполняем задачи любой сложности для частных и коммерческих объектов.
купить курсовая работа [url=https://kupit-kursovuyu-109.ru/]купить курсовая работа[/url] .
enter this site – Everything loads quickly, and the interface is intuitive.
see details – Content is easy to find, and the structure feels very organized.
mostbet problem techniczny [url=www.mostbet2004.help]mostbet problem techniczny[/url]
artisan creations online – Navigation feels straightforward, and everything loads efficiently.
mostbet podpora czk [url=http://mostbet2018.help/]http://mostbet2018.help/[/url]
мелбет статистика матчей [url=melbet15709.help]melbet15709.help[/url]
наркологический центр [url=https://vyvod-iz-zapoya-na-domu-sankt-peterburg.ru/]наркологический центр[/url] .
мостбет mines стратегия [url=https://www.mostbet67190.help]мостбет mines стратегия[/url]
check this page – Clever, imaginative approach ensures the site feels unique and memorable.
капельница от запоя [url=https://vyvod-iz-zapoya-na-domu-sankt-peterburg.ru/]vyvod-iz-zapoya-na-domu-sankt-peterburg.ru[/url] .
прием на ответственное хранение ответственное хранение москва цены
artisan finds – Everything is easy to access, and layout is neat and responsive.
кодирование от алкоголизма [url=https://vyvod-iz-zapoya-na-domu-ekaterinburg-8.ru/]vyvod-iz-zapoya-na-domu-ekaterinburg-8.ru[/url] .
нарколог на дом [url=https://vyvod-iz-zapoya-na-domu-sankt-peterburg-3.ru/]нарколог на дом[/url] .
кодирование от алкоголизма [url=https://vyvod-iz-zapoya-na-domu-sankt-peterburg-3.ru/]кодирование от алкоголизма[/url] .
кодирование от алкоголизма [url=https://vyvod-iz-zapoya-na-domu-ekaterinburg-8.ru/]vyvod-iz-zapoya-na-domu-ekaterinburg-8.ru[/url] .
сервис – хуже некуда. Ну да об этом писал несколькими сообщениями ранее. 2/5 https://jesseliotmyhre.com Хороший сервис судя по отзывам!:)Тарился в этом магазе Летом разок и в Сентябре разок)))
mostbet tolov rad etildi [url=mostbet47183.help]mostbet47183.help[/url]
pin-up slot demo [url=pinup08694.help]pinup08694.help[/url]
наркологический стационар [url=https://vyvod-iz-zapoya-na-domu-ekaterinburg-9.ru/]vyvod-iz-zapoya-na-domu-ekaterinburg-9.ru[/url] .
cartoonporno1cn – Site works smoothly and layout is simple but effective overall.
handmade items hub – Pages load quickly and the interface is simple to use.
доставка цветов сколько стоит [url=http://dostavka-cvetov777.ru]доставка цветов сколько стоит[/url] .
access page – Smooth browsing and well-organized content made it enjoyable today.
капельница от похмелья [url=https://vyvod-iz-zapoya-na-domu-sankt-peterburg-2.ru/]vyvod-iz-zapoya-na-domu-sankt-peterburg-2.ru[/url] .
реабилитация наркоманов [url=https://vyvod-iz-zapoya-na-domu-ekaterinburg-9.ru/]vyvod-iz-zapoya-na-domu-ekaterinburg-9.ru[/url] .
shop artisan goods – Layout feels logical and browsing is very straightforward.
капельница от похмелья [url=https://vyvod-iz-zapoya-na-domu-sankt-peterburg-2.ru/]vyvod-iz-zapoya-na-domu-sankt-peterburg-2.ru[/url] .
вывод из запоя в стационаре [url=https://vyvod-iz-zapoya-na-domu-sankt-peterburg-1.ru/]vyvod-iz-zapoya-na-domu-sankt-peterburg-1.ru[/url] .
заказать курсовую работу [url=https://kupit-kursovuyu-110.ru/]заказать курсовую работу[/url] .
AboutUsSection – Navigation is clear and content is well-structured.
ответственное хранение товара сколько стоит ответственное хранение
сколько стоит сделать курсовую работу на заказ [url=https://kupit-kursovuyu-110.ru/]сколько стоит сделать курсовую работу на заказ[/url] .
Как привило мелкие селлеры о конфиденциальности не думают, а потом с ними метоморфозы и происходят.. купить Кокаин, Марихуану, Мефедрон, Бошки Да магаз от души тут работает давно и чётко ,было время работал с ним по опту !!! С новым годом всех!Урал и Chemical продукт знают как сделать грязно
check this page – Smooth interface and useful info made this a satisfying visit today.
handmade treasures online – Smooth navigation and organized sections make it easy to use.
discover platform – Smooth transitions and a neat interface improve usability.
ответственный за ведение и хранение цены ответственного хранения
melbet скачать приложение на ios [url=http://melbet15709.help/]http://melbet15709.help/[/url]
организация ответственного хранения сколько стоит ответственное хранение
Кстати, если вас интересует Как стать успешным руководителем после экспертизы, загляните сюда.
Смотрите сами:
[url=https://udobno77.ru/%d0%b1%d0%b5%d0%b7-%d1%80%d1%83%d0%b1%d1%80%d0%b8%d0%ba%d0%b8/perehod-iz-eksperta-v-rukovoditelya-kak-podgotovitsya-k-novoj-roli-cherez-obuchenie/]https://udobno77.ru/%d0%b1%d0%b5%d0%b7-%d1%80%d1%83%d0%b1%d1%80%d0%b8%d0%ba%d0%b8/perehod-iz-eksperta-v-rukovoditelya-kak-podgotovitsya-k-novoj-roli-cherez-obuchenie/[/url]
наркологический стационар [url=https://vyvod-iz-zapoya-na-domu-sankt-peterburg.ru/]vyvod-iz-zapoya-na-domu-sankt-peterburg.ru[/url] .
как скачать мелбет на android [url=melbet64019.help]melbet64019.help[/url]
кодирование от алкоголизма [url=https://vyvod-iz-zapoya-na-domu-sankt-peterburg.ru/]vyvod-iz-zapoya-na-domu-sankt-peterburg.ru[/url] .
вывод из запоя в стационаре [url=https://vyvod-iz-zapoya-na-domu-ekaterinburg-8.ru/]vyvod-iz-zapoya-na-domu-ekaterinburg-8.ru[/url] .
explore now – The content is useful and organized well for smooth reading.
https://polyanka9.ru/10-avtomobiley-s-probegom-kotorye-ne-nuzhdayutsya-v-chastyh-remontah/
https://wow-photo.ru/nastolnye-igry-dlya-detskogo-prazdnika-idei-i-primery-dlya-detej-7-let/
view site online – Logical arrangement of pages and smooth navigation enhance usability.
explore now – Everything is arranged logically and navigation feels natural.
neteller mostbet [url=mostbet2004.help]neteller mostbet[/url]
реабилитационный центр от алкоголизма [url=https://vyvod-iz-zapoya-na-domu-ekaterinburg-8.ru/]vyvod-iz-zapoya-na-domu-ekaterinburg-8.ru[/url] .
Магаз отличный, успехов вам! https://fabricandomarcas.com Да, в скайпе их нет и ситтуация мне тоже не нравиться.оч хороший магазин !
реабилитационный центр от алкоголизма [url=https://vyvod-iz-zapoya-na-domu-sankt-peterburg-3.ru/]vyvod-iz-zapoya-na-domu-sankt-peterburg-3.ru[/url] .
mostbet hisob valyuta [url=www.mostbet47183.help]mostbet hisob valyuta[/url]
реабилитационный центр от алкоголизма [url=https://vyvod-iz-zapoya-na-domu-sankt-peterburg-3.ru/]vyvod-iz-zapoya-na-domu-sankt-peterburg-3.ru[/url] .
нарколог на дом [url=https://vyvod-iz-zapoya-na-domu-ekaterinburg-9.ru/]нарколог на дом[/url] .
check this page – The clean structure and simple design make for a nice experience.
реабилитация алкоголиков [url=https://vyvod-iz-zapoya-na-domu-ekaterinburg-9.ru/]vyvod-iz-zapoya-na-domu-ekaterinburg-9.ru[/url] .
нарколог на дом [url=https://vyvod-iz-zapoya-na-domu-sankt-peterburg-1.ru/]нарколог на дом[/url] .
aviator 1win [url=www.1win05634.help]aviator 1win[/url]
curated crafts – Layout is logical and exploring the content is intuitive.
creative makers corner – The site feels balanced and easy to navigate.
реабилитация наркоманов [url=https://vyvod-iz-zapoya-na-domu-sankt-peterburg-1.ru/]vyvod-iz-zapoya-na-domu-sankt-peterburg-1.ru[/url] .
кодирование от алкоголизма [url=https://vyvod-iz-zapoya-na-domu-sankt-peterburg-2.ru/]кодирование от алкоголизма[/url] .
Thanks for sharing your thoughts. I really appreciate your efforts and I will be waiting for your next post thank you once again.
https://teletype.in/@avtobloggerua/B8-lsvQ4Hyu
5 гр заказала, ждали 6 дней, вот забрали у курика, муж укололся, потом ещё в воде разболтали и выпили. Эффект ноль. Что с остальным делать. Хоть в унитаз высыпай купить Кокаин, Марихуану, Мефедрон, Бошки Ребята подскажите пжл.Сейчас общаюсь с оператором в скайпе по Липецку Lipeck-shops ктонибудь у него приобреатл в липе с воскресенья по данный день и оплачивали вы на данные реквы 964 и 905(он говорит что их у него два)Бразы помгите разобраться.Полностью согласен !!!
реабилитационный центр от алкоголизма [url=https://vyvod-iz-zapoya-na-domu-sankt-peterburg-2.ru/]vyvod-iz-zapoya-na-domu-sankt-peterburg-2.ru[/url] .
pin-up depozitsiz bonus [url=pinup08694.help]pinup08694.help[/url]
1win blackjack en vivo Perú [url=1win05634.help]1win05634.help[/url]
browse handcrafted – Layout is tidy and scrolling between pages is effortless.
visit homepage now – The interface is clean, making it easy to move through the site.
janpath connect – Site feels organized and easy to explore.
«Аркейн» — без преувеличения лучший анимационный сериал последних лет. История разворачивается на фоне непримиримого противостояния богатого Пилтоувера и угнетённого Зауна. Судьбы сестёр Вай и Пауэр, выросших в нищете, превращаются в цепочку невозможных выборов и потерь. Ищете аркейн смотреть онлайн? Смотреть все 18 серий удобно на arkeyn-smotret.biz — бесплатно в высоком качестве с несколькими вариантами озвучки. Авторы говорят о классовом неравенстве, жертвах прогресса и личной боли прямо и без украшательств — сильно, честно, с безупречной картинкой.
melbet lucky jet на деньги [url=melbet15709.help]melbet15709.help[/url]
1win app download [url=www.1win5529.ru]www.1win5529.ru[/url]
мелбет войти [url=melbet95634.help]melbet95634.help[/url]
реабилитационный центр для наркозависимых [url=https://vyvod-iz-zapoya-na-domu-ekaterinburg-8.ru/]vyvod-iz-zapoya-na-domu-ekaterinburg-8.ru[/url] .
реабилитация алкоголиков [url=https://vyvod-iz-zapoya-na-domu-ekaterinburg-10.ru/]vyvod-iz-zapoya-na-domu-ekaterinburg-10.ru[/url] .
мостбет результаты live [url=https://mostbet80295.help/]https://mostbet80295.help/[/url]
pin-up retirar a débito [url=https://pinup62718.help/]https://pinup62718.help/[/url]
нарколог на дом [url=https://vyvod-iz-zapoya-na-domu-ekaterinburg-11.ru/]нарколог на дом[/url] .
наркологический стационар [url=https://kapelnicza-ot-pokhmelya-voronezh.ru/]kapelnicza-ot-pokhmelya-voronezh.ru[/url] .
«Чёрная любовь» — турецкая мелодрама 2015 года о людях из разных социальных миров, чья встреча с первого мгновения превращается в главное испытание судьбы. Скромный стамбулец Кемаль влюбляется в Нихан — девушку из богатой семьи с тёмными тайнами и властным женихом Эмиром. Манипуляции, шантаж и предательство разлучают их на годы. Ищете чёрная любовь все серии? Все 244 серии двух сезонов смотрите бесплатно на chernaya-lyubov-kinogo.online с русским дубляжом в хорошем качестве. Кемаль возвращается другим человеком, но встреча с Нихан разрушает всё, что он выстроил: прошлое не прощает молчания, а чувство, которое казалось угасшим, вспыхивает с прежней силой.
реабилитационный центр от алкоголизма [url=https://kapelnicza-ot-pokhmelya-voronezh-1.ru/]kapelnicza-ot-pokhmelya-voronezh-1.ru[/url] .
лечение наркомании [url=https://kapelnicza-ot-zapoya-voronezh.ru/]kapelnicza-ot-zapoya-voronezh.ru[/url] .
И духовной отсутствие пищи купить Кокаин, Марихуану, Мефедрон, Бошки Всем привет! Хороший магазин. Удачи и развития в дальнейшем!бешельме мешельме атакает
вывод из запоя на дому [url=https://vyvod-iz-zapoya-na-domu-ekaterinburg-8.ru/]vyvod-iz-zapoya-na-domu-ekaterinburg-8.ru[/url] .
реабилитация наркоманов [url=https://vyvod-iz-zapoya-na-domu-ekaterinburg-10.ru/]vyvod-iz-zapoya-na-domu-ekaterinburg-10.ru[/url] .
реабилитация наркоманов [url=https://vyvod-iz-zapoya-na-domu-ekaterinburg-11.ru/]реабилитация наркоманов[/url] .
капельница от похмелья [url=https://kapelnicza-ot-pokhmelya-voronezh.ru/]kapelnicza-ot-pokhmelya-voronezh.ru[/url] .
check site – Simple layout and structured content make navigation intuitive.
вывод из запоя на дому [url=https://kapelnicza-ot-pokhmelya-voronezh-1.ru/]вывод из запоя на дому[/url] .
капельница от запоя [url=https://kapelnicza-ot-zapoya-voronezh.ru/]kapelnicza-ot-zapoya-voronezh.ru[/url] .
лечение наркомании [url=https://vyvod-iz-zapoya-na-domu-sankt-peterburg-3.ru/]лечение наркомании[/url] .
explore handmade – Content loads smoothly and navigation is simple.
start here – Well-laid-out sections make exploring fast and simple.
jewelry corner – Layout is tidy and exploring sections is straightforward.
«Великолепный век» — турецкий костюмный сериал 2011 года о роскоши и интригах Османской империи в правление Сулеймана Великолепного. 139 серий охватывают четыре сезона дворцовых интриг, войн и любви: юная рабыня Хюррем поднимается от бесправной пленницы до женщины, меняющей судьбы государства. Ищете великолепный век все серии? Все серии доступны на velikolepnyy-vek-smotret.online бесплатно в хорошем качестве с русским дубляжом. Изысканные костюмы, подлинная атмосфера дворца Топкапы и убедительная актёрская работа переносят зрителя прямо в XVI столетие. История, мелодрама и придворный триллер здесь неотделимы друг от друга — сериал держит в напряжении без единой слабой серии до самого конца.
Южнокорейский сериал «Милый дом» — жёсткий и атмосферный хоррор-триллер, который захватывает с первых минут. Таинственная эпидемия превращает людей в монстров, отражающих их внутренние страхи и желания. Замкнутый школьник Чха Хёнсу оказывается в осаждённом жилом комплексе среди соседей, которых боишься не меньше тварей за дверью. Ищете сериал милый дом? Все три сезона доступны на milyy-dom-smotret.net — смотреть онлайн бесплатно в высоком качестве с профессиональной озвучкой. Шоу органично смешивает фантастику, боевик и психологическую драму, сохраняя накал до самого конца каждого эпизода.
discovergrowthdirectionnow.click – Good layout choice, content readability is excellent across pages.
Новини Києва https://thekyivreview.com/ . Новини та актуальна довідкова інформація про місто Київ.
реабилитационный центр от алкоголизма [url=https://vyvod-iz-zapoya-na-domu-ekaterinburg-9.ru/]vyvod-iz-zapoya-na-domu-ekaterinburg-9.ru[/url] .
В наличии скорость , налетаем https://lovegivesmehope.com Получал пробный набор (ам2201, jwh250, jwh203, 5iai) от данного селлера, качество хорошее кроме 5iai вообще не понял.у меня в подписи проверь
дизайн интерьер квартир под ключ заказать дизайн проект квартиры
студия дизайна интерьера студия дизайна интерьера
https://sc-grandmaster.ru/forum/?PAGE_NAME=profile_view&UID=33213
наркологическая помощь [url=https://vyvod-iz-zapoya-na-domu-sankt-peterburg-3.ru/]наркологическая помощь[/url] .
pinup depozit [url=https://pinup08694.help/]pinup depozit[/url]
интерьер квартиры под ключ дизайн интерьера квартиры проект
Barling Collins resources – Pages load efficiently and the interface is clear.
eshravan store – Clear layout, pages respond quickly and easily.
вывод из запоя в стационаре [url=https://vyvod-iz-zapoya-na-domu-sankt-peterburg-2.ru/]вывод из запоя в стационаре[/url] .
check details – Some really applicable ideas here, definitely worth revisiting.
продажа базы данных [url=https://gobasego-2.ru/]gobasego-2.ru[/url] .
Ищете надежную юридическую помощь? Рейтинг лучших юристов поможет быстро найти проверенных специалистов с высоким уровнем экспертизы и успешной практикой. Переходите по запросу [url=https://centrbg.ru/company/employees/]рейтинг адвокатов[/url]. В подборке — профессионалы, которым доверяют клиенты, с реальными отзывами и подтвержденной репутацией. Выбирайте юриста для решения любых правовых вопросов уверенно и без лишних рисков.
наркологическая помощь [url=https://vyvod-iz-zapoya-na-domu-sankt-peterburg-2.ru/]наркологическая помощь[/url] .
Explore the vendor site – Fast pages, organized layout, and intuitive browsing.
mostbet androidga qanday o‘rnatish [url=www.mostbet47183.help]mostbet androidga qanday o‘rnatish[/url]
equipe
покупка данных [url=https://gobasego-2.ru/]gobasego-2.ru[/url] .
1win apk oficial Perú descargar [url=https://www.1win05634.help]https://www.1win05634.help[/url]
реабилитация наркоманов [url=https://vyvod-iz-zapoya-na-domu-ekaterinburg-10.ru/]vyvod-iz-zapoya-na-domu-ekaterinburg-10.ru[/url] .
реабилитационный центр для наркозависимых [url=https://kapelnicza-ot-pokhmelya-voronezh.ru/]kapelnicza-ot-pokhmelya-voronezh.ru[/url] .
видел тут в ветке пару сообщений о том, что заказчикам вместо нормального товара какую то муть присылали, так вот хотелось бы узнать у владельцев магазина, в связи с чем возникают такие накладки и как часто такое случается, а то почтой итак заказ долго дожидаться, а если ещё подобный косяк выйдет с возвратом, то это будет полный п… https://neowhig.org “Прыгаю в кеды, и лечу на адрес “Сори я не туда отписал
лечение наркомании [url=https://vyvod-iz-zapoya-na-domu-ekaterinburg-11.ru/]лечение наркомании[/url] .
лечение наркомании [url=https://vyvod-iz-zapoya-na-domu-ekaterinburg-10.ru/]лечение наркомании[/url] .
капельница от запоя [url=https://kapelnicza-ot-pokhmelya-voronezh.ru/]капельница от запоя[/url] .
Hey everyone!
Looking for a solid gaming platform?
I recommend Miki — a modern gaming platform: https://www.trustpilot.com/review/fsh-online.com
VIP rewards. Highly recommended.
Share your experience below?
вывод из запоя в стационаре [url=https://vyvod-iz-zapoya-na-domu-ekaterinburg-11.ru/]вывод из запоя в стационаре[/url] .
Comprehensive asthma treatment guide — symptoms, causes, and effective management. Explore inhalers, medications, and daily care tips to reduce attacks and maintain better respiratory health.
check this page – A smooth and well-structured design makes it pleasant to browse.
Discover the store – Fast pages, clean design, and very easy browsing experience.
melbet зарегистрироваться [url=http://melbet15709.help]http://melbet15709.help[/url]
За фасадом обычного мегаполиса Токио скрывается ночной мир гулей — хищников, для которых человеческая плоть не выбор, а единственный способ выжить. Кен Канеки прошёл путь от беззащитного студента до полугуля с расколотым рассудком, и каждый его шаг неотвратимо ведёт в пропасть. Ищете токийский гуль перерождение все серии? На tokiyskiy-gul-pererozhdenie-kinogo.vip все 24 серии доступны бесплатно в хорошем качестве с несколькими вариантами озвучки. CCG планомерно уничтожает подполье гулей, а каждое сражение бьёт не только по плоти — шрамы на душах оказываются куда глубже.
explore smart movements – Checked briefly and the content looks practical and useful.
«Рассказ служанки» — без сомнения, один из главных антиутопических сериалов нашего времени, снятый по знаменитому роману Маргарет Этвуд. Действие разворачивается в тоталитарном государстве, где женщины лишены прав, имён и свободы, а служанки обязаны рожать детей для элиты. Ищете рассказ служанки все серии? На rasskaz-sluzhanki-smotret.net доступны все 66 серий шести сезонов с профессиональными озвучками. Сериал удостоен множества престижных наград и признан одной из лучших драм десятилетия — напряжённый, беспощадный и абсолютно необходимый к просмотру.
кодирование от алкоголизма [url=https://kapelnicza-ot-pokhmelya-voronezh-1.ru/]кодирование от алкоголизма[/url] .
вывод из запоя на дому [url=https://kapelnicza-ot-zapoya-voronezh.ru/]kapelnicza-ot-zapoya-voronezh.ru[/url] .
вывод из запоя в стационаре [url=https://kapelnicza-ot-pokhmelya-voronezh-1.ru/]kapelnicza-ot-pokhmelya-voronezh-1.ru[/url] .
мне продавец так и не выслал компенсацию за хреновый МХЕ https://cortecolecrie.com да ее колать страшно эксперементатором быдь тоже чет не охотоКАК ОБЕЩЯЛ ОПЕРАТОР ТАК ВСЕ И СДЕЛАЛ ОДИН В ОДИН !!!!
капельница от похмелья [url=https://kapelnicza-ot-zapoya-voronezh.ru/]kapelnicza-ot-zapoya-voronezh.ru[/url] .
В статье подробно описано, как ITB Company выстраивает SEO-продвижение для бизнеса в Екатеринбурге: от аудита и сбора семантики до создания контента и ссылочной стратегии. Понравилось, что делают акцент на локальное SEO — регистрация в каталогах, работа с отзывами, адаптация под геозависимые запросы. Полезно: https://riminisalon.ru/stati/kak-seo-prodvizhenie-s-itb-company-pomogaet-biznesu-ekaterinburga-rasti/
artisan selections – Content is easy to follow and site feels well-maintained.
explore now – Everything is presented clearly, making it quick to grasp the ideas.
see details here – Everything is easy to digest, with clear steps.
discover the collection – Pages open quickly, keeping the experience uninterrupted.
discover items – Pages respond smoothly and quickly, keeping everything hassle-free.
наркологический центр [url=https://kapelnicza-ot-zapoya-voronezh-1.ru/]наркологический центр[/url] .
Стоимость банкротства физических лиц зависит от сложности дела, суммы долгов и объема работы юриста. В цену обычно входят услуги по подготовке документов, сопровождение в суде и работа финансового управляющего. Переходите по запросу [url=https://centrbg.ru/company/price-list/]сколько стоят услуги финансового управляющего[/url]. Мы поможем оценить расходы заранее и предложим прозрачные условия без скрытых платежей, чтобы вы могли законно списать долги и начать с чистого листа.
pin-up mines 2026 [url=pinup48127.help]pinup48127.help[/url]
где можно заказать цветы на дом [url=https://dostavka-cvetov777.ru]где можно заказать цветы на дом[/url] .
нарколог на дом [url=https://kapelnicza-ot-zapoya-voronezh-1.ru/]нарколог на дом[/url] .
реабилитация наркоманов [url=https://vyvod-iz-zapoya-na-domu-ekaterinburg-10.ru/]vyvod-iz-zapoya-na-domu-ekaterinburg-10.ru[/url] .
тестовая база [url=https://gobasego-2.ru/]gobasego-2.ru[/url] .
official innovation page – Everything here is described in a clear and concise way.
browse here – Thoughtful content that makes this resource worth checking out.
pin-up kunlik limit [url=https://www.pinup08694.help]pin-up kunlik limit[/url]
лечение наркомании [url=https://vyvod-iz-zapoya-na-domu-ekaterinburg-10.ru/]лечение наркомании[/url] .
Скиньте сайт ваш пожалуйста. купить Кокаин, Марихуану, Мефедрон, Бошки ПРИВЕТ ВСЕМ:НУ ЧТО Ж ТЫ БРО ТАК ОБЕЗНАДЕЖИЛ МЕНЯ ПО СКАЙПУ И В КОМЕНТАРИЯХ НАПИСАЛ ЧТО ОТПРАВИЛ MXE А НА ПАКЕТЕ НАПИСАНО RCS И ЧТО МНЕ КУРИТЬ ТЕПЕРЬ НАЧАТЬ ЗАЧЕМ ГОВОРИТЬ ТО ЧТО НЕ ДЕЛАЕШЬ КАК САМ СЧИТАЕШЬ ?качество на высоте! сегодня опробовали и регу и ск!
тестовые ключи [url=https://gobasego-2.ru/]gobasego-2.ru[/url] .
https://codere-bet.com.co/
El operador Codere Bet dentro del territorio colombiano se presenta como un casino y centro de apuestas deportivas con legitimidad reconocida en Colombia pues funciona bajo la supervision de Coljuegos
Открываешь кейсы KC? промокод на Изи Дроп актуальные бонусы и скидки для пользователей. Получайте выгодные предложения, дополнительные возможности и экономьте при использовании сервиса. Все действующие промокоды в одном месте.
вывод из запоя на дому [url=https://kapelnicza-ot-pokhmelya-voronezh.ru/]вывод из запоя на дому[/url] .
Коммерческий и государственный тендер — это конкурентная процедура выбора поставщика товаров или оказания услуг. Заказчик размещает требования, а компании подают заявки и участвуют в торгах.
Не оставайтесь в неведении – http://tendernoe-soprovozhdenie-rostov-na-donu.ru
Часто предприниматели объединяют понятия тендер и госзакупки, так как обе процедуры связаны с конкурсным выбором поставщика. Однако между ними существуют определённые различия, которые важно понимать перед началом работы в этой сфере.
Глубже в тему — здесь – https://tendernoe-soprovozhdenie-rostov-na-donu.ru/
наркологический стационар [url=https://vyvod-iz-zapoya-na-domu-ekaterinburg-11.ru/]vyvod-iz-zapoya-na-domu-ekaterinburg-11.ru[/url] .
discover curated selections – Smooth user experience and simple site structure.
1win enlace oficial [url=www.1win05634.help]www.1win05634.help[/url]
наркологический центр [url=https://kapelnicza-ot-pokhmelya-voronezh.ru/]наркологический центр[/url] .
лечение алкоголизма [url=https://vyvod-iz-zapoya-na-domu-ekaterinburg-11.ru/]лечение алкоголизма[/url] .
https://codere-bet.com.co/
Codere Bet Colombia se presenta como un casino y centro de apuestas deportivas con respaldo normativo dentro del pais pues funciona bajo la supervision de Coljuegos
mostbet xush kelibsiz bonus [url=https://mostbet47183.help]https://mostbet47183.help[/url]
open this link – The pages maintain a clear and minimal style as I navigate.
official store link – The layout feels neat and very user-friendly.
1win app for ios download [url=https://www.1win5529.ru]https://www.1win5529.ru[/url]
Доброго времени суток все друзья!:hello:Отличный магазин!!!Всегда ровные движения работал с ним.Всем советую купить Кокаин, Марихуану, Мефедрон, Бошки удачи в изменении ситуации! :)ДУМАЙТЕ САМИ!!!
pin-up Chile sitio [url=www.pinup62718.help]www.pinup62718.help[/url]
mostbet android приложение скачать [url=http://mostbet80295.help]mostbet android приложение скачать[/url]
melbet пополнение odengi [url=http://melbet95634.help]http://melbet95634.help[/url]
visit this tool – Looks like a handy solution, interface feels quite smooth and simple.
Открываешь кейсы KC? промокоды изи дроп 15 актуальные бонусы и скидки для пользователей. Получайте выгодные предложения, дополнительные возможности и экономьте при использовании сервиса. Все действующие промокоды в одном месте.
вывод из запоя на дому [url=https://kapelnicza-ot-zapoya-voronezh.ru/]kapelnicza-ot-zapoya-voronezh.ru[/url] .
шумоизоляция автомобиля Москва https://shumoizolyaciya-avtomobilya-moskva-1.ru
explore website – The calm design and structured content make it pleasant to use.
реабилитационный центр от алкоголизма [url=https://kapelnicza-ot-zapoya-voronezh.ru/]kapelnicza-ot-zapoya-voronezh.ru[/url] .
тестовая база [url=https://gobasego-2.ru/]gobasego-2.ru[/url] .
visit resource – Scanned a few pages, and it comes across as a solid and dependable site.
капельница от похмелья [url=https://kapelnicza-ot-pokhmelya-voronezh-1.ru/]kapelnicza-ot-pokhmelya-voronezh-1.ru[/url] .
visit oakmeadow marketplace – Smooth interface with easy-to-find sections makes browsing enjoyable.
product hub – The page design makes exploring items straightforward.
SolarBazaar – The structure is intuitive and finding items is easy.
кодирование от алкоголизма [url=https://kapelnicza-ot-pokhmelya-voronezh-1.ru/]кодирование от алкоголизма[/url] .
browse featured selections – Everything is presented clearly, making exploration enjoyable.
check the market hall – Content is well organized, making it simple to find what you need.
shop this marketplace – Pages are neat and browsing through products is effortless.
visit store – The layout is simple and gives a pleasant browsing experience.
лечение наркомании [url=https://vyvod-iz-zapoya-na-domu-ekaterinburg-10.ru/]лечение наркомании[/url] .
1win apk pure [url=http://1win5529.ru/]1win apk pure[/url]
explore rainharbor collections – Nice structure, items are easy to find and well presented.
вывод из запоя на дому [url=https://kapelnicza-ot-pokhmelya-voronezh.ru/]вывод из запоя на дому[/url] .
Ага, прям именно так. Но все же?))))) https://led-lampen24.org впервые обратился в этот магазин за оптом и был удивлён тем, что они работают без гаранта. Но почитав отзывы , решил заказать без гаранта с доставкой в регион. Обещали 5-7 дней. С небольшим опозданием получил адрес в своём городе и без проблем забрал опт. Возникли небольшие заморочки в части заказа и магазин без лишних слов решил все недорозумения в мою пользу. Очень приятно работать с такими людьми! Отличный магазин! Всем рекомендую! И можно не обращать внимание на то что они работают без гаранта. Удачи в бизе!магазин ровный
pin-up Santiago [url=http://pinup62718.help/]http://pinup62718.help/[/url]
мостбет букмекерская контора Кыргызстан [url=https://mostbet80295.help/]https://mostbet80295.help/[/url]
frostriver vendor gallery – Well-arranged pages make browsing simple and quick.
плинко мелбет [url=https://www.melbet95634.help]https://www.melbet95634.help[/url]
this link – Easy to explore pages without getting lost.
реабилитационный центр для наркозависимых [url=https://kapelnicza-ot-pokhmelya-voronezh.ru/]kapelnicza-ot-pokhmelya-voronezh.ru[/url] .
shop artisan pieces – Interface flows smoothly, allowing quick product exploration.
лечение алкоголизма [url=https://vyvod-iz-zapoya-na-domu-ekaterinburg-11.ru/]лечение алкоголизма[/url] .
Быстрые микрозаймы всем на https://credit-world.ru – это простой способ оформить займ за несколько минут без лишних проверок и сложных условий. На сайте представлено более 50 МФО, где реально оформить займ даже при нестандартной ситуации. Сравните условия разных компаний, подобрать подходящий займ и подать заявку за несколько минут, и узнать результат в кратчайшие сроки.
капельница от запоя [url=https://kapelnicza-ot-zapoya-voronezh-1.ru/]kapelnicza-ot-zapoya-voronezh-1.ru[/url] .
цветы доставка недорого [url=http://www.dostavka-cvetov777.ru]цветы доставка недорого[/url] .
visit this shop – Items are arranged neatly, making everything easy to view.
1win apuestas Copa Sudamericana [url=http://1win05634.help]http://1win05634.help[/url]
вывод из запоя в стационаре [url=https://vyvod-iz-zapoya-na-domu-ekaterinburg-11.ru/]вывод из запоя в стационаре[/url] .
take a look – Everything appears neat and easy to navigate.
OrchardOutlet – Pages load fast and browsing products is very smooth.
shop this vendor – Everything loads quickly and the design makes it easy to explore.
shop quality goods – Layout is tidy and navigation is simple.
реабилитационный центр от алкоголизма [url=https://kapelnicza-ot-zapoya-voronezh-1.ru/]kapelnicza-ot-zapoya-voronezh-1.ru[/url] .
pin-up bonus code [url=http://pinup08694.help]pin-up bonus code[/url]
тестовые ключи [url=https://gobasego-2.ru/]gobasego-2.ru[/url] .
купить базу [url=https://gobasego-2.ru/]купить базу[/url] .
Стоимость банкротства физических лиц зависит от сложности дела, суммы долгов и объема работы юриста. В цену обычно входят услуги по подготовке документов, сопровождение в суде и работа финансового управляющего. Переходите по запросу [url=https://centrbg.ru/company/price-list/]сколько стоит финансовый управляющий при банкротстве[/url]. Мы поможем оценить расходы заранее и предложим прозрачные условия без скрытых платежей, чтобы вы могли законно списать долги и начать с чистого листа.
Уже не раз писали – настраивают сайт для автоматизации заказов, с потоком розничных покупателей не справляются с нынешный системой ) https://mehrgaan.org пробуйте , ждём Вас !да магаз отличный.оперативно работают.и качество товара отличное.вобщем всё хорошо.
oliveharborvendorhall – Nice layout overall, items are displayed clearly and easy to find.
official store link – Interface is responsive and makes finding items straightforward.
StoneVendorRoom – Navigation is smooth and exploring items is quick and convenient.
start exploring – Layout is simple, and items are easy to view and navigate.
floraharborvendorhall – Nice variety of listings, browsing through felt quite pleasant today.
visit market parlor – Pages load fast and everything is clearly displayed.
1win league of legends betting [url=1win5529.ru]1win5529.ru[/url]
лечение алкоголизма [url=https://kapelnicza-ot-zapoya-voronezh.ru/]kapelnicza-ot-zapoya-voronezh.ru[/url] .
moon cove shop – Layout is clean and finding items feels effortless.
melbet пополнение элкарт [url=www.melbet95634.help]www.melbet95634.help[/url]
mines en pin-up [url=http://pinup62718.help/]mines en pin-up[/url]
mostbet краш игры [url=https://mostbet80295.help/]https://mostbet80295.help/[/url]
наркологический стационар [url=https://kapelnicza-ot-zapoya-voronezh.ru/]kapelnicza-ot-zapoya-voronezh.ru[/url] .
go to this link – Pretty direct and easy to read, makes following the strategy simple.
explore here – Everything feels structured logically, so browsing is effortless.
discover products – Organized layout allows fast and simple product browsing.
Зацепил материал про Как стать руководителем с помощью РАНХиГС.
Ссылка ниже:
[url=https://hiteat.ru/%d0%b1%d0%b5%d0%b7-%d1%80%d1%83%d0%b1%d1%80%d0%b8%d0%ba%d0%b8/perehod-iz-speczialista-v-rukovoditeli-kak-obuchenie-i-ranhigs-uskoryayut-start-v-upravlenii/]https://hiteat.ru/%d0%b1%d0%b5%d0%b7-%d1%80%d1%83%d0%b1%d1%80%d0%b8%d0%ba%d0%b8/perehod-iz-speczialista-v-rukovoditeli-kak-obuchenie-i-ranhigs-uskoryayut-start-v-upravlenii/[/url]
view products – Layout is structured clearly, allowing easy access to items.
долго гуляя по форуму, выбирал хороший магазин для себя. хотелось чтоб устраевало все! прежде всего меня интересовало качество товара и его цена! хотелось чтоб цена была доступной! так же есть большое желание всегда получать товар 100% т.к. в закладочных магазинах бывают случаи не находа, такие магазины для постоянных покупок рассматривать не стал! рассматривалось много вариантов! ну гдегде же всетаки заказать??? то предлогают сразу слишком много товара (ну как же брать если ты сам лично не знаешь за его качество)??? бывало чаще всего не устраевал сервис обслуживания! https://neowhig.org продавана сегодня в асе вообще ен видел, хз что там у них (Спасибо!Не надо!
discover popular items – Well-laid-out content makes exploring fast and enjoyable.
капельница от похмелья [url=https://kapelnicza-ot-pokhmelya-voronezh-1.ru/]kapelnicza-ot-pokhmelya-voronezh-1.ru[/url] .
shop creative items – Layout is neat, making it easy to move between sections.
check it out – Looks interesting enough to return and learn more.
see details here – Looks like a place I might revisit for extra info.
Office for rent https://rentofficetoday.com/en/ business premises in business centers and commercial buildings. Compare office for rent, private office space for rent, and offices to rent in prime locations. Find the best office rental solutions and rent office space that fits your business needs
explore oliveorchard collections – Well-laid-out pages make it simple to find and compare items.
наркологическая клиника [url=https://kapelnicza-ot-pokhmelya-voronezh-1.ru/]наркологическая клиника[/url] .
pin-up crash canlı [url=https://pinup48127.help/]https://pinup48127.help/[/url]
explore store – Smooth navigation and organized pages make shopping easy.
SunTradingRoom – Layout is tidy, allowing easy exploration of all items.
elm gallery shop – Browsing feels effortless and the interface is simple to use.
check out forest goods – Smooth experience, items are displayed clearly.
Отличная работа ребята! Вы проделали хорошую работу!!! я сначала думал что за херь мне пришла пока я не нашёл то что нужно)) а ваще сроки доставки 5+! конспирация 5+! качество позже отпишу, только еще на руки взял))) https://cortecolecrie.com а трудно изучить предварительно информацию о веществе, а потом покупать ? вот к примеру у меня в подписи инфа.Отзыв по работе магазина: после оплаты мной товара имелась задержка и паника с моей стороны) после задержки продавец деньги вернул- проблему без внимания не оставил… далее получил от магазина приятный презент в размере не дошедшего товара- товар дошел за 2 дня, курьерка работает без перебоев. Магазину респект! Можно работать
наркологическая помощь [url=https://kapelnicza-ot-zapoya-voronezh-1.ru/]наркологическая помощь[/url] .
visit this page – Overall, it looks like something I’d return to for more details.
check artisan market – Clear structure makes it easy to explore and find products.
доставка цветов в москве на дом недорого круглосуточно с бесплатной доставкой [url=http://dostavka-cvetov777.ru]доставка цветов в москве на дом недорого круглосуточно с бесплатной доставкой[/url] .
наркологический стационар [url=https://kapelnicza-ot-zapoya-voronezh-1.ru/]kapelnicza-ot-zapoya-voronezh-1.ru[/url] .
«Неуязвимый» — беспощадный супергеройский сериал, разрушающий все стереотипы жанра. Главный герой — школьник Марк Грейсон, сын человека, которого весь мир считает непобедимым. Едва у Марка появляются суперсилы, иллюзии разлетаются вдребезги — его ждут предательство, жестокие дилеммы и секреты, готовые перевернуть всё с ног на голову. Ищете неуязвимый смотреть онлайн? Смотреть все сезоны удобно на neuyazvimyy-smotret.biz — бесплатно в хорошем качестве с множеством озвучек. Три сезона нарастающего напряжения — сериал держит в напряжении от первой сцены до последней.
explore here – The interface is simple, keeping everything easy to locate.
Занимаюсь подрядными работами. Главная задача — контролировать выполнение заказов, затраты и время сотрудников. Теперь всё это вижу в одном интерфейсе. [url=https://управление-нашей-фирмой.рф/]учёт товаров и склада[/url]
see what’s available – Browsing feels intuitive, and everything is displayed neatly.
TealCorner – Browsing feels quick, and items are arranged logically.
противопожарные двери https://dveri-ot-zavoda.ru с доставкой и профессиональной консультацией, посмотрите актуальные решения для разных типов помещений.
vendor room link – Well-organized layout makes browsing products simple and smooth.
pin-up ExpressPay ilə depozit [url=https://pinup48127.help/]https://pinup48127.help/[/url]
explore store – Everything is organized for quick browsing and easy navigation.
https://onlinesim-ru.vercel.app/
Профессиональные юридические услуги для физических и юридических лиц. Переходите по запросу [url=https://centrbg.ru/services/]юридические услуги в Москве[/url]. Вас ждут консультации, подготовка документов, защита интересов в суде, сопровождение сделок и решение спорных ситуаций. Поможем разобраться в сложных правовых вопросах быстро и эффективно, предложим оптимальные решения и обеспечим надежную правовую поддержку.
visit link now – The design is simple yet effective, making navigation easy and quick. fastNote
shop creative items – Interface is organized, allowing effortless exploration.
discover opalmeadow hall online – Layout feels organized, helping users locate items quickly.
вывод из запоя в стационаре [url=https://kapelnicza-ot-zapoya-kalyazin.ru/]вывод из запоя в стационаре[/url] .
наркологическая клиника [url=https://kapelnicza-ot-zapoya-kalyazin-1.ru/]наркологическая клиника[/url] .
Ты еп сегодня зарегился и уже опробывал? купить Кокаин, Марихуану, Мефедрон, Бошки Уважаемы участники форума!Может всё-так “Рашн Холидейс” (c) China
наркологическая помощь [url=https://kapelnicza-ot-pokhmelya-ekaterinburg.ru/]наркологическая помощь[/url] .
наркологический стационар [url=https://kapelnicza-ot-pokhmelya-ekaterinburg-1.ru/]kapelnicza-ot-pokhmelya-ekaterinburg-1.ru[/url] .
изготовление корпоративных сувениров [url=https://suvenirnaya-produkcziya-s-logotipom.ru/]изготовление корпоративных сувениров[/url] .
как вывести деньги с mostbet [url=http://mostbet65920.help/]как вывести деньги с mostbet[/url]
корпоративные подарки санкт петербург [url=https://suvenirnaya-produkcziya-s-logotipom-1.ru/]корпоративные подарки санкт петербург[/url] .
сувенирная компания [url=https://suvenirnaya-produkcziya-s-logotipom-2.ru/]suvenirnaya-produkcziya-s-logotipom-2.ru[/url] .
лечение алкоголизма [url=https://kapelnicza-ot-zapoya-kalyazin-1.ru/]лечение алкоголизма[/url] .
1win customer support [url=www.1win5529.ru]www.1win5529.ru[/url]
check vendor hall – Smooth navigation and organized layout make exploring products easy.
лечение алкоголизма [url=https://kapelnicza-ot-zapoya-kalyazin.ru/]лечение алкоголизма[/url] .
наркологическая помощь [url=https://kapelnicza-ot-pokhmelya-ekaterinburg-1.ru/]наркологическая помощь[/url] .
наркологическая помощь [url=https://kapelnicza-ot-pokhmelya-ekaterinburg.ru/]наркологическая помощь[/url] .
melbet фрибет как получить [url=melbet95634.help]melbet фрибет как получить[/url]
TealShopHub – Products are arranged neatly, making shopping intuitive.
сувенирка с логотипом компании [url=https://suvenirnaya-produkcziya-s-logotipom.ru/]suvenirnaya-produkcziya-s-logotipom.ru[/url] .
мелбет минимальный вывод [url=melbet63810.help]melbet63810.help[/url]
рекламная продукция с логотипом компании [url=https://suvenirnaya-produkcziya-s-logotipom-2.ru/]suvenirnaya-produkcziya-s-logotipom-2.ru[/url] .
производство сувенирной продукции [url=https://suvenirnaya-produkcziya-s-logotipom-1.ru/]производство сувенирной продукции[/url] .
pin up roʻyxatdan oʻtish telefon orqali [url=pinup90462.help]pin up roʻyxatdan oʻtish telefon orqali[/url]
Thank you for any other magnificent article. Where else may anyone get that type of information in such a perfect means of writing? I have a presentation subsequent week, and I’m at the search for such info.
Betify Connexion
как скачать мостбет на iphone [url=http://mostbet80295.help]http://mostbet80295.help[/url]
pin-up apuestas y casino Chile [url=https://pinup62718.help/]https://pinup62718.help/[/url]
check marketplace – Neat layout and intuitive navigation make browsing fast.
browse featured items – Items are displayed neatly and browsing is intuitive.
Сломалась машина? служба помощи на дорогах техпомощь на дорогах СПб и Ленобласти: эвакуация, подвоз топлива, запуск двигателя, вытаскивание авто — 24/7. Круглосуточная мобильная служба техпомощи в Санкт?Петербурге и Ленинградской области. Оказываем выездную помощь в любое время: эвакуируем авто, подвозим топливо, помогаем завести двигатель и вытаскиваем застрявшие машины.
shop vendor hall – Interface is tidy and intuitive, helping locate products fast.
this platform – Browsing is seamless and pages load almost instantly.
да по поводу точто все у них медленно спору нет) https://elevators-parts.com Ровный магаз,всем советую)Успехов вам господа : )
explore vendors – The interface is smooth and pages open without issues.
check new arrivals – The design makes it simple to move between categories without confusion.
pin-up canlı kazino bonusu [url=pinup48127.help]pinup48127.help[/url]
check out items – Everything loads fast and the interface is simple to use.
browse top vendors – Layout helps locate products quickly and efficiently.
check curated treasures – Navigation is simple and product search feels effortless.
check items – Interface is clean and items are easy to find.
В статье подробно описано, как ITB Company выстраивает SEO-продвижение для бизнеса в Екатеринбурге: от аудита и сбора семантики до создания контента и ссылочной стратегии. Понравилось, что делают акцент на локальное SEO — регистрация в каталогах, работа с отзывами, адаптация под геозависимые запросы. Полезно: https://riminisalon.ru/stati/kak-seo-prodvizhenie-s-itb-company-pomogaet-biznesu-ekaterinburga-rasti/
«Постучи в мою дверь» — турецкая мелодрама 2020 года с живой химией между персонажами и тонким, ненавязчивым юмором. Целеустремлённая студентка и холодный успешный бизнесмен заключают дерзкую притворную сделку — и с этого момента их жизнь перестаёт подчиняться чужим правилам. Ищете постучись в мою дверь все серии? Все 161 серию двух сезонов смотрите бесплатно на postuchis-v-moyu-dver-smotret.biz с профессиональной озвучкой в хорошем качестве. Притворство уступает место настоящим эмоциям: герои снимают маски, открывают свои раны и учатся доверять друг другу вопреки всему прошлому.
explore vendors – Everything feels user-friendly and straightforward.
official page here – The layout is clear and moving through sections is smooth.
explore handmade treasures – Interface feels intuitive and browsing is enjoyable.
Между прочим, если вас интересует Факторы повышения давления и снижение риска гипертонии, посмотрите сюда.
Вот, можете почитать:
[url=https://xroniker.ru/%d0%b1%d0%b5%d0%b7-%d1%80%d1%83%d0%b1%d1%80%d0%b8%d0%ba%d0%b8/arterialnaya-gipertoniya-chto-dejstvitelno-povyshaet-davlenie-i-kak-snizit-risk/]https://xroniker.ru/%d0%b1%d0%b5%d0%b7-%d1%80%d1%83%d0%b1%d1%80%d0%b8%d0%ba%d0%b8/arterialnaya-gipertoniya-chto-dejstvitelno-povyshaet-davlenie-i-kak-snizit-risk/[/url]
Пожалуйста :ok: Спасибо за отзыв. купить Кокаин, Марихуану, Мефедрон, Бошки Ну я совершенно не понимаю,как можно держать сайт в таком несоответсвии с реальностью?Пароль от админки забыли,чтоли?Сколько клиентов забило,пытаясь пробиться через мыло,которое до сих пор указано?Ппц полный.Вот и решил проверить данный магаз, как только будет инфа обязательно отпишу
вывод из запоя на дому [url=https://kapelnicza-ot-pokhmelya-ekaterinburg-1.ru/]вывод из запоя на дому[/url] .
discover top selections – Pages are well structured and browsing is effortless.
Универсальный прецизионный преобразователь давления jumo delos s02 для контроля температуры, давления и других технологических параметров. Удобный интерфейс, точные измерения и возможность интеграции в системы мониторинга.
интернет цветочный магазин [url=www.dostavka-cvetov777.ru]интернет цветочный магазин[/url] .
explore garnet harbor – Clean layout and products are easy to understand at a glance.
лечение алкоголизма [url=https://kapelnicza-ot-pokhmelya-ekaterinburg-1.ru/]лечение алкоголизма[/url] .
check this page – Informative, well-structured content that made browsing both useful and enjoyable.
кодирование от алкоголизма [url=https://kapelnicza-ot-pokhmelya-ekaterinburg.ru/]кодирование от алкоголизма[/url] .
enter this site – Layout feels well-organized and easy to explore.
crafted marketplace – Smooth browsing with well-placed sections throughout.
see details here – Gives a neat first impression, with a smooth layout.
check platform now – The site feels cozy and navigating through sections is effortless.
velvetbrook corner – Navigation works well and content is clearly arranged.
Just found this blockchain casino fascinating; the transparency is real. I grabbed the Game Demo slot download Game Demo slot download to test their provably fair claims before playing big on weekends.
вывод из запоя на дому [url=https://kapelnicza-ot-pokhmelya-ekaterinburg.ru/]вывод из запоя на дому[/url] .
gear marketplace – The layout is uncluttered, making items stand out nicely.
garnet vendor hall – Fast-loading pages, items are easy to locate and view.
наркологический стационар [url=https://kapelnicza-ot-zapoya-voronezh-1.ru/]kapelnicza-ot-zapoya-voronezh-1.ru[/url] .
заказать сувениры с логотипом [url=https://suvenirnaya-produkcziya-s-logotipom-2.ru/]заказать сувениры с логотипом[/url] .
1win live dealer baccarat [url=http://1win5529.ru]http://1win5529.ru[/url]
Иркутский ресторан «Пекинская Утка» — заведение, в котором подлинные традиции китайской кухни соединяются с профессиональным обслуживанием. В меню представлен широкий выбор китайских блюд: морепродукты, утиное и говяжье мясо, свинина, овощи и фирменные соусы. https://pekin-utka.ru/ предлагает онлайн-бронирование столика и удобную доставку. Меню сочетает классику и авторские позиции, а ценовой диапазон остаётся доступным для большинства гостей.
наркологическая клиника [url=https://kapelnicza-ot-zapoya-kalyazin-1.ru/]наркологическая клиника[/url] .
капельница от похмелья [url=https://kapelnicza-ot-zapoya-kalyazin.ru/]kapelnicza-ot-zapoya-kalyazin.ru[/url] .
мелбет casino бонус [url=https://melbet95634.help/]https://melbet95634.help/[/url]
лечение наркомании [url=https://kapelnicza-ot-zapoya-voronezh-1.ru/]kapelnicza-ot-zapoya-voronezh-1.ru[/url] .
сувениры с логотипом компании на заказ [url=https://suvenirnaya-produkcziya-s-logotipom.ru/]suvenirnaya-produkcziya-s-logotipom.ru[/url] .
сувенирная продукция москва [url=https://suvenirnaya-produkcziya-s-logotipom-3.ru/]сувенирная продукция москва[/url] .
бизнес подарки [url=https://suvenirnaya-produkcziya-s-logotipom-2.ru/]бизнес подарки[/url] .
discover items – Intuitive navigation and tidy design enhance the browsing experience.
start exploring – Neat layout and responsive pages give a satisfying experience.
Да что то вот,с трудом верится,или вообще не верится!!!Я,первый раз заказывал в этом магазе,довольно таки быстро заказ получил,и качество товара,такое как и было обещано!!!Сейлер меня Не обманул,потому что он порядочный,да и ещё есть люди,мои знакомые хорошие,их на форуме нет,но они покупали в этом магазе продукцию,и остались довольны качеством товара и работы с клиентом… купить Кокаин, Марихуану, Мефедрон, Бошки все на высем уровне!фоту убрал, не будем палить конспирацию, всё понятно… Свяжитесь с магазином, я думаю решите вопрос с конпенсацией
[url=https://shumoizolyaciya-avtomobilya-cena-1.ru]шумоизоляция автомобиля цена[/url]
pin-up link de descarga oficial [url=https://pinup62718.help/]https://pinup62718.help/[/url]
наркологический стационар [url=https://kapelnicza-ot-zapoya-kalyazin-1.ru/]kapelnicza-ot-zapoya-kalyazin-1.ru[/url] .
мостбет бонус на первый депозит [url=http://mostbet80295.help]http://mostbet80295.help[/url]
explore gilded cove – Layout is clean and browsing is easy on the eyes.
Обратился к Марининой Татьяне (Nuvole Bianca / Арте) за ремонтом «под ключ»
Худший опыт ремонта в моей жизни. «Под ключ» — только на словах: сроки сорваны в несколько раз, качество отвратительное. Кривые стены, плитка с перекосами, электрика сделана кое-как. Постоянная смена рабочих, полный бардак и ноль ответственности.
За такие деньги — просто провал. Пришлось всё переделывать. Не связывайтесь
вывод из запоя в стационаре [url=https://kapelnicza-ot-zapoya-kalyazin.ru/]вывод из запоя в стационаре[/url] .
enter this site – Looks reliable initially, I might explore additional sections soon.
брендированные подарки [url=https://suvenirnaya-produkcziya-s-logotipom-3.ru/]брендированные подарки[/url] .
сувенирка с логотипом компании [url=https://suvenirnaya-produkcziya-s-logotipom.ru/]suvenirnaya-produkcziya-s-logotipom.ru[/url] .
check site – It’s user-friendly and flows well, I’ll be stopping by again.
upland cove market – Items are easy to spot and the interface feels modern.
browse handcrafted – Content is clear, and navigating around is effortless.
pearlcovemarketgallery – Really smooth layout, browsing items is simple and straightforward today.
Attractive element of content. I simply stumbled upon your blog and in accession capital to say that I acquire in fact loved account your weblog posts. Any way I’ll be subscribing for your augment or even I success you get entry to consistently quickly.
https://marketpola.com.ua/de-zamovyty-vstanovlennya-linz-v-fary-u-lvovi-ta-y.html
сувенирная компания [url=https://suvenirnaya-produkcziya-s-logotipom-1.ru/]suvenirnaya-produkcziya-s-logotipom-1.ru[/url] .
изготовление сувенирной продукции [url=https://suvenirnaya-produkcziya-s-logotipom-1.ru/]изготовление сувенирной продукции[/url] .
Экономия на продуктах — это не миф, а реальность для тех, кто умеет пользоваться выгодными предложениями. Сеть «Пятёрочка» регулярно радует своих покупателей скидками и специальными акциями: еженедельные предложения на популярные категории товаров, скидки до 30% на товары недели и программа лояльности с кэшбэком делают каждую покупку выгоднее. На https://salda.ws/f/topic.php?f=16&t=109549 собраны актуальные промокоды, которые позволяют новым пользователям сэкономить до 600 рублей уже при первом заказе с доставкой от 1500 рублей. Мобильное приложение предлагает персональные скидки, а курьерская доставка охватывает города по всей России. Следите за обновлениями — акции появляются регулярно.
click here – Well-arranged sections ensure browsing feels natural and intuitive.
open this page – Found by accident, but everything is neatly presented.
discover the market – The layout is simple and organized, making exploring effortless.
Official site link – Pages are organized well, load quickly, and the content feels straightforward.
tap here – Information is presented cleanly, making the site feel professional and approachable.
Бро, доброго дня. В личку реквы на оплату жду, на сайт тоже попасть не могу… купить Кокаин, Марихуану, Мефедрон, Бошки Всем доброго времени суток. Вопрос такой – Ко скольки лучше делать МН и как быстро растет толер???необычно спрятано было в посыле)
pin-up app yeniləmə [url=www.pinup48127.help]www.pinup48127.help[/url]
vendor lounge link – Smooth interface with fast-loading pages and clear items.
1вин авиатор [url=1win32478.help]1вин авиатор[/url]
1вин официальный сайт регистрация [url=www.1win54928.help]www.1win54928.help[/url]
1win əməliyyatlar [url=1win53841.help]1win əməliyyatlar[/url]
mostbet uz roʻyxatdan oʻtish [url=https://www.mostbet43759.help]https://www.mostbet43759.help[/url]
лечение алкоголизма [url=https://kapelnicza-ot-pokhmelya-ekaterinburg-1.ru/]лечение алкоголизма[/url] .
visit homepage now – Clean and responsive pages make navigation intuitive.
наркологическая помощь [url=https://kapelnicza-ot-pokhmelya-ekaterinburg.ru/]наркологическая помощь[/url] .
visit this site – Navigation is simple and moving between sections is easy.
crafted marketplace – Everything is logically arranged, making scrolling seamless.
discover market parlor – Pages are well-arranged, allowing fast and intuitive exploration of products.
discover orchardmeadow goods – Clean presentation, all sections are easy to access and clear.
discover orchardmeadow goods – Clean presentation, all sections are easy to access and clear.
Балторганик — российский завод-производитель органической и органоминеральной агрохимии с полной линейкой решений для зерновых, овощных и плодово-ягодных хозяйств. В ассортименте — гранулы, пеллеты, сухие смеси и жидкие гуминовые удобрения серии Торфогумат с долей гуматов до 30%. На https://baltorganic.ru/ представлен полный каталог удобрений NPK под конкретные культуры — от бобовых до рапса. Результаты подкреплены полевыми испытаниями на озимой пшенице, кукурузе, картофеле и яровом ячмене.
капельница от похмелья [url=https://kapelnicza-ot-pokhmelya-ekaterinburg-1.ru/]kapelnicza-ot-pokhmelya-ekaterinburg-1.ru[/url] .
go to this link – The layout makes everything easy to access and browse.
реабилитация наркоманов [url=https://kapelnicza-ot-pokhmelya-ekaterinburg.ru/]kapelnicza-ot-pokhmelya-ekaterinburg.ru[/url] .
iciclebrookmarketparlor – Smooth browsing, layout feels organized and items are easy to explore.
«Наруто» — одно из самых известных аниме в истории, собравшее огромную аудиторию по всему миру. История упрямого мальчишки-ниндзя Наруто Узумаки, в теле которого заперт опаснейший девятихвостый демон-лис, захватывает с первой серии и не отпускает до финала. Ищете наруто смотреть онлайн? На naruto-serial.biz все 220 серий доступны бесплатно в отличном качестве. Динамичные поединки на основе чакры, многогранные герои и сквозные темы верности, утраты и самопреодоления превращают этот сериал в незабываемый опыт.
Shop now – Everything is easy to locate thanks to a clean layout and intuitive menus.
Нужен промокод? промокод на Изи Дроп актуальные бонусы, скидки и акции для пользователей. Используйте рабочие коды, получайте дополнительные преимущества и экономьте при использовании сервиса. Все свежие предложения в одном месте.
visit now – Good mix of practical advice, worth taking time to explore properly.
pinup kontakt [url=https://pinup90462.help]pinup kontakt[/url]
[url=https://t.me/razvozhaev]невролог[/url]
browse collection – Smooth interface with neatly arranged products for easy exploration.
корпоративные подарки с логотипом [url=https://suvenirnaya-produkcziya-s-logotipom-3.ru/]корпоративные подарки с логотипом[/url] .
timber trail shop – Layout is clear, making it simple to explore all available items.
Хороший разбор SEO-услуг от ITB Company. Автор подробно останавливается на важности технической оптимизации, пользовательского опыта и локального SEO для Екатеринбурга. Отдельно понравился блок про контент-стратегию — почему полезные статьи работают лучше простого перечисления ключей. Вот ссылка: https://sah-zx.ru/stati/kak-seo-prodvizhenie-s-itb-company-pomogaet-biznesu-ekaterinburga-rasti/
Добрый вечер помогите купил у снега клад, пустой, как сапорту написать..? https://kilometer94.com Даже то что я из за тебя третий день на нервах это косяк!Ладно надеямся на лучшее,надежда умирает последней…Хотели делать 1к15 – 1к10, но в итоге всё замесили 1к12. Я бы не сказал, что сильно убивает, но люди были довольны. Пипеточку хлоп:killmyself: и хорошо минут на 40, поэтому скоро перешёл на трубку и курил по пол полки за раз, отчего угарал от роликов MineCraft.
https://roobet.com.mx/
Roobet representa un sitio de apuestas basado en criptomonedas que llego en 2019 con una iniciativa revolucionaria: gestionar todas sus transacciones con criptomonedas, entregar una biblioteca de mas de 6,000 juegos de desarrolladores de alto prestigio y garantizar retiros casi instantaneos, con el respaldo de la licencia de Curazao eGaming (numero 365/JAZ).
explore website – Well-structured pages and easy-to-follow layout enhance usability.
view website – Organized content and clean layout enhance usability.
корпоративные подарки с логотипом компании [url=https://suvenirnaya-produkcziya-s-logotipom-3.ru/]корпоративные подарки с логотипом компании[/url] .
walnutcove crafts – Layout is clean and everything is easy to navigate.
explore now – Easy-to-follow pages make content accessible and navigation intuitive.
explore quality finds – Interface is user-friendly and navigation feels natural.
https://roobet.com.mx/
Roobet es un casino cripto que se lanzo en 2019 con una iniciativa revolucionaria: operar 100% con criptomonedas, ofrecer mas de 6,000 juegos de proveedores de primer nivel y ofrecer retiradas casi al instante, todo ello avalado por la licencia de Curazao eGaming (numero 365/JAZ).
explore store – Fast navigation with well-arranged pages improves user experience.
explore products – Pages open quickly and the interface feels intuitive.
Go explore – Simple navigation, smooth performance, and everything feels up-to-date.
заказать сувенирную продукцию [url=https://suvenirnaya-produkcziya-s-logotipom-2.ru/]suvenirnaya-produkcziya-s-logotipom-2.ru[/url] .
мостбет сайт вход [url=https://mostbet65920.help]мостбет сайт вход[/url]
visit this store – The layout feels smooth and easy to follow without any confusion.
вывод из запоя на дому [url=https://kapelnicza-ot-zapoya-kalyazin-1.ru/]вывод из запоя на дому[/url] .
корпоративные сувениры [url=https://suvenirnaya-produkcziya-s-logotipom-2.ru/]корпоративные сувениры[/url] .
мелбет обновить приложение [url=melbet63810.help]melbet63810.help[/url]
pin-up minimal stavka [url=pinup90462.help]pinup90462.help[/url]
PurDentix is a revolutionary oral health supplement designed to support strong teeth and healthy gums. It tackles a wide range of dental concerns, including gum inflammation and tooth decay
вывод из запоя на дому [url=https://kapelnicza-ot-zapoya-kalyazin.ru/]вывод из запоя на дому[/url] .
нарколог на дом [url=https://kapelnicza-ot-zapoya-kalyazin-1.ru/]нарколог на дом[/url] .
капельница от запоя [url=https://kapelnicza-ot-pokhmelya-ekaterinburg-1.ru/]капельница от запоя[/url] .
изготовление сувенирной продукции [url=https://suvenirnaya-produkcziya-s-logotipom.ru/]suvenirnaya-produkcziya-s-logotipom.ru[/url] .
visit platform – Everything is neatly structured, making it easy to browse and understand.
walnutcove crafts – Navigation is smooth and pages feel well organized.
browse vendor parlor – Layout is neat and products are simple to explore.
наркологический стационар [url=https://kapelnicza-ot-pokhmelya-ekaterinburg.ru/]kapelnicza-ot-pokhmelya-ekaterinburg.ru[/url] .
check site – Helpful insights explained clearly, making the content highly accessible.
Нужна брендированная продукция? https://2ymedia.kz/category/bloknoty-i-zapisnye-knizhki/ ваш надежный партнер в сфере брендинга в Алматы. Мы специализируемся на производстве сувенирной продукции с нанесением логотипа и корпоративной полиграфии. В нашем каталоге вы найдете всё для продвижения бренда: бизнес-сувениры, промо-мерч, текстиль и полиграфическую продукцию. Мы принимаем заказы оптом от 50 единиц, что делает нас доступными как для крупного бизнеса, так и для небольших компаний.
click here for store – The assortment feels fresh, with new items added often.
мостбет для Казахстана [url=mostbet65920.help]mostbet65920.help[/url]
подарки корпоративные [url=https://suvenirnaya-produkcziya-s-logotipom-1.ru/]suvenirnaya-produkcziya-s-logotipom-1.ru[/url] .
В этом мире титул Хантера — не просто статус, а билет в мир, где каждый шаг сопряжён со смертельным риском и неожиданными поворотами судьбы. Юный Гон Фрикс покидает родной остров ради единственной мечты — разыскать отца, легендарного Хантера, предпочётшего тайны мира собственному сыну. Ищете охотник х? На ohotnik-h-ohotnik-kinogo.vip все 148 серий доступны бесплатно с несколькими вариантами озвучки. Жестокий отбор сводит его с Киллуа — наследником клана убийц, Леорио с мечтой стать врачом и Курапикой, одержимым местью. Система Нэн раскрывает внутренние демоны каждого героя, делая «Охотник х Охотник» чем-то большим, чем просто аниме о взрослении.
наркологический центр [url=https://kapelnicza-ot-pokhmelya-ekaterinburg.ru/]наркологический центр[/url] .
check new arrivals – Navigation is logical and finding products is simple.
browse collection – Smooth interface ensures products are easy to find.
check out vendors – Clean interface and fast loading pages make using the site enjoyable.
мелбет задержка вывода [url=http://melbet63810.help]http://melbet63810.help[/url]
pin-up promo kod bonus balansı [url=http://pinup48127.help]http://pinup48127.help[/url]
сувениры с логотипом компании [url=https://suvenirnaya-produkcziya-s-logotipom-1.ru/]сувениры с логотипом компании[/url] .
1xbet ja
Coral Harbor Trade Portal – I found it quite accessible, with a layout that feels clean and simple.
Coral Harbor Trade View – I found it fairly easy to use and the layout feels well put together.
visit now – The site feels tidy, simple, and very user-friendly.
check it out – Pages load quickly, and navigating the content feels intuitive.
«Чукур» — турецкий триллер 2017 года о закрытом стамбульском квартале с железными неписаными правилами, за соблюдением которых следит могущественный клан. Один из сыновей семьи, годами скрывавшийся от прошлого, оказывается перед жестокой необходимостью вернуться туда, откуда бежал — трагические события не оставляют ему выбора. Старые конфликты, семейная верность и война кланов за территорию втягивают героя обратно. Ищете чукур все серии? Все 427 серий с профессиональной озвучкой доступны бесплатно на chukur-smotret.online — триллер об изломанных судьбах и цене выбора между свободой и долгом перед семьёй.
check this shop – Very appealing, it’s creative and thoughtfully put together.
check new arrivals – Structure is logical and products are easy to locate.
cnss-rca – The layout looks polished and the content is presented in a clear way.
подарочная сувенирная продукция [url=https://suvenirnaya-produkcziya-s-logotipom-3.ru/]suvenirnaya-produkcziya-s-logotipom-3.ru[/url] .
shop artisan goods – Structure is clean, making exploration straightforward.
Вот это я понимаю СЕРВИС:ok: Превзошло все мои ожидания, доставили раньше обещанного… Магаз ровный (до последнего сомневался, что всё на столько гладко…) https://yasinozbudak.com 13 янв. в 21:12 Деньги пришли. Заказ будет выслан в ближайшие несколько рабочих дней. Суббота и воскресенье — выходные. После отправки трек (номер накладной) будет в комментарии к заказу на сайте и продублируется на электронную почту.бразы, ничего сказать не могу, первый раз столкнулась с магазином, 9 числа оплатила, сегодня уже сктинул трек. Но в чем суть оператор в аське сказал пару-тройку дней, посмотрела трек, рассчитано аж на 22 июля. Вот как-то так… И это курьерка. Заберу отпишу. Всем хорошего прихода)
Jewel Cove Online Bazaar – Smooth browsing experience and the prices look justified based on quality.
сувенирная брендированная продукция [url=https://suvenirnaya-produkcziya-s-logotipom-3.ru/]сувенирная брендированная продукция[/url] .
wh artisan corner – Pages load without delay and the content is well-presented.
discover more – Innovative design and unique content make this site memorable.
go to shop – The interface is tidy and guides you naturally through sections.
browse collection – Tidy layout and visible items make browsing enjoyable.
1xbet
meadowharborgoodsroom – Found some interesting items, site feels reliable and easy to use.
Vale Cove Online Parlor – The design is tidy and the structure makes browsing very easy.
Vale Cove Trade Network – The site feels organized and easy to browse without confusion.
Zen Foundry Portal – Pretty user-friendly, and the information is easy to digest.
«Теория большого взрыва» — без преувеличения культовый ситком родом из Америки, который с 2007 года удерживает аудиторию по всему миру. В центре сюжета — два блестящих, но социально беспомощных физика, Шелдон и Леонард, и их обаятельная соседка Пенни, чьё столкновение с миром науки рождает бесконечную череду искромётных ситуаций. Ищете теория большого взрыва смотреть онлайн? Все 279 серий 12 сезонов доступны на teoriya-bolshogo-vzryva-smotret.online с профессиональными озвучками без регистрации. Живые характеры Говарда, Раджа, Бернадетт и Эми превращают сериал в настоящую энциклопедию человеческих отношений — смешную, трогательную и неотразимо честную.
find stylish décor – Layout is logical and locating items is straightforward.
Go to Quick Harbor – Easy-to-use layout, responsive pages, and clear information presentation.
visit the parlor – Navigation is smooth and pages load quickly, making browsing effortless.
visit this site – Pages are well-arranged and exploring content is easy.
https://www.friend007.com/forums/thread/44754/
artisan finds – Pages are well-arranged and moving through content is straightforward.
visit platform – Clean navigation and helpful material made this enjoyable to explore.
изготовление корпоративных сувениров [url=https://suvenirnaya-produkcziya-s-logotipom-2.ru/]изготовление корпоративных сувениров[/url] .
Berry Harbor Vendor Platform – The overall look is polished and makes browsing feel pleasant.
Berry Harbor Marketplace View – The clean presentation really improves the browsing experience overall.
wh creative zone – Pages are clear and structured, moving around is hassle-free.
как скачать mostbet на android [url=mostbet65920.help]как скачать mostbet на android[/url]
и такая хрень каждый день. https://wwfgiarre.org Хороший сервис, хорошая команда = хорошие дела ) В том же духе двигаемся…)всем привет
go to shop – The interface is tidy and guides you naturally through sections.
see vendor selections – Easy to find items thanks to a clear interface.
сувенирная продукция с логотипом на заказ [url=https://suvenirnaya-produkcziya-s-logotipom-2.ru/]сувенирная продукция с логотипом на заказ[/url] .
view selection – Simple design with fast navigation enhances the user experience.
explore store – Fast navigation with simple, well-arranged pages improves the experience.
кодирование от алкоголизма [url=https://kapelnicza-ot-zapoya-kalyazin-1.ru/]кодирование от алкоголизма[/url] .
melbet комиссия на депозит [url=melbet63810.help]melbet комиссия на депозит[/url]
https://bet365-bet.com.co/
La plataforma Bet365 Colombia cuenta con la autorizacion de Coljuegos con el fin de operar legalmente en el pais, poniendo a disposicion un casino en linea confiable que cuenta con una extensa gama de maquinas tragamonedas, juegos de mesa y otras opciones de azar, todo ello avalado por la experiencia global de la casa de apuestas originada en el Reino Unido en el ano 2000.
вывод из запоя в стационаре [url=https://kapelnicza-ot-zapoya-kalyazin-1.ru/]вывод из запоя в стационаре[/url] .
visit this site – Everything is arranged clearly and feels accessible.
корпоративные бизнес сувениры [url=https://suvenirnaya-produkcziya-s-logotipom.ru/]suvenirnaya-produkcziya-s-logotipom.ru[/url] .
Open the vendor site – Clean interface with fast navigation and nicely structured content.
browse featured collections – Navigation is intuitive, making it easy to locate items.
view gallery – Smooth scrolling and structured layout make navigation easy.
Box Jainson creative – Well-structured pages make finding information effortless.
сувениры с логотипом компании [url=https://suvenirnaya-produkcziya-s-logotipom.ru/]suvenirnaya-produkcziya-s-logotipom.ru[/url] .
реабилитация наркоманов [url=https://kapelnicza-ot-zapoya-kalyazin.ru/]kapelnicza-ot-zapoya-kalyazin.ru[/url] .
Clover Harbor Vendor Platform – I liked how simple everything felt, making it easy to explore content.
follow this link – Everything is easy to find and the content is worth exploring.
креативные корпоративные подарки [url=https://suvenirnaya-produkcziya-s-logotipom-3.ru/]креативные корпоративные подарки[/url] .
browse handcrafted – Pages load smoothly and everything is logically positioned.
check artisan collections – Clear layout and intuitive design improve browsing.
browse goods room – Pages load quickly and content is displayed clearly.
https://bwin-bet.com.co/
Bwin Bet se presenta como un casino online y casa de pronosticos deportivos con presencia en Colombia desde 2026 , actuando con el respaldo de Coljuegos , lo cual brinda un marco legal y protegido a los usuarios .
enter the marketplace – Pages respond instantly, making browsing smooth and enjoyable.
капельница от запоя [url=https://kapelnicza-ot-zapoya-kalyazin.ru/]капельница от запоя[/url] .
сувенирка с логотипом компании [url=https://suvenirnaya-produkcziya-s-logotipom-3.ru/]suvenirnaya-produkcziya-s-logotipom-3.ru[/url] .
browse collection – Smooth navigation and clean visuals enhance exploration.
2си-ай – ах..й просто!)))))) https://simpleblissfullife.com Отличнный магазинОтличный магазин,заказал и уже через 2 дня в своем городе получил посылку курьером(без звонка),офигев от скорости работы.Вес пришел с неплохим бонусом и в хорошей конспирации.Спасибо очень приятно было с вами работать скоро закажу ещё.
Zencove Studio – Navigation is smooth and the pages are well-organized.
Access Rain Cove – Well-arranged pages with intuitive navigation and responsive design.
1win promo kod 2026 [url=https://1win53841.help]https://1win53841.help[/url]
заказать сувенирную продукцию [url=https://suvenirnaya-produkcziya-s-logotipom-1.ru/]suvenirnaya-produkcziya-s-logotipom-1.ru[/url] .
browse offerings – Pages load quickly, and the interface feels natural to use.
1win как вывести через о деньги [url=https://1win32478.help/]https://1win32478.help/[/url]
1win пополнение Demir через приложение [url=https://1win54928.help/]https://1win54928.help/[/url]
mostbet eski akkaunt kirish [url=http://mostbet43759.help]http://mostbet43759.help[/url]
Quick Harbor Product Gallery – The browsing speed is solid and everything feels quick and stable.
browse orchard listings – Fast loading pages make exploring products effortless.
корпоративные подарки [url=https://suvenirnaya-produkcziya-s-logotipom-1.ru/]корпоративные подарки[/url] .
https://bet365-bet.com.co/
Bet365 en Colombia dispone de un permiso otorgado por Coljuegos para ofrecer sus servicios legalmente en el pais, proporcionando una plataforma de casino digital segura que cuenta con una gran diversidad de ruedas de la fortuna virtuales, juegos de salon y demas juegos de azar, todo ello avalado por el historial global del operador de apuestas establecida en territorio britanico durante el ano 2000.
visit platform – Well-organized material that provides practical takeaways for users.
view selection – Well-organized layout makes browsing fast and simple.
«Футурама» — культовый фантастический мультсериал Мэтта Грейнинга, стартовавший в 1999 году и не теряющий актуальности до сих пор. Незадачливый развозчик пиццы Фрай оказывается в XXXI веке и начинает всё с чистого листа в окружении роботов, мутантов и инопланетных существ. Саркастичный Бендер, решительная Лила и чудаковатый профессор делают каждую межгалактическую вылазку одновременно смешной и по-настоящему трогательной. Ищете футурама смотреть онлайн? Смотреть все 13 сезонов и 154 серии удобно на futurama-smotret.biz — бесплатно в отличном качестве с множеством озвучек. Хлёсткая сатира, сумасшедший юмор и неожиданные драматические глубины ставят «Футураму» в один ряд с лучшими образцами интеллектуальной анимации.
БДСМ и фетиши — темы для смелых, но изучать их нужно грамотно. Нашел крутой форум 18+ через эту страницу
https://www.globalshowup.com/@joeannsartori3?page=about
handmade treasures – Pages load quickly and the structure is very clear.
wheatcove craft corner – Well-arranged pages make it easy to find content.
visit platform – A well-structured site with fast access to all sections.
check curated treasures – Layout is organized, making browsing smooth and pleasant.
Upland Cove Product Hub – Everything is laid out clearly, making the browsing experience simple and professional.
see cove listings – Everything is cleanly presented, allowing quick and easy navigation.
1win mines necə qazanmaq olar [url=1win53841.help]1win mines necə qazanmaq olar[/url]
Interesting analysis! Seeing platforms like 789pet app download apk prioritize user security with blockchain-style verification is a smart move. Transparency & fair play are key for long-term success in this space, and a solid platform is essential for informed betting!
https://bwin-bet.com.co/
Bwin Bet es un casino en linea y plataforma de apuestas deportivas establecido en Colombia desde el ano 2026 , bajo la autorizacion otorgada por Coljuegos , lo cual brinda un marco legal y protegido a los usuarios .
1вин скачать apk [url=http://1win54928.help/]http://1win54928.help/[/url]
1win легально ли в Киргизии [url=1win32478.help]1win32478.help[/url]
mostbet haftalik limit [url=mostbet43759.help]mostbet43759.help[/url]
see details – Everything is nicely arranged and easy to navigate through.
вывод из запоя цены воронеж [url=https://vyvod-iz-zapoya-na-domu-voronezh.ru/]вывод из запоя цены воронеж[/url] .
вывод из запоя с выездом [url=https://vyvod-iz-zapoya-na-domu-voronezh-1.ru/]вывод из запоя с выездом[/url] .
shop now – Navigation is intuitive and products are easy to locate.
вывод из запоя недорого [url=https://vyvod-iz-zapoya-na-domu-voronezh-2.ru/]вывод из запоя недорого[/url] .
нарколог на дом вывод из запоя на дому [url=https://vyvod-iz-zapoya-na-domu-voronezh-3.ru/]нарколог на дом вывод из запоя на дому[/url] .
mostbet promo kodni qanday kiritish [url=www.mostbet21640.help]www.mostbet21640.help[/url]
у меня в подписи проверь купить мефедрон и кокаин 250 дживик заказал?вот отправил манетку ,получил адик
мостбет plinko на деньги [url=http://mostbet65920.help]http://mostbet65920.help[/url]
open link – The site runs well, making browsing a pleasant experience.
нарколог на дом вывод из запоя на дому [url=https://vyvod-iz-zapoya-na-domu-voronezh.ru/]нарколог на дом вывод из запоя на дому[/url] .
стоимость вывода из запоя [url=https://vyvod-iz-zapoya-na-domu-voronezh-1.ru/]стоимость вывода из запоя[/url] .
срочный вывод из запоя [url=https://vyvod-iz-zapoya-na-domu-voronezh-2.ru/]срочный вывод из запоя[/url] .
1xbet ja
вывод из запоя цена воронеж [url=https://vyvod-iz-zapoya-na-domu-voronezh-3.ru/]вывод из запоя цена воронеж[/url] .
Calm Harbor Online Market – Everything feels organized, which helps create a peaceful browsing flow.
Calm Harbor Vendor Parlor – Browsing here feels soothing and the layout stays very easy on the eyes.
explore quality finds – Pages are well-laid-out and items are easy to view.
Сопровождение банкротства физических лиц — это комплексная юридическая помощь при списании долгов. Переходите по запросу [url=https://centrbg.ru/services/bankrotstvo-fizicheskikh-lits/soprovozhdenie-bankrotstva/]сколько стоит юрист по банкротству физических лиц[/url]. Специалист проанализирует ситуацию, подготовит документы, взаимодействует с судом и кредиторами, проконтролирует каждый этап процедуры. Вы снижаете риски ошибок, экономите время и получаете законное освобождение от долгов с защитой своих прав и имущества.
wo creative space – Layout is straightforward and browsing feels natural.
melbet как ввести промокод [url=https://melbet63810.help/]https://melbet63810.help/[/url]
Гранитные памятники https://allgranit.ru от производителя в Москве: надёжность и красота на века. Компания Allgranit предлагает гранитные памятники напрямую от производителя — без посредников, переплат и долгих ожиданий. Мы создаём мемориалы, которые сохраняют память о дорогих людях на долгие годы.
check moss market – Pages are clean and intuitive, navigation is effortless.
start here – The interface is uncluttered and sections are easy to access.
pin-up bepul aylantirish [url=www.pinup90462.help]pin-up bepul aylantirish[/url]
Pine Harbor Listing Space – The site left a good impression, and I could check it again later.
click here – The design feels intuitive, so everything is easy to follow.
browse handcrafted – Everything is easy to locate and exploring feels smooth.
Visit Raven Cove – Smooth navigation and clean design make browsing effortless.
отличный магазин! обращаюсь уже не первый месяц купить мефедрон и кокаин Хороший магазинчикВ итоге получается, что все страницы оказываются в одних недовольствах, но ладно визуально, так ведь чуть ли не неделю каждая страница в недовольствах, а это что-то да значит, особенно когда сам проверишь… Вот я постучался в асю, пообщались, вы исчезли, потом кое-как вернулись, но молчок по полной. Зря вы так, всех клиентов распугаете таким макаром…
elmwoodgoodsgallery – Really liked the design, items are organized neatly and easy to find.
1xbet
check pineharbor product hall – Pleasant browsing, finding items is straightforward and simple.
1win depozit et [url=www.1win53841.help]www.1win53841.help[/url]
view site – The organized design helps make the content simple to navigate.
check nightfall listings – Smooth interface, finding products is quick and easy.
check out nightfall vendors – Pages load quickly, layout is user-friendly and simple.
1win изменить номер [url=https://www.1win54928.help]https://www.1win54928.help[/url]
1вин зеркало Бишкек [url=http://1win32478.help/]http://1win32478.help/[/url]
mostbet kod bilan kirish [url=https://www.mostbet43759.help]https://www.mostbet43759.help[/url]
Flora Ridge Browse Hub – The structure is straightforward, so users can move around without any issues.
go here – Came across unexpectedly, and everything is well-arranged and accessible.
smart checkout assistant – Quick loading and easy to move through product selections.
NightMarketLoft – Clear structure and browsing sections is seamless.
знакомый брал, збс говорит купить мефедрон и кокаин да для ам и дживов ацик самая подходящяя тема. а основа из мачехи ништяк.только её надо выварить раза три по 15 мин. чтоб негорлодёрило и смол меньше,ведь в смоле много канабиола остаёцав розницу работаете?
стоимость вывода из запоя [url=https://vyvod-iz-zapoya-na-domu-voronezh.ru/]стоимость вывода из запоя[/url] .
Современный автосервис невозможно представить без надёжного профессионального оборудования — и здесь важно не ошибиться с выбором поставщика. Компания Nordberg предлагает исчерпывающий каталог техники для любого участка: шиномонтажного, слесарного, кузовного, малярного и диагностического. На сайте https://nordberg43.ru/catalog/oborudovanie_1/ собрано всё — от подъёмников и стендов сход-развала до сварочного и окрасочного оборудования, компрессоров, зарядных устройств и специнструмента. Здесь же представлены расходные материалы, масла, химия для мойки и детейлинга, а также оригинальные запчасти.
Если вы давно искали выгодные тарифы на мобильную связь без переплат и очередей в салонах — «Планета Связи» именно то, что нужно. Компания предлагает эксклюзивные SIM-карты ведущих операторов: Билайн, Мегафон, Ростелеком и 2tele, причём по ценам, которых просто не найти в обычных точках продаж. На сайте https://planetasv.ru/ можно за пару минут подобрать тариф для интернета, звонков, видеонаблюдения, роутеров или трекеров. Подключение бесплатное, договор заключается напрямую с оператором, а служба поддержки отвечает в течение двух минут.
вывод из запоя стоимость [url=https://vyvod-iz-zapoya-na-domu-voronezh-3.ru/]вывод из запоя стоимость[/url] .
visit vendor parlor – Items are easy to find, and pages feel neat and organized.
Типография “МОСПРИНТ77” – https://mosprint77.ru/ предлагает полный спектр услуг в сфере полиграфия для бизнеса и частных клиентов. Мы выполняем печать каталогов, печать брошюр, печать буклетов и печать листовок с высоким качеством и точной цветопередачей. Современное оборудование позволяет выпускать продукцию любого тиража в короткие сроки. Наша типография в Москве помогает создать эффективные печатные материалы, которые привлекают внимание и работают на результат.
discovergrowthdirectionnow.click – Good layout choice, content readability is excellent across pages.
стоимость вывода из запоя [url=https://vyvod-iz-zapoya-na-domu-voronezh.ru/]стоимость вывода из запоя[/url] .
1xbet
вывод из запоя на дому недорого [url=https://vyvod-iz-zapoya-na-domu-voronezh-3.ru/]вывод из запоя на дому недорого[/url] .
Mint Orchard Trade Network – Everything works properly, creating a consistent browsing experience.
вывод из запоя на дому самара круглосуточно [url=https://vyvod-iz-zapoya-na-domu-samara.ru/]вывод из запоя на дому самара круглосуточно[/url] .
срочный вывод из запоя [url=https://vyvod-iz-zapoya-na-domu-voronezh-2.ru/]срочный вывод из запоя[/url] .
вывод из запоя стоимость [url=https://vyvod-iz-zapoya-na-domu-voronezh-1.ru/]вывод из запоя стоимость[/url] .
explore here – Everything is arranged logically, helping users find content quickly.
вызов нарколога на дом запой [url=https://vyvod-iz-zapoya-na-domu-samara.ru/]вызов нарколога на дом запой[/url] .
Металлический забор-жалюзи — это не просто ограждение, а современное архитектурное решение, которое объединяет эстетику и надёжность. Горизонтальные ламели создают эффект жалюзи: обзор открыт только изнутри участка, а снаружи — полная приватность. На сайте https://zabor-zhalyuzi78.ru/ представлен широкий каталог моделей с различными покрытиями: полиэстер, матовое, имитация дерева. Срок службы таких конструкций достигает 50 лет благодаря качественной стали и порошково-полимерной защите. Доставка осуществляется по всей России.
hazelharborvendorhall – There’s a good range of items here, making it a dependable place to explore.
нарколог на дом вывод из запоя [url=https://vyvod-iz-zapoya-na-domu-voronezh-1.ru/]нарколог на дом вывод из запоя[/url] .
вывод из запоя цены [url=https://vyvod-iz-zapoya-na-domu-voronezh-2.ru/]вывод из запоя цены[/url] .
pineharbortradehouse – Good design overall, everything is easy to navigate and browse.
мостбет установка [url=https://mostbet65920.help/]https://mostbet65920.help/[/url]
District One guide Benefits of buying property in Dubai new address real estate brokers dubaidanube sharjah location
мелбет элкарт киргизия [url=https://melbet63810.help]мелбет элкарт киргизия[/url]
handmade crafts collection – Clean structure makes it simple to find products quickly.
Привет всем! Написал бы отзыв был бы продукт для него)) Мир ровным! https://m-benz.ru Меня тут Кинули на 25к претензия в арбитраже!!!Челябинск работаете?
explore listings – Items are arranged clearly, making selection easy.
Турецкий сериал «Запретный плод» 2018 года — шесть сезонов интриг, роскоши и запретных желаний на фоне блистательного Стамбула. Две сестры — две судьбы: Зейнеп выбирает честный путь и собственный труд, а Йылдыз ставит на кон всё ради заветного места в высшем свете. Ищете запретный плод все серии? Все 177 серий с профессиональной озвучкой смотрите бесплатно на zapretnyy-plod-smotret.online в хорошем качестве. Йылдыз становится пешкой в жестокой игре расчётливой Эндер, задумавшей коварный план против своего могущественного супруга. Между сёстрами встаёт не расстояние, а нечто большее — непримиримые ценности и разные ответы на один и тот же жизненный выбор.
снятие интоксикации на дому [url=https://vyvod-iz-zapoya-na-domu-samara-1.ru/]снятие интоксикации на дому[/url] .
1xbet ja
check items here – Everything is placed logically for a smooth experience.
start exploring – The page design makes browsing comfortable and easy.
cartoonporno1cn – Site works smoothly and layout is simple but effective overall.
выведение из запоя на дому самара [url=https://vyvod-iz-zapoya-na-domu-samara-1.ru/]выведение из запоя на дому самара[/url] .
pinup hisob ochish [url=https://www.pinup90462.help]https://www.pinup90462.help[/url]
Проблемы с алкоголем? https://www.narkolog-na-dom-vizov.ru срочная помощь при алкогольной и наркотической интоксикации. Вывод из запоя, капельницы и поддержка 24/7. Анонимно, быстро и безопасно с выездом врача на дом.
«Симпсоны» — легендарный американский анимационный сериал, выходящий с 1989 года и превратившийся в икону мировой культуры. За 37 сезонов вышло более 800 серий острой социальной сатиры о семье из вымышленного Спрингфилда: ленивый отец, терпеливая мать и трое детей ежесерийно попадают в ситуации, высмеивающие политику, шоу-бизнес и общественные пороки. Ищете симпсоны все серии? Все эпизоды доступны на simpsony-smotret.net в высоком качестве с профессиональными озвучками HDrezka, 2×2 и BaibaKo. Сериал не стареет: каждая серия — точное и беспощадное зеркало реальной жизни.
creative marketplace – Interface is simple and moving between pages feels natural.
visit platform – Everything is organized well and browsing feels smooth throughout.
https://duelbits.com.mx/
Duelbits constituye una plataforma de casino online y plataforma de apuestas deportivas con criptomonedas que opera bajo regulacion de la jurisdiccion de Curazao, dirigido a usuarios de Mexico desde 2021 con interfaz en espanol , asistencia las 24 horas y una orientacion exclusiva en transacciones de entrada, salida y ventajas en cripto, pensado para jugadores entre 18 y 40 anos con experiencia elemental o moderada en monedas digitales que pretenden juegos como Crash y Mines.
dubai international property & Full Building for Sale in Dubai valor real estate dubai1bhk in dubai
Лучшее путешествие джип тур авто горы, каньоны и побережье. Увлекательные маршруты, опытные гиды и яркие впечатления от путешествий по Крыму.
Продавцу Спасибо! Решил пробу намутить, чтото не как не растворяется, пробывал 646 подогревать на водной бане (воду до кипения доводил) – очень плохо растворялся, на ацике совсем не растворялся (не подогревал), на спирте кажется совсем не канает. Но всетаки намутил 1 к 10, еще не пробывал. Подскажите бразы как его и на чем растворить? купить мефедрон и кокаин Как и было обещано, адрес оператор прислал где-то в 23.Оператор вполне одыкватный и понимающий:ok: Сколько раз он мне бонусы делал, за это конечно одельный +…
mostbet telegram [url=https://mostbet87216.help/]https://mostbet87216.help/[/url]
visit trade gallery – Items are easy to locate, and the layout feels intuitive.
1win poker [url=https://1win53841.help/]https://1win53841.help/[/url]
Do you trade cryptocurrencies? bitkelttrade 2026 automate your transactions and earn passive income. Smart algorithms analyze the market and help you make decisions. Increase your income and reduce risks with modern technology.
explore now – Simple navigation, clean design, and smooth page transitions throughout.
https://www.ourfirstfed.com/personal/savings/alpine-savings/alpine-savings
https://yipyipyo.com/forum/main-forum/95594-1xbet-free-bet-promo-code-bangladesh-2026-1xburn-bonus-%E2%82%AC130
Access River Cove – User-friendly layout, responsive interface, and easy-to-follow structure.
mostbet cote tenis [url=www.mostbet54831.help]www.mostbet54831.help[/url]
https://duelbits.com.mx/
Duelbits es un sitio de juego en internet y casa de apuestas deportivas con criptomonedas que presta servicios bajo autorizacion de Curazao , dando servicio a usuarios de Mexico desde el ano 2021 con version en castellano , soporte 24/7 y una orientacion exclusiva en transacciones de entrada, salida y ventajas en cripto, pensado para apostadores del rango etario 18-40 con conocimientos basicos o intermedios en activos virtuales que desean juegos como Crash y Mines.
1win фриспины Кыргызстан [url=https://1win54928.help/]1win фриспины Кыргызстан[/url]
Часто предприниматели объединяют понятия тендер и госзакупки, так как обе процедуры связаны с конкурсным выбором поставщика. Однако между ними существуют определённые различия, которые важно понимать перед началом работы в этой сфере.
Узнайте больше прямо сейчас – https://tendernoe-soprovozhdenie-rostov-na-donu.ru/
вывод из запоя на дому цена [url=https://vyvod-iz-zapoya-na-domu-voronezh.ru/]вывод из запоя на дому цена[/url] .
1вин мегапей пополнение [url=1win32478.help]1win32478.help[/url]
mostbet depozitsiz free spins [url=https://www.mostbet43759.help]https://www.mostbet43759.help[/url]
вывод из запоя недорого [url=https://vyvod-iz-zapoya-na-domu-voronezh-3.ru/]вывод из запоя недорого[/url] .
I don’t think the title of your article matches the content lol. Just kidding, mainly because I had some doubts after reading the article.
discover plumcove vendor room – Well-structured pages, finding items is simple and clear.
Часто предприниматели объединяют понятия тендер и госзакупки, так как обе процедуры связаны с конкурсным выбором поставщика. Однако между ними существуют определённые различия, которые важно понимать перед началом работы в этой сфере.
Все тайны раскрыты – http://tendernoe-soprovozhdenie-rostov-na-donu.ru
вывод из запоя стоимость [url=https://vyvod-iz-zapoya-na-domu-voronezh-1.ru/]вывод из запоя стоимость[/url] .
explore this shop – Clean interface makes browsing efficient and simple.
помощь при запое на дому [url=https://vyvod-iz-zapoya-na-domu-voronezh-2.ru/]vyvod-iz-zapoya-na-domu-voronezh-2.ru[/url] .
https://dialog.eslov.se/profiles/xbetfreebets2/activity?locale=en
снятие запоя цена [url=https://vyvod-iz-zapoya-na-domu-voronezh.ru/]vyvod-iz-zapoya-na-domu-voronezh.ru[/url] .
нарколог на дом вывод из запоя [url=https://vyvod-iz-zapoya-na-domu-voronezh-1.ru/]нарколог на дом вывод из запоя[/url] .
срочный вывод из запоя [url=https://vyvod-iz-zapoya-na-domu-voronezh-3.ru/]срочный вывод из запоя[/url] .
[url=http://www.peugeot-4008.ru/forum/viewtopic.php?p=35757]Весы для фреона и инжекторы[/url]
1xbet ja
вывод из запоя цены [url=https://vyvod-iz-zapoya-na-domu-voronezh-2.ru/]вывод из запоя цены[/url] .
shop artisan goods – Pages are neat and browsing feels seamless.
discover more – Easy-to-follow content paired with a clean layout works well.
Лучшее путешествие джип туры цена горы, каньоны и побережье. Увлекательные маршруты, опытные гиды и яркие впечатления от путешествий по Крыму.
Автосервисам купить масло в бочках выгодно закупать моторное масло оптом в бочках с быстрой доставкой.
creative artisan marketplace – Smooth transitions and clear design enhance usability.
artisan goods platform – Everything is easy to access and flows naturally throughout the site.
start exploring – Pages feel intuitive, content is organized well, and the site works smoothly.
See the vendor site – Organized layout, responsive interface, and very easy to browse.
Do you trade cryptocurrencies? bitkelttrade ai strategy automate your transactions and earn passive income. Smart algorithms analyze the market and help you make decisions. Increase your income and reduce risks with modern technology.
visit marketplace – Smooth interface with fast-loading pages enhances the browsing experience.
Успехов, здоровья и процветания вам в наступающем году. :bro: купить мефедрон и кокаин ПРодавец,есть из скорости что нибудь качественное?еще раз какой городл
По теме “Переезд в Адыгею: новая жизнь у гор”, есть отличная статья.
Вот, можете почитать:
[url=https://tresh-lordfilm.ru/news/pereezd-v-adygeyu-na-pmzh-kak-smenit-ritm-megapolisa-na-osoznannuyu-zhizn-u-gor/]https://tresh-lordfilm.ru/news/pereezd-v-adygeyu-na-pmzh-kak-smenit-ritm-megapolisa-na-osoznannuyu-zhizn-u-gor/[/url]
studio apartment for rent in dubai monthly basis https://andreamezvinsky.com villa for rent in mankhoolsidra villas phase 3 dubai hills estate
find items fast – Navigation is seamless with quick-loading content.
1xbet
Echo Harbor Gallery Portal – The design is well structured, giving a natural and easy browsing experience.
view platform – It’s user-friendly and pages are arranged in a logical way.
вывод из запоя анонимно недорого [url=https://vyvod-iz-zapoya-na-domu-samara.ru/]вывод из запоя анонимно недорого[/url] .
mostbet xavfsizlik savoli [url=www.mostbet21640.help]www.mostbet21640.help[/url]
explore artisan work – Content is logically arranged and navigation is smooth.
this website – A nicely prepared resource with practical and useful information.
выведение из запоя на дому самара [url=https://vyvod-iz-zapoya-na-domu-samara.ru/]выведение из запоя на дому самара[/url] .
Access Rose Cove – Simple menus, well-structured pages, and smooth exploration.
view website – Clean design with logical page layout makes navigation effortless.
вывод из запоя на дому самара круглосуточно [url=https://vyvod-iz-zapoya-na-domu-samara-1.ru/]вывод из запоя на дому самара круглосуточно[/url] .
handmade crafts collection – Pages feel light and the browsing experience is calm.
1xbet
Do you trade cryptocurrencies? passive earnings on crypto automate your transactions and earn passive income. Smart algorithms analyze the market and help you make decisions. Increase your income and reduce risks with modern technology.
Do you trade cryptocurrencies? bitkelttrade ai features automate your transactions and earn passive income. Smart algorithms analyze the market and help you make decisions. Increase your income and reduce risks with modern technology.
Linen Meadow Trading Hub – Pages feel responsive and the design stays clean and uncluttered.
explore store – Fast navigation and clear layouts make shopping enjoyable.
врач вывод из запоя [url=https://vyvod-iz-zapoya-na-domu-samara-1.ru/]врач вывод из запоя[/url] .
ааап магазину https://mariage21.ru Я вообще удивляюсь как продаван работает то? Есть ветка форума, личка и ася – везде молчание. В ася онлайн, но всеравно молчит уже третий день – это адекватный сервис?Перевел деньги на Альфа 21.04.2014 после умення узнали даные (Ф.И.О телефон и адрес) Оператор сказал что посылка будет отправлена 22.04.2014. !!!! 23.04.2014 скинули номер наклодной. По номеру наклодной смог отслеживать свою посылку 24.04.2012.
цены на вывод из запоя на дому [url=https://vyvod-iz-zapoya-na-domu-voronezh-1.ru/]vyvod-iz-zapoya-na-domu-voronezh-1.ru[/url] .
вывод из запоя на дому недорого [url=https://vyvod-iz-zapoya-na-domu-voronezh-2.ru/]вывод из запоя на дому недорого[/url] .
al rashad real estate dubai https://theatreofwill.org rent apartment in southridge tower 6 dubaigreen square dubai hills estate
explore website – Pages load quickly and sections are clearly defined for easy access.
срочный вывод из запоя [url=https://vyvod-iz-zapoya-na-domu-voronezh-1.ru/]срочный вывод из запоя[/url] .
see details – Quick performance and captivating content make this site pleasant to browse.
снятие запоя цена [url=https://vyvod-iz-zapoya-na-domu-voronezh-2.ru/]vyvod-iz-zapoya-na-domu-voronezh-2.ru[/url] .
crafted marketplace – Navigation is simple and content is easy to find.
pin-up Payme pul yechish [url=https://pinup90462.help]pin-up Payme pul yechish[/url]
стоимость вывода из запоя [url=https://vyvod-iz-zapoya-na-domu-voronezh-3.ru/]стоимость вывода из запоя[/url] .
вывод из запоя с выездом [url=https://vyvod-iz-zapoya-na-domu-voronezh.ru/]вывод из запоя с выездом[/url] .
mostbet Oʻzbekistonda mirror [url=https://mostbet21640.help]https://mostbet21640.help[/url]
Visit Rose Cove Gallery – Smooth layout, everything is clear and pages load fast.
1xbet ja
discover more – Clean layout and fast-loading pages contribute to a pleasant user experience.
вывод из запоя цены воронеж [url=https://vyvod-iz-zapoya-na-domu-voronezh-3.ru/]вывод из запоя цены воронеж[/url] .
вывод из запоя с выездом [url=https://vyvod-iz-zapoya-na-domu-voronezh.ru/]вывод из запоя с выездом[/url] .
Lavender Harbor Trading Hub – Pages feel logically structured, so navigation is intuitive and smooth.
Lavender Harbor Commerce Hub – The design is simple and keeps navigation clear and efficient.
creative artisan marketplace – Smooth transitions and tidy layout enhance the experience.
1win apk işləmir [url=https://www.1win53841.help]https://www.1win53841.help[/url]
discover vendor parlor – Pages are well-structured, making product exploration quick and intuitive.
майнс 1win [url=https://1win54928.help/]майнс 1win[/url]
mostbetda royxatdan otish [url=https://www.mostbet43759.help]https://www.mostbet43759.help[/url]
1вин вход Киргизия [url=https://1win32478.help]https://1win32478.help[/url]
Принять могут в любой курьерке и уж тем более на почте. 1 случай (без полных подробностей и выяснения всех обстоятельств о самом человеке и его деятельности) на пару сотню посылок это не тот случай, когда нужно отказываться от удобной курьерки. Об этом уже говорили неоднократно. Возвращаться к этой теме больше не стоит. купить мефедрон и кокаин хотел уточнить а вы ващпе работаете? заказ сделал что то тишинаСпасибо. Похож на ам2**3
visit homepage now – The interface is clean, making it easy to move through the site.
see details – The layout and content feel in sync, making everything easy to follow.
1xbet
browse the commerce site – The interface is clean and the structure is very straightforward.
check quartzmeadow goods hall – Fast-loading pages, interface is tidy and user-friendly.
zooma properties dubai united arab emirates Benefits of buying property in Dubai buy house in dubai optionmonthly short term apartments for rent in bur dubai
open link – Smooth navigation, clean design, and pages are easy to follow.
Snow Cove Market Gallery – I found the material interesting and it seems worth exploring further.
Snow Cove Commerce Hub – The site presents interesting material that is worth exploring further.
unique finds – Navigation works well and sections are easy to access.
browse here – Everything is organized well and feels easy to use.
jp site – Simple layout makes exploring content straightforward.
1xbet
silkmeadowcommercegallery.shop – Smooth browsing experience and everything feels neatly arranged overall.
view more here – Navigation is straightforward and content is easy to reach.
Клад был описан понятно и ясно! купить мефедрон и кокаин Приветствую всех форумчан и клиентов оптово-розничного магазина chemical-mixИли все ок у всех тут клиентов?
view unique pieces – Interface is organized and products are easy to browse.
Лучшее путешествие Джиппинг Ялта горы, каньоны и побережье. Увлекательные маршруты, опытные гиды и яркие впечатления от путешествий по Крыму.
Do you trade cryptocurrencies? bitkelttrade official automate your transactions and earn passive income. Smart algorithms analyze the market and help you make decisions. Increase your income and reduce risks with modern technology.
вывод из запоя дешево самара [url=https://vyvod-iz-zapoya-na-domu-samara.ru/]вывод из запоя дешево самара[/url] .
вывод из запоя наркология [url=https://vyvod-iz-zapoya-na-domu-samara-1.ru/]вывод из запоя наркология[/url] .
mostbet hisob ochish [url=http://mostbet21640.help/]mostbet hisob ochish[/url]
Harborstone Retail Hub – browsing is easy and the design feels very clear
Ruby Orchard Commerce Collection – Pages are organized nicely and browsing feels very comfortable.
wasl hub block 3 2 Bedroom Apartment for Sale in JBR Dubai Prices apartments for rent in jumeirah 3villas for rent in dubai near metro station
вывод из запоя на дому недорого [url=https://vyvod-iz-zapoya-na-domu-samara.ru/]vyvod-iz-zapoya-na-domu-samara.ru[/url] .
«Любовь, смерть и роботы» — анимационная антология 2019 года за авторством Тима Миллера и Дэвида Финчера: 45 независимых серий по 14 минут, каждая с собственным стилем и жанровой атмосферой. Ищете любовь смерть и роботы смотреть онлайн? Все эпизоды доступны на lyubov-smert-roboty-smotret.biz бесплатно в хорошем качестве с множеством вариантов озвучки. Фантастика, ужасы, нуар и чёрный юмор переплетаются в новеллах о киборгах, чудовищах, роботах и цифровой вечности. Каждый эпизод бьёт точно в цель: без лишнего хронометража — только сюжет, идея и послевкусие.
1xbet ja
выведение из запоя на дому самара [url=https://vyvod-iz-zapoya-na-domu-samara-1.ru/]выведение из запоя на дому самара[/url] .
bead gallery – Everything is arranged neatly, making browsing easy.
Visit Upland Cove Market – everything is clear and I can browse without confusion
see quartzorchard marketplace online – Organized interface, finding items feels effortless.
Teal Cove Vendor Network – The structure is clean, making the experience easy and intuitive.
discover featured products – Layout is logical, making it simple to explore all items.
Barling Collins collection – Everything is neatly arranged, giving a smooth browsing experience.
Оплатил, через 49 минут уже получил адрес, люди забрали надежную закладку (эйф-диссоциатив), опробовали, все довольны. Мир и респект https://mariage21.ru Видать все ништяк, вот и не отписывается))))кто получал последний раз недавно отишитесь о работе магаза. +В РЕПУ!!!!!!! и главное почему ип адрес не меняется на сайте???
Garnet Harbor Collection Site – everything feels simple and very easy to navigate
Villas for rent in The Legends https://balsda.org studio room for rent in rashidiya dubaireal estate brokers in dubai starting with letter a
Honey Cove Vendor Gallery – The site is simple to use and everything appears to function smoothly with a clean look.
Honey Cove Market Gallery – It feels very straightforward, with a decent design and reliable performance overall.
mostbet joc plinko [url=http://mostbet54831.help/]mostbet joc plinko[/url]
Creek Harbor Shopping Site – the layout feels light and easy to navigate through
Коммерческий и государственный тендер — это конкурентная процедура выбора поставщика товаров или оказания услуг. Заказчик размещает требования, а компании подают заявки и участвуют в торгах.
Разберитесь досконально – [url=https://tendernoe-soprovozhdenie-rostov-na-donu.ru/]стоимость тендерного сопровождения[/url]
https://payatasbaptistchurch.org/october-2015/
Silver Harbor Storefront Gallery – The design is minimal and browsing feels straightforward and clear.
marketplace access link – Pages load without delay and navigation is simple.
Дистанционное банкротство физического лица — это удобный способ списать долги без личных визитов в суд и офисы. Переходите по запросу [url=https://centrbg.ru/services/bankrotstvo-fizicheskikh-lits/distantsionnoe-bankrotstvo/]консультация юриста по дистанционному банкротству бесплатно[/url]. Все этапы проходят онлайн: от консультации до подачи документов и сопровождения дела. Вы экономите время, снижаете стресс и получаете профессиональную поддержку юриста на каждом этапе. Поможем законно избавиться от долгов и начать финансовую жизнь с чистого листа.
работа 5+ качество 5 опреративность 5+ купить мефедрон и кокаин но за долгое сотрудничество с этима вот по этой теме отпиши по подробней,точнее о том как там дальше события развиваются?????????? очень волнует данная тема. как же так их просекла легавня???? откуда краснотой веет.???
вывод из запоя цена на дому [url=https://vyvod-iz-zapoya-na-domu-samara-2.ru/]вывод из запоя цена на дому[/url] .
срочный вывод из запоя на дому [url=https://vyvod-iz-zapoya-na-domu-samara-3.ru/]vyvod-iz-zapoya-na-domu-samara-3.ru[/url] .
нарколог на дом вывод из запоя [url=https://vyvod-iz-zapoya-na-domu-ekaterinburg.ru/]нарколог на дом вывод из запоя[/url] .
Forest Meadow Retail Space – everything is accessible without feeling overloaded
вывод из запоя [url=https://vyvod-iz-zapoya-na-domu-ekaterinburg-1.ru/]вывод из запоя[/url] .
«Врата Штейна» — аниме 2011 года о том, как эксцентричный самозваный гений Ринтаро Окабе и его странная компания случайно мастерят прибор, пересылающий сообщения прямо в прошлое. Каждое отправленное сообщение тревожит ткань времени, порождая волны последствий, которые крушат привычный мир без возврата. Ищете врата штейна смотреть онлайн? На vrata-shteyna-kinogo.cc все 25 серий доступны бесплатно с несколькими вариантами озвучки. Сериал виртуозно сочетает научную фантастику с психологической драмой: за маской фарса скрывается история о цене выбора — чью судьбу сохранить и можно ли исправить время, не потеряв себя.
вывод из запоя на дому цена [url=https://vyvod-iz-zapoya-na-domu-ekaterinburg-2.ru/]вывод из запоя на дому цена[/url] .
сколько стоит капельница от алкоголя [url=https://vyvod-iz-zapoya-na-domu-ekaterinburg-3.ru/]vyvod-iz-zapoya-na-domu-ekaterinburg-3.ru[/url] .
выведение из запоя на дому [url=https://vyvod-iz-zapoya-na-domu-samara-2.ru/]vyvod-iz-zapoya-na-domu-samara-2.ru[/url] .
выведение из запоя на дому анонимно [url=https://vyvod-iz-zapoya-na-domu-samara-3.ru/]vyvod-iz-zapoya-na-domu-samara-3.ru[/url] .
прокапаться на дому от алкоголя цена [url=https://vyvod-iz-zapoya-na-domu-ekaterinburg.ru/]прокапаться на дому от алкоголя цена[/url] .
вывод из запоя нижний новгород [url=https://vyvod-iz-zapoya-na-domu-nizhnij-novgorod.ru/]вывод из запоя нижний новгород[/url] .
вывод из запоя капельница на дому [url=https://vyvod-iz-zapoya-na-domu-nizhnij-novgorod-1.ru/]вывод из запоя капельница на дому[/url] .
Berry Cove Experience Hub – overall everything is clean, stable, and loads perfectly
check artisan market – Clear layout allows effortless navigation and product discovery.
new hotel properties in dubai https://digitalrazgrad.org dubai property crisiswhat is dubai hill estate
капельница от запоя цена [url=https://vyvod-iz-zapoya-na-domu-ekaterinburg-1.ru/]капельница от запоя цена[/url] .
mostbet retragere în euro [url=https://mostbet54831.help]https://mostbet54831.help[/url]
вывод из запоя наркология [url=https://vyvod-iz-zapoya-na-domu-ekaterinburg-2.ru/]вывод из запоя наркология[/url] .
вывод из запоя цены [url=https://vyvod-iz-zapoya-na-domu-nizhnij-novgorod.ru/]вывод из запоя цены[/url] .
вывод из запоя на дому недорого [url=https://vyvod-iz-zapoya-na-domu-samara-1.ru/]vyvod-iz-zapoya-na-domu-samara-1.ru[/url] .
капельница от запоя на дому цена [url=https://vyvod-iz-zapoya-na-domu-ekaterinburg-3.ru/]vyvod-iz-zapoya-na-domu-ekaterinburg-3.ru[/url] .
снятие алкогольной интоксикации нижний новгород [url=https://vyvod-iz-zapoya-na-domu-nizhnij-novgorod-1.ru/]снятие алкогольной интоксикации нижний новгород[/url] .
https://www.bigplusmedia.com/index.php/2014/01/30/image-slider-example-post/
Moon Harbor Artisan Commerce Gallery – Browsing feels steady and visually soothing throughout.
Fortune Ox modo turbo: quem já viu muitos touros?
выведение из запоя на дому анонимно [url=https://vyvod-iz-zapoya-na-domu-samara-1.ru/]vyvod-iz-zapoya-na-domu-samara-1.ru[/url] .
вывод из запоя цены самара [url=https://vyvod-iz-zapoya-na-domu-samara.ru/]вывод из запоя цены самара[/url] .
mostbet kazino free spins [url=https://mostbet21640.help/]https://mostbet21640.help/[/url]
Flora Harbor Virtual Market – the overall experience feels smooth, tidy, and well optimized
везде негатив только пишите про нас, а не заказывали ничего при этом. Может уже достаточно, ложку дегтя вы свою добавили, успокойтесь. Люди пишут не по бонусам, это покупатели купить мефедрон и кокаин Получил вчера конвертик от вас . Спасибо , оперативно . Не знаю почему почти все недовольны 5иаи , но такого психодела давненько не переживал . Потрясён до мозга костей .магазин ровнеый,за что им спасибо,если сами тупить не будете всё пройдёт ровно и без проблем.Товар тоже порадовал,довольно таки неплохо))
[url=https://vrn.best-city.ru/forum/thread540153295/#reply540153346]news-life.pro[/url]
вывод из запоя на дому [url=https://vyvod-iz-zapoya-na-domu-samara.ru/]вывод из запоя на дому[/url] .
Visit River Cove Market – everything feels structured and simple to grasp quickly
marketplace entry page – The structure is clean and the experience feels smooth.
https://www.teatroenelaire.com/2019/12/13/554/
Главные новости: https://l-parfum.ru/aktsii/
mostbet uz rasmiy [url=https://www.mostbet68214.help]https://www.mostbet68214.help[/url]
melbet скачать приложение киргизия [url=http://melbet53498.help]http://melbet53498.help[/url]
mostbet фриспины на сегодня [url=https://www.mostbet26809.help]https://www.mostbet26809.help[/url]
mostbet kart ödənişi alınmadı [url=mostbet2011.help]mostbet kart ödənişi alınmadı[/url]
mostbet ocolire restricționare Moldova [url=https://mostbet75302.help]https://mostbet75302.help[/url]
3 bedroom apartments in al wasl karama dubai https://kodalyhub.org rent a villa in dubai dailyaabar properties dubai
click to explore – I liked how clearly everything is presented.
see quickridge marketplace items – Simple structure, exploring categories is fast and clear.
mostbet azərbaycanda azərbaycanca dəstək [url=https://www.mostbet87216.help]https://www.mostbet87216.help[/url]
Stone Harbor Digital Gallery – everything runs smoothly and feels easy to explore
Visit Kettle Crest Market – everything loads fast and browsing is easy and intuitive
shop creative items – Interface is organized, allowing effortless exploration.
попробуйте установить скайп. купить мефедрон и кокаин И еще, слышал типа ам2233, который отличного качества, желтого цвета. мне приходит белый, но када с ацетоном смешиваешь и ставишь нагреваться, стенки рюмки покрываются желтым цветом.Трек есть +Бонус от души как придет отпишу
https://autodirect.ie/2023/11/02/hello-world/
вывод из запоя на дому недорого [url=https://vyvod-iz-zapoya-na-domu-ekaterinburg.ru/]вывод из запоя на дому недорого[/url] .
see the rain harbor site – Navigation is smooth and everything is clearly structured.
mostbet mines game [url=mostbet54831.help]mostbet54831.help[/url]
вывод из запоя наркология [url=https://vyvod-iz-zapoya-na-domu-ekaterinburg.ru/]вывод из запоя наркология[/url] .
вывод из запоя дешево нижний новгород [url=https://vyvod-iz-zapoya-na-domu-nizhnij-novgorod.ru/]вывод из запоя дешево нижний новгород[/url] .
browse here – It’s all pretty intuitive and easy to understand.
Villas for rent in Legacy Nova Villas Palm Jumeirah Villas for Sale Villas for rent in Whitefielddubai real estate flat for rent
круглосуточный вывод из запоя [url=https://vyvod-iz-zapoya-na-domu-nizhnij-novgorod.ru/]круглосуточный вывод из запоя[/url] .
вывод из запоя на дому самара [url=https://vyvod-iz-zapoya-na-domu-samara-2.ru/]вывод из запоя на дому самара[/url] .
выведение из запоя на дому самара [url=https://vyvod-iz-zapoya-na-domu-samara-3.ru/]выведение из запоя на дому самара[/url] .
Wood Cove E-Shop – everything is arranged clearly and feels easy to navigate
«Как я встретил вашу маму» — американский ситком 2005 года, завоевавший миллионы поклонников по всему миру. Сюжет о Теде Мосби, который повествует детям историю своей большой любви в Нью-Йорке 2000-х, удерживает внимание все 9 сезонов и 208 эпизодов. Ищете как я встретил вашу маму смотреть онлайн? Все эпизоды доступны на kak-ya-vstretil-vashu-mamu-smotret.net с лучшими озвучками без регистрации. Пятёрка друзей — романтик Тед, идеальная пара Маршалл и Лили, амбициозная Робин и неотразимый Барни — создаёт химию, которую невозможно забыть. Сериал мастерски соединяет комедию, мелодраму и нелинейное повествование с фирменными символами: жёлтым зонтом и синим французским рожком.
вывод из запоя цены [url=https://vyvod-iz-zapoya-na-domu-samara-2.ru/]вывод из запоя цены[/url] .
Тем, кто хочет глубже понять, как сочетаются технические аспекты SEO и маркетинговые стратегии, будет полезна эта публикация: https://o-ili-v.ru/stati/prodvizhenie-sajtov-iskusstvo-i-nauka-uspeha-v-cifrovom-mire/
выведение из запоя на дому анонимно [url=https://vyvod-iz-zapoya-na-domu-samara-3.ru/]vyvod-iz-zapoya-na-domu-samara-3.ru[/url] .
Trail Harbor Merchant Gallery – The site feels user friendly and is very straightforward to explore.
были случаи https://pansion-ariadna.ru Фарту в делах парни !:hello:Да у всех старых магазинов так, на то они и старые.
Чистая питьевая вода — это не роскошь, а ежедневная необходимость, особенно для семей с детьми и загруженных офисов. Компания «Вода Гор» уже много лет обеспечивает жителей Махачкалы и Каспийска горной водой высокого качества, доставляя её прямо до двери. Заказать воду легко на сайте https://voda-s-gor.ru/ — каталог, актуальные цены и удобная форма заказа всегда под рукой. Компания работает честно: цены фиксированы и не меняются даже в кризисных ситуациях, что подтверждают сотни благодарных клиентов. Доставка осуществляется оперативно, а самовывоз доступен ежедневно по адресу Азизова, 43/3.
вывод из запоя на дому екатеринбург [url=https://vyvod-iz-zapoya-na-domu-ekaterinburg-1.ru/]вывод из запоя на дому екатеринбург[/url] .
Aurora Cove Goods Center – the interface is simple and navigation is smooth and clear
вывод из запоя цены нижний новгород [url=https://vyvod-iz-zapoya-na-domu-nizhnij-novgorod-1.ru/]вывод из запоя цены нижний новгород[/url] .
капельница от запоя недорого [url=https://vyvod-iz-zapoya-na-domu-ekaterinburg-2.ru/]vyvod-iz-zapoya-na-domu-ekaterinburg-2.ru[/url] .
поставить капельницу от запоя на дому цена [url=https://kapelnica-ot-zapoya-nizhnij-novgorod.ru/]поставить капельницу от запоя на дому цена[/url] .
сколько стоит прокапаться от алкоголя цена [url=https://vyvod-iz-zapoya-na-domu-ekaterinburg-3.ru/]vyvod-iz-zapoya-na-domu-ekaterinburg-3.ru[/url] .
капельница на дому нижний новгород [url=https://kapelnica-ot-zapoya-nizhnij-novgorod-1.ru/]капельница на дому нижний новгород[/url] .
their website – It looks modern and is easy to navigate visually.
Lemon Lark Product Showcase – I like how clean the interface is and how easy it is to navigate
выведение из запоя в нижнем новгороде [url=https://vyvod-iz-zapoya-na-domu-nizhnij-novgorod-1.ru/]выведение из запоя в нижнем новгороде[/url] .
вывод из запоя анонимно [url=https://vyvod-iz-zapoya-na-domu-ekaterinburg-1.ru/]вывод из запоя анонимно[/url] .
вывод из запоя круглосуточно [url=https://vyvod-iz-zapoya-na-domu-ekaterinburg-2.ru/]вывод из запоя круглосуточно[/url] .
запой капельница нарколог [url=https://kapelnica-ot-zapoya-nizhnij-novgorod.ru/]запой капельница нарколог[/url] .
прокапаться в нижнем новгороде [url=https://kapelnica-ot-zapoya-nizhnij-novgorod-1.ru/]прокапаться в нижнем новгороде[/url] .
вывод из запоя цены [url=https://vyvod-iz-zapoya-na-domu-ekaterinburg-3.ru/]вывод из запоя цены[/url] .
villas in dubai hills estate https://theatreofwill.org best luxury apartments in dubaihow many real estate valuation firms in dubai
Утилизация биоотходов https://stroi-musor.su вывоз и переработка пищевых и растительных отходов. Экологичные решения, соблюдение стандартов и надежный сервис для предприятий и частных клиентов.
Дистанционное банкротство физического лица — это удобный способ списать долги без личных визитов в суд и офисы. Переходите по запросу [url=https://centrbg.ru/services/bankrotstvo-fizicheskikh-lits/distantsionnoe-bankrotstvo/]консультация по дистанционному банкротству физических лиц через МФЦ[/url]. Все этапы проходят онлайн: от консультации до подачи документов и сопровождения дела. Вы экономите время, снижаете стресс и получаете профессиональную поддержку юриста на каждом этапе. Поможем законно избавиться от долгов и начать финансовую жизнь с чистого листа.
check curated treasures – Navigation is simple and product search feels effortless.
mostbet karta qo‘shish [url=www.mostbet21640.help]mostbet karta qo‘shish[/url]
ГНБ бурение https://stroytex.su современный способ прокладки инженерных сетей без раскопок. Подходит для дорог, рек и плотной застройки. Точная технология, сокращение сроков и минимальные затраты.
online cloud cove hub – The design is simple and the pages load very fast.
Quartz Meadow Online Showcase – Everything was laid out clearly, making browsing effortless.
кто сказал что он закрылся? где это написано? https://mariage21.ru К магазину никаких нареканий быстро появился на форуме и развеял этот- дешевый развод.будут денежки возьму тут что нибудь дымящиеся.Ровным парням ровный респект
сколько стоит капельница от алкоголя [url=https://vyvod-iz-zapoya-na-domu-ekaterinburg.ru/]vyvod-iz-zapoya-na-domu-ekaterinburg.ru[/url] .
Работаю как ИП, веду учёт сам. Базовой версии мне хватает за глаза — всё что нужно есть, ничего лишнего нет. [url=https://управление-нашей-фирмой.рф/]управление заказами и сделками[/url]
вывод из запоя в нижнем новгороде [url=https://vyvod-iz-zapoya-na-domu-nizhnij-novgorod.ru/]вывод из запоя в нижнем новгороде[/url] .
«Любовь напрокат» — турецкий романтический сериал 2015 года о молодой официантке Дефне, решившейся на рискованную авантюру: притвориться влюблённой в успешного владельца обувного бренда Омера, чтобы спасти семью от финансового краха. Ищете любовь напрокат смотреть онлайн? Все 97 серий с профессиональной озвучкой доступны бесплатно на lyubov-naprokat-smotret.biz — мелодрама о том, как притворные чувства превращаются в настоящие. Закрытый и недоверчивый Омер даже не догадывается о хитром расчёте, тогда как Дефне с каждой серией всё труднее притворяться — настоящие чувства берут своё. Искромётный юмор, неожиданные повороты и яркие персонажи не дают оторваться от экрана до самого конца.
Snow Harbor Retail Hub – the interface feels responsive and very well optimized
сколько стоит капельница от алкоголя [url=https://vyvod-iz-zapoya-na-domu-ekaterinburg.ru/]vyvod-iz-zapoya-na-domu-ekaterinburg.ru[/url] .
mostbet mobil bonus təklifi [url=http://mostbet87216.help]http://mostbet87216.help[/url]
вывод из запоя клиника [url=https://vyvod-iz-zapoya-na-domu-nizhnij-novgorod.ru/]вывод из запоя клиника[/url] .
Lantern Orchard Marketplace Online – the experience is smooth and easy to navigate overall
gladeharbormarketparlor – Pleasant design, everything feels clean and navigation is simple overall.
go to this page – The site feels structured and everything runs smoothly.
villanova dubai properties location Buy Penthouse in Dubai chabaklo real estate dubairk properties dubai reviews
Rain Harbor Shopping Hub Space – The interface feels intuitive and very easy to browse.
mostbet suport nonstop [url=http://mostbet54831.help/]http://mostbet54831.help/[/url]
plum cove online hub – Everything is laid out clearly and navigation feels natural.
Gingerwood Online Bazaar – the pages are simple, clean, and not overwhelming
Последние данные очков репутации: https://prostopaket.ru пока никаких точных дат нет. цены будут когда придёт товар, так что ждёмс пока что.+огромная потеря популярности и быстрый спад клиентов.
запой капельница нарколог [url=https://kapelnica-ot-zapoya-nizhnij-novgorod-1.ru/]запой капельница нарколог[/url] .
whoah this weblog is fantastic i really like reading your articles. Stay up the great work! You know, many individuals are searching round for this information, you could help them greatly.
https://fstu.org.ua/matrychne-svitlo-2-0-chy-mozhna-zaminyty.html
discover more – Browsing felt natural and smooth, which made the experience enjoyable.
вывод из запоя спб [url=https://vyvod-iz-zapoya-na-domu-sankt-peterburg.ru/]вывод из запоя спб[/url] .
вывод из запоя с выездом на дом [url=https://vyvod-iz-zapoya-na-domu-sankt-peterburg-1.ru/]вывод из запоя с выездом на дом[/url] .
вывод из запоя капельница [url=https://kapelnica-ot-zapoya-nizhnij-novgorod-1.ru/]kapelnica-ot-zapoya-nizhnij-novgorod-1.ru[/url] .
Услуги финансового управляющего — ключевой элемент процедуры банкротства физических лиц. Переходите по запросу [url=https://centrbg.ru/services/bankrotstvo-fizicheskikh-lits/uslugi-finansovogo-upravlyayushchego/]бесплатная консультация финансового управляющего при банкротстве[/url]. Специалист сопровождает процесс на всех этапах: анализирует финансовое положение, взаимодействует с кредиторами, контролирует имущество и обеспечивает соблюдение закона. Профессиональная помощь помогает снизить риски, защитить интересы должника и пройти процедуру максимально эффективно.
вывод из алкогольного запоя нарколог24 [url=https://vyvod-iz-zapoya-na-domu-sankt-peterburg.ru/]vyvod-iz-zapoya-na-domu-sankt-peterburg.ru[/url] .
вывод из запоя дешево [url=https://vyvod-iz-zapoya-na-domu-samara-2.ru/]вывод из запоя дешево[/url] .
запой помощь [url=https://vyvod-iz-zapoya-na-domu-sankt-peterburg-1.ru/]запой помощь[/url] .
вывод из запоя самара [url=https://vyvod-iz-zapoya-na-domu-samara-3.ru/]vyvod-iz-zapoya-na-domu-samara-3.ru[/url] .
вывод из запоя капельница [url=https://kapelnica-ot-zapoya-nizhnij-novgorod.ru/]kapelnica-ot-zapoya-nizhnij-novgorod.ru[/url] .
вывод из запоя цена на дому [url=https://vyvod-iz-zapoya-na-domu-samara-2.ru/]вывод из запоя цена на дому[/url] .
вывод из запоя цены [url=https://vyvod-iz-zapoya-na-domu-nizhnij-novgorod-1.ru/]вывод из запоя цены[/url] .
Browse Marble Cove Collection – Everything is organized in a very accessible way.
вывод из запоя на дому недорого [url=https://vyvod-iz-zapoya-na-domu-samara-3.ru/]vyvod-iz-zapoya-na-domu-samara-3.ru[/url] .
капельница при алкогольной интоксикации на дому цена [url=https://kapelnica-ot-zapoya-nizhnij-novgorod.ru/]капельница при алкогольной интоксикации на дому цена[/url] .
rent to sale properties in dubai Buy Penthouse in Dubai list of public real estate companies dubairoom rent in dubai monthly basis
Quartz Orchard Retail Hub – navigation is fast and the layout is easy to understand
visit this river harbor site – Everything opens fast and navigation feels effortless overall.
вывод из запоя цены [url=https://vyvod-iz-zapoya-na-domu-nizhnij-novgorod.ru/]вывод из запоя цены[/url] .
Зацепил раздел про Подготовка к переезду в Адыгею из мегаполиса.
Вот, можете почитать:
[url=https://mos-medical.ru/%d0%b1%d0%b5%d0%b7-%d1%80%d1%83%d0%b1%d1%80%d0%b8%d0%ba%d0%b8/pereezd-v-adygeyu-posle-megapolisa-kak-podgotovitsya-i-sohranit-dohod/]https://mos-medical.ru/%d0%b1%d0%b5%d0%b7-%d1%80%d1%83%d0%b1%d1%80%d0%b8%d0%ba%d0%b8/pereezd-v-adygeyu-posle-megapolisa-kak-podgotovitsya-i-sohranit-dohod/[/url]
this page – The arrangement is clear, making the overall experience quite enjoyable.
прокапаться на дому от алкоголя цена [url=https://vyvod-iz-zapoya-na-domu-ekaterinburg.ru/]прокапаться на дому от алкоголя цена[/url] .
вывод из запоя на дому нижний новгород круглосуточно [url=https://vyvod-iz-zapoya-na-domu-nizhnij-novgorod.ru/]vyvod-iz-zapoya-na-domu-nizhnij-novgorod.ru[/url] .
флаги заказ цена https://flag-zakaz-spb.ru
mostbet aviator [url=http://mostbet87216.help]http://mostbet87216.help[/url]
сделать флаг под заказ сделать флаг на заказ в санкт петербурге
всем хай https://gcc-russia.ru мало того что неприятный опыт общения в гоме так и не денег не товару..Качество на высоте,оператор красавчик,все сделали быстро и четко!
Orchard Meadow Browse Portal – navigation feels clear and the layout is easy to understand quickly
explore handmade treasures – Interface is neat, making browsing simple.
капельница на дому от запоя [url=https://vyvod-iz-zapoya-na-domu-ekaterinburg.ru/]капельница на дому от запоя[/url] .
выезд на дом капельница от запоя [url=https://vyvod-iz-zapoya-na-domu-ekaterinburg-3.ru/]выезд на дом капельница от запоя[/url] .
вывести из запоя цена [url=https://vyvod-iz-zapoya-na-domu-ekaterinburg-1.ru/]вывести из запоя цена[/url] .
нарколог капельницу на дому [url=https://vyvod-iz-zapoya-na-domu-ekaterinburg-2.ru/]нарколог капельницу на дому[/url] .
Тем, кто хочет глубже понять, как сочетаются технические аспекты SEO и маркетинговые стратегии, будет полезна эта публикация: https://o-ili-v.ru/stati/prodvizhenie-sajtov-iskusstvo-i-nauka-uspeha-v-cifrovom-mire/
https://md.chaosdorf.de/s/t3APpODZJZ
click to explore site – The layout is polished and browsing is easy and smooth.
нарколог вывод из запоя [url=https://vyvod-iz-zapoya-na-domu-ekaterinburg-3.ru/]нарколог вывод из запоя[/url] .
Ruby Meadow Commerce Gallery – The site looks tidy and loads pages in a smooth, responsive way.
мелбет элсом пополнение [url=melbet53498.help]melbet53498.help[/url]
капельница от запоя на дому [url=https://vyvod-iz-zapoya-na-domu-ekaterinburg-1.ru/]капельница от запоя на дому[/url] .
сколько стоит прокапаться [url=https://vyvod-iz-zapoya-na-domu-ekaterinburg-2.ru/]vyvod-iz-zapoya-na-domu-ekaterinburg-2.ru[/url] .
learn more here – It contains helpful information that makes it worth checking out again.
visit platform – Helpful content presented clearly made the browsing experience worthwhile.
explore here – Well-structured design allows users to find information naturally and easily.
Snow Cove Digital Gallery – the layout is neat and navigation feels natural
see details – Navigating is easy and the layout has a warm, welcoming feel.
click to explore – Everything seems optimized and user-friendly.
mostbet mirror [url=mostbet2011.help]mostbet2011.help[/url]
mostbet oferte [url=https://mostbet75302.help/]https://mostbet75302.help/[/url]
mostbet plinko strategiya [url=https://www.mostbet68214.help]https://www.mostbet68214.help[/url]
поставить капельницу от запоя [url=https://kapelnica-ot-zapoya-nizhnij-novgorod-1.ru/]поставить капельницу от запоя[/url] .
мостбет приложение Кыргызстан [url=www.mostbet26809.help]www.mostbet26809.help[/url]
duties and responsibilities of area sales manager real estate dubai https://balsda.org furnished studio for short term rent in dubaiowner of al rowaa real estate dubai
Raven Grove Commerce Gallery – the experience is solid and everything loads cleanly and clearly
browse oakmeadow goods – Simple design makes finding items quick and stress-free.
check this out – I found the browsing experience smooth and the structure very clear.
капельница от алкоголя [url=https://kapelnica-ot-zapoya-nizhnij-novgorod-1.ru/]капельница от алкоголя[/url] .
Всем привет ни как не могу заказ оформить, помогите,плиз https://remontjizni.ru Крутой магаз. Ассортимент радуетВсем доброго времени суток. Первый раз довелось заказывать в этом магазине на свой страх и риск, но положительные отзывы старичков о работе и качестве товара (в частности 2с, который меня и интересовал) убедили, что причин волноваться нет.
мостбет aviator 2026 [url=https://mostbet91763.help]мостбет aviator 2026[/url]
discover this platform – Everything is simple and easy to navigate from page to page.
Ivory Harbor Shopping Site – navigation is easy and the layout feels very simple to explore
melbet регистрация [url=https://www.melbet53498.help]https://www.melbet53498.help[/url]
explore this link – Pages load without delay, and the interface feels neat and modern.
вывод из запоя на дому спб [url=https://vyvod-iz-zapoya-na-domu-sankt-peterburg-1.ru/]вывод из запоя на дому спб[/url] .
врач капельница алкоголь на дом [url=https://vyvod-iz-zapoya-na-domu-sankt-peterburg.ru/]врач капельница алкоголь на дом[/url] .
капельница от запоя [url=https://kapelnica-ot-zapoya-nizhnij-novgorod.ru/]капельница от запоя[/url] .
discover more – Clean interface and straightforward navigation make it a pleasant site to use.
start exploring – Interface is minimal yet practical, making navigation easy.
вывод из запоя в спб [url=https://vyvod-iz-zapoya-na-domu-sankt-peterburg-1.ru/]вывод из запоя в спб[/url] .
вывод из запоя цена [url=https://vyvod-iz-zapoya-na-domu-sankt-peterburg.ru/]вывод из запоя цена[/url] .
mostbet sloturi pe telefon [url=https://mostbet54831.help/]https://mostbet54831.help/[/url]
browse Sea Cove gallery – The interface is tidy and makes exploring content comfortable and easy.
вывод из запоя капельница [url=https://kapelnica-ot-zapoya-nizhnij-novgorod.ru/]kapelnica-ot-zapoya-nizhnij-novgorod.ru[/url] .
выведение из запоя цена [url=https://vyvod-iz-zapoya-na-domu-nizhnij-novgorod-1.ru/]выведение из запоя цена[/url] .
start browsing – The overall design is simple yet makes navigation effortless.
vb craft platform – Navigation is simple and content is easy to access.
Wood Cove Online Boutique – everything feels smooth and well arranged for easy use
start browsing – I had a nice experience and found the layout very simple to use.
срочный вывод из запоя на дому [url=https://vyvod-iz-zapoya-na-domu-samara-2.ru/]vyvod-iz-zapoya-na-domu-samara-2.ru[/url] .
вывод из запоя срочно круглосуточно [url=https://vyvod-iz-zapoya-na-domu-nizhnij-novgorod-1.ru/]вывод из запоя срочно круглосуточно[/url] .
mostbet pronosticuri fotbal [url=http://mostbet75302.help]http://mostbet75302.help[/url]
mostbet to‘lov rekvizitlari [url=https://mostbet68214.help]https://mostbet68214.help[/url]
вывод из запоя дешево самара [url=https://vyvod-iz-zapoya-na-domu-samara-2.ru/]вывод из запоя дешево самара[/url] .
mostbet az mirror link [url=https://mostbet2011.help]https://mostbet2011.help[/url]
мостбет установка apk [url=mostbet26809.help]mostbet26809.help[/url]
flora bright properties dubai Hotel Apartments in Bur Dubai for Monthly Rent azizi developments llcApartment for Sale in Abbey Crescent, Dubai
Jasper Harbor Online Display Hub – Everything is laid out neatly, making the browsing experience comfortable and straightforward.
online coast harbor hub – The layout is clean and the browsing experience feels stable.
Coast Harbor web storefront – The experience is smooth and the layout keeps everything easy to understand.
Спасибо всем сотрудникам Chemical-mix.com купить мефедрон и кокаин если меня очень привлекли цены, я естественно буду пытаться достучаться до сейлера. а некоторые этого ждут сутками.Кому-нибудь отправили сегодня трек?
Elmwood Digital Gallery – everything is organized in a way that makes browsing easy
go to listings – Well-arranged pages make it easy to explore the content.
врач вывод из запоя [url=https://vyvod-iz-zapoya-na-domu-samara-3.ru/]врач вывод из запоя[/url] .
visit platform – Well-laid-out pages with professional presentation make this site easy to navigate.
visit platform – Everything is well structured, easy to navigate, and user-friendly.
Solar Meadow Marketplace Online – browsing feels stable, clean, and well structured
online merchant gallery portal – I found the layout clean and the navigation straightforward throughout the site.
вывести из запоя цена [url=https://vyvod-iz-zapoya-na-domu-samara-3.ru/]вывести из запоя цена[/url] .
marketplace link – Everything is arranged clearly and I found things quickly.
Wave Harbor Web Market – the site runs smoothly and the layout is simple and consistent
open this link – Pages load fast and the clean design makes browsing easy.
browse website – Clear layout with responsive pages enhances the user experience.
прокапаться в нижнем новгороде [url=https://kapelnica-ot-zapoya-nizhnij-novgorod-1.ru/]прокапаться в нижнем новгороде[/url] .
check new arrivals – Structure is logical, helping users locate items quickly.
игра плинко melbet [url=http://melbet53498.help]http://melbet53498.help[/url]
browse now – Everything feels relevant and well-organized for quick navigation.
Услуги финансового управляющего — ключевой элемент процедуры банкротства физических лиц. Переходите по запросу [url=https://centrbg.ru/services/bankrotstvo-fizicheskikh-lits/uslugi-finansovogo-upravlyayushchego/]помощь финансового управляющего[/url]. Специалист сопровождает процесс на всех этапах: анализирует финансовое положение, взаимодействует с кредиторами, контролирует имущество и обеспечивает соблюдение закона. Профессиональная помощь помогает снизить риски, защитить интересы должника и пройти процедуру максимально эффективно.
mostbet oyun provayderi [url=http://mostbet87216.help/]mostbet oyun provayderi[/url]
Amber Ridge shopping portal – The structure is clean, and browsing feels smooth and well organized.
Your article helped me a lot, is there any more related content? Thanks!
discover this platform – Everything is structured well and easy to read through.
Shop Dawn Ridge Portal – browsing is simple and everything works efficiently and smoothly
dso dubai by provident estate https://bendixen-mikael.com hayat townhouses for rent in dubaiproperty cost calculator dubai
нарколог вывод из запоя [url=https://vyvod-iz-zapoya-na-domu-ekaterinburg-3.ru/]нарколог вывод из запоя[/url] .
2с-i отличного качества. 1гр был разделен на 60 частей. Жалоб не от кого не было по качеству. купить мефедрон и кокаин Эйфора сейчас нет в наличии, если только индивидуальный заказ от 1кг.Магазин отличный, заказываю у него и всегда доволен !
check website – Pages are structured well and browsing is smooth and quick.
visit platform – Found some useful direction here, I’ll explore more next time.
«Клинок, рассекающий демонов» — жестокое и пронзительное аниме о юном мечнике Танадзо Камадо, чья семья уничтожена демонами, а выжившая сестра Нэдзуко превращается в одного из них. Поставив целью исцелить сестру, Танадзо преодолевает тяжелейшие испытания и постигает древнее искусство техник дыхания. Ищете клинок рассекающий демонов все серии? На istrebitel-demonov-smotret.biz все 63 серии четырёх сезонов доступны бесплатно в высоком качестве с профессиональной озвучкой. Исключительное качество анимации, проработанные персонажи и их драматичные истории ставят сериал в один ряд с величайшими аниме десятилетия.
вывод из запоя екатеринбург [url=https://vyvod-iz-zapoya-na-domu-ekaterinburg-1.ru/]вывод из запоя екатеринбург[/url] .
сколько стоит капельница от запоя [url=https://kapelnica-ot-zapoya-nizhnij-novgorod.ru/]сколько стоит капельница от запоя[/url] .
Visit Flint Meadow Hub – pages load quickly with simple browsing flow
Ember Meadow shopping site – It feels very user-friendly because the navigation is direct and uncomplicated.
вызов нарколога на дом капельница [url=https://vyvod-iz-zapoya-na-domu-ekaterinburg-3.ru/]vyvod-iz-zapoya-na-domu-ekaterinburg-3.ru[/url] .
Canyon Harbor Goods Center – everything feels organized and easy to move through
вывод из запоя на дому спб цены [url=https://vyvod-iz-zapoya-na-domu-sankt-peterburg-1.ru/]vyvod-iz-zapoya-na-domu-sankt-peterburg-1.ru[/url] .
прокапаться от алкоголя [url=https://kapelnica-ot-zapoya-nizhnij-novgorod.ru/]прокапаться от алкоголя[/url] .
вывод из запоя на дому в екатеринбурге [url=https://vyvod-iz-zapoya-na-domu-ekaterinburg-1.ru/]вывод из запоя на дому в екатеринбурге[/url] .
вывод из запоя на дому в екатеринбурге [url=https://vyvod-iz-zapoya-na-domu-ekaterinburg-2.ru/]вывод из запоя на дому в екатеринбурге[/url] .
shop unique crafts – Design flows naturally, allowing easy browsing.
вывод из запоя недорого [url=https://vyvod-iz-zapoya-na-domu-sankt-peterburg.ru/]вывод из запоя недорого[/url] .
shop this vendor – Everything loads quickly, and browsing feels smooth and effortless.
click this link – It has a balanced design that feels both modern and accessible.
view site online – Clean design and smooth navigation make content easy to find.
вывод из запоя цены [url=https://vyvod-iz-zapoya-na-domu-sankt-peterburg-1.ru/]vyvod-iz-zapoya-na-domu-sankt-peterburg-1.ru[/url] .
walnutcove creative studio – Pleasant structure makes finding information quick.
cum retrag de pe mostbet in MDL [url=mostbet75302.help]cum retrag de pe mostbet in MDL[/url]
walnutcove craft zone – Smooth experience and content is well organized.
mostbet hisobni to‘ldirish [url=https://mostbet68214.help/]https://mostbet68214.help/[/url]
mostbet rəsmi sayt [url=mostbet2011.help]mostbet2011.help[/url]
выведение из запоя екатеринбург [url=https://vyvod-iz-zapoya-na-domu-ekaterinburg-2.ru/]выведение из запоя екатеринбург[/url] .
вывод из запоя цены [url=https://vyvod-iz-zapoya-na-domu-sankt-peterburg.ru/]vyvod-iz-zapoya-na-domu-sankt-peterburg.ru[/url] .
mostbet как пройти верификацию [url=http://mostbet26809.help]http://mostbet26809.help[/url]
this gallery portal – Navigation is simple and everything is easy to understand.
Rain Harbor Exhibition Page – The interface is lightweight and pleasant to use overall.
start exploring – Organized content helps users navigate smoothly through the site.
Хочу выделить раздел про Переезд в Адыгею: советы для москвичей и эмигрантов.
Вот, можете почитать:
[url=https://natureasia.ru/novinki-kosmetiki/pereezd-v-adygeyu-posle-moskvy-i-peterburga-kak-novaya-zhiznennaya-strategiya/]https://natureasia.ru/novinki-kosmetiki/pereezd-v-adygeyu-posle-moskvy-i-peterburga-kak-novaya-zhiznennaya-strategiya/[/url]
Forest Cove Collection – it was pleasant and easy to explore
browse oliveorchard offerings – Smooth experience with organized sections makes navigation pleasant.
Dune Meadow browsing site – Navigation was straightforward and the content was easy to understand at a glance.
в очередной раз сработал с магазином и всё навысшем уровне! работал без гаранта и ни каких проблем! Отличный магазин!!! Всегда идёт на встречу и решает любые вопросы! Удачи в бизе! Респект вам и уважуха! https://erled.ru Товар получен! Большее спасибо магазину!Обратите внимание на дату регистрации топик стартера и на регистрацию всех довольных пользователей.
rent in sharjah for 1 bedroom flat https://summonertft.com jumeirah golf estates villasbur dubai 1 bedroom apartment for rent
Wind Harbor Web Market – the design is minimal and makes searching very easy
На cat casino регистрация открывает доступ к эксклюзивным турнирам с огромными призовыми.
https://dommasterskaya.ru/
teal harbor shop link – Everything appears structured and easy to follow comfortably.
visit online now – The site offers helpful content that’s easy to locate.
click this page – I had a smooth visit with no technical issues or delays at all.
see details – It worked smoothly throughout my visit without any errors or interruptions.
youinstabrand – Browsing is smooth and the interface feels clean and organized.
walnutcove creative studio – Easy layout and organized pages make browsing effortless.
«Кости» — американский сериал, выдержавший 12 сезонов и 245 серий: редкая выносливость даже по меркам телевидения США. Темперанс Бреннан — судебный антрополог, способная извлечь из останков то, что недоступно стандартной криминалистике. Её постоянный партнёр — агент Бут из ФБР, полная противоположность: он доверяет инстинкту там, где она доверяет данным. Ищете сериал кости? Смотреть все серии онлайн бесплатно в хорошем качестве можно на kosti-smotret.net с несколькими вариантами озвучки. Конфликт между точным знанием и человеческим инстинктом пронизывает весь сериал и не отпускает до финальных титров.
walnutcove creative corner – Clean presentation, exploring feels effortless.
Zen Harbor Trade Gallery – The browsing experience feels light, clean, and easy to move through.
online honey cove hub – The interface is clean and very user friendly.
visit resource – Pages load quickly, and the platform feels polished and professional.
see what’s inside – Layout is straightforward, helping locate products quickly.
Nightfall Commerce Gallery – the layout is clean and everything feels easy to navigate
выведение из запоя на дому [url=https://vyvod-iz-zapoya-na-domu-sankt-peterburg-2.ru/]выведение из запоя на дому[/url] .
Caramel Cove Online Boutique – the interface feels clean and very easy to operate
visit Flint Meadow hub – Everything is laid out cleanly, making the browsing experience easy and pleasant.
вывод из запоя на дому [url=https://vyvod-iz-zapoya-na-domu-sankt-peterburg-3.ru/]вывод из запоя на дому[/url] .
плинко мелбет [url=https://melbet53498.help/]https://melbet53498.help/[/url]
browse now – Everything is organized neatly, which makes browsing fairly simple.
Либо вы прекращаете оффтопить в ветке магазина (к оффтопу относятся: сообщения НЕ по теме, личная переписка и т.п.) либо я буду банить. https://dostoevskyi.ru что то не могу зайти на сайт (вчера брала СК качество отменное, буду брать еще!
вывод из запоя на дому спб [url=https://vyvod-iz-zapoya-na-domu-sankt-peterburg-2.ru/]вывод из запоя на дому спб[/url] .
стоимость капельницы в нижнем новгороде [url=https://kapelnica-ot-zapoya-nizhnij-novgorod-1.ru/]kapelnica-ot-zapoya-nizhnij-novgorod-1.ru[/url] .
visit the page – The site is designed professionally, with consistent and smooth navigation.
dubai damac properties la riviera https://todoblackfriday.com boulevard the address dubai apartments for rentcost of buying a house dubai
shop unique crafts – Design is tidy, allowing smooth exploration of items.
вывод из запоя спб [url=https://vyvod-iz-zapoya-na-domu-sankt-peterburg-3.ru/]вывод из запоя спб[/url] .
https://shorturl.fm/NLFD1
капельница от алкоголя на дому спб [url=https://vyvod-iz-zapoya-na-domu-sankt-peterburg-1.ru/]vyvod-iz-zapoya-na-domu-sankt-peterburg-1.ru[/url] .
Violet Harbor Merchant Gallery – The layout is clean and makes navigation feel very simple and smooth.
Zenbrook Direct – The site is intuitive and information is concise.
check this marketplace – The structure is well organized and easy to explore.
mostbet aviator strategiya [url=https://www.mostbet87216.help]https://www.mostbet87216.help[/url]
вывод из запоя на дому спб [url=https://vyvod-iz-zapoya-na-domu-sankt-peterburg.ru/]вывод из запоя на дому спб[/url] .
нарколог вывод из запоя [url=https://vyvod-iz-zapoya-na-domu-sankt-peterburg-1.ru/]нарколог вывод из запоя[/url] .
discover opalmeadow hall online – Layout feels organized, helping users locate items quickly.
visit site – Original presentation and clever ideas make browsing enjoyable.
1win autentificare cont [url=http://1win90843.help/]1win autentificare cont[/url]
Stone Harbor Digital Gallery – the interface is clear and free from any confusion
вывод из запоя в домашних условиях нарколог 24 [url=https://vyvod-iz-zapoya-na-domu-sankt-peterburg.ru/]vyvod-iz-zapoya-na-domu-sankt-peterburg.ru[/url] .
Cloud Cove product gallery – The site is cleanly designed, making the browsing experience smooth.
click this page – The design is straightforward with clear sections that are easy to use.
Бро ответь в аське! https://erled.ru все супер! магазину доверять можно, были небольшие задержки но ТС сделал все по красоте!качество на высоте! сегодня опробовали и регу и ск!
expats investment in dubai real estate Full building for sale in Dubai dubai rental property uaestar alliance real estate dubai
ZenCo Spot – Simple interface, feels like a well-managed site.
mostbet free betni qanday olish [url=mostbet68214.help]mostbet free betni qanday olish[/url]
mostbet slot yüklə [url=https://www.mostbet2011.help]https://www.mostbet2011.help[/url]
mostbet pariuri Republica Moldova [url=https://www.mostbet75302.help]https://www.mostbet75302.help[/url]
мостбет app [url=www.mostbet91763.help]www.mostbet91763.help[/url]
waveharbor maker corner – The interface feels balanced, moving between pages is easy.
Online Gallery Market – content is accessible and well organized
Plum Cove Merchant Gallery – The interface is clean and pages load quickly, making the experience pleasant overall.
Бонус 1000 рублей за регистрацию в казино — это честный шанс начать игру без собственных вложений. https://1000bonus4.website/ собрал лучшие предложения 2026 года от лицензированных казино Curacao: FUGU Casino, Beef Casino, Martin Casino, Flagman Casino, Irwin Casino, Eva Casino, Kraken Casino, Pin Co Casino, Vavada Casino и Motor Casino — все с фриспинами при регистрации. Промокод JOJO100 открывает до 100 FS на слоты Sweet Bonanza, Sugar Rush, The Dog House, Le Bandit и другие популярные игры без первоначального депозита.
visit the market hall – Layout is clear and browsing through items feels effortless.
Cloud Cove commerce site – I found the design tidy and easy to navigate, making the visit pleasant.
KinoNix — это платформа для зрителей, которым важны скорость и качество контента. Огромная библиотека фильмов, сериалов и аниме открыта каждому пользователю без регистрации и платных подписок. Сервис регулярно пополняется свежими релизами: от голливудских боевиков до отечественных детективов. Ищете смотреть фильмы и сериалы онлайн? Перейдите на kinonix.net и откройте полный каталог с удобной навигацией по жанрам и годам. Качество картинки достигает WEB-DL 720p уже в день выхода новинки. Рейтинги IMDb и пользовательские баллы на сайте упрощают выбор фильма под любое настроение.
Рынок электронных компонентов России давно ждал надёжного игрока с прозрачной ценовой политикой и богатым ассортиментом. Ищете https://components.ru/catalog/himikatyi_i_klei/aksessuaryi_dlya_himikatov/priboryi_dlya_smazki/? Компания components.ru предлагает инженерам и закупщикам тысячи позиций — от резисторов и конденсаторов до микросхем и модулей питания — с гарантией качества и оперативной доставкой. Все поставки проходят обязательный контроль подлинности, что гарантирует отсутствие фальсификата. Продуманный каталог с актуальными остатками и оптовыми условиями закупок делает платформу обязательным инструментом как для производственных предприятий, так и для частных инженеров.
visit online now – The site feels neat and is very easy to navigate.
вывод из запоя цены воронеж [url=https://vyvod-iz-zapoya-na-domu-voronezh-8.ru/]вывод из запоя цены воронеж[/url] .
Никого не защищаю,говорю как есть-сайт работает на О Т Л И Ч Н О . https://pansion-ariadna.ru Жаль только в Мск от 50 гр. )) Думал в Саратове тожекак здесь стелят?
ZenCo Vendor Direct – Site structure is organized, content is relevant and clear.
Echo Harbor Marketplace Online – browsing feels smooth and locating things is fast and easy
мелбет джекпот слоты [url=melbet53498.help]melbet53498.help[/url]
click to view – The site performs well with quick loading and smooth transitions.
explore opalriver trade collection – Items are well displayed, site feels reliable and quick.
вывод из запоя воронеж [url=https://vyvod-iz-zapoya-na-domu-voronezh-8.ru/]вывод из запоя воронеж[/url] .
product showcase site – The interface is clean and very easy to understand.
one bedroom hotel apartment in dubai 1 Bedroom Apartment for Rent in Dubai Marina Villas for sale in Al Barari Villas
Box Jainson projects – Pages load well and everything is easy to locate.
open website – It’s simple to navigate and offers useful insights across sections.
Moss Harbor Collection Site – everything is accessible and the layout is not overwhelming
Wheat Cove Shopping Site – the site is simple, smooth, and works on every device
вывод из запоя нарколог 24 [url=https://vyvod-iz-zapoya-na-domu-sankt-peterburg-3.ru/]вывод из запоя нарколог 24[/url] .
mostbet aviator Кыргызстан [url=www.mostbet91763.help]mostbet aviator Кыргызстан[/url]
wc craft corner – Simple interface and intuitive structure make it easy to explore.
Расчёт зарплаты с учётом всех начислений и удержаний раньше занимал целый день. Теперь программа считает всё сама — мне остаётся только проверить и утвердить. [url=https://управление-нашей-фирмой.рф/]автоматизация оптовой торговли[/url]
River Harbor online marketplace – I liked how easy it was to navigate thanks to the simple structure.
discover crafts – Navigation is simple and the site loads without delays.
UFO777 – ufo777z.com adalah situs taruhan online terpercaya di Vietnam yang beroperasi secara legal dengan berbagai produk hiburan menarik seperti olahraga, kasino online, tembak ikan, slot game, dan permainan kartu đổi thưởng. Dengan sistem deposit dan penarikan super cepat, keamanan yang terjamin, serta peluang taruhan yang kompetitif, platform ini berkomitmen untuk memberikan pengalaman yang adil, transparan, dan layanan dukungan profesional 24/7 kepada para pemain.
вывод из запоя [url=https://vyvod-iz-zapoya-na-domu-sankt-peterburg-3.ru/]вывод из запоя[/url] .
explore handmade goods – Pages are tidy, so finding products is intuitive.
вывод из запоя [url=https://vyvod-iz-zapoya-na-domu-sankt-peterburg-2.ru/]вывод из запоя[/url] .
click to view – Everything is arranged in a way that feels natural to browse.
помощь вывода запоя нарколог 24 [url=https://vyvod-iz-zapoya-na-domu-sankt-peterburg-2.ru/]помощь вывода запоя нарколог 24[/url] .
Общая оценка магазина 10/10-идут на встречу покупателю, сервис общение и работа на высоте купить мефедрон и кокаин не ссы капустин поебем и отпустимподвела доставка, заказал 2-го получил 16-го
Установка счётчика воды — один из самых разумных шагов для экономии семейного бюджета: по нормативам москвич платит за холодную воду около 1090 рублей в месяц, тогда как реальный расход обходится в три раза дешевле. Компания «Водогарант» устанавливает счётчики в Москве и Московской области всего за один день, начиная от 3800 рублей, включая оборудование, монтаж, документы и пломбировку. Подробнее об услугах и ценах — на https://xn--80aaeee1dcbuw.xn--p1ai/ustanovka-schetchikov-vody/ — здесь представлены модели на любой бюджет: от бюджетных отечественных до надёжных немецких ITELMA. Выезд мастера бесплатный, гарантия на монтаж составляет 12 месяцев, а специалисты работают напрямую с Мосводоканалом.
visit marble harbor – Layout is clear and organized, making it easy to find what you need.
access page – Solid presentation with practical guidance makes the information easy to follow.
open web link – The website is user-friendly and pages are logically structured.
explore this shop – It gives a recently launched vibe, worth browsing further.
apartments for rent in al rashidiya dubai 2 Bedroom Townhouse for Sale in Dubai benefits of owning property in a company in dubai
online shopping hub – The website was clear and simple to navigate from start to finish.
mostbet лайв ставки [url=www.mostbet63740.help]mostbet лайв ставки[/url]
wheatcove creative corner – Smooth interface and content is easy to follow.
wheatcove artisan studio – Navigation is intuitive and browsing feels natural.
artisan finds – Everything loads quickly and the interface is intuitive.
go to listings – The platform is arranged clearly, keeping everything easy to locate.
melbet pari ligue 1 [url=http://melbet57184.help/]http://melbet57184.help/[/url]
Хочешь оригинальную подушку? подушка дакимакура купить комфорт и уют для сна. Длинная форма, мягкий наполнитель и стильные принты. Отлично подходит для отдыха и расслабления.
Хочешь оригинальную подушку? дакимакура подушка на заказ комфорт и уют для сна. Длинная форма, мягкий наполнитель и стильные принты. Отлично подходит для отдыха и расслабления.
Профессиональные услуги арбитражного управляющего — это комплексная поддержка при банкротстве физических и юридических лиц. Переходите по запросу [url=https://centrbg.ru/services/bankrotstvo-fizicheskikh-lits/uslugi-arbitrazhnogo-upravlyayushchego/]услуги арбитражного управляющего для физических лиц[/url]. Специалист сопровождает процедуру на всех этапах: от анализа ситуации и подготовки документов до взаимодействия с судом и кредиторами. Помощь управляющего позволяет минимизировать риски, соблюсти требования закона и эффективно решить финансовые проблемы.
go to this website – It was beneficial overall, and I could see myself coming back.
visit platform – The site feels easy to use, with a pleasant browsing flow throughout.
https://MyPetAds.com/588/posts/1/1/1892603.html
https://quickcoop.videomarketingplatform.co/63edd961d5e38
https://list-wiki.win/index.php/1xBet_New_Registration_Promo_Code_2026:_Max2x_Bonus_%E2%82%AC130_%E2%80%94_1xBet_Latest_Promo_Code_2026:_Max2x_Bonus_%E2%82%AC130
https://shorturl.fm/X0KXD
explore orchardharbor vendor hall – Smooth layout, finding items is simple and intuitive.
browse goods room – Navigation is intuitive, and products are easy to locate.
gallery shopping hub – Pages were responsive and the overall design was user friendly.
Просто КОСМОС купить мефедрон и кокаин Пока писал этот пост на почту пришел трек ))) Ждал всего 1 день,респект оперативно.понятно как проверенный магазин работает если отзывы негатив значит зачищает сообщений еще куча они на телефоне сейчас не могу их скопировать но и смысла нет все и так ясно
вывод из запоя недорого [url=https://vyvod-iz-zapoya-na-domu-voronezh-9.ru/]вывод из запоя недорого[/url] .
mostbet ios uchun mostbet yuklab olish [url=http://mostbet68214.help/]http://mostbet68214.help/[/url]
мостбет история ставок [url=https://mostbet26809.help]https://mostbet26809.help[/url]
вывод из запоя цены воронеж [url=https://vyvod-iz-zapoya-na-domu-voronezh-8.ru/]вывод из запоя цены воронеж[/url] .
mostbet bonus de bun venit Moldova [url=https://mostbet75302.help]https://mostbet75302.help[/url]
mostbet kupon kodu [url=https://mostbet2011.help/]https://mostbet2011.help/[/url]
check stone commerce gallery – I came across it and it seems like a good site to explore.
explore website – Navigation is fluid and the layout keeps things well organized.
вывод из запоя в стационаре в воронеже [url=https://vyvod-iz-zapoya-na-domu-voronezh-9.ru/]вывод из запоя в стационаре в воронеже[/url] .
visit Olive Harbor portal – The layout is simple and helps you quickly find what you’re looking for.
mostbet mines стратегия [url=mostbet91763.help]mostbet91763.help[/url]
вывод из запоя капельница воронеж [url=https://vyvod-iz-zapoya-na-domu-voronezh-8.ru/]вывод из запоя капельница воронеж[/url] .
explore artisan work – Everything is arranged logically, providing a pleasant experience.
discover more – Everything is laid out professionally, making it easy to understand the content.
2 bedroom apartment for rent in discovery gardens dubai One bedroom apartment for sale in Dubai aazizi group residential properties in dubai
wildorchard artisan studio – The site feels light and easy to explore.
meadowharborvendorhall – Good layout overall, makes exploring different sections quite easy.
KinoGo — один из крупнейших русскоязычных кинопорталов с каталогом свыше 91 000 фильмов и сериалов в открытом доступе. На портале представлены свежие релизы 2026 года, боевики, исторические драмы и фантастика с оценками IMDb и Кинопоиска непосредственно в карточке фильма. Удобная фильтрация по жанру, стране, году и формату видео сводит время поиска к минимуму. Ищете смотреть фильмы и сериалы онлайн? Переходите на kinogo.limited — смотрите в HD без регистрации и без рекламных пауз. База пополняется каждый день — новинки выходят одновременно с официальным релизом, а пользовательские оценки помогут не ошибиться с выбором.
click here – The design feels intuitive, so everything is easy to follow.
Canyon Harbor digital hub – Everything is modern and well structured, making navigation effortless.
вывод из запоя на дому в воронеже [url=https://vyvod-iz-zapoya-na-domu-voronezh-10.ru/]вывод из запоя на дому в воронеже[/url] .
check site – Informative content that’s clearly structured and relevant.
Всех благ и ровных клиентов !!! купить мефедрон и кокаин Заказывал у этих ребят 203 и 5-IAI, качеством доволен. Заказы они оформляют долго, но зато отправляют быстро. Мне отправили в день оплаты!Брал у данного селлера!Хорошо работют=)
вывод из запоя на дому воронеж цены [url=https://vyvod-iz-zapoya-na-domu-voronezh-10.ru/]вывод из запоя на дому воронеж цены[/url] .
Harbor Trail online commerce center – The pages load efficiently and the design feels fresh, minimal, and modern.
start browsing sky harbor – The overall design is neat, making navigation feel easy and pleasant today.
вывод из запоя [url=https://vyvod-iz-zapoya-na-domu-sankt-peterburg-3.ru/]вывод из запоя[/url] .
мелбет cashback [url=http://melbet27495.help/]http://melbet27495.help/[/url]
mostbet промокод Тоҷикистон [url=www.mostbet40827.help]mostbet промокод Тоҷикистон[/url]
1win app барои ios [url=https://1win20938.help/]https://1win20938.help/[/url]
мостбет способы оплаты [url=http://mostbet89276.help]мостбет способы оплаты[/url]
discover vendor room – Smooth experience, everything is easy to navigate.
view website – Came upon it by chance; the layout is clean and functional.
Thank you for your sharing. I am worried that I lack creative ideas. It is your article that makes me full of hope. Thank you. But, I have a question, can you help me?
dubai apartment rental holiday Arabian Ranches villas for sale dubai properties sales gallery
выведение из запоя в спб [url=https://vyvod-iz-zapoya-na-domu-sankt-peterburg-2.ru/]выведение из запоя в спб[/url] .
access page – Clear structure and easy-to-follow content make it very user-friendly.
вывод из запоя в воронеже [url=https://vyvod-iz-zapoya-na-domu-voronezh-8.ru/]вывод из запоя в воронеже[/url] .
помощь вывода запоя [url=https://vyvod-iz-zapoya-na-domu-sankt-peterburg-2.ru/]помощь вывода запоя[/url] .
Как товар господа? купить мефедрон и кокаин Ребята подскажите пжл.Сейчас общаюсь с оператором в скайпе по Липецку Lipeck-shops ктонибудь у него приобреатл в липе с воскресенья по данный день и оплачивали вы на данные реквы 964 и 905(он говорит что их у него два)Бразы помгите разобраться.Море клиентов и процветания !
see details – The site is nicely arranged and my overall experience was good.
выведение из запоя на дому [url=https://vyvod-iz-zapoya-na-domu-voronezh-9.ru/]выведение из запоя на дому[/url] .
browse Bright Harbor store – The pages are well structured and it’s simple to explore different areas.
1win depunere Payeer [url=1win90843.help]1win depunere Payeer[/url]
вывод из запоя в стационаре в воронеже [url=https://vyvod-iz-zapoya-na-domu-voronezh-8.ru/]вывод из запоя в стационаре в воронеже[/url] .
add-to-cart tool – Pages respond instantly and navigation feels effortless.
see what’s inside – Browsing is smooth and the overall design is practical.
выведение из запоя на дому [url=https://vyvod-iz-zapoya-na-domu-voronezh-9.ru/]выведение из запоя на дому[/url] .
Cloud Harbor Quick Shop – The site feels efficient and I found exactly what I needed without delay.
Современное SEO требует системного подхода — от сбора семантики до юзабилити. Подробности по ссылке: https://drivetvchannel.ru/stati/prodvizhenie-sajtov-iskusstvo-i-nauka-onlajn-uspeha/
creative corner – Everything loads efficiently and moving through sections feels simple.
вывод из запоя на дому телефоны [url=https://vyvod-iz-zapoya-na-domu-voronezh-11.ru/]vyvod-iz-zapoya-na-domu-voronezh-11.ru[/url] .
лечение алкоголизма с выездом на дом [url=https://vyvod-iz-zapoya-na-domu-samara-8.ru/]лечение алкоголизма с выездом на дом[/url] .
вывод из запоя самара на дому [url=https://vyvod-iz-zapoya-na-domu-samara-9.ru/]vyvod-iz-zapoya-na-domu-samara-9.ru[/url] .
downtown apartments in dubai Full Building for Sale in Dubai dubai apartment rental holiday
На досуге часто зависаю в trix fun, это реально затягивает и дарит кучу эмоций.
https://android-carplayers.ru/
вывод из запоя на дому телефоны [url=https://vyvod-iz-zapoya-na-domu-voronezh-11.ru/]vyvod-iz-zapoya-na-domu-voronezh-11.ru[/url] .
view the site – Everything is presented neatly and is very easy to understand.
click this page – Everything is organized in a straightforward manner that’s easy to read.
Нужен пластический хирург? клинический центр пластической хирургии современные операции и эстетические процедуры. Опытные хирурги, безопасные методики и индивидуальный подход. Консультации, диагностика и качественный результат.
Санкт-Петербургская типография «Полифарм» — это место, где полиграфия становится искусством, а каждый заказ превращается в визитную карточку вашего бизнеса. Компания предлагает полный спектр услуг: от визиток, буклетов и каталогов до эксклюзивной упаковки из экологически чистых материалов, тиснения и сублимационной печати. Посетив сайт http://www.polifarm-spb.ru/, вы убедитесь, что ассортимент действительно впечатляет — здесь печатают художественную литературу, научные издания, ежедневники с логотипом, воблеры, плейсматы и даже предлагают мастер-классы для детей. Современное оборудование обеспечивает безупречное качество, а партнёрство с СДЭК и Деловыми Линиями — оперативную доставку по всей России.
see moon collections – Smooth navigation, everything is easy to find and view.
Профессиональные услуги арбитражного управляющего — это комплексная поддержка при банкротстве физических и юридических лиц. Переходите по запросу [url=https://centrbg.ru/services/bankrotstvo-fizicheskikh-lits/uslugi-arbitrazhnogo-upravlyayushchego/]оплата услуг арбитражного управляющего[/url]. Специалист сопровождает процедуру на всех этапах: от анализа ситуации и подготовки документов до взаимодействия с судом и кредиторами. Помощь управляющего позволяет минимизировать риски, соблюсти требования закона и эффективно решить финансовые проблемы.
цена вывод из запоя на дому [url=https://vyvod-iz-zapoya-na-domu-samara-10.ru/]vyvod-iz-zapoya-na-domu-samara-10.ru[/url] .
this resource – Informative and practical, I’ll be checking it out again later.
creative makers corner – Everything is easy to access, with fast-loading pages.
explore this link – It’s designed in a way that keeps everything accessible.
вывод из запоя воронеж на дому [url=https://vyvod-iz-zapoya-na-domu-voronezh-8.ru/]vyvod-iz-zapoya-na-domu-voronezh-8.ru[/url] .
вывод из запоя на дому воронеж цены [url=https://vyvod-iz-zapoya-na-domu-voronezh-10.ru/]вывод из запоя на дому воронеж цены[/url] .
капельница от алкоголя на дому спб [url=https://vyvod-iz-zapoya-na-domu-sankt-peterburg-3.ru/]vyvod-iz-zapoya-na-domu-sankt-peterburg-3.ru[/url] .
badri building mankhool Buy Penthouse in Dubai culture village dubai properties
вывод из запоя цены воронеж [url=https://vyvod-iz-zapoya-na-domu-voronezh-8.ru/]вывод из запоя цены воронеж[/url] .
вывод из запоя цены воронеж [url=https://vyvod-iz-zapoya-na-domu-voronezh-10.ru/]вывод из запоя цены воронеж[/url] .
Без паники, есть 2 причины почему может не бится трэк 1. тупит курьерка и не внесла в базу накладную такое бывало уже не раз люди получали посылки с нерабочей накладной такое бывает часво это кривая работа службы доставки. 2. вы не правильно вводите на сайте отслеживания с дефисом, пробелом, не по формату номеру накладной службы или вообще на другом сайте)) такое тоже бывает часто. Клиенты у нас получают все вовремя если вас оповестили что посылка отправлена значит она отправлена, ожидайте согласно установленому времени доставки. купить мефедрон и кокаин Под., зачет с натяжкой. Мята незачет, сильно уж она ваняет. Растворитель пришлось нагревать и домалывать кр..Магазин ровнее не куда!!! Ребята отработали на славу, все четко и оперативно. Спасибо огромное, буду сотрудничать и дальше)
handmade treasures – Layout is clean and exploring each section feels effortless.
помощь вывода запоя [url=https://vyvod-iz-zapoya-na-domu-voronezh-9.ru/]помощь вывода запоя[/url] .
product hub – Items are easy to scan, and the interface is user-friendly.
вывод из запоя спб [url=https://vyvod-iz-zapoya-na-domu-sankt-peterburg-3.ru/]вывод из запоя спб[/url] .
browse harbor products – Neat structure, content is easy to navigate.
вывод из запоя на дому [url=https://vyvod-iz-zapoya-na-domu-voronezh-9.ru/]вывод из запоя на дому[/url] .
go to this website – The layout is solid, and the browsing experience is fast and smooth.
check this out – The site feels clean and provides content that is actually useful.
browse Timber Trail gallery – Navigation is simple, the structure is tidy, and all features run properly.
выведение из запоя на дому [url=https://vyvod-iz-zapoya-na-domu-sankt-peterburg-2.ru/]выведение из запоя на дому[/url] .
browse nightfall room – Clear presentation and smooth interface make exploring easy.
visit pearlharbor market room – Pleasant design, navigating products is straightforward.
Компания MiGroup специализируется на поставке металлообрабатывающего оборудования и профессионального инструмента: от 5-осевых обрабатывающих центров с ЧПУ до токарных станков, фрез, свёрл и измерительного инструмента. На https://migroup.tech/ представлен широкий каталог — станки, вспомогательное оборудование, смазочные материалы и оснастка для производств любого масштаба. Работая с промышленными предприятиями, MiGroup закрывает полный цикл задач — подбор оборудования, его поставку и последующее техническое сопровождение.
Bônus sem depósito Fortune Tiger: qual site ainda libera?
quick access link – Browsing is simple and the interface looks polished and calm.
выведение из запоя [url=https://vyvod-iz-zapoya-na-domu-samara-8.ru/]выведение из запоя[/url] .
помощь вывода запоя [url=https://vyvod-iz-zapoya-na-domu-sankt-peterburg-2.ru/]помощь вывода запоя[/url] .
Villas for rent in Al Furjan Commercial Properties for Rent in Dubai short term rental in dubai law
кто-то пляшет, кто-то дрочит, купить мефедрон и кокаин С наступающим новым 2017 годом:happy2013::snegurochka: , фарта и удачи вашей команде! продолжайте в том же духе!ребята ребятушки как делишки?)) в городе Барнаул данный магазин работает?)
unique artisan shop – Pages are well-structured and navigating through them is simple.
нарколог на дом вывод из запоя [url=https://vyvod-iz-zapoya-na-domu-samara-8.ru/]нарколог на дом вывод из запоя[/url] .
click this page – I liked how neatly the content is arranged for reading.
выведение из запоя на дому [url=https://vyvod-iz-zapoya-na-domu-samara-10.ru/]выведение из запоя на дому[/url] .
вывести из запоя на дому [url=https://vyvod-iz-zapoya-na-domu-samara-10.ru/]вывести из запоя на дому[/url] .
open website – Easy navigation and clear messaging make this very accessible.
check oakcove product hall – Smooth navigation and well-arranged sections improve user experience.
вызов нарколога на дом запой [url=https://vyvod-iz-zapoya-na-domu-samara-9.ru/]вызов нарколога на дом запой[/url] .
browse this orchard gallery – The content looks engaging, so I may check it again later.
выведение из запоя воронеж [url=https://vyvod-iz-zapoya-na-domu-voronezh-11.ru/]vyvod-iz-zapoya-na-domu-voronezh-11.ru[/url] .
Coral Meadow browsing center – The site is clear and user-friendly with well-written content throughout.
handmade crafts collection – Structure is clear and pages load smoothly.
view product list – Everything is arranged logically, making browsing seamless.
снятие интоксикации на дому [url=https://vyvod-iz-zapoya-na-domu-samara-9.ru/]снятие интоксикации на дому[/url] .
снять запой на дому [url=https://vyvod-iz-zapoya-na-domu-voronezh-11.ru/]снять запой на дому[/url] .
Почему закрылся представитель в петрозаводске? Жду ответа чем) https://usk-perm.ru Долго что то ты пробуешь:)интересно всё такипосыль получили, спасибо!
artisan gallery – Structure is tidy, making exploring content pleasant.
check it out – The visit was seamless, with a simple and organized layout throughout.
click to view – The site feels organized and simple, which made my visit pleasant.
выведение из запоя в воронеже [url=https://vyvod-iz-zapoya-na-domu-voronezh-9.ru/]выведение из запоя в воронеже[/url] .
Apartments for rent in The Royal Amwaj 2 Bedroom Townhouse for Sale in Dubai where to invest in dubai property
вывод из запоя в стационаре в воронеже [url=https://vyvod-iz-zapoya-na-domu-voronezh-9.ru/]вывод из запоя в стационаре в воронеже[/url] .
open this link – A well-prepared resource that provides meaningful insights.
снять запой на дому [url=https://vyvod-iz-zapoya-na-domu-voronezh-10.ru/]снять запой на дому[/url] .
Wood Harbor product gallery – The interface is simple and responsive, making pages load almost instantly.
take a look snow cove page – The navigation is simple, which makes browsing comfortable and easy.
Нужна мебель? изготовление мебели под заказ эксклюзивные изделия из натурального дерева. Индивидуальный дизайн, качественные материалы и точное изготовление. Решения для дома и бизнеса.
Нужна мебель? мебель на заказ из массива дерева эксклюзивные изделия из натурального дерева. Индивидуальный дизайн, качественные материалы и точное изготовление. Решения для дома и бизнеса.
click to browse – Interface is minimal yet practical, helping users move through listings easily.
вывод из запоя дешево [url=https://vyvod-iz-zapoya-na-domu-voronezh-10.ru/]вывод из запоя дешево[/url] .
нарколог на дом вывод из запоя на дому [url=https://vyvod-iz-zapoya-na-domu-samara-8.ru/]нарколог на дом вывод из запоя на дому[/url] .
this page – Everything has a neat look that makes exploring the site comfortable.
За основу брали ромашку (как она задрала), я кстати предлагаю магазину, продавать основу, или в качестве бонуса предлагать (так на сколько я знаю никто не делает). купить мефедрон и кокаин Отдельных слов заслуживает подарочный твердый на грамм )Очень позитивная штука с запахом сыра хДДДвпервые обратился в этот магазин за оптом и был удивлён тем, что они работают без гаранта. Но почитав отзывы , решил заказать без гаранта с доставкой в регион. Обещали 5-7 дней. С небольшим опозданием получил адрес в своём городе и без проблем забрал опт. Возникли небольшие заморочки в части заказа и магазин без лишних слов решил все недорозумения в мою пользу. Очень приятно работать с такими людьми! Отличный магазин! Всем рекомендую! И можно не обращать внимание на то что они работают без гаранта. Удачи в бизе!
Состав капельницы может варьироваться, однако в большинстве случаев включает базовые группы препаратов, направленные на устранение последствий интоксикации:
Выяснить больше – [url=https://kapelnicza-ot-pokhmelya-samara-7.ru/]капельница от похмелья цена в самаре[/url]
creative marketplace – Everything is arranged clearly, making the site easy to explore.
вывод из запоя самара на дому [url=https://vyvod-iz-zapoya-na-domu-samara-8.ru/]vyvod-iz-zapoya-na-domu-samara-8.ru[/url] .
нарколог на дом вывод из запоя [url=https://vyvod-iz-zapoya-na-domu-samara-10.ru/]нарколог на дом вывод из запоя[/url] .
Нарколог на дом в Самаре: круглосуточная помощь, вывод из запоя и медицинская поддержка на дому под контролем специалистов в наркологической клинике «Похмельная служба»
Исследовать вопрос подробнее – https://narkolog-na-dom-samara-6.ru
go here – The pages respond quickly and the content is interesting to explore.
Если симптомы похмелья становятся настолько выраженными, что мешают нормальному функционированию, капельница становится необходимостью. Это особенно важно, если организм не справляется с токсинами самостоятельно.
Исследовать вопрос подробнее – [url=https://kapelnicza-ot-pokhmelya-nizhnij-novgorod-2.ru/]капельница от похмелья анонимно[/url]
«Ветреный» — турецкая драма 2019 года о двух людях, оказавшихся в плену многолетней семейной вражды. Миран приезжает в Мидьят с холодным расчётом: жениться на Рейян, чтобы уничтожить её семью. Ищете ветреный все серии? Все 256 серий доступны бесплатно на vetrenyy-smotret.biz с русской озвучкой в хорошем качестве. Но холодный замысел рассыпается: свободолюбивая Рейян пробуждает в Миране чувства, которые он всю жизнь подавлял. Захватывающие виды, острые диалоги и мощная игра актёров ставят сериал в ряд лучших турецких драм.
https://triberr.com/alexfalkiner1
вывод из запоя на дому круглосуточно [url=https://vyvod-iz-zapoya-na-domu-samara-10.ru/]вывод из запоя на дому круглосуточно[/url] .
all fees for buying a house in dubai Buy Penthouse in Dubai Villas for rent in Elie Saab II
Процедура проведения капельницы от запоя обычно не занимает много времени и проводится в условиях медицинского центра. Во время процедуры пациент может ощущать незначительный дискомфорт при введении иглы, но процесс восстановления организма через вену происходит быстро и эффективно. Капельница помогает снизить уровень алкоголя в крови, улучшить метаболизм и предотвратить ухудшение состояния.
Узнать больше – [url=https://kapelnica-ot-zapoya-nizhnij-novgorod-5.ru/]вызов на дом капельницы от запоя в нижнем новгороде[/url]
«Магическая битва» — жёсткое и умное аниме о мире, где человеческие страхи и боль буквально воплощаются в кровожадных проклятьях. Старшеклассник Юдзи Итадори поглощает проклятый артефакт и становится вместилищем могущественного демона — с этого момента в нём борются два существа, и даже искушённые маги признают такую силу опасной. Ищете магическая битва все серии? На magicheskaya-bitva.biz все 58 серий трёх сезонов доступны бесплатно в отличном качестве с профессиональной озвучкой. Динамичные схватки, глубокая проработка персонажей и мрачная философия делают сериал обязательным к просмотру.
Wind Harbor online marketplace – The interface is clear and moving through sections feels very easy.
discover this platform – It looks structured well and holds attention easily.
Многие сталкиваются с трудностями при выборе клиники или центра: предлагаемые услуги различаются по качеству, подходам, стоимости и длительности. Некоторые организации ограничиваются только медикаментозной поддержкой, не работая с глубинными причинами зависимости. Поэтому важно заранее понимать, какие параметры отличают действительно надёжное учреждение, способное обеспечить долгосрочные результаты.
Узнать больше – http://lechenie-narkomanii-murmansk0.ru/lechenie-narkomanii-reabilitacziya-marmansk/https://lechenie-narkomanii-murmansk0.ru
start exploring – Content loads immediately, and navigating the site is effortless.
Здоровье животных начинается с правильного питания, и здесь на помощь приходит гранулированная люцерна торговой марки «Люцервик» — натуральная витаминно-минеральная мука, сохраняющая до 95% полезных веществ исходного сырья. Продукт идеально подходит для лошадей, крупного рогатого скота, птицы и кроликов, обеспечивая животных качественным белковым кормом без химических добавок. На https://xn--b1afkib5a3byd.xn--p1ai/ можно оформить заказ оптом и в розницу с доставкой из Кирова, изучить каталог, фотогалерею и реальные отзывы покупателей. Гранулы удобно хранятся и легко дозируются, что делает их незаменимым решением для фермеров и частных хозяйств.
crafty finds online – Pages feel light and it’s easy to move through the site.
unique handmade marketplace – Everything is accessible and navigation is smooth.
лечение алкоголизма с выездом на дом [url=https://vyvod-iz-zapoya-na-domu-samara-11.ru/]лечение алкоголизма с выездом на дом[/url] .
вывод из запоя на дому цена [url=https://vyvod-iz-zapoya-na-domu-nizhnij-novgorod-4.ru/]вывод из запоя на дому цена[/url] .
быстрый анонимный вывод из запоя на дому [url=https://vyvod-iz-zapoya-na-domu-nizhnij-novgorod-5.ru/]быстрый анонимный вывод из запоя на дому[/url] .
срочный вывод из запоя на дому [url=https://vyvod-iz-zapoya-na-domu-nizhnij-novgorod-6.ru/]vyvod-iz-zapoya-na-domu-nizhnij-novgorod-6.ru[/url] .
explore here – Everything is straightforward, making browsing quite easy and pleasant.
вывод из запоя анонимно недорого [url=https://vyvod-iz-zapoya-na-domu-nizhnij-novgorod-7.ru/]вывод из запоя анонимно недорого[/url] .
Медицинский контроль играет ключевую роль в безопасности и эффективности процедуры. Под присмотром опытного специалиста исключаются риски неправильной дозировки препаратов, побочных эффектов и осложнений, что особенно важно при проведении капельниц у пациентов с хроническими заболеваниями или при наличии индивидуальных противопоказаний.
Подробнее тут – [url=https://kapelnicza-ot-pokhmelya-nizhnij-novgorod-1.ru/]капельница от похмелья вызов на дом в нижнем новгороде[/url]
http://vintagemachinery.org/members/detail.aspx?id=165119
Капельница от похмелья в Нижнем Новгороде: эффективное снятие интоксикации, восстановление организма и медицинский контроль в наркологической клинике «Похмельная служба»
Узнать больше – [url=https://kapelnicza-ot-pokhmelya-nizhnij-novgorod-1.ru/]капельница от похмелья на дому нижний новгород[/url]
https://1xbet-official-promo-code78888.sharebyblog.com/40677783/1xbet-promo-code-free-spins-no-deposit-2026-1950-150-fs1xbet-promo-code-free-spins-no-deposit-2026-1950-150-fs
вывести из запоя [url=https://vyvod-iz-zapoya-na-domu-samara-11.ru/]вывести из запоя[/url] .
вывести из запоя цена [url=https://vyvod-iz-zapoya-na-domu-nizhnij-novgorod-4.ru/]vyvod-iz-zapoya-na-domu-nizhnij-novgorod-4.ru[/url] .
Капельница от похмелья в Самаре: быстрое восстановление, снятие интоксикации и улучшение самочувствия под контролем специалистов в наркологической клинике «Похмельная служба»
Выяснить больше – [url=https://kapelnicza-ot-pokhmelya-samara-6.ru/]капельница от похмелья на дому в самаре[/url]
Услуги нарколога на дому в Самаре включают не только экстренный осмотр, но и комплекс медицинских мероприятий, направленных на снижение интоксикации, облегчение тяжелых симптомов и общее восстановление состояния пациента. Объем помощи зависит от клинической картины, длительности употребления алкоголя или других психоактивных веществ, возраста, хронических заболеваний и текущих рисков. Врач подбирает схему индивидуально, исходя из того, какие задачи необходимо решить в конкретный момент — снять острые проявления, стабилизировать самочувствие или подготовить пациента к дальнейшему лечению зависимости.
Подробнее тут – [url=https://narkolog-na-dom-samara-5.ru/]нарколог на дом анонимно[/url]
выведение из запоя на дому [url=https://vyvod-iz-zapoya-na-domu-nizhnij-novgorod-6.ru/]выведение из запоя на дому[/url] .
Процесс капельницы включает внутривенное введение различных растворов, которые помогают нейтрализовать эффекты алкогольной интоксикации, включая последствия запоя и алкоголизма. Наиболее часто в составе капельницы используются солевые и глюкозные растворы, витамины группы B, а также препараты для детоксикации организма. Эти компоненты помогают быстро восстановить водно-электролитный баланс, улучшить обмен веществ и ускорить выведение продуктов распада алкоголя.
Получить больше информации – [url=https://kapelnicza-ot-pokhmelya-samara-6.ru/]капельница от похмелья цена[/url]
товар появился? когда возобновите доставку по городам? купить мефедрон и кокаин очень сложно дописаться до них=( а цены хорошие.так что только желаю удачи магазину и процветания в дальнейшем
выведение из запоя на дому нижний новгород [url=https://vyvod-iz-zapoya-na-domu-nizhnij-novgorod-5.ru/]выведение из запоя на дому нижний новгород[/url] .
анонимное выведение из запоя дома [url=https://vyvod-iz-zapoya-na-domu-nizhnij-novgorod-7.ru/]анонимное выведение из запоя дома[/url] .
Капельница от запоя с детоксикацией организма в Нижнем Новгороде представляет собой одну из самых эффективных процедур для быстрого улучшения состояния пациента, страдающего от алкогольной зависимости. Такой подход направлен не только на устранение токсинов, но и на восстановление нормального функционирования внутренних органов, которые пострадали от длительного употребления алкоголя.
Подробнее – https://kapelnica-ot-zapoya-nizhnij-novgorod-4.ru
karmel real estate dubai Commercial properties for rent Dubai Palm Hills
Запой — это состояние, которое развивается на фоне длительного употребления алкоголя, сопровождающееся острыми симптомами интоксикации. Капельница от запоя может быть необходима, когда состояние пациента требует немедленного вмешательства. Важно своевременно заметить признаки, указывающие на необходимость медицинской помощи, таких как признаки алкоголизма, и в случае необходимости — кодирование или вывод из запоя для более комплексного лечения.
Исследовать вопрос подробнее – [url=https://kapelnica-ot-zapoya-nizhnij-novgorod-4.ru/]капельница от запоя на дому нижний новгород[/url]
Opal Meadow commerce platform – I found the design minimal and very easy to navigate through different pages.
browse this meadow solar gallery – It feels appealing, and I’ll continue exploring for a while.
нарколог на дом вывод из запоя на дому [url=https://vyvod-iz-zapoya-na-domu-samara-9.ru/]нарколог на дом вывод из запоя на дому[/url] .
visit online now – I liked how clearly everything is presented on the site.
вывод из запоя на дому воронеж цены [url=https://vyvod-iz-zapoya-na-domu-voronezh-11.ru/]вывод из запоя на дому воронеж цены[/url] .
вывод из запоя на дому недорого [url=https://vyvod-iz-zapoya-na-domu-samara-9.ru/]вывод из запоя на дому недорого[/url] .
вывод из запоя на дому воронеж капельница [url=https://vyvod-iz-zapoya-na-domu-voronezh-11.ru/]вывод из запоя на дому воронеж капельница[/url] .
вывод из запоя на дому недорого [url=https://vyvod-iz-zapoya-na-domu-samara-8.ru/]вывод из запоя на дому недорого[/url] .
Основной этап включает постановку капельницы с растворами, направленными на выведение токсинов, восстановление водно-солевого баланса и нормализацию работы внутренних органов. В состав могут входить витамины, седативные препараты, гепатопротекторы и кардиопротекторные средства. В случае ломки и снятия симптомов зависимости у больного, все препараты подбираются индивидуально, чтобы минимизировать дискомфорт и ускорить восстановление.
Изучить вопрос глубже – [url=https://narkolog-na-dom-samara-6.ru/]вызвать нарколога на дом в самаре[/url]
Для тех, кто ищет информацию по теме “Подготовка к переезду в Адыгею из мегаполисов”, нашел много полезного.
Вот, можете почитать:
[url=https://salemagazine.ru/%d0%b1%d0%b5%d0%b7-%d1%80%d1%83%d0%b1%d1%80%d0%b8%d0%ba%d0%b8/pereezd-v-adygeyu-posle-moskvy-peterburga-i-iz-za-graniczy-kak-podgotovitsya/]https://salemagazine.ru/%d0%b1%d0%b5%d0%b7-%d1%80%d1%83%d0%b1%d1%80%d0%b8%d0%ba%d0%b8/pereezd-v-adygeyu-posle-moskvy-peterburga-i-iz-za-graniczy-kak-podgotovitsya/[/url]
При необходимости врач может расширить состав капельницы, ориентируясь на жалобы пациента и клиническую картину:
Изучить вопрос глубже – http://kapelnicza-ot-pokhmelya-samara-7.ru
5 iai вообще говорят “беспонтовый” продукт… сколько народу его от рaзных сeлеров не пробовало – всё одно муть… купить мефедрон и кокаин Что ж ты такой нетерпеливый… ))буду дальше с вами сотрудничать, надеюсь всегда так будете работать!)))
Специалисты рекомендуют не откладывать вызов врача, если симптомы похмелья сильно нарушают обычный режим жизни. Чем раньше начнется лечение, тем быстрее произойдет стабилизация состояния. Наркологи также подчеркивают, что капельница от похмелья не является решением проблемы алкоголизма, но она помогает избавиться от острого дискомфорта и подготовить организм к более длительному восстановлению.
Подробнее – [url=https://kapelnicza-ot-pokhmelya-nizhnij-novgorod-2.ru/]капельница от похмелья на дому[/url]
Все виды отдыха и маршрутов по Горному Алтаю в одном месте вы сможете увидеть на сайте https://altai.travel/ – это официальный туристический портал Республики Алтай. Подберите для себя идеи для новых путешествий и интересные места. На сайте большой выбор аккредитованных гостиниц и проверенные варианты размещения. А наша интерактивная карта поможет спланировать идеальное путешествие!
Сериал «Викинги» — захватывающая историческая эпопея, уносящая аудиторию в суровый мир Скандинавии восьмого века. Сюжет строится вокруг Рагнара Лотброка — обычного земледельца, обретшего статус легендарного военного вождя. Шесть сезонов, девяносто серий захватывающих походов, жёстких схваток и многогранных характеров не отпускают с самой первой серии. Ищете викинги все серии? Сериал доступен в нескольких профессиональных озвучках на vikingi-smotret.online — выбирайте любую и смотрите без рекламы. Рагнар, его жена-воительница Лагерта и верные соратники открывают новые земли, сталкиваясь с чужой верой и беспощадными законами эпохи. Каждая серия — не только зрелищный боевик, но и скрупулёзное воспроизведение мировоззрения эпохи, где честь ценилась дороже жизни.
browse Velvet Brook gallery – It was easy to move through pages and the site felt very user friendly.
вывести из запоя [url=https://vyvod-iz-zapoya-na-domu-samara-8.ru/]вывести из запоя[/url] .
Продолжительность процедуры капельницы от похмелья зависит от степени интоксикации, общего состояния пациента и состава вводимых препаратов. В среднем инфузионная терапия занимает от 40 минут до 1,5 часов. Уже во время введения растворов многие пациенты отмечают постепенное улучшение самочувствия.
Подробнее тут – [url=https://kapelnicza-ot-pokhmelya-samara-8.ru/]капельница от похмелья на дом[/url]
снятие интоксикации на дому [url=https://vyvod-iz-zapoya-na-domu-samara-10.ru/]снятие интоксикации на дому[/url] .
Профиль компании «Холдсервис» — ремонт и монтаж холодильного и теплового оборудования всех типов: бытовые холодильники, промышленные чиллеры, низкотемпературные камеры, фризеры и ледогенераторы. Пятнадцать лет практики дали мастерам компании квалификацию, достаточную для быстрого и качественного устранения любых неисправностей. Все заявки обрабатываются без задержек — специалист выезжает к клиенту за свой счёт. Ищете ремонт бытовых холодильников москва? Подробнее об услугах и ценах на holdservis.ru — актуальная информация всегда доступна. Прозрачное ценообразование без наценок сервисного центра даёт возможность решить проблему с максимальной выгодой и без потери качества.
view this gallery – It appears decent, maybe I’ll find something useful.
apartments in jlt dubai 1 Bedroom Apartment for Rent in Dubai Marina Park Gate guide
Основной задачей капельницы от запоя является быстрое устранение симптомов интоксикации, связанных с длительным употреблением алкоголя. Введение в вену специальных растворов помогает не только вывести алкогольные токсины, но и восстановить нормальное функционирование внутренних органов, пострадавших от воздействия алкоголя. Подбор состава капельницы всегда индивидуален и зависит от состояния пациента, а также может включать дополнительные методы лечения, такие как кодирование от алкоголизма.
Изучить вопрос глубже – [url=https://kapelnica-ot-zapoya-nizhnij-novgorod-5.ru/]капельницы от запоя вызов город[/url]
Многие сталкиваются с трудностями при выборе клиники или центра: предлагаемые услуги различаются по качеству, подходам, стоимости и длительности. Некоторые организации ограничиваются только медикаментозной поддержкой, не работая с глубинными причинами зависимости. Поэтому важно заранее понимать, какие параметры отличают действительно надёжное учреждение, способное обеспечить долгосрочные результаты.
Углубиться в тему – https://lechenie-narkomanii-murmansk0.ru
Суть капельницы заключается в том, чтобы быстро ввести в организм необходимые растворы, которые помогают восстановить водно-солевой баланс, очищают организм от токсинов, ускоряют обмен веществ и снижают нагрузку на внутренние органы. Врачи-наркологи используют специальные составы, которые включают в себя жидкости, электролиты, витамины и лекарственные средства для снятия симптомов похмелья.
Разобраться лучше – [url=https://kapelnicza-ot-pokhmelya-nizhnij-novgorod-2.ru/]капельница от похмелья на дом[/url]
Ситуации, когда требуется срочный вызов нарколога на дом в Самаре, как правило, связаны с острыми проявлениями алкогольной или наркотической интоксикации, а также с ухудшением общего состояния пациента на фоне длительного употребления психоактивных веществ. Важно понимать, что своевременное вмешательство специалиста позволяет предотвратить развитие тяжелых осложнений, включая нарушения работы сердечно-сосудистой системы, дыхания и центральной нервной системы.
Исследовать вопрос подробнее – [url=https://narkolog-na-dom-samara-6.ru/]нарколог на дом[/url]
лечение алкоголизма с выездом на дом [url=https://vyvod-iz-zapoya-na-domu-samara-10.ru/]лечение алкоголизма с выездом на дом[/url] .
this page – The browsing experience was stable with no noticeable issues.
Перед постановкой капельницы специалист оценивает общее состояние пациента, измеряет давление, пульс, уточняет анамнез и возможные противопоказания. На основании этих данных формируется индивидуальный состав, который обеспечивает не только устранение симптомов похмелья, но и безопасное восстановление организма.
Узнать больше – [url=https://kapelnicza-ot-pokhmelya-samara-7.ru/]капельница от похмелья в самаре[/url]
После введения капельницы пациент сразу чувствует облегчение, так как токсические вещества, отравляющие организм, начинают вымываться, а уровень обезвоживания снижается. Важно отметить, что капельница позволяет быстро снять острые симптомы и вернуть человека к нормальному состоянию.
Подробнее – https://kapelnicza-ot-pokhmelya-nizhnij-novgorod-2.ru
Постановка капельницы — это не просто средство для снятия головной боли или тошноты, а комплексное восстановление организма. Состав раствора подбирается в зависимости от симптомов и состояния пациента. Врач-нарколог оценивает общее состояние пациента и выбирает наиболее подходящий состав, который будет наиболее эффективен для него. При необходимости может быть предложена дополнительная помощь, включая кодирование от алкогольной зависимости.
Углубиться в тему – [url=https://kapelnicza-ot-pokhmelya-nizhnij-novgorod.ru/]капельница от похмелья цена нижний новгород[/url]
Ситуации, когда требуется срочный вызов нарколога на дом в Самаре, как правило, связаны с острыми проявлениями алкогольной или наркотической интоксикации, а также с ухудшением общего состояния пациента на фоне длительного употребления психоактивных веществ. Важно понимать, что своевременное вмешательство специалиста позволяет предотвратить развитие тяжелых осложнений, включая нарушения работы сердечно-сосудистой системы, дыхания и центральной нервной системы.
Выяснить больше – [url=https://narkolog-na-dom-samara-6.ru/]запой нарколог на дом в самаре[/url]
вывод из запоя дешево [url=https://vyvod-iz-zapoya-na-domu-voronezh-10.ru/]вывод из запоя дешево[/url] .
Перед постановкой капельницы специалист оценивает общее состояние пациента, измеряет давление, пульс, уточняет анамнез и возможные противопоказания. На основании этих данных формируется индивидуальный состав, который обеспечивает не только устранение симптомов похмелья, но и безопасное восстановление организма.
Подробнее тут – [url=https://kapelnicza-ot-pokhmelya-samara-7.ru/]капельница от похмелья на дому самара[/url]
It’s amazing to visit this web site and reading the views of all mates regarding this article, while I am also keen of getting knowledge.
05161
bead gallery – Everything is arranged neatly, making browsing easy.
выведение из запоя воронеж [url=https://vyvod-iz-zapoya-na-domu-voronezh-10.ru/]vyvod-iz-zapoya-na-domu-voronezh-10.ru[/url] .
Суть капельницы заключается в том, чтобы быстро ввести в организм необходимые растворы, которые помогают восстановить водно-солевой баланс, очищают организм от токсинов, ускоряют обмен веществ и снижают нагрузку на внутренние органы. Врачи-наркологи используют специальные составы, которые включают в себя жидкости, электролиты, витамины и лекарственные средства для снятия симптомов похмелья.
Получить больше информации – https://kapelnicza-ot-pokhmelya-nizhnij-novgorod-2.ru
Как отмечает ведущий научный сотрудник ФГБУН «НМИЦ психиатрии и наркологии» Минздрава России, наличие междисциплинарной команды — один из основных факторов, определяющих успех терапии при зависимости.
Выяснить больше – http://lechenie-narkomanii-murmansk0.ru
Игнорирование выраженных симптомов может привести к развитию таких опасных состояний, как алкогольный делирий, острые психозы, инфаркт или инсульт. Вызов нарколога на дом круглосуточно позволяет оперативно стабилизировать состояние пациента в привычной для него обстановке, минимизируя стресс и риски, связанные с транспортировкой в стационар. Анонимный формат обращения обеспечивает конфиденциальность и делает помощь доступной даже для тех, кто опасается огласки.
Исследовать вопрос подробнее – [url=https://narkolog-na-dom-samara-6.ru/]нарколог на дом вывод[/url]
Нужна премиум мебель? деревянная мебель из массива изготовление на заказ. Натуральные материалы, эксклюзивный дизайн и долговечность. Решения для дома и бизнеса с высоким уровнем качества.
Основной задачей капельницы от запоя является быстрое устранение симптомов интоксикации, связанных с длительным употреблением алкоголя. Введение в вену специальных растворов помогает не только вывести алкогольные токсины, но и восстановить нормальное функционирование внутренних органов, пострадавших от воздействия алкоголя. Подбор состава капельницы всегда индивидуален и зависит от состояния пациента, а также может включать дополнительные методы лечения, такие как кодирование от алкоголизма.
Подробнее можно узнать тут – [url=https://kapelnica-ot-zapoya-nizhnij-novgorod-5.ru/]капельница от запоя цена[/url]
Нужна премиум мебель? сайт премиум мебели изготовление на заказ. Натуральные материалы, эксклюзивный дизайн и долговечность. Решения для дома и бизнеса с высоким уровнем качества.
Состав капельницы может варьироваться, однако в большинстве случаев включает базовые группы препаратов, направленные на устранение последствий интоксикации:
Детальнее – [url=https://kapelnicza-ot-pokhmelya-samara-7.ru/]капельница от похмелья на дому[/url]
Многие сталкиваются с трудностями при выборе клиники или центра: предлагаемые услуги различаются по качеству, подходам, стоимости и длительности. Некоторые организации ограничиваются только медикаментозной поддержкой, не работая с глубинными причинами зависимости. Поэтому важно заранее понимать, какие параметры отличают действительно надёжное учреждение, способное обеспечить долгосрочные результаты.
Подробнее можно узнать тут – https://lechenie-narkomanii-murmansk0.ru/czentr-lecheniya-narkomanii-marmansk
выведение из запоя на дому нижний новгород [url=https://vyvod-iz-zapoya-na-domu-nizhnij-novgorod-4.ru/]выведение из запоя на дому нижний новгород[/url] .
Благо им! Биза на высоту купить мефедрон и кокаин за самих представителей нет .Тоже не хочу никого пугать…
Юрист по правам отца поможет защитить ваши интересы в спорах о детях, алиментах и порядке общения. Переходите по запросу [url=https://www.pravovik24.ru/konsultatsii/yurist-po-pravam-ottsa/]юридическая консультация по защите прав отцов[/url]. Окажем квалифицированную поддержку при разводе, определении места жительства ребенка и восстановлении родительских прав. Подготовим документы, представим ваши интересы в суде и добьемся справедливого решения в сложной ситуации.
Капельница от запоя показана в случае, если у пациента наблюдаются выраженные симптомы алкогольной интоксикации, такие как тяжелое похмелье, головная боль, слабость, бессонница, рвота и сильное обезвоживание. Эти симптомы часто сопровождают состояние, когда человек не может самостоятельно справиться с похмельем и продолжает испытывать физический и психоэмоциональный дискомфорт. Услугу можно заказать через специализированные клиники, где наркологическая помощь предоставляется опытными специалистами с большим стажем работы.
Получить больше информации – https://kapelnica-ot-zapoya-nizhnij-novgorod-5.ru/
срочный вывод из запоя [url=https://vyvod-iz-zapoya-na-domu-nizhnij-novgorod-6.ru/]срочный вывод из запоя[/url] .
вывод из запоя на дому 24 [url=https://vyvod-iz-zapoya-na-domu-nizhnij-novgorod-7.ru/]vyvod-iz-zapoya-na-domu-nizhnij-novgorod-7.ru[/url] .
вывод из запоя цена [url=https://vyvod-iz-zapoya-na-domu-nizhnij-novgorod-4.ru/]вывод из запоя цена[/url] .
Ищете Благоустройство участка под ключ? Посетите сайт Идеал строй https://idealstr.ru/uslugi/blagoustrojstvo-territorii – ознакомьтесь с нашими работами или звоните по телефону +7 495 227 58 48 – наши квалифицированные сотрудники ответят на все интересующие вас вопросы.
go to this site – The easy design helps create a stress-free experience.
Wild Bandito sticky wilds: o roubo tá bom demais!
Таблица: Основные признаки надёжного центра лечения наркомании
Детальнее – [url=https://lechenie-narkomanii-murmansk0.ru/]лечение наркомании мурманск[/url]
вывод из запоя дешево нижний новгород [url=https://vyvod-iz-zapoya-na-domu-nizhnij-novgorod-6.ru/]вывод из запоя дешево нижний новгород[/url] .
вывод из запоя цена на дому [url=https://vyvod-iz-zapoya-na-domu-nizhnij-novgorod-7.ru/]вывод из запоя цена на дому[/url] .
Капельница от запоя показана в случае, если у пациента наблюдаются выраженные симптомы алкогольной интоксикации, такие как тяжелое похмелье, головная боль, слабость, бессонница, рвота и сильное обезвоживание. Эти симптомы часто сопровождают состояние, когда человек не может самостоятельно справиться с похмельем и продолжает испытывать физический и психоэмоциональный дискомфорт. Услугу можно заказать через специализированные клиники, где наркологическая помощь предоставляется опытными специалистами с большим стажем работы.
Детальнее – [url=https://kapelnica-ot-zapoya-nizhnij-novgorod-5.ru/]вызов на дом капельницы от запоя в нижнем новгороде[/url]
dubai new building projects in jadaf 2 Bedroom Apartment for Sale in JBR Dubai furnished room for rent in dubai monthly
Капельница от похмелья в Нижнем Новгороде: снятие симптомов похмелья, восстановление и поддержка под наблюдением врачей в наркологической клинике «Похмельная служба»
Ознакомиться с деталями – [url=https://kapelnicza-ot-pokhmelya-nizhnij-novgorod-2.ru/]капельница от похмелья на дому[/url]
Нарколог на дом в Самаре: круглосуточная помощь, вывод из запоя и медицинская поддержка на дому под контролем специалистов в наркологической клинике «Похмельная служба»
Узнать больше – [url=https://narkolog-na-dom-samara-6.ru/]нарколог на дом[/url]
При необходимости врач может расширить состав капельницы, ориентируясь на жалобы пациента и клиническую картину:
Узнать больше – [url=https://kapelnicza-ot-pokhmelya-samara-7.ru/]капельница от похмелья цена[/url]
eshravan site – Layout looks tidy and moving through pages was easy.
цена вывод из запоя на дому [url=https://vyvod-iz-zapoya-na-domu-samara-11.ru/]vyvod-iz-zapoya-na-domu-samara-11.ru[/url] .
Медицинский контроль играет ключевую роль в безопасности и эффективности процедуры. Под присмотром опытного специалиста исключаются риски неправильной дозировки препаратов, побочных эффектов и осложнений, что особенно важно при проведении капельниц у пациентов с хроническими заболеваниями или при наличии индивидуальных противопоказаний.
Выяснить больше – [url=https://kapelnicza-ot-pokhmelya-nizhnij-novgorod-1.ru/]www.domen.ru[/url]
https://betfair-bet.com.mx/
De acuerdo con el texto, Betfair representa una plataforma de casino y apuestas deportivas online con una trayectoria superior a 25 anos, establecido en el Reino Unido durante el ano 2000, y se distingue en todo el mundo debido a su original sistema de apuestas entre usuarios.
unique artisan shop – Pages are balanced and browsing around feels smooth.
Избавление от наркотической зависимости требует последовательной, профессиональной и комплексной помощи. В отличие от краткосрочной детоксикации, полноценное лечение наркомании в Мурманске включает медицинскую стабилизацию, психотерапевтическую коррекцию и этапы социальной адаптации. По данным Минздрава РФ, устойчивые результаты достигаются лишь в тех случаях, когда терапия проводится под наблюдением специалистов, использующих современные доказательные методы.
Разобраться лучше – http://
цена вывод из запоя на дому [url=https://vyvod-iz-zapoya-na-domu-samara-11.ru/]vyvod-iz-zapoya-na-domu-samara-11.ru[/url] .
melbet version compatible [url=http://melbet57184.help/]melbet version compatible[/url]
быстрый анонимный вывод из запоя на дому [url=https://vyvod-iz-zapoya-na-domu-nizhnij-novgorod-5.ru/]быстрый анонимный вывод из запоя на дому[/url] .
Самые положительные впечатления оставляет по прежнему Мажор. 🙁 Джой фулл, а тебе когда отправили? купить мефедрон и кокаин по заказу?)такчто чставлю 100/100баллов магазу и
Срок службы большинства счётчиков воды составляет 12 лет, и по истечении этого периода прибор обязан пройти поверку или замену — иначе показания перестанут считаться действительными и начисления пойдут по завышенным нормативам. Компания «Водогарант» выполняет замену счётчиков воды в Москве и Московской области за один день, начиная всего от 2500 рублей, включая оборудование, демонтаж, монтаж, документы и пломбировку. Актуальные цены и модели приборов доступны на https://xn--80aaeee1dcbuw.xn--p1ai/zamena-schetchikov-vody/ — специалисты работают напрямую с Мосводоканалом, выезд мастера бесплатный, гарантия на монтаж составляет 12 месяцев.
Капельница от запоя — это эффективное медицинское вмешательство, направленное на быстрое восстановление организма после длительного злоупотребления алкоголем. Процесс лечения с использованием капельницы способствует быстрому выводу токсинов, восстановлению водно-электролитного баланса и нормализации общего состояния пациента. Капельница оказывает комплексное воздействие на организм, улучшая его самочувствие уже в течение первых часов после процедуры.
Выяснить больше – [url=https://kapelnica-ot-zapoya-nizhnij-novgorod-5.ru/]вызов на дом капельницы от запоя в нижнем новгороде[/url]
Четкая структура меню позволяет быстро найти нужный металл
https://redmetsplav.ru/store/magniy-i-ego-splavy/zarubezhnye-splavy-2/magniy-m12410—uns/lenta-magnievaya-m12410—uns/
https://betfair-bet.com.mx/
De acuerdo con el texto, Betfair se presenta como un sitio de apuestas en linea y casino con mas de un cuarto de siglo en el mercado, nacido en territorio britanico en el 2000, y se distingue en todo el mundo debido a su original sistema de apuestas entre usuarios.
start browsing nightfall – Everything feels calm, making the whole experience pleasant and simple.
«Самурай Джек» — знаковый мультсериал 2001 года о безымянном самурае, которого злой демон Аку швырнул в мрачное будущее, захлёбывающееся в хаосе и насилии. Ищете самурай джек все серии? Все 5 сезонов и 62 серии доступны на samuray-dzhek.club бесплатно в отличном качестве с русской озвучкой. Самурай с древним мечом и кодексом чести противостоит киберпанковому миру роботов и мутантов, стремясь вернуться домой и уничтожить зло. Каждая серия — лаконичная притча о выборе, стойкости и цене доблести, созданная с безупречным визуальным стилем.
visit pineharbor product hall – Well-organized pages, browsing feels effortless and clear.
вывод из запоя на дому нижний новгород [url=https://vyvod-iz-zapoya-na-domu-nizhnij-novgorod-5.ru/]вывод из запоя на дому нижний новгород[/url] .
explore here – The site offers a clean interface with content that’s easy to find and useful.
После введения растворов активные вещества быстро распределяются по организму. Это способствует выведению продуктов распада алкоголя, улучшению работы нервной системы и восстановлению энергетического баланса. Уже в процессе инфузии уменьшаются головная боль, тошнота и слабость.
Детальнее – [url=https://kapelnicza-ot-pokhmelya-samara-8.ru/]капельница от похмелья на дом[/url]
вывод из запоя на дому [url=https://vyvod-iz-zapoya-na-domu-voronezh-11.ru/]вывод из запоя на дому[/url] .
вывести из запоя на дому [url=https://vyvod-iz-zapoya-na-domu-samara-9.ru/]вывести из запоя на дому[/url] .
featured picks – The structure is tidy and navigation feels very smooth.
вывод из запоя дешево воронеж [url=https://vyvod-iz-zapoya-na-domu-voronezh-11.ru/]вывод из запоя дешево воронеж[/url] .
нарколог на дом вывод из запоя [url=https://vyvod-iz-zapoya-na-domu-samara-9.ru/]нарколог на дом вывод из запоя[/url] .
процедура банкротства физлица
Процедура банкротства физлица состоит из нескольких этапов и требует внимательной подготовки документов. На sorryclosed.ru есть понятные материалы о порядке действий и последствиях процедуры.
dubai real estate course Hotel Apartments in Bur Dubai for Monthly Rent 1 bedroom apartment for rent in sharjah
http://cvaa.com.ar/06inc/articles/1xbet_kenya_sign_up.html
https://www.bf-mechta.ru/wp-content/pages/promokod_1xbet_na_segodnya_pri_registracii.html
Услуги нарколога на дому в Самаре включают не только экстренный осмотр, но и комплекс медицинских мероприятий, направленных на снижение интоксикации, облегчение тяжелых симптомов и общее восстановление состояния пациента. Объем помощи зависит от клинической картины, длительности употребления алкоголя или других психоактивных веществ, возраста, хронических заболеваний и текущих рисков. Врач подбирает схему индивидуально, исходя из того, какие задачи необходимо решить в конкретный момент — снять острые проявления, стабилизировать самочувствие или подготовить пациента к дальнейшему лечению зависимости.
Детальнее – [url=https://narkolog-na-dom-samara-5.ru/]нарколог на дом вывод в самаре[/url]
Никелевые сплавы — основа для жаропрочных конструкций
https://redmetsplav.ru/store/niobiy1/splavy-niobiya-1/niobiy-5v2mc-2-1/folga-niobievaya-5v2mc-2/
1win VPN pentru 1win [url=http://1win90843.help/]1win VPN pentru 1win[/url]
mostbet вход не работает [url=https://mostbet91763.help]https://mostbet91763.help[/url]
discover items – The design is clean and it feels natural to go through the content.
Постановка капельницы — это не просто средство для снятия головной боли или тошноты, а комплексное восстановление организма. Состав раствора подбирается в зависимости от симптомов и состояния пациента. Врач-нарколог оценивает общее состояние пациента и выбирает наиболее подходящий состав, который будет наиболее эффективен для него. При необходимости может быть предложена дополнительная помощь, включая кодирование от алкогольной зависимости.
Узнать больше – [url=https://kapelnicza-ot-pokhmelya-nizhnij-novgorod.ru/]капельница от похмелья цена нижний новгород[/url]
Процесс капельницы включает внутривенное введение различных растворов, которые помогают нейтрализовать эффекты алкогольной интоксикации, включая последствия запоя и алкоголизма. Наиболее часто в составе капельницы используются солевые и глюкозные растворы, витамины группы B, а также препараты для детоксикации организма. Эти компоненты помогают быстро восстановить водно-электролитный баланс, улучшить обмен веществ и ускорить выведение продуктов распада алкоголя.
Подробнее тут – [url=https://kapelnicza-ot-pokhmelya-samara-6.ru/]капельница от похмелья на дому самара[/url]
Жалко конечно что убрали покупку от грамма купить мефедрон и кокаин Дом рядом с адресом говоришь, отдаешь залог, когда приедешь в адрес (в разных такси по-разному, могут и не попросить), и идешб себе за кладом :)Если помог Жми Сказать Спасибо
open walnut cove gallery page – The layout is clean and I had no issues exploring it.
click to view – The clean setup helps you find what you need without any hassle.
последствия банкротства физического лица
Перед подачей важно изучить последствия банкротства физического лица, а не только перспективу списания долгов. На sorryclosed.ru разобраны основные ограничения и правовые последствия после завершения дела.
вывод из запоя цена на дому [url=https://vyvod-iz-zapoya-na-domu-nizhnij-novgorod-4.ru/]вывод из запоя цена на дому[/url] .
melbet bonus machines à sous [url=www.melbet57184.help]www.melbet57184.help[/url]
Указан физический адрес в Екатеринбурге, что повышает доверие
https://redmetsplav.ru/store/vismut/zarubezhnye-splavy-3/vismut-cac906c—jis-h-5121-2016/lenta-vismutovaya-cac906c—jis-h-5121-2016/
Капельница от запоя с детоксикацией организма в Нижнем Новгороде представляет собой одну из самых эффективных процедур для быстрого улучшения состояния пациента, страдающего от алкогольной зависимости. Такой подход направлен не только на устранение токсинов, но и на восстановление нормального функционирования внутренних органов, которые пострадали от длительного употребления алкоголя.
Ознакомиться с деталями – [url=https://kapelnica-ot-zapoya-nizhnij-novgorod-4.ru/]капельница от запоя на дому нижний новгород[/url]
Trail Harbor Handmade Hub – Browsing experience is smooth due to structured design.
вывод из запоя на дому [url=https://vyvod-iz-zapoya-na-domu-nizhnij-novgorod-4.ru/]вывод из запоя на дому[/url] .
запой вывод на дому [url=https://vyvod-iz-zapoya-na-domu-nizhnij-novgorod-7.ru/]запой вывод на дому[/url] .
вывод из запоя на дому недорого [url=https://vyvod-iz-zapoya-na-domu-nizhnij-novgorod-6.ru/]вывод из запоя на дому недорого[/url] .
Первые положительные изменения обычно появляются уже через 15–20 минут после начала капельницы. Уменьшается головная боль, снижается чувство тошноты, стабилизируется давление и пульс. К концу процедуры большинство симптомов становится значительно менее выраженными.
Получить дополнительную информацию – [url=https://kapelnicza-ot-pokhmelya-samara-8.ru/]капельница от похмелья на дому самара[/url]
dubai property auction One Bedroom Apartment for Sale in Dubai dubai property auction
процедура банкротства физлица
Процедура банкротства физлица состоит из нескольких этапов и требует внимательной подготовки документов. На sorryclosed.ru есть понятные материалы о порядке действий и последствиях процедуры.
crafted corner – Everything is clearly arranged, so browsing is very easy.
анонимное выведение из запоя дома [url=https://vyvod-iz-zapoya-na-domu-nizhnij-novgorod-7.ru/]анонимное выведение из запоя дома[/url] .
вывод из запоя цены [url=https://vyvod-iz-zapoya-na-domu-nizhnij-novgorod-6.ru/]вывод из запоя цены[/url] .
mostbet способы оплаты [url=mostbet89276.help]mostbet89276.help[/url]
Информация о доставке по всей РФ делает компанию универсальным поставщиком
https://redmetsplav.ru/store/kobalt/stellite/kobalt-stellite-98m2/krug-kobaltovyy-stellite-98m2/
visit the page – The pages are clean and the overall experience is quite good.
логин мостбет [url=https://mostbet63740.help]логин мостбет[/url]
Jwh 203 порошок светло-желтого цвета у них, делал в пропорции 150-200мг на спичечный коробок микса, кролики довольны! 5-IAI пробывал 200мг по кишке, видимо нужно было сразу 300-400мг чтобы понять кайф! купить мефедрон и кокаин К магазину никаких нареканий быстро появился на форуме и развеял этот- дешевый развод.будут денежки возьму тут что нибудь дымящиеся.скорей бы вы синтез заказали МН…
Gilded Lakefront Goods District – The site feels well organized and browsing is smooth and straightforward.
сроки банкротства физического лица
Сроки банкротства физического лица зависят от сложности дела и состава имущества. На sorryclosed.ru можно изучить примерную продолжительность процедуры и факторы, которые влияют на сроки.
Основное действие капельницы заключается в быстром восстановлении водного баланса и выведении токсинов, оставшихся в организме после употребления алкоголя. Алкоголь нарушает работу печени, почек и других органов, поэтому капельница помогает организму вернуться в норму, восстанавливая функции этих органов и поддерживая обмен веществ. Состав капельницы также может включать препараты, которые поддерживают работу сердечно-сосудистой системы и устраняют болезненные ощущения, такие как головная боль и тошнота.
Выяснить больше – [url=https://kapelnicza-ot-pokhmelya-nizhnij-novgorod.ru/]капельница от похмелья на дом нижний новгород[/url]
1win merge azi [url=https://1win90843.help/]https://1win90843.help/[/url]
Browse Violet Harbor Outlet – The structure is simple and helps users move around without effort.
Общее впечатление: надежный информационный ресурс для снабженцев.
https://redmetsplav.ru/store/magniy-i-ego-splavy/zarubezhnye-splavy-2/magniy-gd-mgal4si1—din-1729-part-2/provoloka-magnievaya-gd-mgal4si1—din-1729-part-2/
Fortune Rabbit no Pix: quem depositou pouco e saiu com muitos giros?
gallery hub – Overall, the experience is smooth and pages load quickly without delay.
The Grand guide 2 Bedroom Townhouse for Sale in Dubai iranian investment in dubai property to rise if sanctions ease
вывод из запоя на дому круглосуточно [url=https://vyvod-iz-zapoya-na-domu-samara-11.ru/]вывод из запоя на дому круглосуточно[/url] .
Специалисты рекомендуют не откладывать вызов врача, если симптомы похмелья сильно нарушают обычный режим жизни. Чем раньше начнется лечение, тем быстрее произойдет стабилизация состояния. Наркологи также подчеркивают, что капельница от похмелья не является решением проблемы алкоголизма, но она помогает избавиться от острого дискомфорта и подготовить организм к более длительному восстановлению.
Исследовать вопрос подробнее – [url=https://kapelnicza-ot-pokhmelya-nizhnij-novgorod-2.ru/]капельница от похмелья на дому нижний новгород[/url]
Игнорирование выраженных симптомов может привести к развитию таких опасных состояний, как алкогольный делирий, острые психозы, инфаркт или инсульт. Вызов нарколога на дом круглосуточно позволяет оперативно стабилизировать состояние пациента в привычной для него обстановке, минимизируя стресс и риски, связанные с транспортировкой в стационар. Анонимный формат обращения обеспечивает конфиденциальность и делает помощь доступной даже для тех, кто опасается огласки.
Ознакомиться с деталями – [url=https://narkolog-na-dom-samara-6.ru/]нарколог на дом анонимно самара[/url]
explore the moss commerce link – It’s simple to use and nothing feels confusing or busy.
вывести из запоя на дому [url=https://vyvod-iz-zapoya-na-domu-nizhnij-novgorod-5.ru/]vyvod-iz-zapoya-na-domu-nizhnij-novgorod-5.ru[/url] .
мостбет бонусы на ставки [url=https://www.mostbet63740.help]https://www.mostbet63740.help[/url]
юрист по банкротству физических лиц
Юрист по банкротству физических лиц помогает оценить риски и подготовить документы. На sorryclosed.ru можно изучить саму процедуру и заранее понять, какие вопросы стоит задавать специалисту.
mostbet регистрация без паспорта [url=https://mostbet89276.help]https://mostbet89276.help[/url]
вывод из запоя дешево [url=https://vyvod-iz-zapoya-na-domu-samara-11.ru/]вывод из запоя дешево[/url] .
Raven Summit Commerce Page – Everything feels responsive and simple to interact with.
Raven Summit Showcase Portal – The browsing experience is smooth and feels reliable throughout.
подвела доставка, заказал 2-го получил 16-го https://m-benz.ru закладок нет, и представителей тоже, в Ярославль можем отправить курьером срок доставки 1 день.всем привет
Юрист по правам отца поможет защитить ваши интересы в спорах о детях, алиментах и порядке общения. Переходите по запросу [url=https://www.pravovik24.ru/konsultatsii/yurist-po-pravam-ottsa/]юрист по защите прав отца[/url]. Окажем квалифицированную поддержку при разводе, определении места жительства ребенка и восстановлении родительских прав. Подготовим документы, представим ваши интересы в суде и добьемся справедливого решения в сложной ситуации.
Upland Canyon Commerce Collective Hub – Everything is well organized and works without delay.
Состав капельницы может варьироваться, однако в большинстве случаев включает базовые группы препаратов, направленные на устранение последствий интоксикации:
Выяснить больше – https://kapelnicza-ot-pokhmelya-samara-7.ru
melbet méthodes de retrait [url=http://melbet57184.help/]melbet méthodes de retrait[/url]
вывод из запоя цены нижний новгород [url=https://vyvod-iz-zapoya-na-domu-nizhnij-novgorod-5.ru/]вывод из запоя цены нижний новгород[/url] .
Никелевые сплавы — основа для жаропрочных конструкций
https://redmetsplav.ru/store/magniy-i-ego-splavy/zarubezhnye-splavy-2/magniy-mg-zn1zr/krug-magnievyy-mg-zn1zr/
Основой эффективного лечения является команда специалистов с подтверждённой профессиональной подготовкой. В штат учреждения должны входить врачи-наркологи, психиатры, клинические психологи, специалисты по социальной адаптации.
Получить больше информации – https://lechenie-narkomanii-murmansk0.ru/
как списать долги
Запрос как списать долги обычно начинается с поиска законных вариантов. На sorryclosed.ru можно сравнить судебную и внесудебную процедуру и понять, какой путь подходит в конкретной ситуации.
Суть капельницы заключается в том, чтобы быстро ввести в организм необходимые растворы, которые помогают восстановить водно-солевой баланс, очищают организм от токсинов, ускоряют обмен веществ и снижают нагрузку на внутренние органы. Врачи-наркологи используют специальные составы, которые включают в себя жидкости, электролиты, витамины и лекарственные средства для снятия симптомов похмелья.
Разобраться лучше – https://kapelnicza-ot-pokhmelya-nizhnij-novgorod-2.ru
Нарколог на дом в Самаре: круглосуточная помощь, вывод из запоя и медицинская поддержка на дому под контролем специалистов в наркологической клинике «Похмельная служба»
Углубиться в тему – [url=https://narkolog-na-dom-samara-6.ru/]запой нарколог на дом[/url]
выведение из запоя в нижнем новгороде [url=https://vyvod-iz-zapoya-na-domu-nizhnij-novgorod-4.ru/]выведение из запоя в нижнем новгороде[/url] .
mostbet вывод на карту [url=https://www.mostbet91763.help]https://www.mostbet91763.help[/url]
Teal Harbor shop access – The layout is modern and allows quick, simple browsing.
crafted marketplace – The site layout is simple, making it easy to explore.
Профессиональный подход к описанию каждого вида металла
https://redmetsplav.ru/store/vanadiy-i-ego-splavy/vanadiy-50u0-6-2—tu-14-115-43-97/pokovka-vanadievaya-50u0-6-2—tu-14-115-43-97/
Основной задачей капельницы от запоя является быстрое устранение симптомов интоксикации, связанных с длительным употреблением алкоголя. Введение в вену специальных растворов помогает не только вывести алкогольные токсины, но и восстановить нормальное функционирование внутренних органов, пострадавших от воздействия алкоголя. Подбор состава капельницы всегда индивидуален и зависит от состояния пациента, а также может включать дополнительные методы лечения, такие как кодирование от алкоголизма.
Получить дополнительные сведения – [url=https://kapelnica-ot-zapoya-nizhnij-novgorod-5.ru/]поставить капельницу от запоя в нижнем новгороде[/url]
капельница от запоя анонимно [url=https://vyvod-iz-zapoya-na-domu-nizhnij-novgorod-4.ru/]капельница от запоя анонимно[/url] .
start browsing here – It looks like a neat concept, I’ll see how it evolves over time.
how can you find an property owner in dubai Commercial properties for rent Dubai Jumeirah Village Circle
Офис в Екатеринбурге работает четко, забирали самовывозом — складская логистика на высоте.
https://xn--80aeedb0bfzeok.xn--p1ai/catalog/latunnaia-vtulka/latunnaia-vtulka-460-mm-ls59/
Как отмечает ведущий научный сотрудник ФГБУН «НМИЦ психиатрии и наркологии» Минздрава России, наличие междисциплинарной команды — один из основных факторов, определяющих успех терапии при зависимости.
Получить дополнительную информацию – https://lechenie-narkomanii-murmansk0.ru/lechenie-narkomanii-i-alkogolizma-marmansk/
\ Honey Cove Artisan Hub – The site performs well and provides a comfortable browsing experience.
\ Honey Cove Online Storefront – Navigation feels simple and the structure supports fast browsing.
вывод из запоя на дому недорого [url=https://vyvod-iz-zapoya-na-domu-nizhnij-novgorod-7.ru/]вывод из запоя на дому недорого[/url] .
Honey Cove Gallery – The presentation is clean and content is easy to explore from the start.
вывод из запоя на дому нижний новгород круглосуточно [url=https://vyvod-iz-zapoya-na-domu-nizhnij-novgorod-6.ru/]вывод из запоя на дому нижний новгород круглосуточно[/url] .
Тем, кто хочет глубже понять, как сочетаются технические аспекты SEO и маркетинговые стратегии, будет полезна эта публикация: https://o-ili-v.ru/stati/prodvizhenie-sajtov-iskusstvo-i-nauka-uspeha-v-cifrovom-mire/
Всем советую таряться здесь))) https://m-benz.ru надо прятать по сложнееОчень странно, что 203 не растворился в ацетоне. Сколько брал ацика на 10 гр основы?
стоимость банкротства физических лиц
Стоимость банкротства физических лиц зависит от формата процедуры и сопутствующих расходов. На sorryclosed.ru можно посмотреть, из чего складываются затраты и на что обратить внимание заранее.
Flora Ridge Goods Hub – Good variety of items here, and checkout was simple and fast.
цены вывод из запоя [url=https://vyvod-iz-zapoya-na-domu-nizhnij-novgorod-7.ru/]vyvod-iz-zapoya-na-domu-nizhnij-novgorod-7.ru[/url] .
анонимный вывод из запоя [url=https://vyvod-iz-zapoya-na-domu-nizhnij-novgorod-6.ru/]анонимный вывод из запоя[/url] .
take a look – The layout is engaging and gives a good overview for newcomers.
Visit Bay Harbor Outpost – The design is simple and everything is easy to navigate across the site.
Upland Harbor Handmade Bazaar – The site structure is clean and helps users find content quickly.
1вин download [url=1win20938.help]1win20938.help[/url]
Violet Harbor Digital Store – The layout is neat and makes browsing effortless from start to finish.
check this online mart – Useful for those late-night shopping needs.
мелбет пополнить с элкарт [url=melbet27495.help]melbet27495.help[/url]
plinko mostbet [url=https://www.mostbet40827.help]https://www.mostbet40827.help[/url]
Artisan Goods at Oak Dock – It feels well structured and easy to browse through categories.
Сайт четко ориентирован на промышленный сектор и B2B сегмент
https://redmetsplav.ru/store/volfram/splavy-volframa-1/volfram-w-re-1/lenta-volframovaya-w-re/
мостбет ошибка входа [url=www.mostbet63740.help]www.mostbet63740.help[/url]
Quick Harbor Order Hub – shipping time was better than the usual experience.
discover items – It has a clear layout and the content is very straightforward to understand.
Редметсплав — пример того, как должен работать современный поставщик металлургического сырья.
https://xn--80aeedb0bfzeok.xn--p1ai/catalog/latunnye-vnutrennie-stopornye-koltsa-po-gost/latunoe-vnutrennee-stopornoe-pruzhinnoe-koltso-50kh1-7-mm-lts25s2-gost-13943-86/
There are so many different online casinos offering Stakelogic games, so it’s important to choose the best one for you. The ideal way to do that is by reviewing the lists we’ve put together here at Casinos. Roulette fans have plenty of options online, and free American Roulette is no exception. Some versions focus on giving you every detail of your bets, while others add new ways to play or make the wheel feel more alive. Below, we highlight a few versions that are worth checking out for free. Progressive Blackjacks estimated RTP stands at 99.53%, you will also find many table games in the digital version. Later, Slots. Deposit and withdrawal at online casino. With plenty of betting options and casino games, you can find many unbiased casino reviews that reveal all the pros and cons of every gambling site. It will soon be expanding into an even larger behemoth thanks to its acquisition of the software provider Playtech, online casino for united kingdom free play this means that winning combinations are created by three or more identical symbols that land on adjacent reels starting at the utmost left reel.
https://shuddha.co.za/2026/03/24/1win-promo-code-review-for-uk-players-casino-game-experience/
It’s a European live dealer roulette game with multipliers, but it’s different from any that you’ve played so far. It’s best described as a hybrid between Quantum Roulette and Mega Fire Blaze Roulette. Honestly, can Baltimore really rely on a 1 and a half-trick pony to get to the Super Bowl. Check out our guide to learn what sites are going to suit you best in this regard, its always best to stick to your guns. However, and its not seen as a luxury at all. Undoubtedly, gambling commission gov UK there are different hand-rank calculators that you can use. Find a full list of the available methods on the gaming clubs site, which will double the total stake. Casino Automaten Spielen Kostenlos Ohne Anmeldung (What a Client Discovered on Their Path to Success) Ingredients, Side Effects, Official Site This level of security gives players peace of mind when playing online, knowing that their data is protected from unauthorized access
Основной задачей капельницы от запоя является быстрое устранение симптомов интоксикации, связанных с длительным употреблением алкоголя. Введение в вену специальных растворов помогает не только вывести алкогольные токсины, но и восстановить нормальное функционирование внутренних органов, пострадавших от воздействия алкоголя. Подбор состава капельницы всегда индивидуален и зависит от состояния пациента, а также может включать дополнительные методы лечения, такие как кодирование от алкоголизма.
Подробнее можно узнать тут – [url=https://kapelnica-ot-zapoya-nizhnij-novgorod-5.ru/]капельница от запоя на дому цена[/url]
банкротство через МФЦ
Банкротство через МФЦ часто ищут как более простой вариант списания долгов. На sorryclosed.ru удобно посмотреть требования, порядок обращения и причины возможного отказа.
mostbet регистрация без кода [url=https://mostbet89276.help]mostbet регистрация без кода[/url]
unique artisan shop – Structure is consistent, making browsing pleasant.
Капельница от похмелья — это медицинская процедура, направленная на быстрое восстановление организма после алкогольной интоксикации. Она помогает устранить обезвоживание, нормализовать обменные процессы и снизить токсическую нагрузку на внутренние органы. В отличие от домашних методов, инфузионная терапия действует напрямую через кровоток, обеспечивая более быстрый и выраженный эффект.
Получить больше информации – [url=https://kapelnicza-ot-pokhmelya-samara-8.ru/]капельница от похмелья на дом в самаре[/url]
1win functioneaza azi [url=http://1win90843.help]1win functioneaza azi[/url]
Pearl Harbor Shopfront Gallery – The browsing flow is smooth and the system feels trustworthy and fast.
Суть капельницы заключается в том, чтобы быстро ввести в организм необходимые растворы, которые помогают восстановить водно-солевой баланс, очищают организм от токсинов, ускоряют обмен веществ и снижают нагрузку на внутренние органы. Врачи-наркологи используют специальные составы, которые включают в себя жидкости, электролиты, витамины и лекарственные средства для снятия симптомов похмелья.
Получить дополнительную информацию – [url=https://kapelnicza-ot-pokhmelya-nizhnij-novgorod-2.ru/]капельница от похмелья на дому нижний новгород[/url]
commercial property leasing in dubai Buy Penthouse in Dubai good small business ideas
Игнорирование выраженных симптомов может привести к развитию таких опасных состояний, как алкогольный делирий, острые психозы, инфаркт или инсульт. Вызов нарколога на дом круглосуточно позволяет оперативно стабилизировать состояние пациента в привычной для него обстановке, минимизируя стресс и риски, связанные с транспортировкой в стационар. Анонимный формат обращения обеспечивает конфиденциальность и делает помощь доступной даже для тех, кто опасается огласки.
Подробнее тут – [url=https://narkolog-na-dom-samara-6.ru/]врач нарколог на дом в самаре[/url]
collection spot – The presentation is distinctive and nicely assembled.
click to explore – It has a fresh layout and feels well crafted overall.
Четкое позиционирование как эксперта в области редких металлов
https://redmetsplav.ru/store/magniy-i-ego-splavy/zarubezhnye-splavy-2/magniy-am90—csa-hg-3/truba-magnievaya-am90—csa-hg-3/
Fern Ridge Artisan Market Home – The overall design looks clean and pages load quickly without any problems.
Fern Ridge Artisan Market Home – The overall design looks clean and pages load quickly without any problems.
ровнее только строительный уровень ) купить мефедрон и кокаин Все будет равно чувак!!!!!!!!”Приезжаю к месту,вижу дом обхожу кооператив который мне нужен (ну я так думал)”
discover quartzmeadow trade listings – Easy layout, everything is simple to explore and access.
Shop Violet Harbor Collection – Pages are arranged well and it’s easy to find what you’re looking for.
Sage Harbor Goods Center – content is organized in a clean and readable format
HDRezka — один из крупнейших русскоязычных онлайн-кинотеатров с библиотекой более 7400 страниц контента: фильмы, сериалы, мультфильмы и аниме на любой вкус. Каталог охватывает всё — от культовой классики до свежих релизов 2026 года с профессиональным дубляжом и субтитрами. Ищете смотреть фильмы онлайн? Переходите на hdrezka.film получайте доступ к тысячам тайтлов в Full HD без регистрации. Сериалы обновляются каждый день — свежие эпизоды «Декстера», «Во все тяжкие» и других хитов выходят в день релиза с выбором перевода.
Покупали изделия из драгметаллов для лаборатории, всё соответствует заявленным характеристикам.
https://xn--80aeedb0bfzeok.xn--p1ai/catalog/mednye-krestoviny-pod-paiku/mednaia-krestovina-pod-paiku-80kh68kh1-8-mm-35-5kh38-5-mm-tverdaia-paika-m2-gost-32590-2013/
Капельница от похмелья с медицинским контролем в Нижнем Новгороде — это эффективный способ восстановления после алкогольной интоксикации, который позволяет быстро и безопасно нормализовать состояние пациента. Основное отличие такой капельницы от домашних методов состоит в том, что вся процедура проходит под контролем профессионалов, что минимизирует риски для здоровья и повышает эффективность лечения.
Подробнее – [url=https://kapelnicza-ot-pokhmelya-nizhnij-novgorod-1.ru/]капельница от похмелья на дом[/url]
1win Тоҷикистон apk [url=http://1win20938.help]http://1win20938.help[/url]
Таблица: Основные признаки надёжного центра лечения наркомании
Углубиться в тему – [url=https://lechenie-narkomanii-murmansk0.ru/]лечение наркомании нарколог[/url]
банкротство при микрозаймах
Банкротство при микрозаймах рассматривают многие заемщики с большой просрочкой и несколькими МФО. На sorryclosed.ru собраны материалы о том, как такие долги учитываются в общей процедуре.
плинко мелбет [url=https://melbet27495.help/]https://melbet27495.help/[/url]
Состав капельницы может варьироваться, однако в большинстве случаев включает базовые группы препаратов, направленные на устранение последствий интоксикации:
Исследовать вопрос подробнее – [url=https://kapelnicza-ot-pokhmelya-samara-7.ru/]капельница от похмелья вызов на дом самара[/url]
бозии lucky jet mostbet [url=www.mostbet40827.help]www.mostbet40827.help[/url]
find more here – The structure is simple and the site looks clean and modern.
Основное действие капельницы заключается в быстром восстановлении водного баланса и выведении токсинов, оставшихся в организме после употребления алкоголя. Алкоголь нарушает работу печени, почек и других органов, поэтому капельница помогает организму вернуться в норму, восстанавливая функции этих органов и поддерживая обмен веществ. Состав капельницы также может включать препараты, которые поддерживают работу сердечно-сосудистой системы и устраняют болезненные ощущения, такие как головная боль и тошнота.
Ознакомиться с деталями – [url=https://kapelnicza-ot-pokhmelya-nizhnij-novgorod.ru/]капельница от похмелья анонимно в нижнем новгороде[/url]
artisan selections – Navigation is intuitive and moving around is hassle-free.
Корзина на сайте промышленного предприятия — удобный инструмент для формирования заявки
https://redmetsplav.ru/store/magniy-i-ego-splavy/zarubezhnye-splavy-2/magniy-m16400—uns/lenta-magnievaya-m16400—uns/
visit the shop page – Everything appears clear and easy to access.
River Harbor Bazaar – The experience is smooth and visually clean.
click to explore – The site feels modern and everything is neatly structured for easy browsing.
Hazel Stone Outpost Exchange – Everything is easy to access and the experience feels pleasant overall.
Hazel Stone Outpost Collective – The site feels neat, structured, and very easy to browse.
Creek Harbor commerce site – I found the interface simple and navigation very clear for finding information.
вывести из запоя на дому [url=https://vyvod-iz-zapoya-na-domu-samara-11.ru/]вывести из запоя на дому[/url] .
бесплатное банкротство через МФЦ
Бесплатное банкротство через МФЦ подходит только при соблюдении установленных условий. На sorryclosed.ru можно быстро проверить базовые критерии и понять, есть ли шанс пройти процедуру без суда.
Высокая квалификация персонала, знают специфику редких металлов и особенности их применения.
https://xn--80aeedb0bfzeok.xn--p1ai/catalog/latunnoe-litoe-koltso/latunnoe-litoe-koltso-150kh200-mm-lmtska/
melbet plinko [url=melbet57184.help]melbet57184.help[/url]
Opal Brook Artisan Exchange – A good variety of handmade goods that feel fresh and distinctive.
Капельница от похмелья с медицинским контролем в Нижнем Новгороде — это эффективный способ восстановления после алкогольной интоксикации, который позволяет быстро и безопасно нормализовать состояние пациента. Основное отличие такой капельницы от домашних методов состоит в том, что вся процедура проходит под контролем профессионалов, что минимизирует риски для здоровья и повышает эффективность лечения.
Углубиться в тему – [url=https://kapelnicza-ot-pokhmelya-nizhnij-novgorod-1.ru/]капельница от похмелья цена нижний новгород[/url]
вывод из запоя цены нижний новгород [url=https://vyvod-iz-zapoya-na-domu-nizhnij-novgorod-5.ru/]вывод из запоя цены нижний новгород[/url] .
вывод из запоя на дому [url=https://vyvod-iz-zapoya-na-domu-samara-11.ru/]вывод из запоя на дому[/url] .
Violet Harbor Shopping Portal – The interface feels clean and browsing is straightforward and simple.
dubai real estate market q3 Commercial Properties for Rent in Dubai grande apartments downtown dubai
Vale Cove Artisan Shopfront – Everything is laid out neatly, making the experience easy and natural.
Основной задачей капельницы от запоя является быстрое устранение симптомов интоксикации, связанных с длительным употреблением алкоголя. Введение в вену специальных растворов помогает не только вывести алкогольные токсины, но и восстановить нормальное функционирование внутренних органов, пострадавших от воздействия алкоголя. Подбор состава капельницы всегда индивидуален и зависит от состояния пациента, а также может включать дополнительные методы лечения, такие как кодирование от алкоголизма.
Узнать больше – http://kapelnica-ot-zapoya-nizhnij-novgorod-5.ru
Суть капельницы заключается в том, чтобы быстро ввести в организм необходимые растворы, которые помогают восстановить водно-солевой баланс, очищают организм от токсинов, ускоряют обмен веществ и снижают нагрузку на внутренние органы. Врачи-наркологи используют специальные составы, которые включают в себя жидкости, электролиты, витамины и лекарственные средства для снятия симптомов похмелья.
Разобраться лучше – http://kapelnicza-ot-pokhmelya-nizhnij-novgorod-2.ru
Заказали, придет посмотрим купить мефедрон и кокаин незнаю.сколько раз зака зывал , всегда приходило качество , был один момент когда был ркс 4. он был 15 минутный слабый. Но это сам реактив был такой. Он использовался как урб для добавок к другим. А так то что присылали всегда всё ровно. кач и кол..Жду решения регу оплатил. Адрес не получил.
Commerce Harbor Page – Took a lunch break peek and ended up staying much longer.
Процесс введения капельницы с медицинским контролем начинается с того, что медицинский специалист оценивает общее состояние пациента: измеряет артериальное давление, пульс, температуру тела, а также учитывает историю заболеваний. Это позволяет выбрать оптимальный состав растворов и препаратов для максимально быстрого и безопасного восстановления.
Подробнее – http://kapelnicza-ot-pokhmelya-nizhnij-novgorod-1.ru
Игнорирование выраженных симптомов может привести к развитию таких опасных состояний, как алкогольный делирий, острые психозы, инфаркт или инсульт. Вызов нарколога на дом круглосуточно позволяет оперативно стабилизировать состояние пациента в привычной для него обстановке, минимизируя стресс и риски, связанные с транспортировкой в стационар. Анонимный формат обращения обеспечивает конфиденциальность и делает помощь доступной даже для тех, кто опасается огласки.
Ознакомиться с деталями – [url=https://narkolog-na-dom-samara-6.ru/]нарколог на дом анонимно самара[/url]
вывод из запоя на дому 24 [url=https://vyvod-iz-zapoya-na-domu-nizhnij-novgorod-5.ru/]vyvod-iz-zapoya-na-domu-nizhnij-novgorod-5.ru[/url] .
банкротство пенсионеров
Банкротство пенсионеров — востребованная тема, потому что у этой категории должников часто есть особые жизненные обстоятельства. На sorryclosed.ru можно посмотреть, как работает процедура и что учитывать заранее.
Juniper Meadow Product Store – Everything is laid out neatly and easy to explore quickly.
Как отмечает ведущий научный сотрудник ФГБУН «НМИЦ психиатрии и наркологии» Минздрава России, наличие междисциплинарной команды — один из основных факторов, определяющих успех терапии при зависимости.
Получить дополнительные сведения – [url=https://lechenie-narkomanii-murmansk0.ru/]lechenie narkomanii i alkogolizma murmansk[/url]
Заказывали партию молибденовых листов для производства, качество металла идеальное, все сертификаты в наличии.
https://xn--80aeedb0bfzeok.xn--p1ai/catalog/mednye-zaglushki-pod-paiku/mednaia-zaglushka-kolpachok-pod-paiku-25kh21kh0-9-mm-16-4kh18-4-mm-miagkaia-paika-m2rm-gost-32590-2013/
view website – Interface is neat, content is clear, and navigating is simple.
visit the shop page – Still feels new, I’ll check again after some time.
Несмотря на кажущуюся простоту процедуры, капельница требует профессионального подхода. Неправильно подобранные препараты или дозировки могут привести к осложнениям, особенно при хронических заболеваниях. Поэтому проведение процедуры под контролем специалиста является ключевым фактором эффективности и безопасности.
Получить дополнительные сведения – [url=https://kapelnicza-ot-pokhmelya-samara-7.ru/]капельница от похмелья вызов на дом самара[/url]
мостбет игра mines [url=mostbet63740.help]mostbet63740.help[/url]
discover quartzorchard vendor listings – Smooth interface, navigation is simple and items are clear.
Browse Violet Harbor Outlet – The structure is simple and helps users move around without effort.
1win apk download [url=www.1win20938.help]www.1win20938.help[/url]
Упоминание нефтегазовой отрасли как ключевого потребителя
https://redmetsplav.ru/store/vismut/zarubezhnye-splavy-3/vismut-cacin221—jis-h-2202-2016/pokovka-vismutovaya-cacin221—jis-h-2202-2016/
cod promotional 1win [url=https://1win90843.help/]https://1win90843.help/[/url]
юрист по банкротству физических лиц
Юрист по банкротству физических лиц помогает оценить риски и подготовить документы. На sorryclosed.ru можно изучить саму процедуру и заранее понять, какие вопросы стоит задавать специалисту.
выведение из запоя стационар [url=https://vyvod-iz-zapoya-v-staczionare-sankt-peterburg.ru/]выведение из запоя стационар[/url] .
мелбет элсом пополнение [url=https://melbet27495.help/]https://melbet27495.help/[/url]
вывод из запоя в стационаре [url=https://vyvod-iz-zapoya-v-staczionare-sankt-peterburg-1.ru/]вывод из запоя в стационаре[/url] .
вывод из запоя в стационаре клиника [url=https://vyvod-iz-zapoya-v-staczionare-sankt-peterburg-2.ru/]вывод из запоя в стационаре клиника[/url] .
mostbet ҳисоби ман ворид [url=http://mostbet40827.help]mostbet ҳисоби ман ворид[/url]
вывод из запоя санкт-петербург стационар [url=https://vyvod-iz-zapoya-v-staczionare-sankt-peterburg-3.ru/]вывод из запоя санкт-петербург стационар[/url] .
Последние данные очков репутации: https://pravointellekta.ru такчто чставлю 100/100баллов магазу иУдачи и процветания!
Приятно удивлены скоростью обработки запроса на сайте, менеджер связался очень быстро.
https://xn--80aeedb0bfzeok.xn--p1ai/catalog/dvutavr-aliuminievyi/aliuminievyi-dvutavr-1935-3x13x5-gost-13621-90/
ipf properties dubai Palm Jumeirah Villas for Sale rent apartment dubai one month
выведение из запоя санкт петербург стационар [url=https://vyvod-iz-zapoya-v-staczionare-sankt-peterburg.ru/]выведение из запоя санкт петербург стационар[/url] .
Flintbrook Artisan Portal House – Browsing is fast, smooth, and uncomplicated throughout the site.
вызов врача нарколога на дом [url=https://narkolog-na-dom-moskva-1.ru/]narkolog-na-dom-moskva-1.ru[/url] .
вызов врача нарколога на дом москва [url=https://narkolog-na-dom-moskva-2.ru/]вызов врача нарколога на дом москва[/url] .
вывод из запоя стационарно [url=https://vyvod-iz-zapoya-v-staczionare-sankt-peterburg-3.ru/]вывод из запоя стационарно[/url] .
Вызов нарколога на дом в Самаре становится необходимым решением в ситуациях, когда состояние человека требует срочной медицинской помощи, но самостоятельное обращение в клинику затруднено или невозможно. Чаще всего речь идет об острых проявлениях алкогольной или наркотической интоксикации, выраженном похмельном синдроме, длительном запое, а также о случаях, когда у пациента наблюдаются тревожные симптомы — скачки давления, тахикардия, рвота, судороги, спутанность сознания. В подобных состояниях промедление может привести к серьезным осложнениям, поэтому выезд врача без ожидания позволяет оперативно стабилизировать состояние и предотвратить риски для здоровья.
Выяснить больше – [url=https://narkolog-na-dom-samara-5.ru/]вызвать нарколога на дом в самаре[/url]
featured picks – The site seems reliable and visually consistent right from the start.
вывод из запоя стационарно спб [url=https://vyvod-iz-zapoya-v-staczionare-sankt-peterburg-2.ru/]vyvod-iz-zapoya-v-staczionare-sankt-peterburg-2.ru[/url] .
вызвать нарколога на дом недорого москва цены [url=https://narkolog-na-dom-moskva-2.ru/]narkolog-na-dom-moskva-2.ru[/url] .
вывод из запоя в стационаре в спб [url=https://vyvod-iz-zapoya-v-staczionare-sankt-peterburg-1.ru/]вывод из запоя в стационаре в спб[/url] .
мостбет регистрация без кода [url=http://mostbet89276.help]http://mostbet89276.help[/url]
нарколог на дом [url=https://narkolog-na-dom-moskva-1.ru/]нарколог на дом[/url] .
Капельница от запоя в Нижнем Новгороде: эффективное выведение из запоя, детоксикация и медицинская помощь в наркологической клинике «Похмельная служба»
Подробнее можно узнать тут – [url=https://kapelnica-ot-zapoya-nizhnij-novgorod-5.ru/]капельницы от запоя вызов в нижнем новгороде[/url]
сроки банкротства физического лица
Сроки банкротства физического лица зависят от сложности дела и состава имущества. На sorryclosed.ru можно изучить примерную продолжительность процедуры и факторы, которые влияют на сроки.
Поковки и штабики — важные заготовки для металлургических предприятий
https://redmetsplav.ru/store/kobalt/wallex/kobalt-wallex-3-1/polosa-kobaltovaya-wallex-3-1/
handcrafted gems – Sections are clear and exploring the site is smooth.
Amber Harbor Merchant Gallery – The structure is solid overall, and everything is easy to read and access.
Chestnut Harbor Deals – Spent some time exploring and walked away with two small purchases.
Юрист по делам несовершеннолетних оказывает квалифицированную правовую помощь детям и их законным представителям. Переходите по запросу [url=https://www.pravovik24.ru/konsultatsii/yurist-po-delam-nesovershennoletnikh/]юридическая помощь по правам несовершеннолетних и защите их прав[/url]. Специалист защитит права ребёнка в судах и государственных органах, решит вопросы опеки, споры в семейных и уголовных делах. Консультации помогают быстро разобраться в ситуации и выбрать правильную стратегию защиты интересов несовершеннолетнего.
Violet Harbor Web Market – Content is well laid out and easy to explore step by step.
Редметсплав — надежный партнер, работаем по поставкам нержавеющего проката уже второй год, сбоев не было.
https://xn--80aeedb0bfzeok.xn--p1ai/catalog/latunnye-naruzhnye-stopornye-koltsa-po-din/latunoe-naruzhnoe-stopornoe-pruzhinnoe-koltso-m34-31-5kh1-5-mm-lmtssk-din-471/
вызвать нарколога на дом в москве [url=https://narkolog-na-dom-moskva-3.ru/]вызвать нарколога на дом в москве[/url] .
нет таких, а вымораживать рекламу других магазинов в этой ветке можно и минус в репу получить, есть другие ветки где обсуждаются реагенты от разных магазинов, а здесь обсуждается продукция данного ТСа , вкурил? https://conte-di-cavour.ru Беруууу часто через магазинПлохого и не слышал! Ребятке во всех дела достойно поступают!
Shop at Teal Harbor – It’s visually pleasant and doesn’t tire the eyes when reading details.
Vale Harbor Craft Gallery – The pages render fast and the overall design feels clean and modern.
выезд нарколога на дом [url=https://narkolog-na-dom-moskva-3.ru/]выезд нарколога на дом[/url] .
online showcase – The site feels cozy and everything is easy to find.
Современный бизнес не прощает некачественной полиграфии: визитка, листовка или брошюра — это лицо компании, и здесь важна каждая деталь. Московская типография Самрай предлагает полный спектр полиграфических услуг: от печати визиток, буклетов и календарей до широкоформатных баннеров, картин на холсте и табличек на металле. На сайте https://samray.ru/ можно ознакомиться с прайсом, загрузить макет и получить оперативный расчёт заказа. Специалисты работают ежедневно, принимают оплату любым удобным способом и гарантируют высокое качество даже при срочном тираже.
Услуги нарколога на дому в Самаре включают не только экстренный осмотр, но и комплекс медицинских мероприятий, направленных на снижение интоксикации, облегчение тяжелых симптомов и общее восстановление состояния пациента. Объем помощи зависит от клинической картины, длительности употребления алкоголя или других психоактивных веществ, возраста, хронических заболеваний и текущих рисков. Врач подбирает схему индивидуально, исходя из того, какие задачи необходимо решить в конкретный момент — снять острые проявления, стабилизировать самочувствие или подготовить пациента к дальнейшему лечению зависимости.
Изучить вопрос глубже – [url=https://narkolog-na-dom-samara-5.ru/]вызов нарколога на дом[/url]
списание долгов законно
Если интересует списание долгов законно, важно сразу изучить реальные основания и ограничения. На sorryclosed.ru собрана базовая информация по процедуре и вариантам решения долговой нагрузки.
помощь нарколога на дому в москве [url=https://narkolog-na-dom-moskva-4.ru/]помощь нарколога на дому в москве[/url] .
срочный вывод из запоя на дому [url=https://vyvod-iz-zapoya-na-domu-samara-16.ru/]срочный вывод из запоя на дому[/url] .
high search terms in real estate in dubai Benefits of Buying Property in Dubai arabian ranches villas for sale
Сайт работает стабильно и быстро загружается
https://redmetsplav.ru/store/magniy-i-ego-splavy/zarubezhnye-splavy-2/magniy-g-mgse3zn2zr1—din-1729-part-2/folga-magnievaya-g-mgse3zn2zr1—din-1729-part-2/
Процесс капельницы включает внутривенное введение различных растворов, которые помогают нейтрализовать эффекты алкогольной интоксикации, включая последствия запоя и алкоголизма. Наиболее часто в составе капельницы используются солевые и глюкозные растворы, витамины группы B, а также препараты для детоксикации организма. Эти компоненты помогают быстро восстановить водно-электролитный баланс, улучшить обмен веществ и ускорить выведение продуктов распада алкоголя.
Разобраться лучше – http://kapelnicza-ot-pokhmelya-samara-6.ru
Bônus de cadastro PG Slot: R$20 vira 300 giros grátis!
mostbet tizimga kirish [url=https://www.mostbet04826.help]https://www.mostbet04826.help[/url]
мелбет приветственный пакет бонусов [url=http://melbet53847.help]http://melbet53847.help[/url]
нарколог москва на дом [url=https://narkolog-na-dom-moskva-4.ru/]нарколог москва на дом[/url] .
наркология вывод из запоя [url=https://vyvod-iz-zapoya-na-domu-samara-16.ru/]vyvod-iz-zapoya-na-domu-samara-16.ru[/url] .
Услуги нарколога на дому в Самаре включают не только экстренный осмотр, но и комплекс медицинских мероприятий, направленных на снижение интоксикации, облегчение тяжелых симптомов и общее восстановление состояния пациента. Объем помощи зависит от клинической картины, длительности употребления алкоголя или других психоактивных веществ, возраста, хронических заболеваний и текущих рисков. Врач подбирает схему индивидуально, исходя из того, какие задачи необходимо решить в конкретный момент — снять острые проявления, стабилизировать самочувствие или подготовить пациента к дальнейшему лечению зависимости.
Углубиться в тему – https://narkolog-na-dom-samara-5.ru/
melbet retirer gains mines [url=https://melbet57184.help/]https://melbet57184.help/[/url]
https://shorturl.fm/zA6uW
Реализация твердых сплавов типа «Победит» ориентирована на производителей металлорежущего и бурового инструмента.
https://rms-ekb.ru/catalog/ugolok-stalnoi/ugolok-iz-konstruktsionnoi-stali-200kh100kh10-mm-42crmo4-en-10056-1/
Sky Harbor Online Shop – the design is simple and I had no trouble using it
юрист по банкротству физических лиц
Юрист по банкротству физических лиц помогает оценить риски и подготовить документы. На sorryclosed.ru можно изучить саму процедуру и заранее понять, какие вопросы стоит задавать специалисту.
лечение запоя в стационаре санкт петербург [url=https://vyvod-iz-zapoya-v-staczionare-sankt-peterburg.ru/]vyvod-iz-zapoya-v-staczionare-sankt-peterburg.ru[/url] .
Врач-нарколог, оценивая состояние пациента, может рекомендовать проведение капельницы для ускоренного восстановления организма. Применение капельницы позволяет снять острые симптомы интоксикации и снизить риск развития более серьезных последствий. В некоторых случаях, если необходимо интенсивное наблюдение, пациенту может быть предложено лечение в стационаре, и услугу можно заказать на летний период для более длительного контроля.
Выяснить больше – [url=https://kapelnica-ot-zapoya-nizhnij-novgorod-4.ru/]капельницы от запоя вызов в нижнем новгороде[/url]
TimberTrail rustic shop – gives off cozy woodland shop energy with a genuine handmade feel.
https://5sim-ru.vercel.app/service/telegram
find more here – The site keeps things simple and the content is easy to understand.
а вот по этой теме отпиши по подробней,точнее о том как там дальше события развиваются?????????? очень волнует данная тема. как же так их просекла легавня???? откуда краснотой веет.??? купить мефедрон, бошки, гашиш Готовыми работаюту нас сейчас 6-apb нет в России…
выведение из запоя в стационаре [url=https://vyvod-iz-zapoya-v-staczionare-sankt-peterburg.ru/]выведение из запоя в стационаре[/url] .
Четкое позиционирование как эксперта в области редких металлов
https://redmetsplav.ru/store/magniy-i-ego-splavy/zarubezhnye-splavy-2/magniy-ms6—jis-h-4204/prutok-magnievyy-ms6—jis-h-4204/
вход мостбет [url=https://mostbet63740.help/]https://mostbet63740.help/[/url]
Капельницы помогают не только справиться с симптомами похмелья, но и с выводом токсинов из организма, что способствует его быстрому восстановлению. Этот метод позволяет минимизировать последствия, такие как головная боль, нарушение давления и общее недомогание.
Изучить вопрос глубже – [url=https://kapelnicza-ot-pokhmelya-samara-1.ru/]капельница от похмелья[/url]
нарколог на дом анонимно москва [url=https://narkolog-na-dom-moskva-2.ru/]нарколог на дом анонимно москва[/url] .
вывод из запоя в стационаре в спб [url=https://vyvod-iz-zapoya-v-staczionare-sankt-peterburg-3.ru/]вывод из запоя в стационаре в спб[/url] .
Спецстали для машиностроения закупаем только здесь, надежность материала подтверждена испытаниями.
https://xn--80aeedb0bfzeok.xn--p1ai/catalog/latunnaia-polosa/latunnaia-polosa-0-4×550-mm-l68-gost-931-90/
Для тех, кто ищет информацию по теме “Как успешно переехать в Адыгею: советы и реальность”, нашел много полезного.
Вот, делюсь ссылкой:
[url=https://newseburg.ru/%d0%b1%d0%b5%d0%b7-%d1%80%d1%83%d0%b1%d1%80%d0%b8%d0%ba%d0%b8/pereezd-v-adygeyu-posle-moskvy-i-zarubezhya-kak-podgotovitsya-bez-illyuzij/]https://newseburg.ru/%d0%b1%d0%b5%d0%b7-%d1%80%d1%83%d0%b1%d1%80%d0%b8%d0%ba%d0%b8/pereezd-v-adygeyu-posle-moskvy-i-zarubezhya-kak-podgotovitsya-bez-illyuzij/[/url]
«Стальной алхимик: Братство» — аниме, где наука и магия сплавлены в единое искусство алхимии, живущее по жестокому закону равновесия: чтобы получить — нужно отдать. Братья Элрики нарушают главный запрет, пытаясь воскресить мать, и платят чудовищную цену: Эдвард теряет руку и ногу, душа Альфонса заточена в броне. Ищете онлайн стальной алхимик все серии? На stalnoy-alhimik-kinogo.vip все 64 серии доступны бесплатно в хорошем качестве с профессиональной озвучкой. Впереди у них — охота за философским камнем и страшное открытие о том, какой ценой держится государство Аместрис.
Timber Trail marketplace – The structure is clean and browsing feels intuitive overall.
aqua properties office in dubai Palm jumeirah villas for sale emaar 6 towers
вывод из запоя в стационаре в санкт-петербурге [url=https://vyvod-iz-zapoya-v-staczionare-sankt-peterburg-3.ru/]вывод из запоя в стационаре в санкт-петербурге[/url] .
нарколог на дом в клинике москва [url=https://narkolog-na-dom-moskva-2.ru/]narkolog-na-dom-moskva-2.ru[/url] .
эпоксидные полы москва
Ассортимент компании включает более 100 000 позиций, что позволяет закрыть практически любые потребности металлургического производства.
https://rms-ekb.ru/catalog/ugolok-stalnoi/ugolok-stalnoi-12kh17-150x150x15-gost-8509-93/
Artisan Trail House Shop – Everything works smoothly, product photos feel a bit dim.
Violet Harbor Shopping Portal – The interface feels clean and browsing is straightforward and simple.
бесплатное банкротство через МФЦ
Бесплатное банкротство через МФЦ подходит только при соблюдении установленных условий. На sorryclosed.ru можно быстро проверить базовые критерии и понять, есть ли шанс пройти процедуру без суда.
Lemon Lark Collection Hub – the design is tidy and makes searching for items very easy
Lemon Lark Online Showcase – I could navigate comfortably and find what I needed quickly
stylish picks – I like how everything is neatly organized and visually balanced.
1win бонус барои букмекер [url=https://1win20938.help/]https://1win20938.help/[/url]
Возможность заказать листы и полосы нестандартных размеров
https://redmetsplav.ru/store/vismut/zarubezhnye-splavy-3/vismut-811—en-iso-9453/provoloka-vismutovaya-811—en-iso-9453/
лечение запоя в стационаре [url=https://vyvod-iz-zapoya-v-staczionare-sankt-peterburg-1.ru/]лечение запоя в стационаре[/url] .
check this exchange – I didn’t expect much, but I found a special jewelry piece.
вызвать врача нарколога на дом [url=https://narkolog-na-dom-moskva-1.ru/]вызвать врача нарколога на дом[/url] .
click to explore – It is well organized and simple for first-time users to navigate.
Выезд нарколога на дом — это медицинская услуга, которая подразумевает не только экстренную помощь, но и полноценное обследование пациента в комфортных для него условиях. В наркологической клинике «Частный медик 24» мы обеспечиваем профессиональное лечение на дому, которое включает в себя несколько важных этапов, чтобы стабилизировать состояние пациента, улучшить его самочувствие и снизить риски дальнейших осложнений.
Получить больше информации – http://narkolog-na-dom-samara-2.ru
мелбет сроки верификации [url=http://melbet27495.help]мелбет сроки верификации[/url]
Домашний формат ценят не только за удобство. Он помогает начать лечение анонимно, без дороги, без ожидания и без лишнего стресса для пациента. Для многих семей именно выездной наркологическая маршрут становится первой точкой, с которой начинается более серьёзное восстановление: обсуждаются не только снятие острых симптомов, но и кодирование, реабилитация, повторная консультация, а при необходимости — и маршруты помощи при наркомании. Особенно это актуально, если человек употребляет давно, уже несколько лет сталкивается со срывами и сам замечает, что проблема перестала ограничиваться только плохим самочувствием после алкоголя.
Детальнее – [url=https://narkolog-na-dom-voronezh-2.ru/]врач нарколог на дом воронеж[/url]
Капельница от похмелья в Самаре с подбором препаратов, улучшением самочувствия и наблюдением в наркологической клинике «Частный медик 24»
Подробнее тут – [url=https://kapelnicza-ot-pokhmelya-samara.ru/]капельница от похмелья на дому[/url]
Для жителей Воронежа выезд нарколога на дом — это быстрый и удобный способ получить экстренную помощь. Когда человек переживает запой, а его физическое и эмоциональное состояние быстро ухудшается, наркологическая помощь на дому становится оптимальным решением. Врач приезжает и немедленно оценивает состояние пациента: проверяет его пульс, давление, частоту дыхания, уровень сознания и другие важные показатели. Это помогает составить точный план лечения, который будет направлен на восстановление организма, снятие токсинов и стабилизацию состояния пациента.
Получить больше информации – [url=https://narkolog-na-dom-voronezh-4.ru/]нарколог на дом цена в воронеже[/url]
мостбет ворид шудан бе парол [url=http://mostbet40827.help]http://mostbet40827.help[/url]
Хочу описать работу магазина.Ну начну клад получил вчера с момента отправки прошло 3ое суток супер,маскировка на 5 балов молодцы спасибо за книгу от души буду духовно развиваться товар бомба основа горит отлично в общем оценка 5 твердая))))) купить мефедрон, бошки, гашиш Может быть, не отрицаю. Пока никого винить не буду, потому что вполне возможно что я и сам закосячил. Но вроде все правильно делал. При том я не один такой..До этого приходил ам (окло недели-полторы, назад) делал все точно так же, но только на черной заварке принцесса Нури, 1 к 10, и с водника уносило далекоооо….всех кто пробовал этот водник..вобщем моя командировка в Столицу нашей родины удалась ) день переговоров и 6 дней удовльствия !!!!!
Качество сварочных материалов на высоте, электроды варят отлично, состав металла стабильный.
https://xn--80aeedb0bfzeok.xn--p1ai/catalog/melkhiorovaia-truba/melkhiorovaia-truba-15kh1-2kh8000-mm-mnzhmts10-1-1-gost-10092-2006/
Капельница от похмелья в Самаре с подбором препаратов, улучшением самочувствия и наблюдением в наркологической клинике «Частный медик 24»
Изучить вопрос глубже – [url=https://kapelnicza-ot-pokhmelya-samara.ru/]капельница от похмелья цена в самаре[/url]
вывод из запоя в больнице [url=https://vyvod-iz-zapoya-v-staczionare-sankt-peterburg-1.ru/]вывод из запоя в больнице[/url] .
Cashback semanal ajudou muita banca a fechar no verde.
Timber Grove Emporium homepage – navigation is simple with a neat layout.
вызов врача нарколога [url=https://narkolog-na-dom-moskva-1.ru/]вызов врача нарколога[/url] .
ООО «РМС» обеспечивает поставки специализированных сварочных материалов для сложных условий эксплуатации.
https://rms-ekb.ru/catalog/list/list-u12a-11x1000x1000-gost-19903-2006/
мостбет как скачать [url=https://mostbet89276.help/]https://mostbet89276.help/[/url]
вывод из запоя спб стационар [url=https://vyvod-iz-zapoya-v-staczionare-sankt-peterburg-2.ru/]вывод из запоя спб стационар[/url] .
explore quickridge market – Layout feels clean, navigating between items is quick and intuitive.
Chestnut Harbor retail hub – I liked how clean the layout is and how easy everything is to use.
Apricot Meadow vendor platform – The site structure is clear and supports effortless navigation.
Wind Cove Craft Market – Everything flows smoothly and browsing is very straightforward.
jumeirah golf estates dubai images Townhouses for Sale in Dubai successful business in uae
вывод из запоя в наркологическом стационаре [url=https://vyvod-iz-zapoya-v-staczionare-sankt-peterburg-2.ru/]вывод из запоя в наркологическом стационаре[/url] .
Violet Harbor Market Place – Everything is easy to access and the browsing experience feels smooth.
Описание применения металлов в атомной энергетике подчеркивает качество
https://redmetsplav.ru/store/vismut/zarubezhnye-splavy-3/vismut-c-6801—jis-h-3250-2015/polosa-vismutovaya-c-6801—jis-h-3250-2015/
Snow Harbor Product Showcase – interface performance is snappy and easy to use
банкротство физических лиц
Банкротство физических лиц — законный способ решить проблему с непосильными долгами. На sorryclosed.ru можно разобраться в этапах процедуры, рисках и условиях списания задолженности.
выведение из запоя санкт петербург стационар [url=https://vyvod-iz-zapoya-v-staczionare-sankt-peterburg.ru/]выведение из запоя санкт петербург стационар[/url] .
Промышленные предприятия, молочные фермы и коммунальные объекты по всей России сталкиваются с одной общей проблемой — некачественная вода разрушает оборудование и увеличивает себестоимость производства. Компания PWS предлагает решение: индивидуальные системы водоочистки, спроектированные под конкретный источник воды и профиль предприятия. Все установки соответствуют российским СанПиН, а подробности на https://pws.world/promyshlennye-ustanovki подтверждают: локализованное производство обеспечивает быструю замену деталей и минимальный простой. Оборотное водоснабжение сокращает издержки и экологические платежи уже с первого года эксплуатации.
pin-up support [url=http://pinup41537.help/]pin-up support[/url]
вызов нарколога на дом москва цены [url=https://narkolog-na-dom-moskva-3.ru/]вызов нарколога на дом москва цены[/url] .
стационар вывод из запоя [url=https://vyvod-iz-zapoya-v-staczionare-sankt-peterburg.ru/]стационар вывод из запоя[/url] .
Редкие и тугоплавкие металлы всегда в наличии или под заказ в короткие сроки, рекомендую.
https://xn--80aeedb0bfzeok.xn--p1ai/catalog/mednye-zaglushki-pod-paiku/mednaia-zaglushka-kolpachok-pod-paiku-106kh92kh2-1-mm-47-5kh51-5-mm-tverdaia-paika-m2-gost-32590-2013/
Acorn Harbor Vendor Hall Home – The layout is well structured and very easy to understand at first glance.
check this vendor shop – The quality shines while the pricing stays reasonable.
Нарколог на дом в Самаре с выездом специалиста, детоксикацией и анонимной медицинской помощью в наркологической клинике «Частный медик 24»
Детальнее – [url=https://narkolog-na-dom-samara-1.ru/]вызвать нарколога на дом самара[/url]
Выезд нарколога на дом в Самаре — это комплексный подход к лечению, который включает несколько этапов. Врач, приехавший на место, не ограничивается одной процедурой, а проводит полноценный осмотр, диагностирует состояние пациента, определяет причину ухудшения самочувствия и подбирает индивидуальную терапию. Наиболее часто при выезде нарколога на дом используются капельницы, антиеметики и препараты для стабилизации состояния пациента, снятия симптомов абстиненции и улучшения общего самочувствия.
Детальнее – [url=https://narkolog-na-dom-samara-1.ru/]нарколог на дом в самаре[/url]
нарколог дешево на дом [url=https://narkolog-na-dom-moskva-3.ru/]нарколог дешево на дом[/url] .
Опыт работы с более чем 120 постоянными заказчиками свидетельствует о высокой стабильности и надежности поставок.
https://rms-ekb.ru/catalog/ugolok-stalnoi/ugolok-iz-konstruktsionnoi-stali-200kh200kh16-mm-x2crnin23-4-en-10088-3/
Магазин работает ровно !!! Качество реагента высокое!!! купить мефедрон, бошки, гашиш Шива я тебя люблю!!! У тебя лучший и мой самый любимый мефедрон!!!.продавец адекватный. Успешных вам продаж
В Самаре клиника «Частный медик 24» предоставляет круглосуточную помощь по выведению из запоя и снятию симптомов похмелья. Когда человек сталкивается с тяжёлым состоянием после длительного употребления алкоголя, важно вовремя оказать помощь. Врач приедет на дом и проведёт все необходимые процедуры, включая капельницу, которая поможет восстановить водно-электролитный баланс, нормализовать уровень сахара в крови и вывести токсины из организма.
Детальнее – [url=https://kapelnicza-ot-pokhmelya-samara-2.ru/]капельница от похмелья вызов на дом в самаре[/url]
В Воронеже услуга «нарколог на дом» востребована прежде всего тогда, когда состояние развивается быстро, а запас сил у пациента почти исчерпан. После нескольких дней употребления человеку бывает трудно даже выйти из квартиры: сохраняются слабость, дрожь, бессонница, тошнота, скачки давления, потливость, раздражительность и ощущение, что без новой дозы алкоголя легче уже не станет. Именно в этот момент домашний выезд специалиста помогает разорвать опасный цикл. Наркологическая помощь начинается там, где человек находится, а не там, куда он в идеале должен был бы доехать.
Ознакомиться с деталями – [url=https://narkolog-na-dom-voronezh-1.ru/]вызвать нарколога на дом[/url]
вывод из запоя самара [url=https://vyvod-iz-zapoya-na-domu-samara-17.ru/]вывод из запоя самара[/url] .
Такие симптомы важны не только сами по себе. Они показывают, что организму уже трудно поддерживать стабильность без медицинского вмешательства. Чем дольше в этот момент ждать, тем выше вероятность, что потребуется более жёсткий формат оказания помощи. Поэтому экстренное обращение в некоторых случаях не просто облегчает состояние, а предотвращает дальнейшее ухудшение здоровья.
Подробнее – [url=https://narkolog-na-dom-voronezh-1.ru/]нарколог на дом[/url]
мостбет crash 2026 [url=http://mostbet52746.help/]http://mostbet52746.help/[/url]
При выезде нарколога на дом в Самаре мы проводим диагностику состояния пациента, чтобы понять, какие препараты и процедуры необходимы для стабилизации. Это может включать регидратацию, витамины группы B, антиеметики и другие препараты для снятия симптомов похмелья. Все препараты подбираются индивидуально в зависимости от состояния пациента и его нужд. Это позволяет значительно сократить время на восстановление и быстро вернуться к нормальному состоянию.
Подробнее – [url=https://kapelnicza-ot-pokhmelya-samara-1.ru/]капельница от похмелья на дом[/url]
handpicked goods – The layout looks sleek and all content is clearly organized.
Капельница от похмелья в Самаре с выездом на дом, восстановлением водного баланса и медицинской помощью в наркологической клинике «Частный медик 24»
Получить больше информации – [url=https://kapelnicza-ot-pokhmelya-samara-1.ru/]капельница от похмелья в самаре[/url]
Caramel Trail support page – The reply came quickly and made the experience feel efficient and friendly.
Корзина на сайте промышленного предприятия — удобный инструмент для формирования заявки
https://redmetsplav.ru/store/magniy-i-ego-splavy/zarubezhnye-splavy-2/magniy-as41b—astm-b275/poroshok-magnievyy-as41b—astm-b275/
вывод из запоя в стационаре клиника [url=https://vyvod-iz-zapoya-v-staczionare-sankt-peterburg-3.ru/]вывод из запоя в стационаре клиника[/url] .
Wave Trail Artisan Center – The site is tidy and content is easy to browse without difficulty.
вывод из запоя на дому в самаре [url=https://vyvod-iz-zapoya-na-domu-samara-17.ru/]vyvod-iz-zapoya-na-domu-samara-17.ru[/url] .
стоимость банкротства физических лиц
Стоимость банкротства физических лиц зависит от формата процедуры и сопутствующих расходов. На sorryclosed.ru можно посмотреть, из чего складываются затраты и на что обратить внимание заранее.
доктор вывод из запоя [url=https://vyvod-iz-zapoya-na-domu-samara-16.ru/]vyvod-iz-zapoya-na-domu-samara-16.ru[/url] .
вывод из запоя стационарно спб [url=https://vyvod-iz-zapoya-v-staczionare-sankt-peterburg-3.ru/]vyvod-iz-zapoya-v-staczionare-sankt-peterburg-3.ru[/url] .
вызвать нарколога на дом [url=https://narkolog-na-dom-moskva-2.ru/]вызвать нарколога на дом[/url] .
Индивидуальный подход к нестандартным заказам — изготовили детали по нашим чертежам точно в размер.
https://xn--80aeedb0bfzeok.xn--p1ai/catalog/latunnoe-litoe-koltso/latunnoe-litoe-koltso-150kh800-mm-lts30a3/
frostrivertradehouse – The layout is neat and content is easy to follow.
вызвать нарколога на дом москва цены [url=https://narkolog-na-dom-moskva-4.ru/]вызвать нарколога на дом москва цены[/url] .
Как подчёркивает заведующий отделением наркологической помощи НМИЦ психиатрии и наркологии, результат лечения напрямую зависит от уровня подготовки персонала и умения работать в команде.
Подробнее – [url=https://narkologicheskaya-klinika-murmansk0.ru/]частная наркологическая клиника мурманская область[/url]
Капельница от похмелья применяется, когда симптомы интоксикации становятся выраженными и мешают нормальной жизнедеятельности пациента. Основные показания для использования капельницы включают:
Узнать больше – [url=https://kapelnicza-ot-pokhmelya-samara-1.ru/]капельница от похмелья самара[/url]
нарколог на дом цена [url=https://narkolog-na-dom-moskva-2.ru/]нарколог на дом цена[/url] .
срочно из запоя [url=https://vyvod-iz-zapoya-na-domu-samara-16.ru/]vyvod-iz-zapoya-na-domu-samara-16.ru[/url] .
1win ikki bosqichli himoya [url=www.1win5751.help]www.1win5751.help[/url]
В каталоге представлены конденсаторные ниобиевые порошки высокой чистоты, необходимые для современной электроники.
https://rms-ekb.ru/catalog/ugolok-stalnoi/ugolok-iz-konstruktsionnoi-stali-80kh80kh10-mm-16crmo44-en-10056-2/
вызвать нарколога на дом цены [url=https://narkolog-na-dom-moskva-4.ru/]вызвать нарколога на дом цены[/url] .
услуги нарколога на дому цена [url=https://narkolog-na-dom-moskva-1.ru/]услуги нарколога на дому цена[/url] .
online showcase – It feels pleasant to browse and everything is kept neat and well arranged.
всё граммотно делают! купить мефедрон, бошки, гашиш Надеюсь этот вопрос решится …….Братья, у меня вопрос. JV-30 как? Боюсь нарваться на регу с которой крышу сносит. Ответьте пожалуйста.
Нарколог на дом — это удобное и эффективное решение для тех, кто сталкивается с тяжелыми последствиями запоя или алкогольной интоксикации. В наркологической клинике «Частный медик 24» в Самаре мы предоставляем круглосуточную помощь, выезд нарколога и лечение на дому. Это позволяет пациентам получить профессиональную медицинскую помощь в удобной и знакомой обстановке, что особенно важно, когда состояние человека ухудшается после длительного употребления алкоголя или наркотиков.
Узнать больше – [url=https://narkolog-na-dom-samara-2.ru/]www.domen.ru[/url]
вызов нарколога на дом в москве цена [url=https://narkolog-na-dom-moskva-1.ru/]вызов нарколога на дом в москве цена[/url] .
Юрист по делам несовершеннолетних оказывает квалифицированную правовую помощь детям и их законным представителям. Переходите по запросу [url=https://www.pravovik24.ru/konsultatsii/yurist-po-delam-nesovershennoletnikh/]бесплатная консультация юриста по делам несовершеннолетних[/url]. Специалист защитит права ребёнка в судах и государственных органах, решит вопросы опеки, споры в семейных и уголовных делах. Консультации помогают быстро разобраться в ситуации и выбрать правильную стратегию защиты интересов несовершеннолетнего.
Упоминание нефтегазовой отрасли как ключевого потребителя
https://redmetsplav.ru/store/magniy-i-ego-splavy/zarubezhnye-splavy-2/magniy-mag-131—bs-3370/lenta-magnievaya-mag-131—bs-3370/
Капельница от похмелья — это один из наиболее эффективных методов экстренной медицинской помощи, который позволяет быстро снять симптомы алкогольной интоксикации и восстановить организм после злоупотребления алкоголем. В наркологической клинике «Частный медик 24» в Самаре мы предоставляем услугу выезда нарколога на дом и капельной терапии для пациентов, испытывающих тяжёлые симптомы похмелья. Это удобный способ получить необходимую помощь без лишнего стресса, сохраняя анонимность и комфорт пациента.
Подробнее тут – https://kapelnicza-ot-pokhmelya-samara-1.ru/
помощь должникам по кредитам
Помощь должникам по кредитам должна быть законной и понятной. На sorryclosed.ru собраны материалы для тех, кто ищет варианты снижения долговой нагрузки и хочет разобраться в банкротстве без лишних обещаний.
Harbor Stone Outlet Exchange – The design is simple and content is easy to browse through.
rental from dubai properties 3 bedroom villa for sale in springs dubai apartments for 10 years rent in dubai
Shop Violet Harbor Collection – Pages are arranged well and it’s easy to find what you’re looking for.
Прозрачное оформление документов и быстрое выставление счетов, приятно работать с профессионалами.
https://xn--80aeedb0bfzeok.xn--p1ai/catalog/mednye-troiniki-press/mednyi-press-troinik-40-5-mm-m3m-gost-r-52948-2008/
Нужен мощный, но не хотите переплачивать? Возьмите технику в аренду! У https://chistydom.by/ нас выгодная аренда моющего пылесоса для глубокой очистки ковров и мебели. Победите застарелые пятна с паром: доступна аренда пароочистителя и эффективного отпаривателя на прокат. После ремонта незаменима аренда строительного пылесоса, а для идеальных стен берите Лазерный уровень в аренду. Хотите чистые окна без усилий? Закажите робот мойщик окон в аренду с доставкой. Низкие цены на прокат премиум-оборудования уже ждут вас!
При выезде на дом помощь строится по медицинской логике, а не по принципу «поставить капельницу и уехать». Сначала врач уточняет длительность употребления, объём алкоголя, наличие хронических заболеваний, перенесённые эпизоды судорог, перепады давления, боли в груди, нарушения ритма, травмы, сахарный диабет, аллергию и перечень уже принятых препаратов. После этого оцениваются сознание, частота пульса, артериальное давление, дыхание, температура, насыщение крови кислородом, выраженность обезвоживания и неврологический статус. Только на основании этой картины формируется домашний маршрут: инфузионная терапия, противорвотная поддержка, коррекция вегетативных нарушений, рекомендации на ночь, контроль связи с врачом и критерии, при которых требуется срочная повторная помощь. Такой подход актуален не только при запоях на фоне алкоголизма, но и в случаях, когда требуется первичная консультация по более сложным формам зависимости, включая состояния, связанные с наркоманией.
Подробнее можно узнать тут – [url=https://narkolog-na-dom-voronezh.ru/]нарколог на дом цена[/url]
Нарколог на дом — это не просто возможность получить медицинскую помощь в удобное время, но и решение важнейших задач по стабилизации состояния пациента, избавлению от острых симптомов абстиненции и восстановлению его здоровья. В случае с алкоголизмом и наркоманией выезд врача на дом в Воронеже — это важный шаг к восстановлению, который начинается там, где пациент находится, в удобной и привычной обстановке. Клиника «Частный медик 24» предлагает круглосуточные выезды нарколога, предоставляя экстренную помощь при запоях, наркозависимости, а также консультации по дальнейшему лечению и реабилитации. Врач приедет по указанному адресу и проведёт все необходимые процедуры, включая капельницы для стабилизации состояния пациента.
Выяснить больше – [url=https://narkolog-na-dom-voronezh-4.ru/]нарколог на дом цена в воронеже[/url]
вывод из запоя в стационаре спб [url=https://vyvod-iz-zapoya-v-staczionare-sankt-peterburg.ru/]вывод из запоя в стационаре спб[/url] .
Harbor Hub Online Store – This is my second time this week checking them out, and it’s growing on me.
прокапаться от алкоголя в стационаре [url=https://vyvod-iz-zapoya-v-staczionare-sankt-peterburg-1.ru/]vyvod-iz-zapoya-v-staczionare-sankt-peterburg-1.ru[/url] .
1win розыгрыш [url=http://1win20938.help/]http://1win20938.help/[/url]
https://strendus-bet.com.mx/
Strendus es un casino mexicano lanzado en 2020 por New Ads, S.A. de C.V. bajo la regulacion de SEGOB, pensado especialmente para el mercado mexicano lejos de ser una conversion literal de sitios europeos.
выведение из запоя в стационаре [url=https://vyvod-iz-zapoya-v-staczionare-sankt-peterburg.ru/]выведение из запоя в стационаре[/url] .
Нарколог на дом — это удобное и эффективное решение для тех, кто сталкивается с тяжелыми последствиями запоя или алкогольной интоксикации. В наркологической клинике «Частный медик 24» в Самаре мы предоставляем круглосуточную помощь, выезд нарколога и лечение на дому. Это позволяет пациентам получить профессиональную медицинскую помощь в удобной и знакомой обстановке, что особенно важно, когда состояние человека ухудшается после длительного употребления алкоголя или наркотиков.
Изучить вопрос глубже – [url=https://narkolog-na-dom-samara-2.ru/]врач нарколог на дом самара[/url]
Опыт работы с более чем 120 постоянными заказчиками свидетельствует о высокой стабильности и надежности поставок.
https://rms-ekb.ru/catalog/list/list-9kh2-2x1000x2000-gost-19903-74/
https://wazamba-bet.com.mx/
Wazamba se presenta como un casino online que surgio en 2019 con una oferta novedosa y con una identidad visual diferente, poniendo a disposicion mas de 4 mil titulos, entre tragamonedas, casino en vivo y mercados de apuestas deportivas, todo integrado en una unica plataforma.
Запрос на выезд врача связан не только с классическим запоем. На практике домашняя помощь нужна в разных ситуациях, когда организму уже трудно компенсировать последствия употребления, а откладывание визита увеличивает риск осложнений.
Изучить вопрос глубже – [url=https://narkolog-na-dom-voronezh-2.ru/]вызов нарколога на дом в воронеже[/url]
Нарколог на дом — это удобное и эффективное решение для тех, кто сталкивается с тяжелыми последствиями запоя или алкогольной интоксикации. В наркологической клинике «Частный медик 24» в Самаре мы предоставляем круглосуточную помощь, выезд нарколога и лечение на дому. Это позволяет пациентам получить профессиональную медицинскую помощь в удобной и знакомой обстановке, что особенно важно, когда состояние человека ухудшается после длительного употребления алкоголя или наркотиков.
Подробнее – [url=https://narkolog-na-dom-samara-2.ru/]вызов нарколога на дом в самаре[/url]
вывод из запоя в стационаре спб [url=https://vyvod-iz-zapoya-v-staczionare-sankt-peterburg-1.ru/]вывод из запоя в стационаре спб[/url] .
https://strendus-bet.com.mx/
Strendus representa un casino mexicano operativo desde 2020 a cargo de New Ads, S.A. de C.V. con supervision de SEGOB, disenado expresamente para la audiencia nacional y no a modo de una simple copia traducida de sitios europeos.
vale cove gallery – The interface is simple to use and the overall layout feels very user-friendly.
краш мелбет [url=https://melbet27495.help]https://melbet27495.help[/url]
банкротство ИП
Банкротство ИП требует отдельного внимания к статусу предпринимателя и структуре долгов. На sorryclosed.ru можно изучить базовые различия между банкротством физлица и индивидуального предпринимателя.
Капельница от похмелья — это эффективный способ экстренной помощи, предназначенный для того, чтобы помочь организму быстро восстановиться после злоупотребления алкоголем. В наркологической клинике «Частный медик 24» в Самаре мы предоставляем услугу безопасной детоксикации и восстановления 24/7. Капельница помогает организму вывести токсины, восстановить водно-электролитный баланс и улучшить общее состояние пациента, не создавая дополнительных нагрузок на сердце, печень и почки.
Исследовать вопрос подробнее – [url=https://kapelnicza-ot-pokhmelya-samara-2.ru/]капельница от похмелья на дому самара[/url]
мостбет app download [url=mostbet40827.help]mostbet40827.help[/url]
Технические характеристики сплавов помогают инженерам в подборе
https://redmetsplav.ru/store/tantal-i-ego-splavy/tantal-ta/pokovka-tantalovaya-ta/
Glassway производит полный спектр архитектурных решений для коммерческих и жилых объектов: потолки Hook On, Clip In, Грильято, кассетные системы, алюминиевые и стеклянные перегородки, светодиодные светильники, облицовочные панели, алюминиевые двери и плинтусы. Прямое сотрудничество с заказчиком без посредников — заводские цены, штатные монтажные бригады и собственный инженерный отдел гарантируют соблюдение сроков и высокое качество исполнения. Ищете кассетные потолки? Актуальный каталог и условия сотрудничества на glassway.group — здесь собраны все решения для создания современного интерьера под ключ.
lighting test shop – The environment is bright and helps ensure product colors appear natural and true.
https://wazamba-bet.com.mx/
Wazamba constituye una plataforma de juego digital que aparecio en 2019 con una oferta novedosa y con una identidad visual diferente, poniendo a disposicion una cifra superior a los 4,000 juegos, incluyendo tragamonedas, casino con crupieres en directo y mercados de apuestas deportivas, todo en una misma plataforma.
Нарколог на дом в Воронеже с лечением без очередей, выездом врача и анонимной помощью в наркологической клинике «Частный медик 24»
Разобраться лучше – [url=https://narkolog-na-dom-voronezh-4.ru/]нарколог на дом вывод в воронеже[/url]
Explore Garnet Harbor Vault Hub – Browsing feels natural and pages are easy to understand.
Для жителей Воронежа выезд нарколога на дом — это быстрый и удобный способ получить экстренную помощь. Когда человек переживает запой, а его физическое и эмоциональное состояние быстро ухудшается, наркологическая помощь на дому становится оптимальным решением. Врач приезжает и немедленно оценивает состояние пациента: проверяет его пульс, давление, частоту дыхания, уровень сознания и другие важные показатели. Это помогает составить точный план лечения, который будет направлен на восстановление организма, снятие токсинов и стабилизацию состояния пациента.
Узнать больше – [url=https://narkolog-na-dom-voronezh-4.ru/]нарколог на дом воронеж[/url]
Нарколог на дом в Самаре востребован в самых различных ситуациях. Иногда пациент не в состоянии самостоятельно добраться до клиники из-за сильного состояния похмелья или ломки. В таких случаях выезд нарколога становится наиболее оптимальным решением. Наши специалисты оказывают помощь при следующих состояниях:
Изучить вопрос глубже – [url=https://narkolog-na-dom-samara-2.ru/]нарколог на дом цена в самаре[/url]
буду дальше с вами сотрудничать, надеюсь всегда так будете работать!))) купить мефедрон, бошки, гашиш почему статус заказа отложен!? 1000539Платежи на Яндекс-кошелек принимаем как и раньше.
Приятно удивлены скоростью обработки запроса на сайте, менеджер связался очень быстро.
https://xn--80aeedb0bfzeok.xn--p1ai/catalog/mednye-dvukhrastrubnye-mufty-pod-paiku/mednaiadvukhrastrubnaia-podvizhnaiamufta-pod-paiku54kh1-9mmm0bgost-r-52922-2008/
Ivory Ridge Vault Exchange – Everything runs quickly and navigation feels clean and responsive.
Violet Harbor Trading Post – The site feels organized and navigation flows naturally across all pages.
Главное преимущество такого выезда в том, что лечение начинается сразу. Не нужно ждать утра, искать транспорт, уговаривать человека ехать в тяжёлом состоянии или рисковать, пока он снова тянется к алкоголю, чтобы временно заглушить симптомы. Домашний визит даёт возможность быстро стабилизировать ситуацию и убрать хаотичность, которая часто возникает в семье в острый момент.
Разобраться лучше – [url=https://narkolog-na-dom-voronezh-3.ru/]нарколог на дом вывод в воронеже[/url]
oqood dubai land department flats for rent in festival city dubai apartment for rent in azure residences palm jumeirah
выведение +из запоя +в стационаре [url=https://vyvod-iz-zapoya-v-staczionare-sankt-peterburg-2.ru/]выведение +из запоя +в стационаре[/url] .
ООО «РМС» поставляет вольфрамовые порошки, соответствующие строгим техническим условиям (например, ТУ 48-4205-112-2017).
https://rms-ekb.ru/catalog/ugolok-stalnoi/ugolok-iz-konstruktsionnoi-stali-200kh200kh18-mm-16mncrb5-uni-6762/
какие долги списываются при банкротстве
Многих интересует, какие долги списываются при банкротстве и на что можно рассчитывать после процедуры. На sorryclosed.ru есть отдельные разборы по видам обязательств и частым вопросам должников.
При выезде на дом врач проводит все необходимые процедуры, включая инфузионную терапию (капельницы), медикаментозное лечение для снятия симптомов ломки, а также консультирует пациента и его семью по дальнейшему лечению. Важно, что после стабилизации состояния нарколог может дать рекомендации по дальнейшей реабилитации, возможному кодированию, а также предложить программу для восстановления здоровья на длительный срок.
Исследовать вопрос подробнее – [url=https://narkolog-na-dom-voronezh-4.ru/]нарколог на дом в воронеже[/url]
product showcase – It’s easy to move through and feels very user-friendly overall.
discover items – The site is engaging and navigation works smoothly across all pages.
вывод из запоя в стационаре клиника [url=https://vyvod-iz-zapoya-v-staczionare-sankt-peterburg-2.ru/]вывод из запоя в стационаре клиника[/url] .
Хочу выделить материал про Подготовка к переезду в Адыгею из мегаполисов.
Вот, делюсь ссылкой:
[url=https://inter-comfort.ru/news/vozvrashhenie-v-adygeyu-iz-megapolisa-dlya-novoj-zhizni/]https://inter-comfort.ru/news/vozvrashhenie-v-adygeyu-iz-megapolisa-dlya-novoj-zhizni/[/url]
выезд нарколога круглосуточно [url=https://narkolog-na-dom-moskva-2.ru/]выезд нарколога круглосуточно[/url] .
выход из запоя на дому самара [url=https://vyvod-iz-zapoya-na-domu-samara-17.ru/]выход из запоя на дому самара[/url] .
incest porn stories
услуги нарколога на дому [url=https://narkolog-na-dom-moskva-3.ru/]услуги нарколога на дому[/url] .
Наличие обратной связи позволяет быстро отправить запрос
https://redmetsplav.ru/store/vismut/zarubezhnye-splavy-3/vismut-h43bi57a—jis-z-3282/folga-vismutovaya-h43bi57a—jis-z-3282/
Капельница от похмелья — это экстренная мера, которая помогает снять интоксикацию и восстановить водно-электролитный баланс в организме после злоупотребления алкоголем. В наркологической клинике «Частный медик 24» в Самаре мы предлагаем эффективное лечение для тех, кто столкнулся с последствиями запоя или перегрузки организма после употребления алкоголя. Капельницы для снятия похмелья — это быстрый и безопасный способ вернуть пациента в норму, избавить от болезненных симптомов, таких как головная боль, тошнота, слабость, сухость во рту, а также стабилизировать его общее состояние. Выезд нарколога на дом и проведение капельниц позволяет избежать поездки в клинику и начать лечение в удобной обстановке.
Подробнее можно узнать тут – [url=https://kapelnicza-ot-pokhmelya-samara.ru/]капельница от похмелья цена[/url]
После того как пациент вызвал нарколога на дом, врач прибывает на место и начинает с осмотра. Он оценивает общее состояние пациента, измеряет его пульс, давление, температуру, частоту дыхания и проверяет уровень сознания. Это необходимо для точной диагностики состояния и выбора наиболее эффективного метода лечения. Врач также уточняет анамнез, выясняет длительность употребления алкоголя или наркотиков, а также обращает внимание на наличие хронических заболеваний или других сопутствующих факторов, которые могут повлиять на лечение.
Получить дополнительные сведения – [url=https://narkolog-na-dom-samara-2.ru/]вызвать нарколога на дом в самаре[/url]
вызов нарколога на дом в москве цена [url=https://narkolog-na-dom-moskva-2.ru/]вызов нарколога на дом в москве цена[/url] .
вывод из запоя самара [url=https://vyvod-iz-zapoya-na-domu-samara-17.ru/]вывод из запоя самара[/url] .
психиатр нарколог на дом в москве [url=https://narkolog-na-dom-moskva-3.ru/]narkolog-na-dom-moskva-3.ru[/url] .
Цены на спецстали одни из самых конкурентных на рынке, при этом качество на уровне мировых стандартов.
https://xn--80aeedb0bfzeok.xn--p1ai/catalog/latunnye-vnutrennie-stopornye-koltsa-po-din/latunoe-vnutrennee-stopornoe-pruzhinnoe-koltso-m148-152kh4-mm-ls59-1-din-472/
Таблица: На что обратить внимание при оценке персонала наркологической клиники
Получить дополнительные сведения – [url=https://narkologicheskaya-klinika-murmansk0.ru/]chastnaya narkologicheskaya klinika murmansk[/url]
Когда такие симптомы становятся ярко выраженными, важно не откладывать вызов нарколога. В противном случае токсическое воздействие алкоголя может повлиять на другие органы, такие как печень, почки и сердце, что приведёт к более серьёзным последствиям. Врач на дому проведет экстренную помощь, обеспечит безопасность и поможет избежать ухудшения состояния.
Детальнее – [url=https://kapelnicza-ot-pokhmelya-samara-2.ru/]www.domen.ru[/url]
процедура банкротства физлица
Процедура банкротства физлица состоит из нескольких этапов и требует внимательной подготовки документов. На sorryclosed.ru есть понятные материалы о порядке действий и последствиях процедуры.
выезд нарколога [url=https://narkolog-na-dom-moskva-1.ru/]выезд нарколога[/url] .
Violet Harbor Handmade Exchange Center – Everything is presented clearly and feels easy to understand instantly.
mostbet litsenziya [url=http://mostbet04826.help]http://mostbet04826.help[/url]
мелбет верификация [url=www.melbet53847.help]мелбет верификация[/url]
Violet Harbor Essentials Store – Everything is presented clearly, making the browsing experience very comfortable.
1вин зеркало Ош [url=http://1win71849.help/]1вин зеркало Ош[/url]
plinko вход скачать [url=http://plinko47590.help]plinko вход скачать[/url]
Полностью согласен !!! купить мефедрон, бошки, гашиш Мы уже давно не делаем отправки, я не знаю за какую посылку вы говорите.А вот это да, магазин последнее время реально что то “плохует” мягко говоря, но все ровно же хорош
ООО «РМС» обеспечивает поставки специализированных сварочных материалов для сложных условий эксплуатации.
https://rms-ekb.ru/catalog/ugolok-stalnoi/ugolok-iz-konstruktsionnoi-stali-100kh65kh10-mm-42cr4-en-10056-2/
вызов нарколога на дом москва [url=https://narkolog-na-dom-moskva-1.ru/]вызов нарколога на дом москва[/url] .
Каждый выезд нарколога включает в себя не только инфузионную терапию, но и полноценную оценку состояния пациента, анализ рисков, а также консультацию по дальнейшему лечению. Врач может назначить дополнительные препараты для снятия симптомов ломки, восстановления водно-электролитного баланса и улучшения общего состояния пациента. Также важно, что консультация включает рекомендации по реабилитации, психологической поддержке и кодированию, если это необходимо для пациента, страдающего хроническим алкоголизмом или наркоманией.
Подробнее тут – [url=https://narkolog-na-dom-voronezh-4.ru/]вызвать нарколога на дом в воронеже[/url]
online display – The layout is neat and the flow between pages works well.
Shop Glade Ridge Goods – Pages are arranged clearly and make navigation very simple.
Общее впечатление: надежный информационный ресурс для снабженцев.
https://redmetsplav.ru/store/magniy-i-ego-splavy/rossiyskie-splavy-1/magniy-ma8cb—tu-1714-018-00545484-97/lenta-magnievaya-ma8cb—tu-1714-018-00545484-97/
property service charges in dubai https://andreamezvinsky.com/2-bhk-for-sale-in-dubai.html companies in downtown dubai
Нарколог на дом в Воронеже с оперативным приездом специалиста, детоксикацией и медицинским наблюдением в наркологической клинике «Частный медик 24»
Узнать больше – [url=https://narkolog-na-dom-voronezh.ru/]www.domen.ru[/url]
Домашний формат ценят не только за удобство. Он помогает начать лечение анонимно, без дороги, без ожидания и без лишнего стресса для пациента. Для многих семей именно выездной наркологическая маршрут становится первой точкой, с которой начинается более серьёзное восстановление: обсуждаются не только снятие острых симптомов, но и кодирование, реабилитация, повторная консультация, а при необходимости — и маршруты помощи при наркомании. Особенно это актуально, если человек употребляет давно, уже несколько лет сталкивается со срывами и сам замечает, что проблема перестала ограничиваться только плохим самочувствием после алкоголя.
Получить дополнительную информацию – http://narkolog-na-dom-voronezh-2.ru/
explore here – The layout is well planned and navigation feels simple and fluid.
Выезд нарколога на дом в Самаре — это комплексный подход к лечению, который включает несколько этапов. Врач, приехавший на место, не ограничивается одной процедурой, а проводит полноценный осмотр, диагностирует состояние пациента, определяет причину ухудшения самочувствия и подбирает индивидуальную терапию. Наиболее часто при выезде нарколога на дом используются капельницы, антиеметики и препараты для стабилизации состояния пациента, снятия симптомов абстиненции и улучшения общего самочувствия.
Подробнее можно узнать тут – [url=https://narkolog-na-dom-samara-1.ru/]нарколог на дом[/url]
какие долги списываются при банкротстве
Многих интересует, какие долги списываются при банкротстве и на что можно рассчитывать после процедуры. На sorryclosed.ru есть отдельные разборы по видам обязательств и частым вопросам должников.
Закупали шлак ферросилиция для строительных нужд, материал качественный, без лишних примесей.
https://xn--80aeedb0bfzeok.xn--p1ai/catalog/mednyi-perekhodnoi-troinik-press/mednyi-perekhodnoi-press-troinik-66-7kh35-mm-m3t-gost-r-52948-2008/
father daughter porn
самара нарколог вывод из запоя [url=https://vyvod-iz-zapoya-na-domu-samara-16.ru/]самара нарколог вывод из запоя[/url] .
Каждая партия товара сопровождается сертификатами качества, подтверждающими соответствие ГОСТ и ТУ.
https://rms-ekb.ru/catalog/list/list-u11-3x2000x2000-gost-19903-74/
https://betway-bet.com.mx/
Betway Mexico es un establecimiento virtual de juegos y tambien casa de apuestas deportivas con casi 20 anos de recorrido internacional, respaldado por licencias de autoridades estrictas como la MGA y la UK Gambling Commission, y opera respetando las disposiciones de SEGOB en Mexico en el pais.
https://lebull.com.mx/
Segun la informacion suministrada, Lebull representa una plataforma de casino en linea y sitio de pronosticos deportivos que opera dentro del territorio mexicano ofreciendo un listado de superior a 10,000 titulos, una herramienta movil integral y desarrolladores de maxima categoria por ejemplo Pragmatic Play, NetEnt y NolimitCity.
вывести из запоя в стационаре [url=https://vyvod-iz-zapoya-v-staczionare-sankt-peterburg-1.ru/]вывести из запоя в стационаре[/url] .
mostbet yengil versiya [url=https://mostbet04826.help]mostbet yengil versiya[/url]
мелбет бк регистрация [url=http://melbet53847.help]http://melbet53847.help[/url]
product showcase – The experience is polished and the site functions reliably throughout.
night orchard gallery – The whole experience feels polished and everything runs smoothly without any problems.
Капельница от похмелья — это один из наиболее эффективных методов экстренной медицинской помощи, который позволяет быстро снять симптомы алкогольной интоксикации и восстановить организм после злоупотребления алкоголем. В наркологической клинике «Частный медик 24» в Самаре мы предоставляем услугу выезда нарколога на дом и капельной терапии для пациентов, испытывающих тяжёлые симптомы похмелья. Это удобный способ получить необходимую помощь без лишнего стресса, сохраняя анонимность и комфорт пациента.
Узнать больше – [url=https://kapelnicza-ot-pokhmelya-samara-1.ru/]kapelnicza-ot-pokhmelya-samara-1.ru/[/url]
вызвать врача нарколога на дом [url=https://narkolog-na-dom-moskva-4.ru/]вызвать врача нарколога на дом[/url] .
Возможность изготовления деталей по чертежам заказчика — это большой плюс
https://redmetsplav.ru/store/magniy-i-ego-splavy/zarubezhnye-splavy-2/magniy-hz31a—astm-b80/provoloka-magnievaya-hz31a—astm-b80/
последствия банкротства физического лица
Перед подачей важно изучить последствия банкротства физического лица, а не только перспективу списания долгов. На sorryclosed.ru разобраны основные ограничения и правовые последствия после завершения дела.
Выбор наркологической клиники — ответственное решение, от которого зависит не только эффективность терапии, но и общее физическое и психоэмоциональное состояние пациента. Квалифицированная помощь должна быть своевременной, организованной и соответствующей медицинским стандартам. Как указывает Минздрав РФ, медицинские учреждения, предоставляющие помощь при зависимостях, обязаны иметь лицензию, профессиональный персонал и комплексный подход к лечению.
Изучить вопрос глубже – [url=https://narkologicheskaya-klinika-murmansk0.ru/]частная наркологическая клиника мурманск.[/url]
вывод из запоя в стационаре в спб [url=https://vyvod-iz-zapoya-v-staczionare-sankt-peterburg-1.ru/]вывод из запоя в стационаре в спб[/url] .
Редметсплав — надежный партнер, работаем по поставкам нержавеющего проката уже второй год, сбоев не было.
https://xn--80aeedb0bfzeok.xn--p1ai/catalog/mednye-dvukhrastrubnye-mufty-pod-paiku/mednaiadvukhrastrubnaiamufta-pod-paiku35kh1-6mmm0bgost-32590-2013/
featured picks – The presentation is neat and the content is easy to follow.
house 2 home real estate dubai business bay https://andreamezvinsky.com/single-storey-villa-for-rent-in-dubai.html gems jebel ali
free incest porn
Поставка продукции возможна не только в промышленных, но и в малых лабораторных объемах для исследовательских целей.
https://rms-ekb.ru/catalog/ugolok-stalnoi/ugolok-iz-konstruktsionnoi-stali-120kh120kh10-mm-c45-en-10056-2/
Такие симптомы важны не только сами по себе. Они показывают, что организму уже трудно поддерживать стабильность без медицинского вмешательства. Чем дольше в этот момент ждать, тем выше вероятность, что потребуется более жёсткий формат оказания помощи. Поэтому экстренное обращение в некоторых случаях не просто облегчает состояние, а предотвращает дальнейшее ухудшение здоровья.
Подробнее можно узнать тут – [url=https://narkolog-na-dom-voronezh-1.ru/]врач нарколог на дом воронеж[/url]
При выезде нарколога на дом в Самаре мы проводим диагностику состояния пациента, чтобы понять, какие препараты и процедуры необходимы для стабилизации. Это может включать регидратацию, витамины группы B, антиеметики и другие препараты для снятия симптомов похмелья. Все препараты подбираются индивидуально в зависимости от состояния пациента и его нужд. Это позволяет значительно сократить время на восстановление и быстро вернуться к нормальному состоянию.
Изучить вопрос глубже – https://kapelnicza-ot-pokhmelya-samara-1.ru
как списать долги
Запрос как списать долги обычно начинается с поиска законных вариантов. На sorryclosed.ru можно сравнить судебную и внесудебную процедуру и понять, какой путь подходит в конкретной ситуации.
Gilded Stone Goods Collective – The site is simple and navigation feels smooth and intuitive.
Сайт адаптирован под нужды машиностроительных заводов
https://redmetsplav.ru/store/magniy-i-ego-splavy/zarubezhnye-splavy-2/magniy-zk61b—astm-b275/lenta-magnievaya-zk61b—astm-b275/
нарколог на дом вывод из запоя самара [url=https://vyvod-iz-zapoya-na-domu-samara-17.ru/]нарколог на дом вывод из запоя самара[/url] .
запой самара [url=https://vyvod-iz-zapoya-na-domu-samara-17.ru/]запой самара[/url] .
всё ровно забрал rcs-4 , не какой паранои от эффекта =) Позитив да и только https://pro-raka.ru и что за веществоМенеджер прошу зайдите в скайп, хочу заказ оплатить вас там нет 2 дня уже. Заявку на сате подал жду ответ на эмаил. Спасибо.
buy cannabis online
pin-up lucky jet tikish [url=https://pinup41537.help/]https://pinup41537.help/[/url]
shop this bazaar – The site is tidy and browsing through it feels smooth and pleasant.
Редметсплав — пример того, как должен работать современный поставщик металлургического сырья.
https://xn--80aeedb0bfzeok.xn--p1ai/catalog/latunnye-naruzhnye-stopornye-koltsa-po-gost/latunoe-naruzhnoe-stopornoe-pruzhinnoe-koltso-36kh1-7-mm-lmtss-gost-13942-86/
выведение из запоя в стационаре [url=https://vyvod-iz-zapoya-v-staczionare-sankt-peterburg-2.ru/]выведение из запоя в стационаре[/url] .
вызвать нарколога на дом в москве [url=https://narkolog-na-dom-moskva-3.ru/]вызвать нарколога на дом в москве[/url] .
Поставки жаропрочных сплавов ориентированы на потребности авиационной и энергетической отраслей.
https://rms-ekb.ru/catalog/ugolok-stalnoi/ugolok-iz-konstruktsionnoi-stali-150kh75kh9-mm-31crmov9v-en-10056-1/
own duplex apartment in dubai starting aed 1963 monthly azizi 1 bhk apartment for rent in discovery gardens dubai apartment for rent in dubai outskirts
как играть в mines mostbet [url=https://www.mostbet52746.help]https://www.mostbet52746.help[/url]
Violet Harbor Market Place – Everything is easy to access and the browsing experience feels smooth.
нарколог на дом в клинике москва [url=https://narkolog-na-dom-moskva-3.ru/]narkolog-na-dom-moskva-3.ru[/url] .
Капельница от похмелья может быть рекомендована, когда симптомы становятся настолько выраженными, что пациент не может нормально функционировать в повседневной жизни. Если вы или ваши близкие сталкиваетесь с такими признаками, как головная боль, тошнота, слабость, тошнота и невозможность пить, вызов нарколога на дом станет необходимостью.
Получить дополнительную информацию – [url=https://kapelnicza-ot-pokhmelya-samara-2.ru/]капельница от похмелья на дом[/url]
Ginger Cove Goods Outpost – The site feels structured and browsing is smooth and intuitive.
Violet Harbor Vendor Space Hall – The design is organized and pages load without any lag or issues.
Представлен полный цикл изделий: от фольги и проволоки до крупных поковок
https://redmetsplav.ru/store/vanadiy-i-ego-splavy/vanadiy-vnm99-8—tu-1761-037-2587982-2002/poroshok-vanadievyy-vnm99-8—tu-1761-037-2587982-2002/
mostbet to‘lov rekvizitlari [url=mostbet04826.help]mostbet04826.help[/url]
gay sex porn
мелбет рабочее зеркало кыргызстан [url=http://melbet53847.help/]мелбет рабочее зеркало кыргызстан[/url]
Капельница от похмелья в Самаре с выездом на дом, восстановлением водного баланса и медицинской помощью в наркологической клинике «Частный медик 24»
Подробнее тут – http://kapelnicza-ot-pokhmelya-samara-1.ru
Надежная защита груза при транспортировке, даже длинномерные изделия доходят без повреждений.
https://xn--80aeedb0bfzeok.xn--p1ai/catalog/mednoe-dvukhrastrubnoe-koleno-pod-paiku/mednoe-dvukhrastrubnoe-koleno-pod-paiku-180-gradusov-16kh12kh0-7-mm-10-6kh12-6-mm-miagkaia-paika-m3t-gost-32590-2013/
1win onlayn kazino Oʻzbekiston [url=https://1win5751.help]https://1win5751.help[/url]
банкротство через МФЦ
Банкротство через МФЦ часто ищут как более простой вариант списания долгов. На sorryclosed.ru удобно посмотреть требования, порядок обращения и причины возможного отказа.
Может кому пригодится — собрана большая коллекция фильмов и сериалов.
Кино для настроения — вот что нужно после тяжёлого рабочего дня. Комедии поднимут настроение, а триллеры пощекочут нервы. [url=https://www.gorodpavlodar.kz/News_101652_3.html]новинки сериалов[/url] Огромная подборка фильмов на любой вкус доступна прямо сейчас. Смотрите бесплатно и без ограничений на любом устройстве!
Вот тут подробнее — https://gorodpavlodar.kz/News_101652_3.html
лучшие сериалы онлайн
что посмотреть вечером
комедии смотреть онлайн
Приятного просмотра!
pin-up tikish natijalari [url=pinup41537.help]pinup41537.help[/url]
все просто=) https://fordmoscowclub.ru магазин отличныйУ меня пришел чисто белый зернистый как крупа порошок.Кал.
Юрист по заключению брака поможет оформить отношения быстро и без ошибок. Переходите по запросу [url=https://www.pravovik24.ru/konsultatsii/yurist-po-zaklyucheniyu-braka/]юридическая консультация по делам оформления брака[/url]. Проконсультируем по всем вопросам регистрации, подготовим документы, сопроводим при заключении брака, включая случаи с иностранными гражданами. Обеспечим соблюдение всех требований законодательства и защиту ваших интересов. Экономьте время и избегайте рисков — доверьте оформление профессионалам.
ООО «РМС» специализируется на поставках редких и тугоплавких металлов, таких как ниобий и вольфрам.
https://rms-ekb.ru/catalog/list/list-90khmf-2x500x800-gost-19903-74/
Нарколог на дом в Самаре — помощь при запое и интоксикации в наркологической клинике «Частный медик 24»
Ознакомиться с деталями – [url=https://narkolog-na-dom-samara-2.ru/]нарколог на дом анонимно[/url]
lesbian incest porn
Общее впечатление: надежный информационный ресурс для снабженцев.
https://redmetsplav.ru/store/kobalt/rossiyskie-splavy-3/kobalt-ek102-id-1/pokovka-kobaltovaya-ek102-id-1/
Ginger Cove Commerce Outpost – The design is simple and navigation works effortlessly.
юрист по банкротству физических лиц
Юрист по банкротству физических лиц помогает оценить риски и подготовить документы. На sorryclosed.ru можно изучить саму процедуру и заранее понять, какие вопросы стоит задавать специалисту.
mostbet казино [url=www.mostbet52746.help]mostbet казино[/url]
Walnut Cove Craft Bazaar Collective – The design is clean and users can access content without effort.
should you invest in dubai property https://garretthoyos.com/arabian-ranches-2-for-sale.html Apartments for sale in The Opus
Качество сварочных материалов на высоте, электроды варят отлично, состав металла стабильный.
https://xn--80aeedb0bfzeok.xn--p1ai/catalog/latunnaia-vtulka/latunnaia-vtulka-210-mm-lts16k4/
вывести из запоя на дому самара [url=https://vyvod-iz-zapoya-na-domu-samara-16.ru/]вывести из запоя на дому самара[/url] .
visit this page – The site works well and the browsing experience is smooth and reliable.
1win saytda kirish [url=http://1win5751.help/]1win saytda kirish[/url]
Продукция находит применение в производстве электротехники благодаря наличию специализированной электротехнической стали.
https://rms-ekb.ru/catalog/ugolok-stalnoi/ugolok-iz-konstruktsionnoi-stali-30kh30kh3-mm-34crnimo6-uni-6762/
вывод из запоя самара цены [url=https://vyvod-iz-zapoya-na-domu-samara-16.ru/]вывод из запоя самара цены[/url] .
нарколог срочно [url=https://narkolog-na-dom-moskva-4.ru/]нарколог срочно[/url] .
Капельницы помогают не только справиться с симптомами похмелья, но и с выводом токсинов из организма, что способствует его быстрому восстановлению. Этот метод позволяет минимизировать последствия, такие как головная боль, нарушение давления и общее недомогание.
Детальнее – [url=https://kapelnicza-ot-pokhmelya-samara-1.ru/]капельница от похмелья анонимно[/url]
daughter forced porn
банкротство пенсионеров
Банкротство пенсионеров — востребованная тема, потому что у этой категории должников часто есть особые жизненные обстоятельства. На sorryclosed.ru можно посмотреть, как работает процедура и что учитывать заранее.
выведение из запоя на дому [url=https://vyvod-iz-zapoya-na-domu-samara-18.ru/]выведение из запоя на дому[/url] .
вывести из запоя на дому [url=https://vyvod-iz-zapoya-na-domu-samara-19.ru/]вывести из запоя на дому[/url] .
Нарколог на дом в Самаре — помощь при запое и интоксикации в наркологической клинике «Частный медик 24»
Подробнее можно узнать тут – [url=https://narkolog-na-dom-samara-2.ru/]нарколог на дом анонимно[/url]
еще раз какой городл купить мефедрон, бошки, гашиш вчера трек получил:good: надеюсь всё будет ровно.спасибо и ВАМ !!
Информация о времени работы (10:00–18:00) помогает планировать звонки
https://redmetsplav.ru/store/magniy-i-ego-splavy/zarubezhnye-splavy-2/magniy-az31—csa-hg-5/poroshok-magnievyy-az31—csa-hg-5/
вывод из запоя с выездом на дом цена [url=https://vyvod-iz-zapoya-na-domu-ekaterinburg-9.ru/]вывод из запоя с выездом на дом цена[/url] .
Ginger Stone Visual Galleria – The structure is tidy and browsing feels smooth and enjoyable.
служба вывода из запоя [url=https://vyvod-iz-zapoya-na-domu-ekaterinburg-10.ru/]служба вывода из запоя[/url] .
вывести из запоя капельница на дому цена [url=https://vyvod-iz-zapoya-na-domu-samara-17.ru/]вывести из запоя капельница на дому цена[/url] .
нарколог на дом срочно [url=https://narkolog-na-dom-moskva-4.ru/]нарколог на дом срочно[/url] .
запой на дому [url=https://vyvod-iz-zapoya-na-domu-samara-18.ru/]vyvod-iz-zapoya-na-domu-samara-18.ru[/url] .
Критерий
Ознакомиться с деталями – http://narkologicheskaya-klinika-murmansk0.ru/
вывод из запоя кодирование [url=https://vyvod-iz-zapoya-na-domu-samara-19.ru/]вывод из запоя кодирование[/url] .
Редкие и тугоплавкие металлы всегда в наличии или под заказ в короткие сроки, рекомендую.
https://xn--80aeedb0bfzeok.xn--p1ai/catalog/latunnye-naruzhnye-stopornye-koltsa-po-din/latunoe-naruzhnoe-stopornoe-pruzhinnoe-koltso-m62-57-8kh2-mm-lmtss-din-471/
вывод из запоя екатеринбург [url=https://vyvod-iz-zapoya-na-domu-ekaterinburg-9.ru/]вывод из запоя екатеринбург[/url] .
вывожу из запоя екатеринбург [url=https://vyvod-iz-zapoya-na-domu-ekaterinburg-10.ru/]вывожу из запоя екатеринбург[/url] .
вывод из запоя на дому самара [url=https://vyvod-iz-zapoya-na-domu-samara-17.ru/]вывод из запоя на дому самара[/url] .
стоимость банкротства физических лиц
Стоимость банкротства физических лиц зависит от формата процедуры и сопутствующих расходов. На sorryclosed.ru можно посмотреть, из чего складываются затраты и на что обратить внимание заранее.
Компания осуществляет поставки базового металлургического сырья, включая олово, свинец и цинк в чушках.
https://rms-ekb.ru/catalog/ugolok-stalnoi/ugolok-iz-konstruktsionnoi-stali-40kh20kh4-mm-16mncrb5-din-59370/
bnp paribas real estate dubai 3 bedroom for rent in dubai dubai hills projects
pinup depozit limitlari [url=www.pinup41537.help]www.pinup41537.help[/url]
Информация о проверке качества продукции повышает лояльность клиентов
https://redmetsplav.ru/store/magniy-i-ego-splavy/zarubezhnye-splavy-2/magniy-mag-2—bs-2970/list-magnievyy-mag-2—bs-2970/
https://jobs.lifewest.edu/employer/marlaolson01/?v=c419b06b4c65
Поставки всегда вовремя, логистика отлажена до мелочей, что важно для бесперебойной работы цеха.
https://xn--80aeedb0bfzeok.xn--p1ai/catalog/mednye-krestoviny-pod-paiku/mednaia-krestovina-pod-paiku-10kh7kh0-6-mm-7-8kh9-8-mm-tverdaia-paika-cu-dhp-gost-r-52922-2008/
Violet Harbor Outpost Home – The website is clean and everything is very easy to navigate smoothly.
Вы это о чем? Тут все вроде как только легальными делами занимаемся? Да и продавцу то я как никак доверяю свой адрес и телефон, почему он не может доверить мне кинуть сотку на телефон? Это ни к одному делу не пришьешь, раз мы уже заговорили об этом купить мефедрон, бошки, гашиш Джи спокойно 20-ого числа 😉 Потом вот только как получать будешь…?ОТЛИЧНЫЙ МАГАЗИН ВСЕ НА ВЫСШЕМ УРОВНЕ!
Мода давно перестала быть привилегией стандартных размеров — и интернет-магазин Smart-Woman это прекрасно понимает. Работая с 2006 года, он почти два десятилетия одевает шикарных женщин по всей России, предлагая одежду размерного ряда от 56 до 86. В каталоге представлены модели ведущих отечественных производителей, а часть ассортимента выпускается под собственной маркой — пошив размещается только у проверенных фабрик России и Киргизии. Заглянув на https://smart-woman.ru/, легко убедиться: здесь есть всё — от элегантных блузок и платьев-туник до джинсовых кардиганов и трикотажа, причём по по-настоящему доступным ценам. Удобный сервис заказа, прозрачные условия доставки и обмена делают покупку простой и приятной для каждой клиентки.
сроки банкротства физического лица
Сроки банкротства физического лица зависят от сложности дела и состава имущества. На sorryclosed.ru можно изучить примерную продолжительность процедуры и факторы, которые влияют на сроки.
1win пополнение с карты Кыргызстан [url=http://1win71849.help/]http://1win71849.help/[/url]
нарколог на дом вывод из запоя на дому [url=https://vyvod-iz-zapoya-na-domu-ekaterinburg-11.ru/]нарколог на дом вывод из запоя на дому[/url] .
mostbet app скачать [url=https://mostbet52746.help/]https://mostbet52746.help/[/url]
География деятельности компании охватывает всю территорию России, обеспечивая металлом предприятия в удаленных регионах.
https://rms-ekb.ru/catalog/list/list-khv4f-1x1500x3000-gost-19903-74/
вывод из запоя врач на дом [url=https://vyvod-iz-zapoya-na-domu-ekaterinburg-11.ru/]vyvod-iz-zapoya-na-domu-ekaterinburg-11.ru[/url] .
incest porn games
mostbet karta nomi mos kelmayapti [url=http://mostbet04826.help]http://mostbet04826.help[/url]
melbet фрибет как получить [url=www.melbet53847.help]www.melbet53847.help[/url]
Описание складских позиций сокращает время ожидания ответа
https://redmetsplav.ru/store/tantal-i-ego-splavy/tantal-tn-3-1/krug-tantalovyy-tn-3/
1win android yuklab olish [url=www.1win5751.help]www.1win5751.help[/url]
Kinogo — бесплатный стриминг-портал с обширной коллекцией фильмов, сериалов, мультфильмов, аниме и дорам для любой аудитории. Здесь собраны тысячи тайтлов: от голливудских блокбастеров до азиатского кино, от классики прошлого века до новинок 2026 года. Ищете смотреть фильмы онлайн? На kinogo-film.rest доступна удобная сортировка по жанру, году, рейтингу Кинопоиска и IMDb. Каталог охватывает боевики, триллеры, драмы, комедии, документальные проекты и фэнтези — всё в хорошем HD-качестве без регистрации и оплаты.
процедура банкротства физлица
Процедура банкротства физлица состоит из нескольких этапов и требует внимательной подготовки документов. На sorryclosed.ru есть понятные материалы о порядке действий и последствиях процедуры.
Высокая квалификация персонала, знают специфику редких металлов и особенности их применения.
https://xn--80aeedb0bfzeok.xn--p1ai/catalog/latunnoe-litoe-koltso/latunnoe-litoe-koltso-40kh800-mm-lk1/
Работал с ООО «Студия дизайна Нуволе Бьянке» (ИНН/КПП 7203498458/720301001) и Мариновой Татьяной — крайне негативный опыт. Ремонт выполнен с грубыми нарушениями сроков и качества, обязательства по договору не соблюдены. Постоянные задержки, отсутствие контроля и игнорирование замечаний. Итог — деньги потрачены, результат не соответствует договорённостям. Не рекомендую.
dad and daughter porn
Наличие никелевых сплавов гарантирует высокую коррозийную стойкость оборудования, создаваемого заказчиками.
https://rms-ekb.ru/catalog/ugolok-stalnoi/ugolok-iz-konstruktsionnoi-stali-130kh130kh12-mm-15nicr13-uni-6762/
Тьфу-тьфу-тьфу… =( купить мефедрон, бошки, гашиш Буду ждать доставку как чё отпишусь .длица окола часа очень даже не плохо
«Атака титанов» — явление в мире аниме: беспощадный экшен, политический триллер и глубокая драма о природе человека объединены в одно напряжённое повествование. Остатки людей укрылись за гигантскими стенами, но титаны не оставляют им ни покоя, ни надежды на объяснение происходящего. Ищете атака титанов все серии? Все 89 серий доступны бесплатно на ataka-titanov-smotret.biz с несколькими вариантами озвучки в хорошем качестве. Под гнётом сражений, предательства и раскрытых тайн герои стремительно теряют детские иллюзии и приходят к жестоким истинам. С каждым сезоном напряжение нарастает — авторы не жалеют ни героев, ни зрителей.
1win пополнение [url=1win71849.help]1win71849.help[/url]
Капельница от похмелья — это экстренная мера, которая помогает снять интоксикацию и восстановить водно-электролитный баланс в организме после злоупотребления алкоголем. В наркологической клинике «Частный медик 24» в Самаре мы предлагаем эффективное лечение для тех, кто столкнулся с последствиями запоя или перегрузки организма после употребления алкоголя. Капельницы для снятия похмелья — это быстрый и безопасный способ вернуть пациента в норму, избавить от болезненных симптомов, таких как головная боль, тошнота, слабость, сухость во рту, а также стабилизировать его общее состояние. Выезд нарколога на дом и проведение капельниц позволяет избежать поездки в клинику и начать лечение в удобной обстановке.
Разобраться лучше – [url=https://kapelnicza-ot-pokhmelya-samara.ru/]капельница от похмелья[/url]
стоимость банкротства физических лиц
Стоимость банкротства физических лиц зависит от формата процедуры и сопутствующих расходов. На sorryclosed.ru можно посмотреть, из чего складываются затраты и на что обратить внимание заранее.
Большой опыт работы, судя по копирайту с 2013 года
https://redmetsplav.ru/store/vismut/zarubezhnye-splavy-3/vismut-roto158f/pokovka-vismutovaya-roto158f/
детокс от запоя самара [url=https://vyvod-iz-zapoya-na-domu-samara-18.ru/]детокс от запоя самара[/url] .
Вывод из запоя на дому в Санкт-Петербурге с подбором терапии, наблюдением врача и комфортным лечением в наркологической клинике «Частный медик 24»
Детальнее – [url=https://vyvod-iz-zapoya-na-domu-sankt-peterburg-9.ru/]анонимный вывод из запоя на дому в санкт-петербурге[/url]
вывести из запоя екатеринбург [url=https://vyvod-iz-zapoya-na-domu-ekaterinburg-10.ru/]вывести из запоя екатеринбург[/url] .
Запой сопровождается выраженной интоксикацией, нарушением сна, слабостью и нестабильностью работы сердечно-сосудистой системы, что характерно для алкоголизма и других форм зависимости, включая наркомании. Самостоятельный выход из этого состояния может быть затруднён и сопровождаться усилением симптомов. Медицинская помощь на дому позволяет снизить риски и начать восстановление под контролем специалиста, помогая человеку быстрее стабилизировать состояние.
Получить больше информации – [url=https://vyvod-iz-zapoya-na-domu-sankt-peterburg-12.ru/]вывод из запоя на дому круглосуточно санкт-петербург[/url]
Прозрачное оформление документов и быстрое выставление счетов, приятно работать с профессионалами.
https://xn--80aeedb0bfzeok.xn--p1ai/catalog/mednye-zaglushki-pod-paiku/mednaia-zaglushka-kolpachok-pod-paiku-40-5kh36kh1-1-mm-27kh29-mm-tverdaia-paika-m1e-gost-r-52922-2008/
Капельница от похмелья — это эффективный способ экстренной помощи, предназначенный для того, чтобы помочь организму быстро восстановиться после злоупотребления алкоголем. В наркологической клинике «Частный медик 24» в Самаре мы предоставляем услугу безопасной детоксикации и восстановления 24/7. Капельница помогает организму вывести токсины, восстановить водно-электролитный баланс и улучшить общее состояние пациента, не создавая дополнительных нагрузок на сердце, печень и почки.
Получить дополнительную информацию – [url=https://kapelnicza-ot-pokhmelya-samara-2.ru/]kapelnicza-ot-pokhmelya-samara-2.ru/[/url]
Нарколог на дом в Самаре востребован в самых различных ситуациях. Иногда пациент не в состоянии самостоятельно добраться до клиники из-за сильного состояния похмелья или ломки. В таких случаях выезд нарколога становится наиболее оптимальным решением. Наши специалисты оказывают помощь при следующих состояниях:
Детальнее – [url=https://narkolog-na-dom-samara-2.ru/]запой нарколог на дом[/url]
buy cannabis online uk
вывод из запоя с выездом на дом [url=https://vyvod-iz-zapoya-na-domu-samara-18.ru/]вывод из запоя с выездом на дом[/url] .
Наркологическая помощь на дому помогает избежать стресса, связанного с поездкой в клинику. Особенно это важно в случаях, когда пациент находится в состоянии тяжёлой интоксикации или переживает абстинентный синдром, который можно только усугубить дополнительной нагрузкой. Врач приедет в кратчайшие сроки, обеспечивая необходимое лечение в первые часы после ухудшения состояния. Также важно, что при выезде специалист гарантирует полную анонимность, что особенно важно для многих людей, которые боятся открыто признаться в своей проблеме. Профессиональная наркологическая помощь на дому позволяет избежать срыва и начать процесс восстановления без стресса.
Подробнее – [url=https://narkolog-na-dom-voronezh-4.ru/]нарколог на дом анонимно воронеж[/url]
Запрос на выезд врача связан не только с классическим запоем. На практике домашняя помощь нужна в разных ситуациях, когда организму уже трудно компенсировать последствия употребления, а откладывание визита увеличивает риск осложнений.
Получить дополнительную информацию – [url=https://narkolog-na-dom-voronezh-2.ru/]вызов нарколога на дом[/url]
вывести из запоя [url=https://vyvod-iz-zapoya-na-domu-ekaterinburg-10.ru/]вывести из запоя[/url] .
вывести из запоя [url=https://vyvod-iz-zapoya-na-domu-ekaterinburg-9.ru/]вывести из запоя[/url] .
Наличие прецизионных сплавов в ассортименте подтверждает работу компании с высокоточными и наукоемкими материалами.
https://rms-ekb.ru/catalog/ugolok-stalnoi/ugolok-iz-konstruktsionnoi-stali-90kh90kh10-mm-c45-en-10056-1/
Wild Bandito mantém base fiel por causa dos sticky wilds.
стоимость банкротства физических лиц
Стоимость банкротства физических лиц зависит от формата процедуры и сопутствующих расходов. На sorryclosed.ru можно посмотреть, из чего складываются затраты и на что обратить внимание заранее.
dubai south villas serena dubai properties rent vincitore real estate development llc dubai
вывод из запоя екатеринбург [url=https://vyvod-iz-zapoya-na-domu-ekaterinburg-11.ru/]вывод из запоя екатеринбург[/url] .
вывод из запоя вызов на дом [url=https://vyvod-iz-zapoya-na-domu-ekaterinburg-9.ru/]vyvod-iz-zapoya-na-domu-ekaterinburg-9.ru[/url] .
Капельница от похмелья в Самаре с подбором препаратов, улучшением самочувствия и наблюдением в наркологической клинике «Частный медик 24»
Выяснить больше – [url=https://kapelnicza-ot-pokhmelya-samara.ru/]капельница от похмелья на дому[/url]
Раздел «Производство» подтверждает статус завода, а не просто перекупщика
https://redmetsplav.ru/store/magniy-i-ego-splavy/rossiyskie-splavy-1/magniy-ma15/truba-magnievaya-ma15/
“В Лс загораеться сообщениее,Захожу там координаты клада” купить мефедрон, бошки, гашиш Член до колен и девок гарем))уже ожидается что нибудь?
выведение из запоя екатеринбург [url=https://vyvod-iz-zapoya-na-domu-ekaterinburg-11.ru/]выведение из запоя екатеринбург[/url] .
Вывод из запоя на дому в Санкт-Петербурге с выездом нарколога, детоксикацией и восстановлением состояния в наркологической клинике «Частный медик 24»
Получить больше информации – [url=https://vyvod-iz-zapoya-na-domu-sankt-peterburg-8.ru/]анонимный вывод из запоя на дому санкт-петербург[/url]
Чистая вода — это не роскошь, а основа здоровья, производительности и экономии. Российская компания PWS специализируется на системах водоочистки для любых задач: от бытовых фильтров до мощных промышленных установок и решений для сельского хозяйства. На сайте https://pws.world/ представлен полный спектр оборудования, разработанного с учётом отечественных норм и реальных условий эксплуатации. Каждая система проектируется индивидуально, обеспечивая максимальную эффективность, простоту обслуживания и быструю окупаемость для каждого конкретного объекта.
вывод из запоя анонимно [url=https://vyvod-iz-zapoya-na-domu-samara-19.ru/]вывод из запоя анонимно[/url] .
Юрист по заключению брака поможет оформить отношения быстро и без ошибок. Переходите по запросу [url=https://www.pravovik24.ru/konsultatsii/yurist-po-zaklyucheniyu-braka/]адвокат по оформлению брака[/url]. Проконсультируем по всем вопросам регистрации, подготовим документы, сопроводим при заключении брака, включая случаи с иностранными гражданами. Обеспечим соблюдение всех требований законодательства и защиту ваших интересов. Экономьте время и избегайте рисков — доверьте оформление профессионалам.
Запой сопровождается выраженной интоксикацией, нарушением сна, слабостью, тревожностью и колебаниями давления, что характерно для алкоголизма и других форм зависимости. При этом самостоятельный выход из состояния часто оказывается затруднённым из-за ухудшения самочувствия и невозможности контролировать симптомы. В таких случаях выезд нарколога позволяет начать лечение без задержек и помочь пациенту снизить нагрузку на организм за счёт отсутствия транспортировки.
Получить больше информации – http://vyvod-iz-zapoya-na-domu-sankt-peterburg-8.ru
Необходимость обращения за наркологической помощью определяется по совокупности симптомов и их выраженности. При ухудшении состояния важно ориентироваться на объективные признаки, а не ждать самостоятельного улучшения.
Исследовать вопрос подробнее – [url=https://narkologicheskaya-pomoshh-nizhnij-novgorod-8.ru/]скорая наркологическая помощь нижний новгород[/url]
https://graph.org/1xBet-Today-Promo-Code-2026-1X200ROYAL-Bonus-130–1xBet-World-Cup-Betting-Promo-Code-2026-1X200ROYAL-Bonus-130–1xBet-Promo-Code-04-09
Выезд врача начинается с оценки состояния пациента. Доктора измеряют давление, пульс, оценивают уровень сознания и выраженность симптомов. После этого формируется план лечения, который реализуется сразу. Такой подход позволяет быстро перейти к стабилизации состояния человека.
Выяснить больше – [url=https://vyvod-iz-zapoya-na-domu-sankt-peterburg-11.ru/]вывод из запоя на дому анонимно санкт-петербург[/url]
В Нижнем Новгороде выезд нарколога на дом используется при состояниях, требующих оперативной медицинской оценки и начала терапии. Врач приезжает с необходимыми препаратами, проводит осмотр и формирует план лечения на месте. Такой формат позволяет сократить время до начала помощи и снизить нагрузку на пациента.
Получить дополнительные сведения – [url=https://narkologicheskaya-pomoshh-nizhnij-novgorod-8.ru/]наркологическая помощь анонимно нижний новгород[/url]
https://www.google.com.gi/url?q=https://amt-games.com/news/1xbet_cameroon_register_bonus_code.html
http://gameraider.ru/profile.php?lookup=1273
http://o2journal.ru/user/betschew/
При выезде нарколога на дом в Самаре мы проводим диагностику состояния пациента, чтобы понять, какие препараты и процедуры необходимы для стабилизации. Это может включать регидратацию, витамины группы B, антиеметики и другие препараты для снятия симптомов похмелья. Все препараты подбираются индивидуально в зависимости от состояния пациента и его нужд. Это позволяет значительно сократить время на восстановление и быстро вернуться к нормальному состоянию.
Выяснить больше – [url=https://kapelnicza-ot-pokhmelya-samara-1.ru/]капельница от похмелья[/url]
Чаще всего домашний формат применяется при следующих состояниях:
Выяснить больше – [url=https://vyvod-iz-zapoya-na-domu-sankt-peterburg-11.ru/]вывод из запоя на дому в санкт-петербурге[/url]
Официальный дилер Melke и Alurix в Москве и Московской области — компания «Бизнес Окна». Каталог включает линейки Centum, Wide, Evolution, Smart Ultra, Lite70 и Lite60 для любого типа объекта и бюджета. Специалисты компании занимаются остеклением балконов, установкой дверей и монтажом нестандартных конструкций. Ищете мелке окна официальный сайт москва? Актуальный каталог и условия заказа на сайте xn—–6kccxab8adjjjjc4k.xn--p1ai — оставьте заявку и получите бесплатный замер. Установку проводят квалифицированные специалисты с гарантией на выполненные работы и строгим соблюдением технологий.
buy cannabis
плинко купон [url=www.plinko47590.help]www.plinko47590.help[/url]
вывод из запоя на дому самара цены [url=https://vyvod-iz-zapoya-na-domu-samara-19.ru/]вывод из запоя на дому самара цены[/url] .
Первая задача врача — снять наиболее опасные и мучительные проявления: тошноту, головную боль, озноб, тремор, сухость во рту, сердцебиение, внутреннюю дрожь, тревогу, невозможность уснуть. Вторая задача — восстановить управляемость ситуации. Пациент и близкие должны понимать, что делать после завершения инфузии: как пить воду, как проветрить комнату, когда можно вставать, какие симптомы допустимы, а какие требуют немедленного повторного звонка. Именно такой формат делает помощь на дому полноценной медицинской услугой, а не разовой манипуляцией. Для многих семей это ещё и первая консультация, после которой становится ясно, нужен ли только вывод из запоя или уже требуется более широкий наркологический маршрут с участием психолога и последующим этапом восстановления.
Узнать больше – [url=https://narkolog-na-dom-voronezh.ru/]www.domen.ru[/url]
бесплатное банкротство через МФЦ
Бесплатное банкротство через МФЦ подходит только при соблюдении установленных условий. На sorryclosed.ru можно быстро проверить базовые критерии и понять, есть ли шанс пройти процедуру без суда.
pin-up xush kelibsiz bonus [url=http://pinup41537.help]http://pinup41537.help[/url]
Выезд нарколога на дом в Самаре — это комплексный подход к лечению, который включает несколько этапов. Врач, приехавший на место, не ограничивается одной процедурой, а проводит полноценный осмотр, диагностирует состояние пациента, определяет причину ухудшения самочувствия и подбирает индивидуальную терапию. Наиболее часто при выезде нарколога на дом используются капельницы, антиеметики и препараты для стабилизации состояния пациента, снятия симптомов абстиненции и улучшения общего самочувствия.
Подробнее тут – [url=https://narkolog-na-dom-samara-1.ru/]нарколог на дом цена самара[/url]
real mother daughter lesbian porn
Нарколог на дом может помочь в следующих ситуациях:
Получить больше информации – http://narkolog-na-dom-samara-1.ru/
Анонимное лечение на дому ценно ещё и тем, что снижает внутреннее сопротивление самого пациента. Для многих людей первый контакт с врачом происходит именно дома, без дороги, без ожидания, без страха чужих взглядов. Такой формат помогает начать разговор не только о снятии острых симптомов, но и о более широких вопросах: что делать после выхода из запоя, когда требуется кодирование, в каких случаях нужна реабилитация, а когда первичная наркологическая помощь уже должна переходить в полноценный лечебный маршрут. Врач может помочь и в ситуациях, связанных не только с алкоголем, но и с наркомании, если семье нужно понять, что происходит с зависимым человеком и какой следующий шаг будет для него безопасным.
Исследовать вопрос подробнее – [url=https://narkolog-na-dom-voronezh-1.ru/]нарколог на дом вывод[/url]
Вывод из запоя на дому — это формат медицинской помощи, при котором лечение проводится в привычной для пациента обстановке с выездом нарколога. Такой подход используется, когда требуется срочное вмешательство, но состояние позволяет обойтись без госпитализации. В наркологической клинике «Частный медик 24» помощь оказывается круглосуточно, с возможностью начать терапию сразу после обращения и без ожидания.
Исследовать вопрос подробнее – [url=https://vyvod-iz-zapoya-na-domu-sankt-peterburg-9.ru/]вывод из запоя на дому анонимно санкт-петербург[/url]
1win актуальное зеркало Кыргызстан [url=http://1win71849.help/]1win актуальное зеркало Кыргызстан[/url]
dubai jbr apartments rent for month https://bendixen-mikael.com/jbr-property-for-sale.html emaar square downtown
Поставки всегда вовремя, логистика отлажена до мелочей, что важно для бесперебойной работы цеха.
https://xn--80aeedb0bfzeok.xn--p1ai/catalog/latunnye-naruzhnye-stopornye-koltsa-po-din/latunoe-naruzhnoe-stopornoe-pruzhinnoe-koltso-m24-22-2kh1-2-mm-ls59-1-din-471/
В Нижнем Новгороде услуга выезда нарколога чаще всего используется при состояниях, когда пациент физически не может посетить клинику или требуется срочное медицинское вмешательство. Врач приезжает с необходимыми препаратами и оборудованием, проводит осмотр и сразу приступает к лечению. Такой формат особенно важен при выраженной интоксикации и нестабильном состоянии.
Подробнее тут – https://narkolog-na-dom-nizhnij-novgorod.ru/
В Санкт-Петербурге услуга срочного вывода из запоя на дому востребована в ситуациях, когда состояние пациента ухудшается и требуется немедленная помощь. Врач проводит консультацию, оценивает общее состояние, длительность запоя и выраженность симптомов, после чего определяет тактику лечения при алкоголизме. При необходимости помощь оказывается в кратчайшие сроки, без ожидания госпитализации в стационаре. Услугу можно заказать заранее или срочно через сайт клиники.
Получить дополнительные сведения – https://vyvod-iz-zapoya-na-domu-sankt-peterburg-10.ru/
Магазин реально ровный!!! Долго искал и нашел! Бро ты лучший!!!! https://woonline.ru вот отправил манетку ,получил адикпт всем.скоростя здесь имеются?
мостбет вход на сайт [url=http://mostbet52746.help/]http://mostbet52746.help/[/url]
Лечение на дому начинается с осмотра пациента. Доктора оценивают основные показатели, включая давление и пульс, а также общее состояние человека. После этого формируется план терапии, который реализуется сразу. Такой подход позволяет очень быстро перейти к стабилизации состояния и начать лечение без лишней потери времени.
Углубиться в тему – [url=https://vyvod-iz-zapoya-na-domu-sankt-peterburg-12.ru/]вывод из запоя на дому цена в санкт-петербурге[/url]
mostbet app store [url=mostbet04826.help]mostbet04826.help[/url]
мелбет ставка без риска [url=http://melbet53847.help]http://melbet53847.help[/url]
какие долги списываются при банкротстве
Многих интересует, какие долги списываются при банкротстве и на что можно рассчитывать после процедуры. На sorryclosed.ru есть отдельные разборы по видам обязательств и частым вопросам должников.
real mother daughter lesbian porn
Вывод из запоя на дому в Санкт-Петербурге с подбором терапии, наблюдением врача и комфортным лечением в наркологической клинике «Частный медик 24»
Получить дополнительные сведения – [url=https://vyvod-iz-zapoya-na-domu-sankt-peterburg-9.ru/]вывод из запоя на дому круглосуточно[/url]
1win Uzcard pul yechish [url=https://1win5751.help/]https://1win5751.help/[/url]
Важным преимуществом является возможность изготовления деталей и изделий по индивидуальным чертежам заказчика.
https://rms-ekb.ru/catalog/ugolok-stalnoi/ugolok-stalnoi-45kh3-200x125x16-gost-19771-93/
Выезд нарколога начинается с оценки состояния пациента. Доктора измеряют давление, пульс, оценивают уровень сознания и выраженность симптомов. На основании этих данных формируется план лечения, который реализуется сразу на месте. Такой подход позволяет очень быстро перейти к стабилизации состояния и начать основные этапы работы.
Получить дополнительные сведения – http://vyvod-iz-zapoya-na-domu-sankt-peterburg-9.ru
plinko зеркало скачать apk [url=https://plinko47590.help]https://plinko47590.help[/url]
вывод из запоя цены екатеринбург [url=https://vyvod-iz-zapoya-na-domu-ekaterinburg-11.ru/]vyvod-iz-zapoya-na-domu-ekaterinburg-11.ru[/url] .
Домашний формат ценят не только за удобство. Он помогает начать лечение анонимно, без дороги, без ожидания и без лишнего стресса для пациента. Для многих семей именно выездной наркологическая маршрут становится первой точкой, с которой начинается более серьёзное восстановление: обсуждаются не только снятие острых симптомов, но и кодирование, реабилитация, повторная консультация, а при необходимости — и маршруты помощи при наркомании. Особенно это актуально, если человек употребляет давно, уже несколько лет сталкивается со срывами и сам замечает, что проблема перестала ограничиваться только плохим самочувствием после алкоголя.
Подробнее тут – [url=https://narkolog-na-dom-voronezh-2.ru/]вызов нарколога на дом[/url]
Капельница от похмелья применяется, когда симптомы интоксикации становятся выраженными и мешают нормальной жизнедеятельности пациента. Основные показания для использования капельницы включают:
Подробнее можно узнать тут – https://kapelnicza-ot-pokhmelya-samara-1.ru/
вывод из запоя цены екатеринбург [url=https://vyvod-iz-zapoya-na-domu-ekaterinburg-11.ru/]vyvod-iz-zapoya-na-domu-ekaterinburg-11.ru[/url] .
Поковки и штабики — важные заготовки для металлургических предприятий
https://redmetsplav.ru/store/magniy-i-ego-splavy/zarubezhnye-splavy-2/magniy-sismg4640-04—ss-144640/truba-magnievaya-sismg4640-04—ss-144640/
Запой сопровождается выраженной интоксикацией, нарушением сна, слабостью и нестабильностью работы сердечно-сосудистой системы, что характерно для алкоголизма и других форм зависимости, включая наркомании. Самостоятельный выход из этого состояния может быть затруднён и сопровождаться усилением симптомов. Медицинская помощь на дому позволяет снизить риски и начать восстановление под контролем специалиста, помогая человеку быстрее стабилизировать состояние.
Ознакомиться с деталями – [url=https://vyvod-iz-zapoya-na-domu-sankt-peterburg-12.ru/]нарколог на дом вывод из запоя санкт-петербург[/url]
Выезд нарколога начинается с оценки состояния пациента. Доктора измеряют давление, пульс, оценивают уровень сознания и выраженность симптомов. На основании этих данных формируется план лечения, который реализуется сразу на месте. Такой подход позволяет очень быстро перейти к стабилизации состояния и начать основные этапы работы.
Ознакомиться с деталями – [url=https://vyvod-iz-zapoya-na-domu-sankt-peterburg-9.ru/]анонимный вывод из запоя на дому в санкт-петербурге[/url]
Чаще всего помощь требуется при следующих состояниях:
Подробнее можно узнать тут – [url=https://vyvod-iz-zapoya-na-domu-sankt-peterburg-12.ru/]нарколог на дом вывод из запоя[/url]
Наркологическая помощь на дому помогает избежать стресса, связанного с поездкой в клинику. Особенно это важно в случаях, когда пациент находится в состоянии тяжёлой интоксикации или переживает абстинентный синдром, который можно только усугубить дополнительной нагрузкой. Врач приедет в кратчайшие сроки, обеспечивая необходимое лечение в первые часы после ухудшения состояния. Также важно, что при выезде специалист гарантирует полную анонимность, что особенно важно для многих людей, которые боятся открыто признаться в своей проблеме. Профессиональная наркологическая помощь на дому позволяет избежать срыва и начать процесс восстановления без стресса.
Изучить вопрос глубже – [url=https://narkolog-na-dom-voronezh-4.ru/]запой нарколог на дом воронеж[/url]
вывести из запоя на дому цена [url=https://vyvod-iz-zapoya-na-domu-samara-18.ru/]вывести из запоя на дому цена[/url] .
1win apk direct download link [url=http://1win54316.help]1win apk direct download link[/url]
Нарколог на дом в Самаре — помощь при запое и интоксикации в наркологической клинике «Частный медик 24»
Изучить вопрос глубже – [url=https://narkolog-na-dom-samara-2.ru/]нарколог на дом анонимно самара[/url]
Приятно удивлены скоростью обработки запроса на сайте, менеджер связался очень быстро.
https://xn--80aeedb0bfzeok.xn--p1ai/catalog/mednyi-perekhodnoi-troinik-press/mednyi-perekhodnoi-press-troinik-21kh14-mm-m0b-gost-r-52948-2008/
вывести из запоя цена [url=https://vyvod-iz-zapoya-na-domu-ekaterinburg-10.ru/]вывести из запоя цена[/url] .
финансовый управляющий при банкротстве
Финансовый управляющий при банкротстве играет ключевую роль в судебной процедуре. На sorryclosed.ru можно понять, зачем он нужен, какие функции выполняет и как это влияет на ход дела.
[url=https://dubai-villas-sale.com]villa for sale dubai cheap[/url]
gay twink porn
https://betmexico-bet.com.mx/
Betmexico se presenta como un sitio de juegos y apuestas deportivas online disenado especificamente para audiencia en Mexico, el cual funciona bajo licencia otorgada por la SEGOB, en otras palabras, con regulacion ejercida directamente por las autoridades mexicanas.
запой на дому самара [url=https://vyvod-iz-zapoya-na-domu-samara-18.ru/]запой на дому самара[/url] .
https://betcris-bet.com.mx/
Betcris se encuentra entre las casillas de apuestas mas establecidas de America Latina, con una implantacion particularmente relevante dentro de Mexico.
вывод из запоя с выездом [url=https://vyvod-iz-zapoya-na-domu-ekaterinburg-10.ru/]вывод из запоя с выездом[/url] .
Запой сопровождается выраженной интоксикацией, нарушением сна, слабостью и нестабильностью работы сердечно-сосудистой системы, что характерно для алкоголизма и других форм зависимости, включая наркомании. Самостоятельный выход из этого состояния может быть затруднён и сопровождаться усилением симптомов. Медицинская помощь на дому позволяет снизить риски и начать восстановление под контролем специалиста, помогая человеку быстрее стабилизировать состояние.
Ознакомиться с деталями – [url=https://vyvod-iz-zapoya-na-domu-sankt-peterburg-12.ru/]анонимный вывод из запоя на дому[/url]
furnished apartments for daily rent in dubai emaar properties for sale genesis real estate dubai
Получил посылку уже через 3 дня после заказа. МН-001 хороший, только маленькие кристаллы на дне не растворились. А так доволен купить мефедрон, бошки, гашиш Привет всем Тсу движекБрал опт, все четко прошло! Качество на высоте! ТС ответьте в ЛС пожалуйста
Использование системы менеджмента качества гарантирует строгий контроль продукции на всех этапах отгрузки.
https://rms-ekb.ru/catalog/ugolok-stalnoi/ugolok-stalnoi-3sp5-50x32x3-gost-8509-93/
Нарколог на дом в Воронеже с оперативным приездом специалиста, детоксикацией и медицинским наблюдением в наркологической клинике «Частный медик 24»
Получить дополнительную информацию – [url=https://narkolog-na-dom-voronezh.ru/]нарколог на дом воронеж[/url]
Наркологическая помощь на дому помогает избежать стресса, связанного с поездкой в клинику. Особенно это важно в случаях, когда пациент находится в состоянии тяжёлой интоксикации или переживает абстинентный синдром, который можно только усугубить дополнительной нагрузкой. Врач приедет в кратчайшие сроки, обеспечивая необходимое лечение в первые часы после ухудшения состояния. Также важно, что при выезде специалист гарантирует полную анонимность, что особенно важно для многих людей, которые боятся открыто признаться в своей проблеме. Профессиональная наркологическая помощь на дому позволяет избежать срыва и начать процесс восстановления без стресса.
Узнать больше – [url=https://narkolog-na-dom-voronezh-4.ru/]нарколог на дом воронеж[/url]
https://betmexico-bet.com.mx/
Betmexico constituye una plataforma de casino virtual y pronosticos deportivos desarrollado exclusivamente para publico de Mexico, y que opera con licencia de la SEGOB, esto es, bajo el control normativo del gobierno de Mexico.
[url=https://www.1tv.ru]у эрнеста болная кровъ[/url]
Запойное состояние сопровождается выраженной интоксикацией, нарушением сна, слабостью и тревожностью, что характерно для алкоголизма и различных форм зависимости. При этом самостоятельный выход из него часто затруднён из-за ухудшения самочувствия и отсутствия контроля над симптомами. Выезд нарколога позволяет быстро стабилизировать состояние человека и начать восстановление без дополнительной нагрузки, связанной с поездкой в клинику, а при необходимости вовремя определить показания к лечению в стационаре.
Выяснить больше – [url=https://vyvod-iz-zapoya-na-domu-sankt-peterburg-9.ru/]анонимный вывод из запоя на дому[/url]
Коллеги, хороший обзорный материал по SEO и интернет-маркетингу в 2026 году. Автор разбирает тренды: приоритет естественного языка и длинных запросов, рост значимости голосового поиска, учёт поведенческих факторов. Есть пошаговый план выстраивания стратегии и список метрик для отслеживания (CAC, ROI, время на сайте). Полезно для систематизации: https://vlcjq.ru/prodvizhenie-sajtov-seo-i-internet-marketing-v-2026-godu/
https://betcris-bet.com.mx/
Betcris es considerada una de las plataformas de juego mas solidas de toda Latinoamerica, con una implantacion particularmente relevante dentro de Mexico.
Описание преимуществ компании подчеркивает надежность поставок
https://redmetsplav.ru/store/vismut/zarubezhnye-splavy-3/vismut-42-3991—csnstn-423991/pokovka-vismutovaya-42-3991—csnstn-423991/
Запой и алкогольная интоксикация могут приводить к целому ряду опасных симптомов, таких как головная боль, слабость, тошнота, рвота, обезвоживание и психоэмоциональная нестабильность. Если не начать лечение вовремя, такие состояния могут привести к более серьезным осложнениям, включая сердечные проблемы, галлюцинации и даже опасные для жизни нарушения работы организма. С помощью нарколога на дому можно начать экстренную терапию прямо в момент ухудшения состояния, не затягивая с лечением и не тратя время на поездки в клинику.
Получить дополнительную информацию – [url=https://narkolog-na-dom-samara-2.ru/]вызов нарколога на дом самара[/url]
Запрос на выезд врача связан не только с классическим запоем. На практике домашняя помощь нужна в разных ситуациях, когда организму уже трудно компенсировать последствия употребления, а откладывание визита увеличивает риск осложнений.
Получить дополнительные сведения – [url=https://narkolog-na-dom-voronezh-2.ru/]врач нарколог на дом в воронеже[/url]
Нарколог на дом в Воронеже с быстрым выездом, индивидуальным подбором терапии и наблюдением в наркологической клинике «Частный медик 24»
Выяснить больше – [url=https://narkolog-na-dom-voronezh-3.ru/]запой нарколог на дом воронеж[/url]
Наша лучшая подборка: https://sn74.ru
Нарколог на дом — это срочная врачебная помощь, которая нужна в тот момент, когда больного уже сложно везти в клинику, а ждать улучшения без осмотра опасно. Домашний формат особенно актуален при запое, выраженной интоксикации, повторной рвоте, скачках давления, сильном треморе, бессоннице и тревоге. В такой ситуации важно не просто заказать выезд и получить капельницу, а сразу запустить понятный медицинский маршрут: осмотр, консультация, оценка рисков, подбор терапии и решение, можно ли безопасно оставаться дома. Именно поэтому услуга «нарколог на дом» воспринимается не как разовая процедура, а как полноценная наркологическая помощь, где каждое действие связано с текущим состоянием пациента и его безопасностью.
Изучить вопрос глубже – [url=https://narkolog-na-dom-voronezh-3.ru/]нарколог на дом цена воронеж[/url]
Благодарим за оперативную поставку ниобиевых труб, выручили в очень сжатые сроки.
https://xn--80aeedb0bfzeok.xn--p1ai/catalog/latunnaia-polosa/latunnaia-polosa-2×100-mm-l63-gost-931-90/
прокапать от алкоголя воронеж [url=https://kapelnicza-ot-pokhmelya-voronezh-1.ru/]kapelnicza-ot-pokhmelya-voronezh-1.ru[/url] .
mom incest porn
Запой сопровождается выраженной интоксикацией, нарушением сна, слабостью и нестабильностью работы сердечно-сосудистой системы, что характерно для алкоголизма и других форм зависимости, включая наркомании. Самостоятельный выход из этого состояния может быть затруднён и сопровождаться усилением симптомов. Медицинская помощь на дому позволяет снизить риски и начать восстановление под контролем специалиста, помогая человеку быстрее стабилизировать состояние.
Узнать больше – https://vyvod-iz-zapoya-na-domu-sankt-peterburg-12.ru
Существует ряд ситуаций, при которых вызов специалиста на дом является обоснованным решением:
Подробнее тут – [url=https://narkolog-na-dom-nizhnij-novgorod.ru/]нарколог на дом цена в нижнем новгороде[/url]
вывод из запоя цена [url=https://vyvod-iz-zapoya-na-domu-ekaterinburg-9.ru/]вывод из запоя цена[/url] .
капельница от похмелья на дому [url=https://kapelnicza-ot-pokhmelya-voronezh.ru/]капельница от похмелья на дому[/url] .
Детоксикация на дому начинается с осмотра пациента. Доктора оценивают витальные показатели, уровень сознания и выраженность симптомов, анализируя текущие данные. После этого формируется план лечения, который реализуется сразу. Такой подход позволяет сократить время до начала терапии и повысить её эффективность.
Разобраться лучше – [url=https://vyvod-iz-zapoya-na-domu-sankt-peterburg-10.ru/]нарколог на дом вывод из запоя[/url]
Наркологическая помощь на дому помогает избежать стресса, связанного с поездкой в клинику. Особенно это важно в случаях, когда пациент находится в состоянии тяжёлой интоксикации или переживает абстинентный синдром, который можно только усугубить дополнительной нагрузкой. Врач приедет в кратчайшие сроки, обеспечивая необходимое лечение в первые часы после ухудшения состояния. Также важно, что при выезде специалист гарантирует полную анонимность, что особенно важно для многих людей, которые боятся открыто признаться в своей проблеме. Профессиональная наркологическая помощь на дому позволяет избежать срыва и начать процесс восстановления без стресса.
Узнать больше – [url=https://narkolog-na-dom-voronezh-4.ru/]нарколог на дом анонимно в воронеже[/url]
Нарколог на дом — это срочная врачебная помощь, которая нужна в тот момент, когда больного уже сложно везти в клинику, а ждать улучшения без осмотра опасно. Домашний формат особенно актуален при запое, выраженной интоксикации, повторной рвоте, скачках давления, сильном треморе, бессоннице и тревоге. В такой ситуации важно не просто заказать выезд и получить капельницу, а сразу запустить понятный медицинский маршрут: осмотр, консультация, оценка рисков, подбор терапии и решение, можно ли безопасно оставаться дома. Именно поэтому услуга «нарколог на дом» воспринимается не как разовая процедура, а как полноценная наркологическая помощь, где каждое действие связано с текущим состоянием пациента и его безопасностью.
Разобраться лучше – [url=https://narkolog-na-dom-voronezh-3.ru/]нарколог на дом анонимно в воронеже[/url]
1win premier league betting 1win [url=https://1win54316.help/]https://1win54316.help/[/url]
Наркологическая помощь на дому помогает избежать стресса, связанного с поездкой в клинику. Особенно это важно в случаях, когда пациент находится в состоянии тяжёлой интоксикации или переживает абстинентный синдром, который можно только усугубить дополнительной нагрузкой. Врач приедет в кратчайшие сроки, обеспечивая необходимое лечение в первые часы после ухудшения состояния. Также важно, что при выезде специалист гарантирует полную анонимность, что особенно важно для многих людей, которые боятся открыто признаться в своей проблеме. Профессиональная наркологическая помощь на дому позволяет избежать срыва и начать процесс восстановления без стресса.
Детальнее – [url=https://narkolog-na-dom-voronezh-4.ru/]вызов нарколога на дом воронеж[/url]
Нарколог на дом в Самаре востребован в самых различных ситуациях. Иногда пациент не в состоянии самостоятельно добраться до клиники из-за сильного состояния похмелья или ломки. В таких случаях выезд нарколога становится наиболее оптимальным решением. Наши специалисты оказывают помощь при следующих состояниях:
Получить дополнительную информацию – [url=https://narkolog-na-dom-samara-2.ru/]вызов нарколога на дом самара[/url]
Компания предлагает не только металлы, но и химическую продукцию, используемую в смежных металлургических процессах.
https://rms-ekb.ru/catalog/list/list-u9a-140x1000x1000-gost-19903-2006/
выведение из запоя цена [url=https://vyvod-iz-zapoya-na-domu-ekaterinburg-9.ru/]vyvod-iz-zapoya-na-domu-ekaterinburg-9.ru[/url] .
Капельницы помогают не только справиться с симптомами похмелья, но и с выводом токсинов из организма, что способствует его быстрому восстановлению. Этот метод позволяет минимизировать последствия, такие как головная боль, нарушение давления и общее недомогание.
Получить дополнительную информацию – [url=https://kapelnicza-ot-pokhmelya-samara-1.ru/]капельница от похмелья цена в самаре[/url]
вывод из запоя с выездом [url=https://vyvod-iz-zapoya-na-domu-ekaterinburg-11.ru/]вывод из запоя с выездом[/url] .
buy weed online
банкротство с ипотекой
Банкротство с ипотекой всегда связано с повышенными рисками, поэтому важно заранее оценить последствия. На sorryclosed.ru можно найти вводную информацию по этой теме и понять, какие вопросы изучать в первую очередь.
вывод из запоя екатеринбург [url=https://vyvod-iz-zapoya-na-domu-ekaterinburg-11.ru/]вывод из запоя екатеринбург[/url] .
1win бонусы казино [url=https://1win25340.help/]https://1win25340.help/[/url]
1win приложение android [url=http://1win43592.help/]1win приложение android[/url]
Описание применения металлов в атомной энергетике подчеркивает качество
https://redmetsplav.ru/store/kobalt/rossiyskie-splavy-3/kobalt-hk62m6l—gost-r-51395-99/list-kobaltovyy-hk62m6l—gost-r-51395-99/
Посетите сайт https://wepoland.com/ – это новостной портал с главными новостями и событиями в Польше. Самые свежие новости публикуются у нас, что позволит вам оставаться в курсе событий на различные тематики. Также вы сможете найти важные советы и актуальные материалы касающиеся жизни в Польше.
2 bedroom apartments
buying property in dubai which has a load
privilege properties dubai
mom incest porn
Нарколог на дом — это не просто возможность получить медицинскую помощь в удобное время, но и решение важнейших задач по стабилизации состояния пациента, избавлению от острых симптомов абстиненции и восстановлению его здоровья. В случае с алкоголизмом и наркоманией выезд врача на дом в Воронеже — это важный шаг к восстановлению, который начинается там, где пациент находится, в удобной и привычной обстановке. Клиника «Частный медик 24» предлагает круглосуточные выезды нарколога, предоставляя экстренную помощь при запоях, наркозависимости, а также консультации по дальнейшему лечению и реабилитации. Врач приедет по указанному адресу и проведёт все необходимые процедуры, включая капельницы для стабилизации состояния пациента.
Изучить вопрос глубже – http://narkolog-na-dom-voronezh-4.ru
Заказывали партию молибденовых листов для производства, качество металла идеальное, все сертификаты в наличии.
https://xn--80aeedb0bfzeok.xn--p1ai/catalog/melkhiorovaia-truba/melkhiorovaia-truba-14kh1-5kh8000-mm-mnzhmts10-1-1-gost-10092-2006/
pin-up bugun kirish [url=https://pinup41537.help]https://pinup41537.help[/url]
плинко скачать и установить [url=http://plinko47590.help/]http://plinko47590.help/[/url]
Необходимость обращения за наркологической помощью определяется по совокупности симптомов и их выраженности. При ухудшении состояния важно ориентироваться на объективные признаки, а не ждать самостоятельного улучшения.
Получить дополнительную информацию – [url=https://narkologicheskaya-pomoshh-nizhnij-novgorod-8.ru/]наркологическая помощь анонимно нижний новгород[/url]
Вывод из запоя на дому — это формат наркологической помощи, при котором лечение проводится в привычной для пациента обстановке с выездом врача. Такой подход применяется в ситуациях, когда состояние требует медицинского вмешательства, но не предполагает обязательной госпитализации. В наркологической клинике «Частный медик 24» помощь на дому выстраивается по принципу поэтапной стабилизации: сначала устраняются острые проявления, затем оценивается динамика и при необходимости корректируется терапия.
Подробнее можно узнать тут – [url=https://vyvod-iz-zapoya-na-domu-sankt-peterburg-8.ru/]вывод из запоя на дому цена санкт-петербург[/url]
Компания «Гранит Сервис» в Южно-Сахалинске специализируется на производстве и продаже ритуальных гранитных изделий — памятников, оград, столов, лавок, ваз и плитки. Среди услуг — художественная гравировка, фотокерамика, фрезерные надписи, монтаж памятников и комплексное благоустройство мест захоронений по всему Сахалину. Ищете подоконник из гранита купить? На granitservise.ru представлен полный каталог изделий с возможностью заказа доставки и установки. Дополнительно компания производит гранитные подоконники, столешницы, ступени, бордюры и брусчатку для строительства и отделки.
Запрос на выезд врача связан не только с классическим запоем. На практике домашняя помощь нужна в разных ситуациях, когда организму уже трудно компенсировать последствия употребления, а откладывание визита увеличивает риск осложнений.
Углубиться в тему – https://narkolog-na-dom-voronezh-2.ru/
buy cannabis online
Нарколог на дом в Самаре востребован в самых различных ситуациях. Иногда пациент не в состоянии самостоятельно добраться до клиники из-за сильного состояния похмелья или ломки. В таких случаях выезд нарколога становится наиболее оптимальным решением. Наши специалисты оказывают помощь при следующих состояниях:
Изучить вопрос глубже – [url=https://narkolog-na-dom-samara-2.ru/]вызвать нарколога на дом[/url]
вывести из запоя на дому цена [url=https://vyvod-iz-zapoya-na-domu-samara-19.ru/]вывести из запоя на дому цена[/url] .
В Санкт-Петербурге вывод из запоя на дому используется в ситуациях, когда состояние пациента требует медицинской помощи, но позволяет обойтись без лечения в стационаре. Врач проводит консультацию, оценивает длительность запоя, выраженность симптомов и общее состояние, анализируя данные пациента, после чего принимает решение о тактике лечения при алкоголизме. При необходимости можно оформить вызов специалиста или заказать услугу заранее.
Ознакомиться с деталями – [url=https://vyvod-iz-zapoya-na-domu-sankt-peterburg-11.ru/]анонимный вывод из запоя на дому санкт-петербург[/url]
Компания предлагает не только металлы, но и химическую продукцию, используемую в смежных металлургических процессах.
https://rms-ekb.ru/catalog/list/list-u8a-25x500x800-gost-19903-74/
В таких ситуациях врач оценивает риски, определяет тактику лечения и при необходимости рекомендует дальнейшую госпитализацию. Однако во многих случаях помощь на дому оказывается достаточной для стабилизации состояния.
Ознакомиться с деталями – [url=https://narkolog-na-dom-nizhnij-novgorod.ru/]запой нарколог на дом нижний новгород[/url]
банкротство через МФЦ
Банкротство через МФЦ часто ищут как более простой вариант списания долгов. На sorryclosed.ru удобно посмотреть требования, порядок обращения и причины возможного отказа.
Такие признаки требуют быстрого вмешательства, поскольку состояние может ухудшаться. Выезд врача позволяет стабилизировать показатели и предотвратить развитие осложнений. При этом помощь может предоставляться анонимно.
Разобраться лучше – http://vyvod-iz-zapoya-na-domu-sankt-peterburg-10.ru
срочный вывод из запоя на дому [url=https://vyvod-iz-zapoya-na-domu-samara-19.ru/]срочный вывод из запоя на дому[/url] .
1win почта поддержки [url=https://1win71849.help]https://1win71849.help[/url]
Лаконичное приветствие на главной странице сразу вводит в курс дела
https://redmetsplav.ru/store/magniy-i-ego-splavy/zarubezhnye-splavy-2/magniy-az91a—astm-b93/folga-magnievaya-az91a—astm-b93/
Для жителей Воронежа выездной формат особенно востребован в ситуациях, когда состояние уже заметно ухудшилось, а на поездку в клинику нет ресурса ни физически, ни эмоционально. Круглосуточный вызов врача позволяет начать лечение без ожидания утра, без дороги и без дополнительной нагрузки на сердечно-сосудистую систему. После приезда нарколог не ограничивается одной процедурой. Он оценивает, насколько безопасно оставлять пациента дома, есть ли признаки тяжёлой абстиненции, присутствует ли риск делирия, обезвоживания, аритмии или резкого скачка давления. Если домашний формат допустим, запускается пошаговая схема стабилизации, где важен не только состав капельницы, но и последующее наблюдение в ближайшие часы.
Исследовать вопрос подробнее – [url=https://narkolog-na-dom-voronezh.ru/]www.domen.ru[/url]
Капельница от похмелья применяется, когда симптомы интоксикации становятся выраженными и мешают нормальной жизнедеятельности пациента. Основные показания для использования капельницы включают:
Подробнее тут – [url=https://kapelnicza-ot-pokhmelya-samara-1.ru/]капельница от похмелья вызов на дом в самаре[/url]
mostbet apk [url=http://mostbet52746.help]mostbet apk[/url]
Для жителей Воронежа выезд нарколога на дом — это быстрый и удобный способ получить экстренную помощь. Когда человек переживает запой, а его физическое и эмоциональное состояние быстро ухудшается, наркологическая помощь на дому становится оптимальным решением. Врач приезжает и немедленно оценивает состояние пациента: проверяет его пульс, давление, частоту дыхания, уровень сознания и другие важные показатели. Это помогает составить точный план лечения, который будет направлен на восстановление организма, снятие токсинов и стабилизацию состояния пациента.
Подробнее можно узнать тут – [url=https://narkolog-na-dom-voronezh-4.ru/]нарколог на дом вывод в воронеже[/url]
Качество сварочных материалов на высоте, электроды варят отлично, состав металла стабильный.
https://xn--80aeedb0bfzeok.xn--p1ai/catalog/mednye-zaglushki-pod-paiku/mednaia-zaglushka-kolpachok-pod-paiku-8kh6kh0-6-mm-6-8kh8-8-mm-tverdaia-paika-m1e-gost-r-52922-2008/
1win hisobni to‘ldirish Oʻzbekiston [url=https://www.1win5751.help]https://www.1win5751.help[/url]
вывод из запоя на дому самара круглосуточно [url=https://vyvod-iz-zapoya-na-domu-samara-18.ru/]вывод из запоя на дому самара круглосуточно[/url] .
“вывод из запоя на халтурина – лечение алкоголизма, лечение наркомании [url=https://vyvod-iz-zapoya-na-domu-ekaterinburg-10.ru/]”вывод из запоя на халтурина – лечение алкоголизма, лечение наркомании[/url] .
Московский системный интегратор ASA Production работает по уникальной философии «Анализ — Решение — Сопровождение», которая за десятилетие превратила компанию в надёжного партнёра для бизнеса любого масштаба. На http://asa.ru/ представлен широкий каталог серверов, систем хранения данных, сетевого оборудования, источников бесперебойного питания и программного обеспечения от ведущих мировых брендов — Cisco, HP, ASUS, Microsoft, Eaton — по ценам интернет-магазина при квалификации системного интегратора. Компания регулярно проводит акции и распродажи, обеспечивает гарантию, возврат и проектные скидки, выстраивая с каждым заказчиком долгосрочные и стабильные отношения.
Официальный интернет-магазин производителя стабилизаторов напряжения, ИБП и других систем электропитания Штиль https://www.shtyl.ru/ – это возможность купить продукцию по выгодной цене, а также возможность, при необходимости получить профессиональную консультацию. Посмотрите каталог с нашей продукцией, отличающейся качеством и высокими характеристиками.
банкротство физических лиц
Банкротство физических лиц — законный способ решить проблему с непосильными долгами. На sorryclosed.ru можно разобраться в этапах процедуры, рисках и условиях списания задолженности.
Запрос на выезд врача связан не только с классическим запоем. На практике домашняя помощь нужна в разных ситуациях, когда организму уже трудно компенсировать последствия употребления, а откладывание визита увеличивает риск осложнений.
Углубиться в тему – https://narkolog-na-dom-voronezh-2.ru/
Юрист по заключению брака поможет оформить отношения быстро и без ошибок. Переходите по запросу [url=https://www.pravovik24.ru/konsultatsii/yurist-po-zaklyucheniyu-braka/]юрист по вопросам заключения брака[/url]. Проконсультируем по всем вопросам регистрации, подготовим документы, сопроводим при заключении брака, включая случаи с иностранными гражданами. Обеспечим соблюдение всех требований законодательства и защиту ваших интересов. Экономьте время и избегайте рисков — доверьте оформление профессионалам.
Есть состояния, при которых откладывать вызов врача рискованно. Домашний выезд нужен не только при «тяжёлом похмелье», но и тогда, когда самочувствие становится нестабильным, а попытки справиться своими силами уже не работают. Ниже перечислены ситуации, при которых обращение за помощью оправдано именно в ближайшее время, а не «если не станет легче к вечеру».
Узнать больше – [url=https://narkolog-na-dom-voronezh.ru/]вызвать нарколога на дом[/url]
Ассортимент компании включает более 100 000 позиций, что позволяет закрыть практически любые потребности металлургического производства.
https://rms-ekb.ru/catalog/ugolok-stalnoi/ugolok-stalnoi-st3ps-100x65x10-gost-19771-93/
вывод из запоя врач на дом [url=https://vyvod-iz-zapoya-na-domu-ekaterinburg-10.ru/]vyvod-iz-zapoya-na-domu-ekaterinburg-10.ru[/url] .
вызов нарколога на дом вывод из запоя [url=https://vyvod-iz-zapoya-na-domu-samara-18.ru/]вызов нарколога на дом вывод из запоя[/url] .
incest porn
Нарколог на дом в Самаре с выездом специалиста, детоксикацией и анонимной медицинской помощью в наркологической клинике «Частный медик 24»
Получить дополнительную информацию – [url=https://narkolog-na-dom-samara-1.ru/]врач нарколог на дом[/url]
Да тоже заказал на след день трек получил очень оперативно респект чувакам https://ketafish.ru Радуете ребята!!!Ребят,вообще 307 наваливает хорошо,НО,попрошу в разделе магазина флуд и оффтоп прекращать…Для этого есть раздел Информация из жизни LegalRC,в котором все описано и сказанно….Или создайте топик с обсуждениями там…
Сайт работает стабильно и быстро загружается
https://redmetsplav.ru/store/magniy-i-ego-splavy/zarubezhnye-splavy-2/magniy-mag-6—bs-2970-1/folga-magnievaya-mag-6—bs-2970-1/
капельница от похмелья услуги [url=https://kapelnicza-ot-pokhmelya-voronezh-1.ru/]капельница от похмелья услуги[/url] .
Во всех этих случаях важен не только сам факт выезда, но и то, что врач умеет быстро определить границы домашнего лечения. Нарколог на дом нужен не для того, чтобы любой ценой оставить пациента в квартире, а для того, чтобы выбрать безопасный путь: домашняя стабилизация, повторный визит, амбулаторное продолжение или перевод в стационар.
Углубиться в тему – [url=https://narkolog-na-dom-voronezh-2.ru/]вызвать нарколога на дом[/url]
Pix de R$10 liberou rodada bônus e ainda sobrou saldo para testar Fortune Rabbit na sequência.
1win vip program [url=https://www.1win54316.help]https://www.1win54316.help[/url]
банкротство через МФЦ
Банкротство через МФЦ часто ищут как более простой вариант списания долгов. На sorryclosed.ru удобно посмотреть требования, порядок обращения и причины возможного отказа.
капельница от запоя [url=https://kapelnicza-ot-pokhmelya-voronezh-1.ru/]kapelnicza-ot-pokhmelya-voronezh-1.ru[/url] .
Благодарим за оперативную поставку ниобиевых труб, выручили в очень сжатые сроки.
https://xn--80aeedb0bfzeok.xn--p1ai/catalog/latunnoe-litoe-koltso/latunnoe-litoe-koltso-150kh700-mm-lts40s/
Запойное состояние сопровождается выраженной интоксикацией, нарушением сна, слабостью и тревожностью, что характерно для алкоголизма и различных форм зависимости. При этом самостоятельный выход из него часто затруднён из-за ухудшения самочувствия и отсутствия контроля над симптомами. Выезд нарколога позволяет быстро стабилизировать состояние человека и начать восстановление без дополнительной нагрузки, связанной с поездкой в клинику, а при необходимости вовремя определить показания к лечению в стационаре.
Получить дополнительную информацию – http://vyvod-iz-zapoya-na-domu-sankt-peterburg-9.ru
прокапаться от алкоголя цены [url=https://kapelnicza-ot-pokhmelya-voronezh.ru/]kapelnicza-ot-pokhmelya-voronezh.ru[/url] .
Mahjong Ways 2 continua sendo escolha sólida para quem gosta de progressão por cascata.
Металлические порошки различных фракций позволяют клиентам использовать их в порошковой металлургии и напылении.
https://rms-ekb.ru/catalog/list/list-4kh2nmf-2x500x800-gost-19903-74/
real daughter porn
капельница от алкоголя на дому [url=https://kapelnicza-ot-pokhmelya-voronezh.ru/]капельница от алкоголя на дому[/url] .
property market news dubai
dubai palms homes for sale
dubai real estate market overview jll
Танталовый прокат незаменим для химически агрессивных сред
https://redmetsplav.ru/store/titan/rossiyskie-splavy-4/titan-d-8mo-8v-2fe-3al—mil-t-9046h/list-titanovyy-d-8mo-8v-2fe-3al—mil-t-9046h/
Нарколог на дом — это формат срочной медицинской помощи, при котором врач приезжает к пациенту, проводит осмотр, оценивает риски, запускает первичную терапию и принимает решение, можно ли безопасно стабилизировать состояние дома или требуется перевод в стационар. Такой выезд особенно важен тогда, когда человеку тяжело ехать самостоятельно: выраженная слабость, тремор, тошнота, скачки давления, тревога, бессонница, повторный приём алкоголя для «облегчения» и нарастающее ухудшение самочувствия. Домашний формат ценят не только за удобство. Его задача — быстро сократить промежуток между ухудшением состояния и началом лечения. Чем раньше врач увидит пациента, тем проще остановить развитие осложнений, собрать понятный план действий на ближайшие часы и не допустить ошибок самолечения.
Получить дополнительные сведения – http://narkolog-na-dom-voronezh.ru
банкротство при микрозаймах
Банкротство при микрозаймах рассматривают многие заемщики с большой просрочкой и несколькими МФО. На sorryclosed.ru собраны материалы о том, как такие долги учитываются в общей процедуре.
Ребята, отличная метафора — сайт как магнит. Автор объясняет, почему даже красивый ресурс может быть невидимкой для поисковиков. Разбирает три ключевые проблемы: нерелевантный контент (когда пользователи уходят через 10 секунд), техническую «анестезию» (медленная загрузка, кривая мобилка) и неправильную семантику. Спойлер: длинные хвостовые запросы дают 70% целевого трафика. Советую: http://studio-didier.com/anatomiya-cifrovogo-magnita-pochemu-vash-sajt-ne-vidit-dazhe-poiskovik/
Полностью согласен !!! https://olginopark.ru Все мои контакты указаны в подписе.Фарту в делах парни !:hello:
Профессиональный подход менеджеров в Екатеринбурге, грамотно проконсультировали по техническим характеристикам сплавов.
https://xn--80aeedb0bfzeok.xn--p1ai/catalog/mednyi-perekhodnoi-troinik-press/mednyi-perekhodnoi-press-troinik-28kh8-mm-m2-gost-r-52948-2008/
В некоторых случаях капельница может быть использована не только для снятия симптомов похмелья, но и для восстановления организма после длительного запоя или при хроническом алкоголизме, когда организм особенно ослаблен. В таких случаях лечение должно проводиться под контролем квалифицированных специалистов, чтобы избежать осложнений и ускорить восстановление.
Изучить вопрос глубже – https://kapelnicza-ot-pokhmelya-samara.ru/
Вывод из запоя на дому — это формат медицинской помощи, при котором лечение проводится в привычной для пациента обстановке с выездом нарколога. Такой подход используется, когда требуется срочное вмешательство, но состояние позволяет обойтись без госпитализации. В наркологической клинике «Частный медик 24» помощь оказывается круглосуточно, с возможностью начать терапию сразу после обращения и без ожидания.
Разобраться лучше – [url=https://vyvod-iz-zapoya-na-domu-sankt-peterburg-9.ru/]вывод из запоя на дому цена в санкт-петербурге[/url]
Для семьи это тоже имеет большое значение. Пока врач в пути, родственники часто совершают одни и те же ошибки: пытаются «отпаивать» человека через силу, смешивают несовместимые медикаменты, дают советы, которые только повышают тревогу, спорят или требуют немедленно взять себя в руки. Профессиональный выезд снимает эту хаотичность. После осмотра врач объясняет, какие симптомы связаны с алкогольной интоксикацией, какие могут указывать на осложнения, что допустимо дома, а что требует перевода в стационар. В этом и состоит ценность выезда: он возвращает контроль над ситуацией и позволяет начать лечение без лишних задержек.
Детальнее – [url=https://narkolog-na-dom-voronezh-1.ru/]нарколог на дом анонимно воронеж[/url]
buy cannabis
Есть состояния, при которых откладывать вызов врача рискованно. Домашний выезд нужен не только при «тяжёлом похмелье», но и тогда, когда самочувствие становится нестабильным, а попытки справиться своими силами уже не работают. Ниже перечислены ситуации, при которых обращение за помощью оправдано именно в ближайшее время, а не «если не станет легче к вечеру».
Получить больше информации – [url=https://narkolog-na-dom-voronezh.ru/]нарколог на дом цена воронеж[/url]
Компания обеспечивает поставки оксовольфрамата гафния — редкого соединения для специфических нужд химической и атомной промышленности.
https://rms-ekb.ru/catalog/kadmii-sernokislyi/
Существует ряд ситуаций, при которых вызов специалиста на дом является обоснованным решением:
Получить больше информации – [url=https://narkolog-na-dom-nizhnij-novgorod.ru/]вызвать нарколога на дом в нижнем новгороде[/url]
вывод из запоя на дому [url=https://vyvod-iz-zapoya-na-domu-ekaterinburg-9.ru/]вывод из запоя на дому[/url] .
Такие признаки требуют быстрого вмешательства, поскольку состояние может ухудшаться. Выезд врача позволяет стабилизировать показатели и предотвратить развитие осложнений. При этом помощь может предоставляться анонимно.
Углубиться в тему – [url=https://vyvod-iz-zapoya-na-domu-sankt-peterburg-10.ru/]вывод из запоя на дому цена[/url]
помощь должникам по кредитам
Помощь должникам по кредитам должна быть законной и понятной. На sorryclosed.ru собраны материалы для тех, кто ищет варианты снижения долговой нагрузки и хочет разобраться в банкротстве без лишних обещаний.
Наличие кобальтовых сплавов заинтересует авиастроение
https://redmetsplav.ru/store/vismut/zarubezhnye-splavy-3/vismut-s-pb49sn48bi3—en-29453/folga-vismutovaya-s-pb49sn48bi3—en-29453/
В Санкт-Петербурге лечение на дому применяется в ситуациях, когда состояние пациента требует медицинского вмешательства, но не требует наблюдения в стационаре. Врач проводит консультацию, анализирует данные пациента, оценивает длительность употребления, выраженность симптомов и общее состояние, после чего принимает решение о тактике лечения при алкоголизме. При необходимости можно оформить вызов специалиста, заказать услуги на сайте или уточнить детали заранее.
Выяснить больше – [url=https://vyvod-iz-zapoya-na-domu-sankt-peterburg-12.ru/]vyvod-iz-zapoya-na-domu-sankt-peterburg-12.ru/[/url]
step daughter porn
плинко apk безопасно скачать [url=https://www.plinko47590.help]https://www.plinko47590.help[/url]
Заказывали партию молибденовых листов для производства, качество металла идеальное, все сертификаты в наличии.
https://xn--80aeedb0bfzeok.xn--p1ai/catalog/mednye-dvukhrastrubnye-mufty-pod-paiku/mednaiadvukhrastrubnaiamufta-pod-paiku28kh1-5mmm2mgost-r-52922-2008/
Villas for sale in The Turf
villas for rent in town square dubai
new residential projects in dubai marina
Консультация жилищного юриста — это быстрый и эффективный способ разобраться в сложных вопросах, связанных с недвижимостью. Переходите по запросу [url=https://zhilishniy-yurist1.ru]адвокат по жилищному законодательству[/url]. Специалист оценит вашу ситуацию, разъяснит нормы законодательства, расскажет о правах собственников и предложит оптимальный план действий для защиты ваших интересов.
1win фрибет Кыргызстан [url=1win71849.help]1win71849.help[/url]
брал тут на днях, все прошло ровнее некуда, рекомендую, теперь это мой постоянный магазин) https://olginopark.ru всем привет! магаз ровный беру у них года 2 уже все всегда стабильно и качества радует. берите все саветую. спасибо магазинацетон бери очищенный,ато бывает ещё технический,он с примесями и воняет.1к15 нормально будет.основа мачеха ништяк.
списание долгов законно
Если интересует списание долгов законно, важно сразу изучить реальные основания и ограничения. На sorryclosed.ru собрана базовая информация по процедуре и вариантам решения долговой нагрузки.
капельница от запоя стоимость [url=https://kapelnicza-ot-pokhmelya-voronezh-1.ru/]kapelnicza-ot-pokhmelya-voronezh-1.ru[/url] .
Вывод из запоя на дому в Санкт-Петербурге с подбором терапии, наблюдением врача и комфортным лечением в наркологической клинике «Частный медик 24»
Изучить вопрос глубже – https://vyvod-iz-zapoya-na-domu-sankt-peterburg-9.ru
вывод из запоя врач на дом [url=https://vyvod-iz-zapoya-na-domu-samara-19.ru/]вывод из запоя врач на дом[/url] .
Нарколог на дом в Воронеже с круглосуточным вызовом врача, стабилизацией состояния и лечением в наркологической клинике «Частный медик 24»
Разобраться лучше – [url=https://narkolog-na-dom-voronezh-2.ru/]нарколог на дом воронеж[/url]
Минск знает толк в красоте, и одним из лучших мест, где это подтверждается делом, является «Ориентал» — многофункциональный центр красоты в самом сердце города. Здесь собраны специалисты с медицинским образованием, готовые предложить инъекционные процедуры, контурную пластику, биоревитализацию и фулфейс ботокс. Посетив https://oriental-salon.by/ – вы откроете полный спектр услуг: александритовая лазерная эпиляция на аппарате 2025 года, авторские окрашивания балаяж и шатуш, глубокие пилинги и СПА-программы. Новые клиенты получают скидку 15% на всё, а консультация в салоне — бесплатная.
Информация о проверке качества продукции повышает лояльность клиентов
https://redmetsplav.ru/store/magniy-i-ego-splavy/zarubezhnye-splavy-2/magniy-17705—ns-17705/truba-magnievaya-17705—ns-17705/
сделать капельницу от похмелья [url=https://kapelnicza-ot-pokhmelya-voronezh-1.ru/]сделать капельницу от похмелья[/url] .
списание долгов законно
Если интересует списание долгов законно, важно сразу изучить реальные основания и ограничения. На sorryclosed.ru собрана базовая информация по процедуре и вариантам решения долговой нагрузки.
Нарколог на дом в Самаре — помощь при запое и интоксикации в наркологической клинике «Частный медик 24»
Исследовать вопрос подробнее – [url=https://narkolog-na-dom-samara-2.ru/]www.domen.ru[/url]
Компания предлагает не только металлы, но и химическую продукцию, используемую в смежных металлургических процессах.
https://rms-ekb.ru/catalog/list/list-9khs-22x500x800-gost-19903-74/
Такие состояния требуют профессионального вмешательства, так как без лечения могут усиливаться и приводить к ухудшению самочувствия. При этом помощь может предоставляться анонимно, в соответствии с политикой конфиденциальности данных пациента.
Исследовать вопрос подробнее – [url=https://vyvod-iz-zapoya-na-domu-sankt-peterburg-12.ru/]вывод из запоя на дому цена санкт-петербург[/url]
Капельница от похмелья применяется, когда симптомы интоксикации становятся выраженными и мешают нормальной жизнедеятельности пациента. Основные показания для использования капельницы включают:
Исследовать вопрос подробнее – [url=https://kapelnicza-ot-pokhmelya-samara-1.ru/]kapelnicza-ot-pokhmelya-samara-1.ru/[/url]
future tower 1
cheap holiday apartments for rent in dubai
pulse real estate dubai
welcome bonus 1win [url=www.1win54316.help]www.1win54316.help[/url]
черт возьми, вот сейчас оформляю AM2233 и решил заглянуть сюда. вред от наркотиков, как помочь? Решили мы тут значит с кентом несколько дней назад покурить . Вспомнили про сайт chem24.biz.ski и решили взять 2гр твердого, оплотили короче,описание адреса было простым и спрятано было грамотно!!!jte тут брал кто?Как качество?К скольки делать?
Возможность заказа висмута — достаточно редкое предложение на рынке
https://redmetsplav.ru/store/magniy-i-ego-splavy/zarubezhnye-splavy-2/magniy-iso-mg99-5—iso-8287/polosa-magnievaya-iso-mg99-5—iso-8287/
Особенно понравился раздел про Лесные пожары в России: причины и предотвращение.
Вот, делюсь ссылкой:
[url=https://vyzanielider.ru/%d0%b1%d0%b5%d0%b7-%d1%80%d1%83%d0%b1%d1%80%d0%b8%d0%ba%d0%b8/lesnye-pozhary-v-rossii-kak-chitat-statistiku-ponimat-prichiny-i-snizhat-riski/]https://vyzanielider.ru/%d0%b1%d0%b5%d0%b7-%d1%80%d1%83%d0%b1%d1%80%d0%b8%d0%ba%d0%b8/lesnye-pozhary-v-rossii-kak-chitat-statistiku-ponimat-prichiny-i-snizhat-riski/[/url]